Rain cloud in a Jar

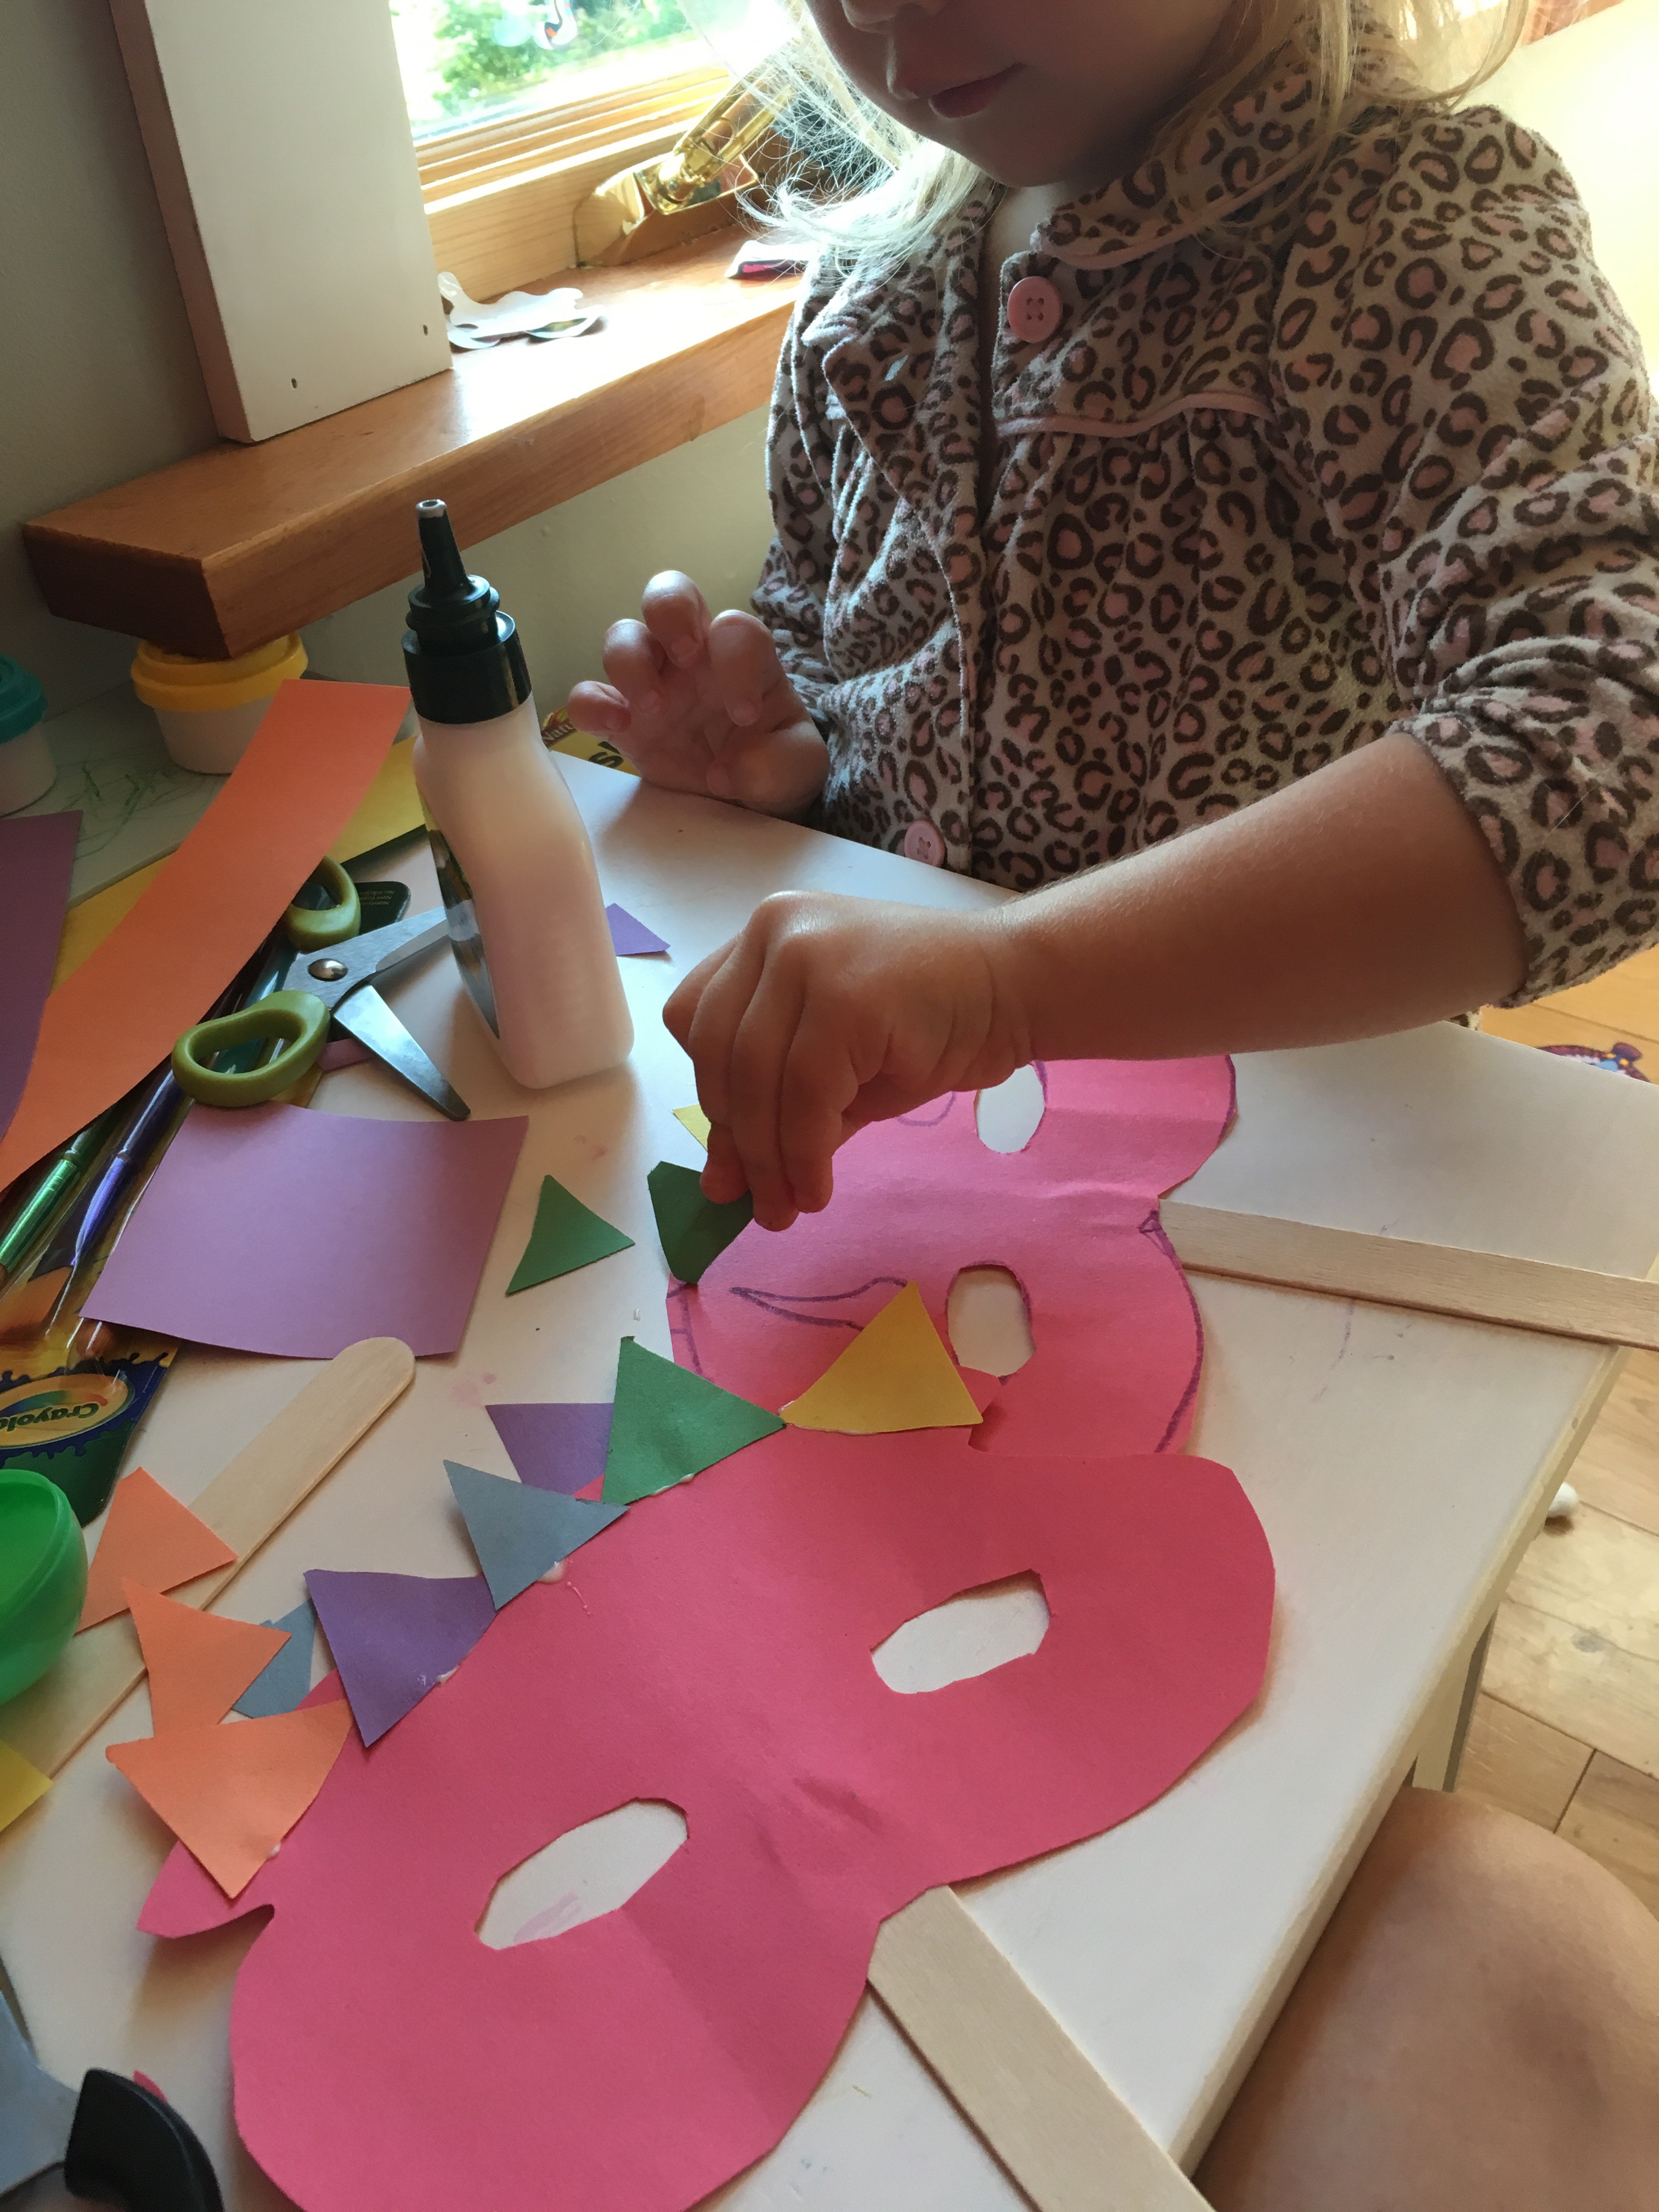
My daughter can’t get enough of science experiments. She will ask for one after another. I don’t always have all of the ingredients around but rain cloud in a jar is a simple experiment with materials you will have on hand!

You will need:

  • blue food coloring (or hey-you could do any color, go for the rainbow)
  • shaving cream
  • dropper
  • water
  • clear mason jar/vase/glass

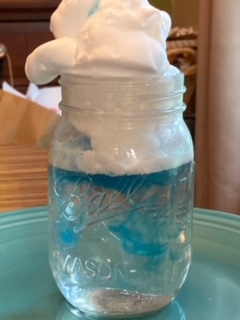
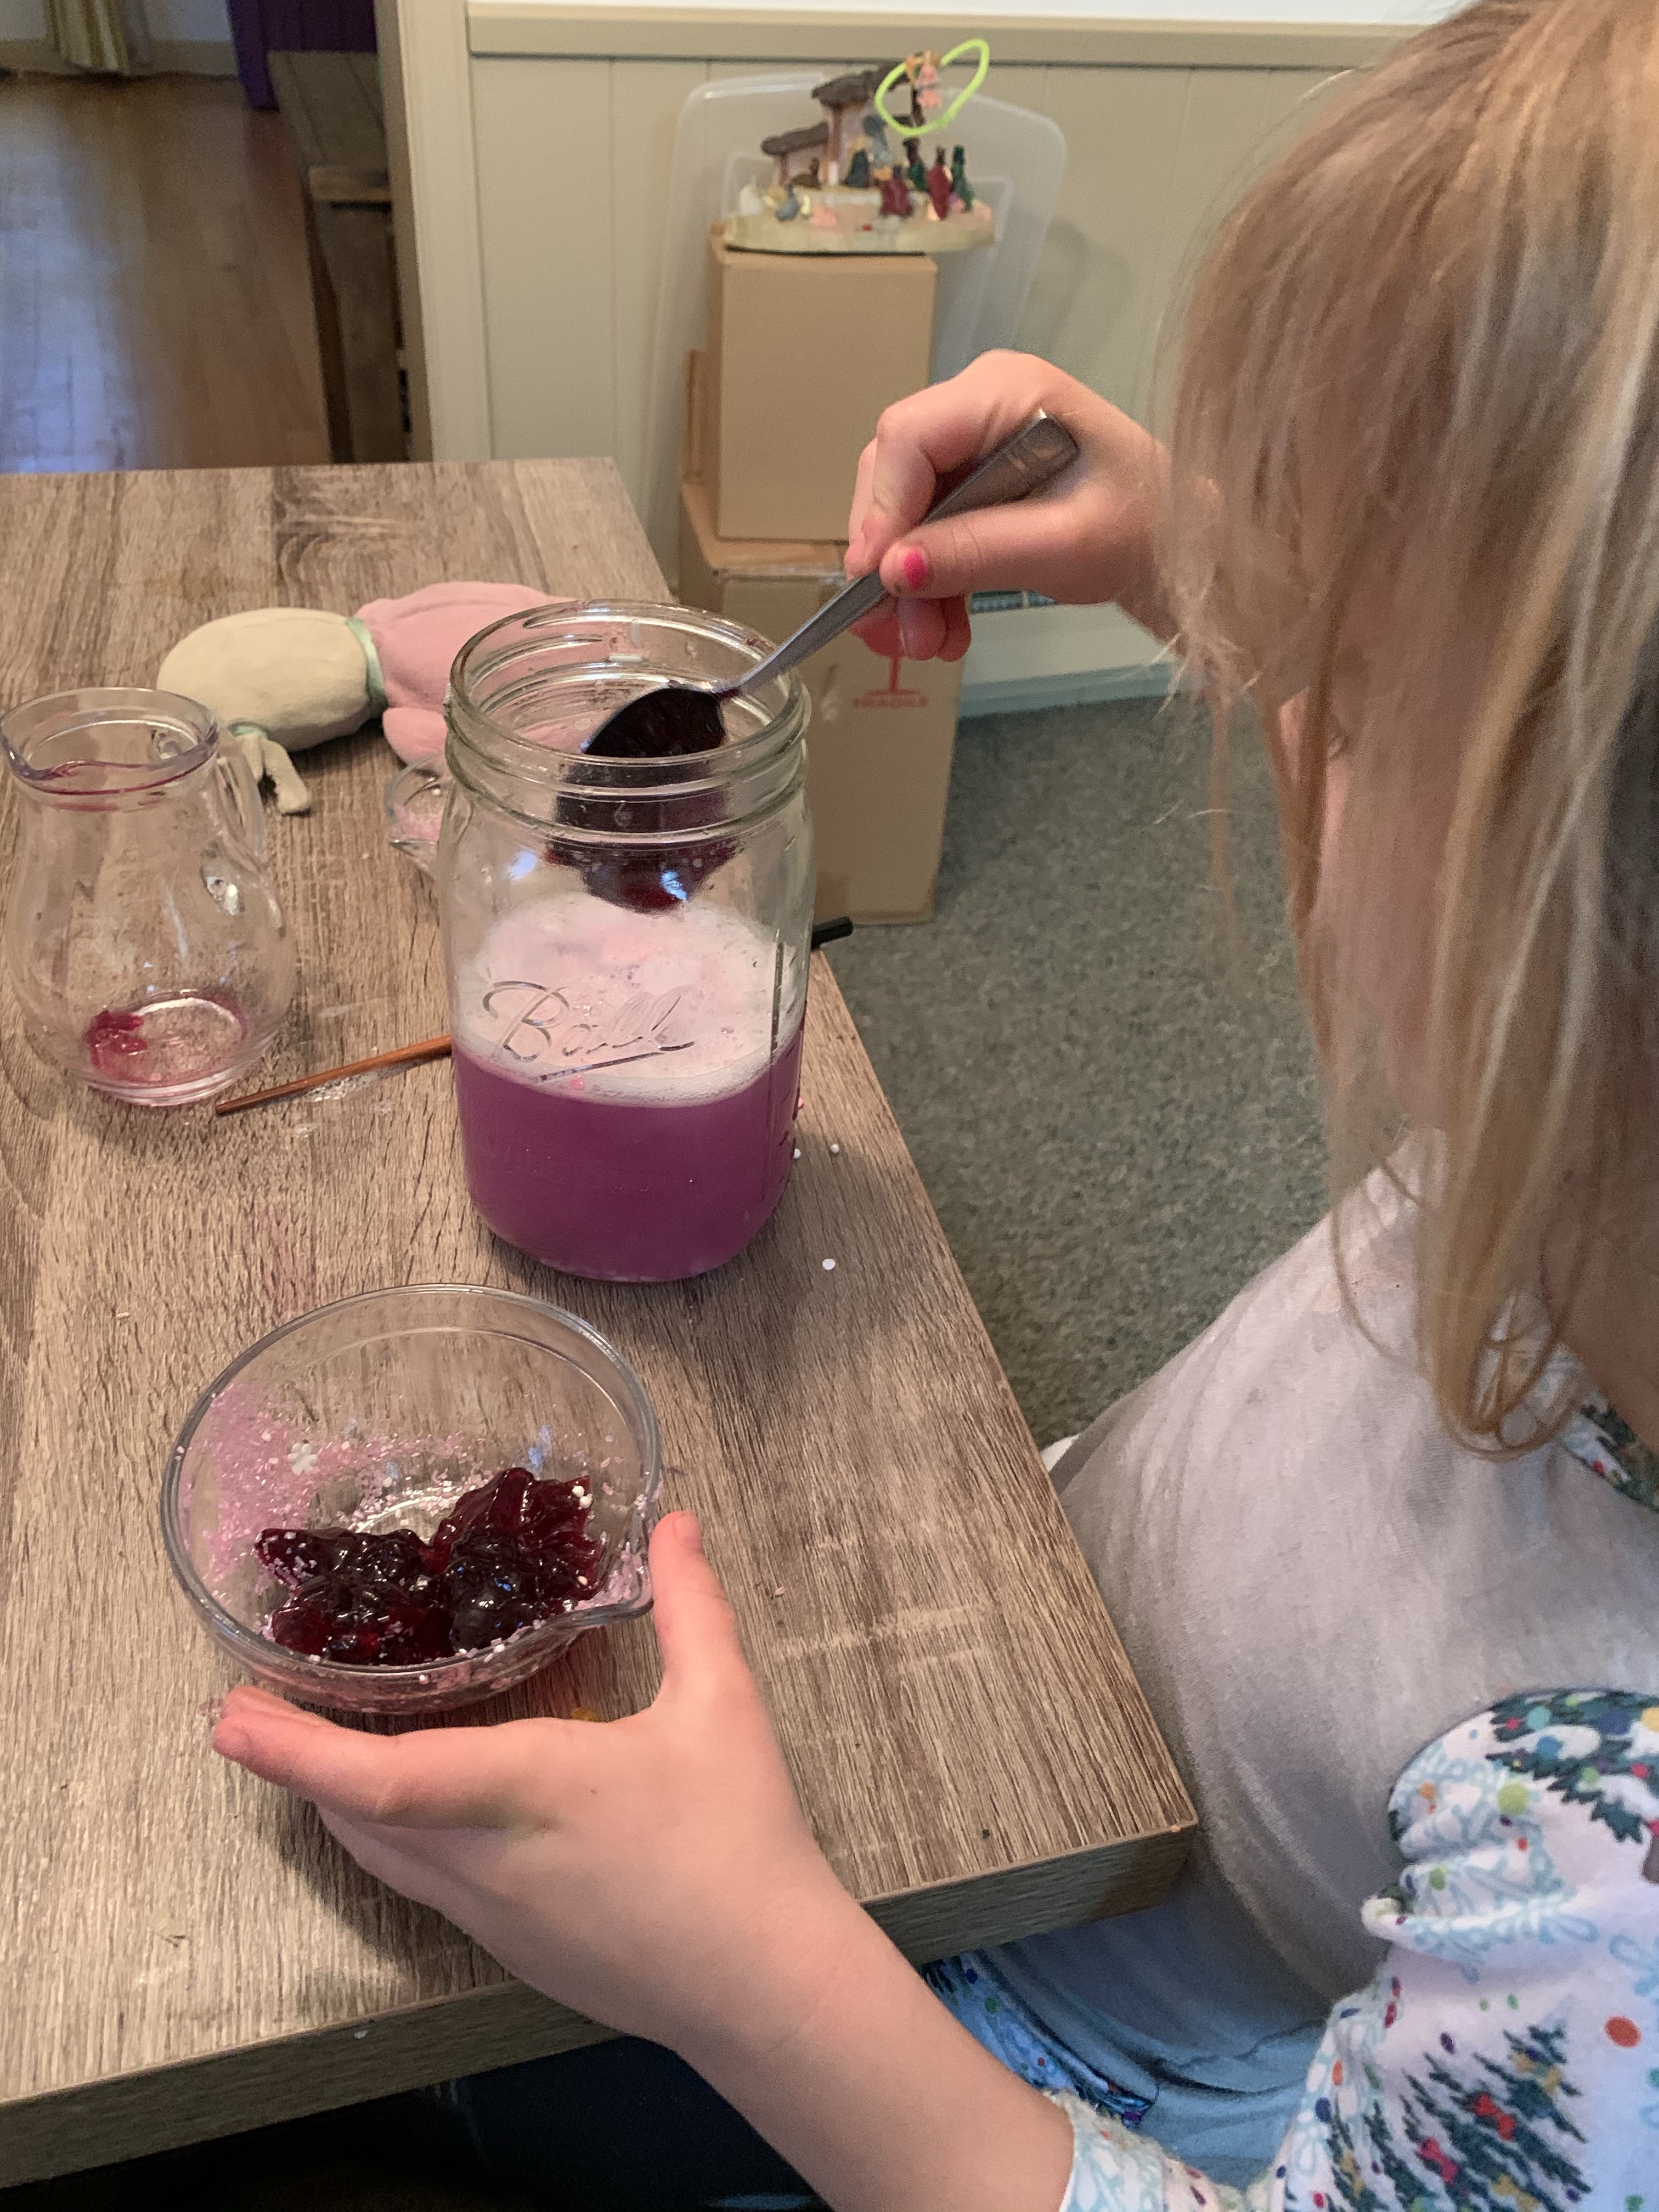
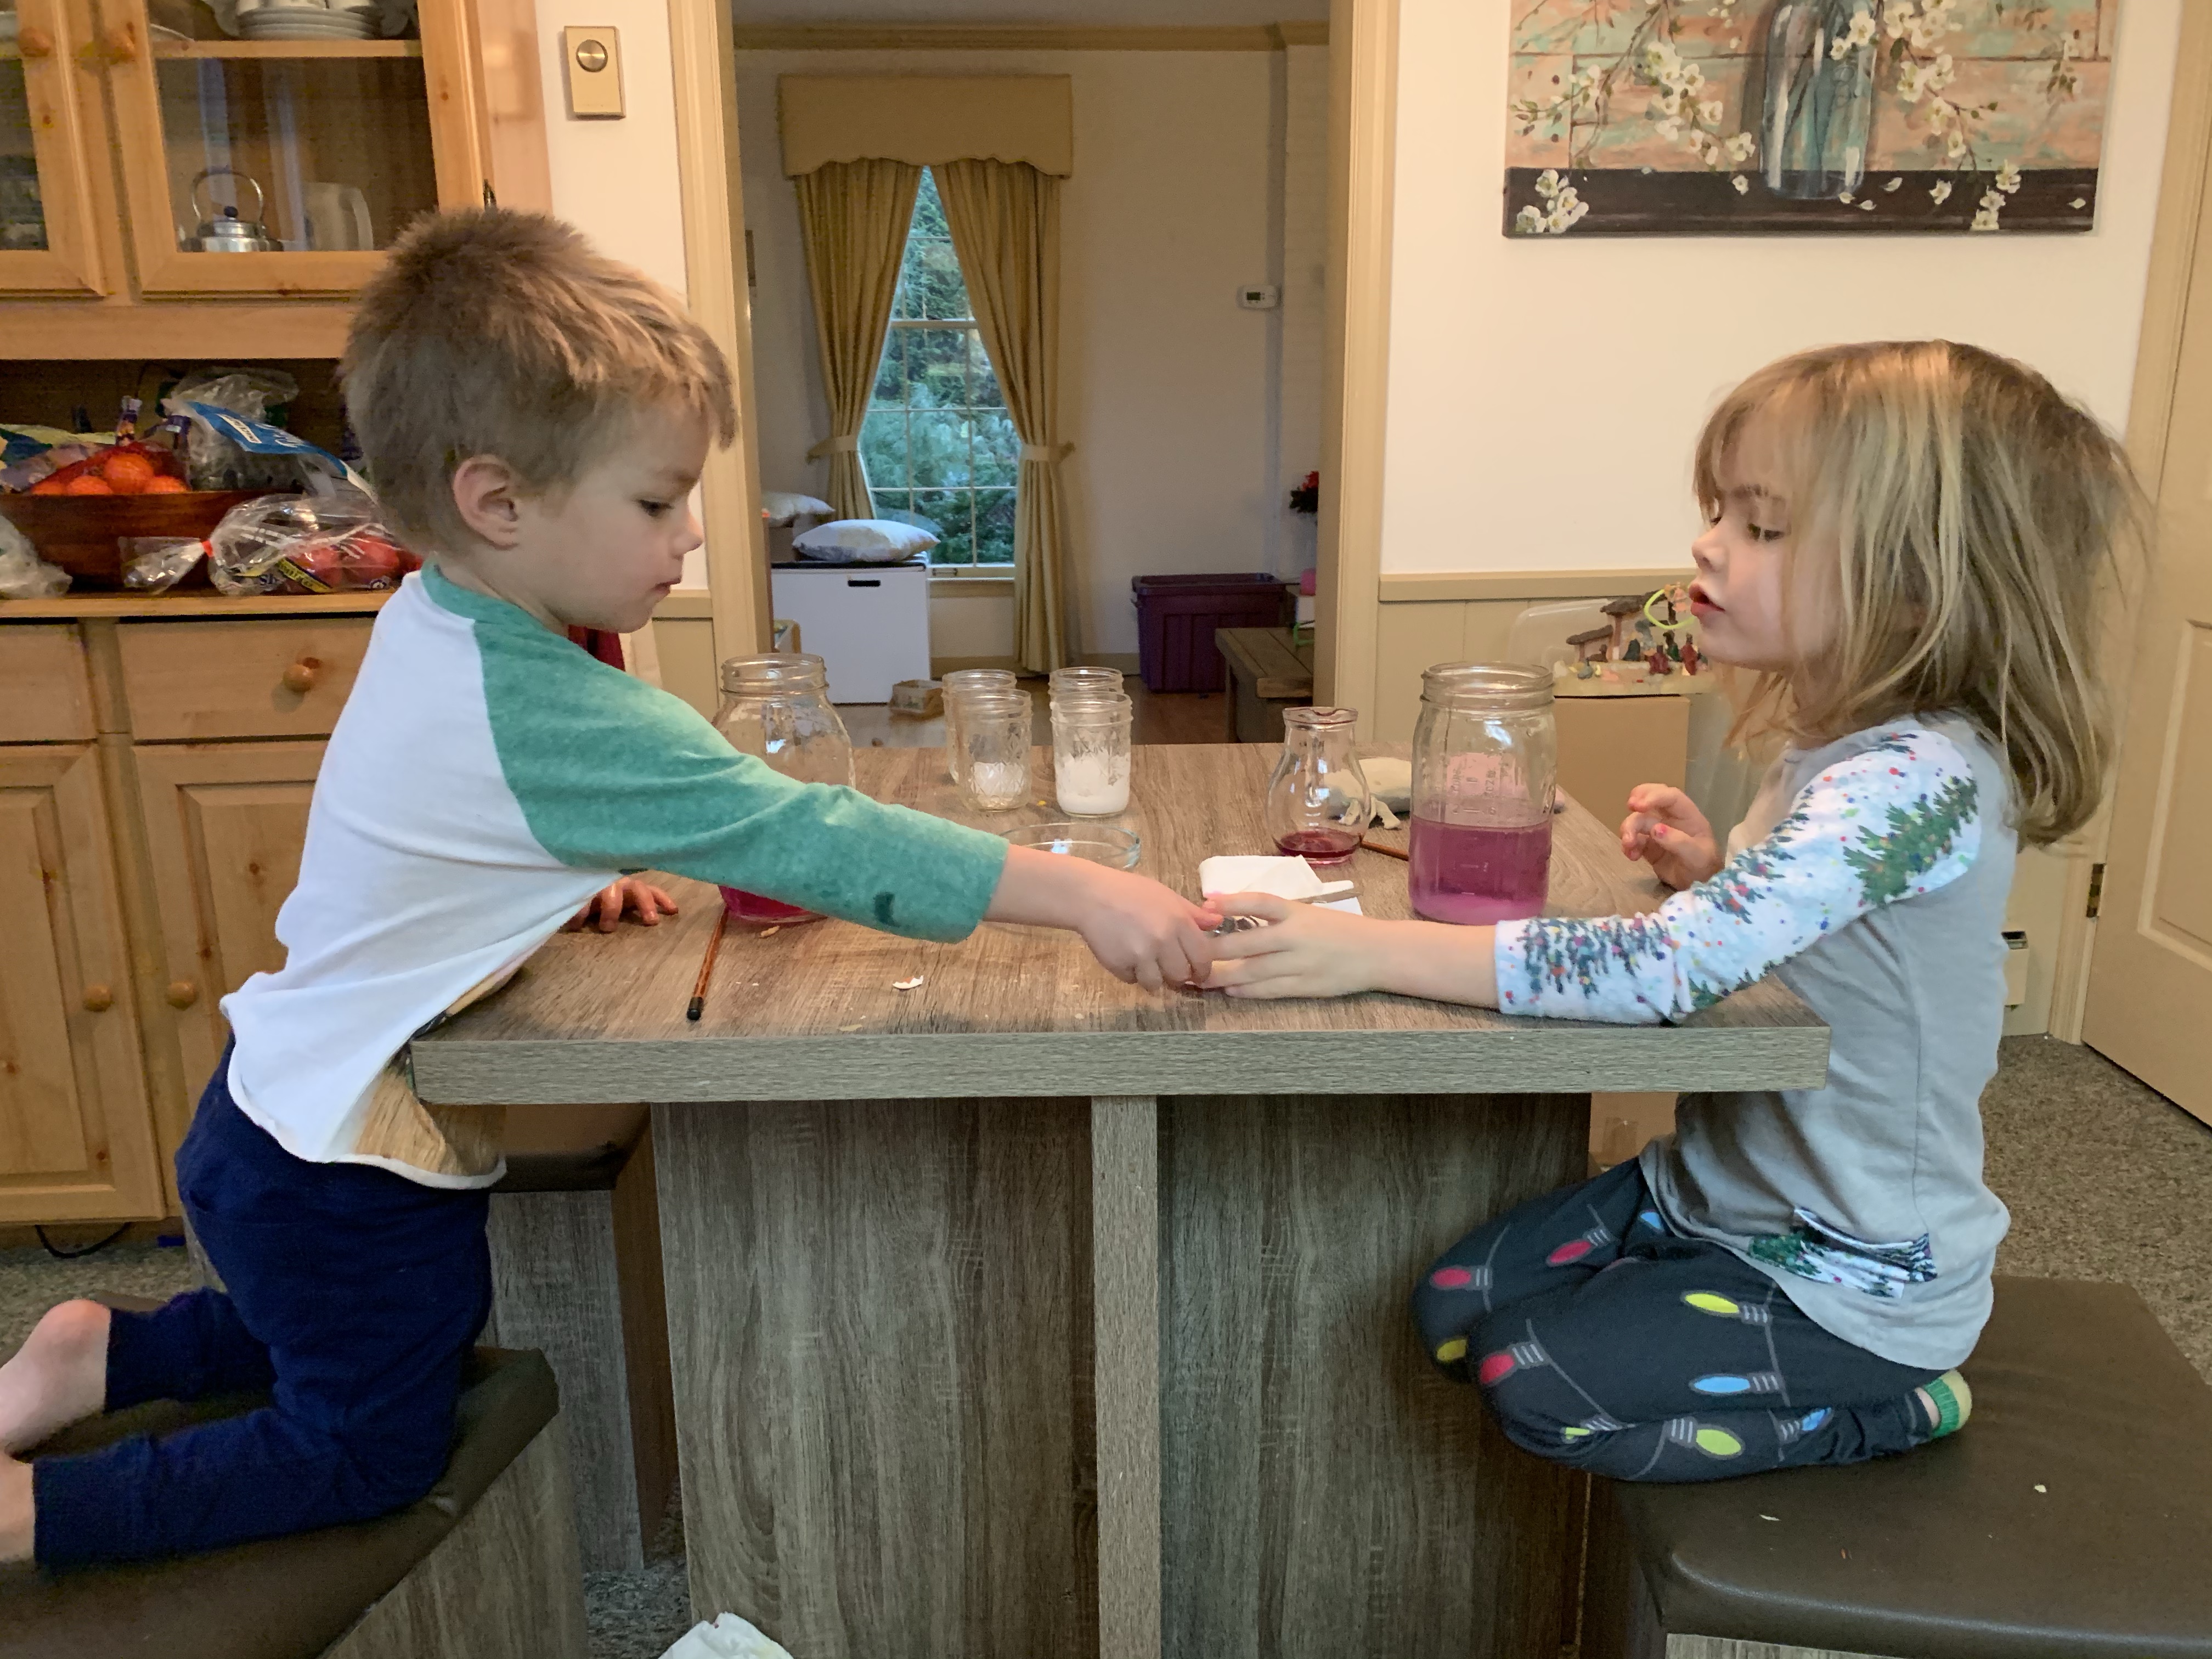
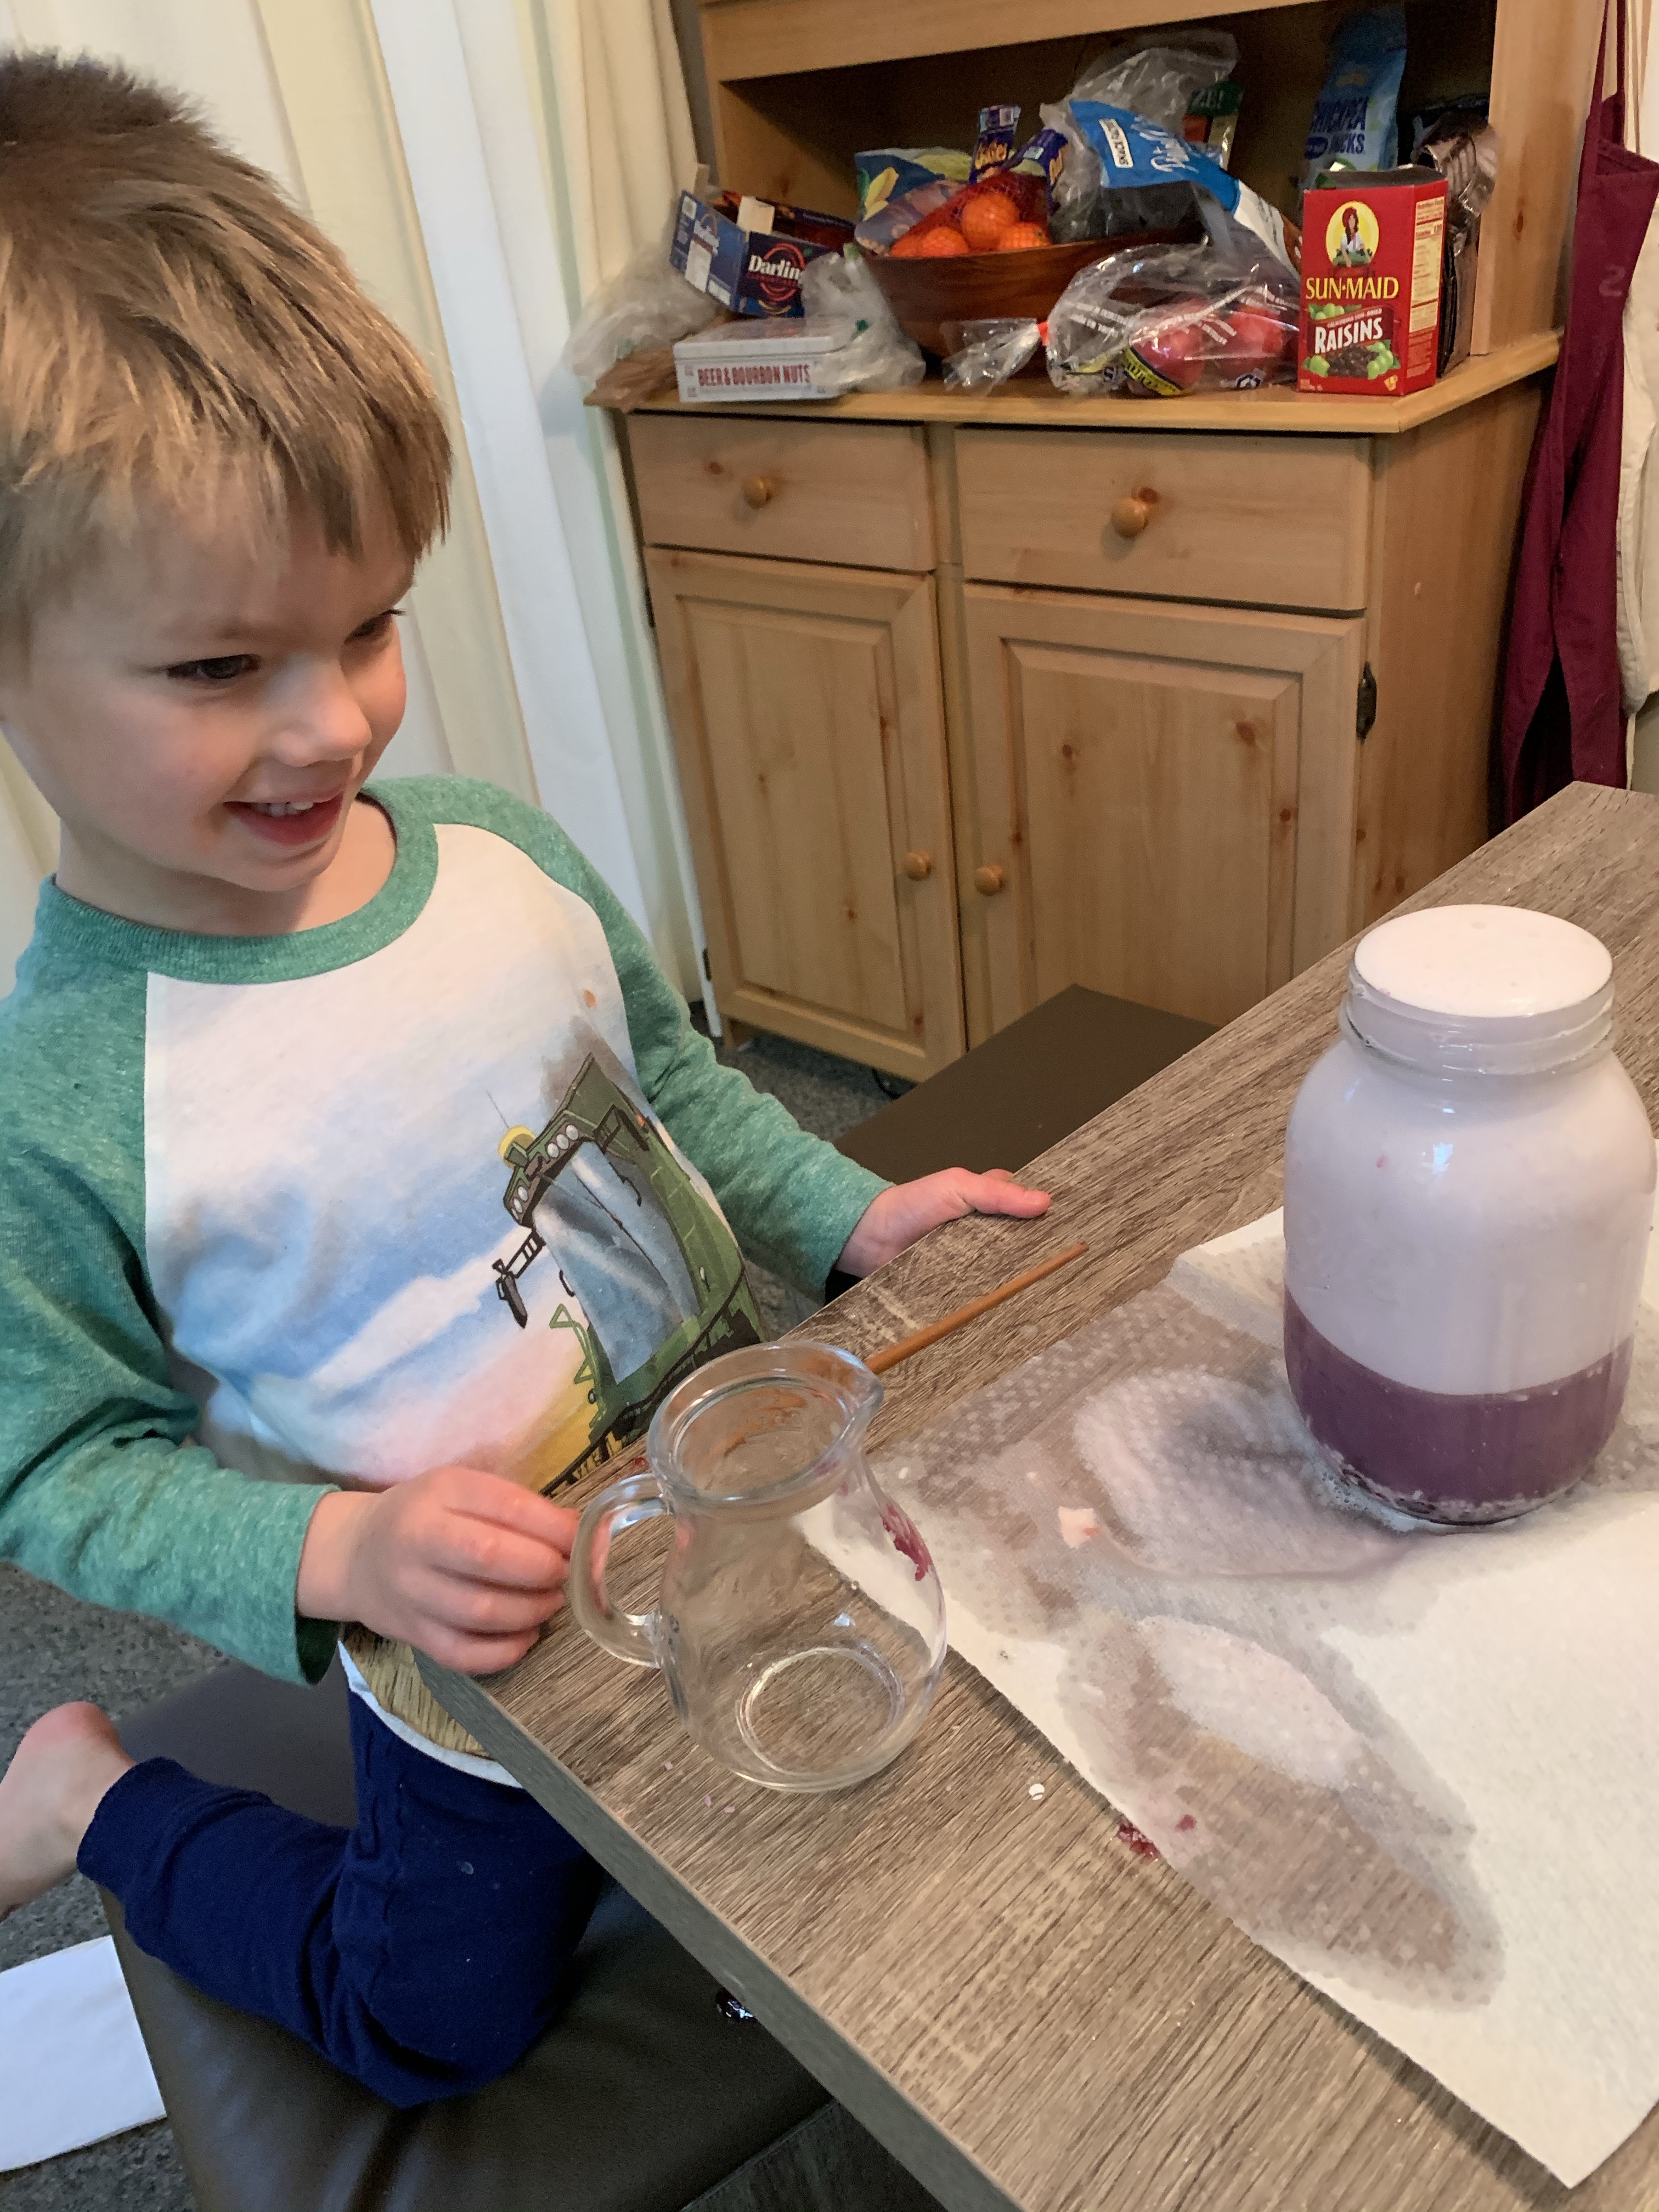
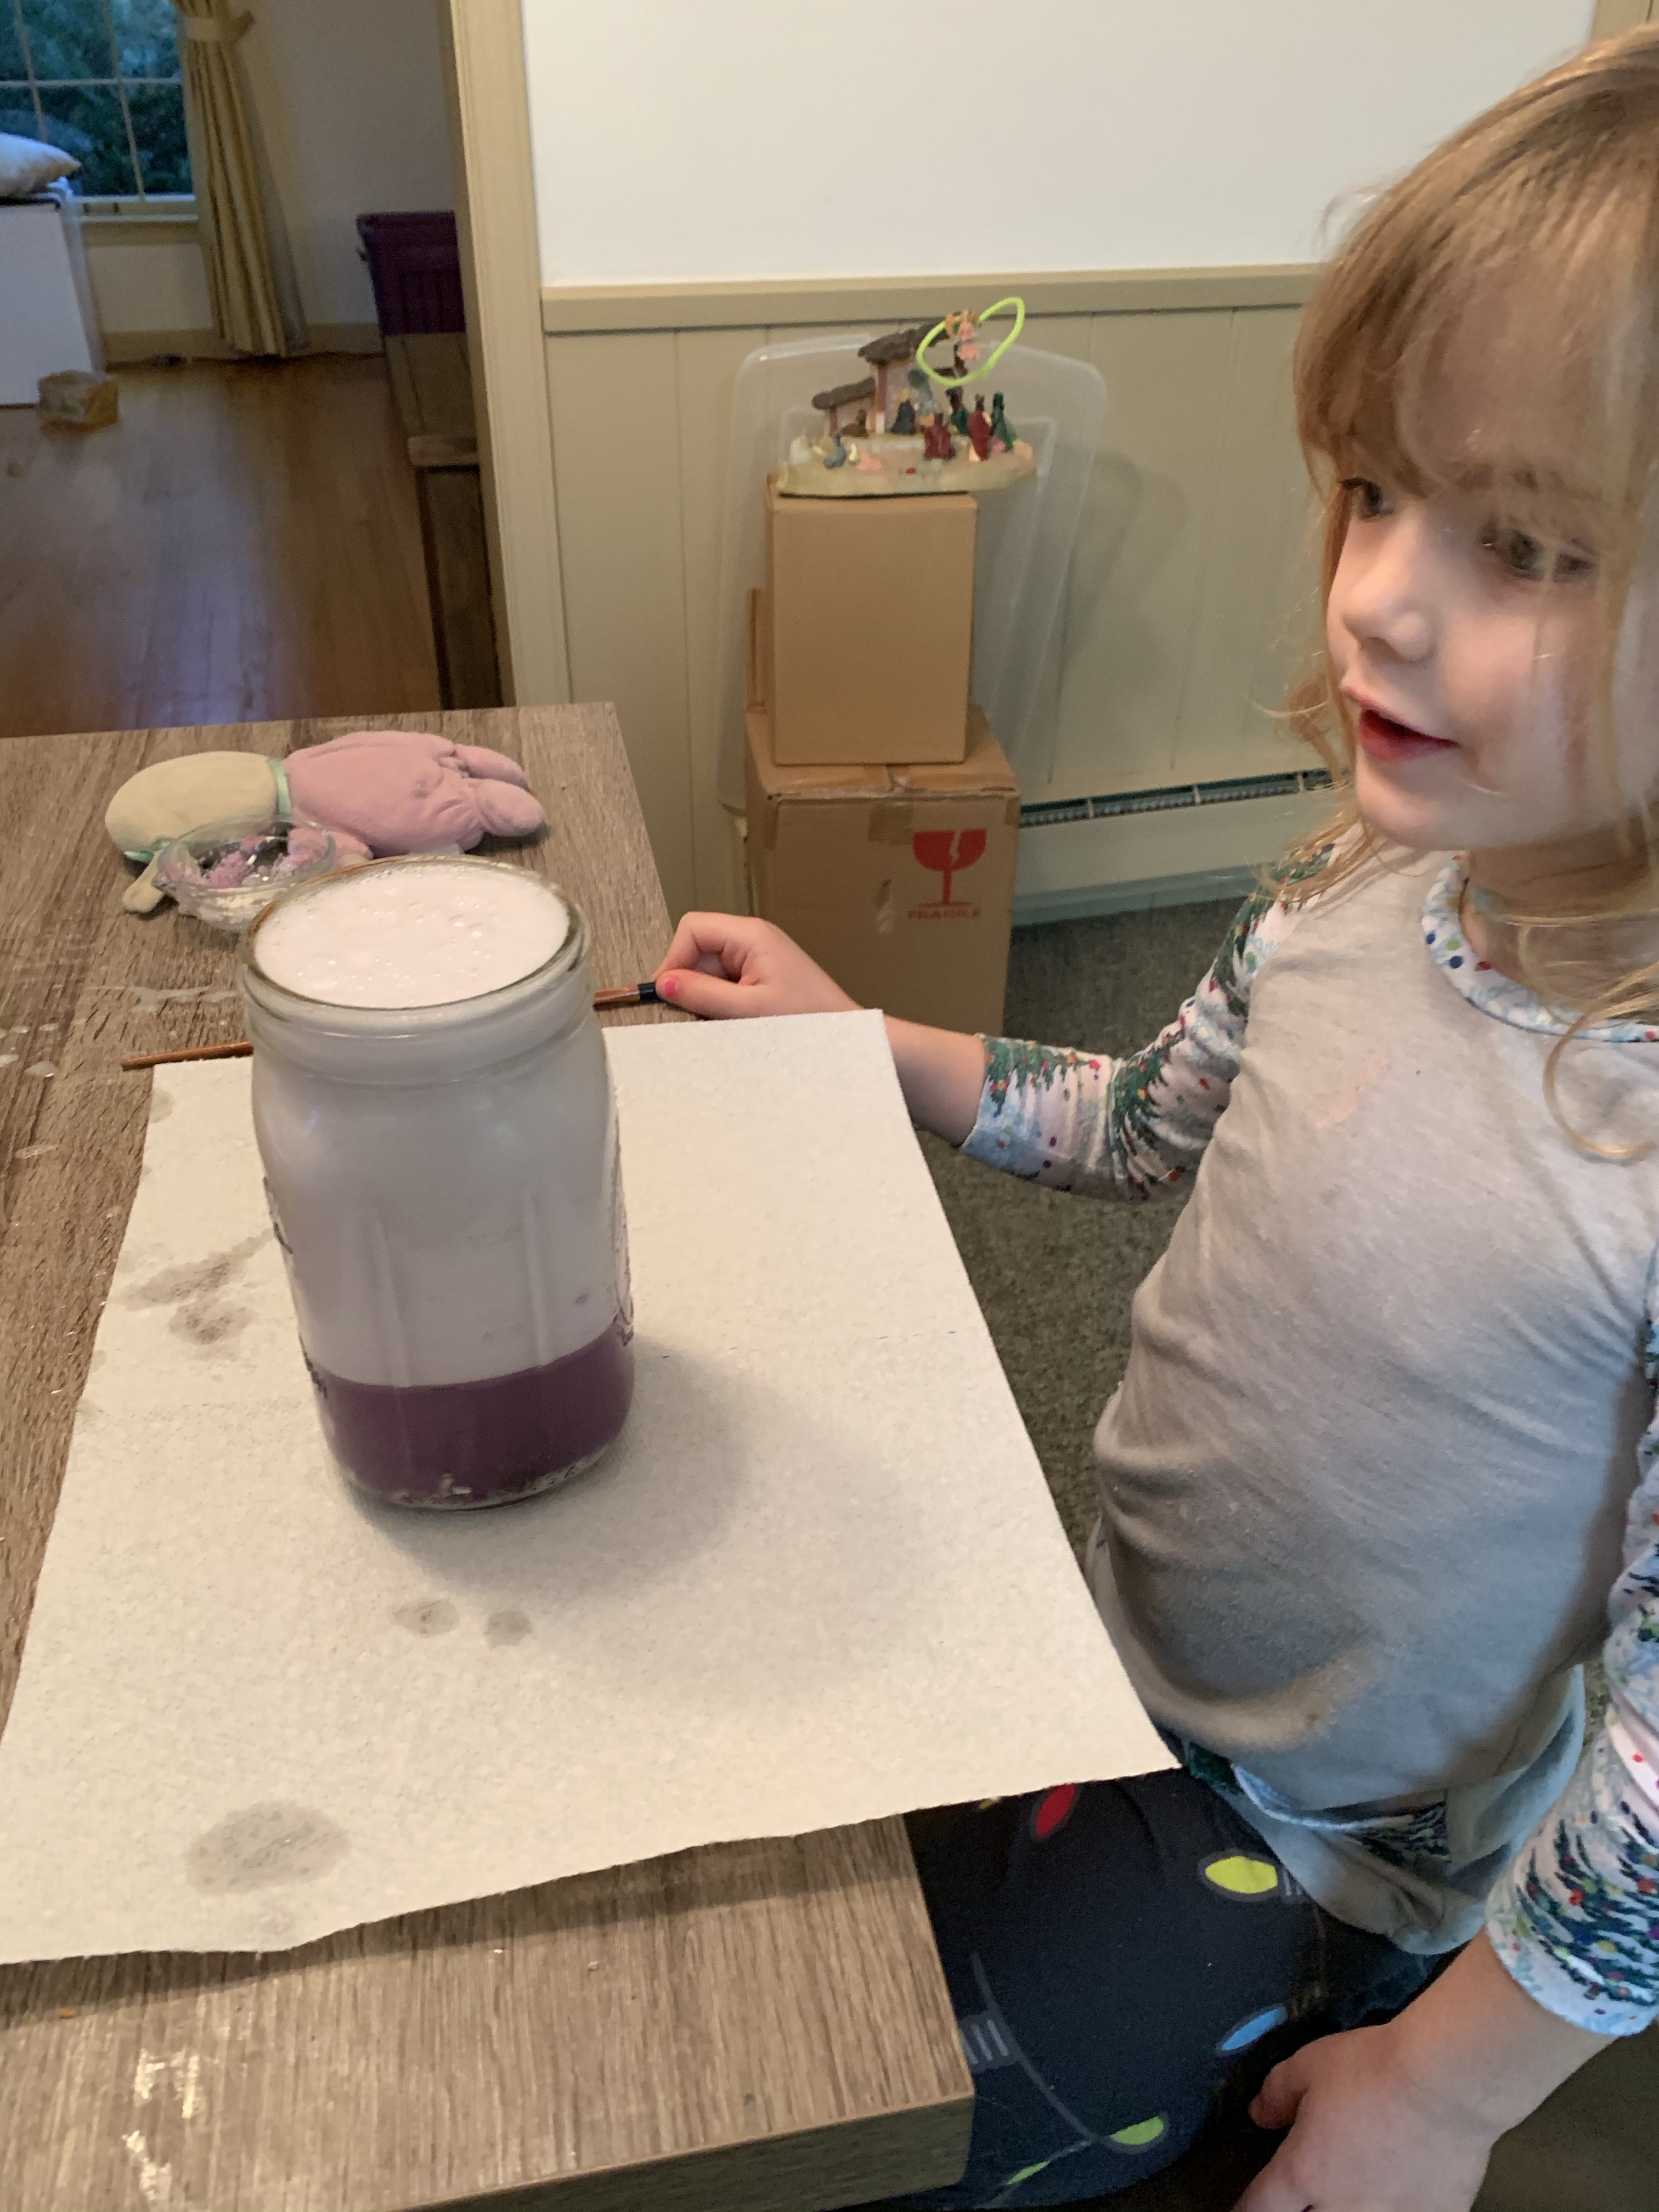
Fill the glass jar with 3/4 cup of water (leave room for the “clouds” aka shaving cream). Next put some shaving cream on top. We went a little crazy as Maddy wanted a giant cloud (cumulus-big, white & fluffy).  You could also talk about the different types of clouds: cumulus, cirrus, stratus, nimbus. There are more clouds but those are the main 4 and that would be more for older elementary students. This cloud demonstration could be fun for any level!

After putting the shaving cream on top get a bowl or small cup and mix a few drops of food dye with water.  This will be the rain.

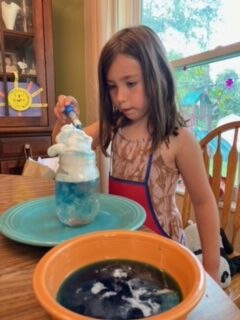
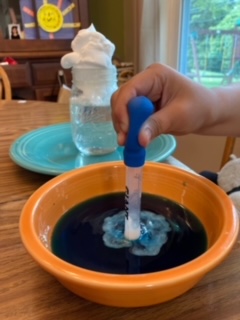
Have your child use the dropper to get some rain and put it on the clouds. This works best if you insert the dropper about half way into the clouds and squirt it out.

Soon they will see rain fall through the clouds when they get so full of the water they can’t hold it anymore!

This can be repeated with different colors and different amounts of liquid. You can have your child hypothesize what they think will happen before they put the drops in and make a conclusion afterward.

The science behind this: Clouds are made when water vapor (gas) turns into liquid water droplets. They form on little particles that are floating in the air (like dust).

If you see puddles outside but then they disappear where did they go? They evaporated (liquid to gas-water vapor). The water vapor travels through the atmosphere to create the clouds. When too many water droplets are in the clouds and it gets saturated, it rains. This is a very simplistic version of some of the water cycle but if you want to dig in more I suggest going here: https://www.nasa.gov/audience/forstudents/k-4/stories/nasa-knows/what-are-clouds-k4.html .   If you scroll down there is also a link at the bottom of that website explaining how clouds form for kids in grades 5-8.

FollowFacebookpinterestrssyoutube
ShareFacebookpinterest

Salt dough wreath, ornament, or garland!

So we have done the salt dough ornaments before, but this time we made garland and a wreath out of our painted Easter ones!

img_3244-1

All you need to make salt dough ornaments is flour, water, and salt. So, start with two cups of flour, 1 cup and salt and mix. Then add water slowly until it is a play dough like consistency.  We ended up using our hands to mix it up. If it is too sticky, add more flour, too dry add more water.

img_3147

Then we rolled out the dough to a 1/4 inch thin, and used some Easter egg halves, including a bunny, chick, and jelly bean shape. You can of course just use cookie cutters as well. Use a straw to make a circle hole at the top of each ornament so you can add string later.

img_3148

Turn the oven on at 200 degrees and put parchment paper on the tray and leave in the oven for 2-3 hours. If you don’t have parchment paper just move the ornaments with a pie lifter to make sure they don’t stick about an hour in. Time depends on how thick the ornaments are. Once cooled and dried, paint them as you wish.  You can add sparkles if you want. Once all dried, use string or ribbon through the hole and tie.  After that hang them up!

img_3249

Or, you can make garland by putting one ornament through the string and then tying it in place and continuing until desired effect.

img_3249-1

If you want to make a wreath, we just used 2 paper plates glued together and cut out the inner circle then used a hot glue gun. Of course you can use cardboard or other material, but this is what we had on hand with the quarantine.

img_3242

We used the glue gun to glue on some ribbon and add pom poms.

img_3244

FollowFacebookpinterestrssyoutube
ShareFacebookpinterest

Crushed Chalk Paint

Have any old pieces of chalk laying around? If you have lots of chalk, you are bound to have small pieces here and there. Take those pieces and make chalk paint for the driveway or sidewalk! Your child will have fun mixing colors, smashing chalk, and painting up the driveway!

First, take the chalk and crush it into a powder. You can do this by putting it in ziploc bags and smashing it with a hammer. We did it by simply putting it in a bowl and smashing it with a rock (neanderthal style).

IMG_5335

When you have all the chalk crushed add water to the consistency you like. BOOM! There you go! Mix it up. If you want to get rid of the smaller chunks you can use a whisk, but we just kept it simple and mixed it with our paintbrushes.

IMG_5339  IMG_5343

You can use all different sizes of paintbrushes and mix colors. My daughter played with this for over an hour and a half! She probably would’ve done it longer if it wasn’t getting dark outside.

IMG_5350

You might not think your child will love it, but give it a try! While painting the color is not very bright but dries brighter than regular chalk! Enjoy!!

FollowFacebookpinterestrssyoutube
ShareFacebookpinterest

Mixing fun

If you’re looking for an activity for your little ones to enjoy and also learn try this mixing fun. You can also use whatever you have in your kitchen! Just as an update, the kids ask to do this almost daily they love it that much!

img_2705

You need a container, preferably a tall see through one such as a large mason jar as shown. Fill the mason jar half way up with water.

Then you will need something to stir with (we grabbed a chopstick!)

Lastly, you need items to put in this mixture, so food coloring or natural coloring (we also used washable paint one time!

Coloring from beet juice etc.

Sprinkles can be used to see if they float or sink!

Ice cubes

Salt versus sugar-do they dissolve

Olive oil or any type of oil to see if it mixes with water

Croutons, cereal, some scraps from the compost bucket, lettuce leaf, onion (although you may want to hold off on too many food items with the quarantine right now!)

img_2707

We even tried jelly to see if it would sink or mix into the concoction. Then have your child mix it real fast in a circle and see a cyclone happen!

Dish soap and the bubbles it causes is fun as well!

img_2704

Pretty much try anything!


Vinegar and baking soda which you want to save for last! The acid base pair will cause a volcanoes explosion! We did those outside then to have a huge overflow!

img_2708

You can keep adding more vinegar to make it continue exploding!  Just bring it outside lol. img_2709

img_2710

ENJOY!!!!


FollowFacebookpinterestrssyoutube
ShareFacebookpinterest

Sparkle Pumpkins!

IMG_2254

It’s finally fall and pumpkin time! Toddlers LOVE holidays and what a great way to get ready for trick-or-treating by decorating pumpkins! Obviously, toddlers shouldn’t be holding knives to make jack-o-lanterns so there are many fun alternatives!

You can have your toddler paint a pumpkin, add stickers, pom-poms, and many other accessories instead of the normal jack-o-lantern.

Or….you can have them make sparkle pumpkins! My daughter LOVES glitter, I mean who doesn’t? Okay, maybe we don’t, especially when you have to clean it. However, this is a perfect activity for outside in the cool, crisp fall weather.

IMG_2244

What do you need for this activity?

A pumpkin of course! Other materials you need are paint, glitter, glue, and brushes. You may want a paper plate or something you are using to put the paint on to mix it with glue. Glitter is a very important part of this activity! We used various colors.

First ask your child what color they want to start with! Add HALF glue and HALF paint concoction together. Mix them with the brush. The glue helps the paint stay on the pumpkin and not flake off. It also helps the glitter stay on. Your child can have fun painting their pumpkin!

IMG_2247


Let them paint to their heart’s content, then have them pick a glitter color or two.


IMG_2257


Madison spread the paint pretty thin, so I went ahead and put some liquid glue on the plate and had her brush the glue over the paint. This allowed the glitter to stick better. She just shook the glitter over the pumpkin (and all over the sidewalk).


I recommend you keep the pumpkin out of the rain!

IMG_2261

ENJOY!

FollowFacebookpinterestrssyoutube
ShareFacebookpinterest

Dress up a dress!

This time I just didn’t have time to make a full princess dress, who does when the kids are little? So last minute I used a plain tutu dress that actually has paint stains I couldn’t get out on it! Don’t worry, they get covered up!

Then I ordered a special mermaid appliqué with the number 5 for my daughters birthday off of Etsy. I also had some leftover sequin fabric I wanted to add to the dress.

I used the sequin fabric and sewed it all

Around the bottom inner layer of the dress. Then I added the patch and wow what a difference with that easy change! I was going to add some puff sleeves but the weather was warm so I ended up keeping it sleeveless.

Purchased an assortment of gem heart stickers and used fabric stitch glue to place them on the dress!

This can be done easily and quickly and you have a birthday dress! You can add sleeves, bows, a sash or belt!

FollowFacebookpinterestrssyoutube
ShareFacebookpinterest

DIY Placemat Place Setting

IMG_1805

My daughter loves to assert her independence, even at meal time! So I thought, why not make a placemat that she can set her own place setting at? There are many ways to make placemats.

One way is simply laminating a printed out version of a placemat setting such as this…

placemat
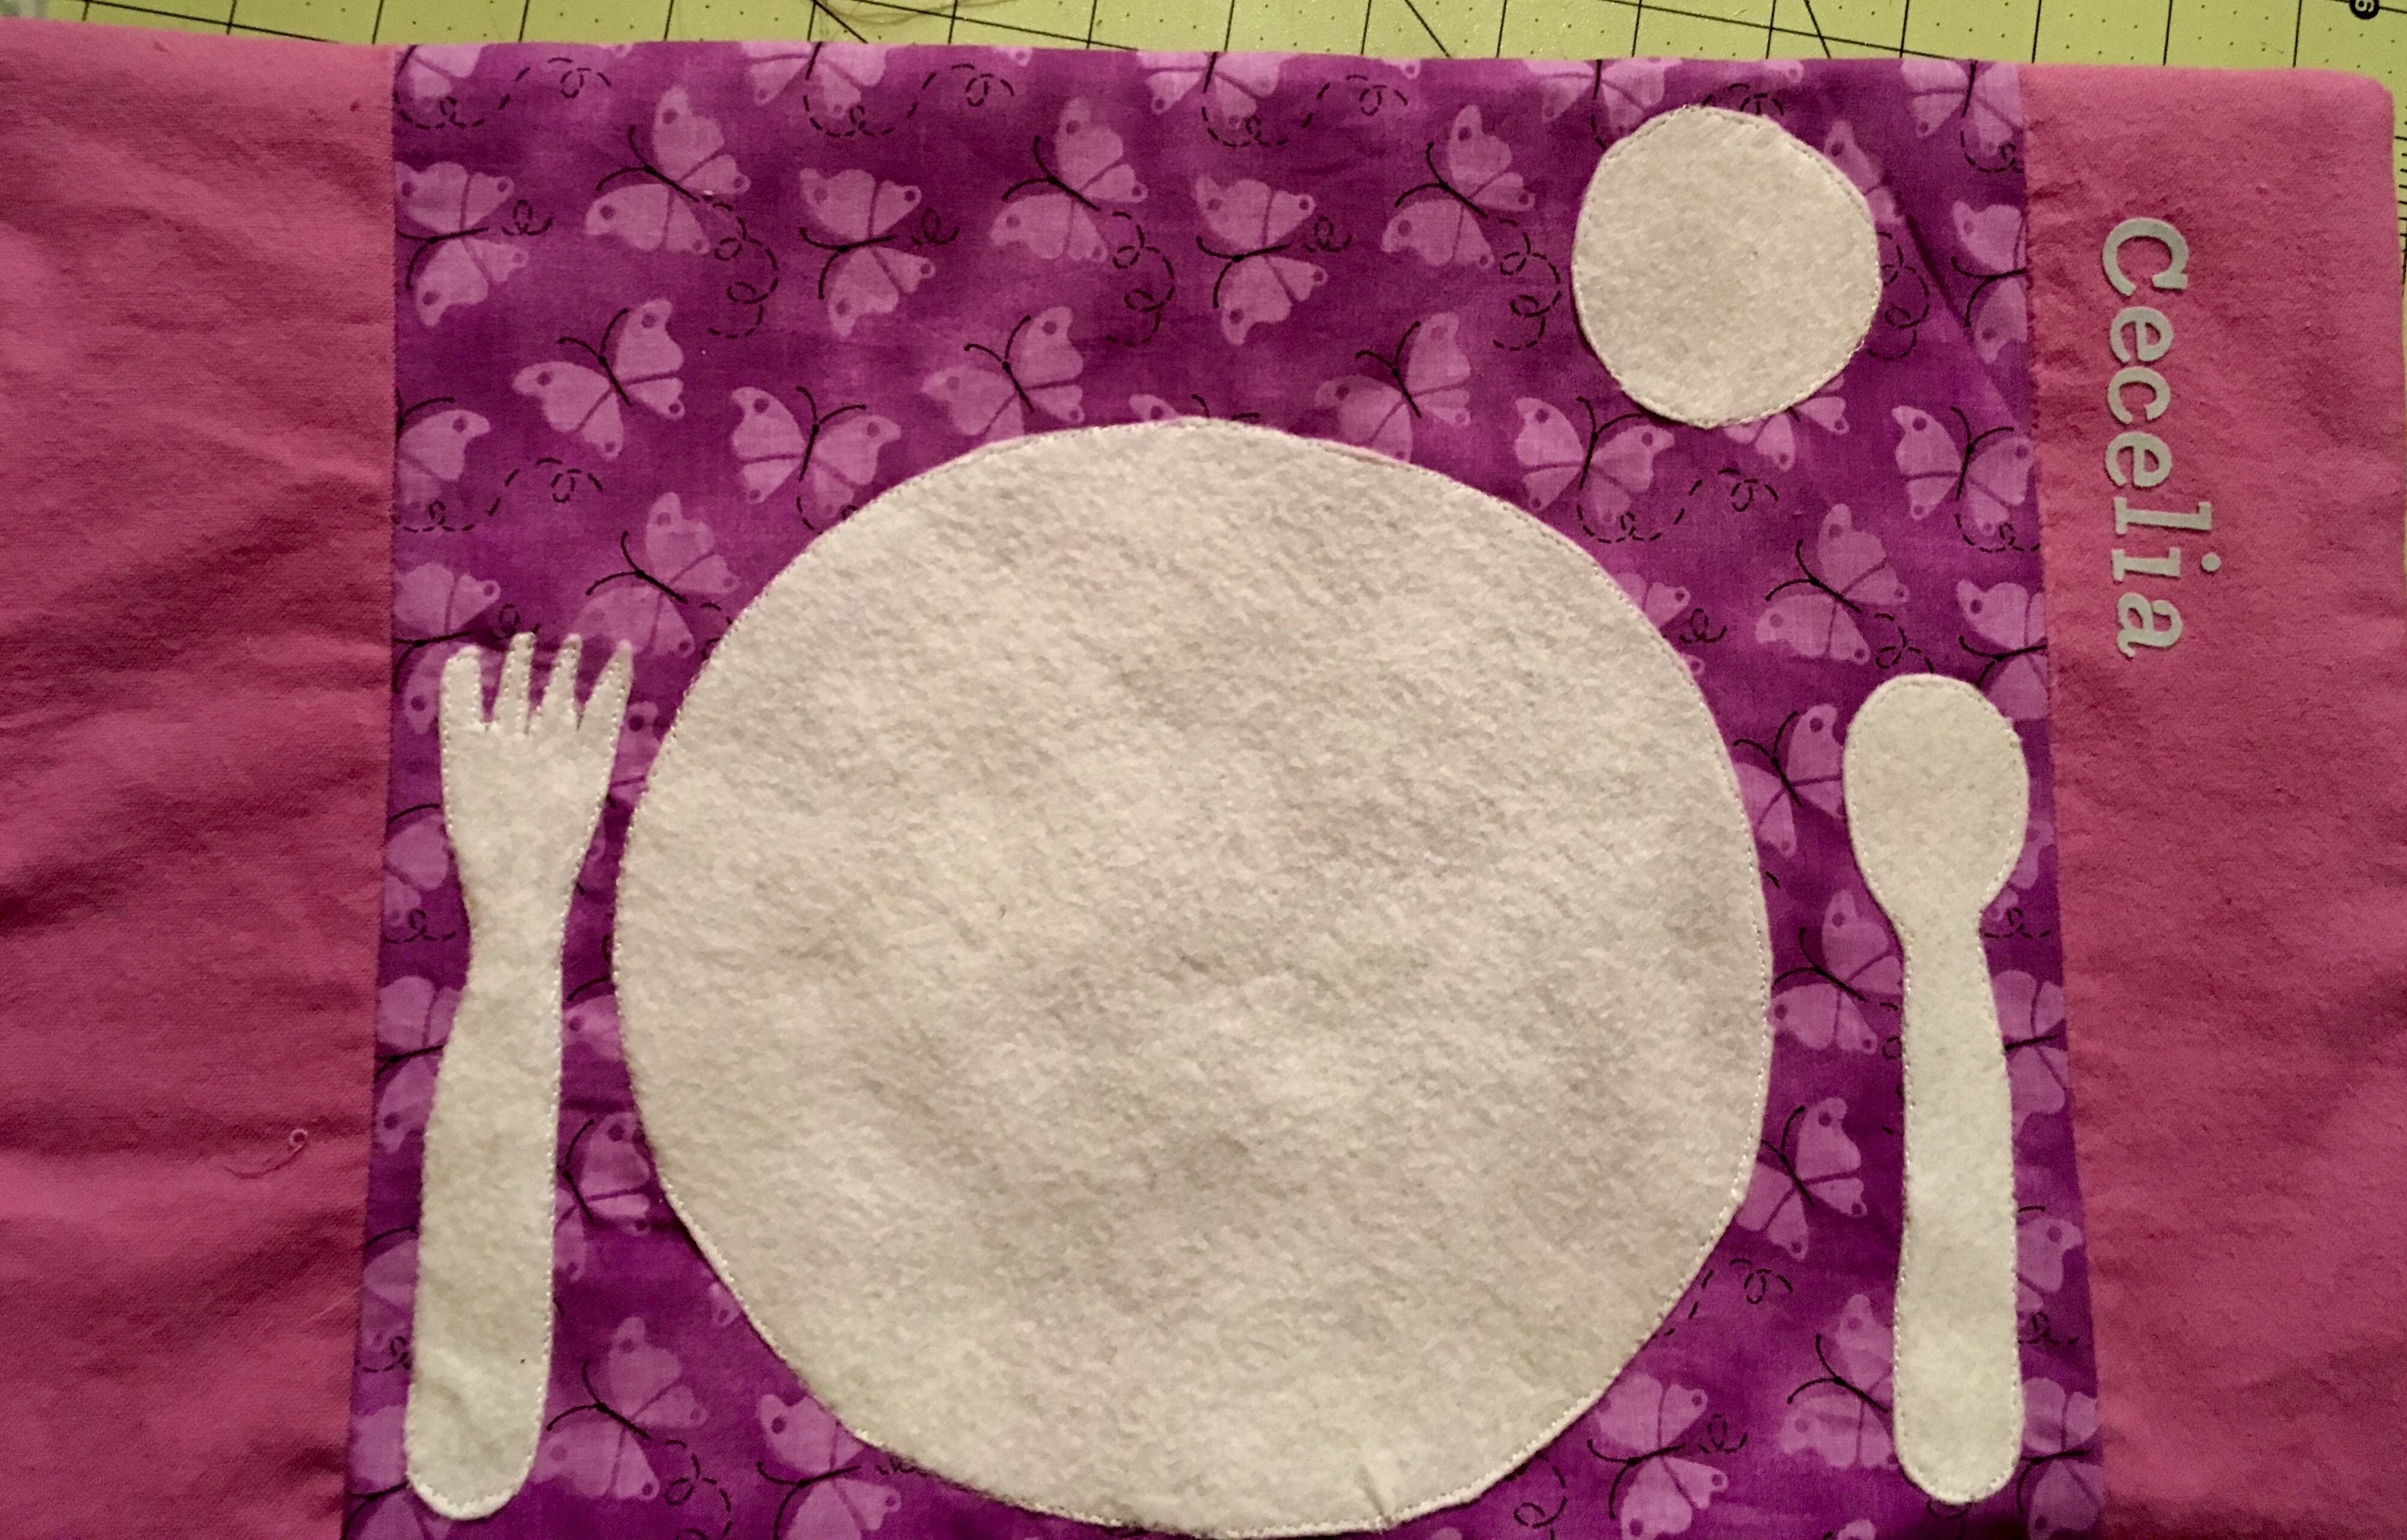
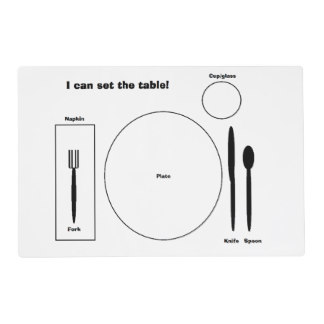
However, my laminator is only big enough for a regular printer sized paper. You can take it to your local staples or office store to get laminated. You can even make your own placemat out of fabric and have it laminated.

I decided to go with the fabric version and just use the washer to clean it.

So you want to prewash the fabric to make sure it does not shrink.

IMG_1805

As always there is a video youtube tutorial and a written one below.

What you need for this placemat place setting is…

1) fabric: it will end up being 12×16 inches.

  • 1 batting or felt for the middle or back side 12×16
  • 1 center front piece 12×12
  • 2 outside front pieces 4×12
  • 1 back side
  • felt or non fraying material to cut out fork, spoon, cup, and plate

2) Next, take your front center piece and your side front pieces and pin them fabric facing fabric on the sides and sew. Then iron the seems.

3) Following that, you want to use your felt or nonfraying material to outline a plate, cup, fork, spoon, and any other utensils that you want on your placemat.  Then cut them out and sew them directly on the front piece.  You can also use fabric glue if you like.

Sketch

4) ***You want to put the piece of fabric you want as the backing down first facing the front fabric and then the basting or felt behind that (as you can see I did it opposite and ended up with my black fabric as the back outside as you will see). However, if you are using felt, it ends up rather nice as a backing since it prevents sliding.

Sketch2

5) Sew all the way around leaving a 3-4 inch opening so you can pull it out the right way. Don’t forget to backstitch. Once this is done, pull the inside out and make sure all the sides and corners are all the way out.  Iron it all out and sew the remaining opening with either a hand stitch, or if you want to use your machine then sew around the whole placemat to give it that look.

IMG_1805

You can add any other embellishments, I used my daughter’s name on the side. Enjoy and check out the other videos and tutorials!  Let me know if you have any questions!


FollowFacebookpinterestrssyoutube
ShareFacebookpinterest

DIY Rudolph Slippers!


DIY RUDOLPH SLIPPERS

This easy DIY sewing project can be made for any size shoe!  All you need to do is trace the shoe (or foot) size and create!  Easy peezey Christmas fun! Also makes a great gift!

IMG_0405

As always, there is a video tutorial on the ceceliasspot channel and here is the link… 

rudolphslippers

Baby Slippers Tutorial! this has a pattern for baby slippers if you don’t want to trace a shoe or foot

And there is the written format below.  ENJOY AND HAPPY HOLIDAYS!


First, what you need for this project:

  1. Non-skid fabric
  2. Fabric colors (I used cotton and fleece)
  3. 1/4 or 1/8 elastic
  4. Sewing tools, googley eyes, red cotton ball, and any accessories you would like to add

IMG_0299

  1. Next, trace your subject’s shoe or foot (if you are using their actual foot add 1/2 inch all the way around).


2. Trace the top of your childs shoe to make the front of the slipper. Cut four of these pieces. Then trace the back and cut 4 of these (add 1 inch to the long length side so you can overlap)

IMG_0387 - Copy - Copy


3.  Take pattern facing pattern and sew the two front pieces together only on the straight side as shown (do this for both slippers).

IMG_0332

4. Trim excess and turn right side out, iron right side out and sew across the top you ant on outside (this makes it look nicer.

5. Take pattern facing pattern for both back pieces and sew across one long side for both slippers.

6. Take your elastic and cut it about 2.5 to 3 inches shorter than the length of the back piece and pin it and pull it tight while sewing across to the end. This is still on the wrong side. Sketch

7. Flip the fabric over the elastic with right side out and iron and then sew right below the elastic and down the sidesSketch2

8. Freehanded antlers by looking at a picture of antlers. cut 4 sew around except bottom and stuff it.

IMG_0331


9. Check sizing and put front and back piece pinned together with pattern facing down (right now you should only see (the side that is up) what will be on the inside when you are finished done).

Sketch3

10. After pinning the front to the back and the antlers in between the front and back piece, sew across front to attach front and back piece

IMG_0389 - Copy - Copy

This is what it should look like now.

11. Line up the sole two pieces with the patterns on the outside (not the usual, but it doesn’t matter since its on the bottom) You can see it in the back there with the nonskid on top.

Sketch4

12. Line up the sole with the top piece (nonstick sole facing upwards to the reindeer face) by finding the middle of the front and back (you can fold to find this). Then sew all the way around. And turn right side out and WAH-LA!!IMG_0398 - Copy.JPG

I sewed on the red cotton ball nose and hot glue gunned the eyes on.  If you have a little one then please don’t use googely eyes since they might try and eat them!

Don’t forget to check out our facebook site and subscribe to our youtube videos!  ENJOY! MERRY CHRISTMAS!

FollowFacebookpinterestrssyoutube
ShareFacebookpinterest

DIY Masks and patterns! 


My daughter loves running around in her cat mask saying she’s Cece cat. She also wanted to be Cece dinosaur, cece giraffe, and many other cece animals.  So I had a couple extra crafting materials nearby and we created these easy masks!  Also, masks are great for parties or as a craft at a party! 


There are many ways to make many different masks, the first way is simply with 

1) popsicle sticks or tongue depressor sticks (or you can use elastic or string) 

2) construction paper

3) scissors and glue 

4) crayons, ribbons, stickers or any other decoration you would like to add


I absolutely love this new glue I got from crayola, it is so easy for my toddler to use herself and its washable! 

I simply held the construction paper up and estimated where the eye holes needed to be and cut them out then made my own design and let her glue the pieces together and decorate! Such a simple and easy project for your little one. 

Now if you are looking for a particular pattern or don’t know how to make an animal let me suggest a couple tutorials I found:

Animal masks by Hoosier
These cute masks are perfect for your little fall creature! There’s a pattern for them too! 

Next are easy felt masks that are perfect for Halloween costumes! 

Felt masks by prettyprudent

Free patterns again!! Enjoy

Here is a tutorial for the little superheroes:

Superhero masks
These masks are simply made from paper plates! 

For the older kid Mask that can be decorated with little jewels! 
Halloween masks! Boo! 

Halloween time
These masks are just a cut out and wear mask, however you can easy trace it and have your little one color and paint.  Paper plate masks

I love these paper plate masks! So easy! 

Animal masks
Lastly, is a group of animal masks you can print off and color or paint! 

Hope you enjoyed these ideas, now get crafting! 

FollowFacebookpinterestrssyoutube
ShareFacebookpinterest

DIY Bandana Drool Bib

Once the drool starts it doesn’t stop!  I saw an adorable bandana drool bib in a store and thought, I could easily make that!  And you can too!  It is a simple 5 to 10 minute project that makes a great gift and a fantastic accent and cute and functional accessory for your little one.


As always, there is a youtube tutorial and the written steps on here!  Hope you enjoy!


This is for size 6months to 12months.

What you will need:
1) Two Fabrics (one side needs to be absorbent). I used a cute flannel fabric and then a yellow fleece material for the back.
2) Velcro or snaps to hold it shut

  1.  Fold your fabric in half. Cut out two triangles, one with each fabric (you can use my measurements or compare to your bib size for your little one) .  I used the measurements of  9in long and 7 1/2in on the fold.
  2. Next, you are going to make a cut for the neckline about 3 inches in from the side
    and 2 inches down the fold.
  3. Cut the little triangle off the very end, abut half an inch, this is where the velcro will connect.
  4. Take pattern side facing pattern side and sew all the way around leaving a small
    opening around 2 inches (this is where you will pull it right side out)
  5. Now pull it right side out and hand sew the hole shut and VOILA! drool bib
    complete!
  6. Iron press it!  You can also go around the whole outside and sew it if you like for the design look!
  7. Next you want to attach either your velcro or snaps.  I have iron on velcro I used.

Hope you enjoyed this tutorial, if you have questions just post! Thanks


FollowFacebookpinterestrssyoutube
ShareFacebookpinterest