Tv tv everywhere…

This evening my husband, my two and four year old children, and myself went to a nice restaurant together. Actually, my favorite restaurant, and the one we had our Wedding rehearsal at 7 years ago. I was nervous that our children would become bored and loud so I brought a coloring book, crayons and a couple stickers. Unlike many restaurants, this one is quiet, in an old farmhouse, and has classical music on and no televisions. You are meant to enjoy one another’s company with local fantastic fresh food. There is no overstimulation with many TVs, too loud music, or too many distractions. The food may take longer to be made, but that’s because it’s fresh. The bread comes out in the clay pot it was cooked in, it’s amazing!

But back to my story, a couple comes in with their 3-4 year old son who they sit in a chair. Immediately, a large iPad is placed in front of him and we can hear blippi playing. If you don’t know the show Blippi, you should check it out, as it is a real person doing real things in the real world (it’s my sons favorite show when I do let him watch anything). Luckily, my kids weren’t too distracted, I thought my son might start yelling blippi, but he went back to eating his bread. Next, the sons father went on his phone for the entire dinner. I had missed this as I was paying attention to my family, however my husband pointed out that he was on his phone the entire time.

Through the entire dinner, the family next to us had the iPad or whatever device it was placed in front of him and could hardly see his parents. No wonder this kid was crawling under the table screaming periodically and trying to run around the restaurant! His parents weren’t paying any attention to him except to reference the show he was watching. The mother even said look at those children behaving over there that is how you should behave. I felt badly for this child because his parents were blocking him out by trying to turn him into the zoning zombie to “enjoy” their dinner. Which in this case, was the father on his phone the whole time anyways.

I see children everywhere I go on their parents phones or iPads zoning out instead of interacting, developing relationships, communicating and learning. Even at the food stores, kids are plopped into a cart and given a phone to play with instead of interacting and watching interactions taking place. The children are learning how to behave from the show instead of reality. I’m guilty of letting my children watch tv, I think I might lose my sanity sometimes if I tried to make a decent dinner with two toddlers trying to help and almost burning themselves or cutting themselves every couple seconds. Granted sometimes they play with their puzzles and legos and such and it’s great. Even better, they play together a lot more these days. I do have them bake with me frequently since they love helping (toddlers love helping, even if it makes more of a mess!).

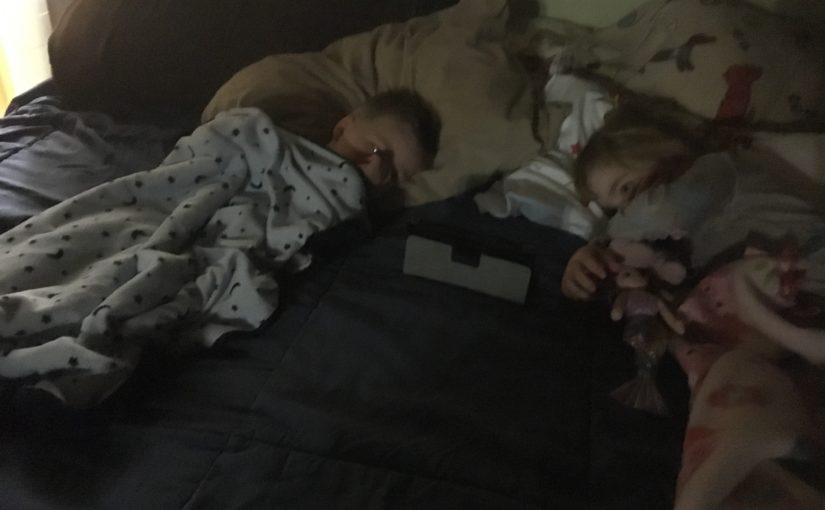
Sometimes I’m guilty of trying to catch a couple more z’s by letting my daughter come into my bed in the morning to watch a pbs show or two. This may let me sleep a couple minutes longer; however I pay the price when it’s time to turn it off. No matter how many times I’ve told her only one show and then breakfast, she throws a mini tantrum or full tantrum and just wants to watch more. This sets a bad tone for the whole day and I immediately regret letting her watch a show.

Another thing that bothers me is when parents post online what type of device they should get their 4 or 5 year old to watch shows before bed or in bed or for restaurants car rides and so on. Children should be interacting with real people, especially their family to build the bonds for their lifetime instead of glued to a screen. If you need to catch your breath once and a whole, I totally get it! Just remember, when you let your daughter watch a show in your bed or take that iPhone out at the store, your child makes that connection that you let him or her do this so they will expect it again and will be persistent. One thing I’ve definitely learned with a toddler is that if you think I’ll pick my battles and let them do something once, they will expect it again and again. More on positive discipline in the future, but that’s all for now!

Of course this is all just my opinion, and everyone has their own opinions, this is America after all, but next time think about actually having a discussion with your kids over dinner instead of bringing out the constant “entertainment.”

FollowFacebookpinterestrssyoutube
ShareFacebookpinterest

Easy Peasy Paint Present

If you have a special occasion coming up and are looking for a gift from your baby, toddler, or child, I have an easy peasy present idea!

Paint…UGH PAINT! The word can invoke fear in any parent, except this is mess free! Okay, almost mess free.

My mom’s birthday was coming up and I wanted to give her something from her granddaughter. I searched online and found this simple craft. I will admit I improvised because I was missing some of the items and I will mention what worked & what didn’t as I go through the steps.

First, gather your materials. You will need:

-Paint in various colors (I used finger paint)

-cardstock (I used regular paper but it didn’t work so well)

-gallon ziplock bag

-picture frame (if you choose to use it as a gift)

-Heart stencil (or you could just draw it yourself)

-scissor

Next, put your choice of colors on your cardstock paper. Note: I didn’t use cardstock and it ripped easily and you could see through some of it. SO USE CARDSTOCK paper or thicker paper. If you are in a pinch you can use regular paper but you will have to be very gentle with it.

a

YES, I USED WAYYYYY TOO MUCH PAINT!!! My paint came jumping out of the bottle super fast, I’m really not sure how that happened (haha). It takes longer to dry with all that paint. It took days for it to dry when it should’ve taken overnight.

Take your cardstock paper and put it in a gallon sized ziplock. This insures your project will be mostly mess free! If you need to cut down the paper a little, go for it.b

Now it’s time for fun!!! Let your child smear the paint!

c

Your child will love smearing the paint and you will love that it’s mess free!

d

When you like the smeared look your child has made, carefully take it out of the bag and leave it in a safe place to dry.

e

Look at all of that paint!!! TOOO MUCH! If you put way too much on like me, you can either dab it off with a paper towel or give it days to dry.

Here’s where you can vary the project. I drew a heart on a new piece of paper (use cardstock) and cut it out. You can pick any shape you like! If you are super crafty you could even cut out a name or shape of an animal. Cut down the paper to whatever size you would like it to fit. I cut it down to fit a frame. However, you could also make this into wall art, a card, or anything you can imagine!

i.JPG

Place the cut out on top of your painted paper. I moved mine around to find which colors I wanted to show. Cut the back painted piece to fit the frame. If you would like to write a message on the paper, go for it! Put in it a frame or glue and fold for a card!

j

Easy Peasy Paint Present! Note: I used regular paper and you can see that there are places you can see through the top paper. I highly recommend cardstock or thicker paper.

This project is perfect for any occasion!!! This could be done for birthdays, anniversaries, and holidays.

I’m thinking green colors with a Christmas tree or wreath cutout for Christmas! You could also use the paint bag trick for ornaments. Instead of using a top layer, just let the painted paper dry, cut out a tree shape, hole punch and use a ribbon and wallah!

box celebrate celebration christmas
Photo by Pixabay on Pexels.com
FollowFacebookpinterestrssyoutube
ShareFacebookpinterest

DIY Rudolph Slippers!


DIY RUDOLPH SLIPPERS

This easy DIY sewing project can be made for any size shoe!  All you need to do is trace the shoe (or foot) size and create!  Easy peezey Christmas fun! Also makes a great gift!

IMG_0405

As always, there is a video tutorial on the ceceliasspot channel and here is the link… 

rudolphslippers

Baby Slippers Tutorial! this has a pattern for baby slippers if you don’t want to trace a shoe or foot

And there is the written format below.  ENJOY AND HAPPY HOLIDAYS!


First, what you need for this project:

  1. Non-skid fabric
  2. Fabric colors (I used cotton and fleece)
  3. 1/4 or 1/8 elastic
  4. Sewing tools, googley eyes, red cotton ball, and any accessories you would like to add

IMG_0299

  1. Next, trace your subject’s shoe or foot (if you are using their actual foot add 1/2 inch all the way around).


2. Trace the top of your childs shoe to make the front of the slipper. Cut four of these pieces. Then trace the back and cut 4 of these (add 1 inch to the long length side so you can overlap)

IMG_0387 - Copy - Copy


3.  Take pattern facing pattern and sew the two front pieces together only on the straight side as shown (do this for both slippers).

IMG_0332

4. Trim excess and turn right side out, iron right side out and sew across the top you ant on outside (this makes it look nicer.

5. Take pattern facing pattern for both back pieces and sew across one long side for both slippers.

6. Take your elastic and cut it about 2.5 to 3 inches shorter than the length of the back piece and pin it and pull it tight while sewing across to the end. This is still on the wrong side. Sketch

7. Flip the fabric over the elastic with right side out and iron and then sew right below the elastic and down the sidesSketch2

8. Freehanded antlers by looking at a picture of antlers. cut 4 sew around except bottom and stuff it.

IMG_0331


9. Check sizing and put front and back piece pinned together with pattern facing down (right now you should only see (the side that is up) what will be on the inside when you are finished done).

Sketch3

10. After pinning the front to the back and the antlers in between the front and back piece, sew across front to attach front and back piece

IMG_0389 - Copy - Copy

This is what it should look like now.

11. Line up the sole two pieces with the patterns on the outside (not the usual, but it doesn’t matter since its on the bottom) You can see it in the back there with the nonskid on top.

Sketch4

12. Line up the sole with the top piece (nonstick sole facing upwards to the reindeer face) by finding the middle of the front and back (you can fold to find this). Then sew all the way around. And turn right side out and WAH-LA!!IMG_0398 - Copy.JPG

I sewed on the red cotton ball nose and hot glue gunned the eyes on.  If you have a little one then please don’t use googely eyes since they might try and eat them!

Don’t forget to check out our facebook site and subscribe to our youtube videos!  ENJOY! MERRY CHRISTMAS!

FollowFacebookpinterestrssyoutube
ShareFacebookpinterest

DIY Bandana Drool Bib

Once the drool starts it doesn’t stop!  I saw an adorable bandana drool bib in a store and thought, I could easily make that!  And you can too!  It is a simple 5 to 10 minute project that makes a great gift and a fantastic accent and cute and functional accessory for your little one.


As always, there is a youtube tutorial and the written steps on here!  Hope you enjoy!


This is for size 6months to 12months.

What you will need:
1) Two Fabrics (one side needs to be absorbent). I used a cute flannel fabric and then a yellow fleece material for the back.
2) Velcro or snaps to hold it shut

  1.  Fold your fabric in half. Cut out two triangles, one with each fabric (you can use my measurements or compare to your bib size for your little one) .  I used the measurements of  9in long and 7 1/2in on the fold.
  2. Next, you are going to make a cut for the neckline about 3 inches in from the side
    and 2 inches down the fold.
  3. Cut the little triangle off the very end, abut half an inch, this is where the velcro will connect.
  4. Take pattern side facing pattern side and sew all the way around leaving a small
    opening around 2 inches (this is where you will pull it right side out)
  5. Now pull it right side out and hand sew the hole shut and VOILA! drool bib
    complete!
  6. Iron press it!  You can also go around the whole outside and sew it if you like for the design look!
  7. Next you want to attach either your velcro or snaps.  I have iron on velcro I used.

Hope you enjoyed this tutorial, if you have questions just post! Thanks


FollowFacebookpinterestrssyoutube
ShareFacebookpinterest

DIY Felt Christmas Tree!

Cece bear loves to pull toys out of baskets and put them back in.  She also likes to build blocks and figure out other puzzles.  So I thought to myself, what can I make for Christmas that she can play with?  And a mini Christmas tree came to mind.  Eventually, I figured out a felt Christmas tree with all sorts of sensory stimulation and Velcro ornaments would work!  So I decided to get to work.

IMG_3608

I decided to make three trees, one for each of Cece’s friends.  It also made a great birthday gift for her friend Kyle’s first birthday!  This is a great activity to do with older children as well.  They can make their own ornaments and decorate the tree!  There are a variety of ways to put the tree, ribbons, buttons, and ornaments together.  The two I used were sewing and hot glue gun, but you can do one or the other as well.  Just make sure if you have a baby, infant, or toddler, to make sure everything is very secure so they can’t pull it off!

IMG_3625

As always, there is a youtube video and written steps and pictures.  Feel free to add your own creativity and pizzazz!!!

If you have an older child, instead of using velcro to stick the ornaments on, you can use string or twine looped on the ornament and they can put them around buttons on the tree!


What you need:
*Green felt fabric (I used 1.5
yards for three trees)
*velcro
*Brown felt fabric (stump)
*Felt fabrics of various colors for
ornaments of your choice and design
*optional: buttons, ribbons,
and other accessories

IMG_35381) Fold your green felt and make a tree outline on the fold (so half of it traced on).  Then cut your tree out!

IMG_3539

2) Next, if you want a stump, use brown fabric to cut one out!  Once again you can trace it out.  You can either sew it on the bottom or hot glue gun.

Snapshot 1 (12-8-2015 1-58 PM)3) I wanted to make something to hold the ornaments besides just having them stick to the tree.  So I decided a present with the child’s name on it would be perfect!  So next I chose a color of felt I had and cut about 11x 7 inches.

IMG_3552

4) Next, for one of the presents I made I wanted the bow long ways down so I sewed a piece of ribbon straight down the piece. (the other two I made have it across the box which you can sew on now or later)

IMG_3553

5) The next step would be to turn it right sides facing inwards and sew to the length you want so you have the top of the present flap long enough.  Check out the picture to see what I mean. Then turn right side out.

IMG_3581

6) As you can see, I decided to iron on letters for the name of the child.  These two presents are different sizes.  Also, if you want to put a piece of iron on or sew on or glue gun on Velcro to the top of the present to have it stick now is the time.

7)  Then decorate the present at will.  I added some adhesive Rudolph stickers.  I did hot glue them so they would be more secure.

IMG_3582

8) Follow that, I sewed the present onto the tree.  This is optional, you can have it separate or not have a present at all.  I opened the top flap and sewed right along the fold to the tree.  You can also hot glue gun it.


IMG_3612

8) Now, back to the tree.  Now is the time to get even more creative!  Use ribbons, garland, buttons, or whatever you want on the tree!  You can sew or hot glue gun them on.  If you have an older child and want to have hanging ornaments on buttons then align your buttons!

9) Next, it is time to make ornaments.  If your child is older they can help decorate and make ornaments.  I chose actually Christmas items and one ornament and one light bulb.  I used whatever felt scraps I had to make them.  I also made a star at the end.  Remember to Velcro your ornaments on the back using the hard side of the Velcro.  You want to iron them on before you decorate the front!  Otherwise you might melt or damage your decorations.

IMG_3555

IMG_3583IMG_3584

To hang the tree, I used 3m adhesive strips, but I have heard that the blue paint tape works well on walls.  You can also use suction cups if its on the window or door.  Ok enjoy!  Feel free to post your tree below!

IMG_3609IMG_3627


FollowFacebookpinterestrssyoutube
ShareFacebookpinterest

Mess Free Painting for Baby!

Every want your baby to create a work of art?  Well, lets get realistic here, a work of art only a parent could love!

IMG_1332

Here is an easy fun project for you and your little one!  I started this at 6 months of age and continue to have her enjoy smashing paint colors together frequently.

What you need:

  • Pack of small canvas or poster boards (I bought a pack of 10 small canvases at Acmore for $12- what a steal!)
  • Paint
  • Zip lock bags that the canvas or board will fit in
  • Scissors

IMG_2380

  1. Place blobs of paint on the canvas- go wild!  Place the canvas carefully into the ziplock bag. Zip it up!
  2. IMG_2384
  3. Place it in front of your little one and watch them enjoy
  4. Now, it’s more complicated to get it out without smearing it.  So I use the scissor to cut the sides off and then carefully lift up.  *Note, I first tried this with saranwrap, and I can tell you my little one just ripped it right away*
  5. Wa-La you are done and have a painting!  You can do this as often as you want or monthly to see a new creation!

IMG_1332

Now if you want a messy way, but edible check out this great blog post about making edible paint.


You can also purchase edible finger paint on amazon and some other stores!  ENJOY!


FollowFacebookpinterestrssyoutube
ShareFacebookpinterest