It’s finally fall and pumpkin time! Toddlers LOVE holidays and what a great way to get ready for trick-or-treating by decorating pumpkins! Obviously, toddlers shouldn’t be holding knives to make jack-o-lanterns so there are many fun alternatives!
You can have your toddler paint a pumpkin, add stickers, pom-poms, and many other accessories instead of the normal jack-o-lantern.
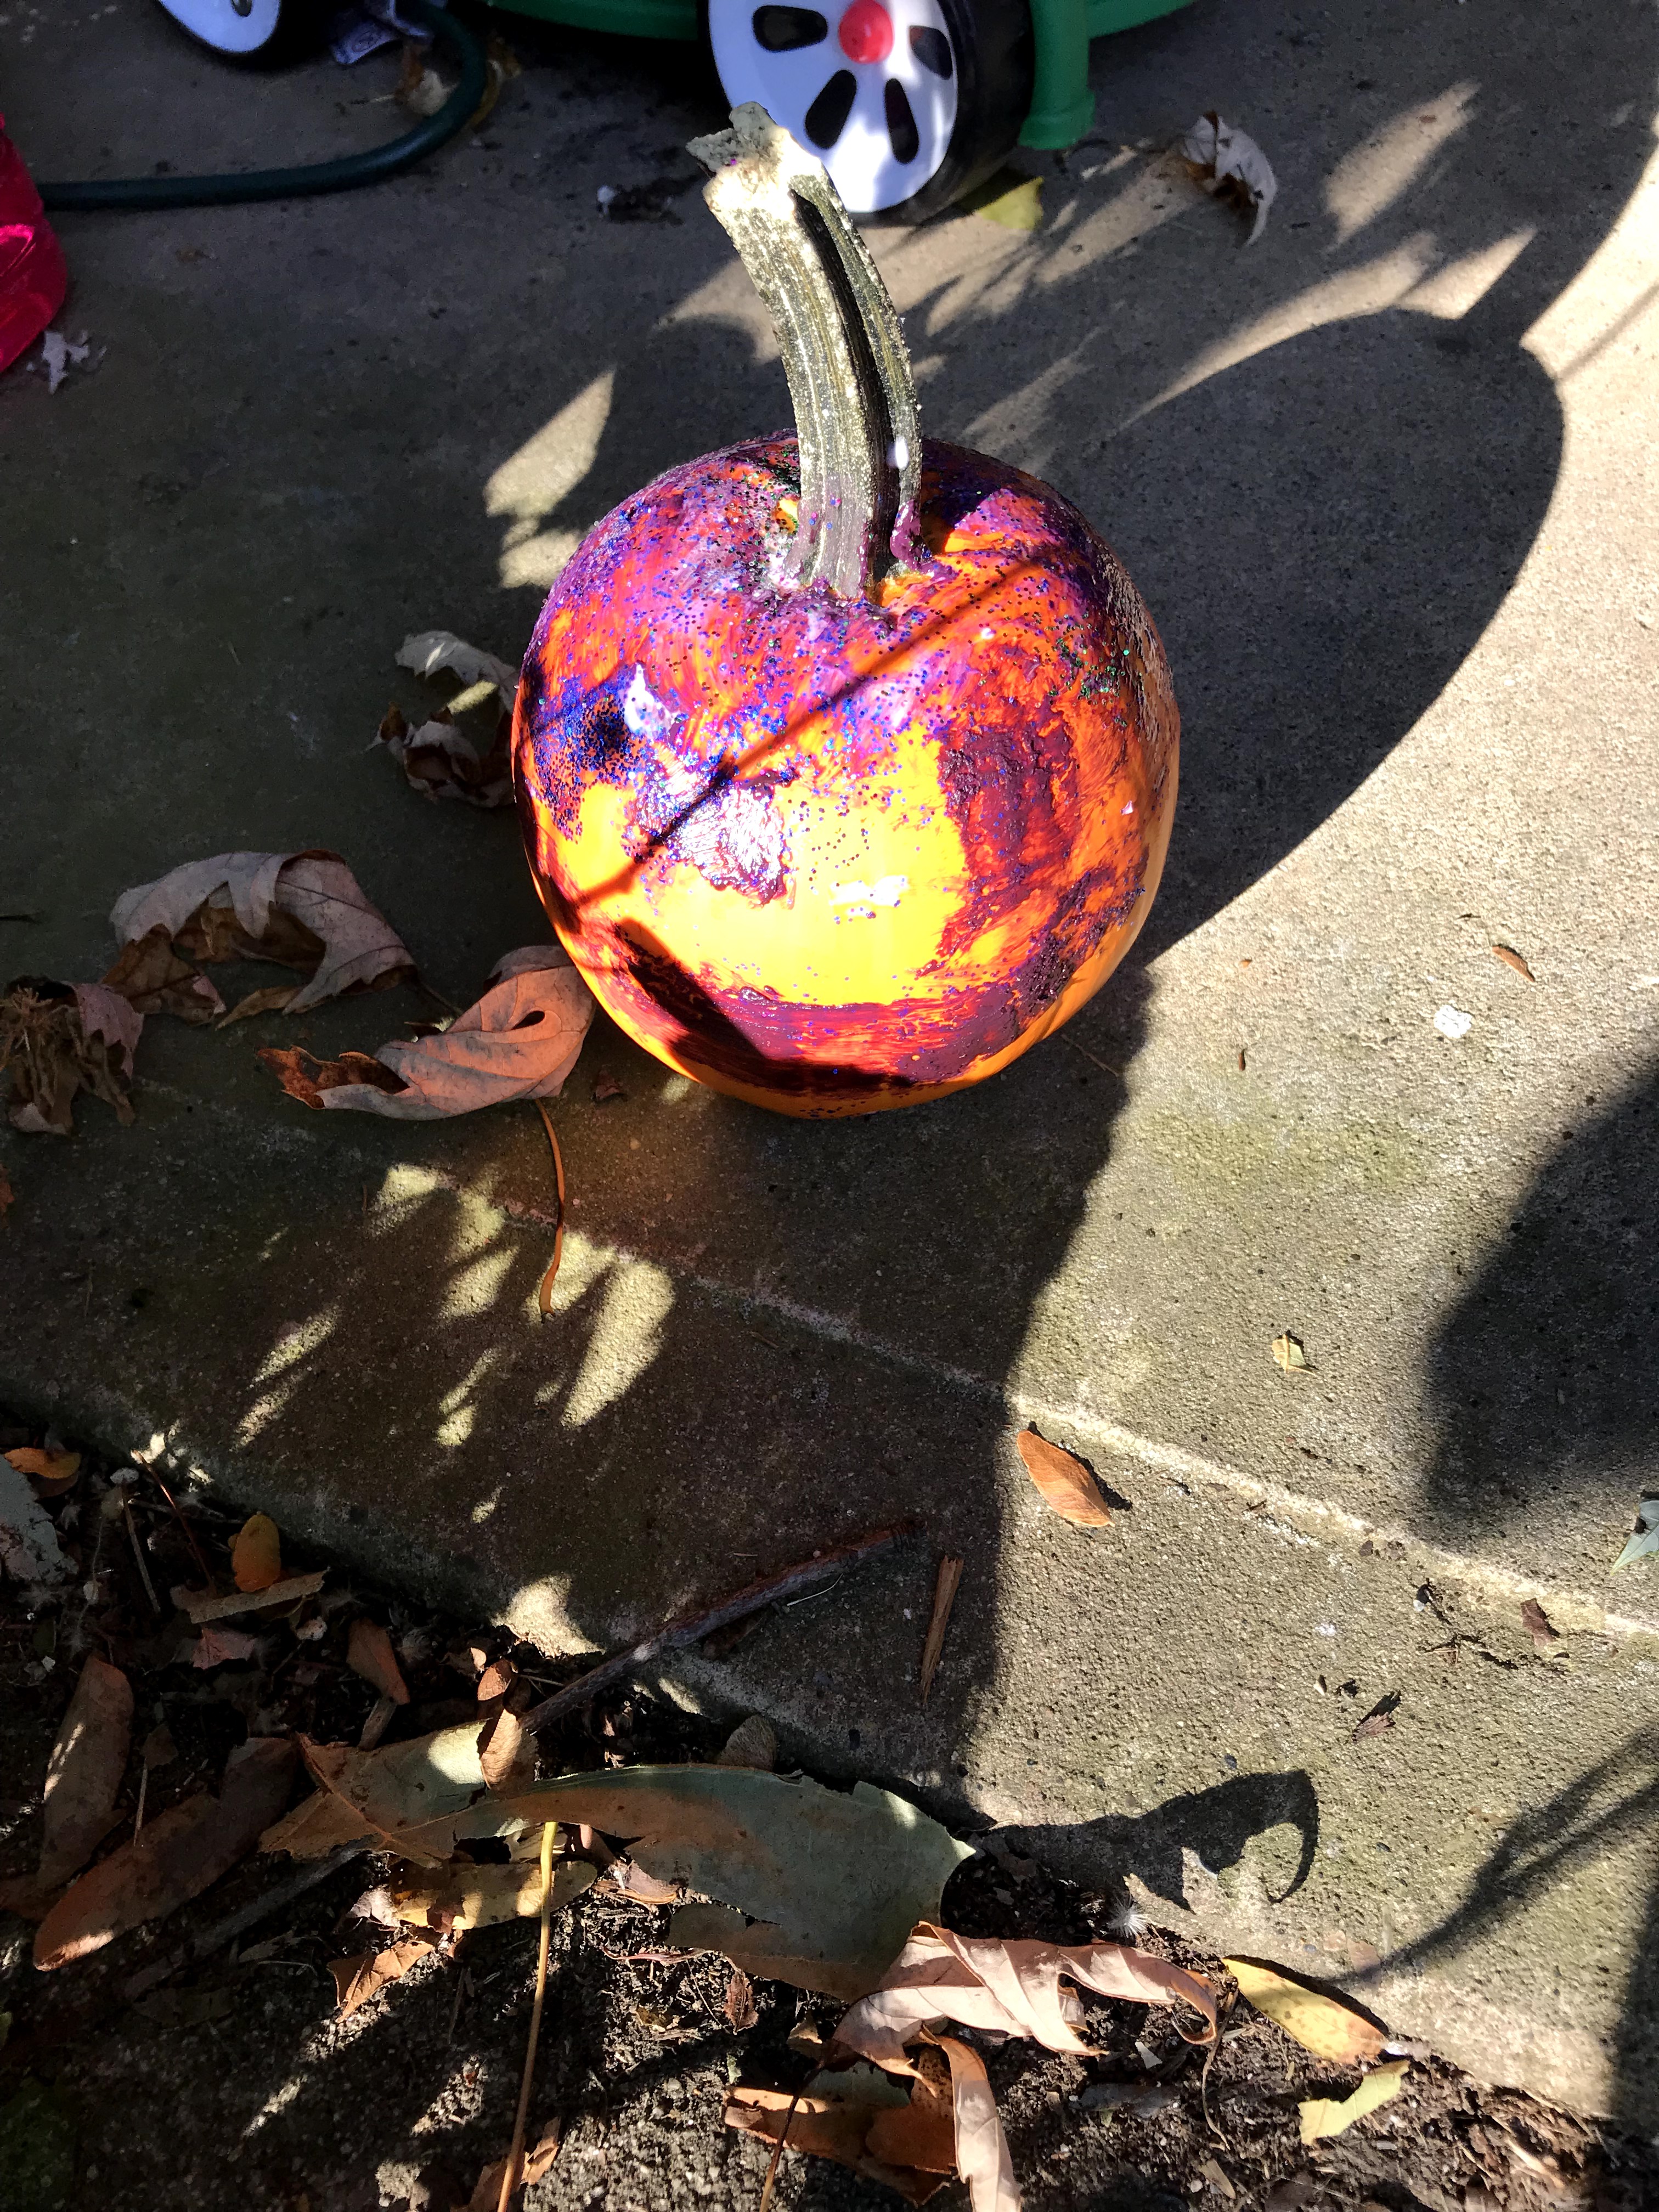
Or….you can have them make sparkle pumpkins! My daughter LOVES glitter, I mean who doesn’t? Okay, maybe we don’t, especially when you have to clean it. However, this is a perfect activity for outside in the cool, crisp fall weather.
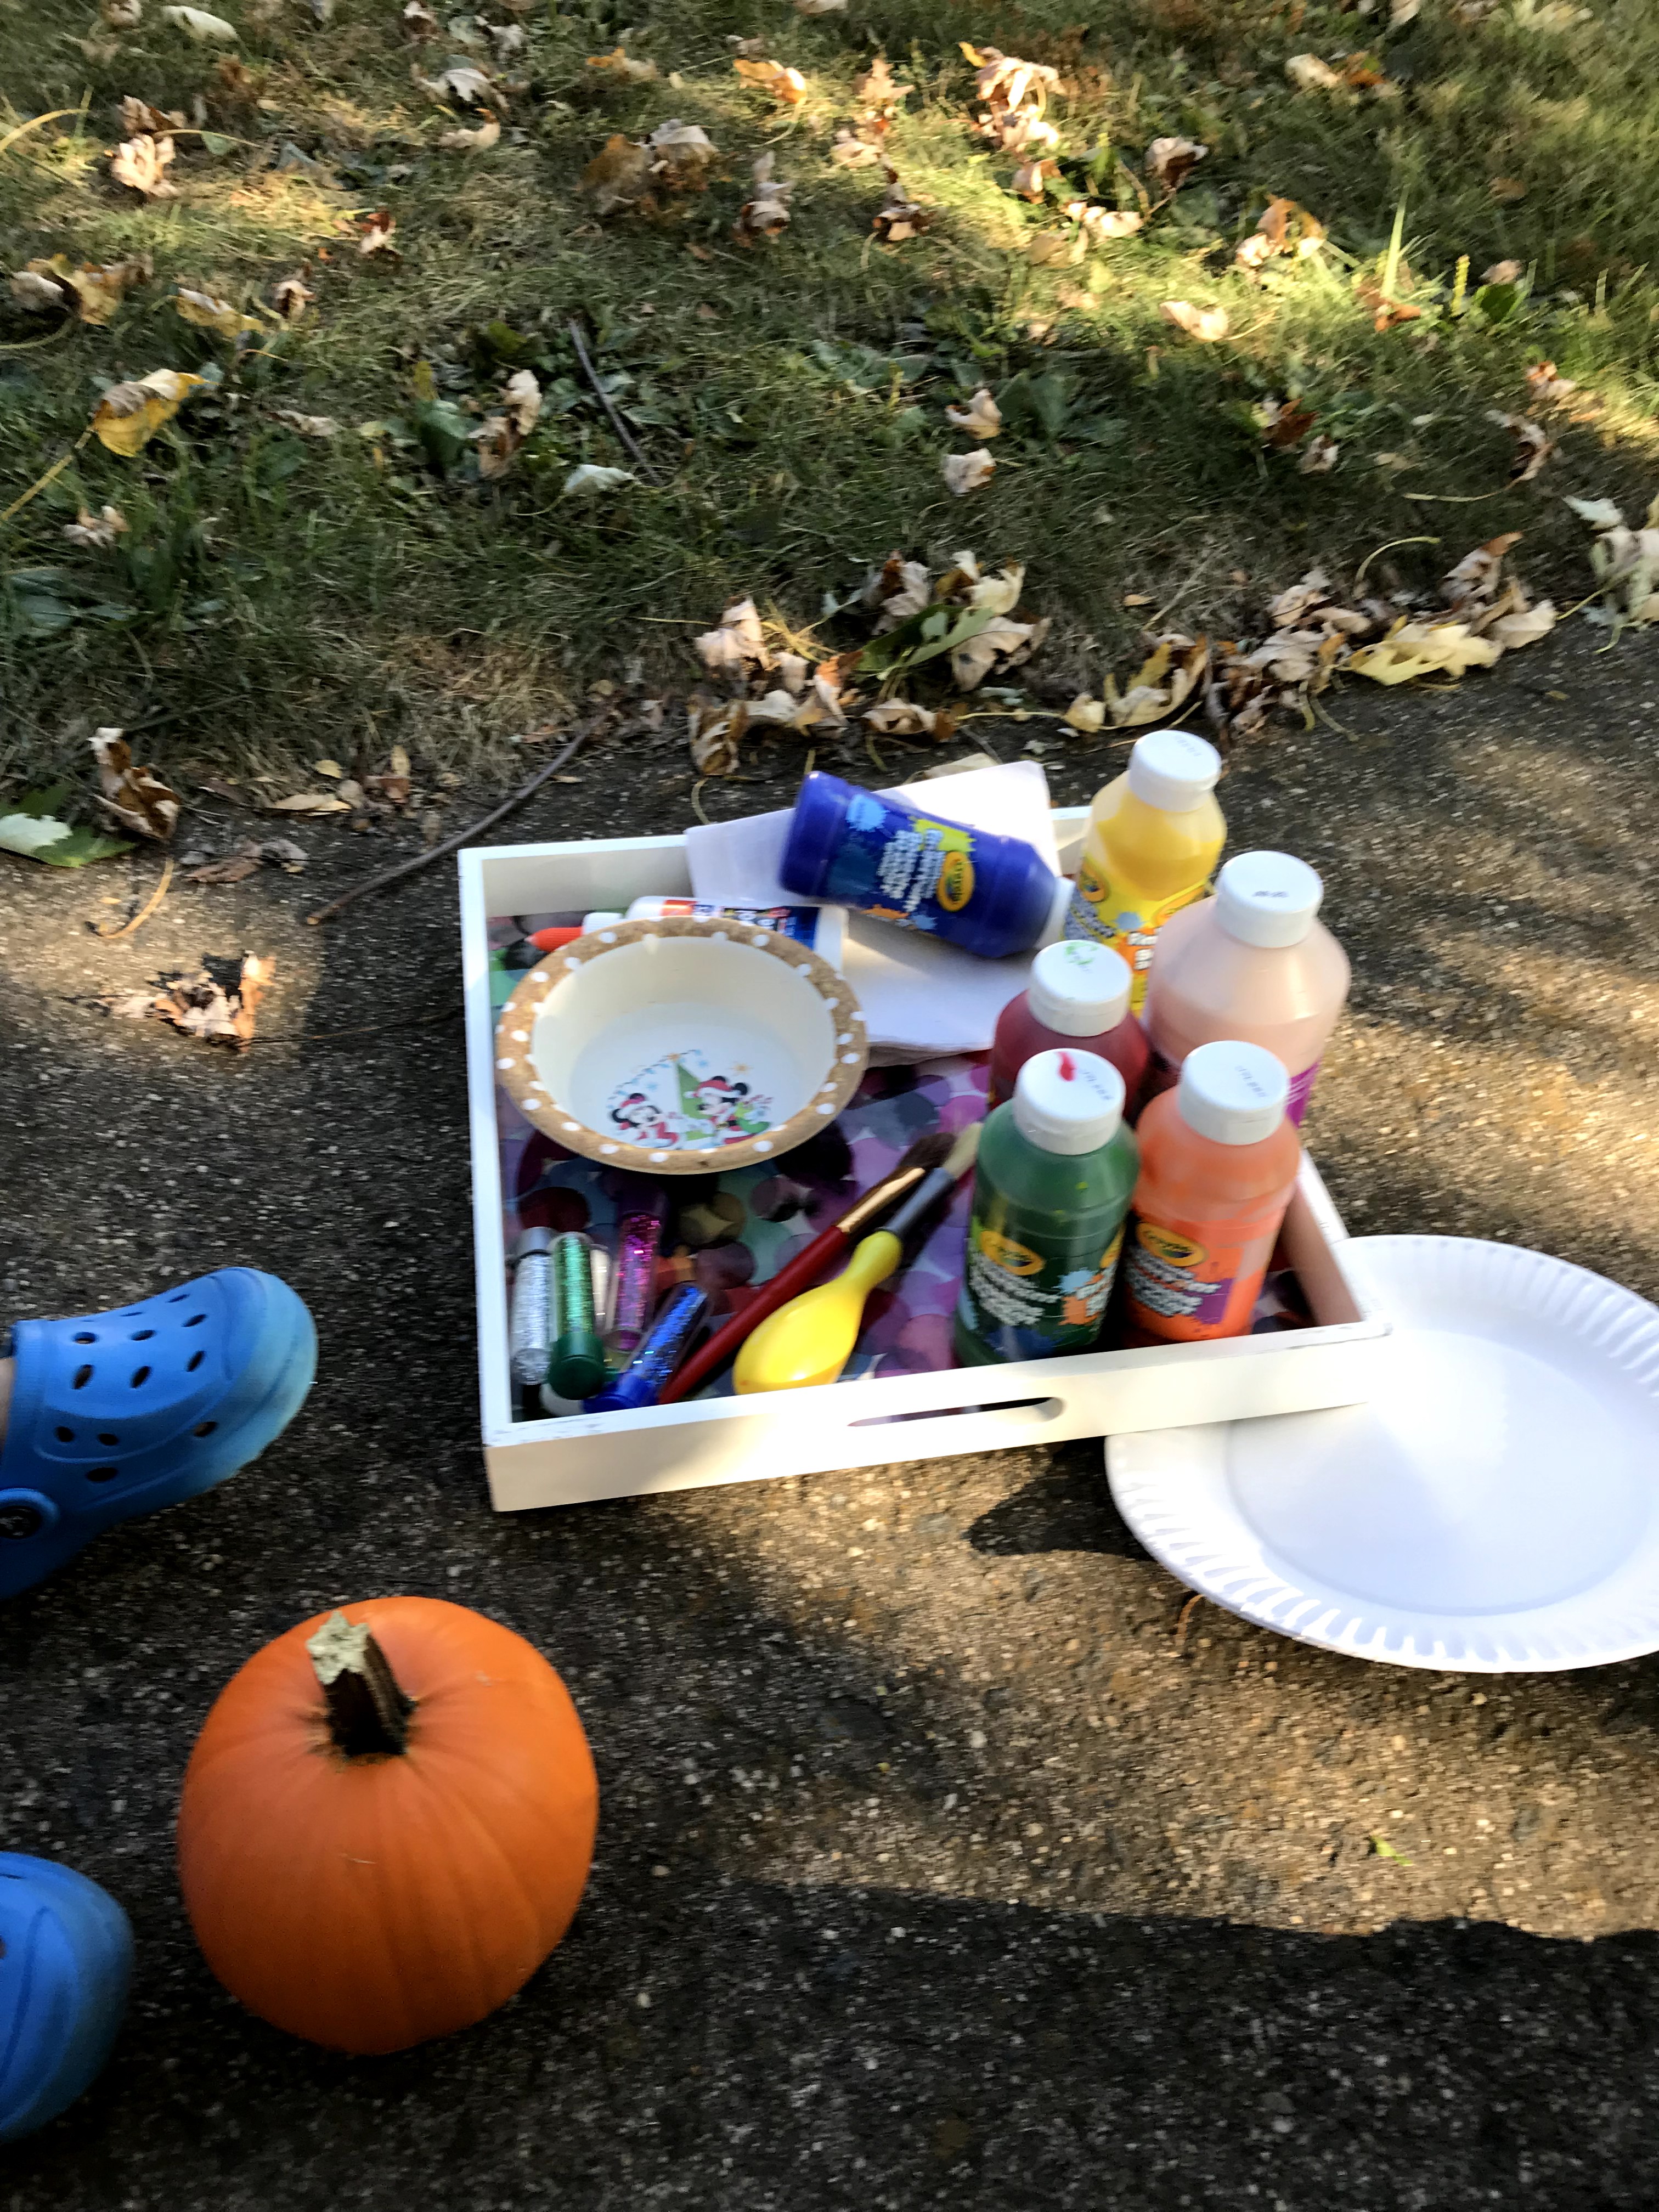
What do you need for this activity?
A pumpkin of course! Other materials you need are paint, glitter, glue, and brushes. You may want a paper plate or something you are using to put the paint on to mix it with glue. Glitter is a very important part of this activity! We used various colors.
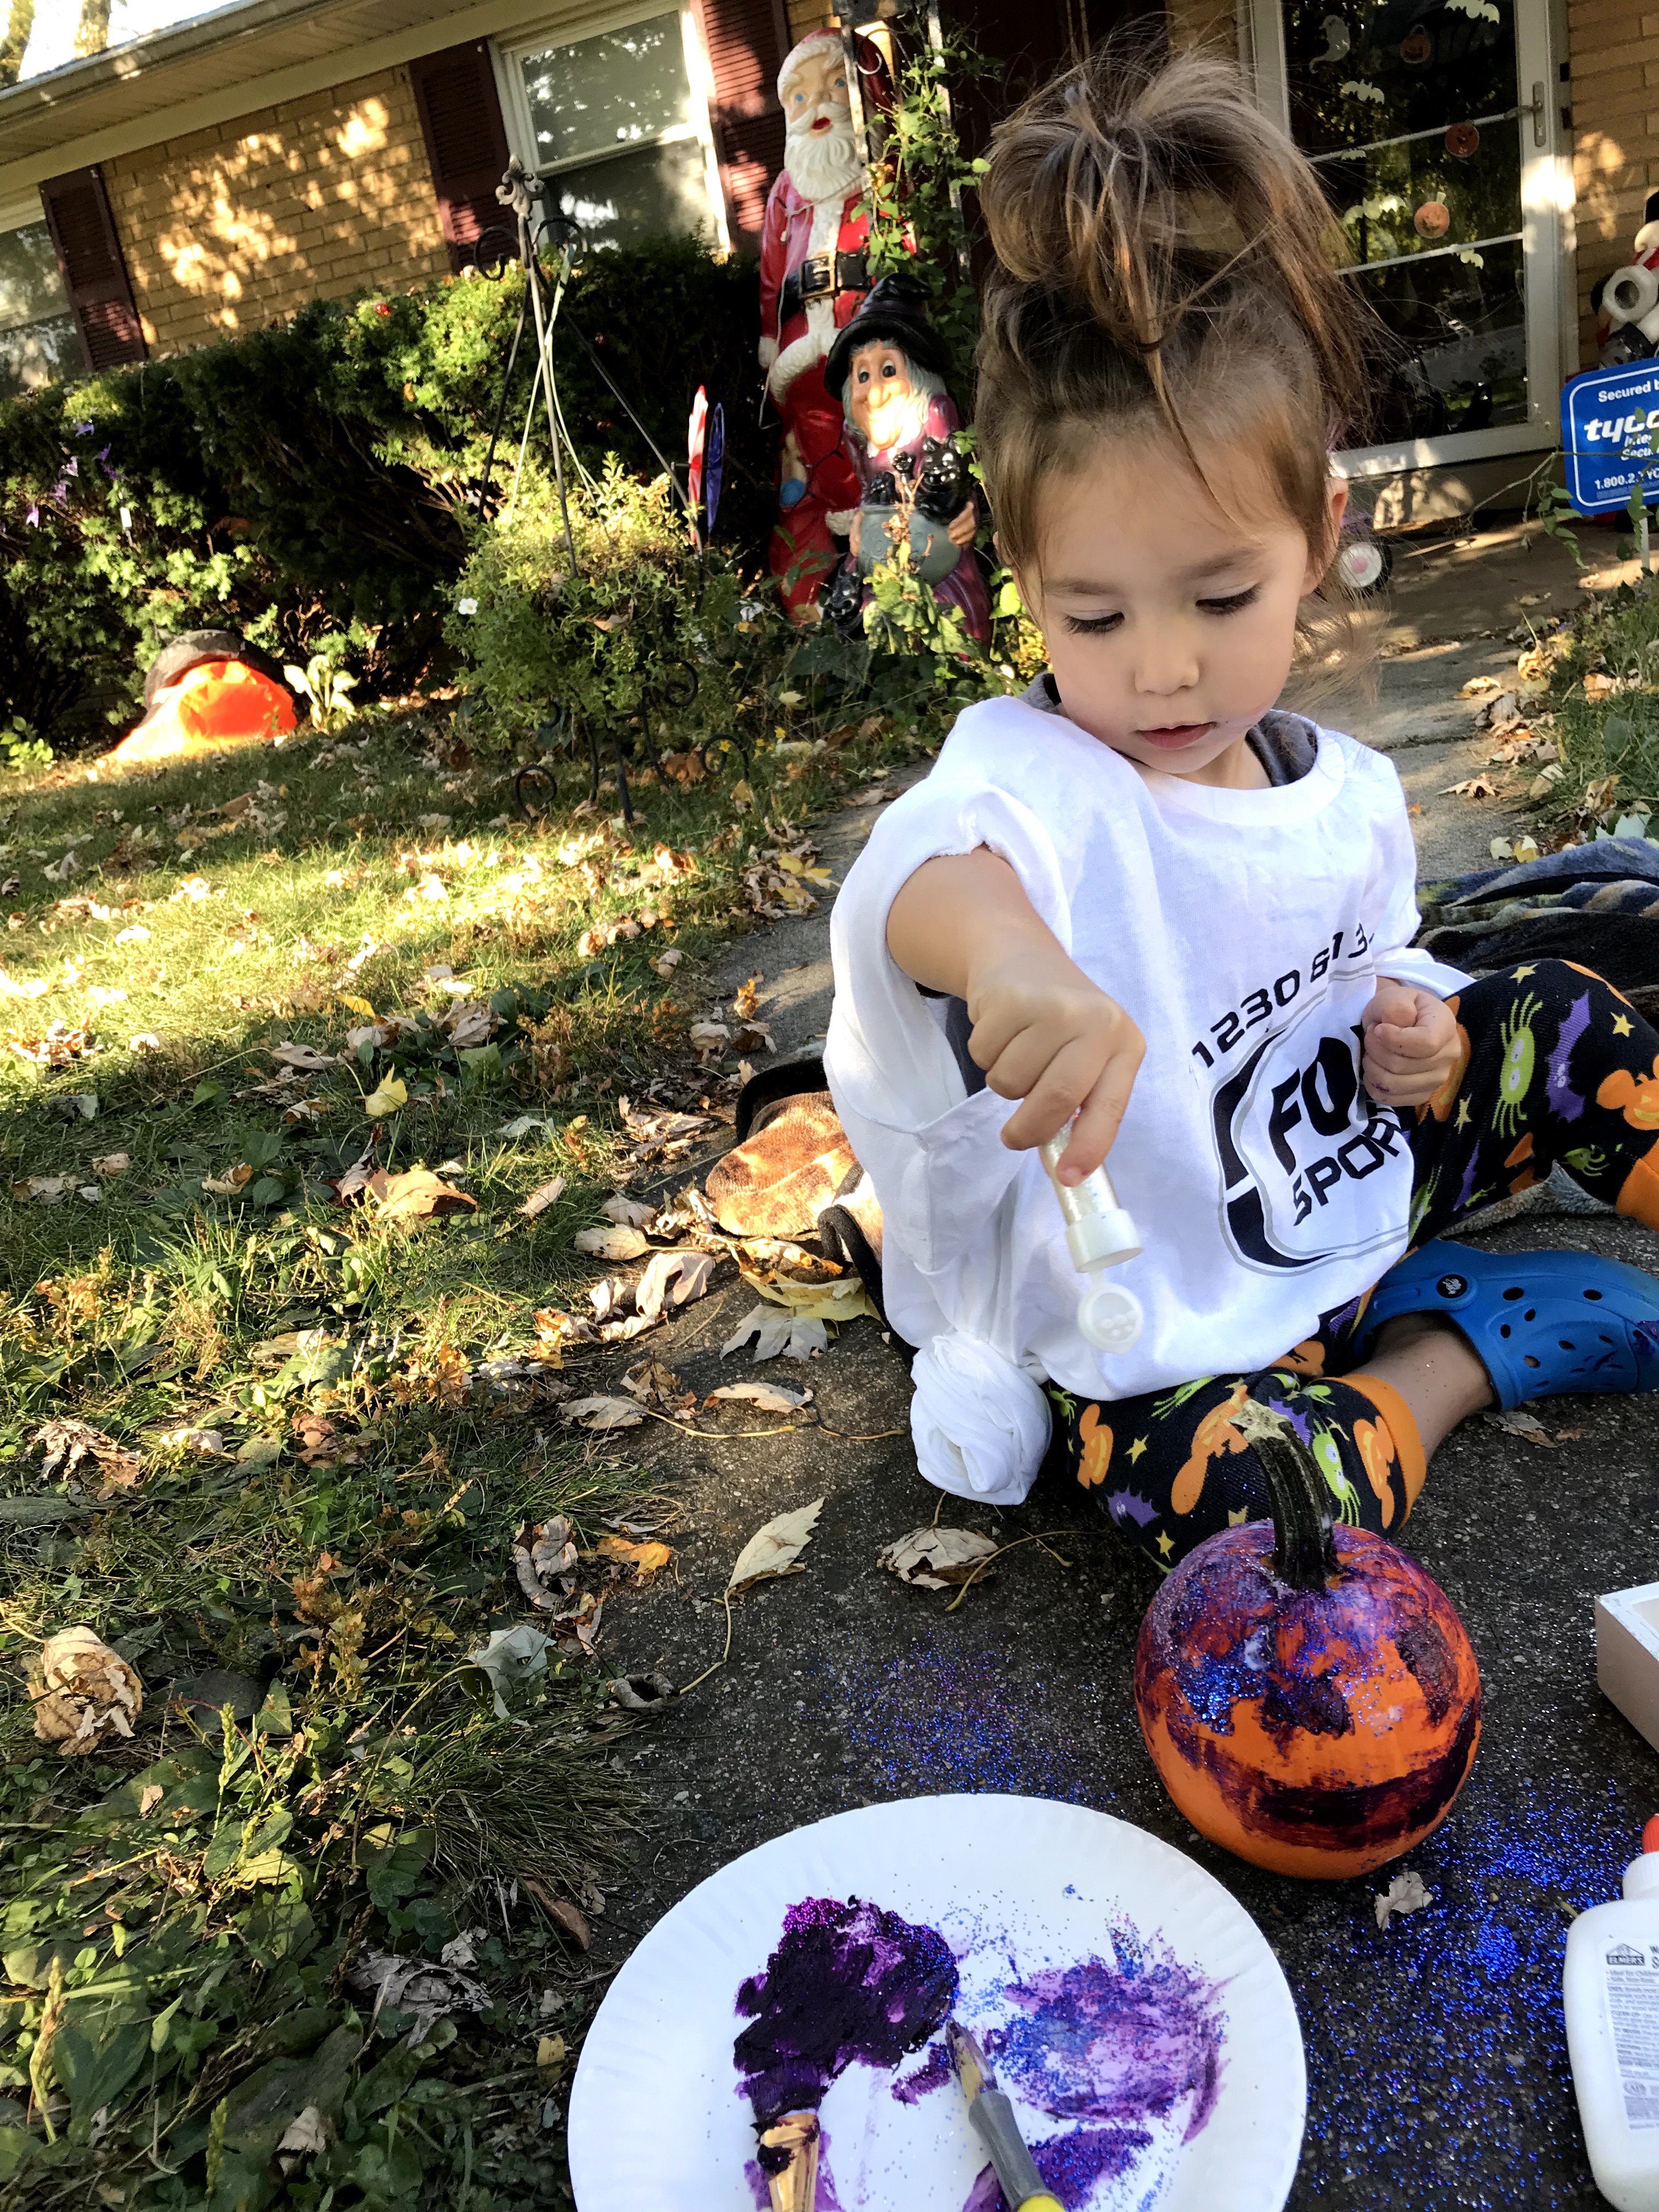
First ask your child what color they want to start with! Add HALF glue and HALF paint concoction together. Mix them with the brush. The glue helps the paint stay on the pumpkin and not flake off. It also helps the glitter stay on. Your child can have fun painting their pumpkin!
Let them paint to their heart’s content, then have them pick a glitter color or two.
Madison spread the paint pretty thin, so I went ahead and put some liquid glue on the plate and had her brush the glue over the paint. This allowed the glitter to stick better. She just shook the glitter over the pumpkin (and all over the sidewalk).
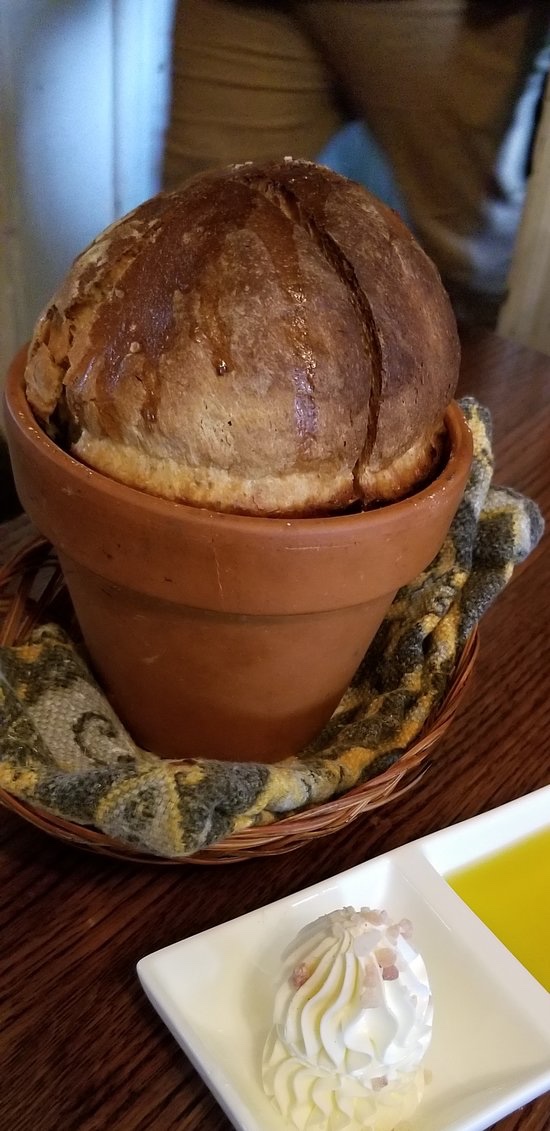
This evening my husband, my two and four year old children, and myself went to a nice restaurant together. Actually, my favorite restaurant, and the one we had our Wedding rehearsal at 7 years ago. I was nervous that our children would become bored and loud so I brought a coloring book, crayons and a couple stickers. Unlike many restaurants, this one is quiet, in an old farmhouse, and has classical music on and no televisions. You are meant to enjoy one another’s company with local fantastic fresh food. There is no overstimulation with many TVs, too loud music, or too many distractions. The food may take longer to be made, but that’s because it’s fresh. The bread comes out in the clay pot it was cooked in, it’s amazing!
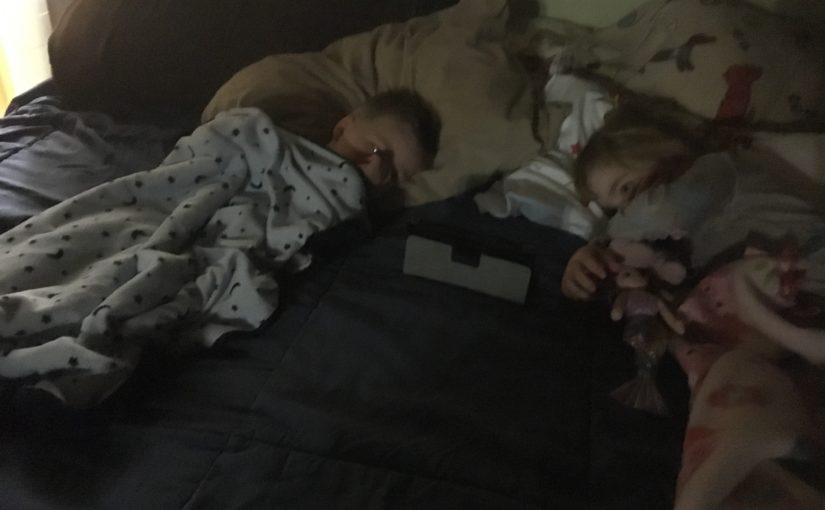
But back to my story, a couple comes in with their 3-4 year old son who they sit in a chair. Immediately, a large iPad is placed in front of him and we can hear blippi playing. If you don’t know the show Blippi, you should check it out, as it is a real person doing real things in the real world (it’s my sons favorite show when I do let him watch anything). Luckily, my kids weren’t too distracted, I thought my son might start yelling blippi, but he went back to eating his bread. Next, the sons father went on his phone for the entire dinner. I had missed this as I was paying attention to my family, however my husband pointed out that he was on his phone the entire time.
Through the entire dinner, the family next to us had the iPad or whatever device it was placed in front of him and could hardly see his parents. No wonder this kid was crawling under the table screaming periodically and trying to run around the restaurant! His parents weren’t paying any attention to him except to reference the show he was watching. The mother even said look at those children behaving over there that is how you should behave. I felt badly for this child because his parents were blocking him out by trying to turn him into the zoning zombie to “enjoy” their dinner. Which in this case, was the father on his phone the whole time anyways.
I see children everywhere I go on their parents phones or iPads zoning out instead of interacting, developing relationships, communicating and learning. Even at the food stores, kids are plopped into a cart and given a phone to play with instead of interacting and watching interactions taking place. The children are learning how to behave from the show instead of reality. I’m guilty of letting my children watch tv, I think I might lose my sanity sometimes if I tried to make a decent dinner with two toddlers trying to help and almost burning themselves or cutting themselves every couple seconds. Granted sometimes they play with their puzzles and legos and such and it’s great. Even better, they play together a lot more these days. I do have them bake with me frequently since they love helping (toddlers love helping, even if it makes more of a mess!).
Sometimes I’m guilty of trying to catch a couple more z’s by letting my daughter come into my bed in the morning to watch a pbs show or two. This may let me sleep a couple minutes longer; however I pay the price when it’s time to turn it off. No matter how many times I’ve told her only one show and then breakfast, she throws a mini tantrum or full tantrum and just wants to watch more. This sets a bad tone for the whole day and I immediately regret letting her watch a show.
Another thing that bothers me is when parents post online what type of device they should get their 4 or 5 year old to watch shows before bed or in bed or for restaurants car rides and so on. Children should be interacting with real people, especially their family to build the bonds for their lifetime instead of glued to a screen. If you need to catch your breath once and a whole, I totally get it! Just remember, when you let your daughter watch a show in your bed or take that iPhone out at the store, your child makes that connection that you let him or her do this so they will expect it again and will be persistent. One thing I’ve definitely learned with a toddler is that if you think I’ll pick my battles and let them do something once, they will expect it again and again. More on positive discipline in the future, but that’s all for now!
Of course this is all just my opinion, and everyone has their own opinions, this is America after all, but next time think about actually having a discussion with your kids over dinner instead of bringing out the constant “entertainment.”
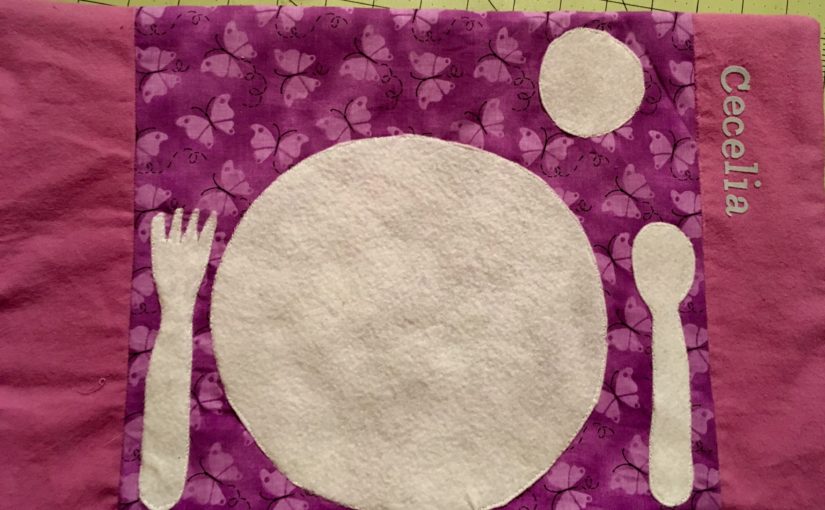
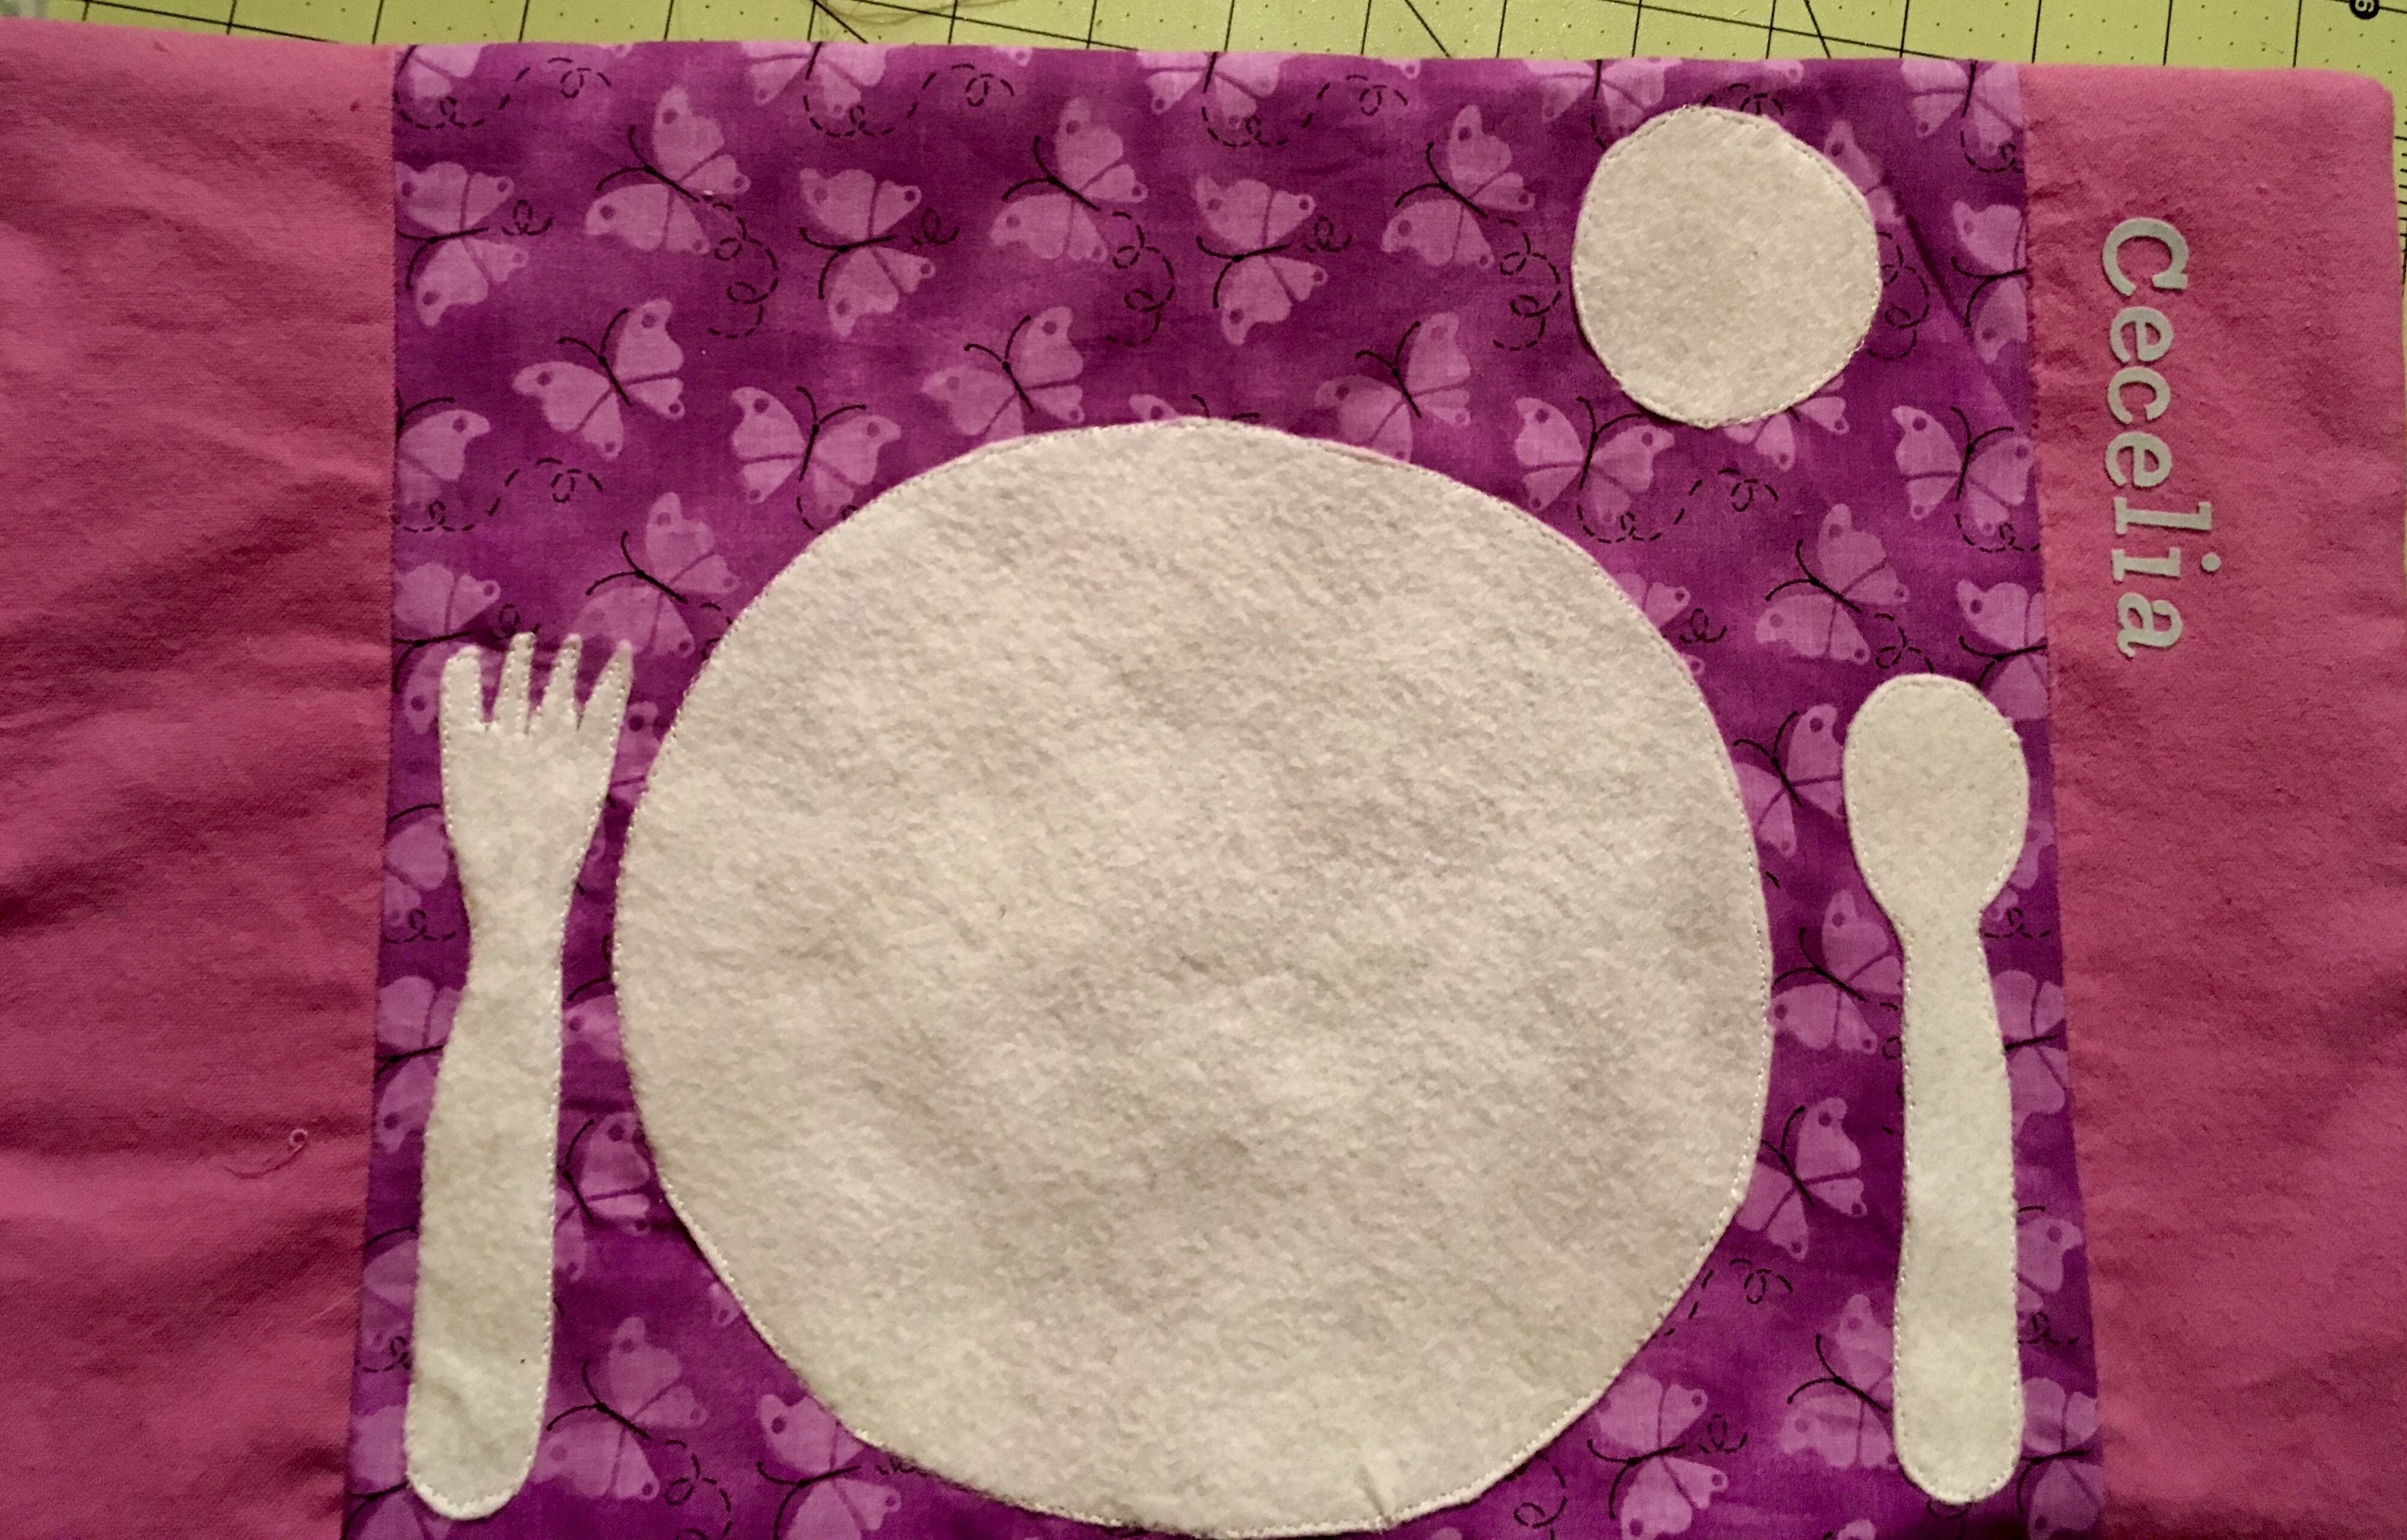
My daughter loves to assert her independence, even at meal time! So I thought, why not make a placemat that she can set her own place setting at? There are many ways to make placemats.
One way is simply laminating a printed out version of a placemat setting such as this…
However, my laminator is only big enough for a regular printer sized paper. You can take it to your local staples or office store to get laminated. You can even make your own placemat out of fabric and have it laminated.
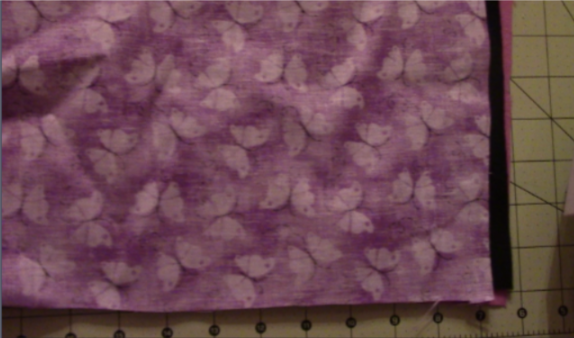
I decided to go with the fabric version and just use the washer to clean it.
So you want to prewash the fabric to make sure it does not shrink.
As always there is a video youtube tutorial and a written one below.
What you need for this placemat place setting is…
1) fabric: it will end up being 12×16 inches.
1 batting or felt for the middle or back side 12×16
1 center front piece 12×12
2 outside front pieces 4×12
1 back side
felt or non fraying material to cut out fork, spoon, cup, and plate
2) Next, take your front center piece and your side front pieces and pin them fabric facing fabric on the sides and sew. Then iron the seems.
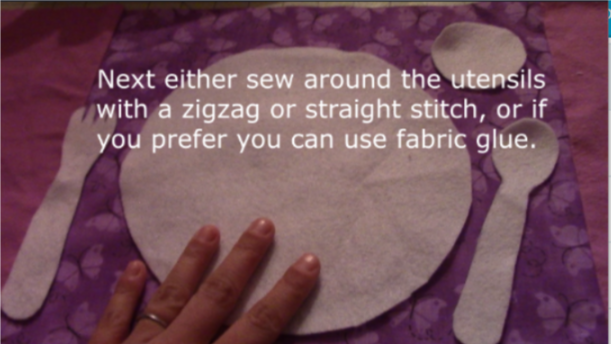
3) Following that, you want to use your felt or nonfraying material to outline a plate, cup, fork, spoon, and any other utensils that you want on your placemat. Then cut them out and sew them directly on the front piece. You can also use fabric glue if you like.
4) ***You want to put the piece of fabric you want as the backing down first facing the front fabric and then the basting or felt behind that (as you can see I did it opposite and ended up with my black fabric as the back outside as you will see). However, if you are using felt, it ends up rather nice as a backing since it prevents sliding.
5) Sew all the way around leaving a 3-4 inch opening so you can pull it out the right way. Don’t forget to backstitch. Once this is done, pull the inside out and make sure all the sides and corners are all the way out. Iron it all out and sew the remaining opening with either a hand stitch, or if you want to use your machine then sew around the whole placemat to give it that look.
You can add any other embellishments, I used my daughter’s name on the side. Enjoy and check out the other videos and tutorials! Let me know if you have any questions!
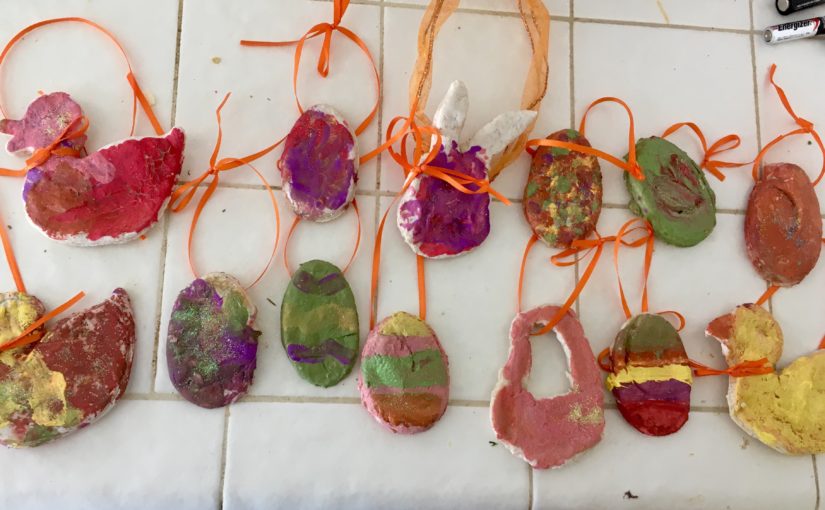
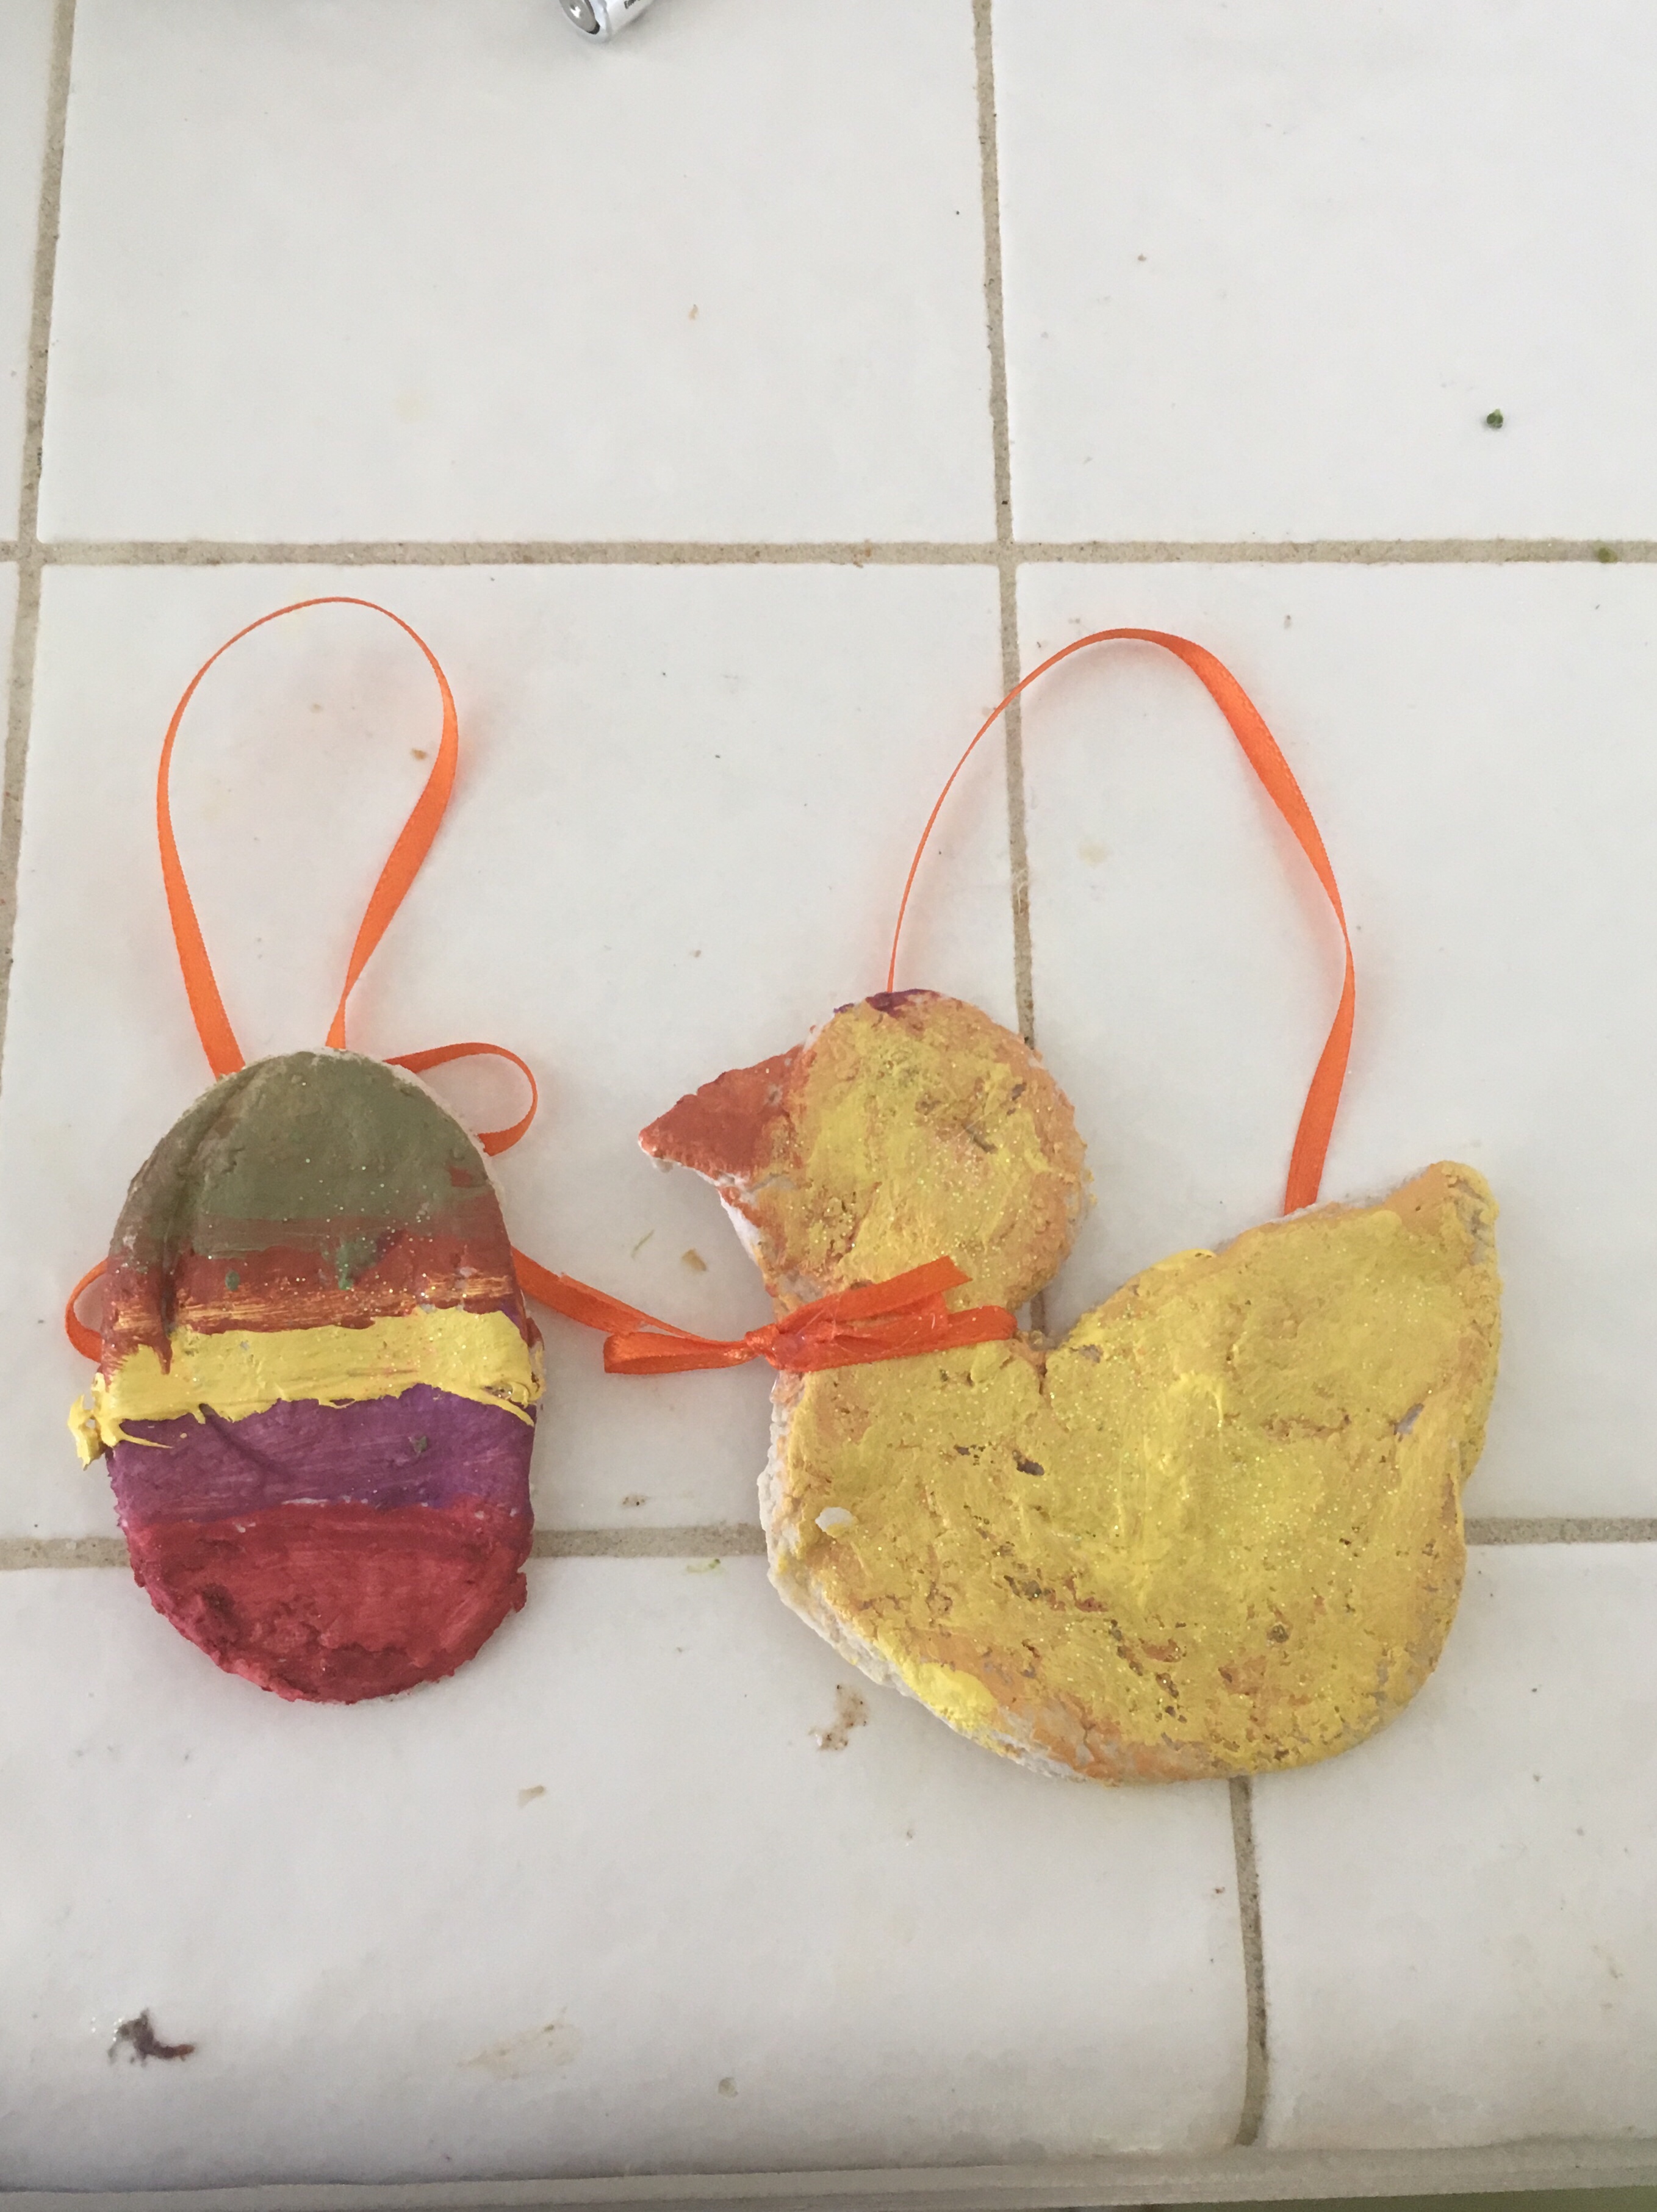
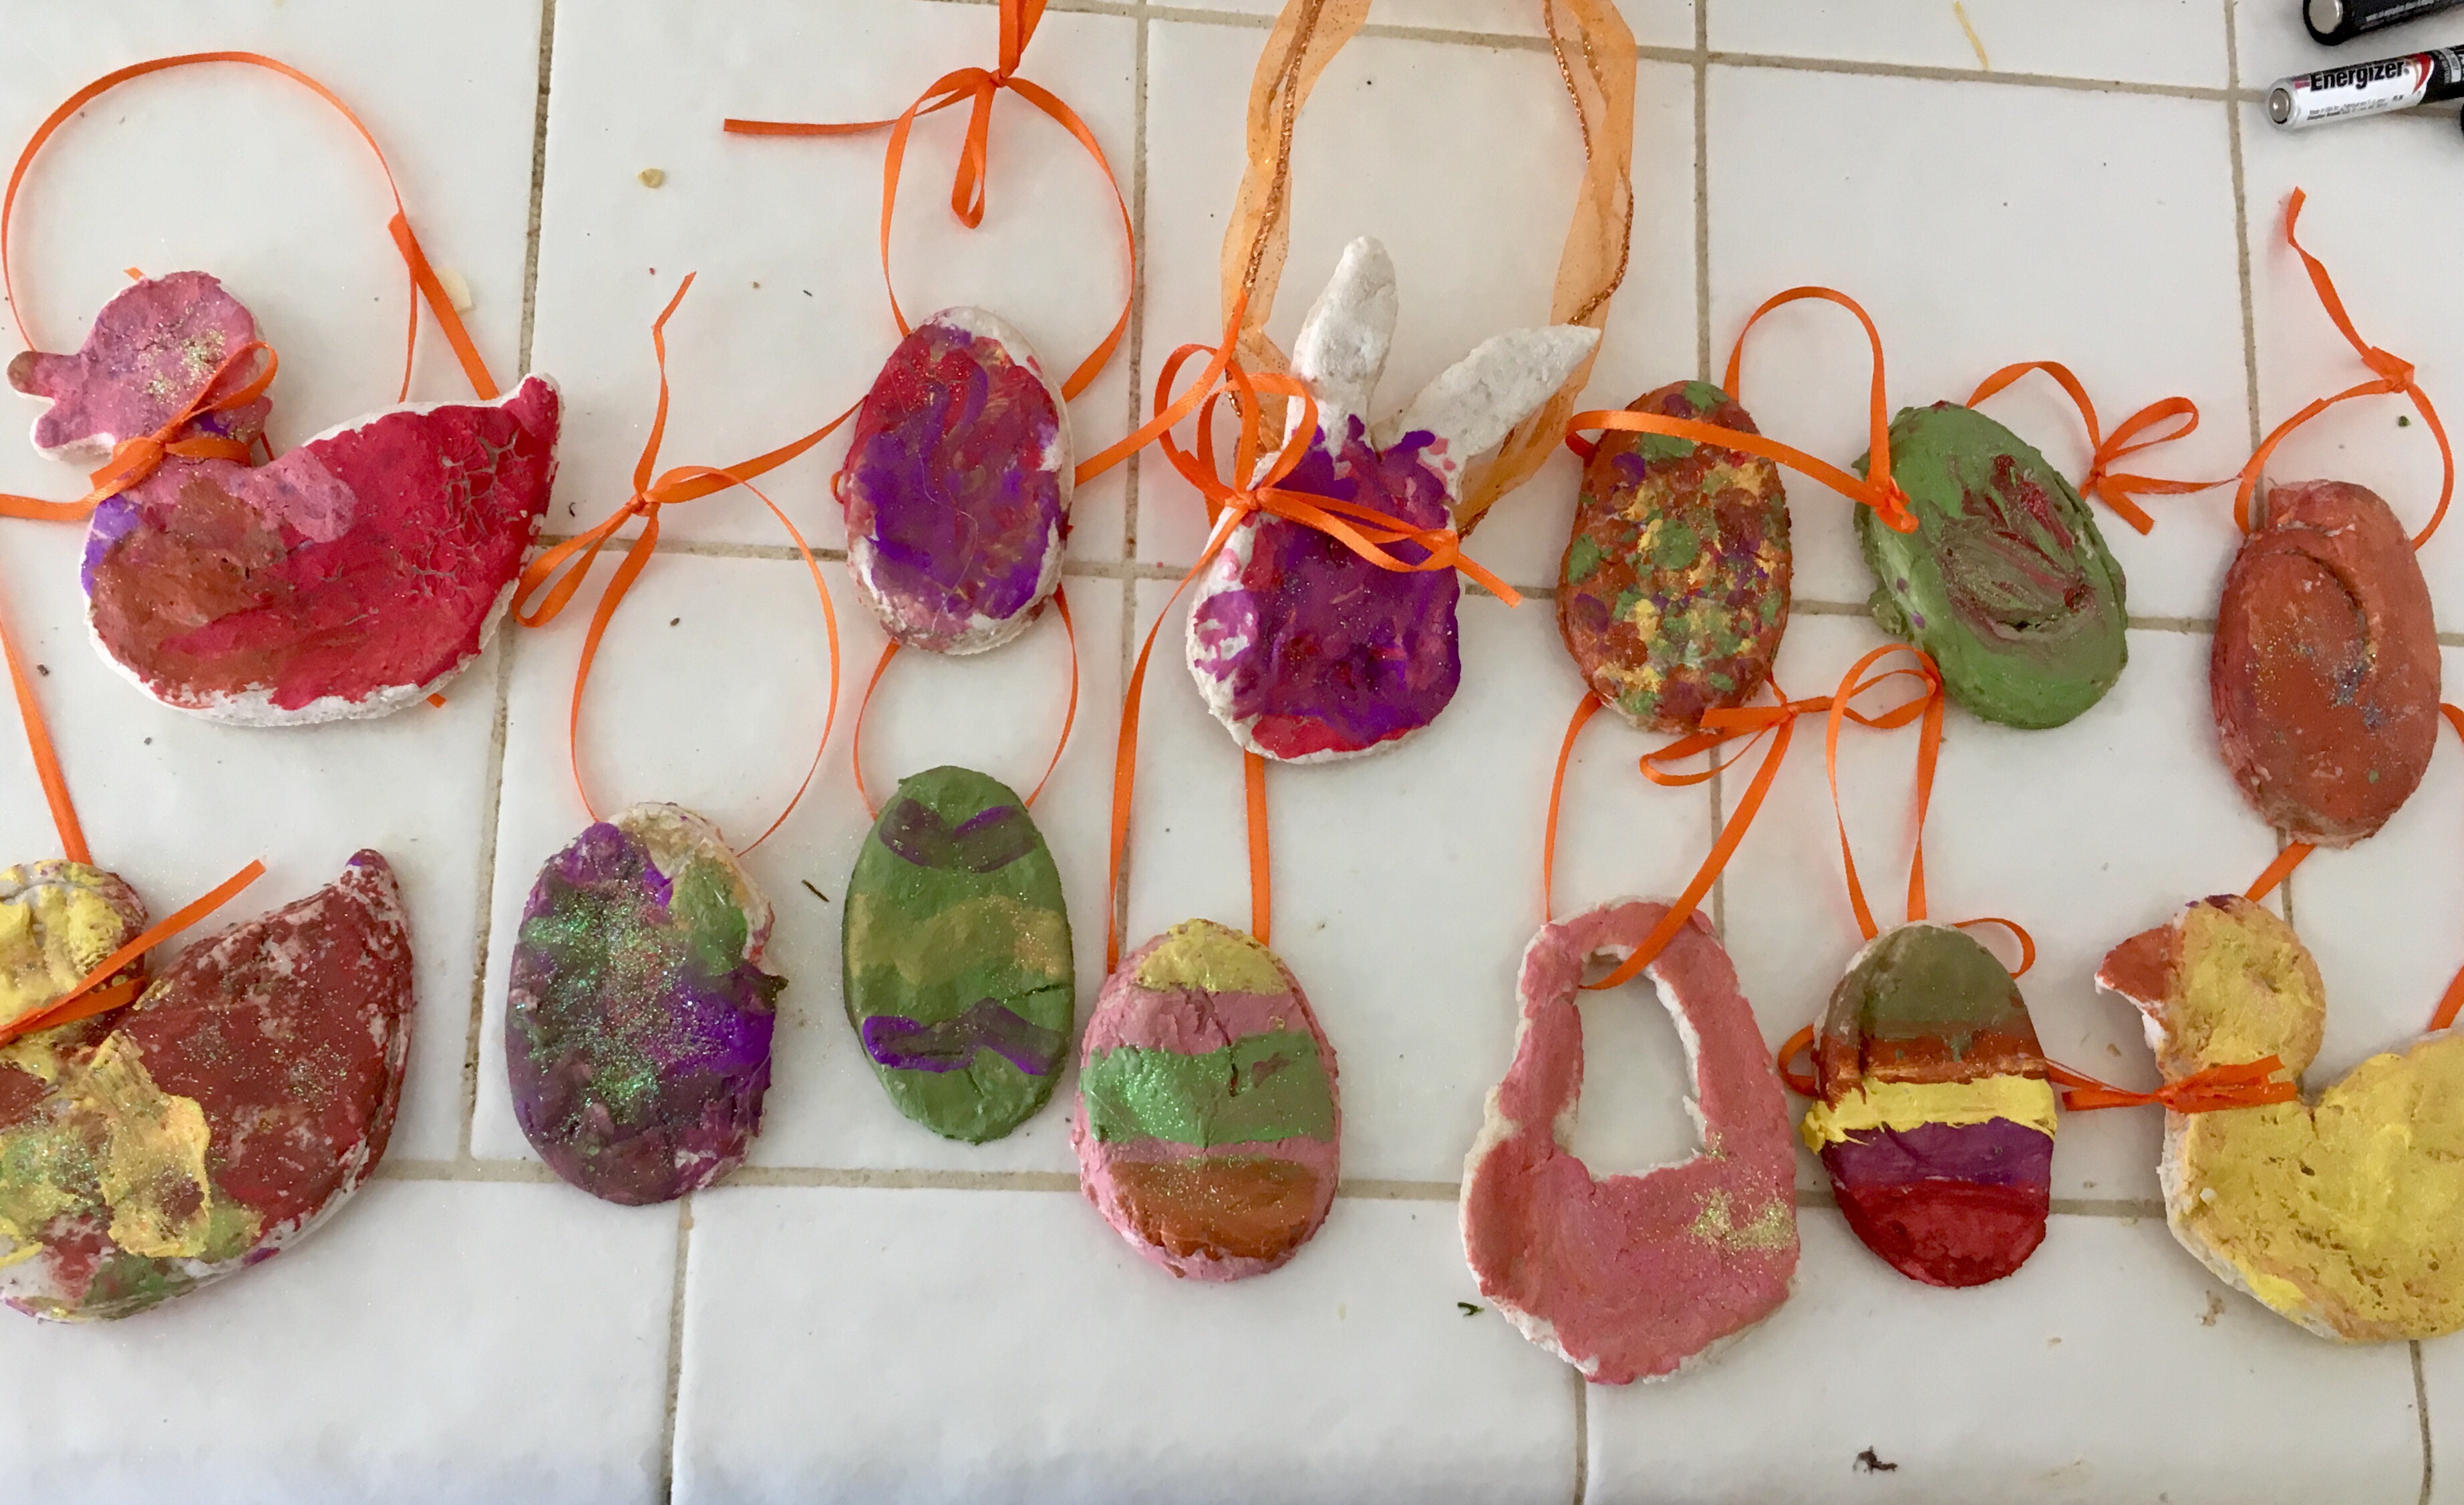
My daughter loves painting! However, she was growing tired of painting paper. So this year, we made cookie cutter Easter shapes! Actually, we had a duck and used a half of a plastic egg as a cutout. I also used a knife to create bunny faces and baskets.
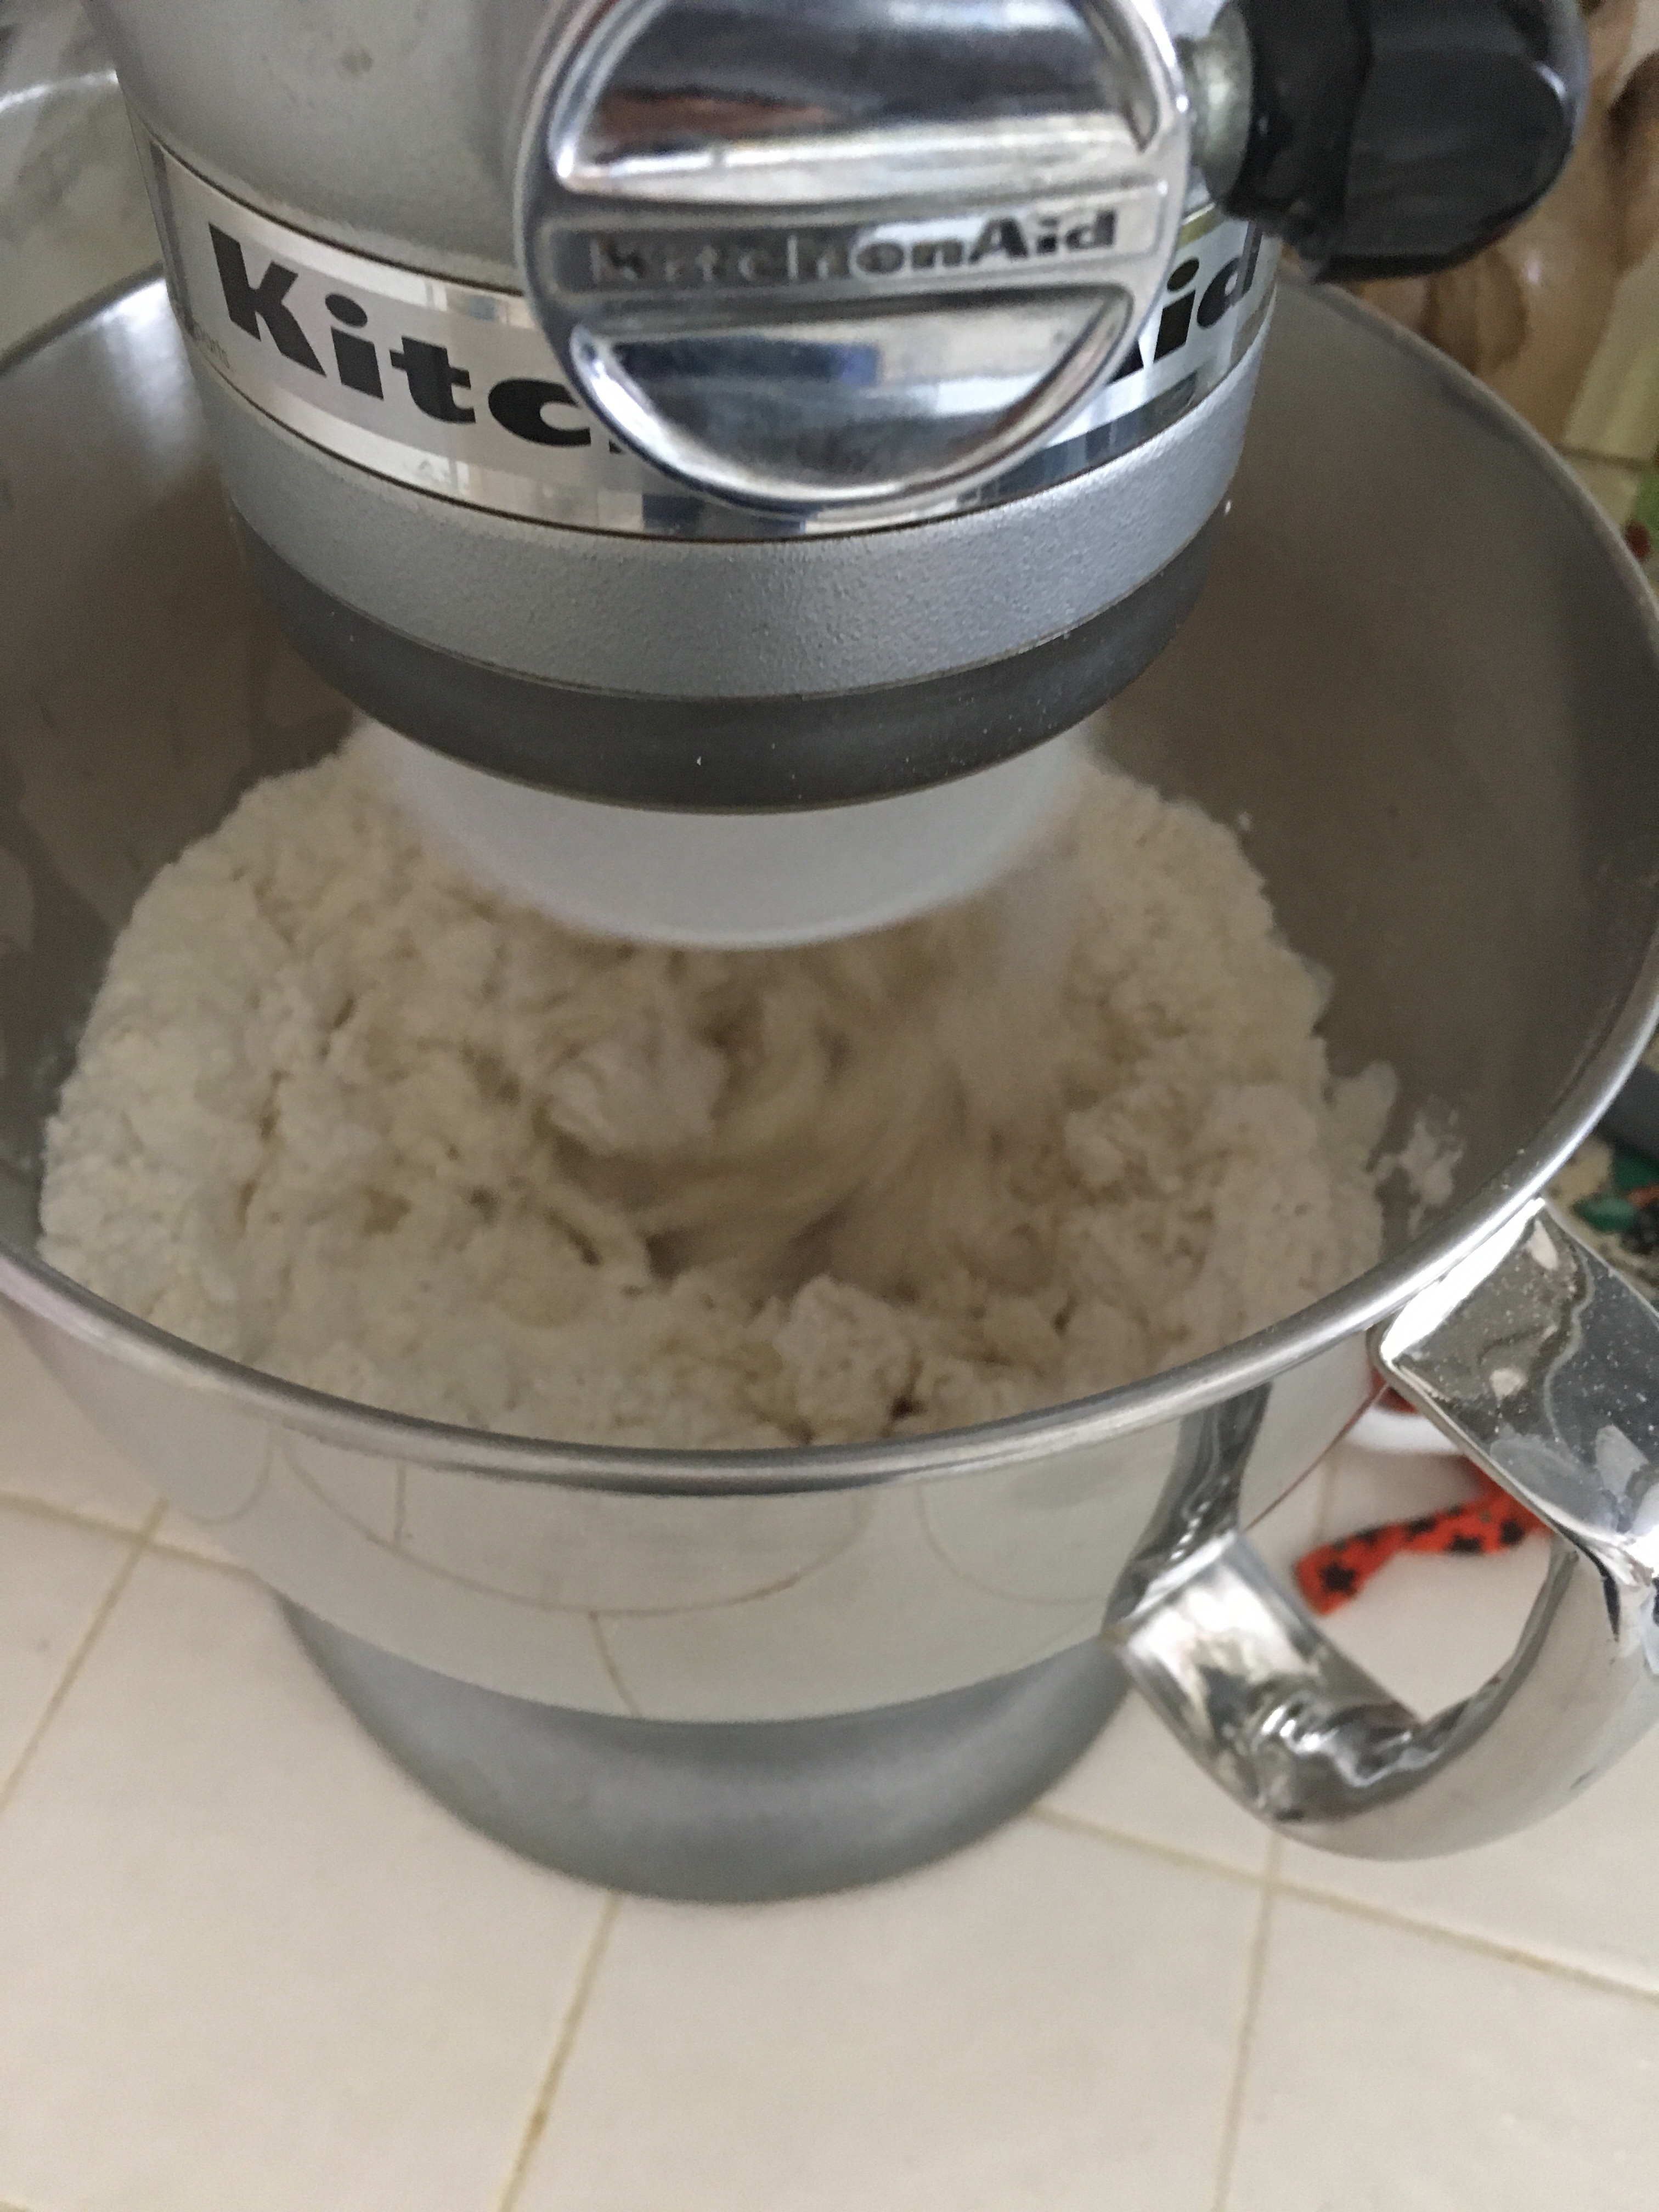
First things first, you have to make the salt dough! This is super simple. all you need is salt, flour, and warm water. You can knead the dough by hand, or use a mixer with the kneading attachment like I did.
So here is the recipe I used:
*this made a lot more than I expected! So you may want to make only half!
•4 cups all purpose flour
•1 cup salt
•1 3/4 cup warm water (add more of its too dry)
Combine the ingredients and knead for about 6 minutes. If it’s not forming into a nice soft ball add more water (or if it’s too sticky add more flour).
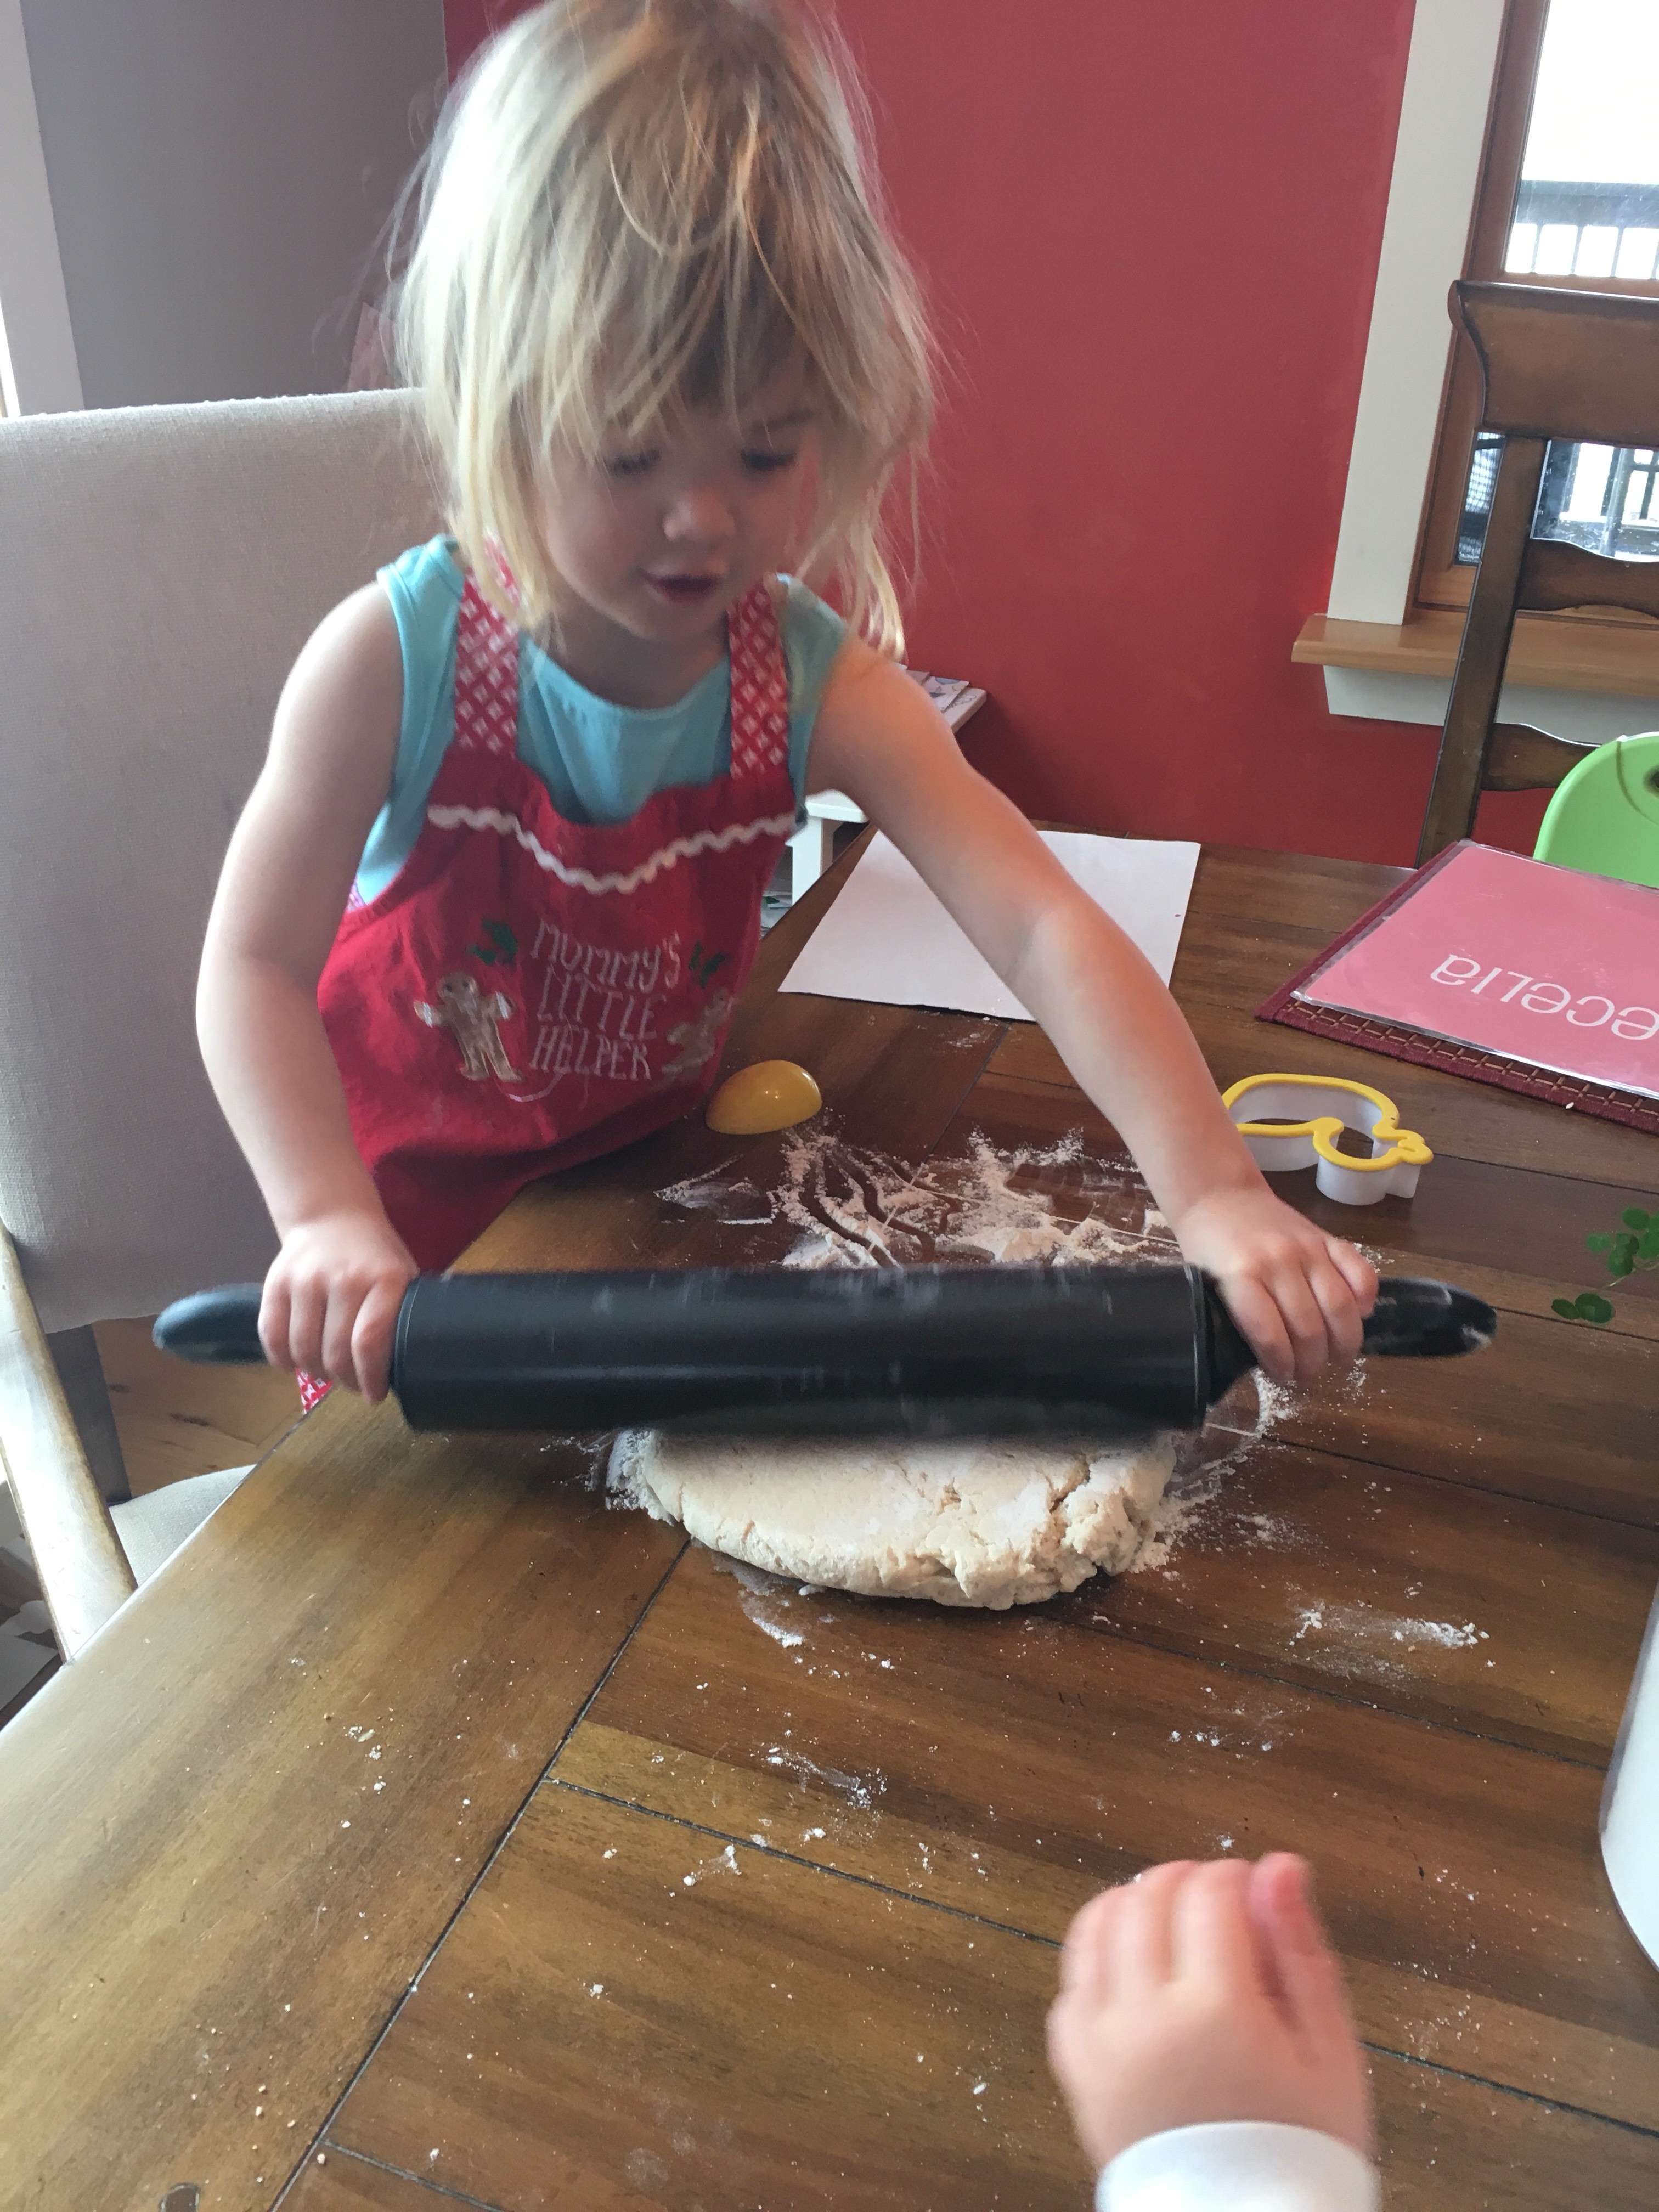
Then it’s time to roll out the dough! Just like you would for sugar cookies! Beware, your child may think you are making cookies! My 19 month old just kept pointing yelling cook-ies!
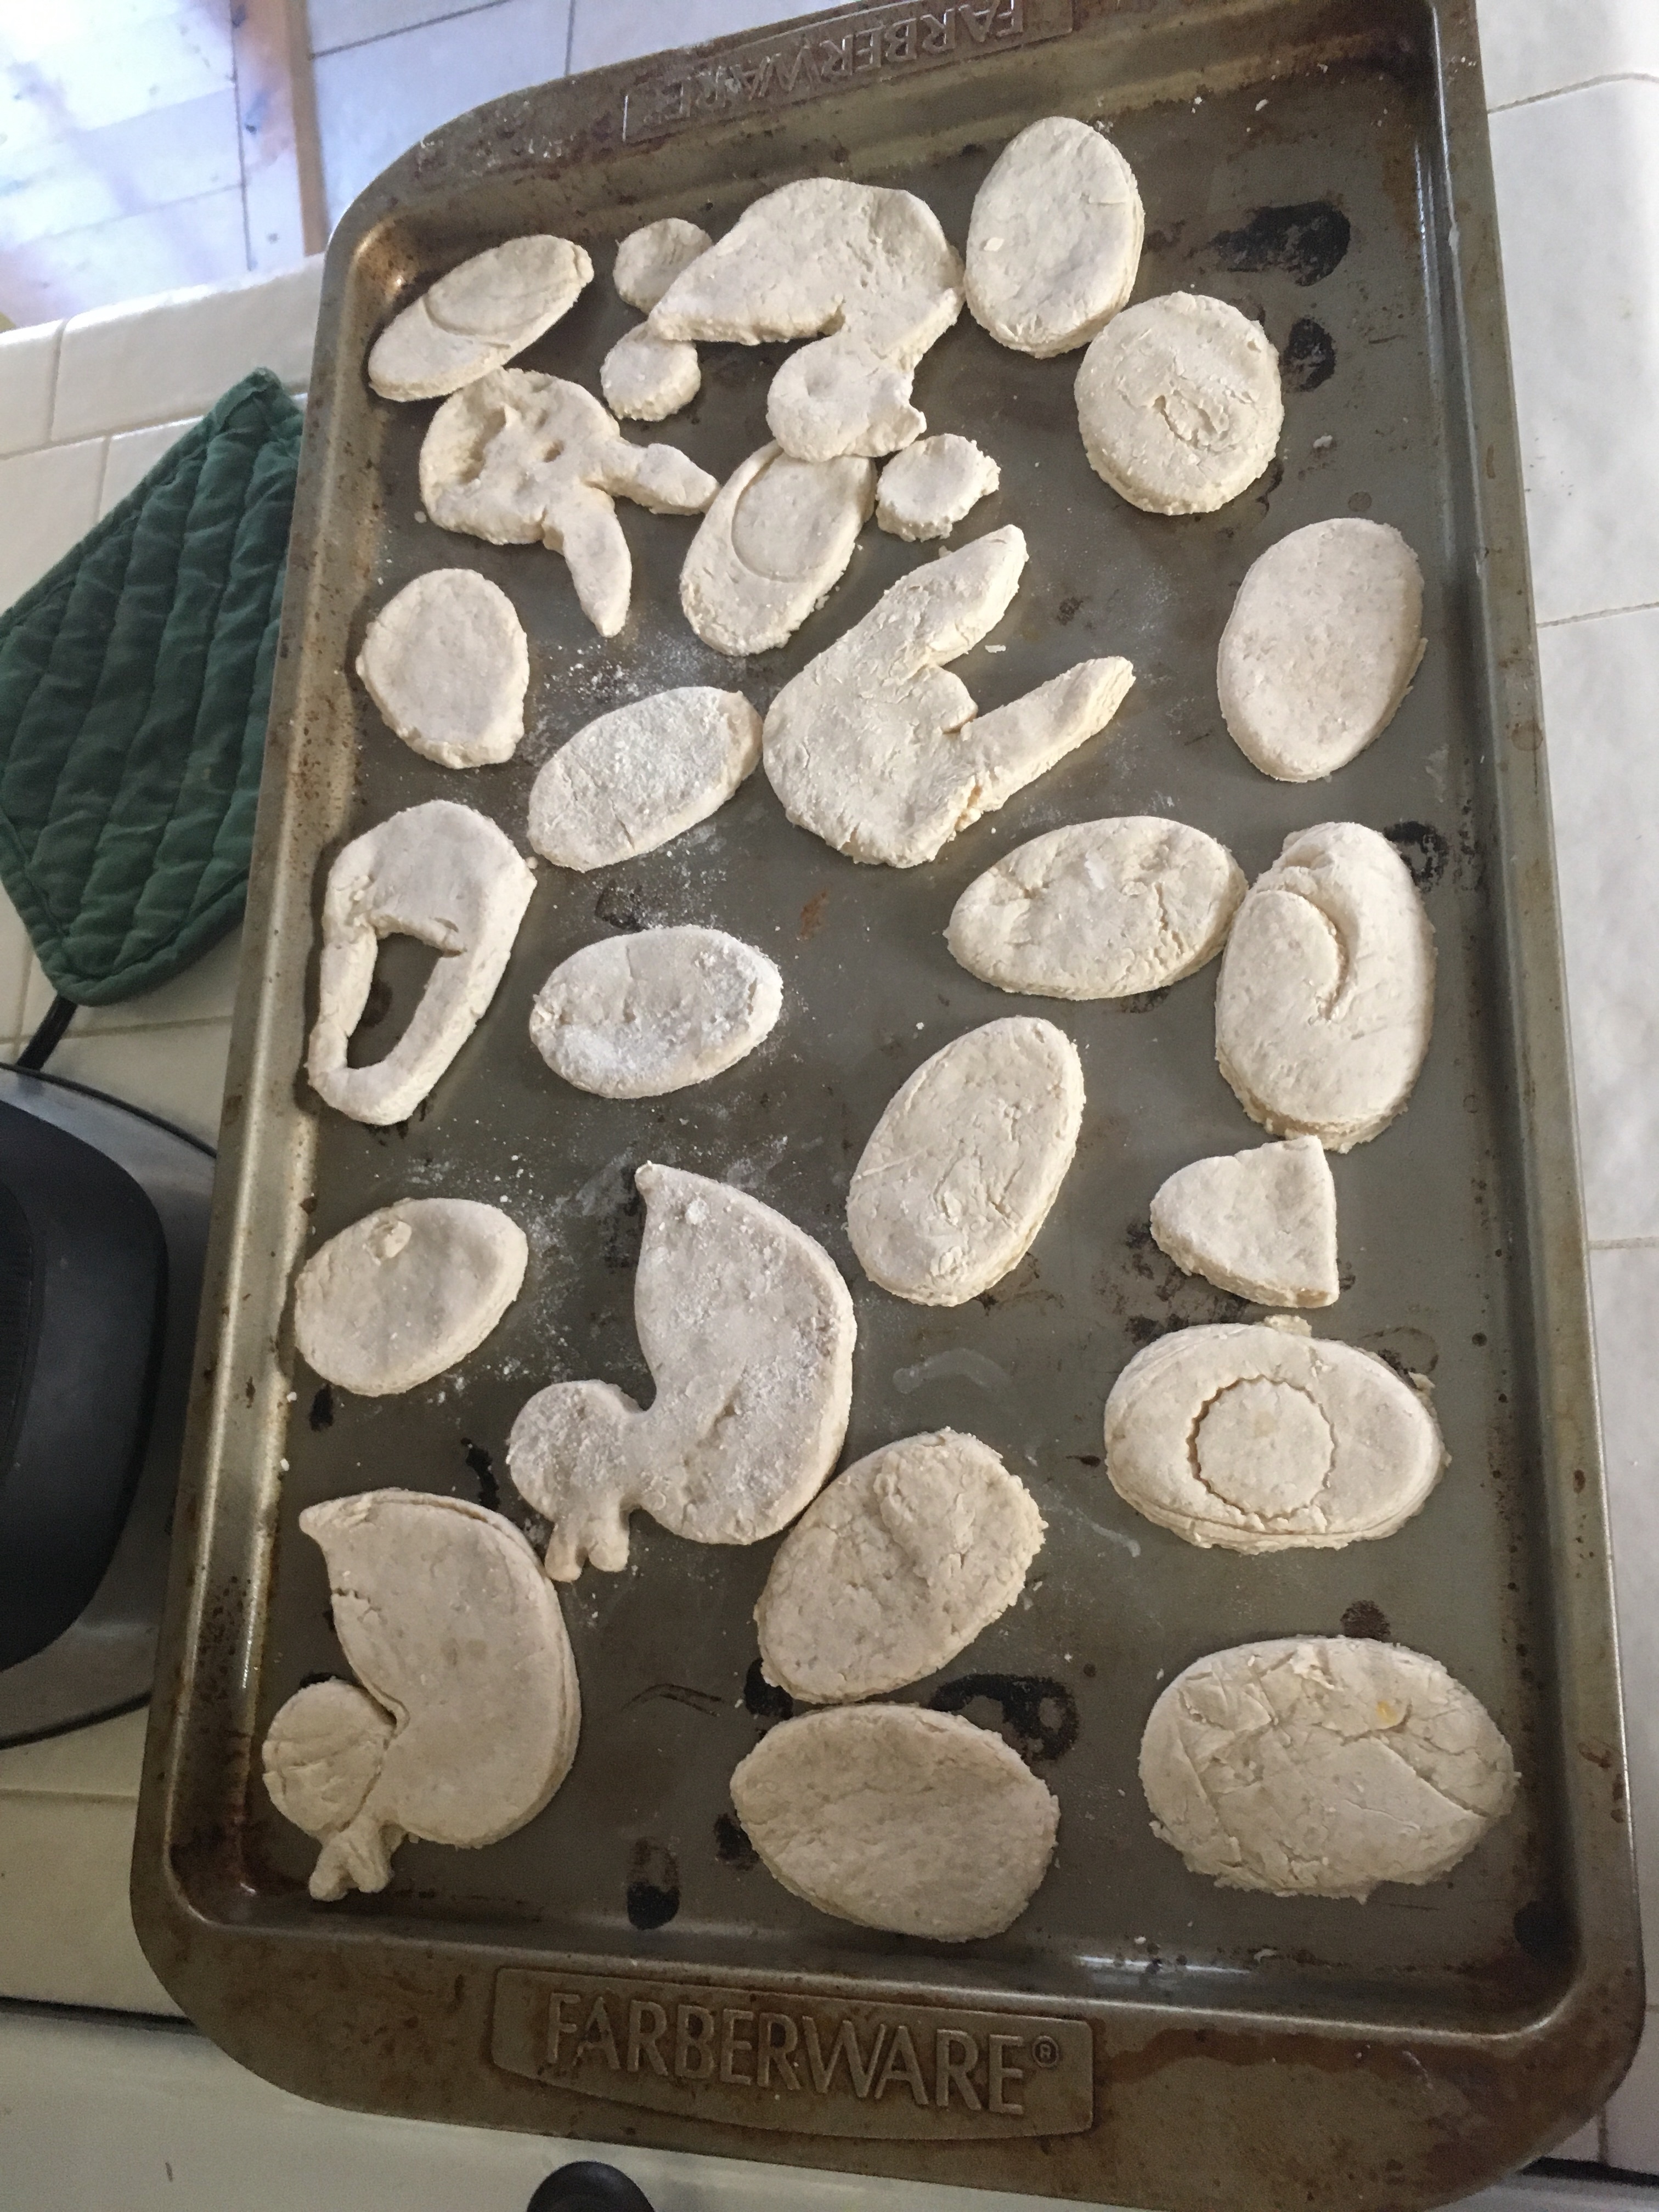
This is a great activity for your toddler to help you with. Next, get out your cookie cutters or Easter shapes and start making those eggs! I used a half of an Easter egg that opened sideways, a duck mold, and then made a couple baskets and bunny heads using a knife. **one thing I forgot to do was to use a straw to make a hole on the top of the eggs for the string to go through. So I ended up hot glue gunning ribbon.
Put your oven on 200 degrees. Place your salt doughs on a cookie sheet and place them in the oven for 2 hours (depending on the thickness you may need a little less or a little more). Once they are done they should be rock hard.
Then the fun, painting time! We used a combination of acrylic paint (which is best but hardest to come off and not non toxic) and water proof fingerprint. My son attempted to paint and did decent for his age, but when he kept trying to eat the painted cookies we had to end the painting time.
my daughter likes to squirt the paint in an old egg carton that way the colors stay separated.
Once we finished painting she sprinkled on some glitter. Unfortunately we don’t have any mod podge or clear finish to put on top right now, but we still love them!
If you have any clear finish or modge podge this is the time to coat it in that for a nice shiny finish!
Since we forgot to make the holes for the ribbon, I used the hot glue gun to attach the ribbons. Then we hung them around the house (high enough that my son couldn’t reach these “cookies.”
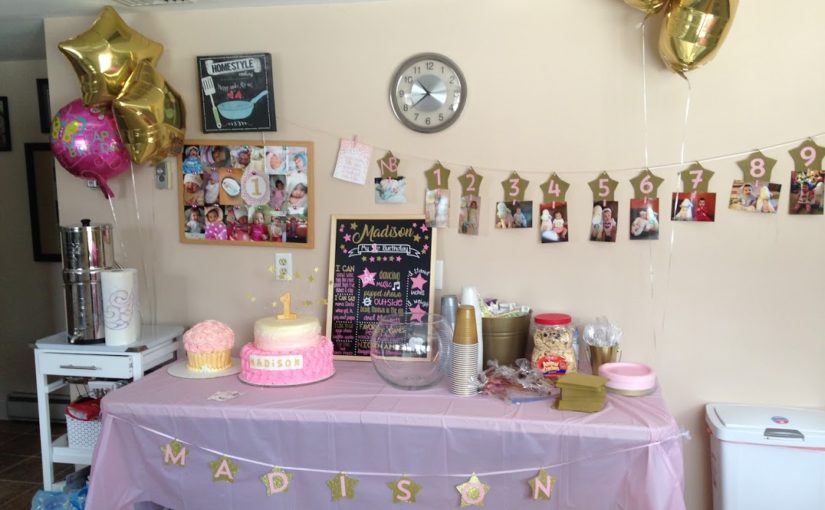
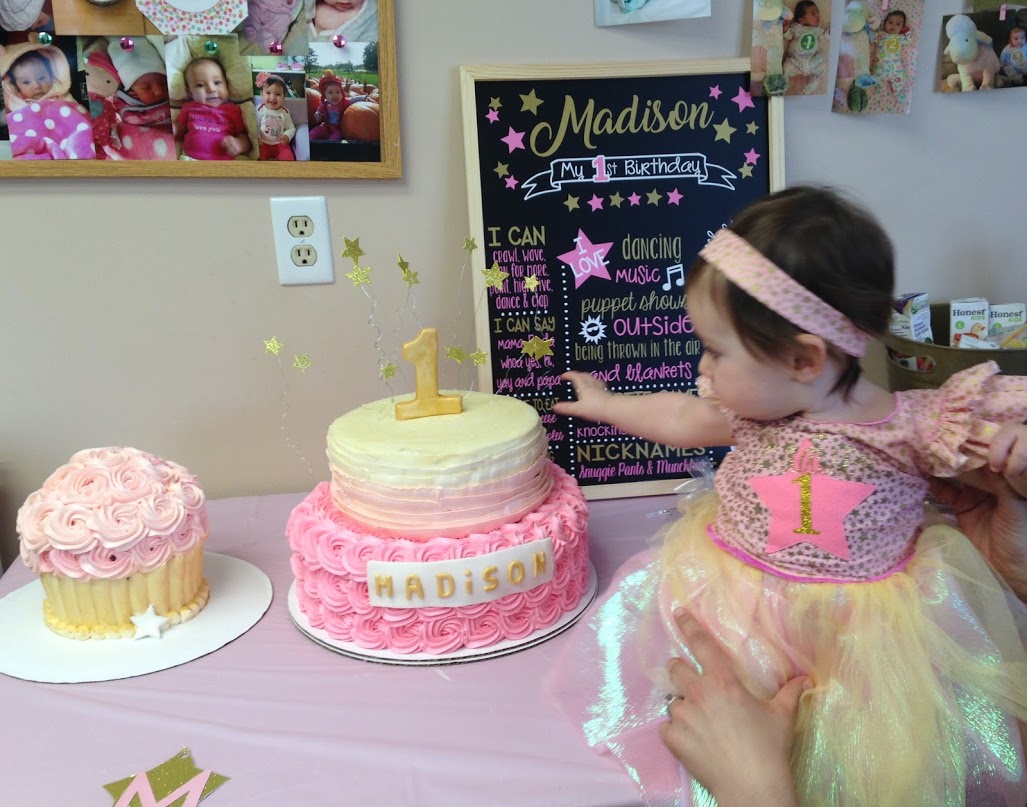
Hello! Guest writer here! I am the blog founder’s twin sister, Jessie, and I’m here to share my decorations and ideas from my little girl Madison’s first birthday party. You can use these decoration ideas for anything from baby showers, birthday parties, to graduation parties depending on what your theme is. If your theme involves stars, pink, or gold then you are in luck!
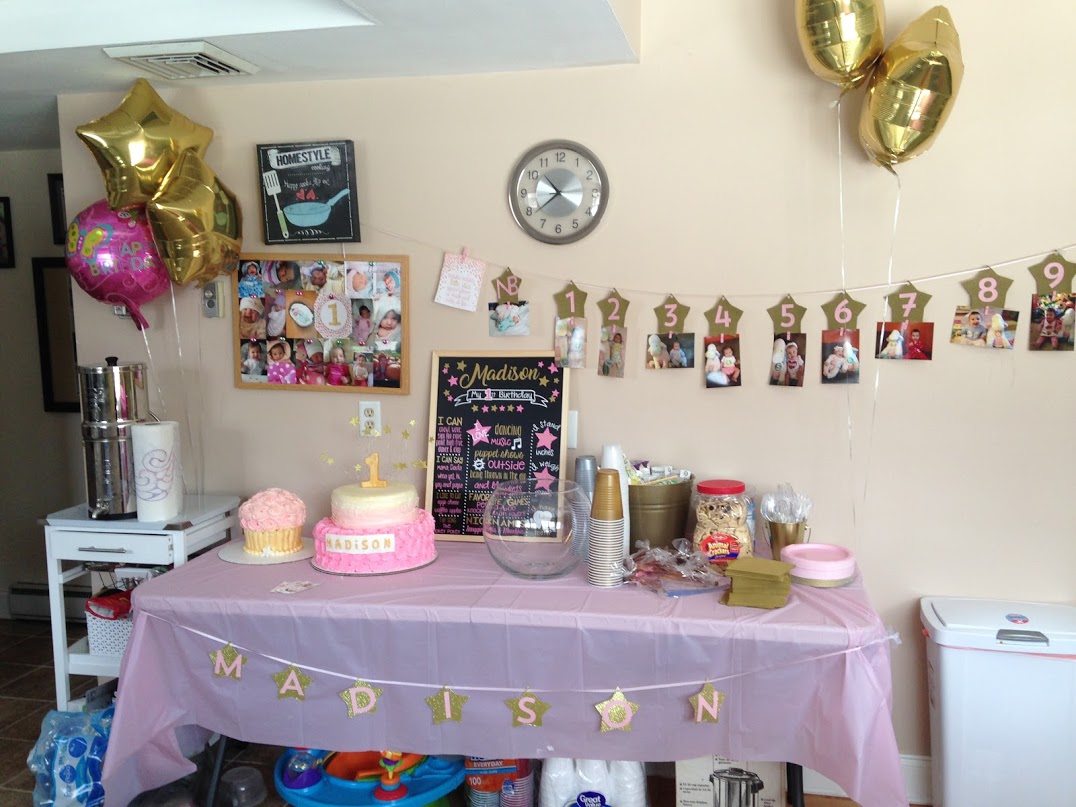
The dessert table before the desserts!
Let’s first start with the pink and gold theme. All of the tablecloths, plates, napkins, and containers are from Walmart. I wanted a good deal, but also wanted it to look good and found the best deals there. Michaels was another store I frequented for ideas and supplies. All of the numbers, letters, and banner supplies were purchased there.
Okay, before we dive too deep into how each decoration was made, let’s check out some pictures!
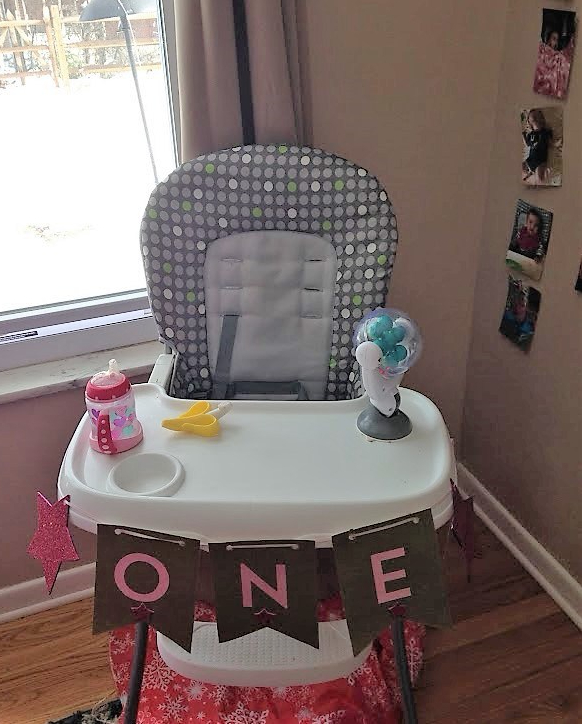
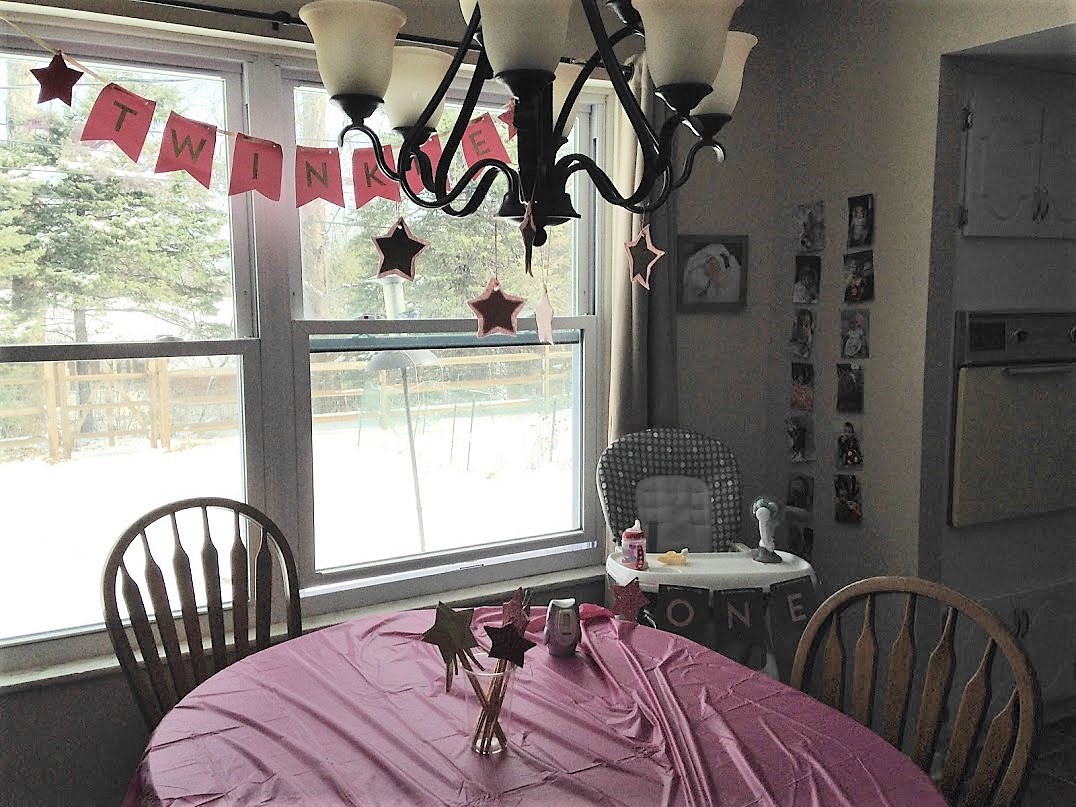
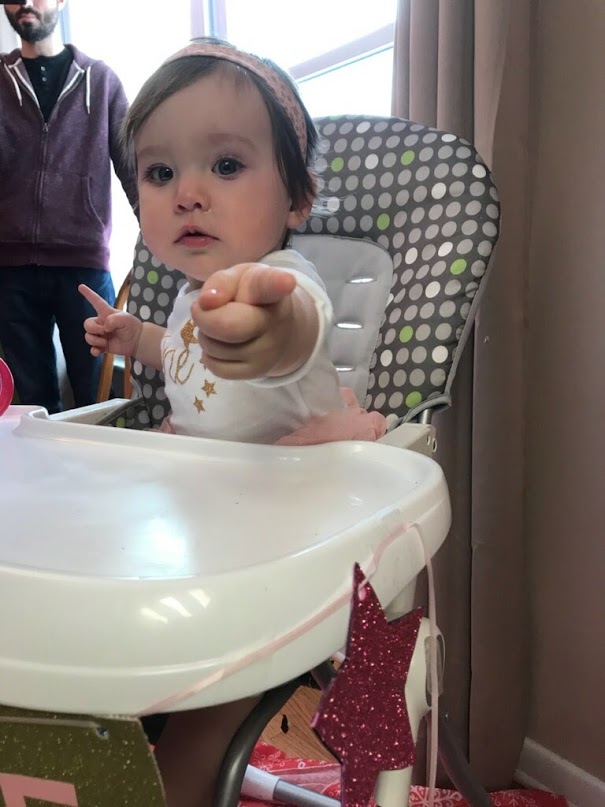
The birthday girl’s chair!
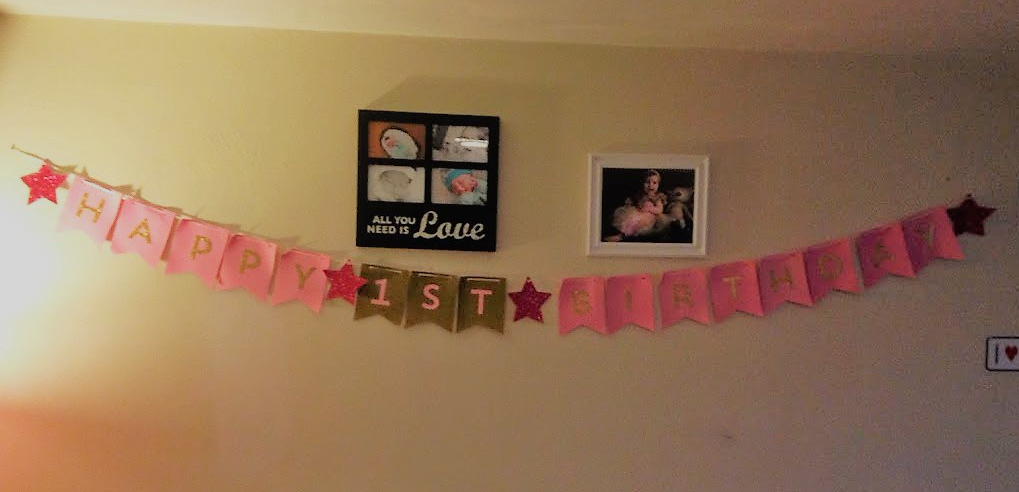
All of the banner pennants in this article were purchased from Michaels. The letters on all of the banners are stick on letters from Michaels too. However, they don’t stay on the thick fabric of the pennants so need to be glued on. I used a hole puncher to make 2 holes at the top of each pennant and put string through them. I purchased some glitter foam sheets from Walmart to make the stars and used a cookie cutter to trace them.
The happy birthday banner hanging above the food table.
Again, I used the materials I purchased to make this banner and it was fairly easy because everything was cut out besides the stars. This banner was definitely worth the time to put it together, it was super cute and personalized to her party. I moved the pictures that were originally above the banner and replaced them with picture frames of Madison.
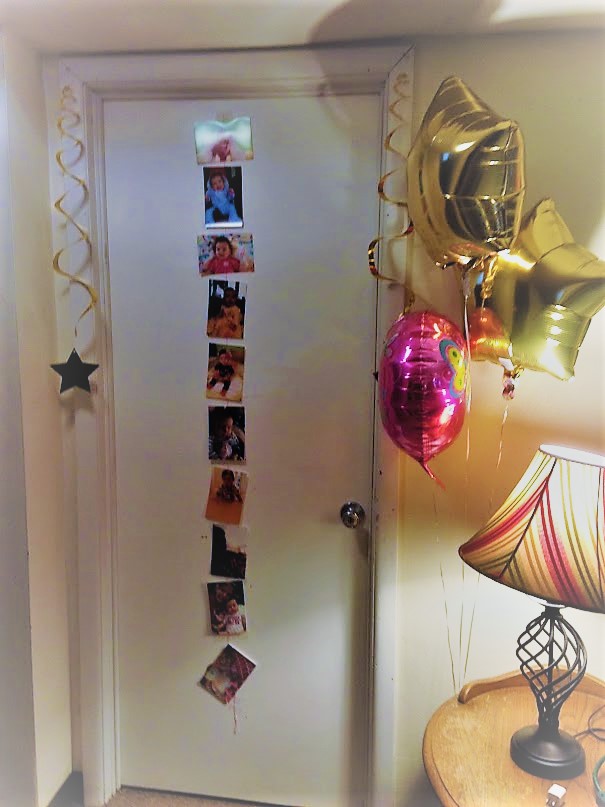
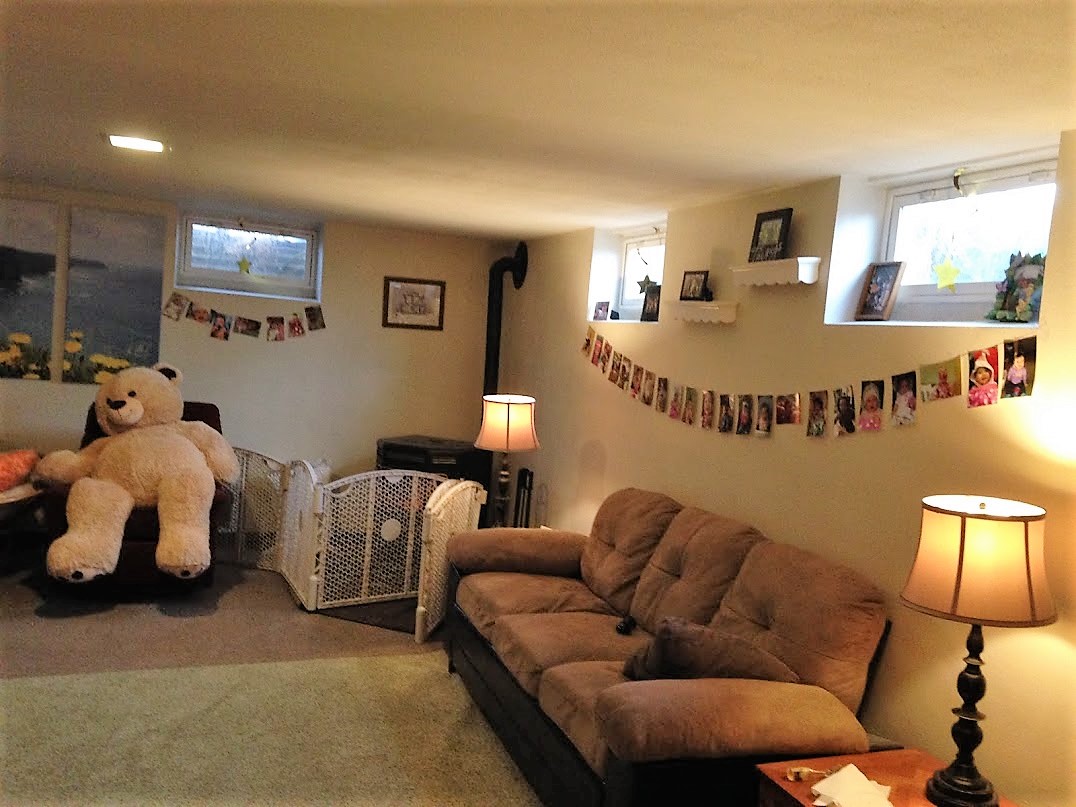
Balloons were purchased at the dollar store. I used the cork board from the kitchen to put pictures of her from the first year-a simple and affordable decoration. The 12 month banner was also made from the pennants. I simply traced the star cookie cutter and cut out stars instead of using the pennant shape. If you don’t have a cookie cutter you could print out a star from a computer and trace it! I found little pink clothespins at Michaels and hot glued them to the stars so the pictures could be added below the banner. This could also be a cute idea for other types of parties. You could write someone’s name and have pictures of them beneath it or for graduation with pictures from each school year. The options are endless!
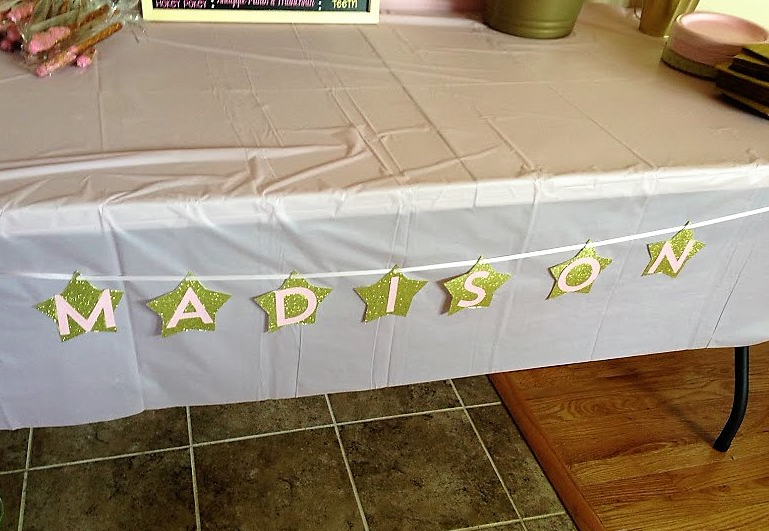
Again, I cut out stars and added the stick on letters with glue. These stars were cut from glitter foam paper.Stars, stars, everywhere!
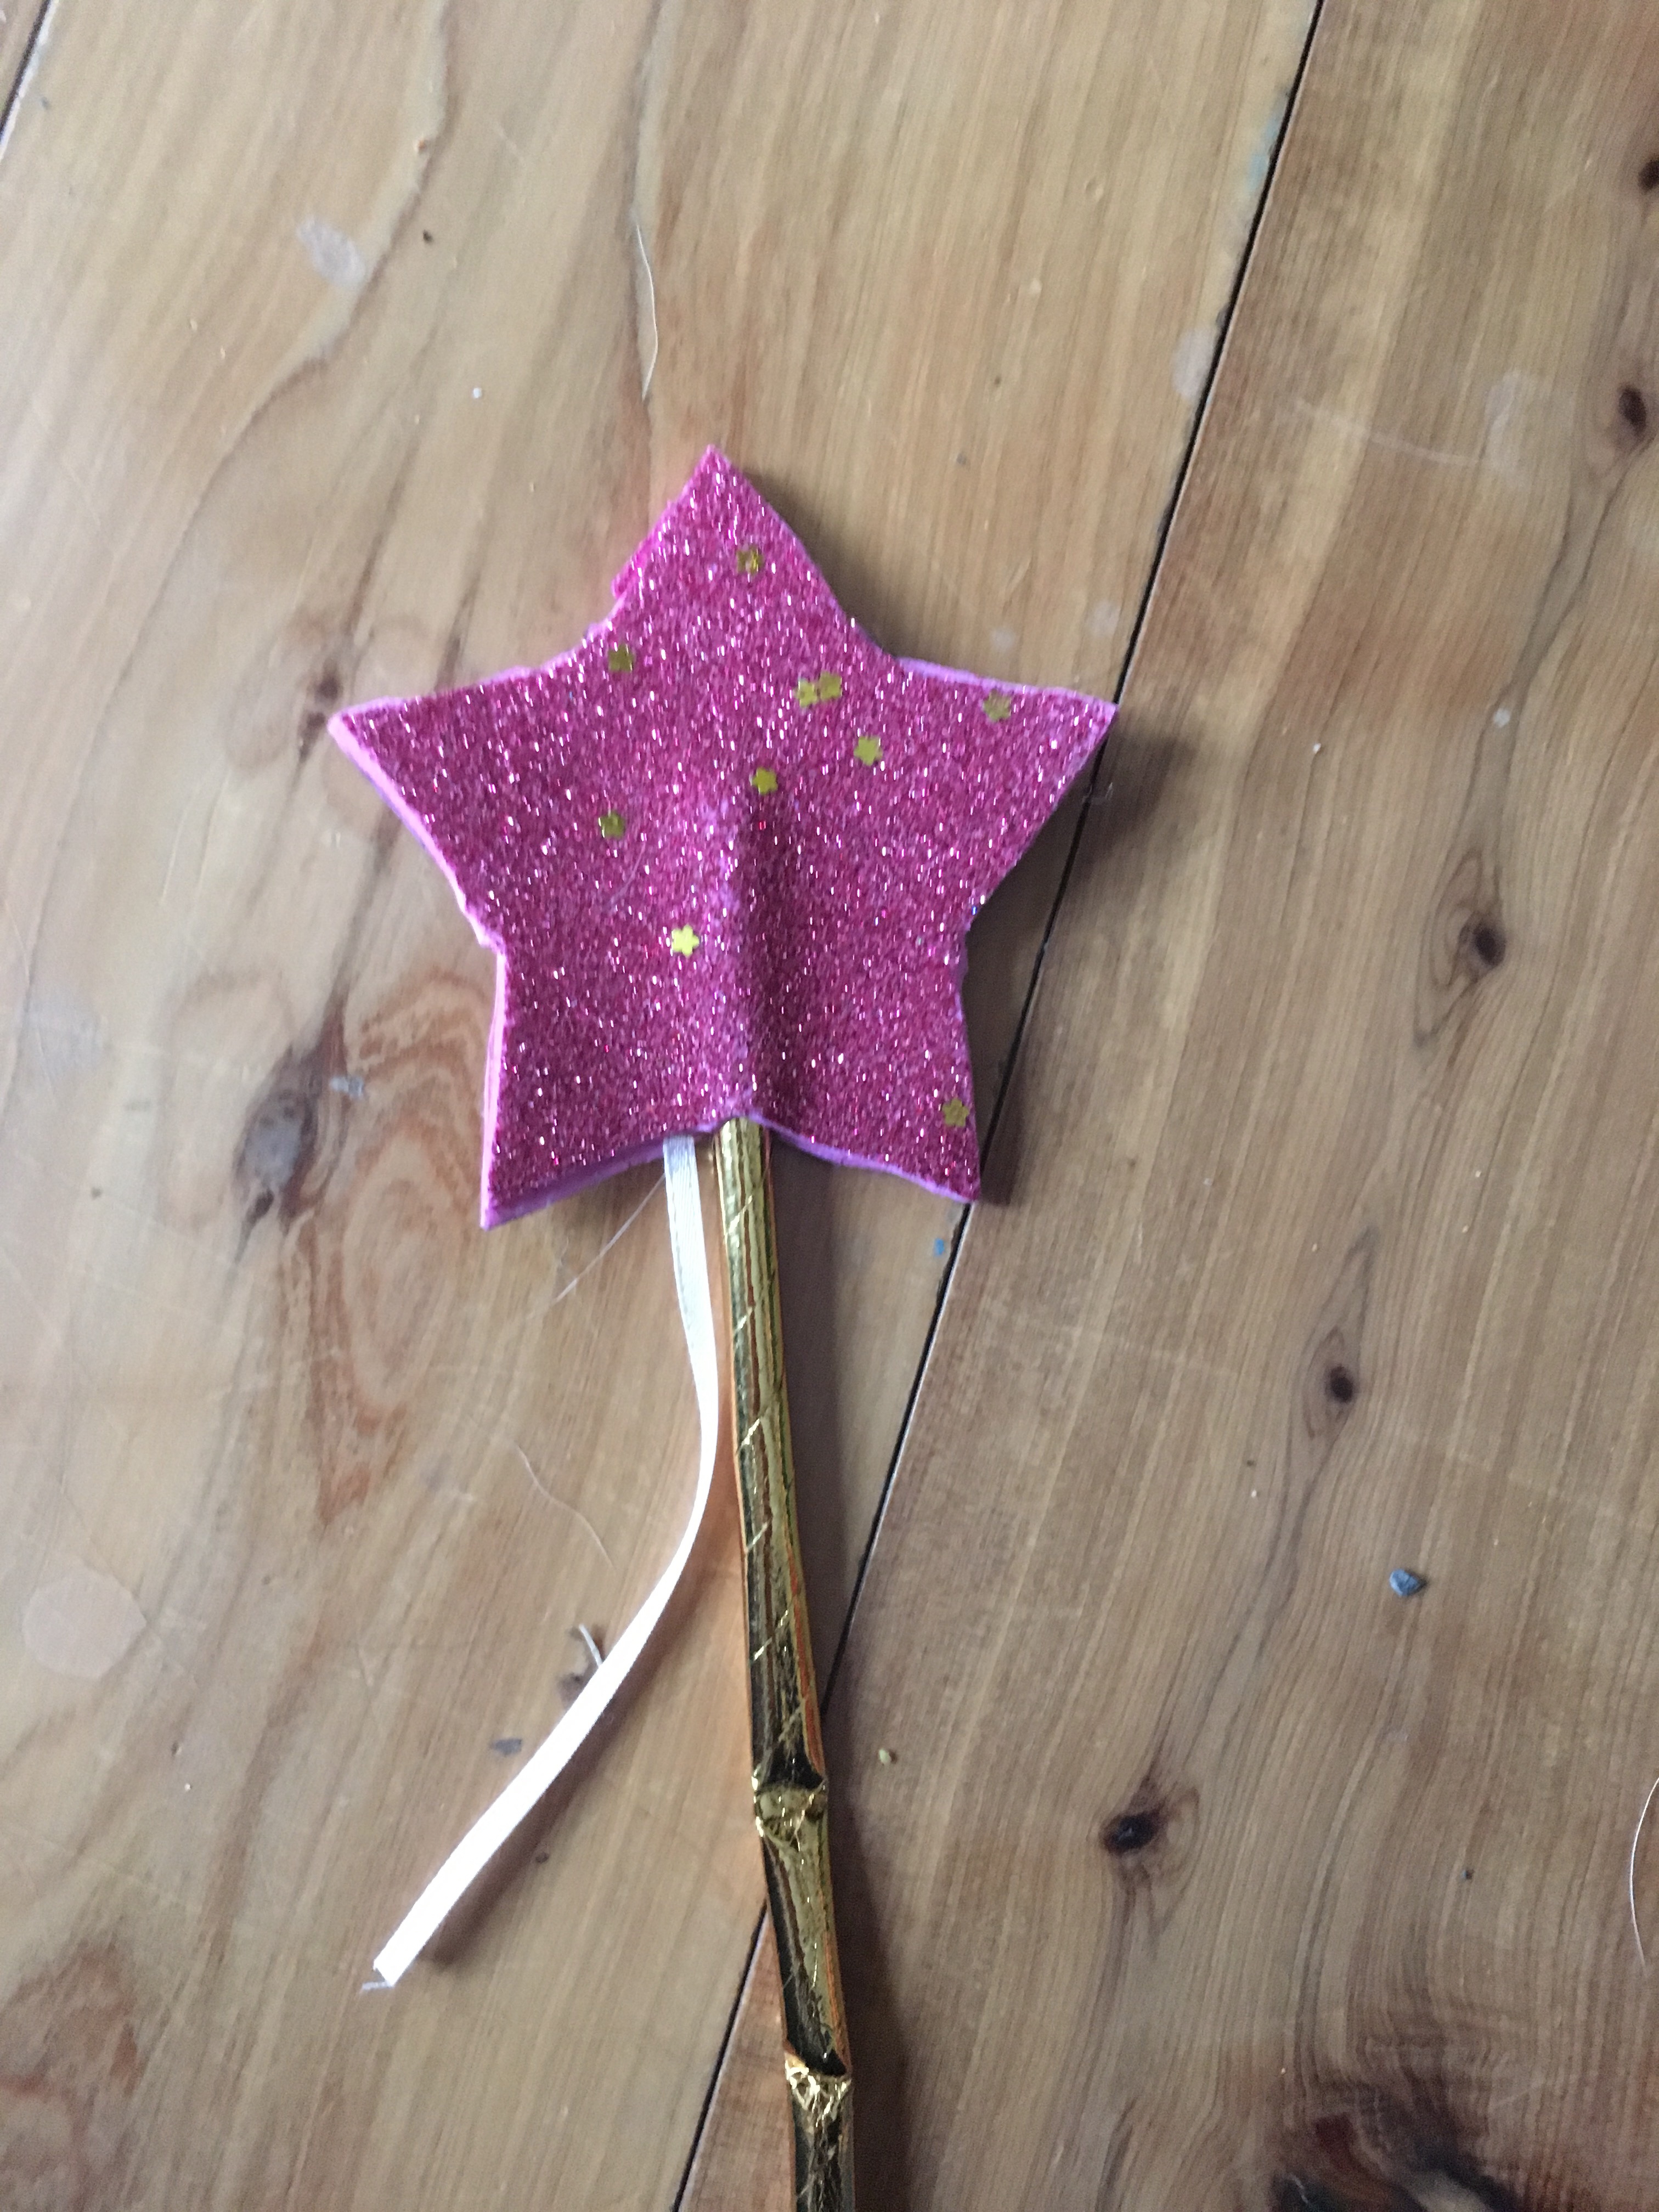
I made the twinkle banner, the stars hanging from the chandelier and the star wands on the table that I used as party favors and a centerpiece. For the stars hanging from the light, I cut out stars from the foam paper and attached it to felt pink cloth I had. I cut the outline of the pink cloth around the gold star so it looks like an outline for the stars.
As for the wands, I purchased gold straws from Michaels and they were very sturdy made from cardboard and didn’t bend. I decided to use the foam paper to cut out two stars and stick them together around the top of the straw. I also included 2 cut pieces of ribbon on the wand. I put one on each side of the star and pushed the stars together (they have sticky backs, but you could easily glue them). They were a hit!
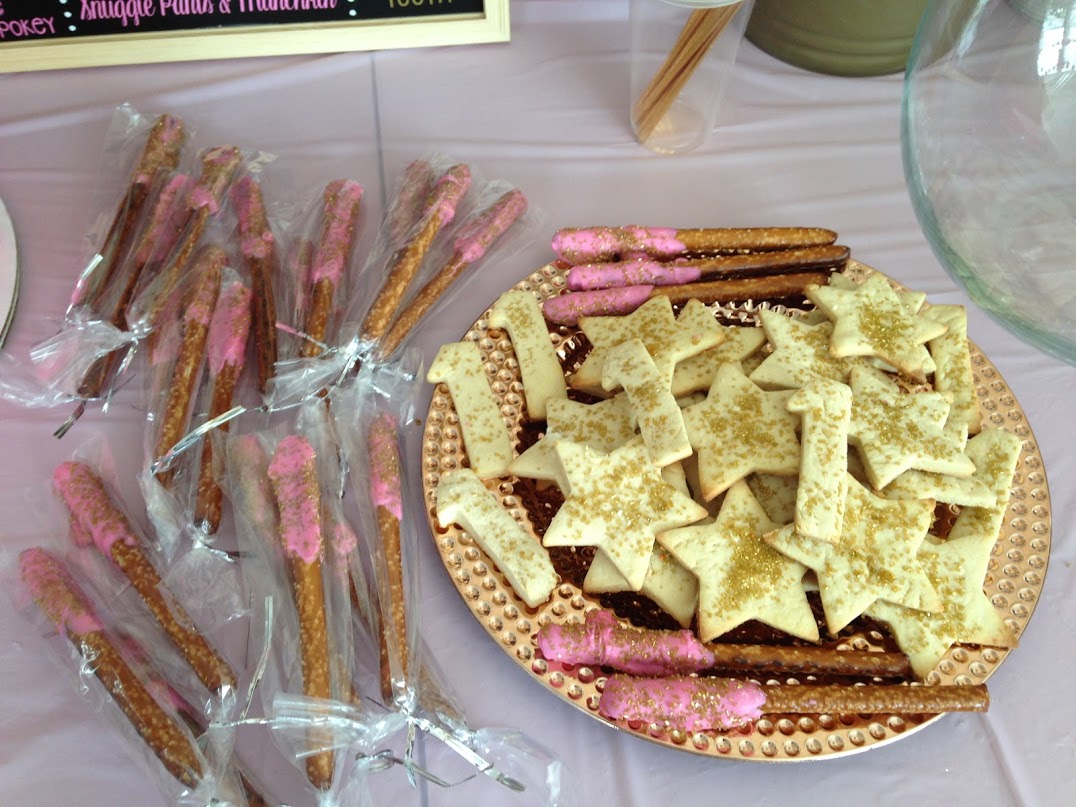
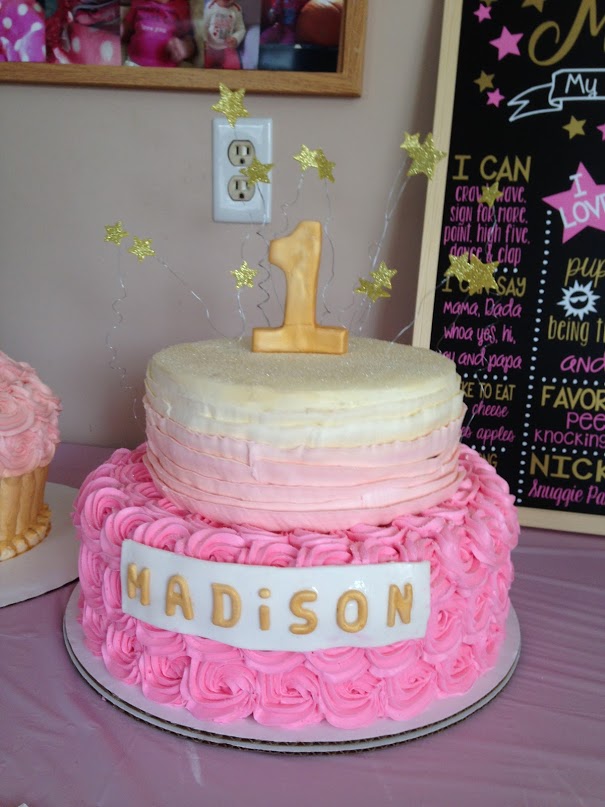
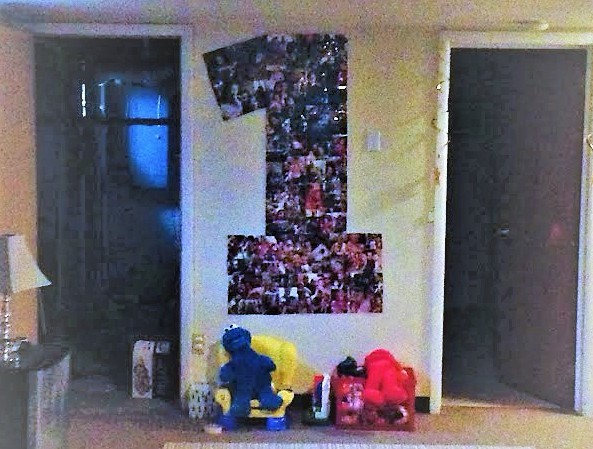
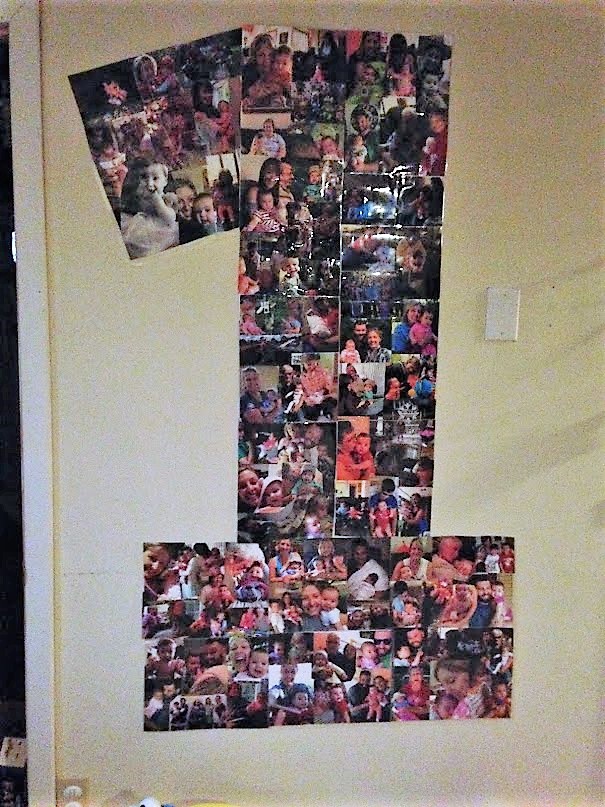
Yum! I made chocolate covered pretzels with pink chocolate melts and gold sprinkles. I also made the sugar cookies with star and number one cookie cutters!No, I didn’t make this beautiful cake. However, I thought the stars sticking out of the top were so cute and easy to make! They simply used some wire and cut out stars they hot glued to the wire! Pictures, pictures, everywhere! Super cheap decoration-pictures on string! I used pink string and taped the pictures. For a twinkle twinkle theme you could also use string lights around the house for decorations!A giant number one made with pictures!
There are great tutorials online about making the number one with pictures for your baby’s first birthday. Most people recommend using cardboard from a large appliance box. I didn’t have any available, so used regular printer paper. I simply cut pictures and fit them on the paper with glue, then laminated the paper. I am a teacher so I happen to have a small scotch laminator at home that worked perfectly. I lined up all the papers to make the number one and adhered it to the wall with tape!
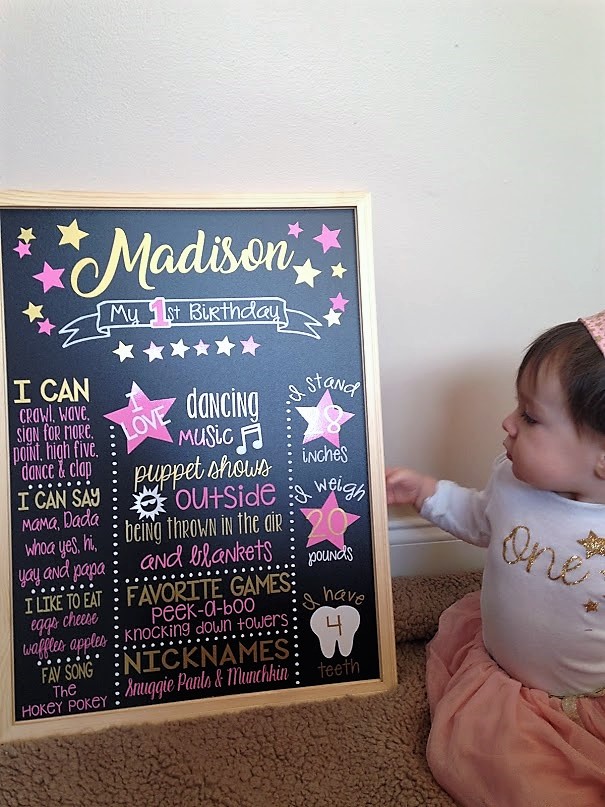
You might be wondering about her outfit and this wonderful sign. I’m sorry to tell you that I didn’t make them. A local woman made them both for me. My sister (aka the blog writer) made her beautiful dress and headband. Hopefully there will be a post on that coming up soon! Yes, Madison wanted the cake.
If you are a very busy person with many kids, making all of these decorations might be too time consuming. However, even making a small amount of them is very rewarding. It not only adds a personal touch, but can be used as a keepsake or for future parties!
Thank you for visiting this blog and YOU can make these decorations too with a little time and effort!
Follow Share
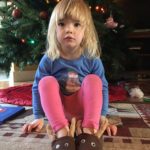
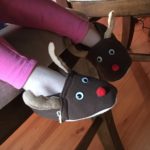
This easy DIY sewing project can be made for any size shoe! All you need to do is trace the shoe (or foot) size and create! Easy peezey Christmas fun! Also makes a great gift!
As always, there is a video tutorial on the ceceliasspot channel and here is the link…
Baby Slippers Tutorial! this has a pattern for baby slippers if you don’t want to trace a shoe or foot
And there is the written format below. ENJOY AND HAPPY HOLIDAYS!
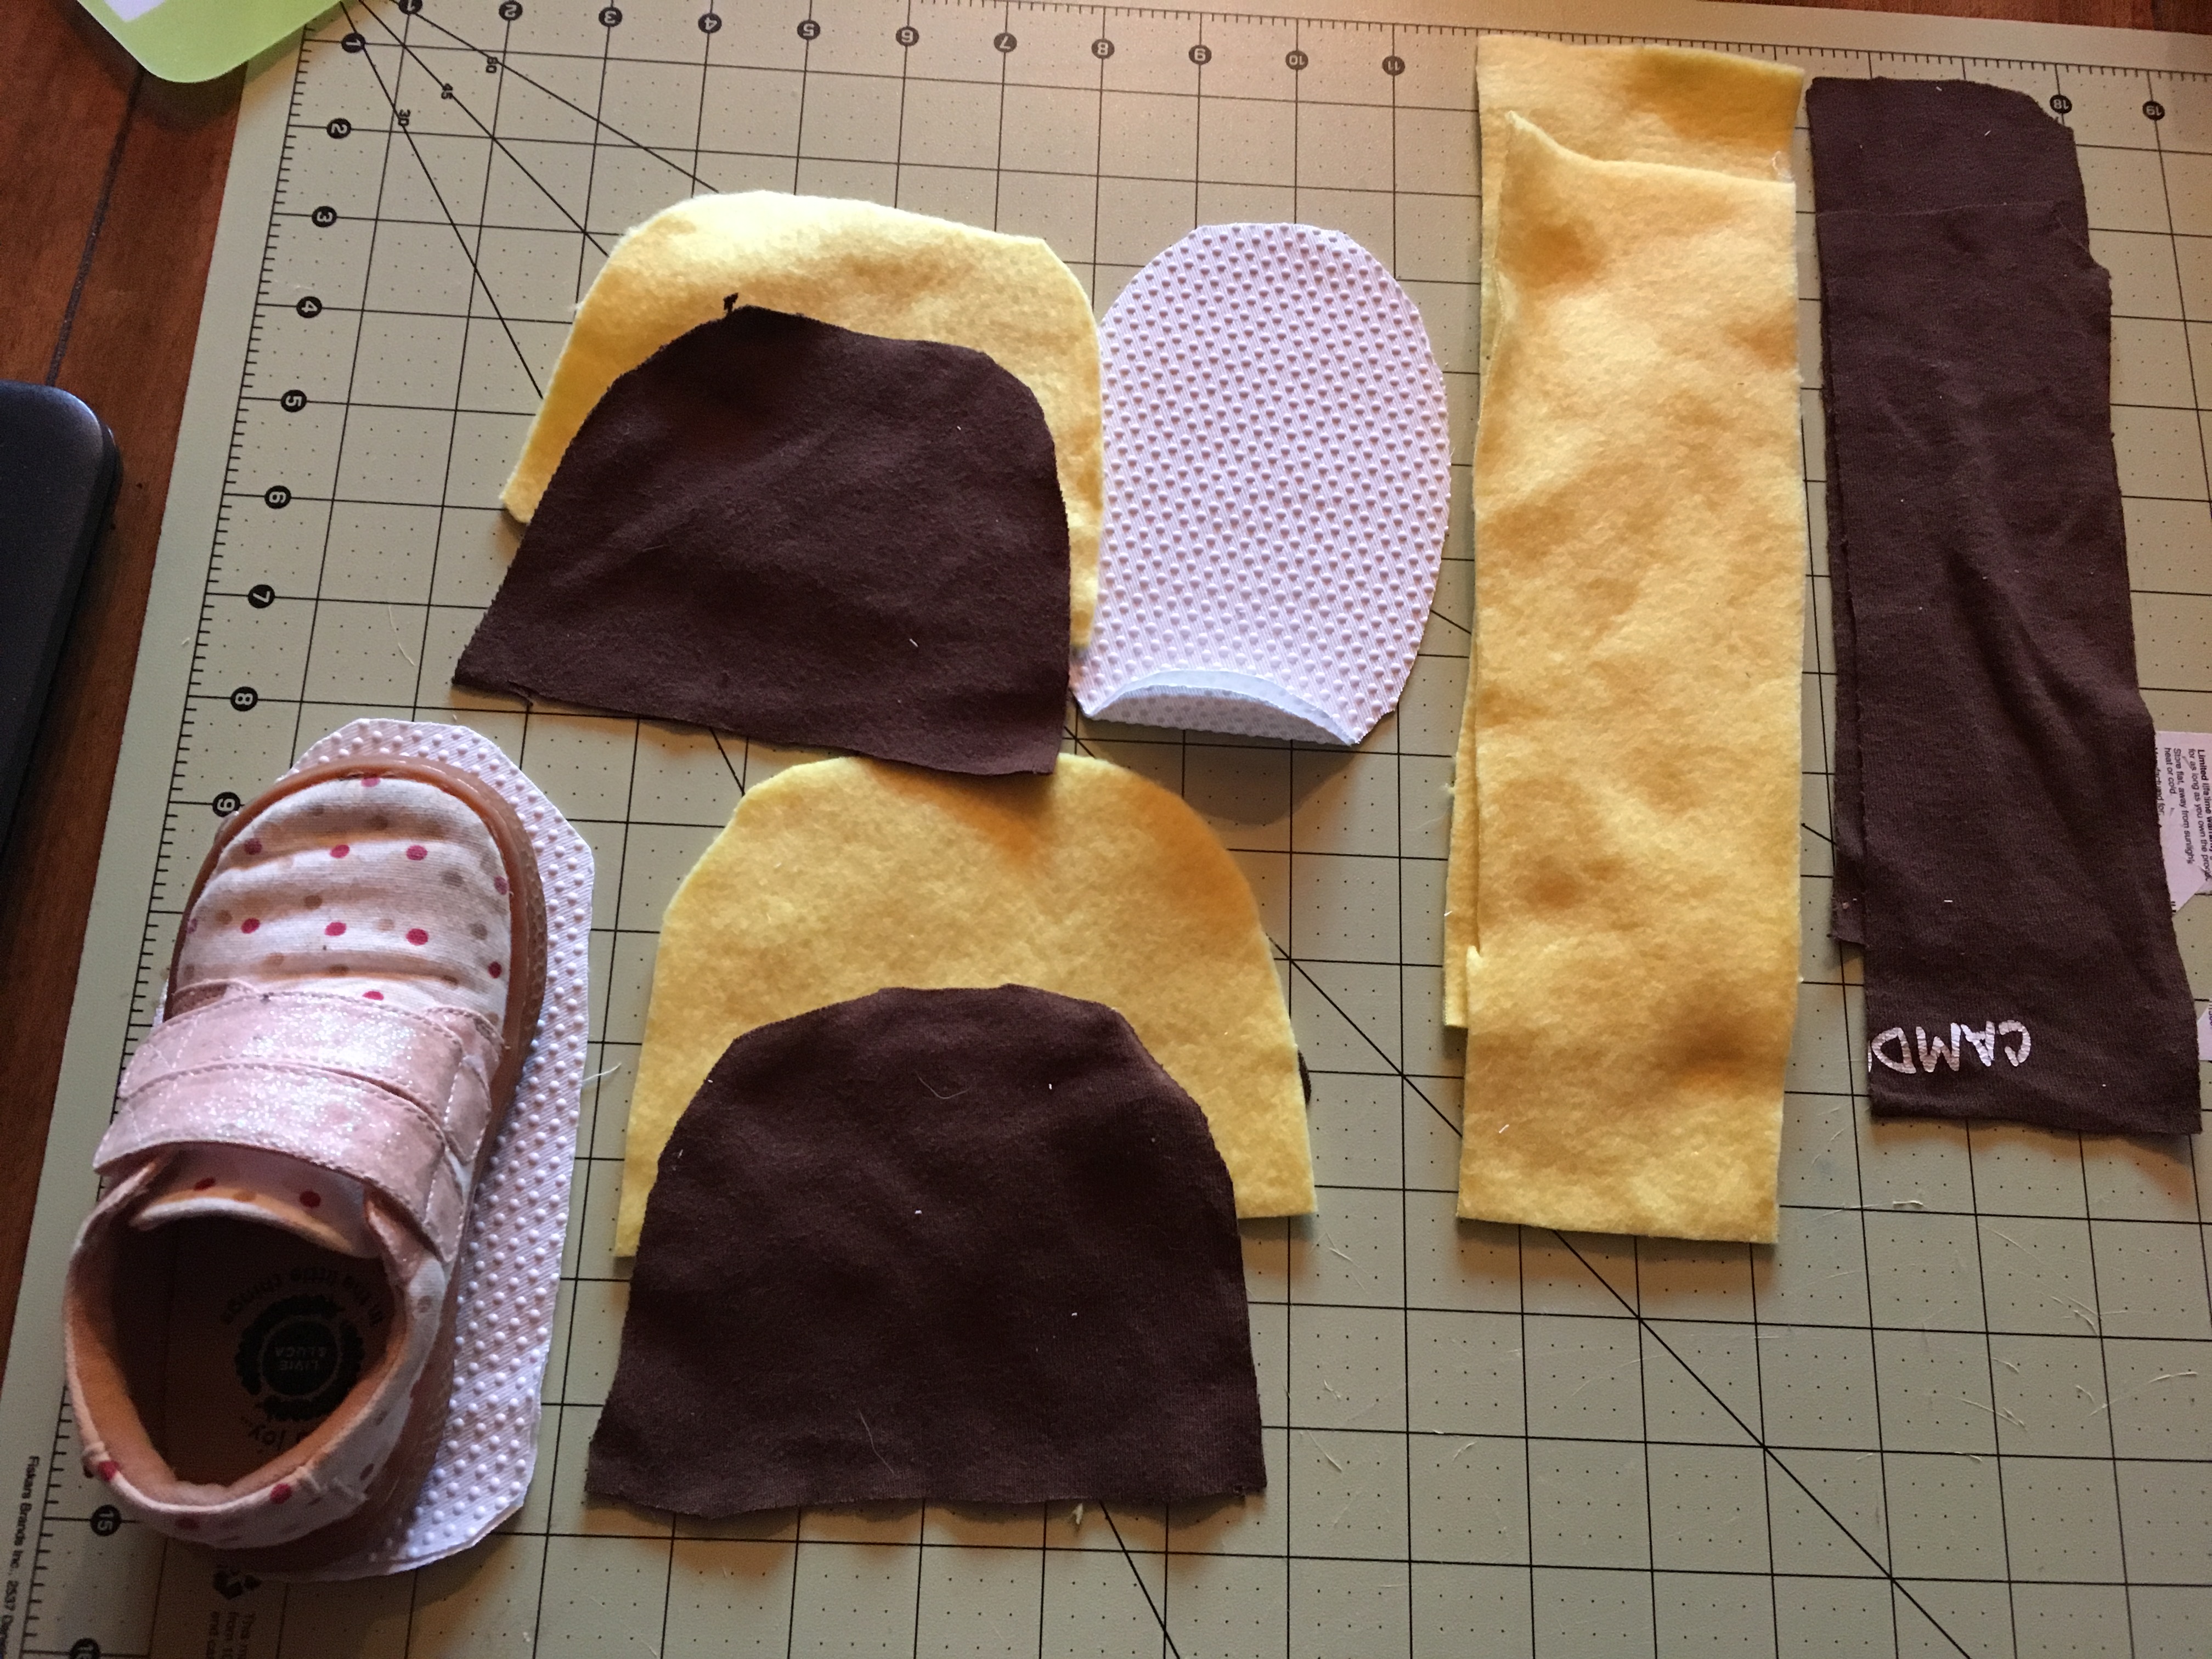
First, what you need for this project:
Non-skid fabric
Fabric colors (I used cotton and fleece)
1/4 or 1/8 elastic
Sewing tools, googley eyes, red cotton ball, and any accessories you would like to add
Next, trace your subject’s shoe or foot (if you are using their actual foot add 1/2 inch all the way around).
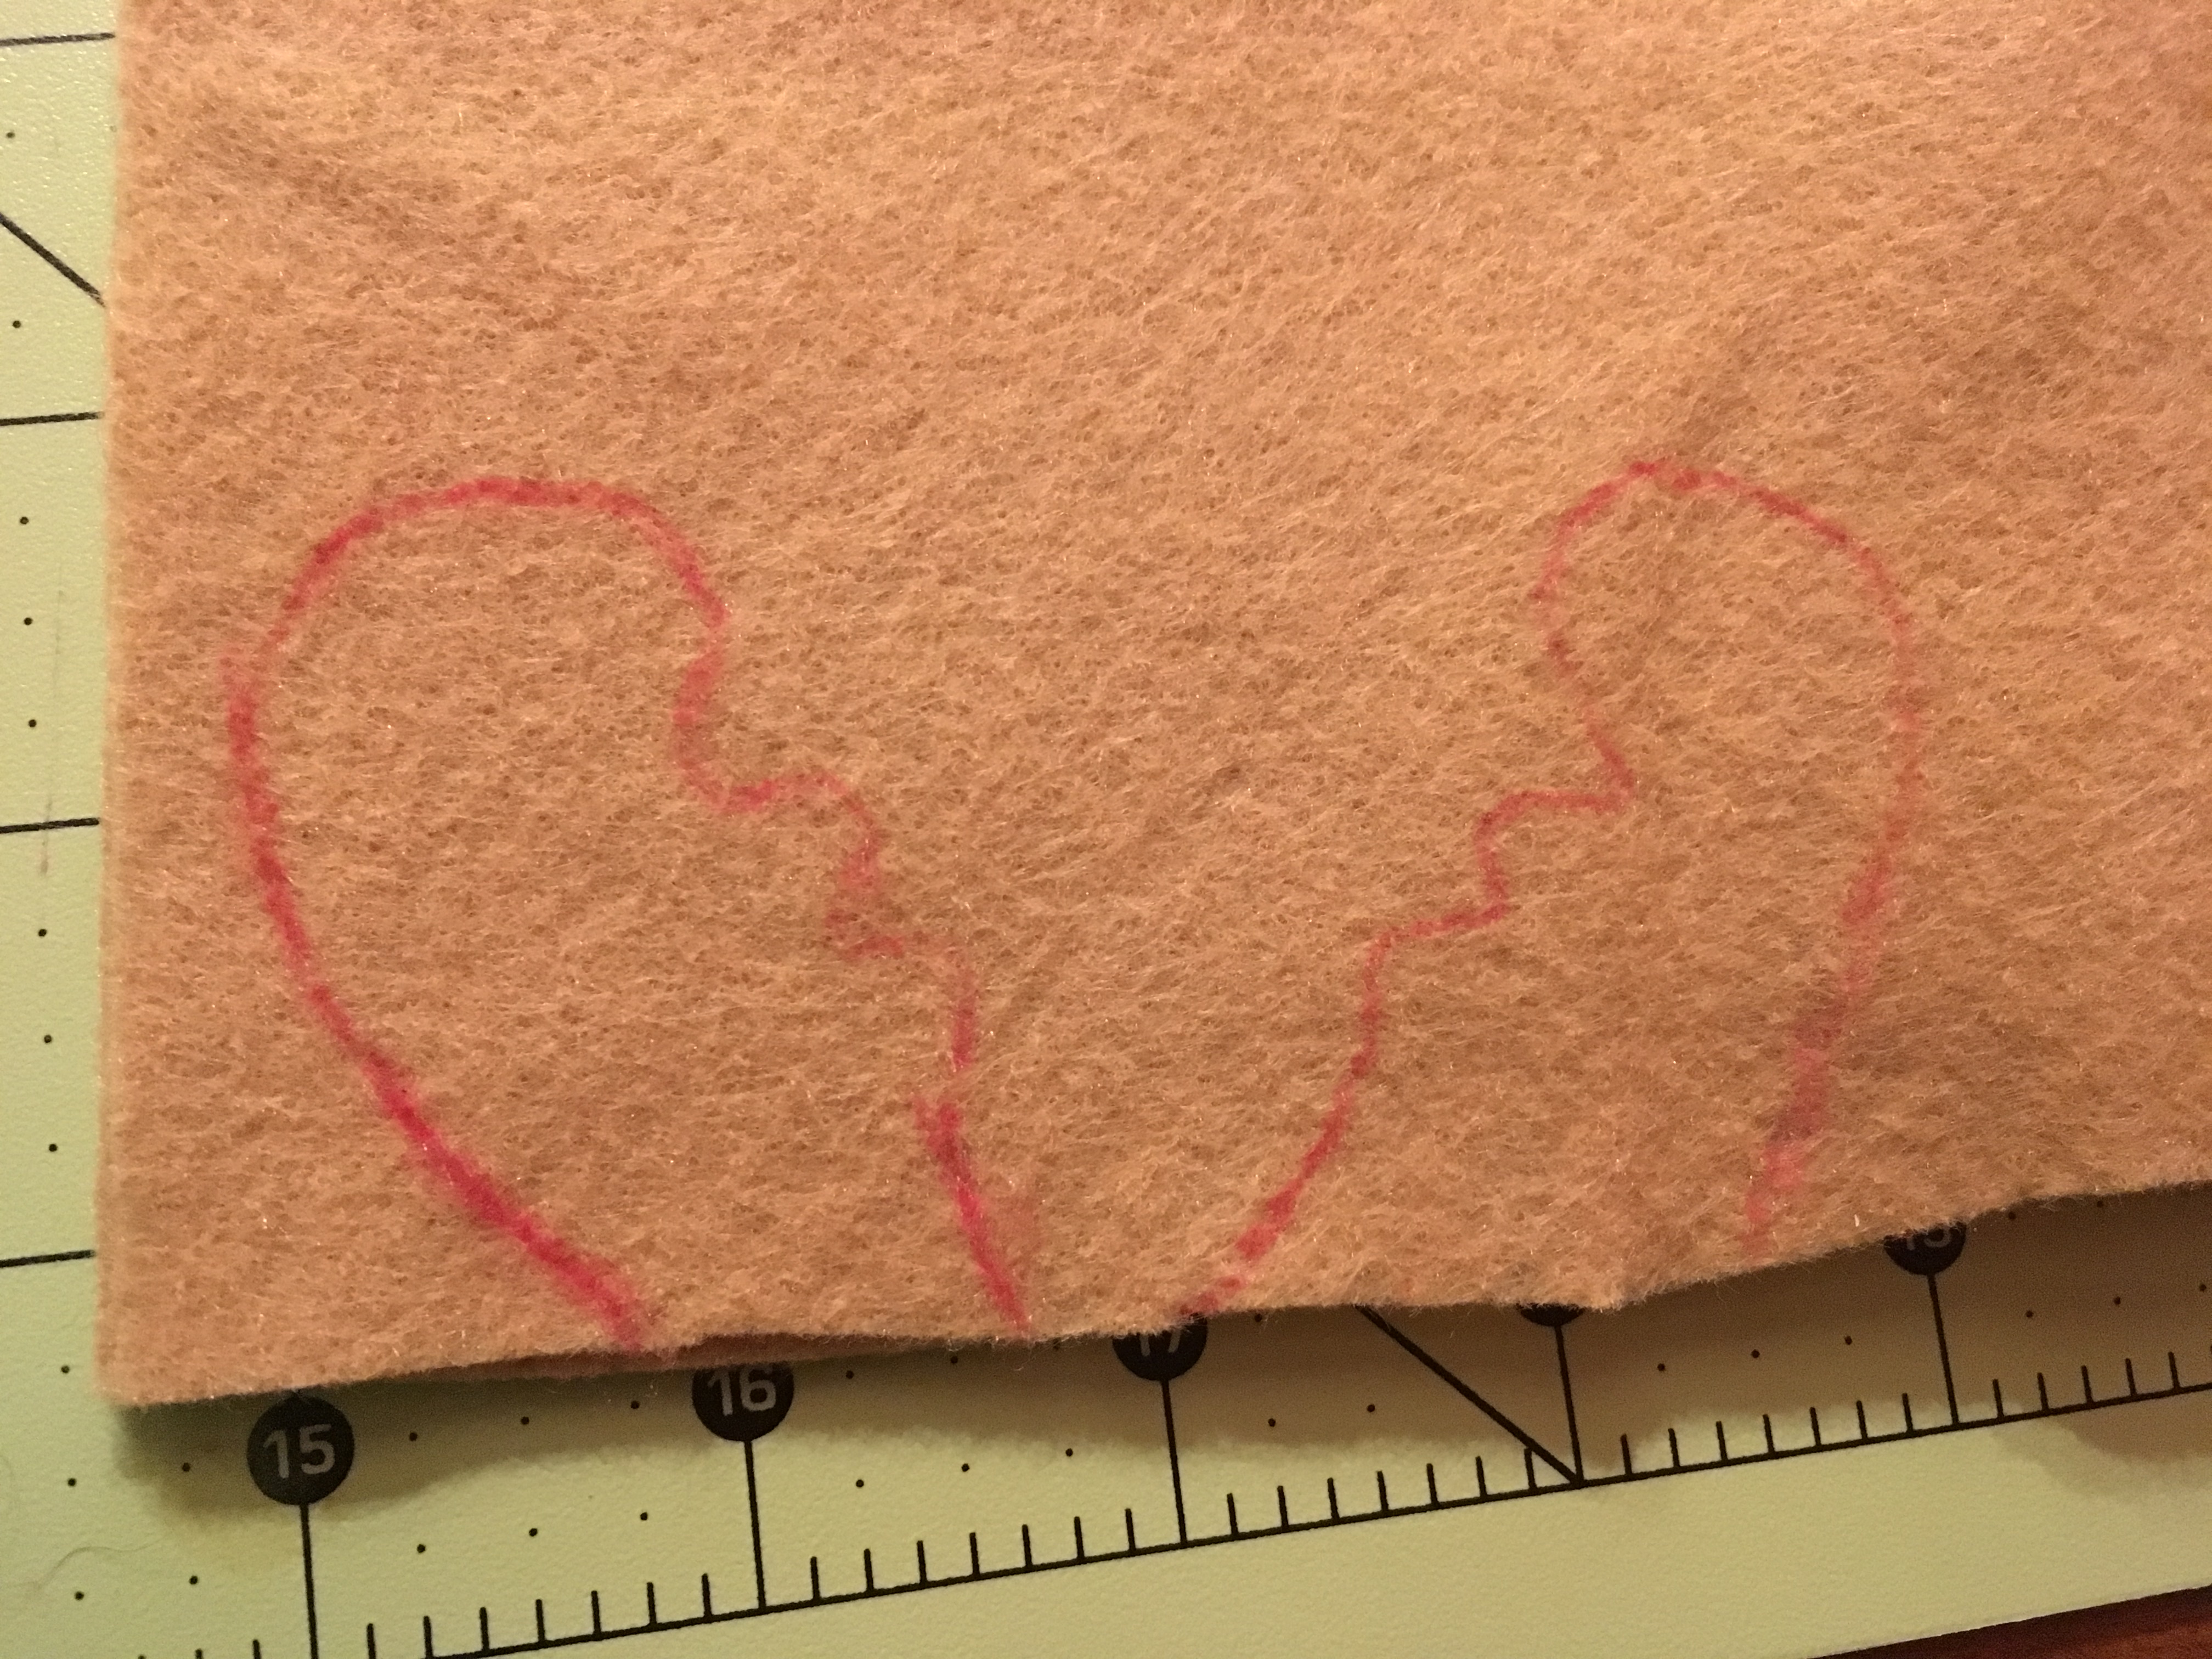
2. Trace the top of your childs shoe to make the front of the slipper. Cut four of these pieces. Then trace the back and cut 4 of these (add 1 inch to the long length side so you can overlap)
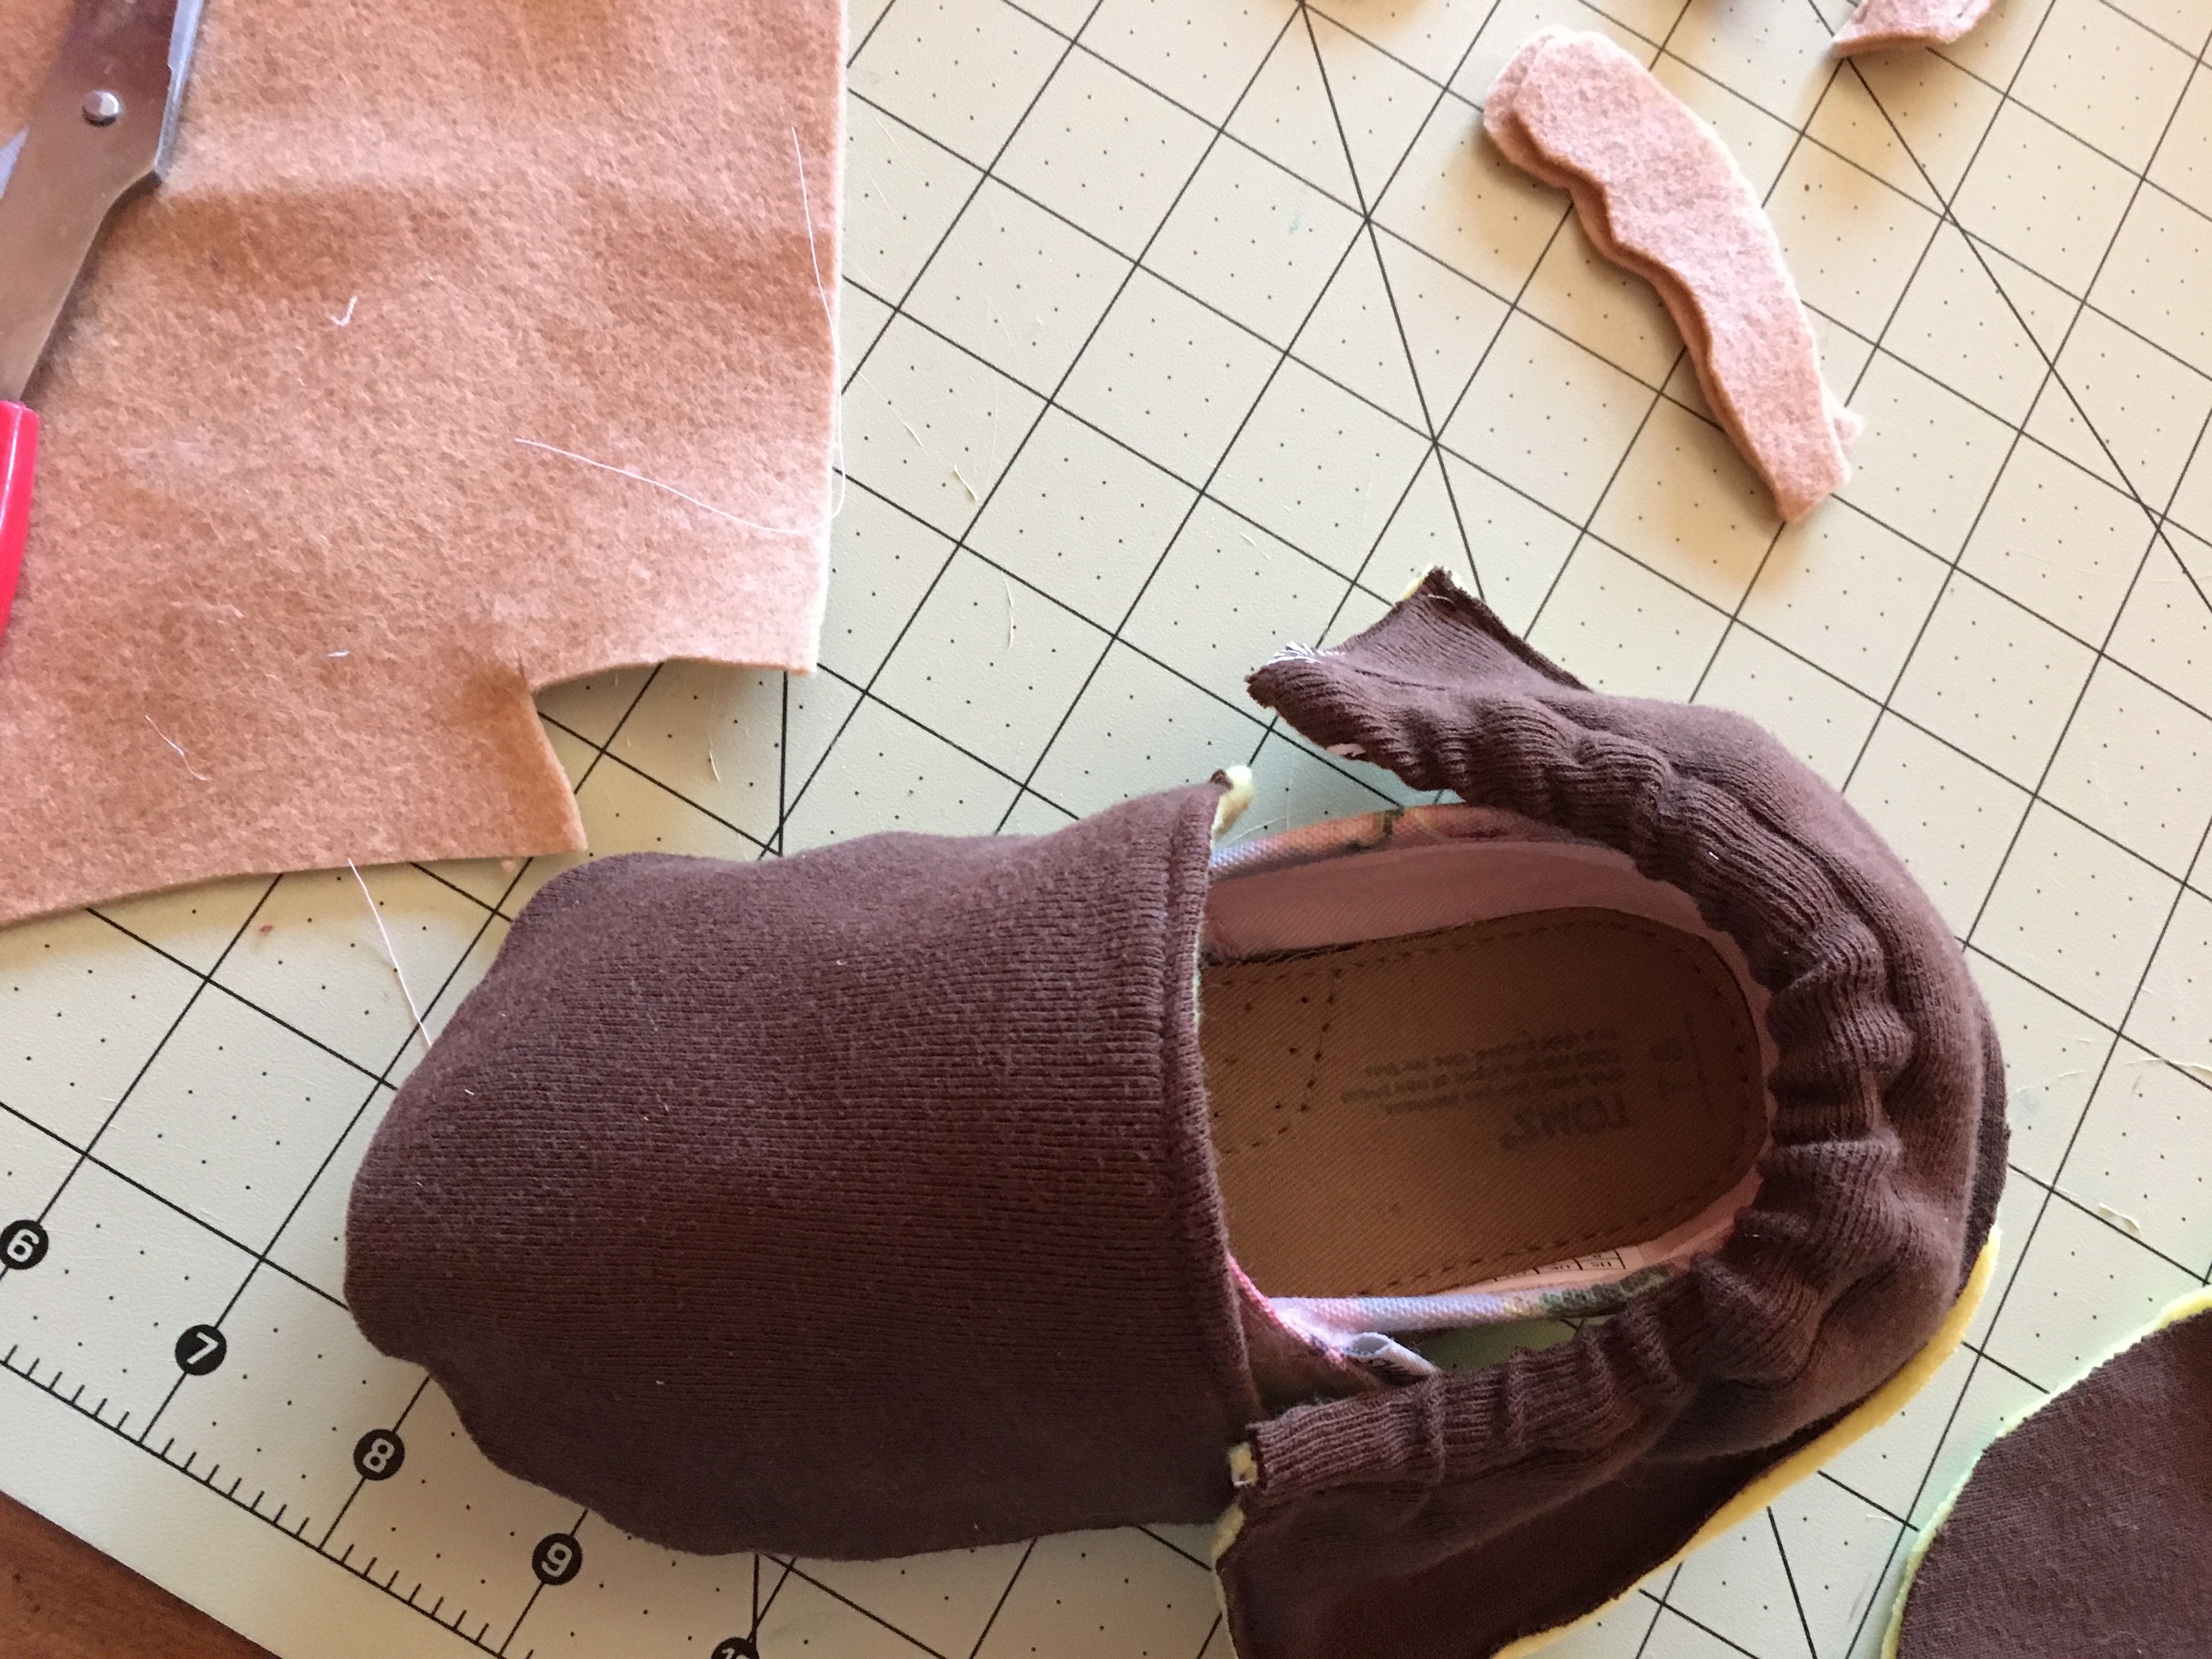
3. Take pattern facing pattern and sew the two front pieces together only on the straight side as shown (do this for both slippers).
4. Trim excess and turn right side out, iron right side out and sew across the top you ant on outside (this makes it look nicer.
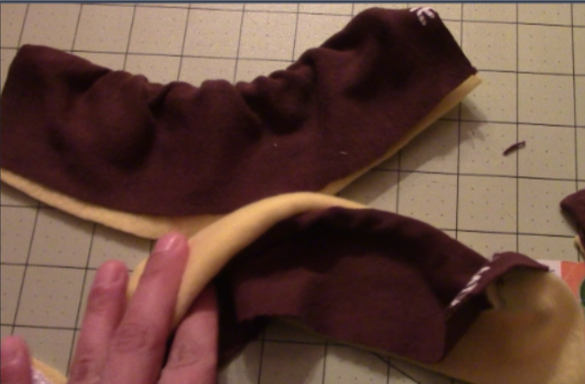
5. Take pattern facing pattern for both back pieces and sew across one long side for both slippers.
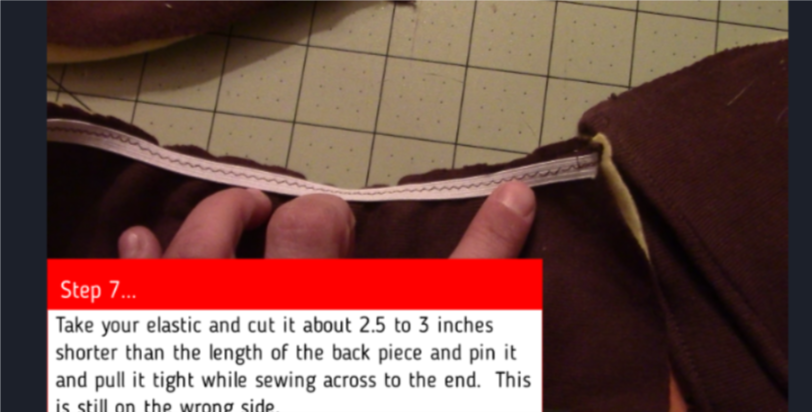
6. Take your elastic and cut it about 2.5 to 3 inches shorter than the length of the back piece and pin it and pull it tight while sewing across to the end. This is still on the wrong side.
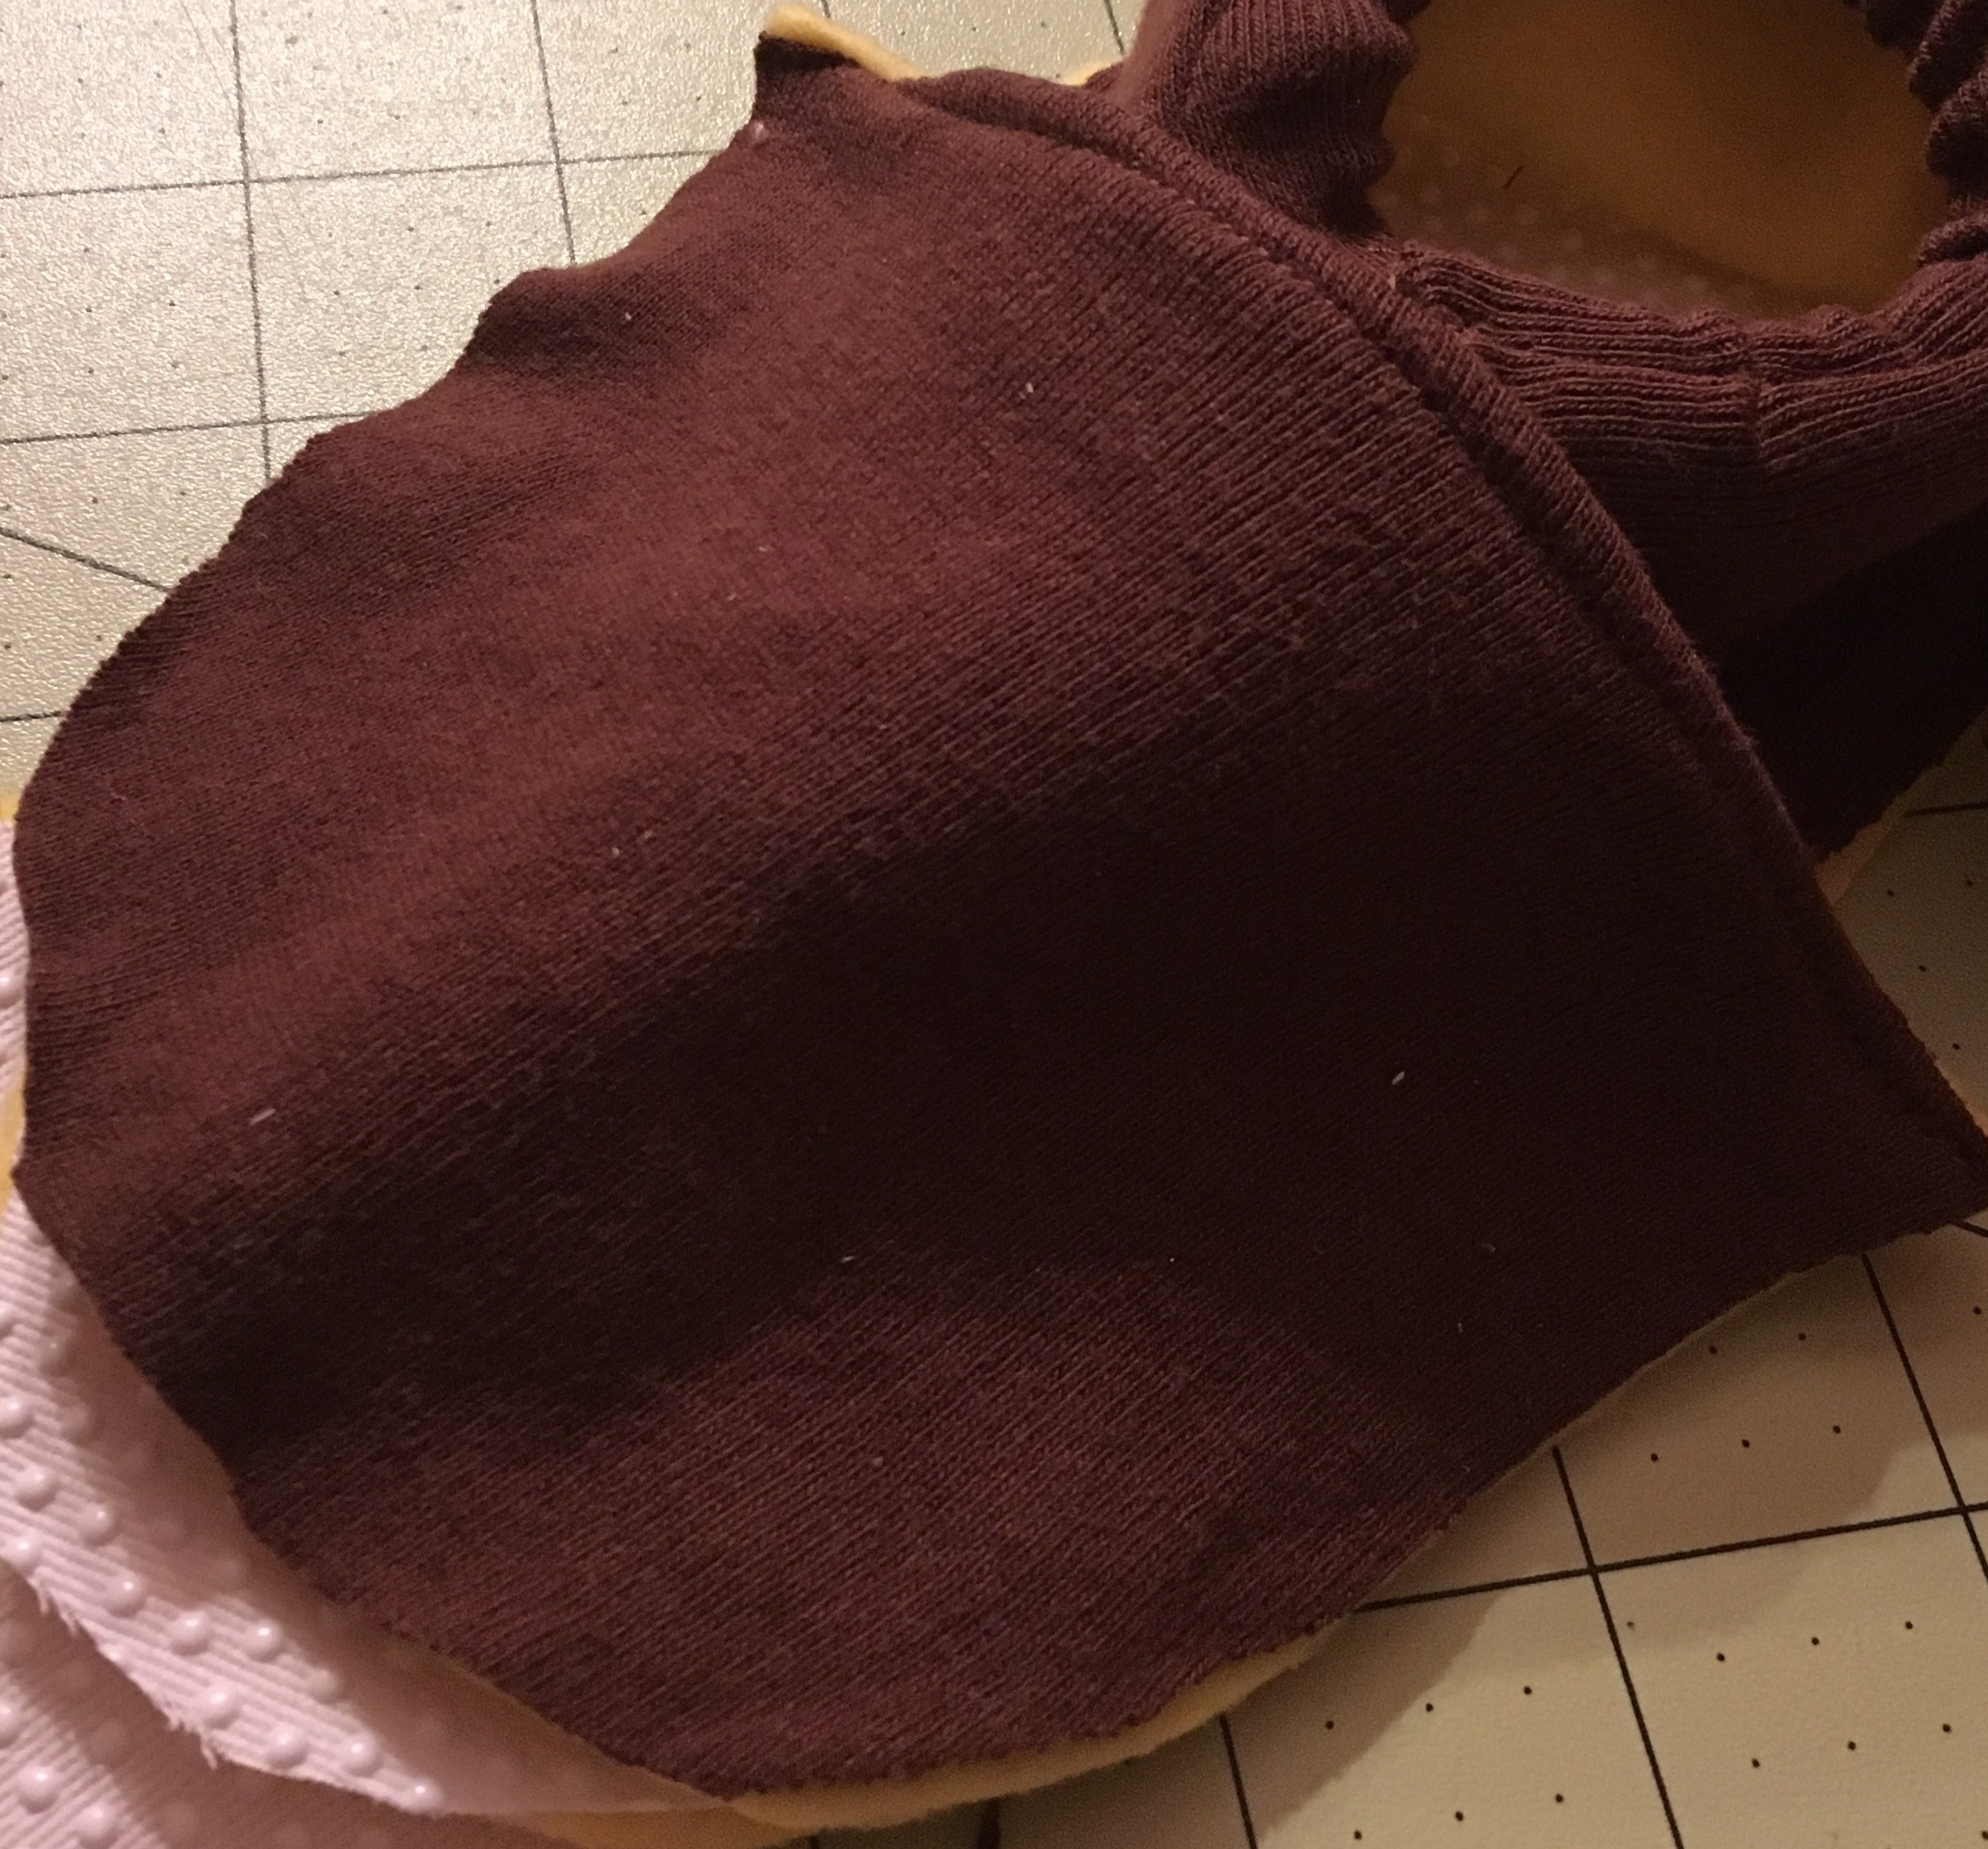
7. Flip the fabric over the elastic with right side out and iron and then sew right below the elastic and down the sides
8. Freehanded antlers by looking at a picture of antlers. cut 4 sew around except bottom and stuff it.
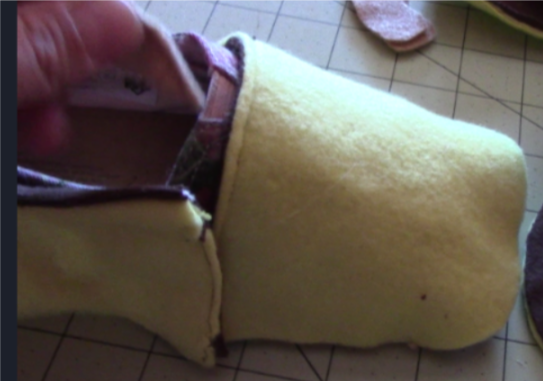
9. Check sizing and put front and back piece pinned together with pattern facing down (right now you should only see (the side that is up) what will be on the inside when you are finished done).
10. After pinning the front to the back and the antlers in between the front and back piece, sew across front to attach front and back piece
This is what it should look like now.
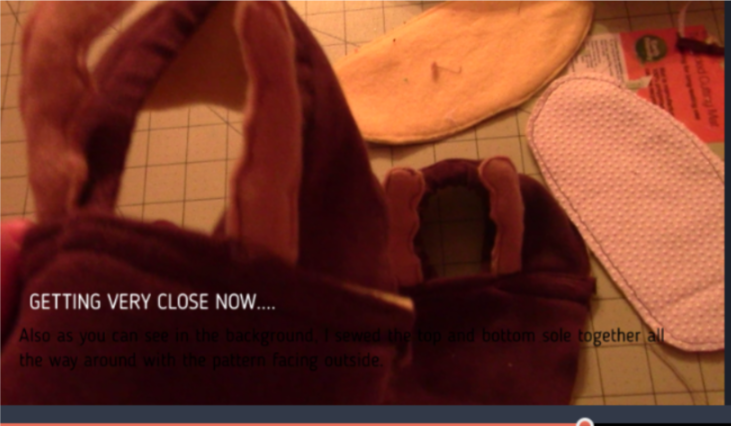
11. Line up the sole two pieces with the patterns on the outside (not the usual, but it doesn’t matter since its on the bottom) You can see it in the back there with the nonskid on top.
12. Line up the sole with the top piece (nonstick sole facing upwards to the reindeer face) by finding the middle of the front and back (you can fold to find this). Then sew all the way around. And turn right side out and WAH-LA!!
I sewed on the red cotton ball nose and hot glue gunned the eyes on. If you have a little one then please don’t use googely eyes since they might try and eat them!
Don’t forget to check out our facebook site and subscribe to our youtube videos! ENJOY! MERRY CHRISTMAS!
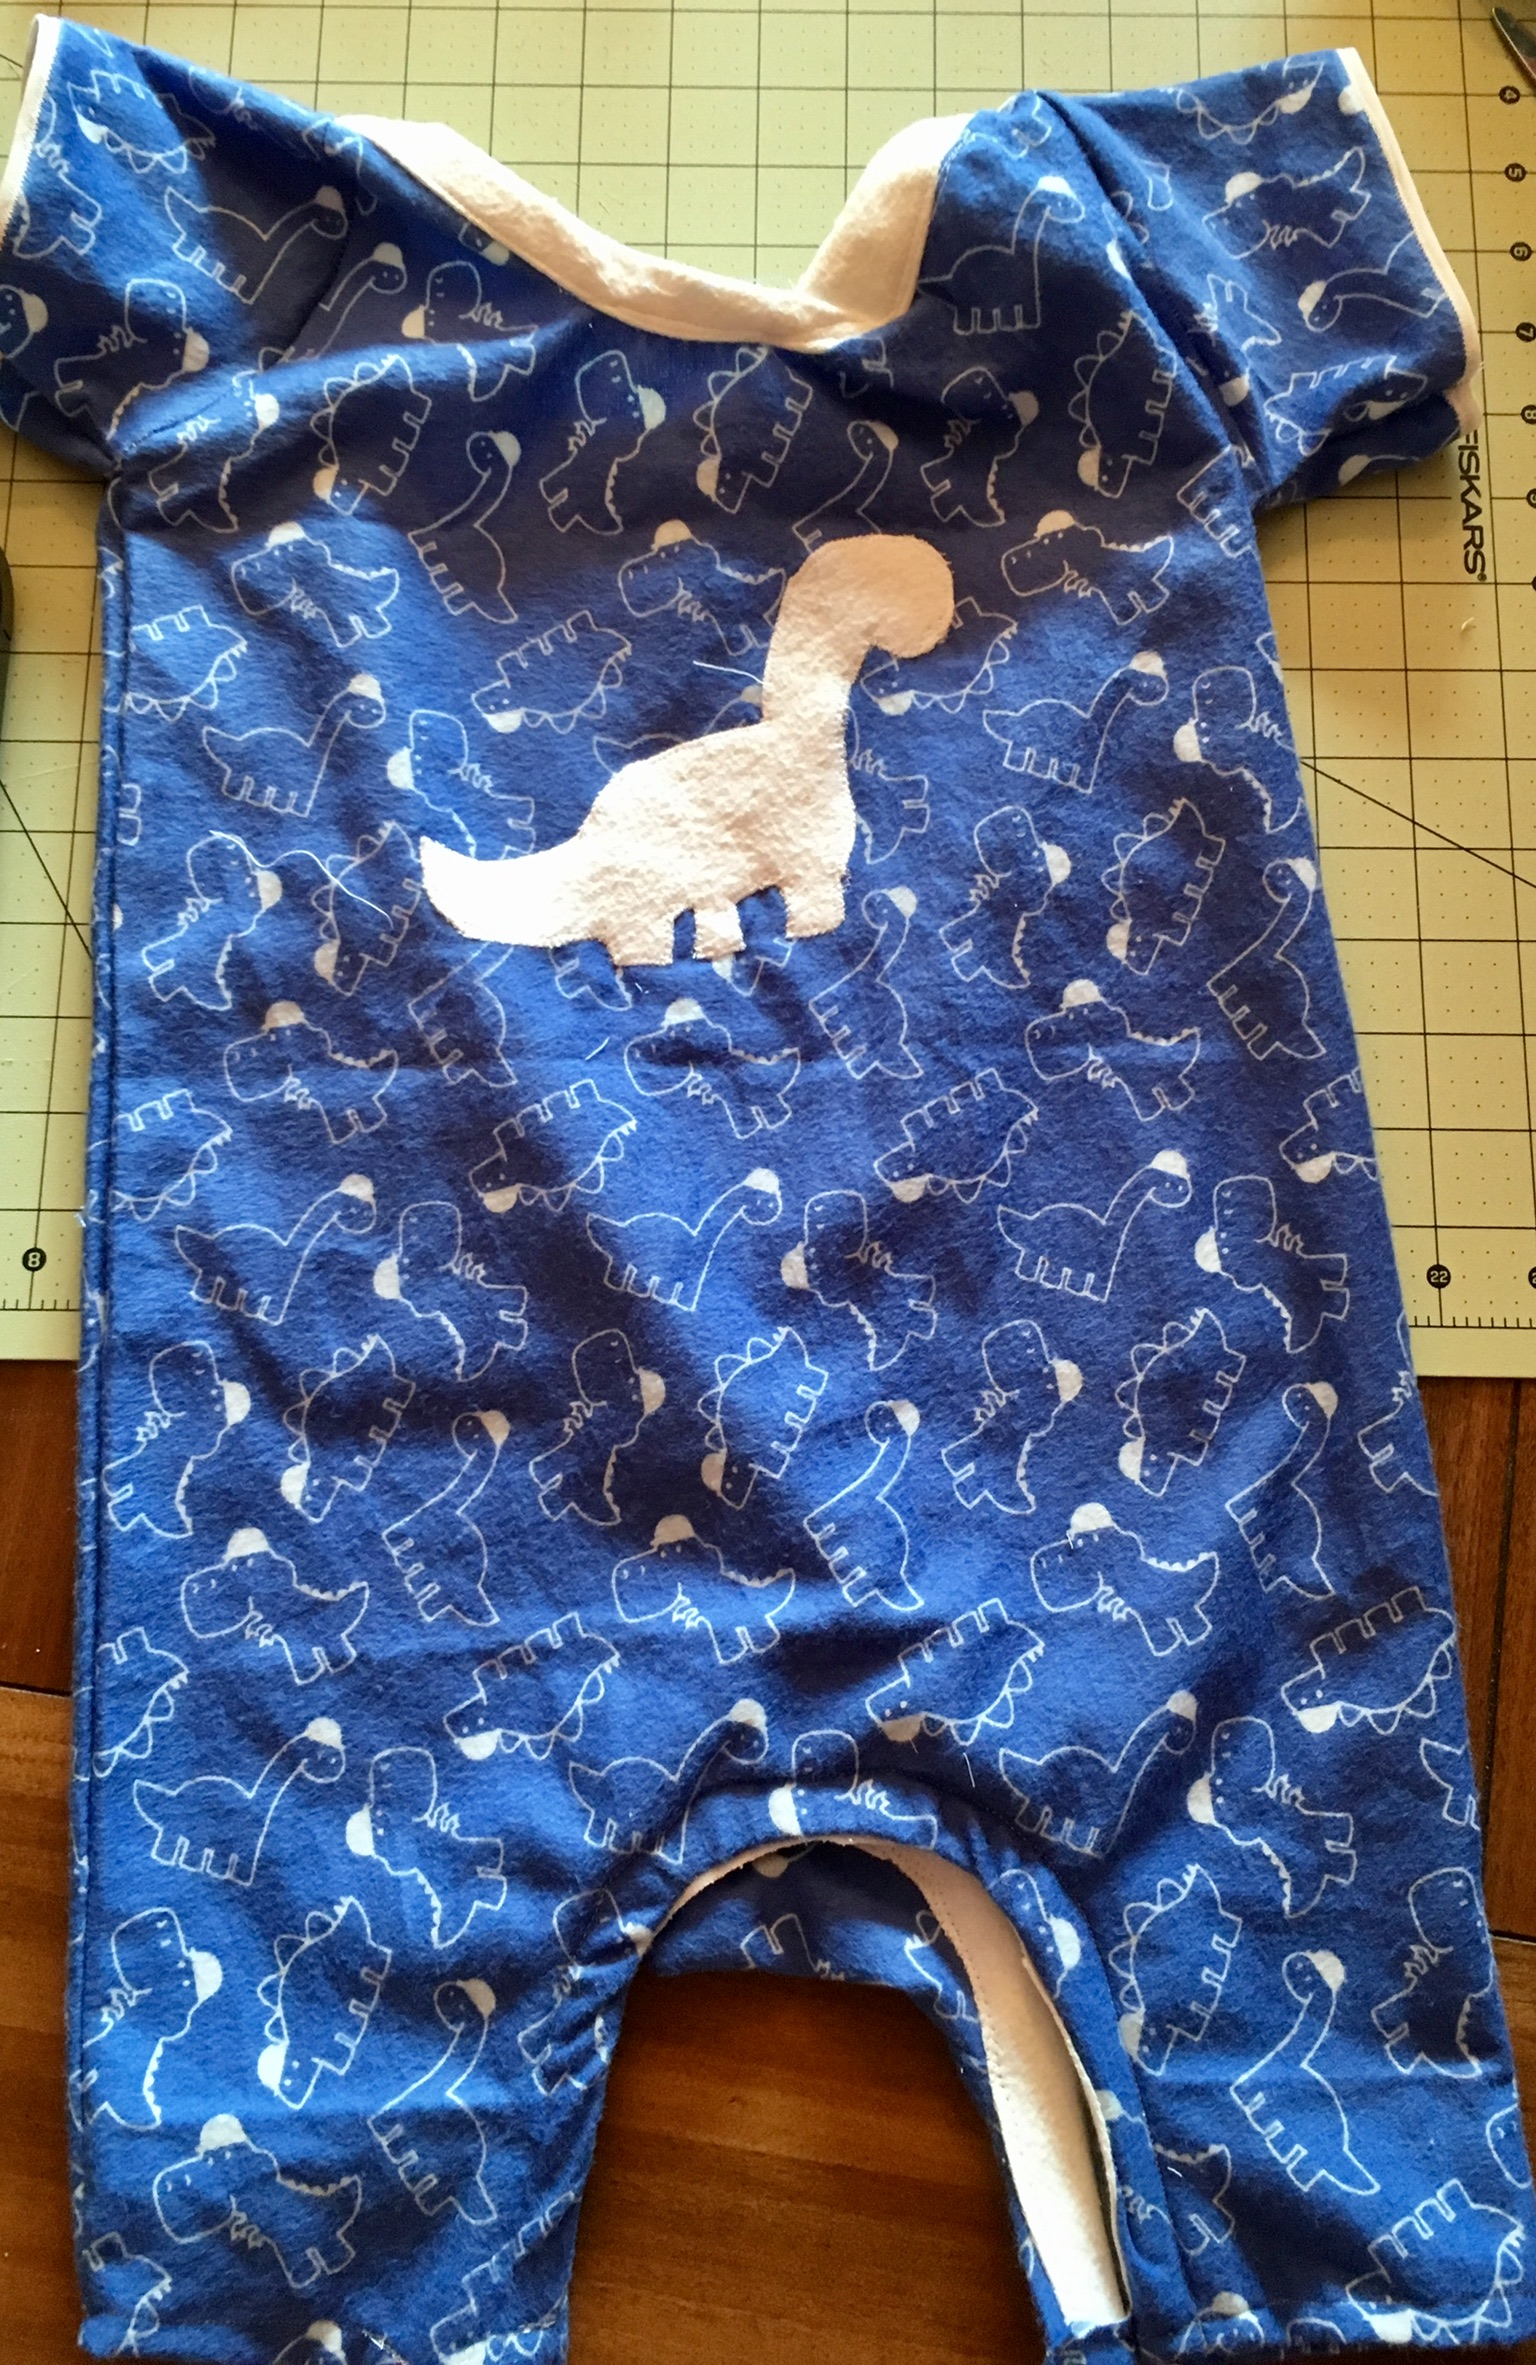
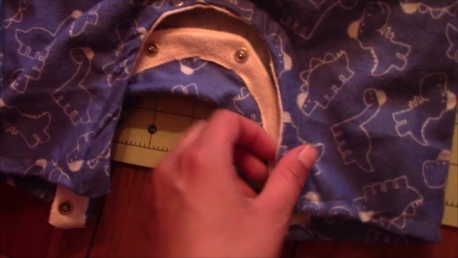
I decided it was time for the classic romper tutorial to come out. I decided to make my first one with a free pattern of dinosaurs for my little cute nephew for his first birthday! Now the size is 2-3t since he is not so little. But you can easily adjust the pattern to your little ones size, just size it up with one of your little one (or big ones) outfit and adjust! Easy Peazy!
Here are the parts of the free pattern..this is a 2-3t however just hold up a onesie or romper to the pattern and adjust for smaller or larger!
Also see the photo with the pieces cut out or the tutorial to see how they go together if you can’t tell!
Here is the written one besides what is written on the tutorial:
What you need:
Fabric choice 1-2 yards depending on size. I used flannel fabric
If you want an alternate color/fabric for for neckline and bottom (a stretcher fabric is best)
Snaps/buttons/or velcro depending on what you want to use
Steps:
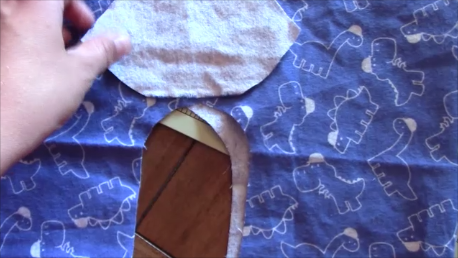
Cut out fabric pieces as written out on the pieces.
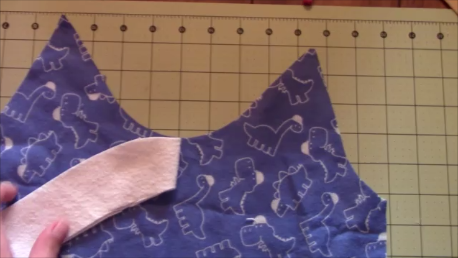
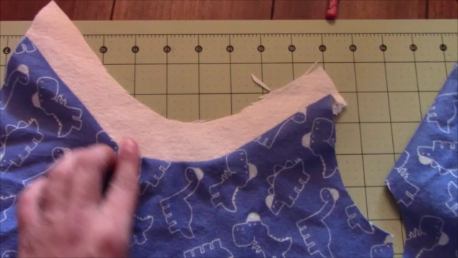
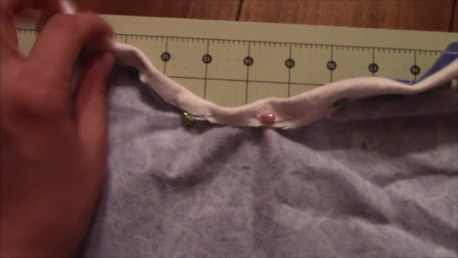
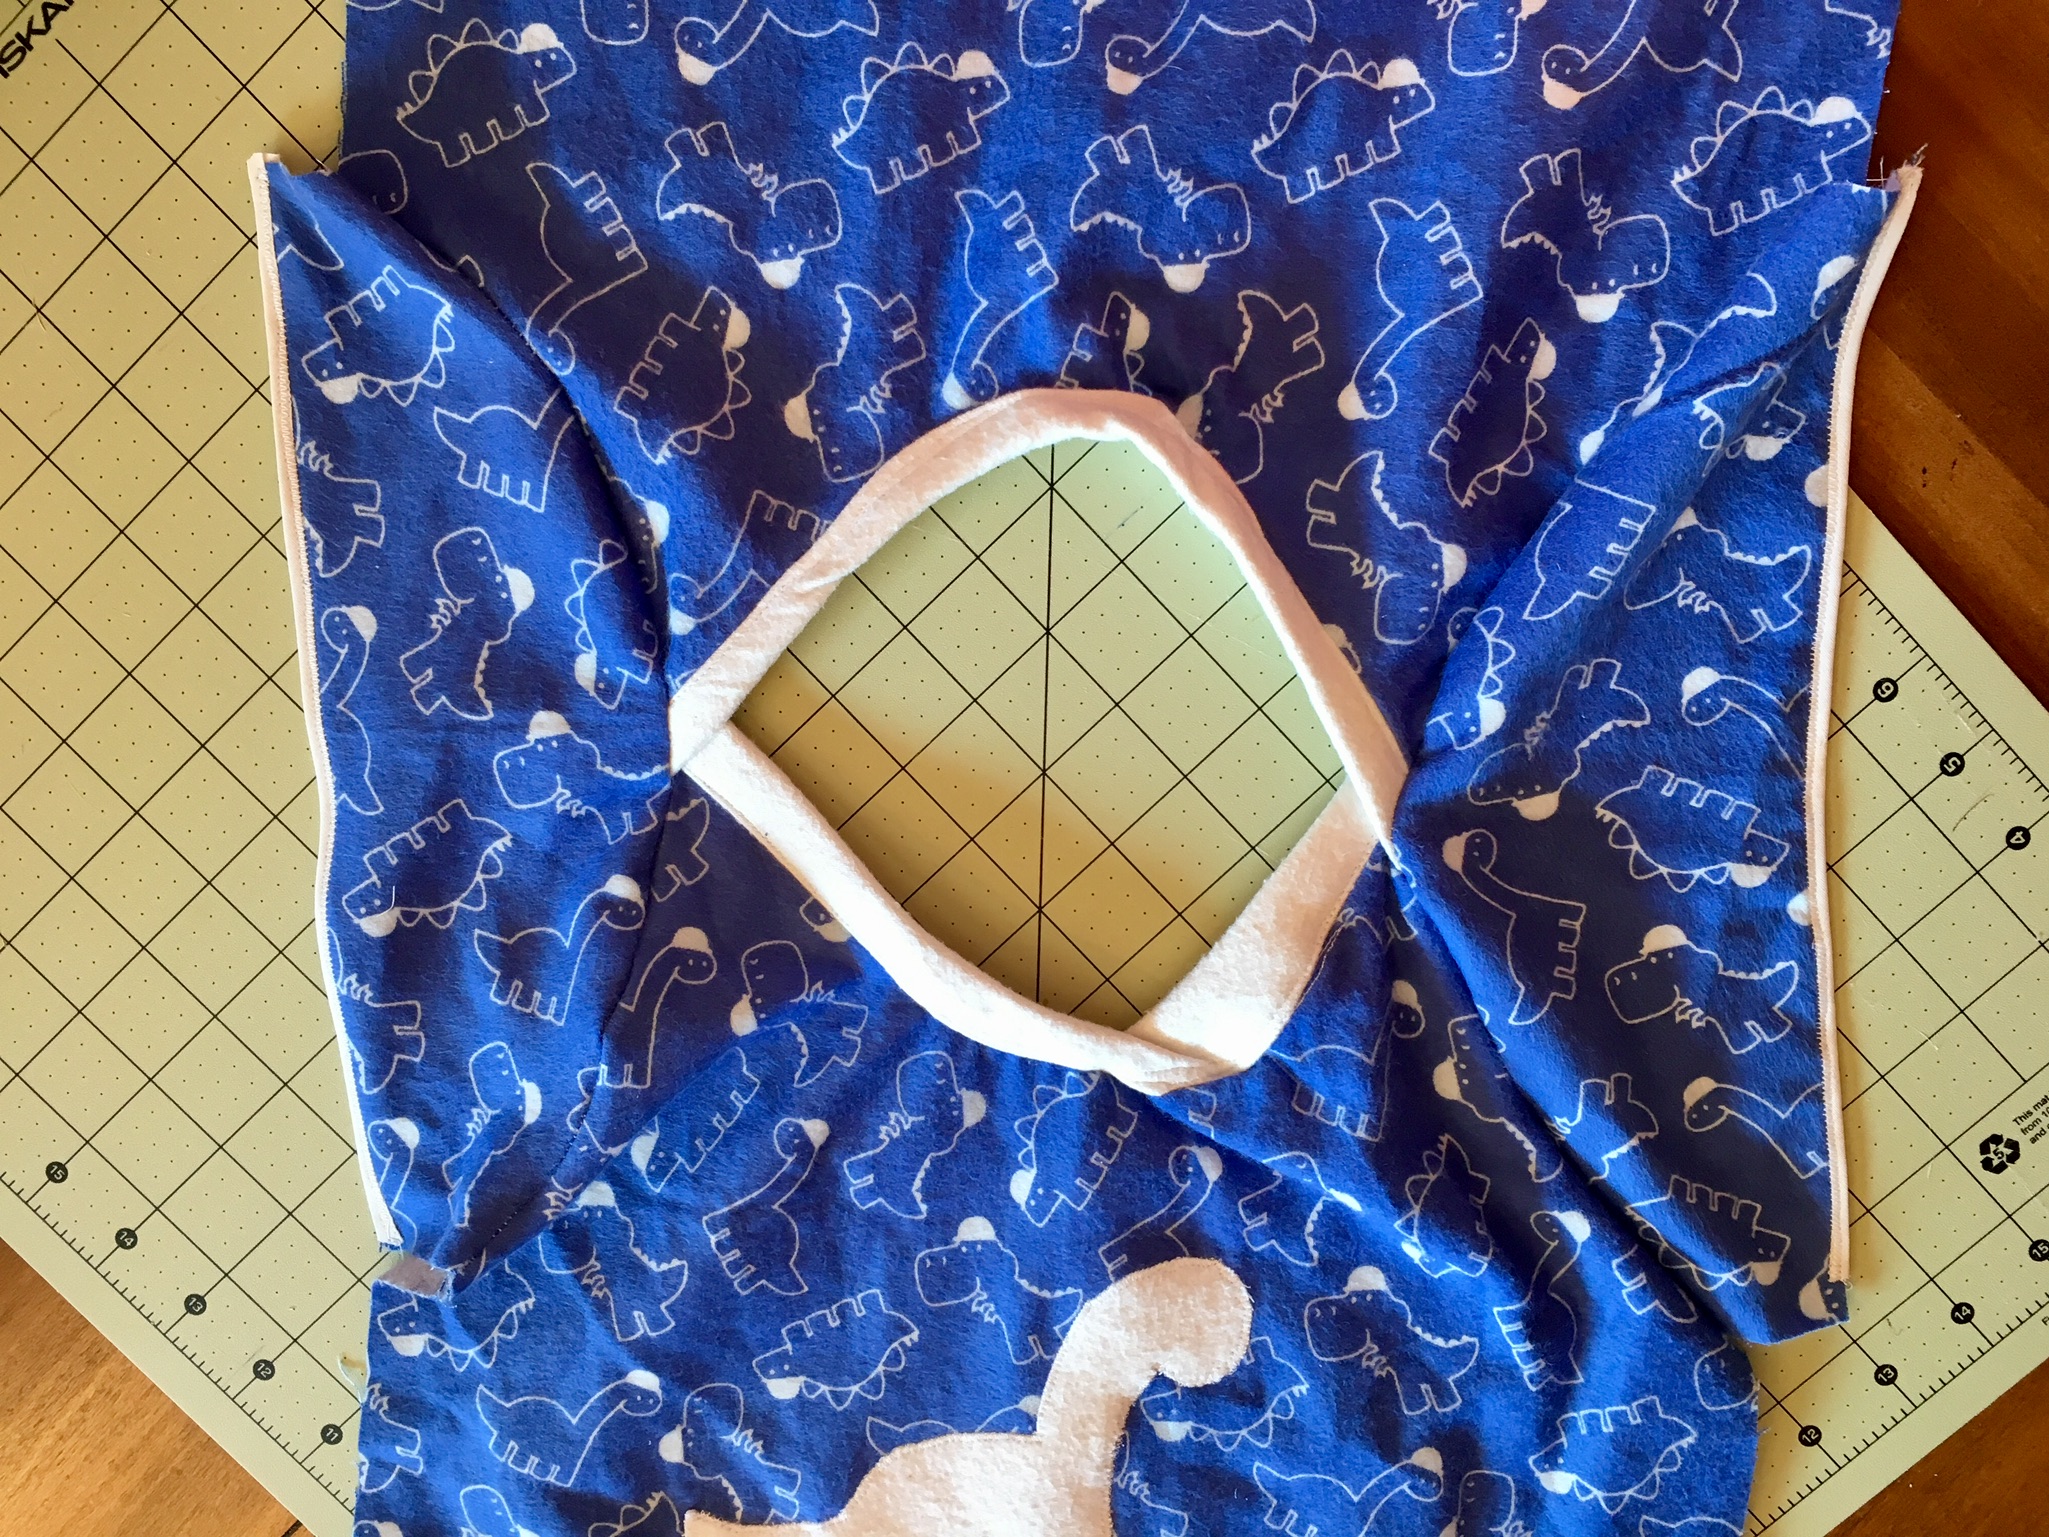
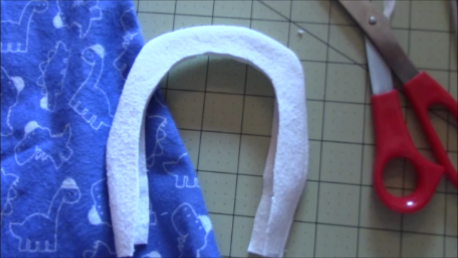
Take one main body piece and find the center by folding in half and one neckline piece (and fold it in half and mark the middle) and place pattern facing
pattern and stretch and sew. Look at the pictures below to see how you need to stretch it and sew (it is not easy if you are a beginner but it just takes practice! Also, if the neckline is a stretchy fabric it is much easier)
Line center to center
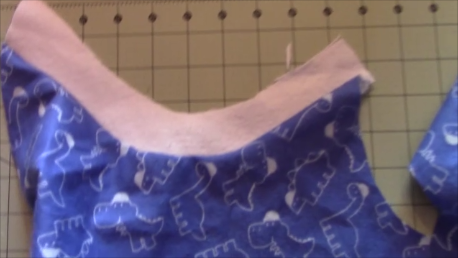
This is the end result, do for both main pieces
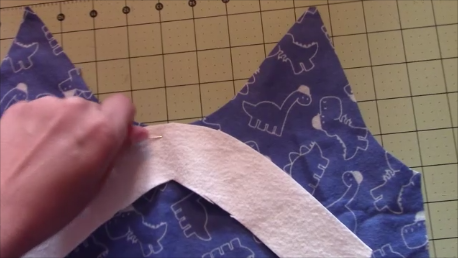
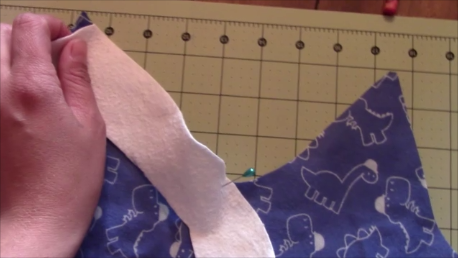
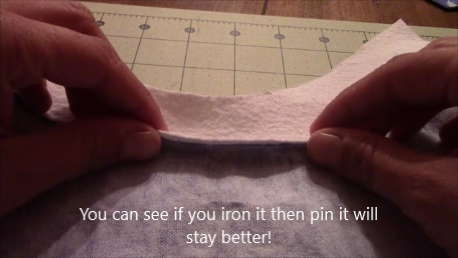
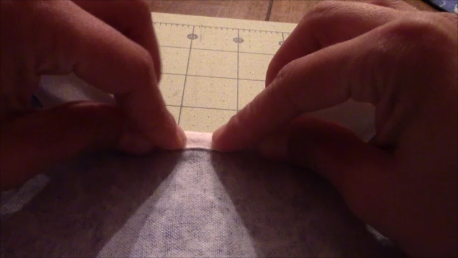
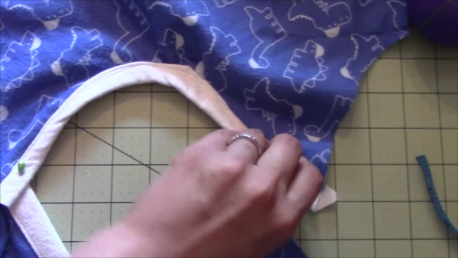
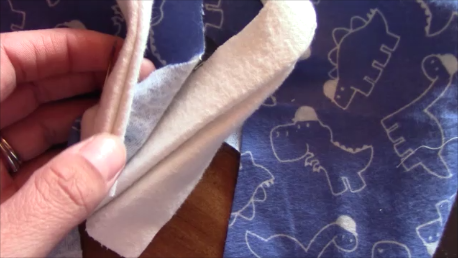
Turn to the backside of the main body piece and fold up and iron the seam line as shown below. Then fold the top down and iron to make it easier to sew and pin.
Turn it right side and either change pins to the front or be careful and take pins out as you sew bottom of collar
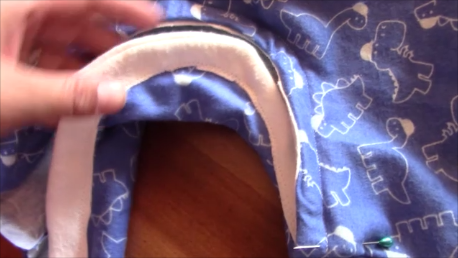
Sew both necklines like this then we will create an envelope neckline.
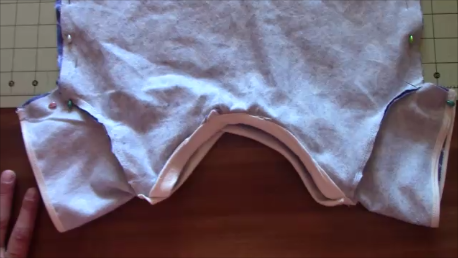
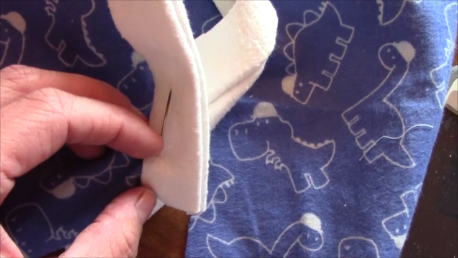
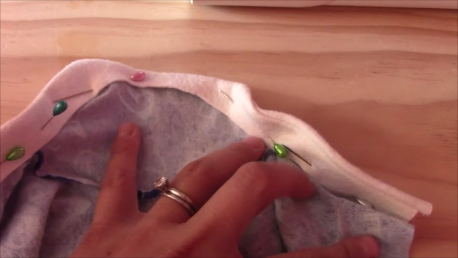
You are going to line up your front and back body piece with finished necklines and measure from the top of each side 1 to2 in down and this is where the top of one side touches the other side and you pin together (this may not be true if you need a bigger opening or smaller based on head size, adjust opening based on head size). Pin this on both sides
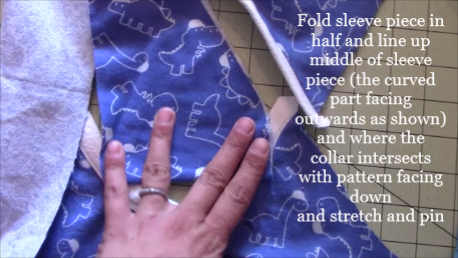
Fold sleeve piece in half and line up middle of sleeve piece (the curved part facing outwards as shown) and where the collar intersects with pattern facing
down and stretch and pin (see pics)
Then sew using a zig zag stitch (which keeps it strong). Do this for both sides and it will look like…
I then added double sided bias tape, for convenience and time saving, to the outside of the sleeve edge.
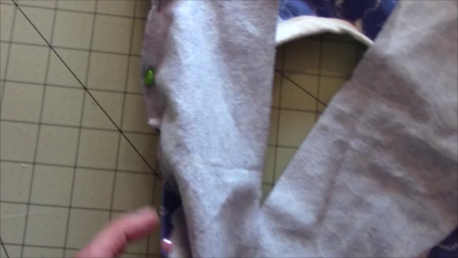
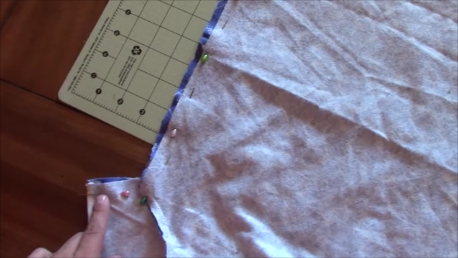
19. Body pieces and sleeve pattern facing pattern, pin around sleeve and down straight to bottom again I used the zig zag stitch. Then I trimmed the sides. Then you can iron it out.
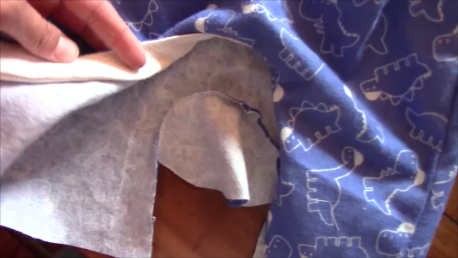
20. Turn your project to the backside and take your football piece and fold in half and line up middle of football with middle of opening pattern facing pattern, pin middle and stretch and pin around then sew. Make sure the front piece is pushed out of the way (you don’t want to sew it shut! Just sew onto the back piece
21. Take two of your leg banding strips and line up pattern facing pattern and sew the outside 1/8th straight stitch and then do this for the other two as well and turn right side out and iron.
22. The binding piece ends up in the inside and it is used for the buttons or snaps (you can alternatively use fusible interface)
23. Next take your one banding piece and line it up with the front bottom with the fold on the inside and then stretch and sew (see video if this is too confusing!) You pin the outside and sew 1/8th zig zag around
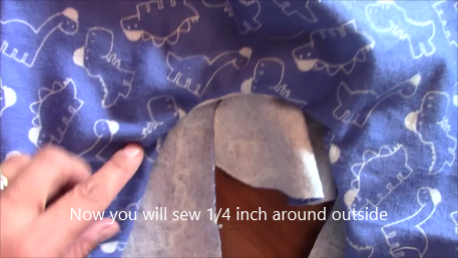
24. Now you will sew 1/4 inch around (the white part as shown will now be in the inside after you do step 23.
25. Next (phew we are getting there- keep going!) is the back banding strip, Same method for the back piece, except you just sew the one time and not the second sew around as in setp 24 because of the flap (you will see what I mean after you do the first sew.
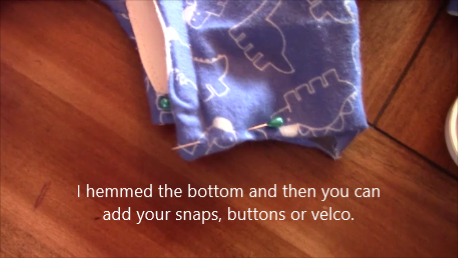
26. I hemmed the bottom leg openings and then did my snap buttons using the hammer method! I used thick material for the banding which I regret (also that it was not stretchy!) I had to use bigger than normal snaps to get it through the fabric!
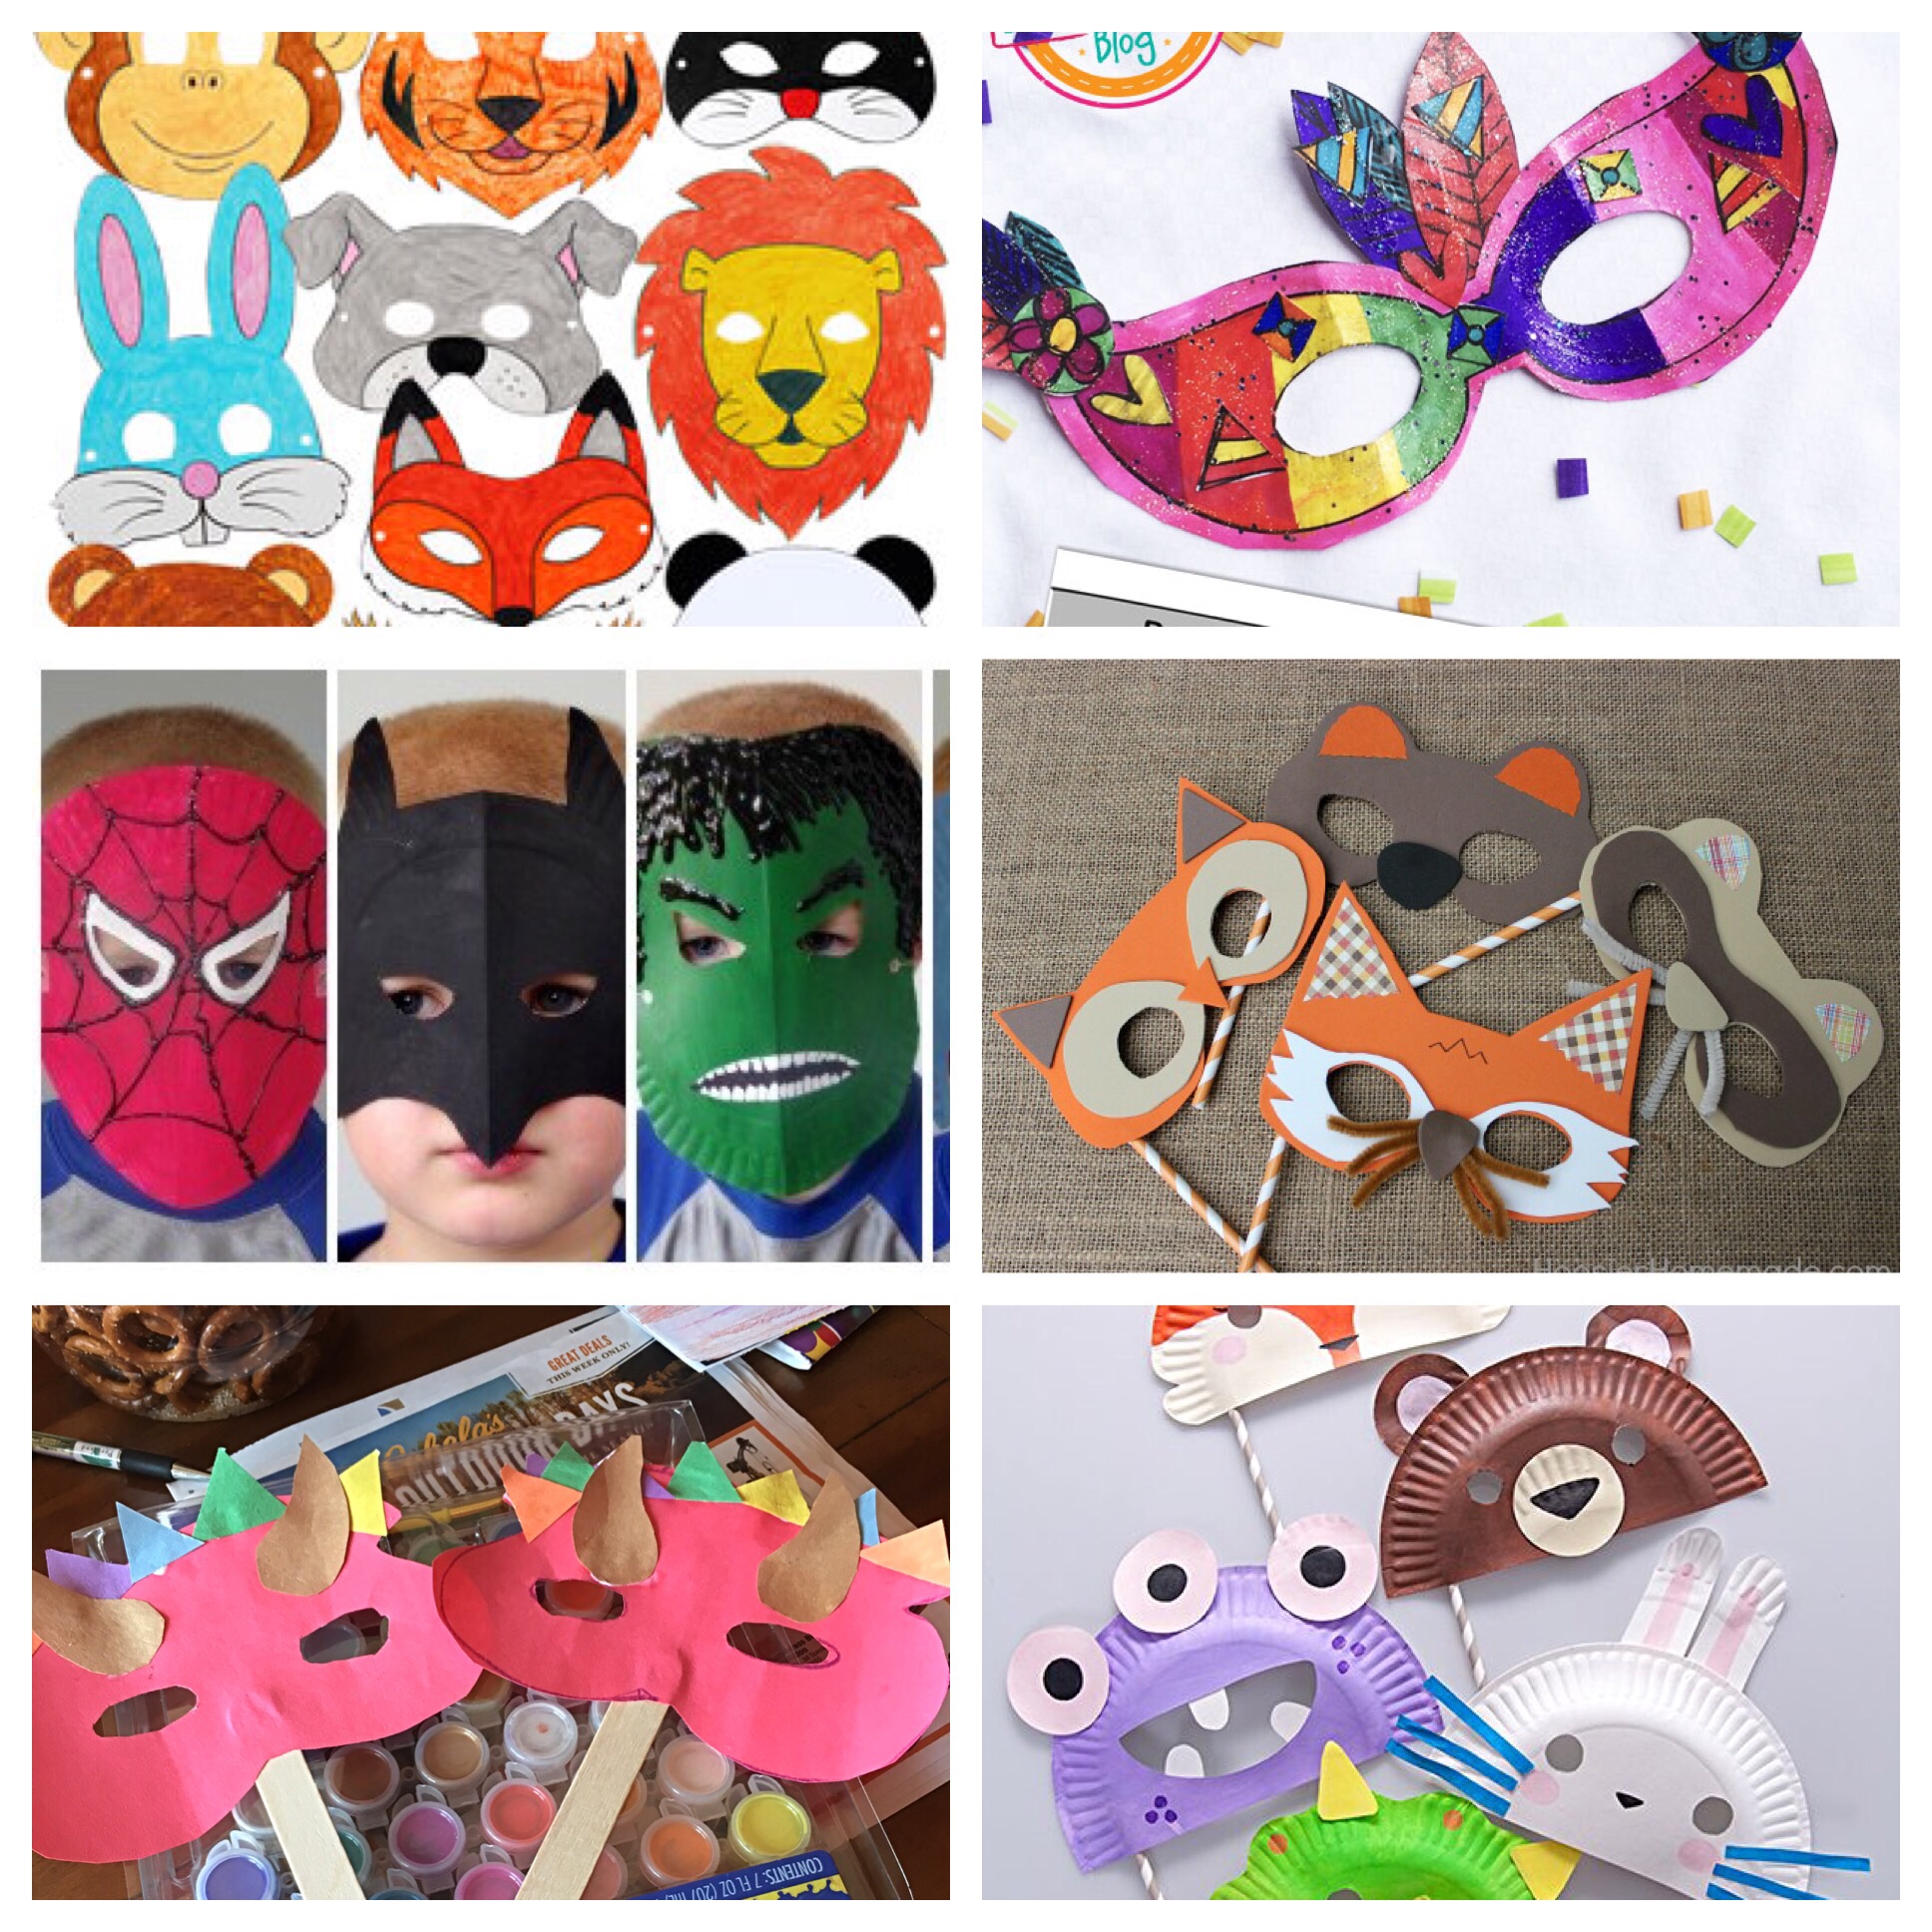
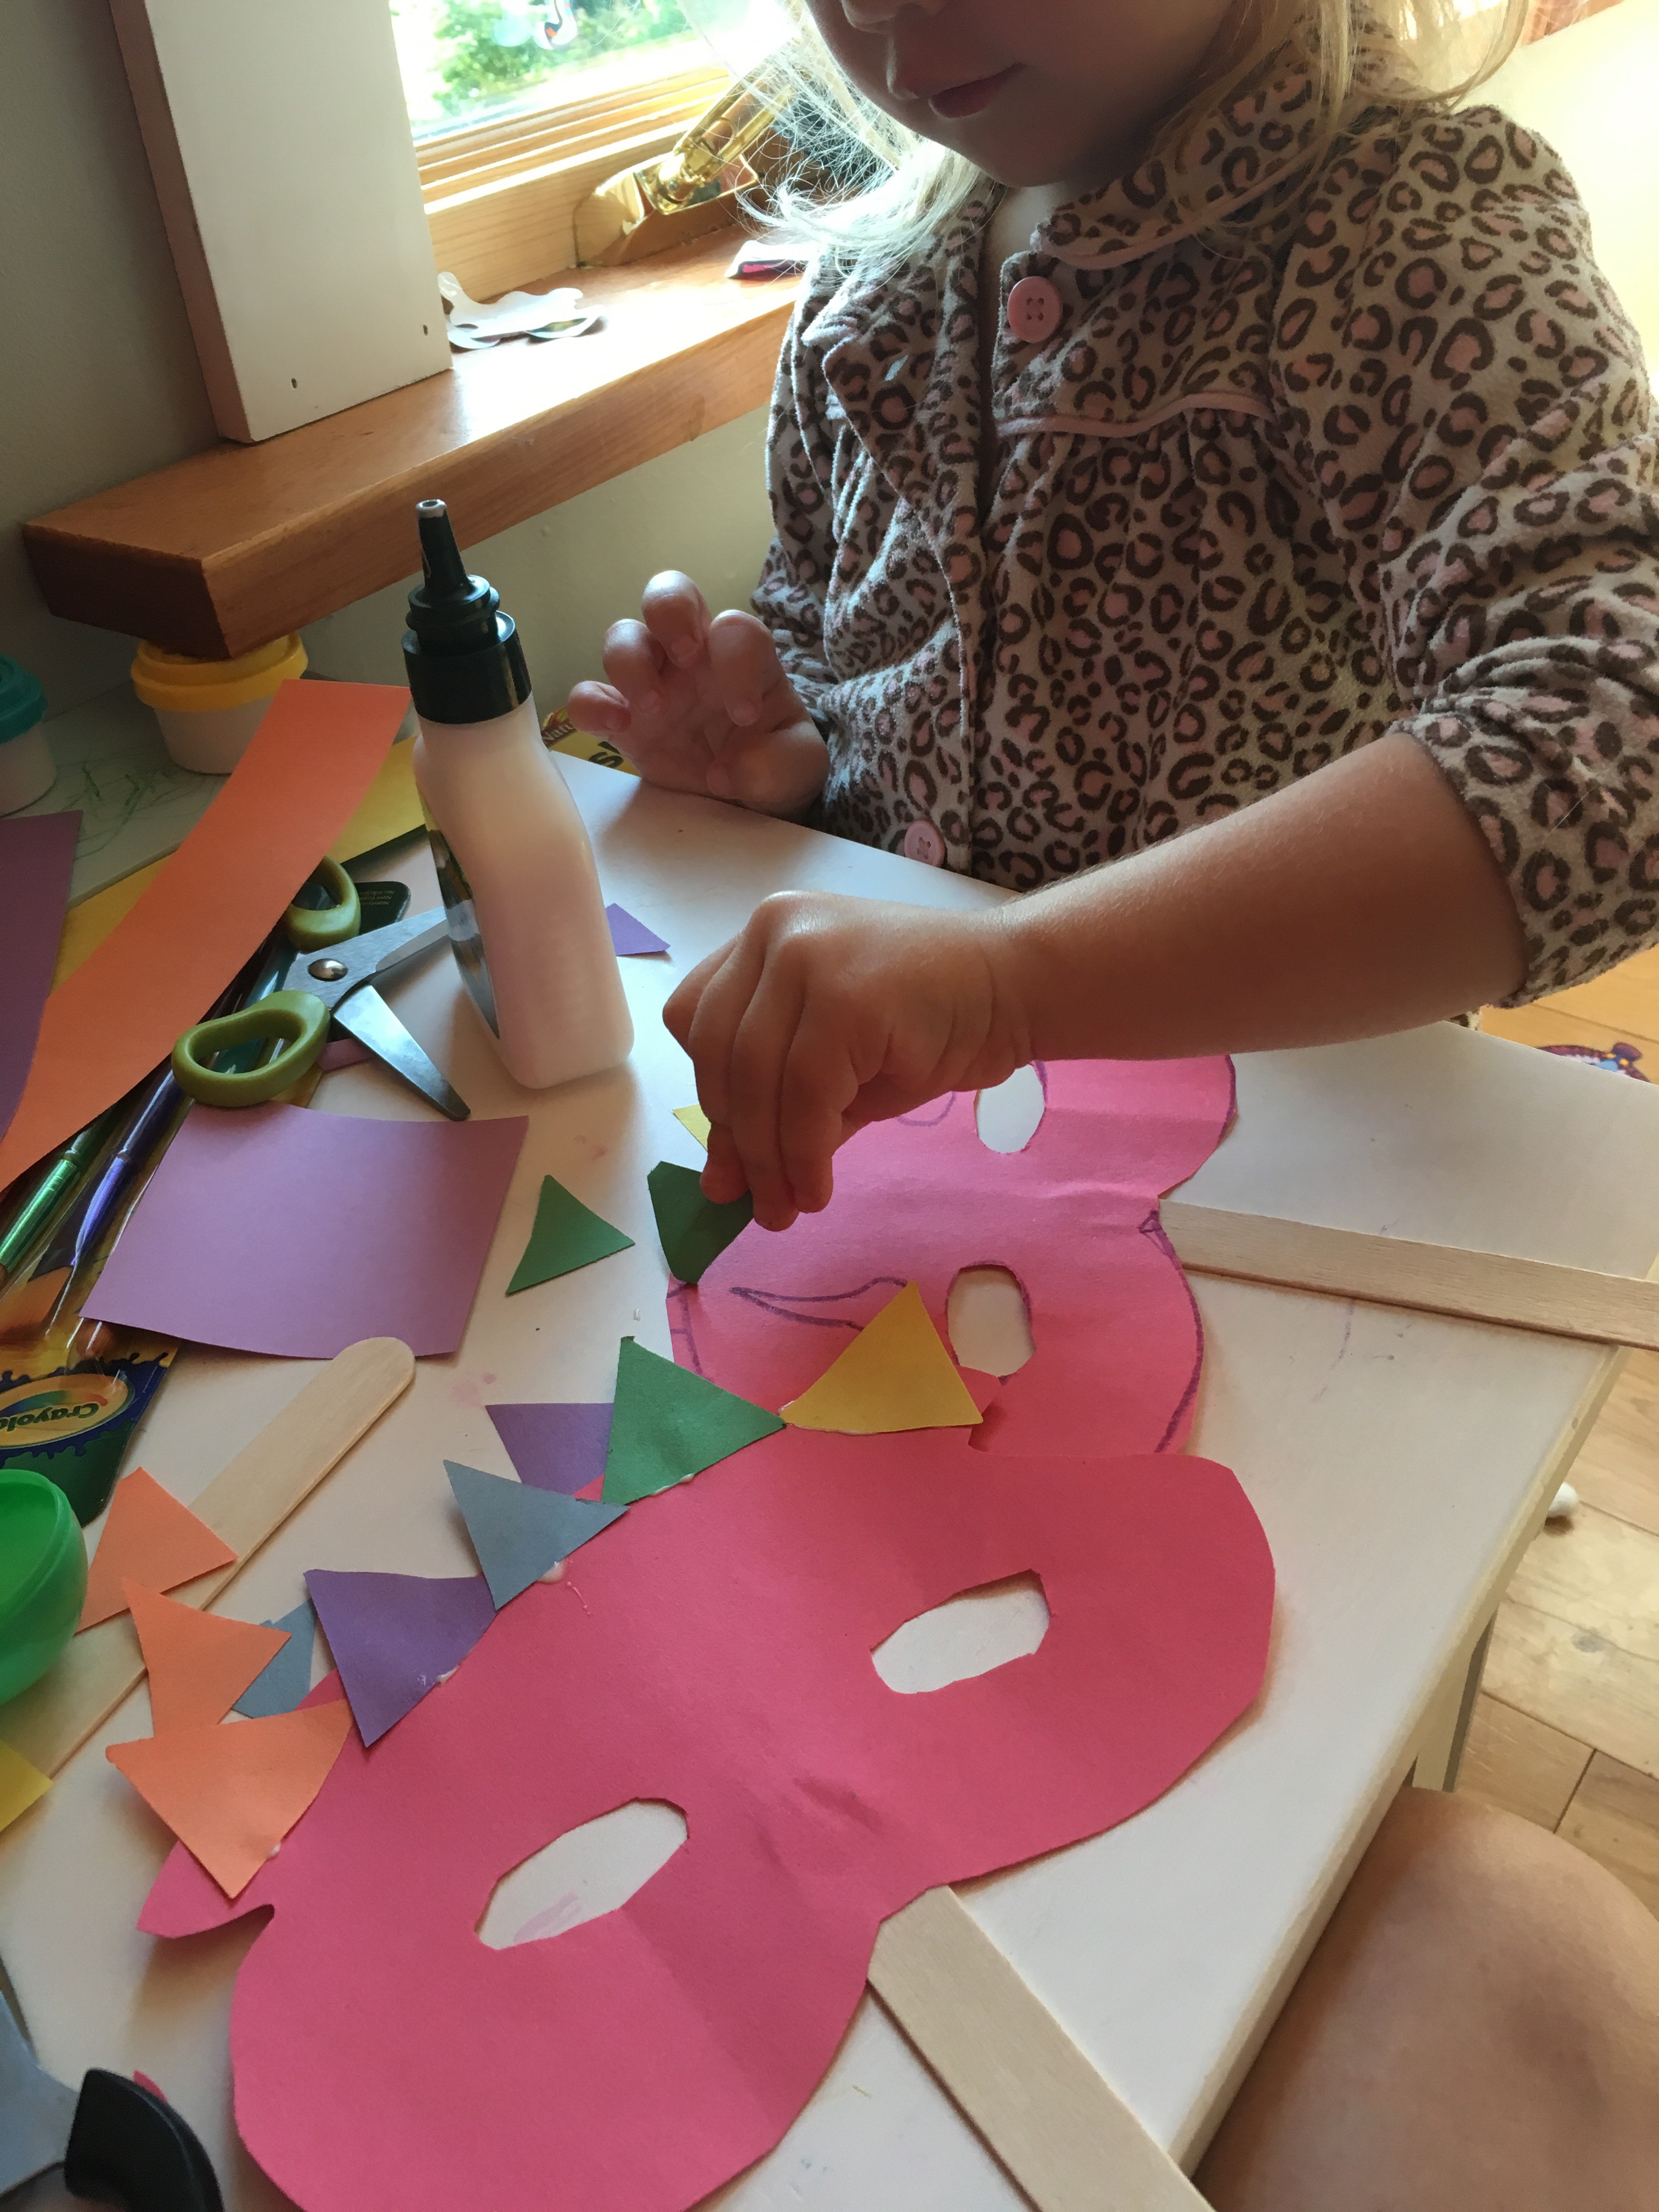
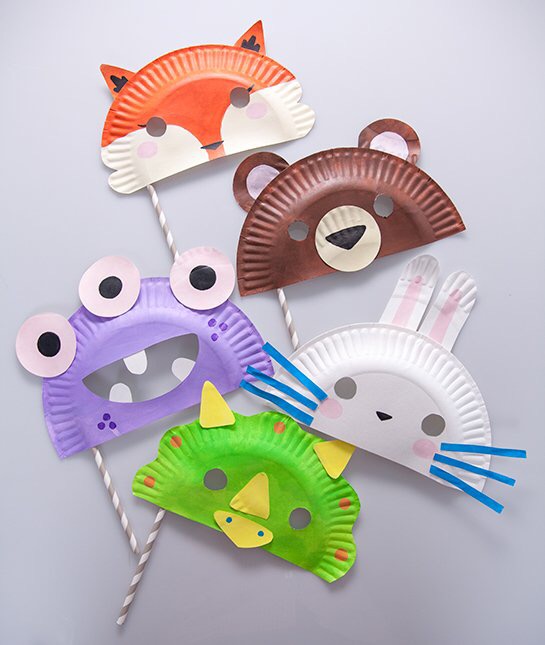
My daughter loves running around in her cat mask saying she’s Cece cat. She also wanted to be Cece dinosaur, cece giraffe, and many other cece animals. So I had a couple extra crafting materials nearby and we created these easy masks! Also, masks are great for parties or as a craft at a party!
There are many ways to make many different masks, the first way is simply with
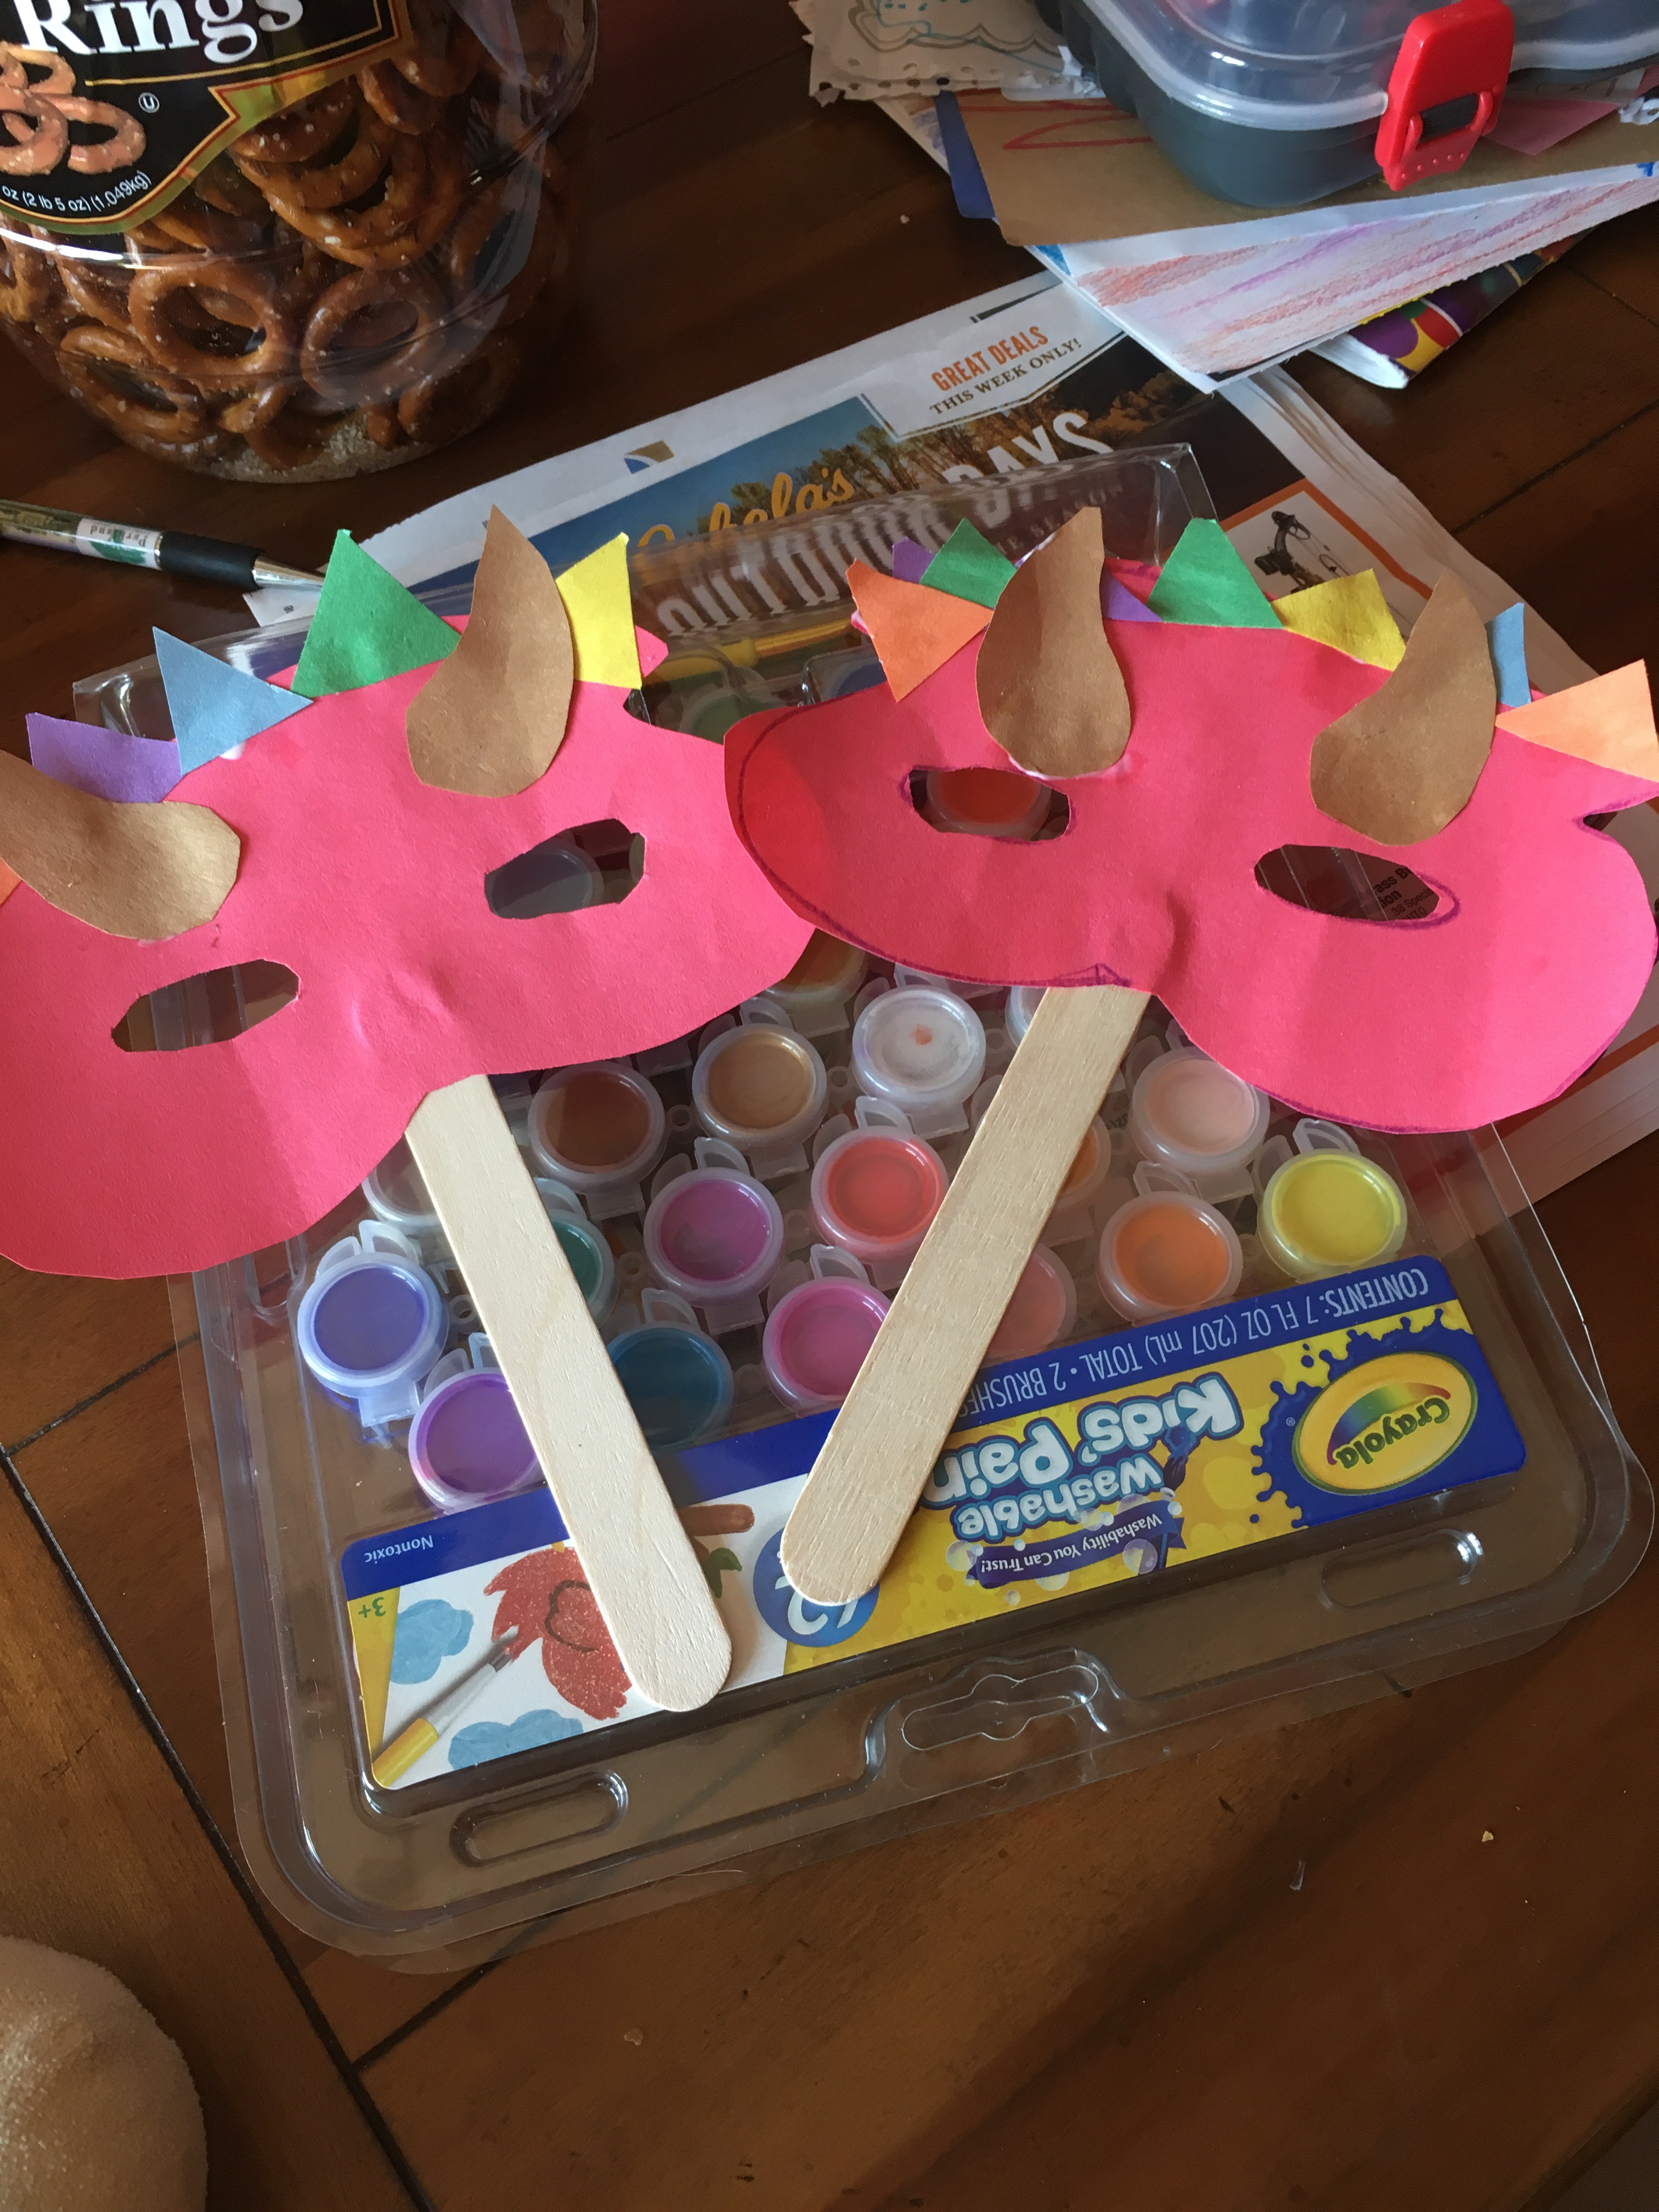
1) popsicle sticks or tongue depressor sticks (or you can use elastic or string)
2) construction paper
3) scissors and glue
4) crayons, ribbons, stickers or any other decoration you would like to add
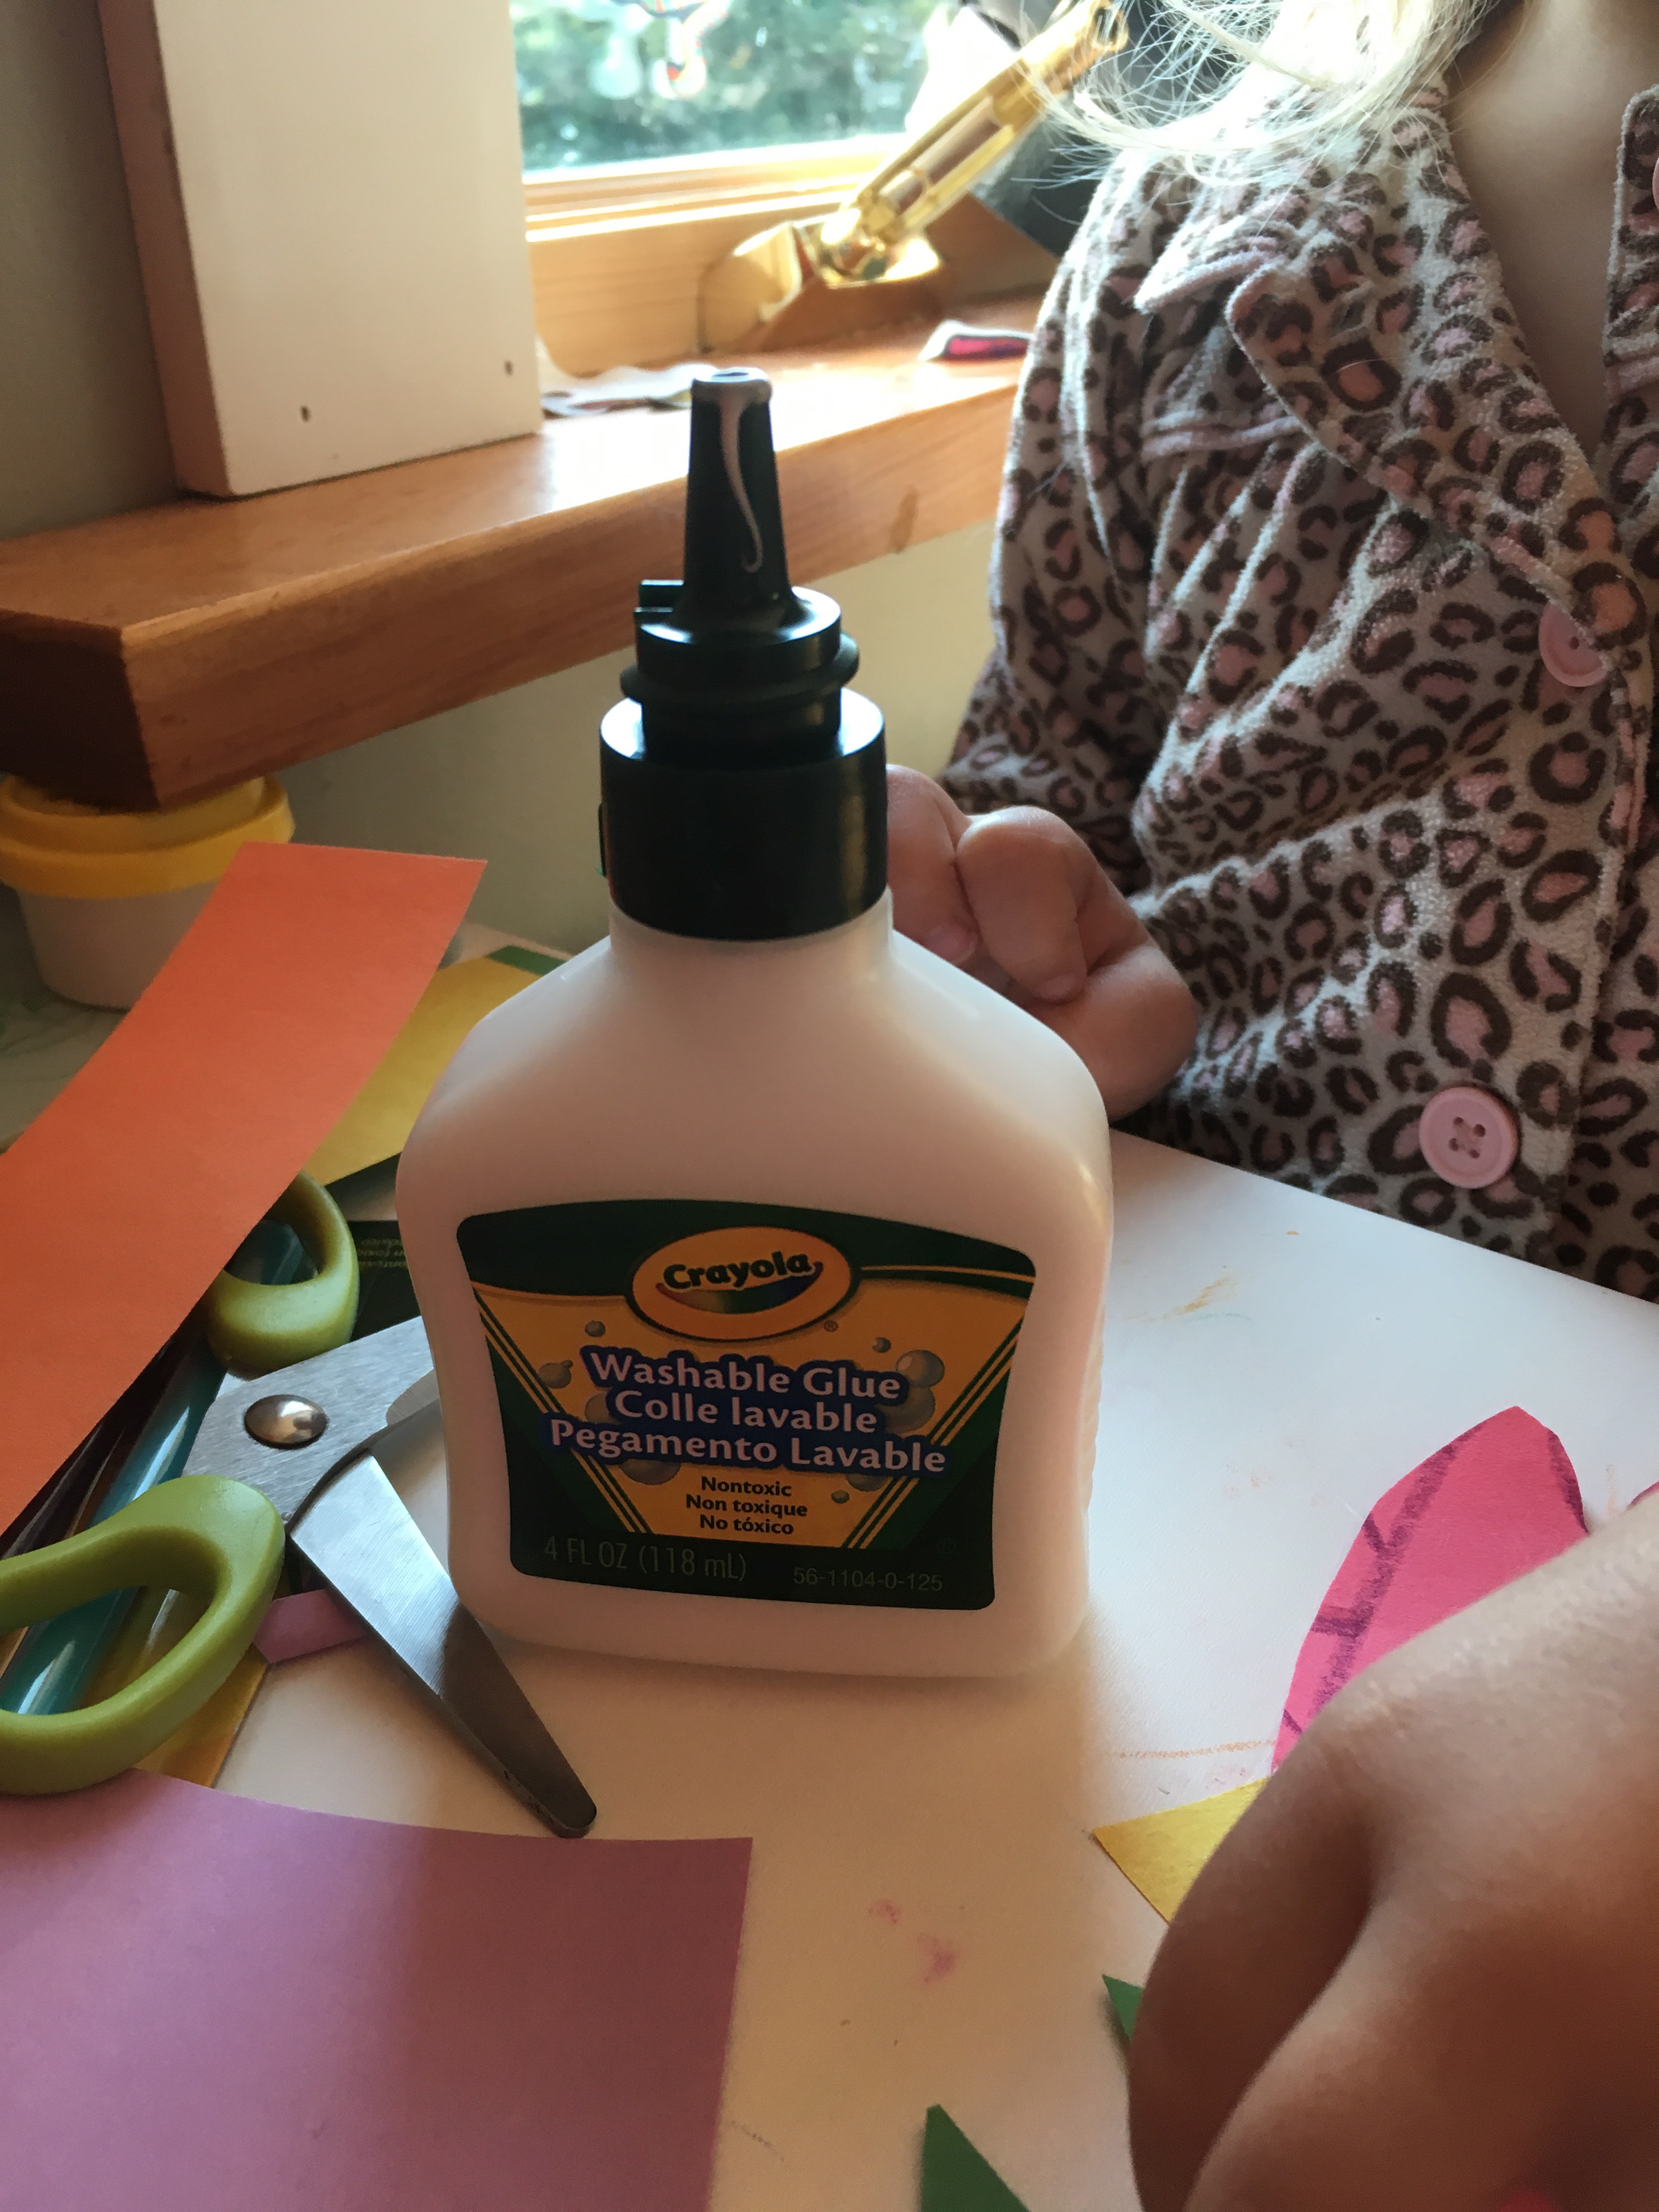
I absolutely love this new glue I got from crayola, it is so easy for my toddler to use herself and its washable!
I simply held the construction paper up and estimated where the eye holes needed to be and cut them out then made my own design and let her glue the pieces together and decorate! Such a simple and easy project for your little one.
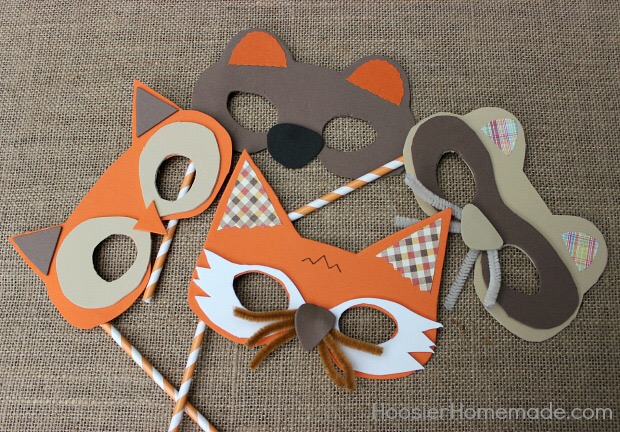
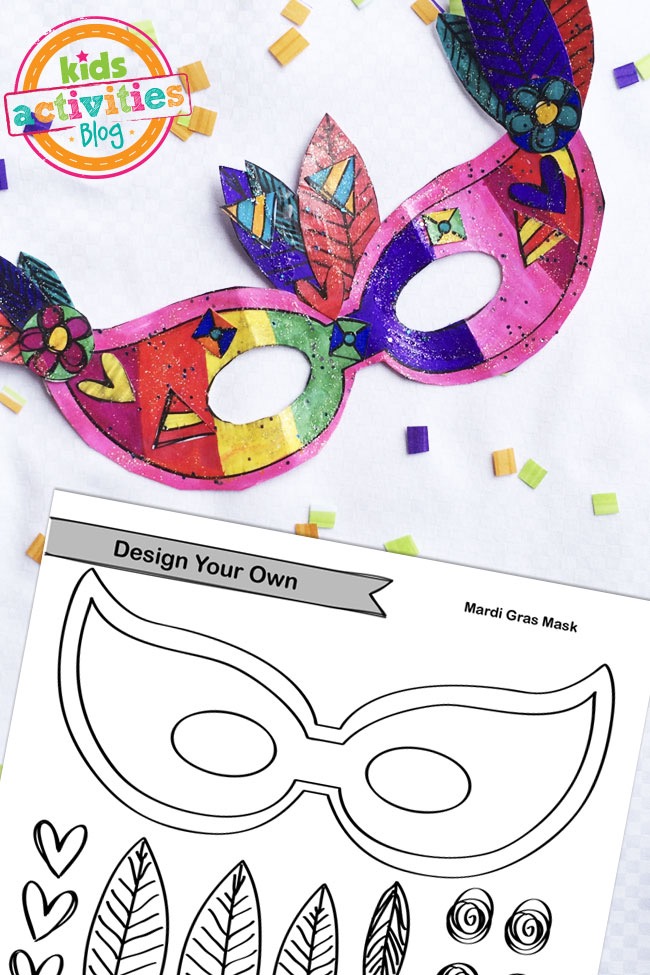
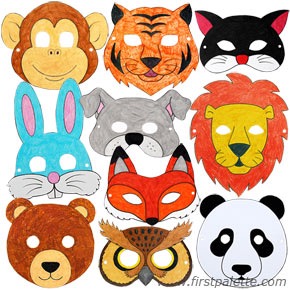
Now if you are looking for a particular pattern or don’t know how to make an animal let me suggest a couple tutorials I found:
Animal masks by Hoosier
These cute masks are perfect for your little fall creature! There’s a pattern for them too!
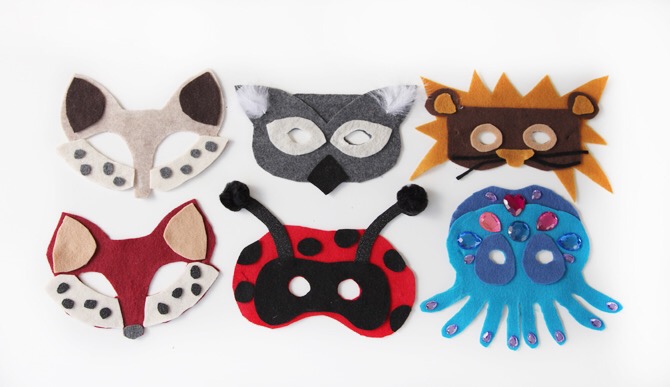
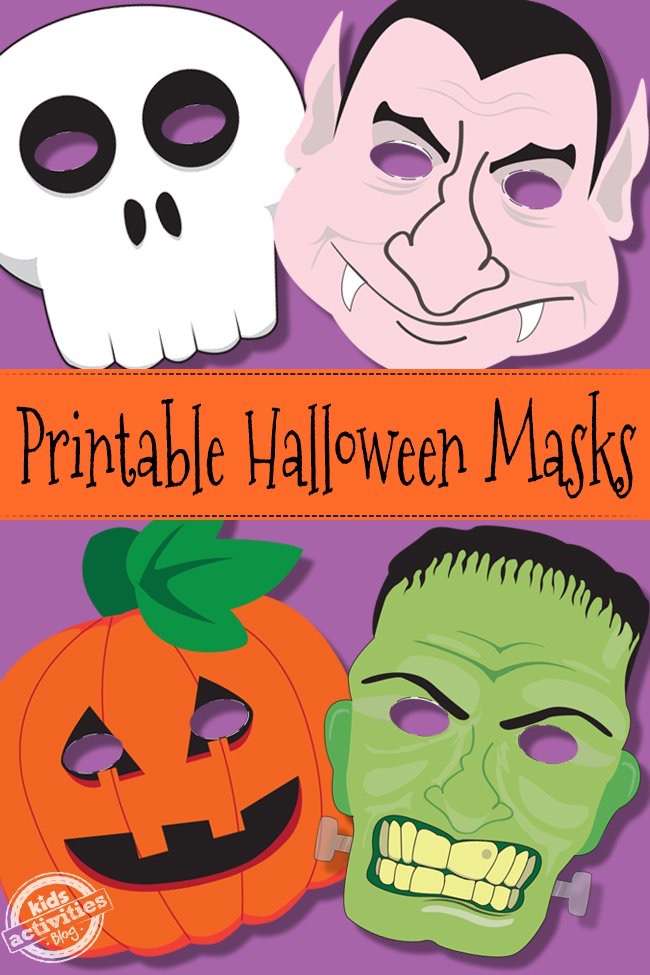
Next are easy felt masks that are perfect for Halloween costumes!
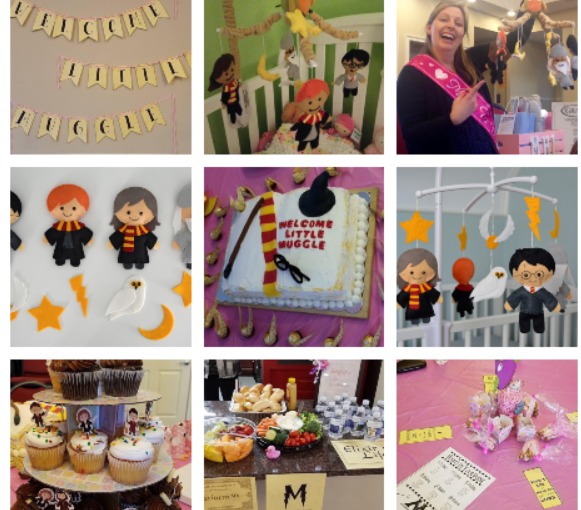
My twin sister loves Harry Potter, and what better way to celebrate the coming of her daughter Madison, then to throw a Harry Potter Baby Shower! I give all the credit to our mother who was able to organize and decorate while I was dealing with my two young children.
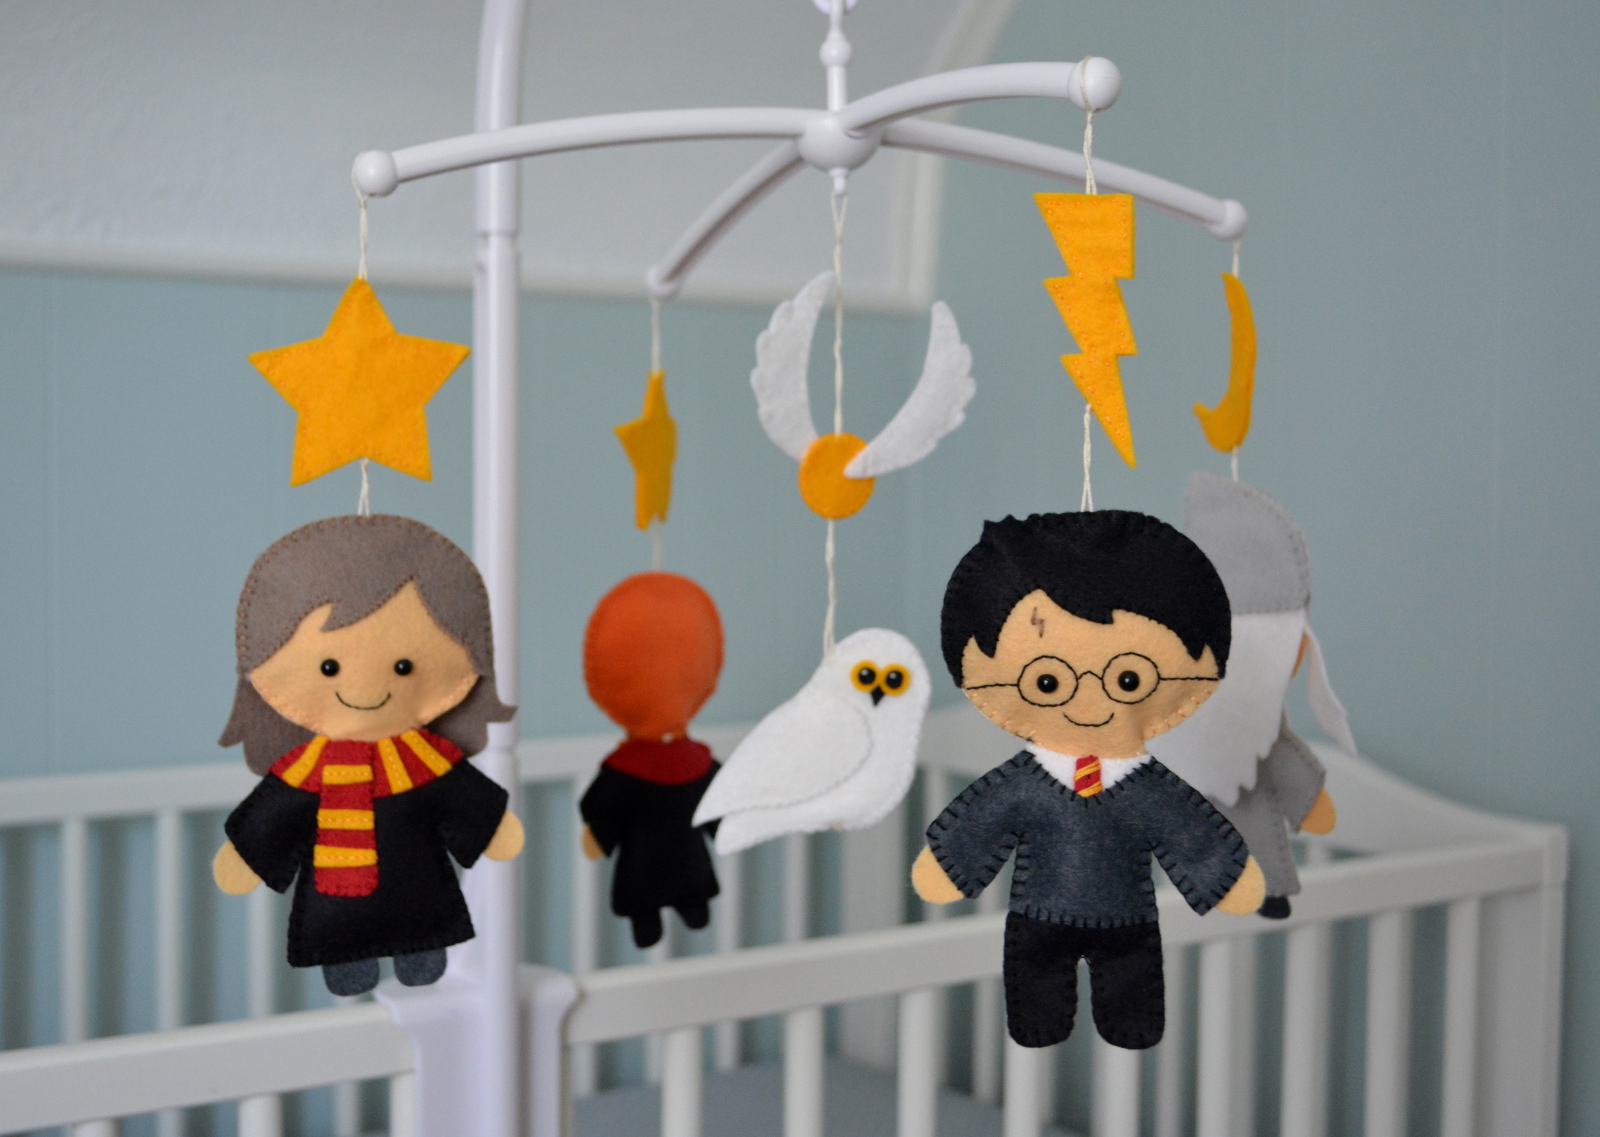
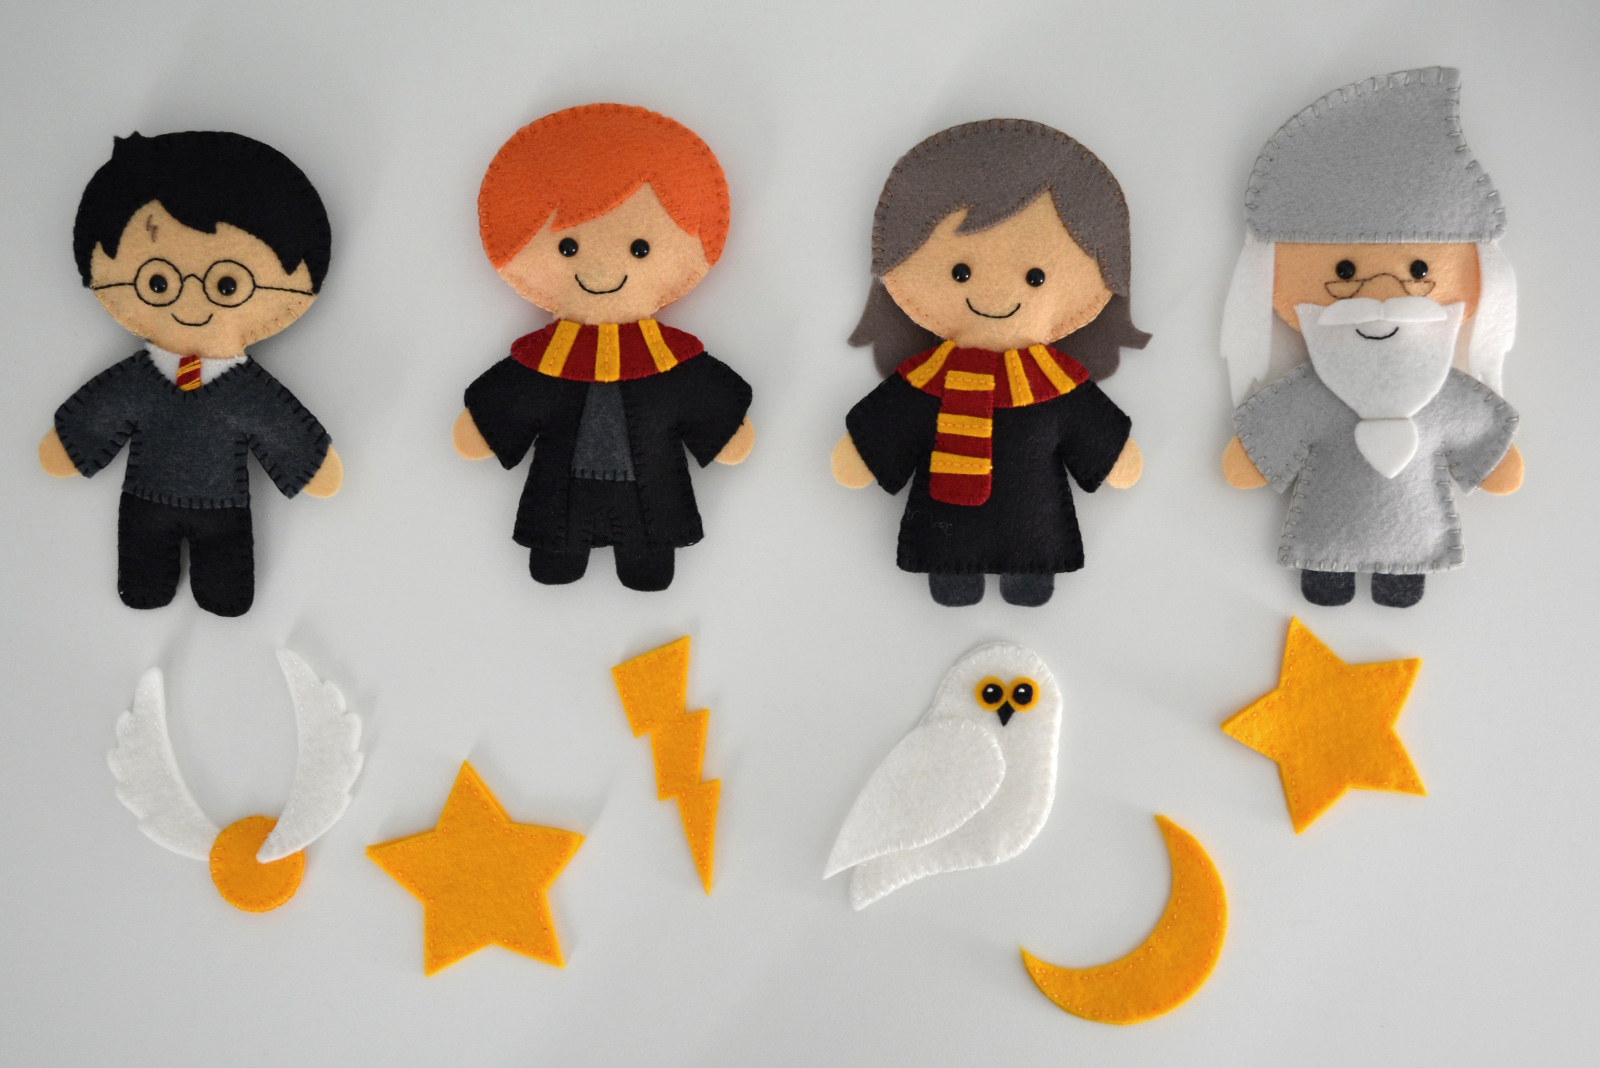
I was able to make a special harry potter mobile for her though!
I used a mobile hanger that I previously had for my daughter which was an outdoor one- so the owl worked out perfectly! I used felt material and sewed mostly by hand to put the pieces together. I also stuffed the pieces with filling and used black puffy paint and marker for the faces and glasses!
I got the template from a fantastic website- and you can ask her for the template but it cannot be for selling the items- just for your personal use. FREE TEMPLATE SITE HERE
I used string from my crocheting to hand the harry potter items.
Here are some more photographs of the awesome Harry Potter shower!
Our talented Aunt Joey G. made this special cake for the shower!
Cupcake toppers!
This cute sign is easily made by printing out or using black marker!
Easy print out ideas!
More easy to print signs (I don’t remember the site we printed them from- but if you look up the signs I’m sure you can find it).
There were harry potter balloons and other decorations as well! Hope you enjoyed this post and it gave you some ideas!
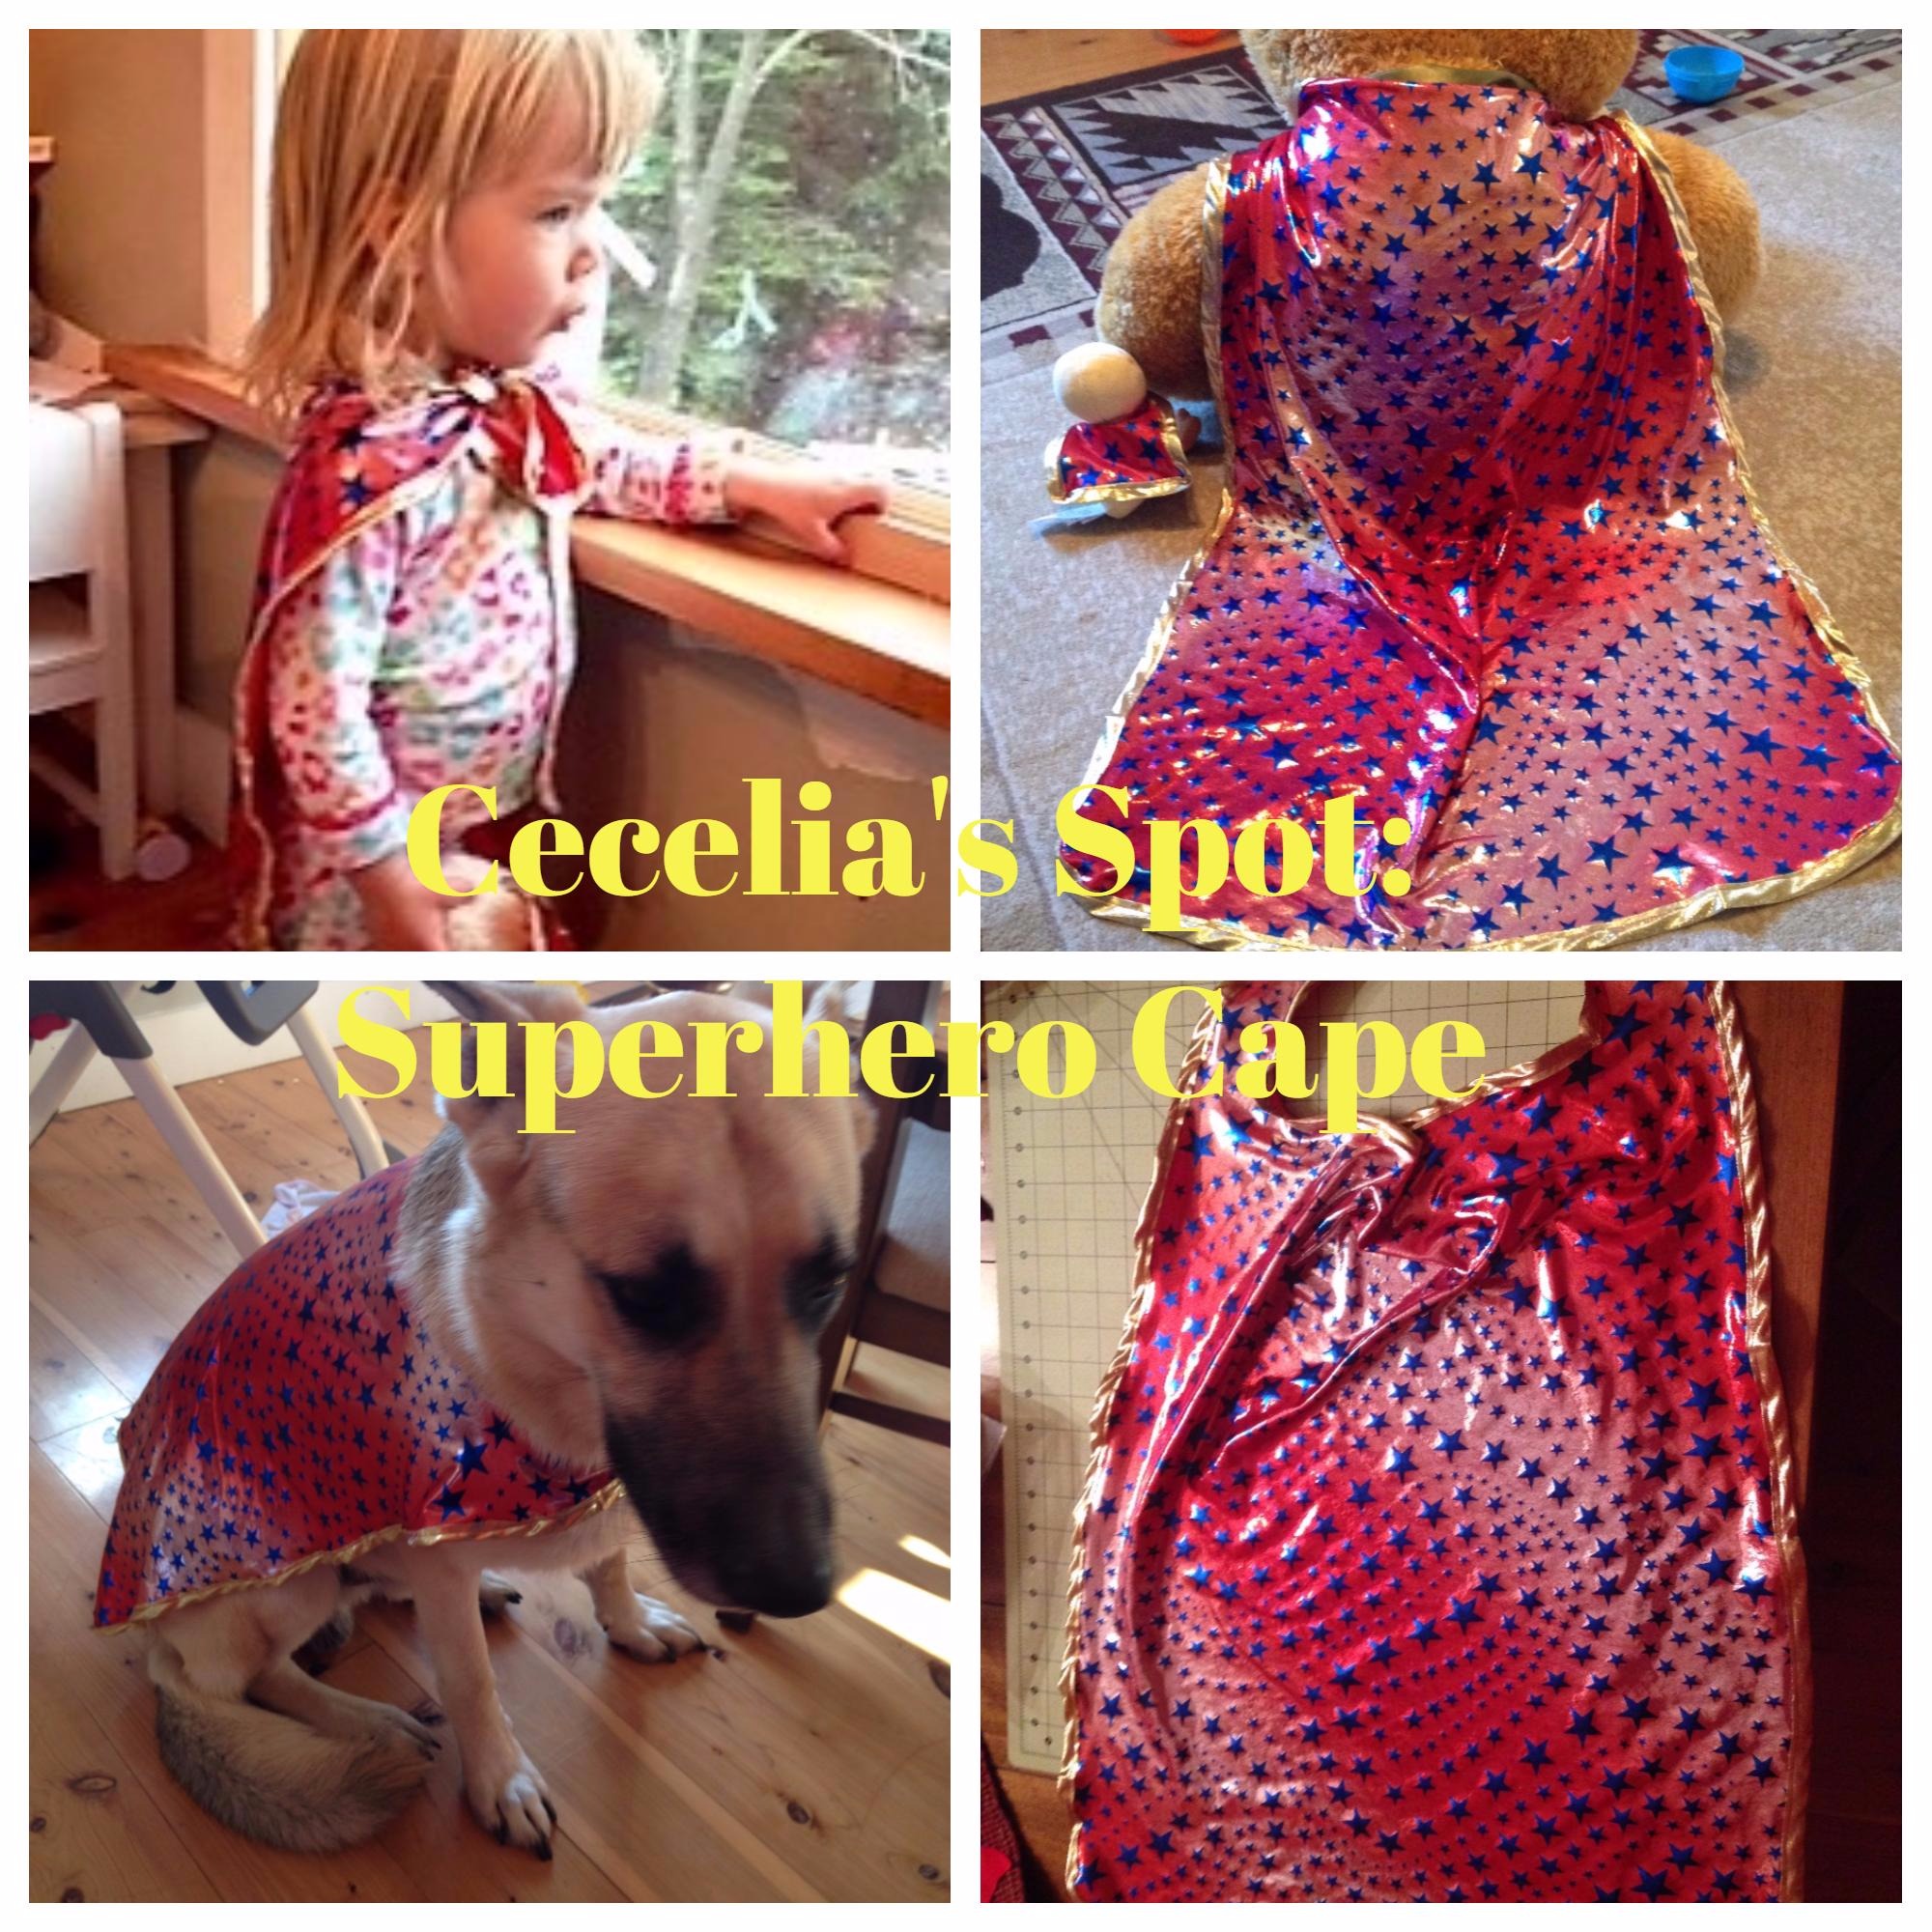
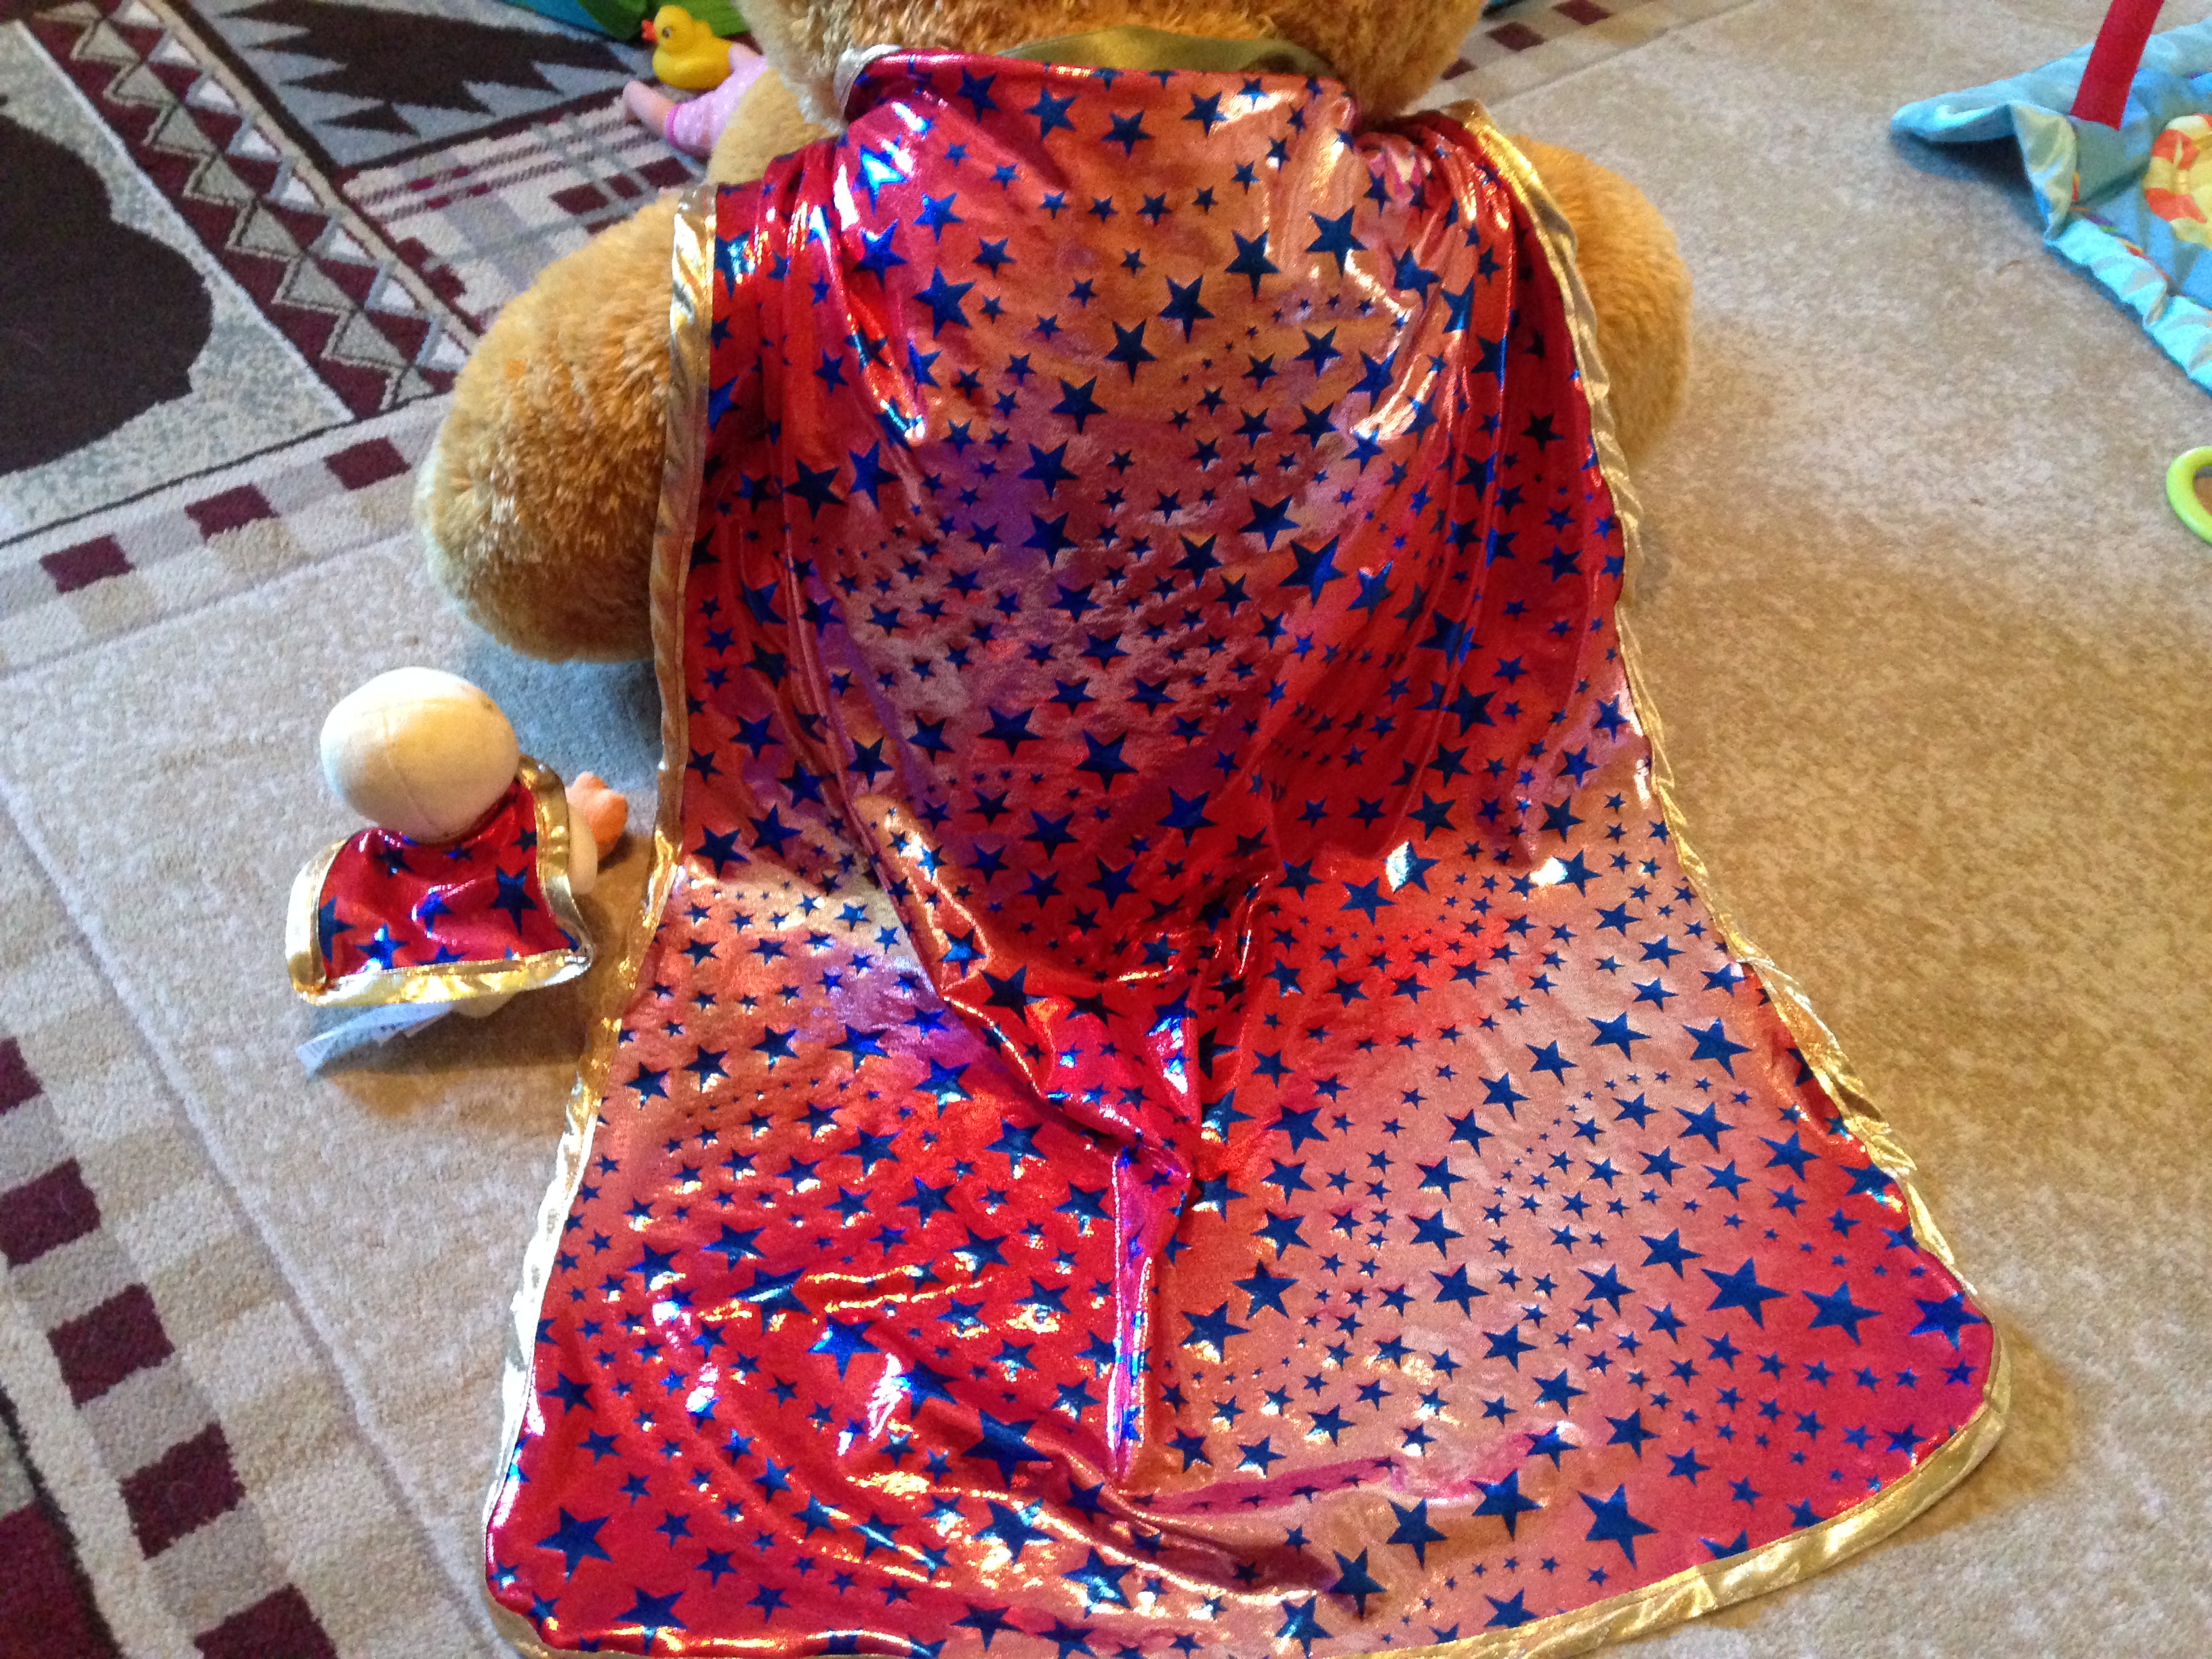
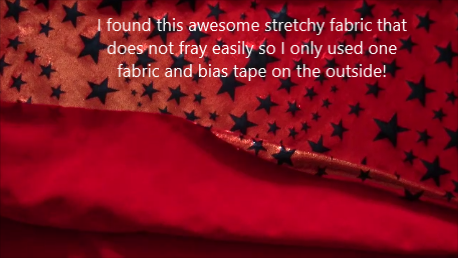
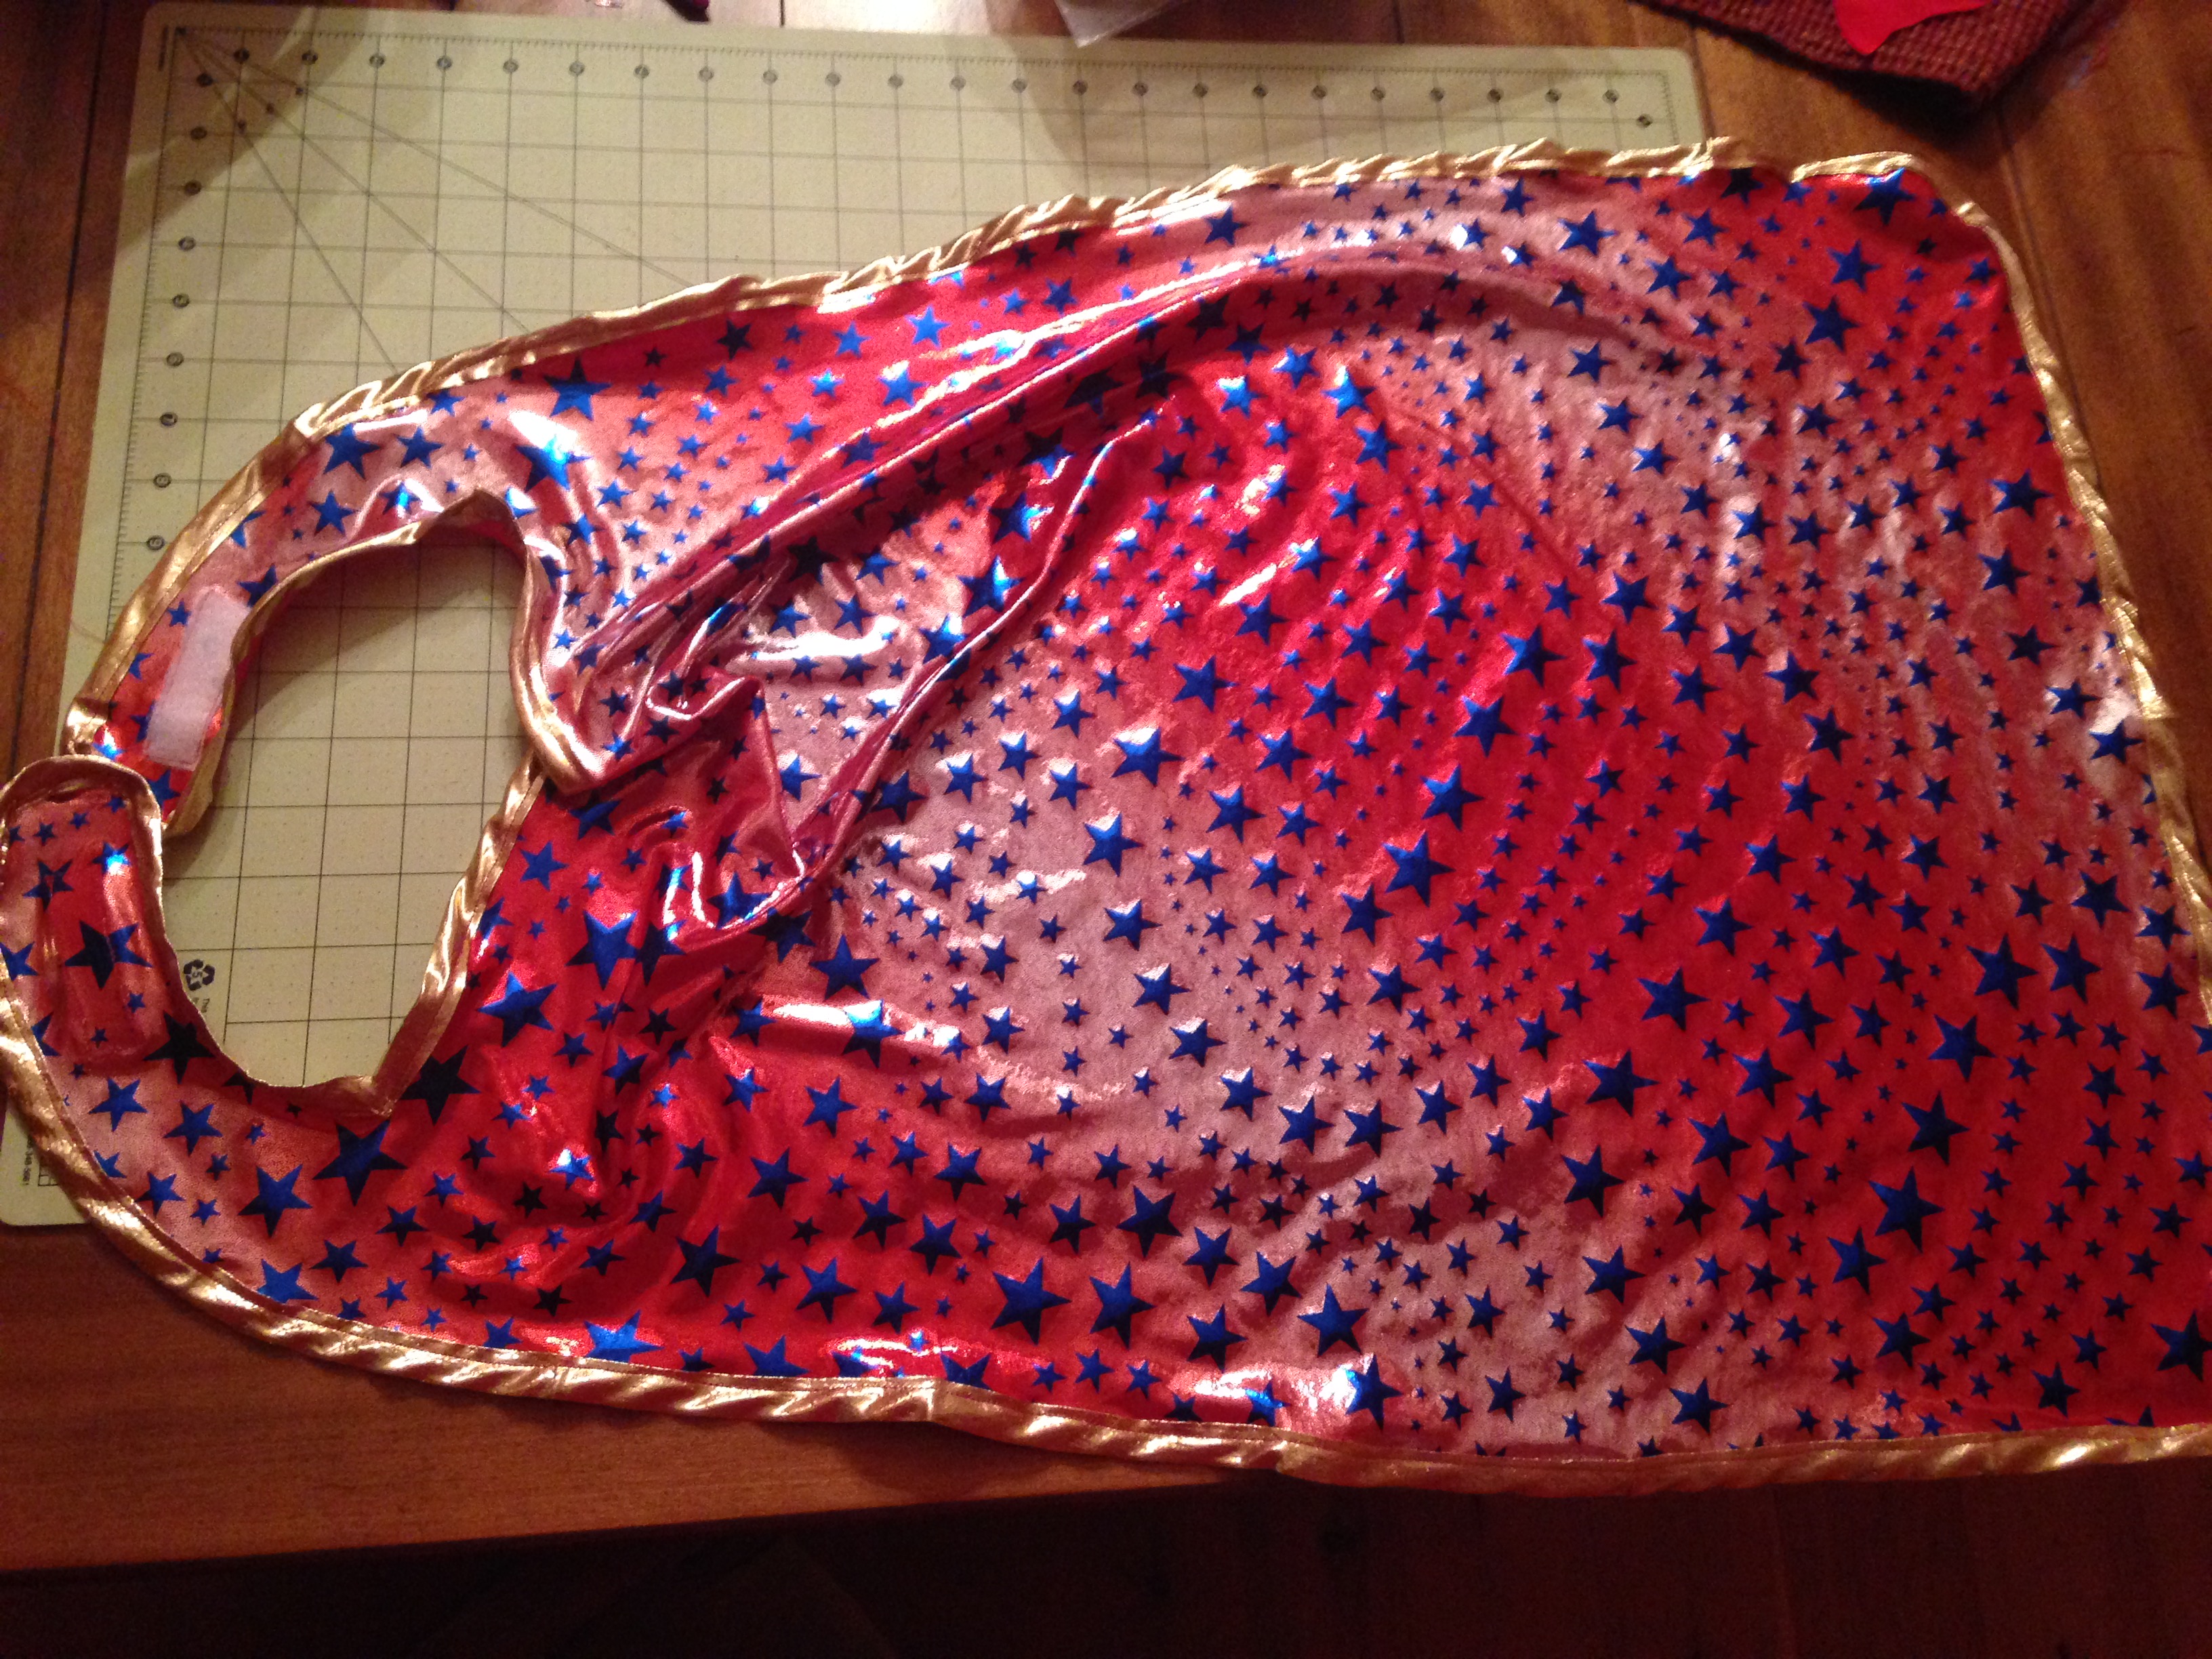
Superhero cape time! You can make an easy superhero cape in less than 15 minutes! My daughter needed to be distracted in a fun way while I needed to care for her baby brother, so we pretend to be superheros who fetch diapers, plastic bags, and bottles for baby brother! Also, her dolly had to have a super cape too! So I went to the fabric store and found the perfect superhero fabric! The fabric has a great design and also is very stretchy and does not fray easily. I also bought double sided bias tape in gold for the outside. Her dolly also needed a superhero cape so I designed a small one for dolly.
As usual, there is a written and youtube tutorial for this cape. I only used one side of material but you can easily do two fabrics (this is outlined below). Enjoy!
What you need:
1) Fabric (one or 2 different cuts 1/2 yard each)
2) Velcro or your preferred method to connect
around neck
3) Optional: Bias tape and/or monogram
You can decide on the best size by either knowing your childs height and how wide you would like it, or you can always look at their clothes! I do outline the length and design in my video and written tutorial.
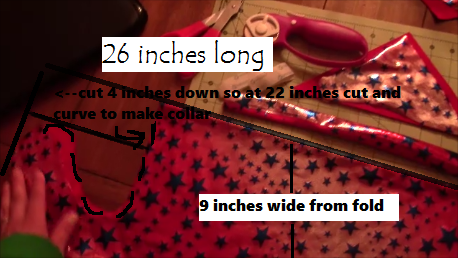
I made the cape for my 2.5year old but it ended up being very big, big enough my German Shepard dog could wear it! The sizes I use could most likely fit up to a 4t. Fold 1/2 yard of fabric in half. Measure long way 26inches long (this was a bit big for my 2.5yr old but still worked) and cut straight across. If you are using two fabrics (one for front and one for back), repeat this whole cutting process.
Then measure about 4 inches down from the 26inch top and cut in and up for the connecting part of the cape (mine was a bit big for my 2.5 year old but she will grow into it!)
If you are using two fabrics take both sides and cut and then face each other and sew all the way around except leave a 3 inch opening (as with all other projects with two fabrics). Then pull the fabric through the hole and sew hole shut (make sure you push out corners).
Next, I took the bias tape and sewed all the way around (pinning it first).
Lastly, I ironed on the Velcro sections with the softer side facing on side downwards (that way if its too big at one point it is not rough on the skin). You can also use snaps or any other closing you would like.
And that is it! Pretty easy just eyeball the size or you can measure your little one! Enjoy!


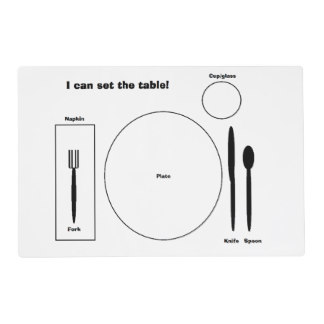 However, my laminator is only big enough for a regular printer sized paper. You can take it to your local staples or office store to get laminated. You can even make your own placemat out of fabric and have it laminated.
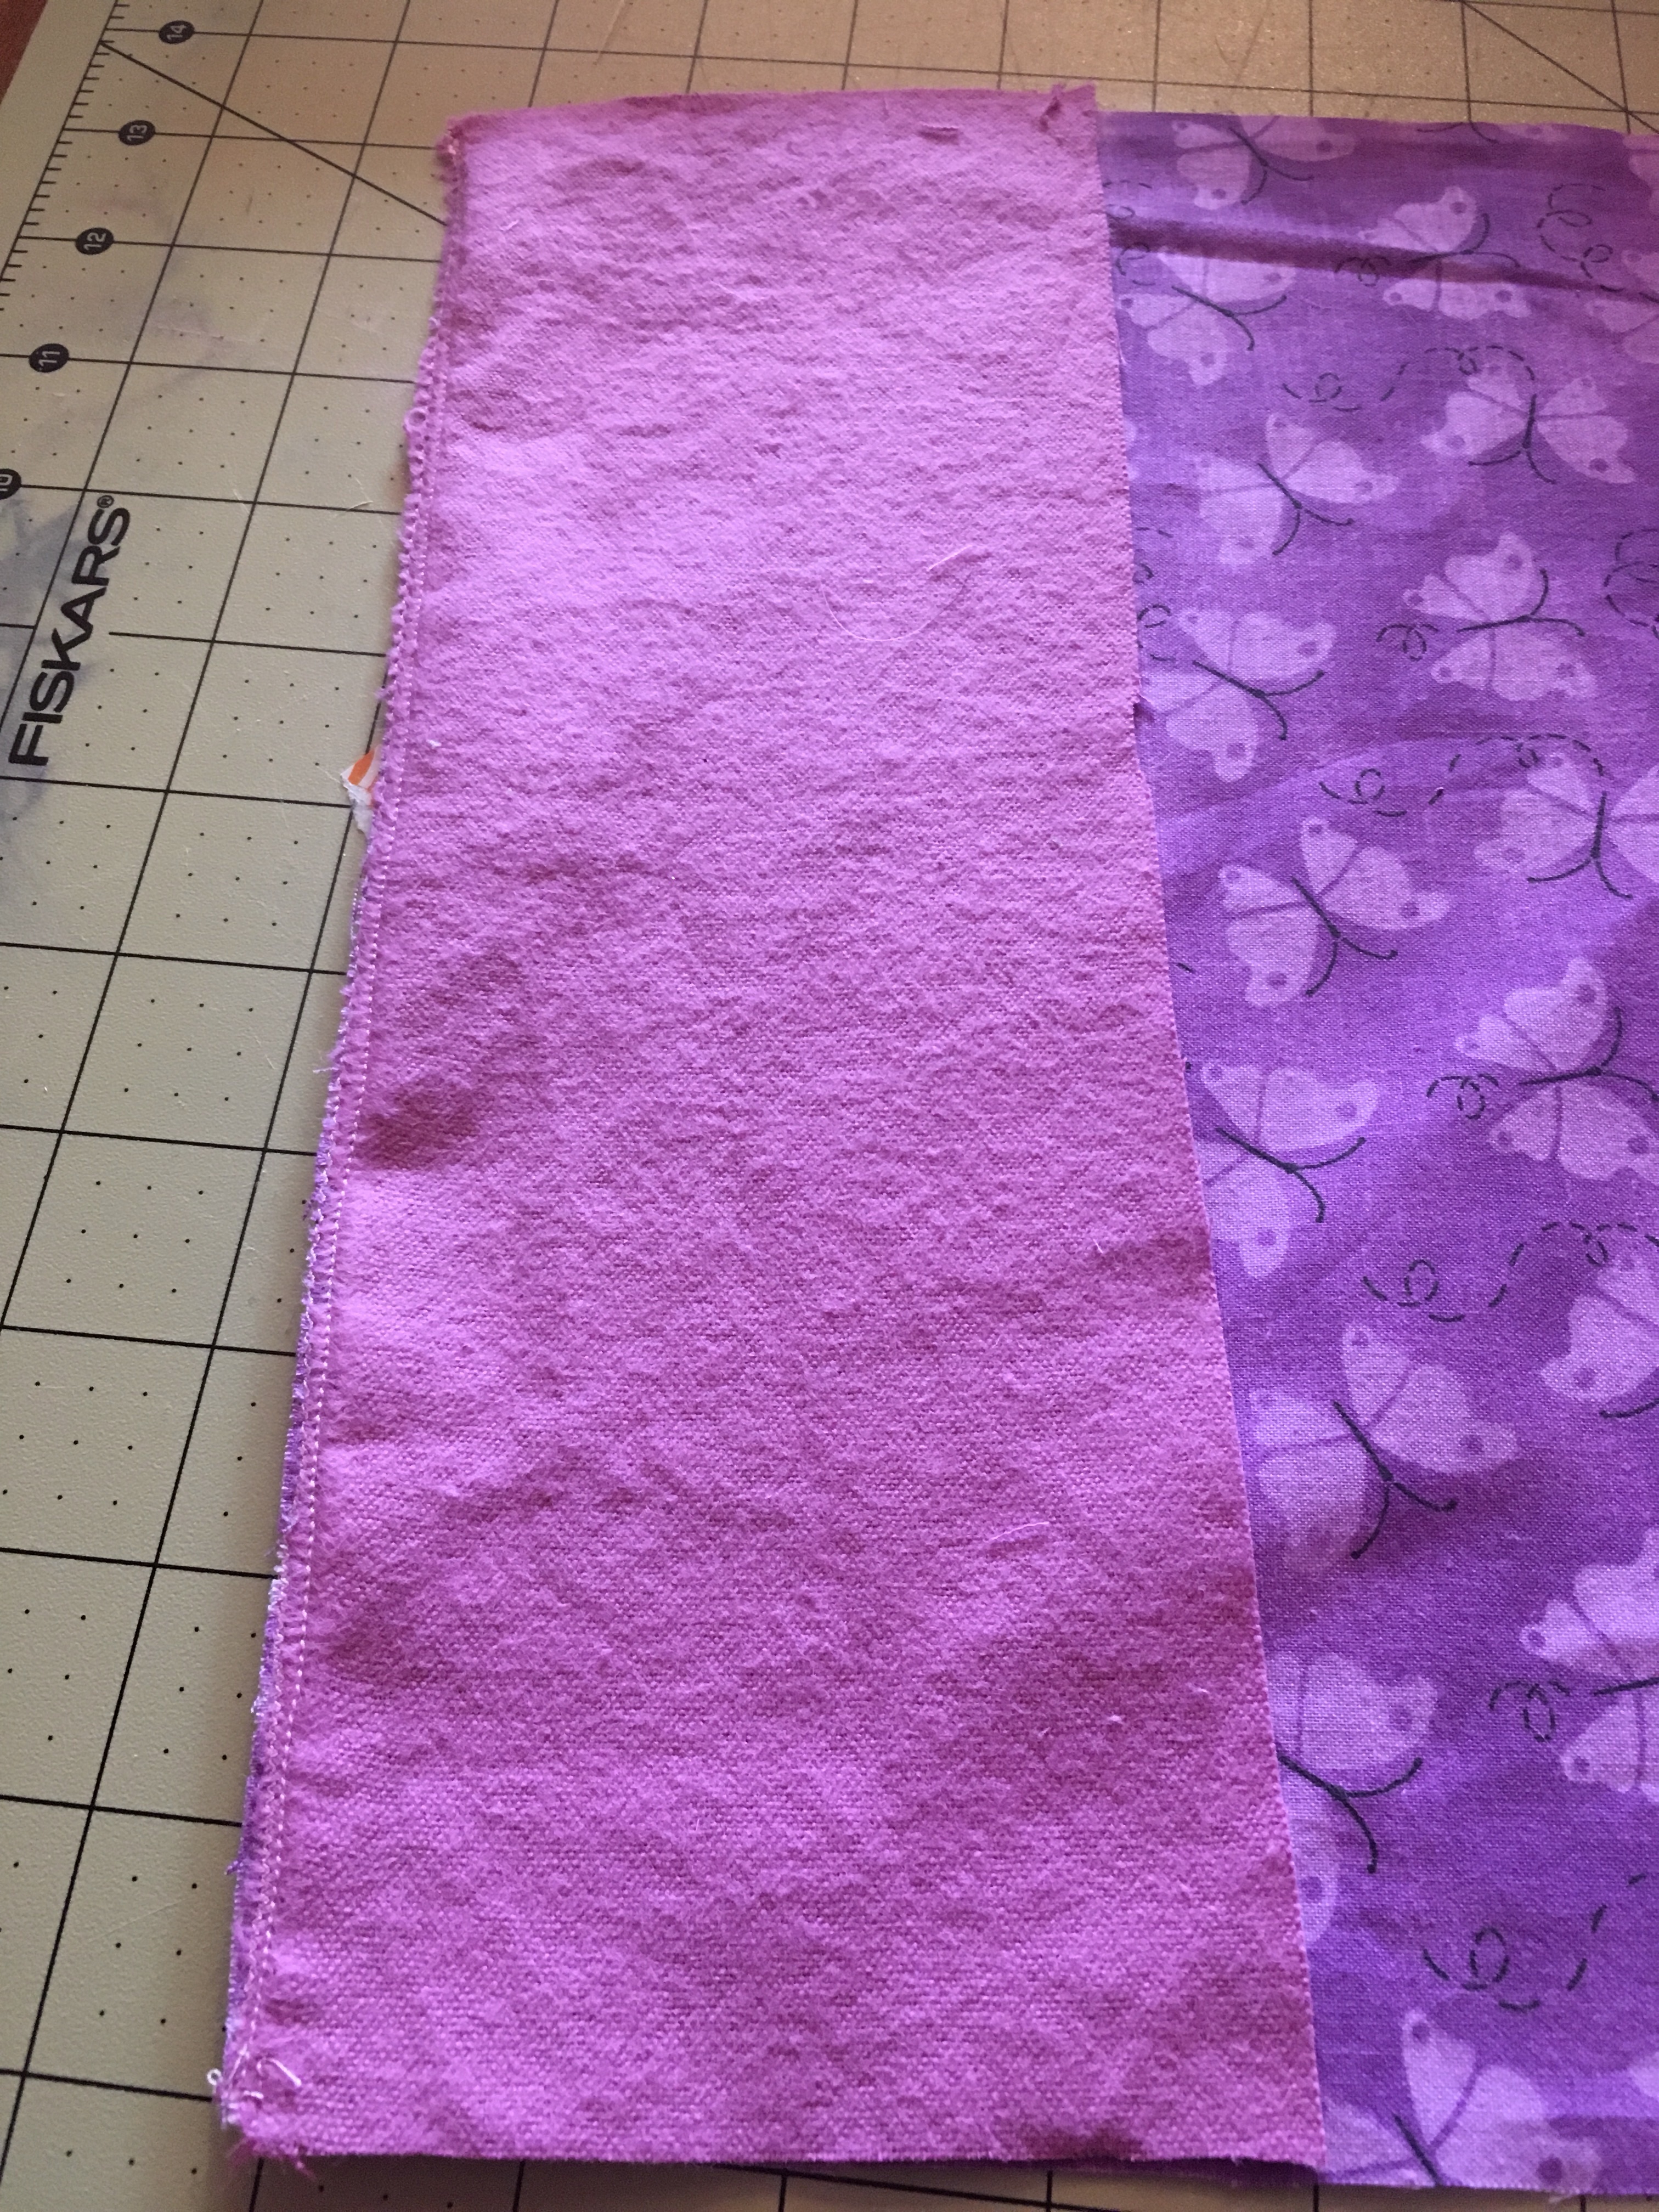

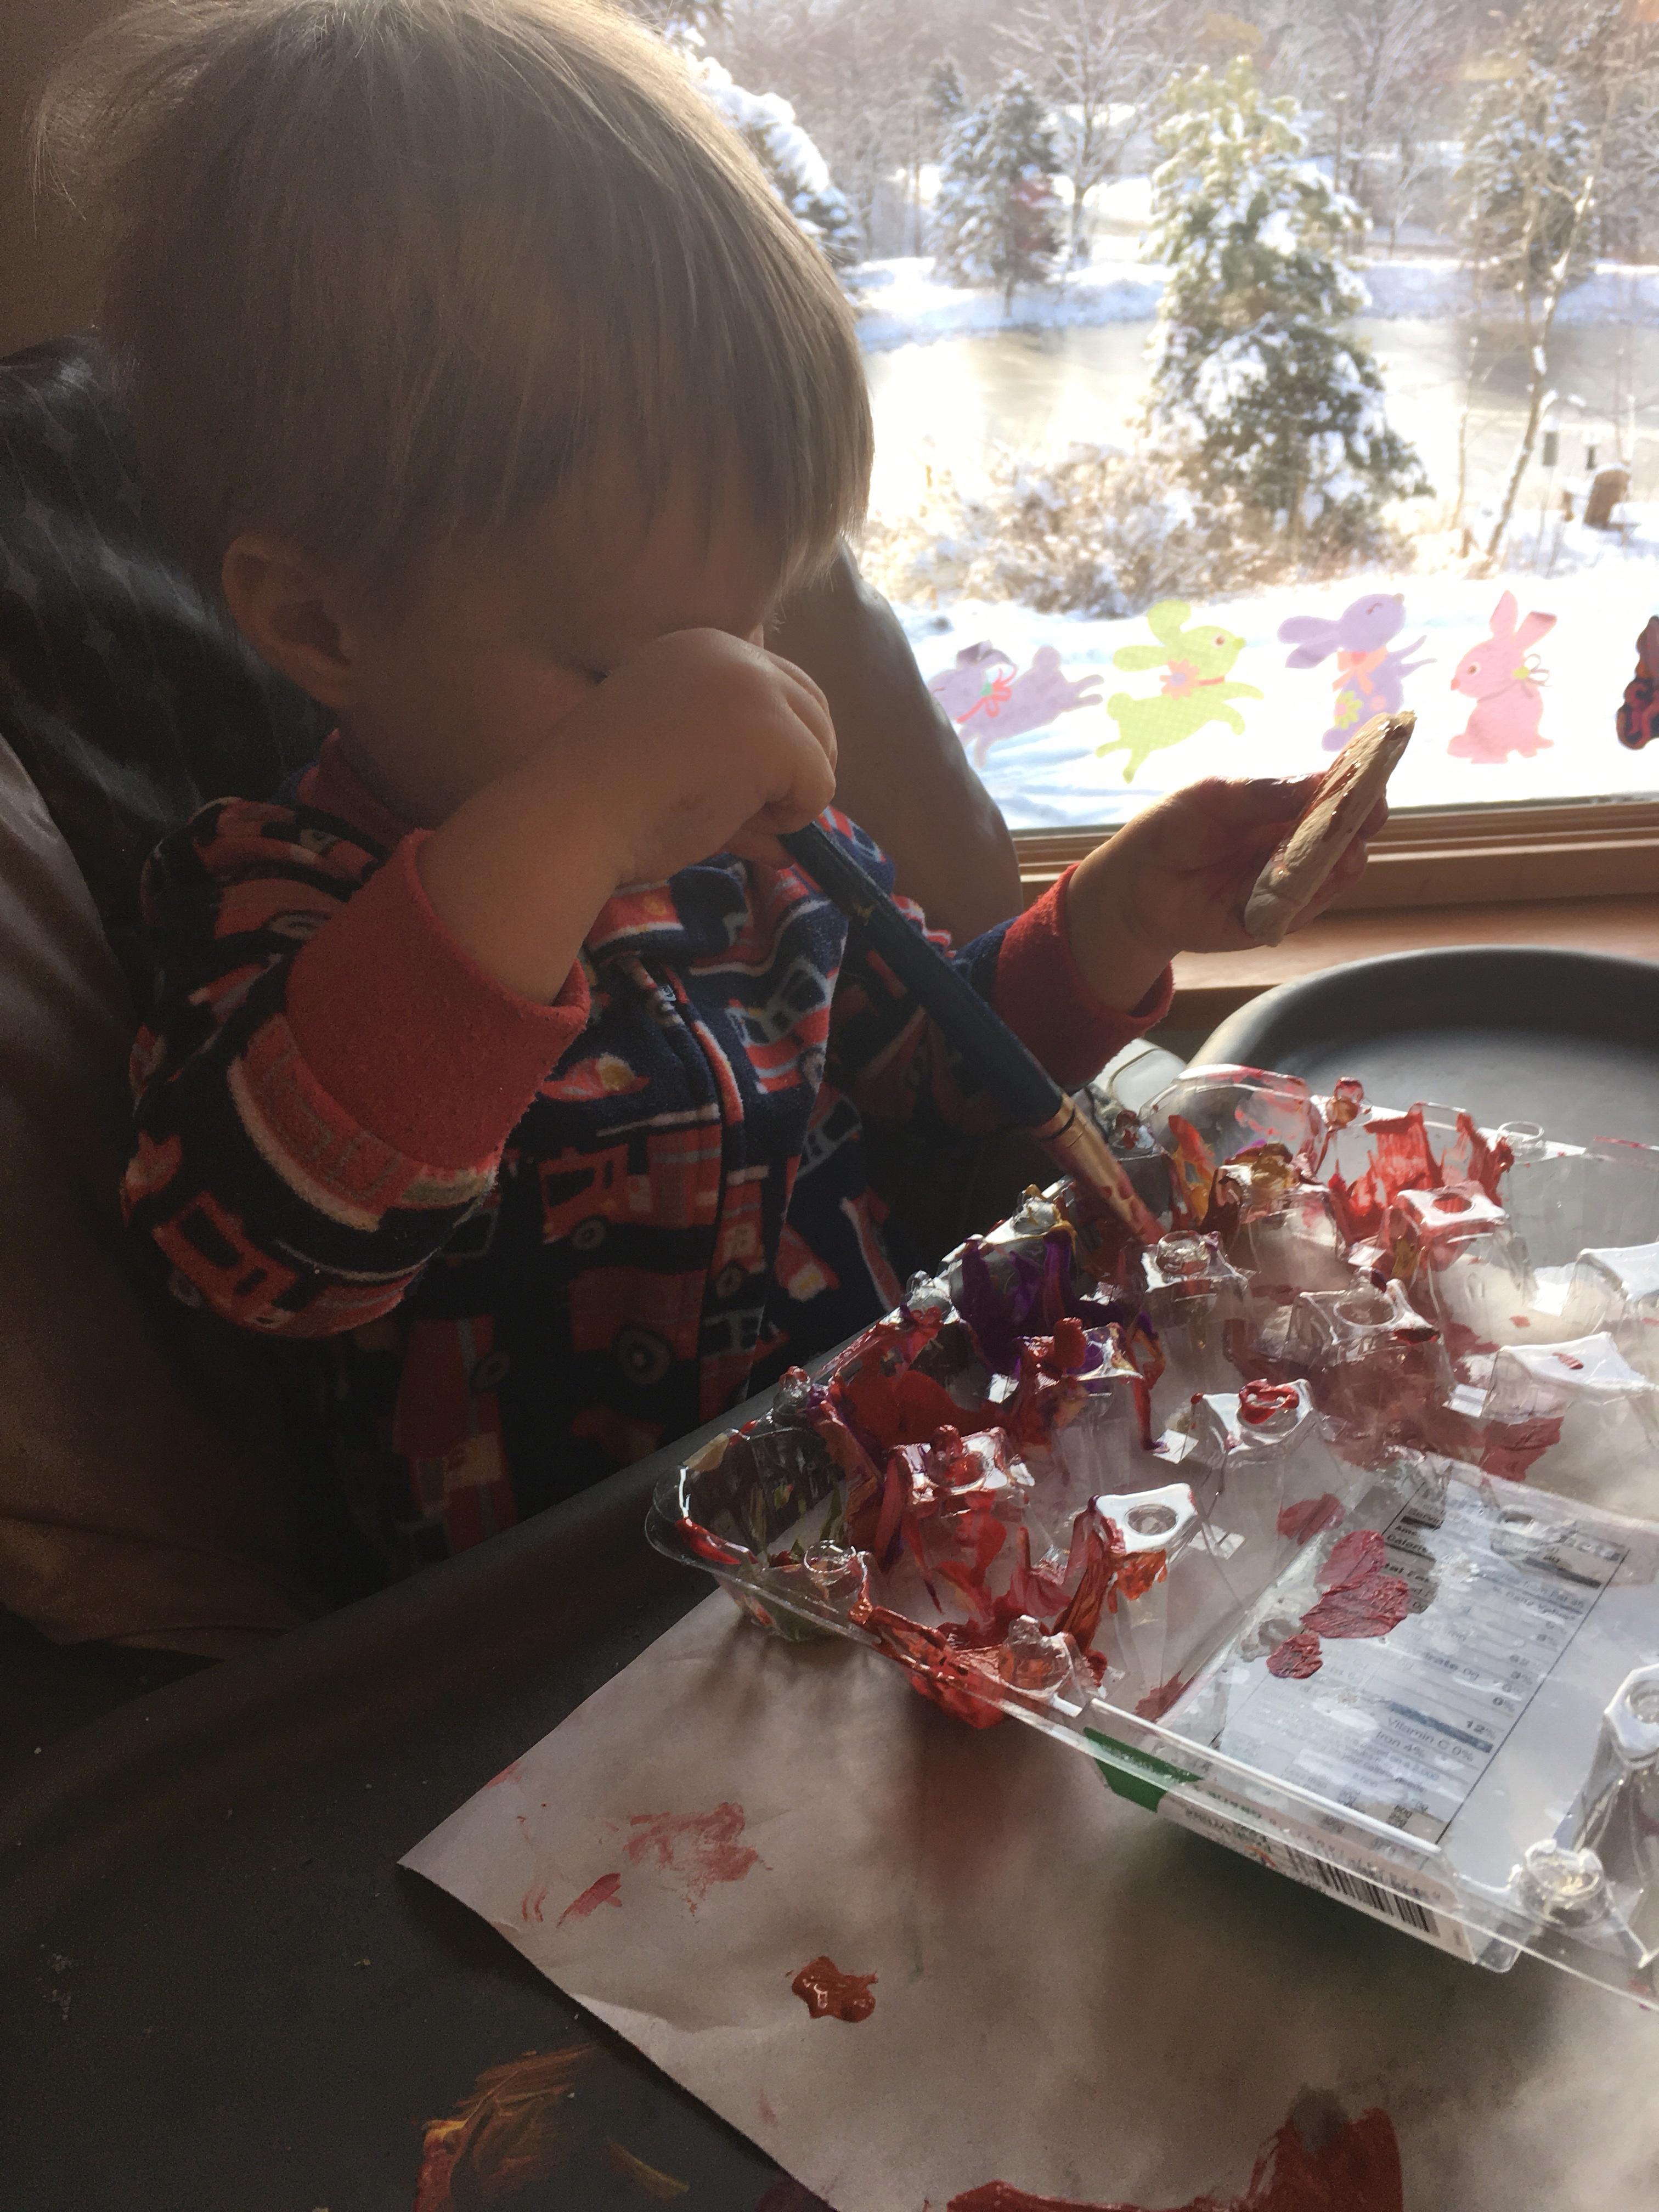
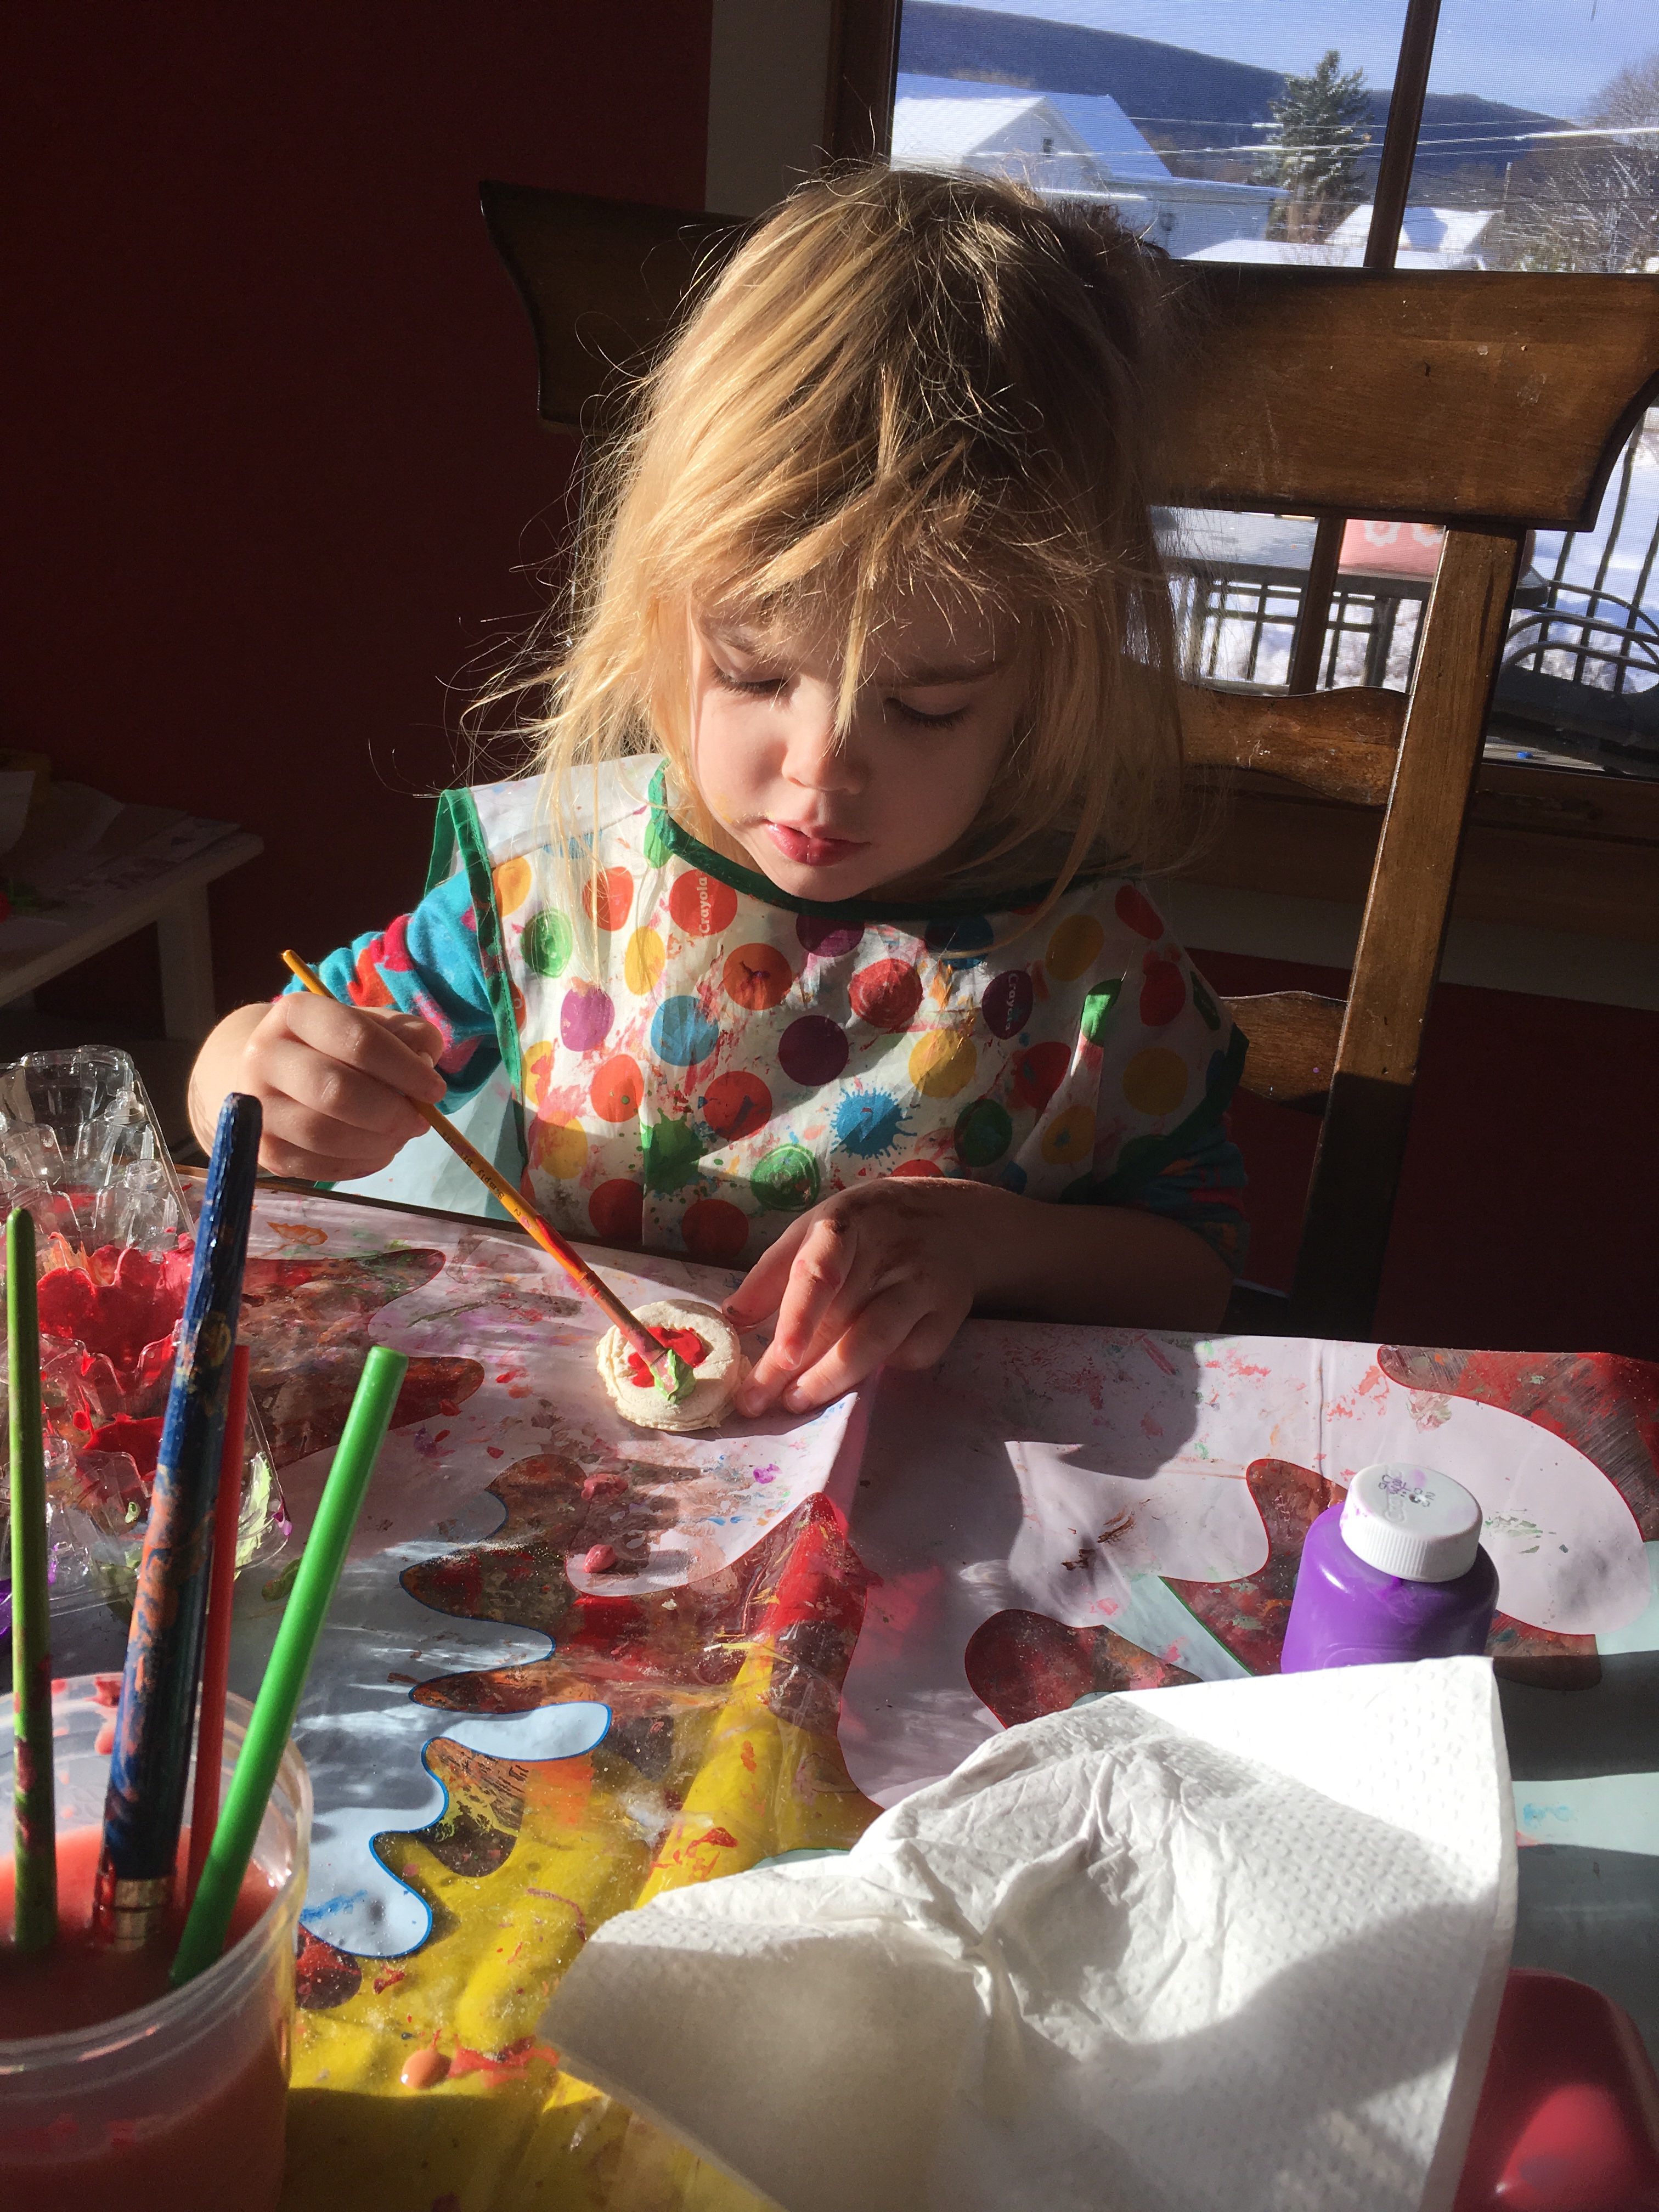 my daughter likes to squirt the paint in an old egg carton that way the colors stay separated.
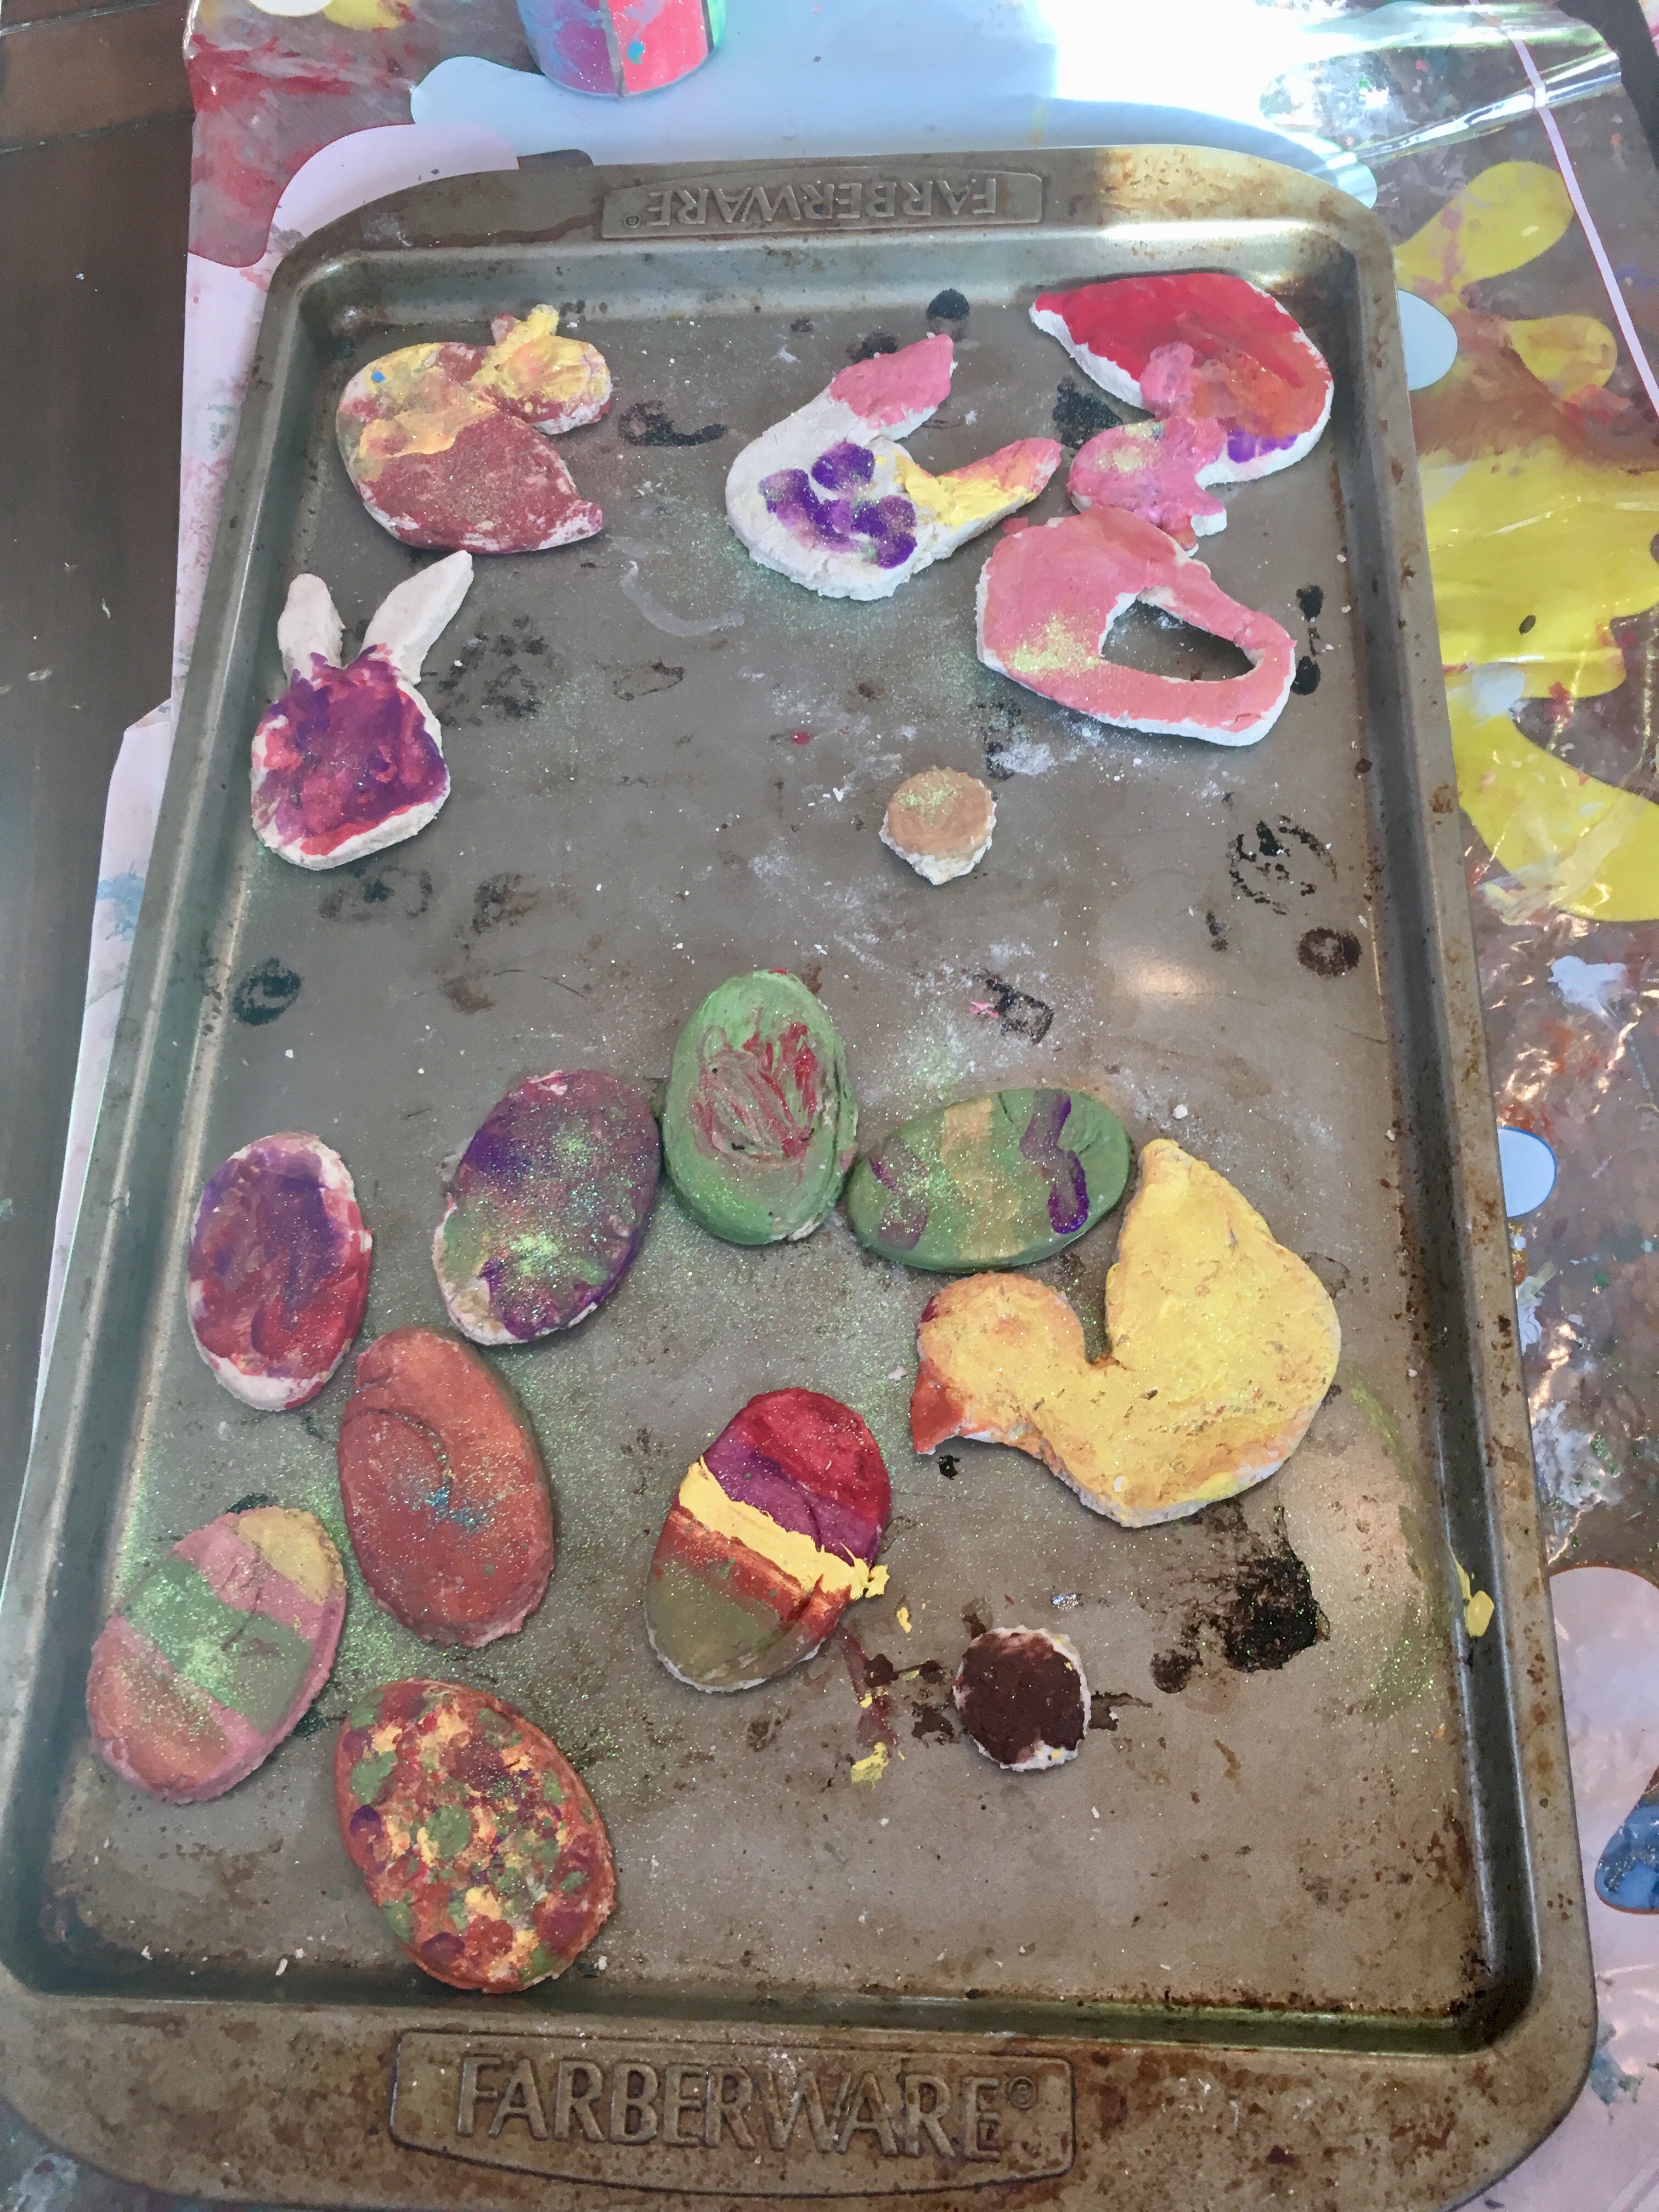


 Our talented Aunt Joey G. made this special cake for the shower!


 More easy to print signs (I don’t remember the site we printed them from- but if you look up the signs I’m sure you can find it).