Salt dough wreath, ornament, or garland!

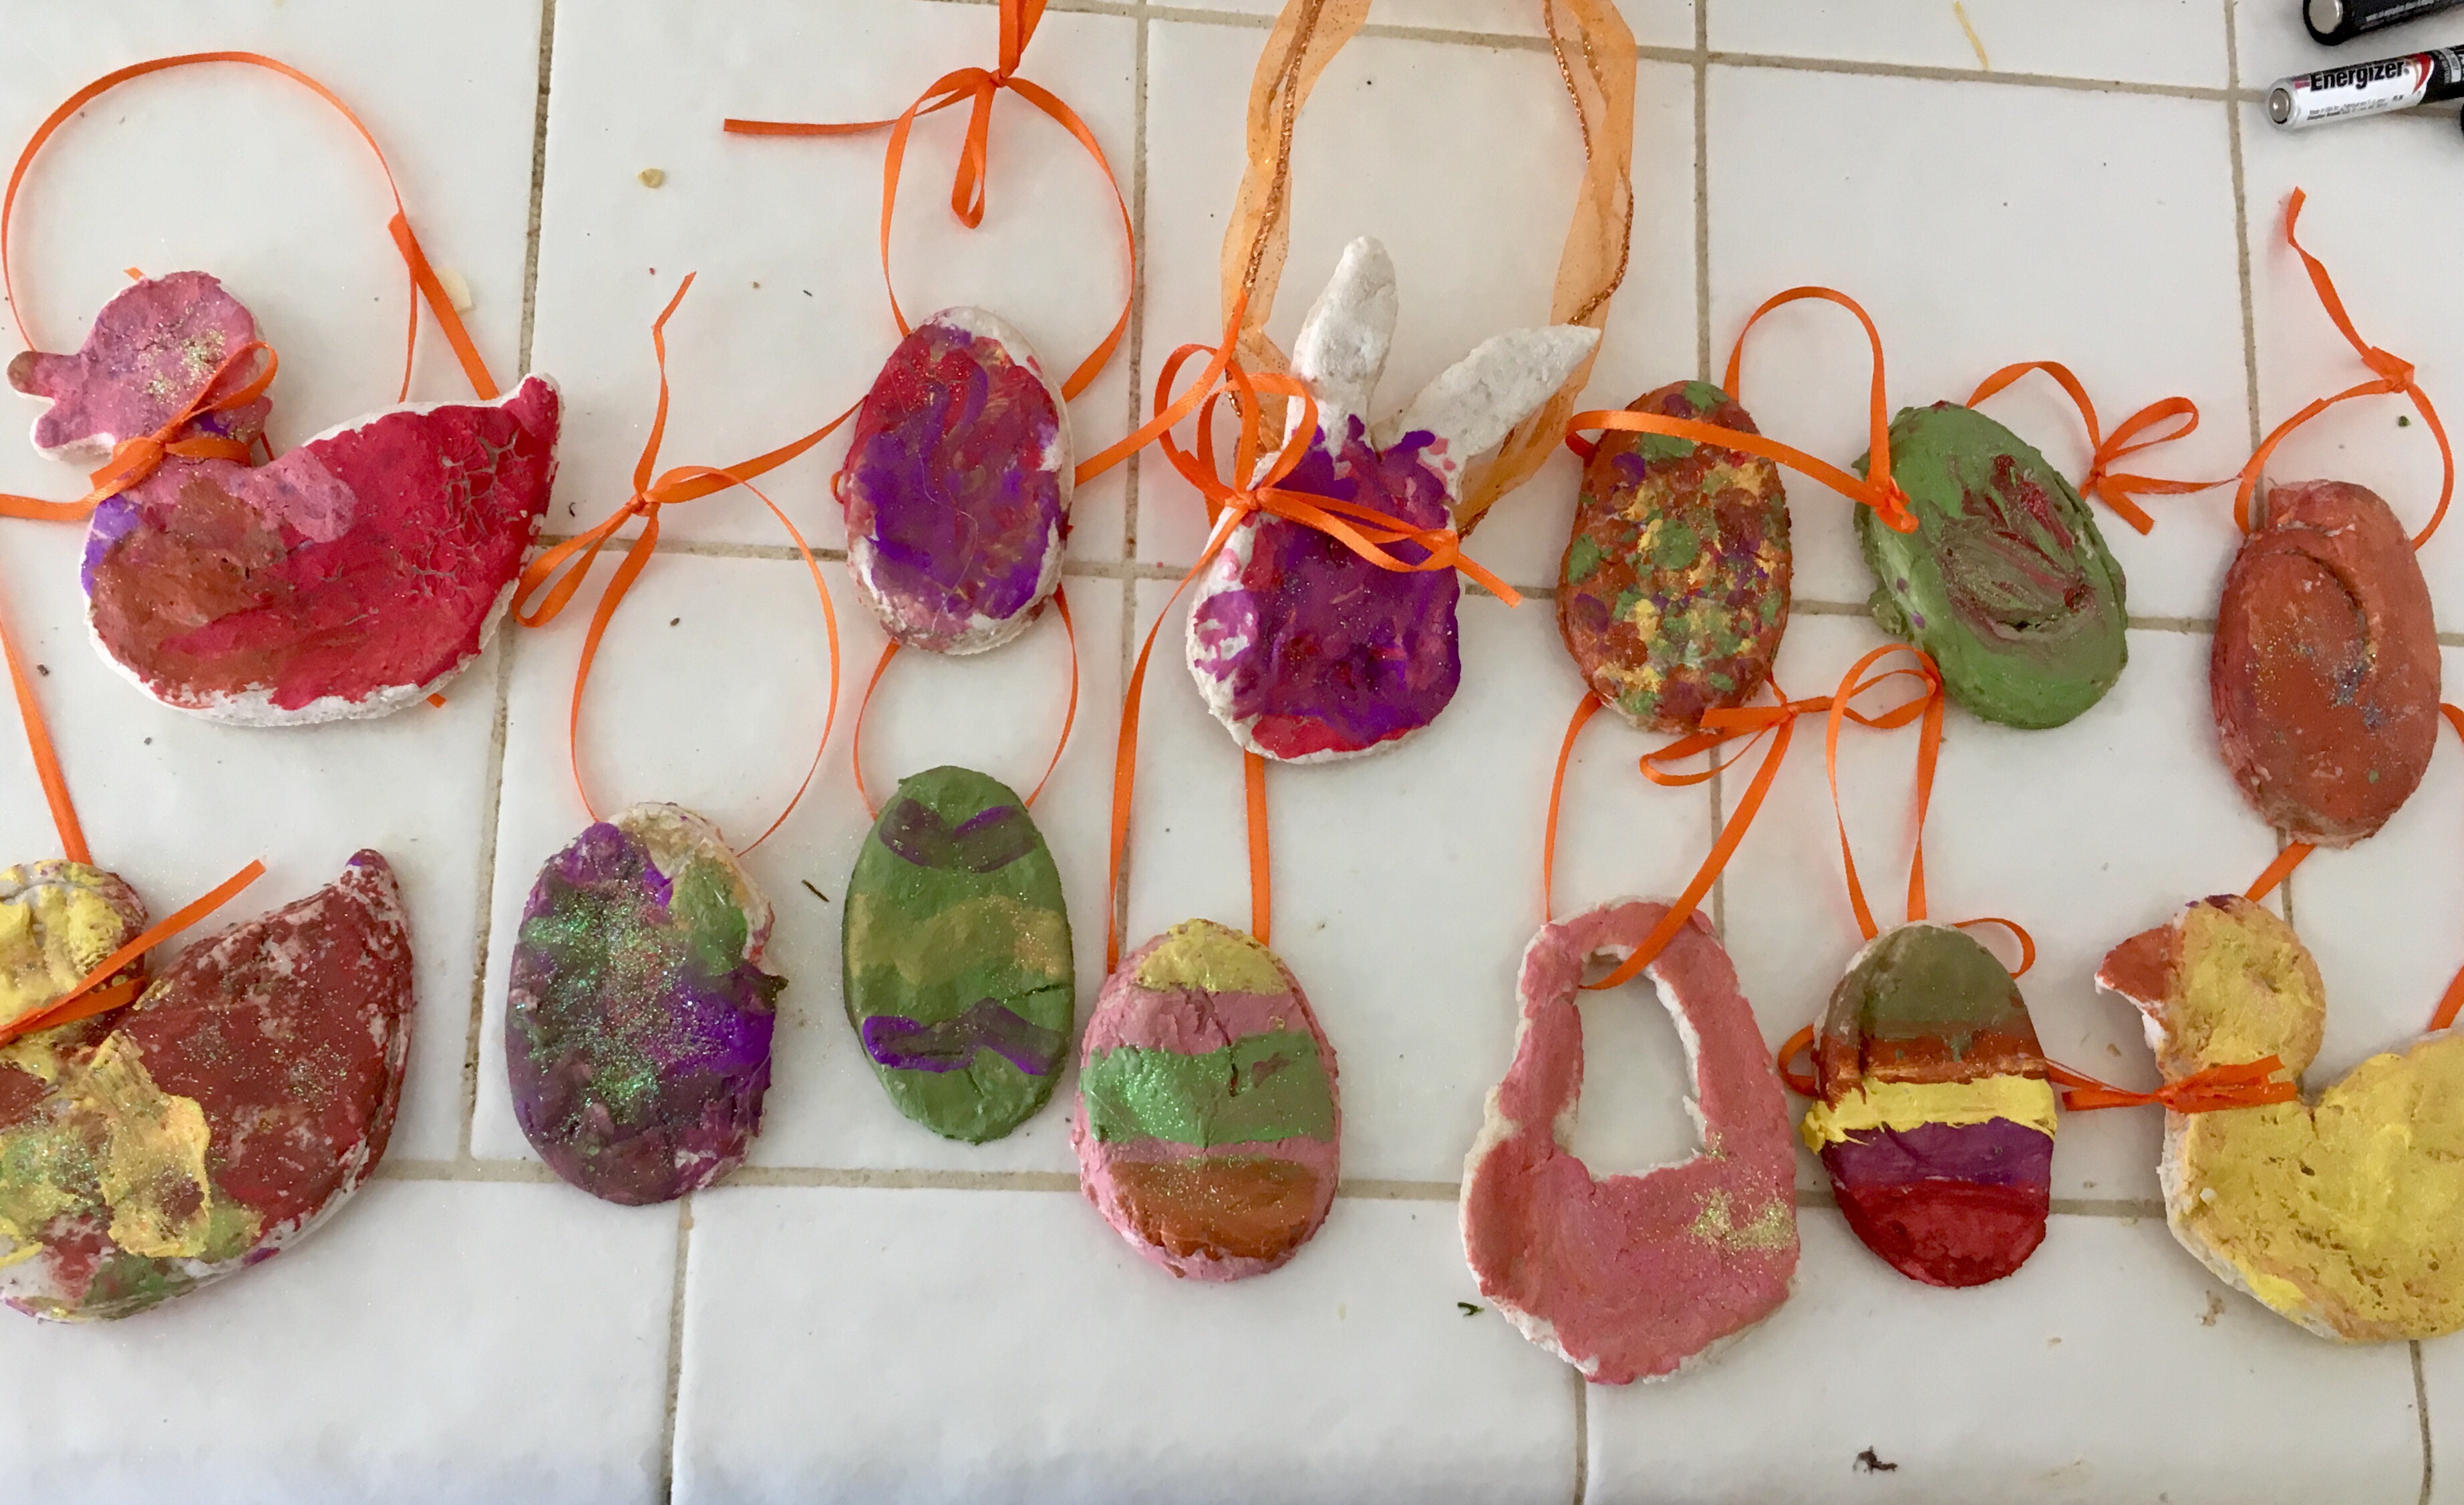
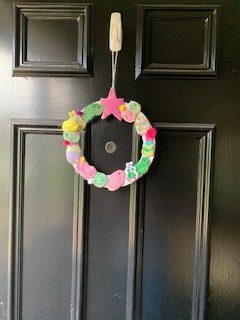
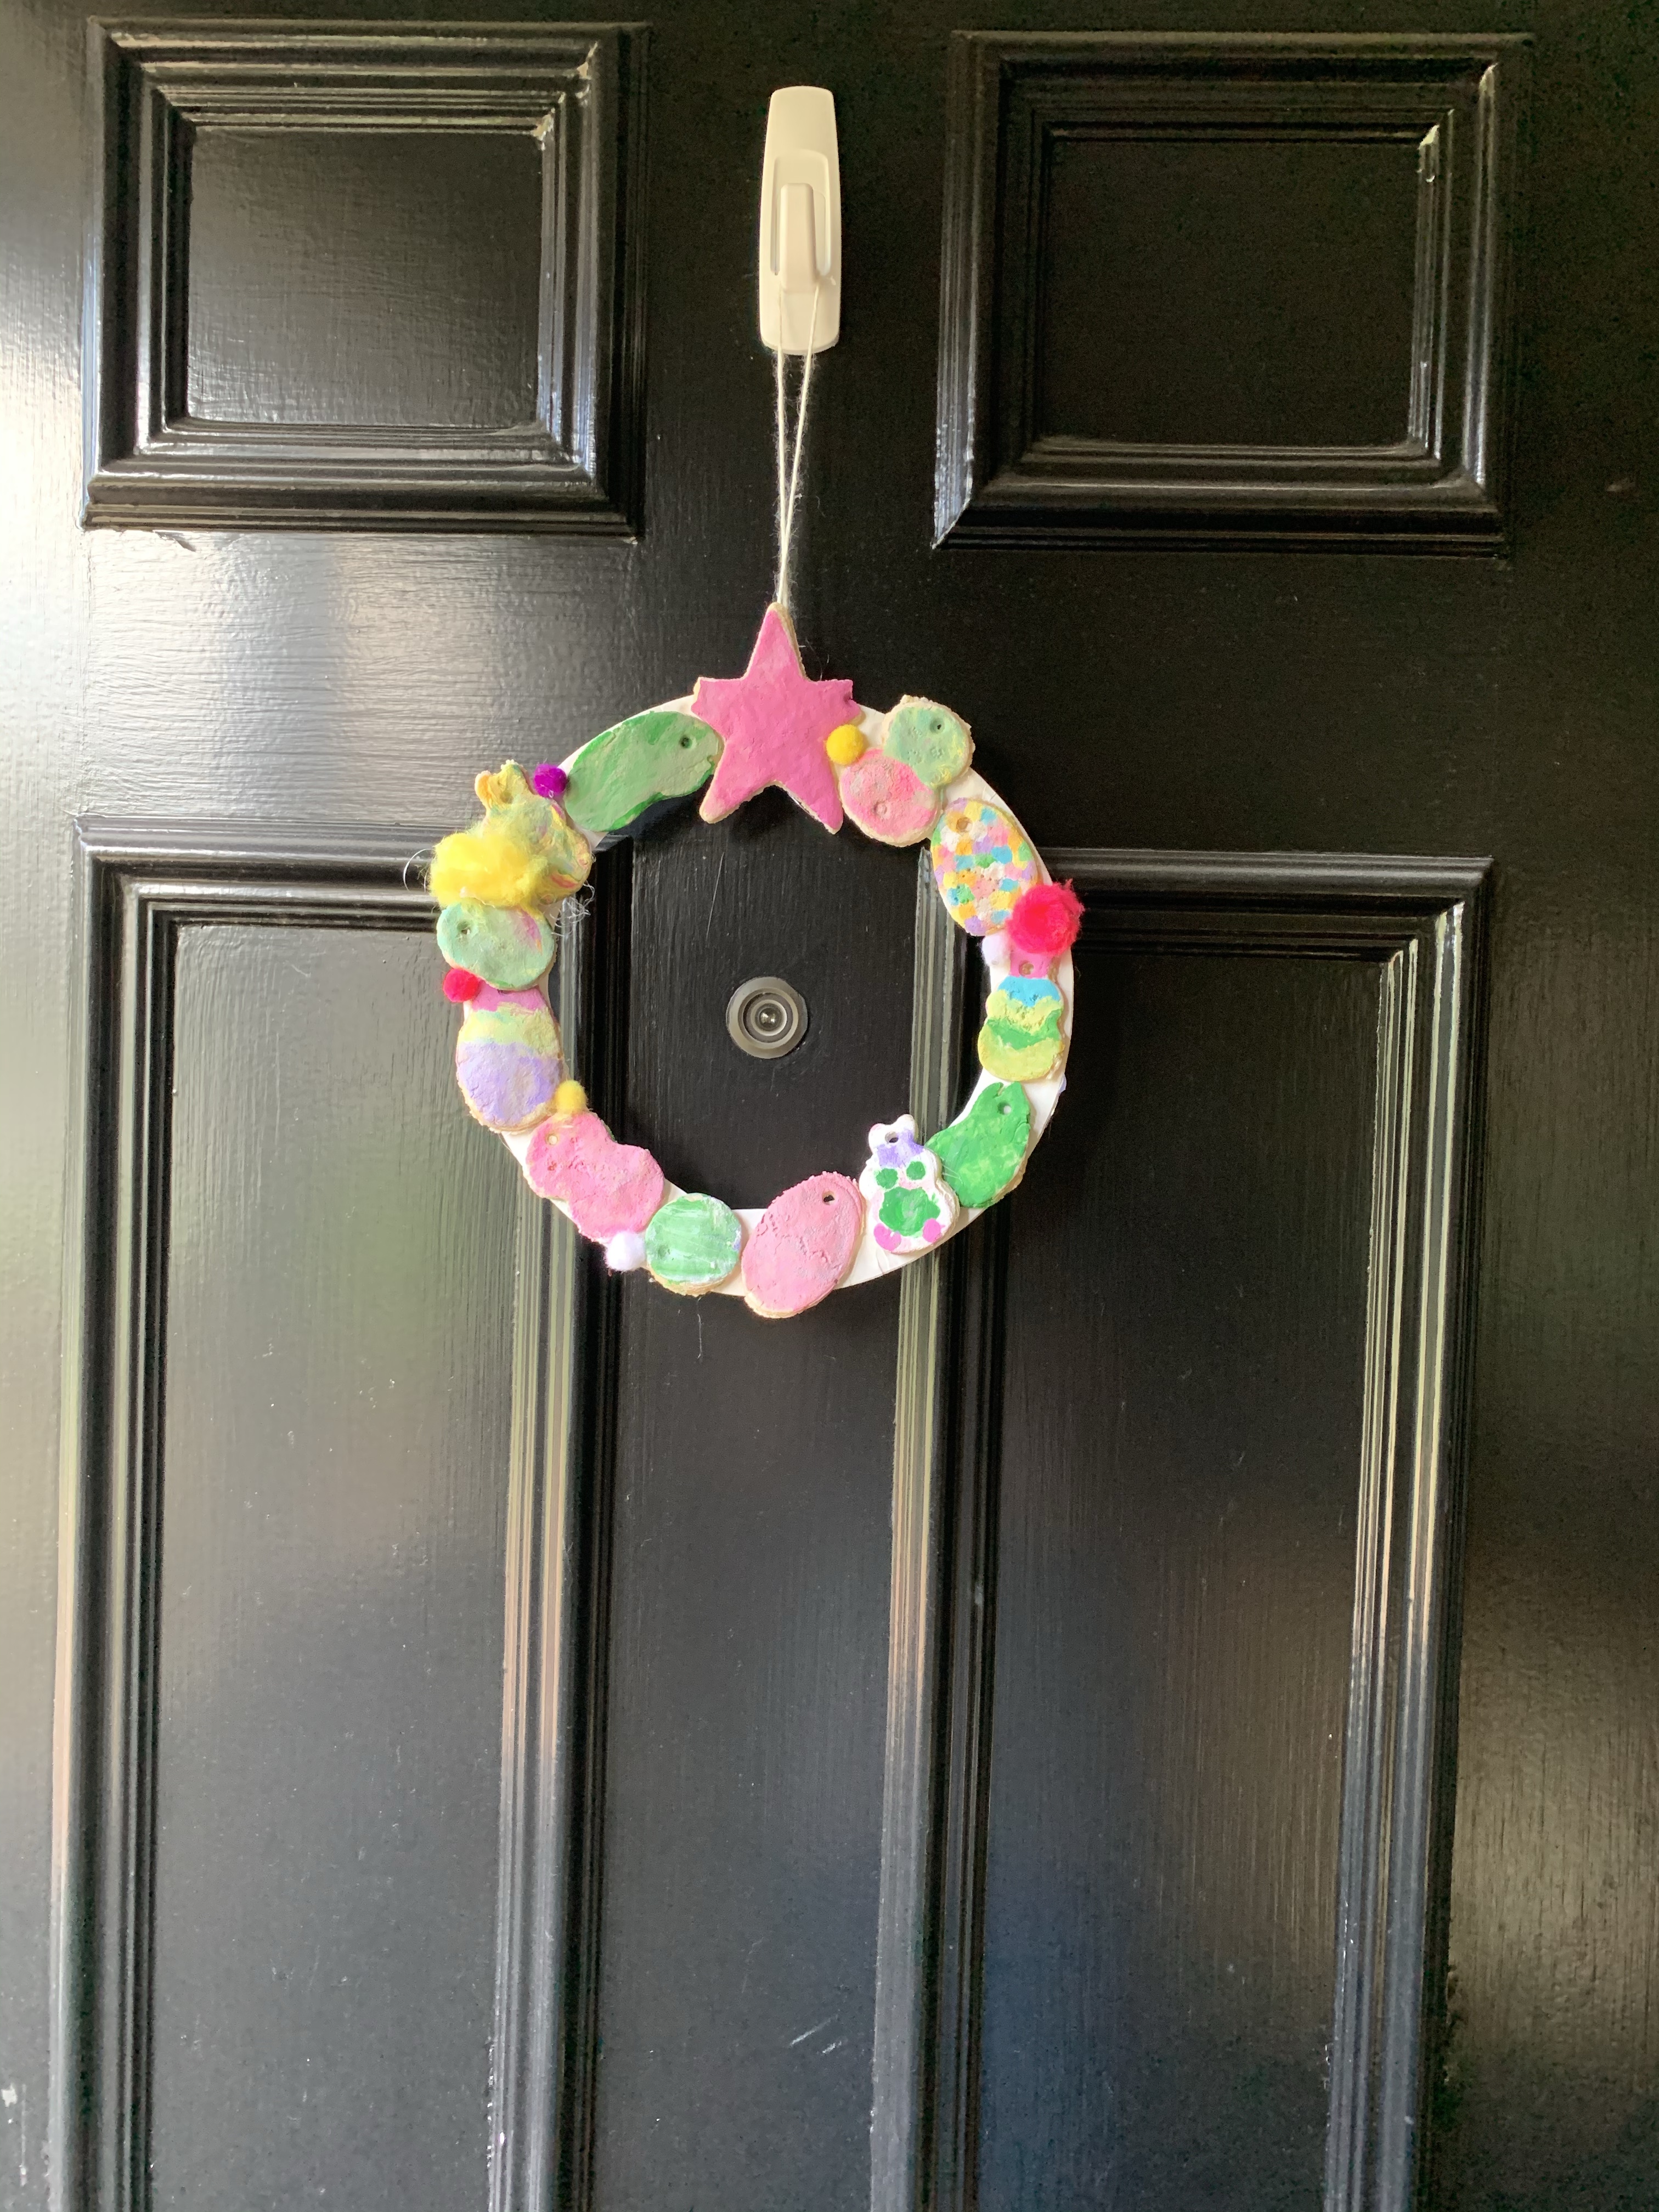
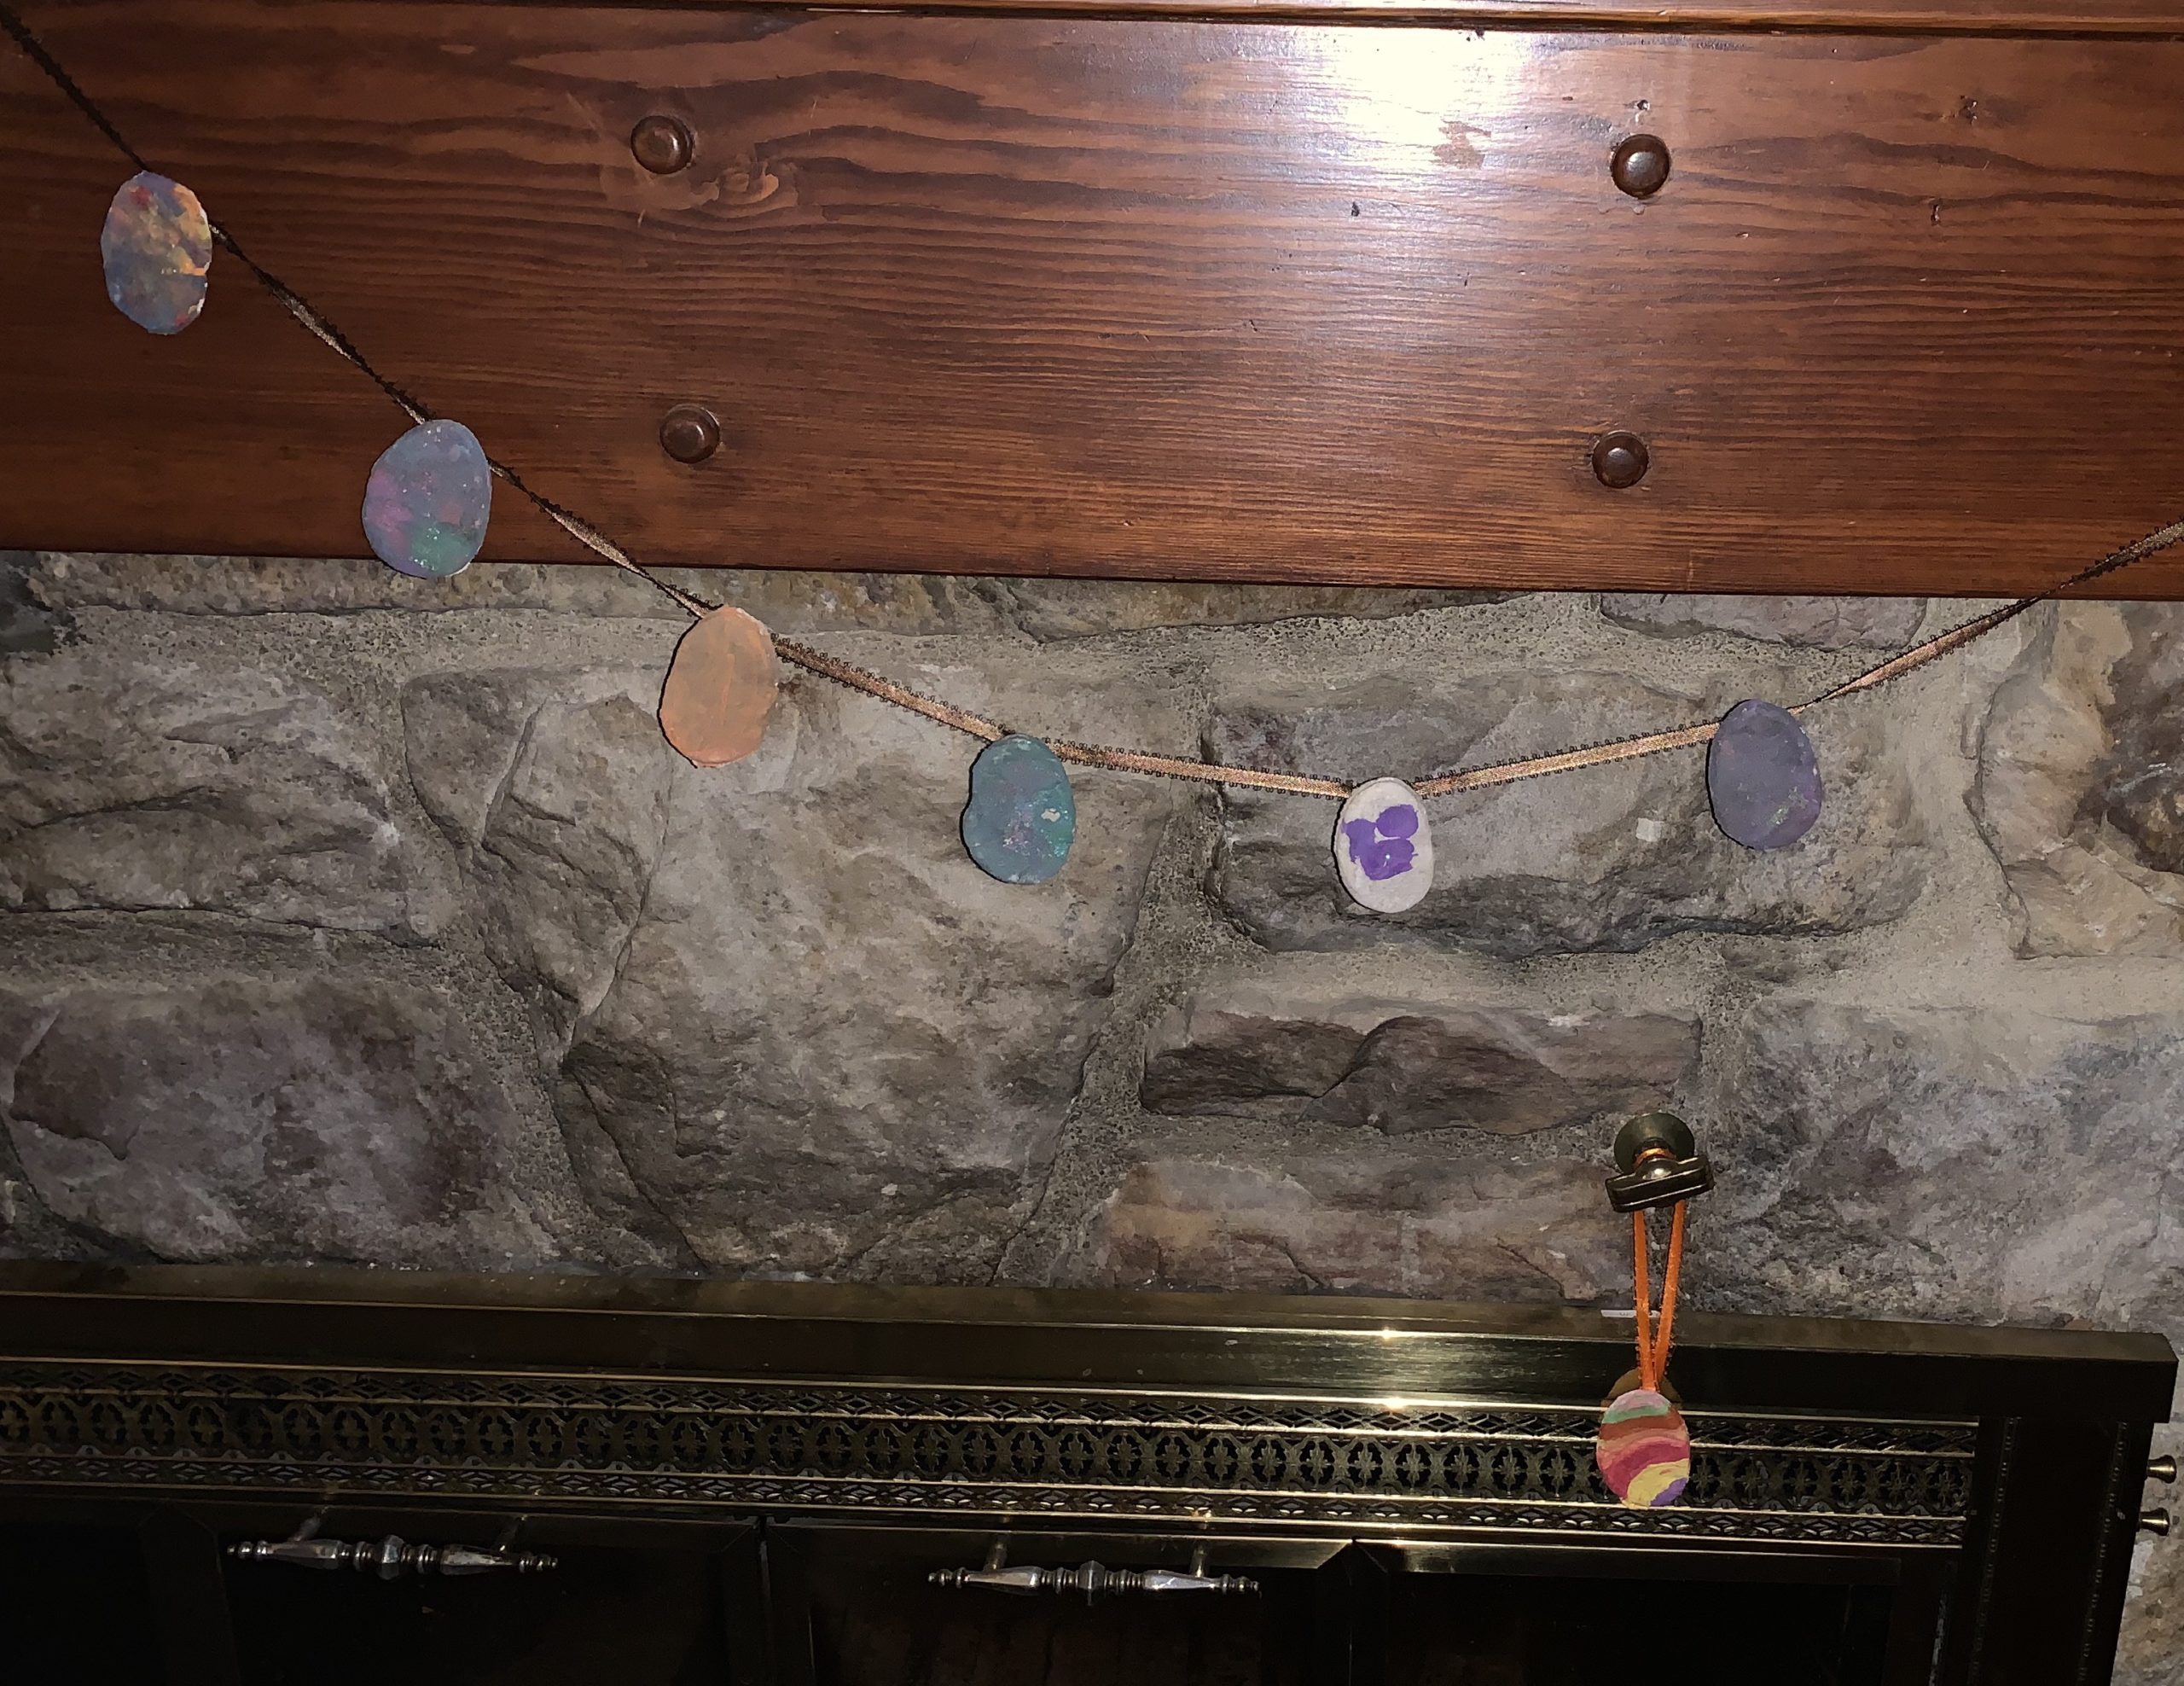
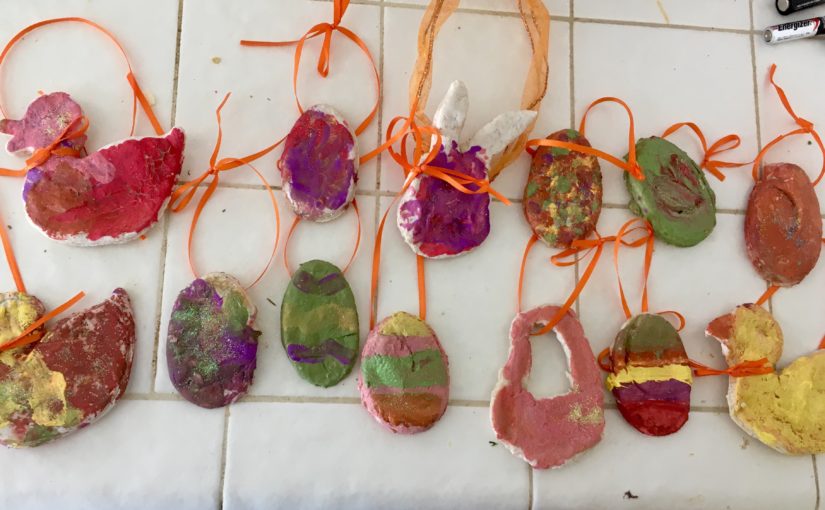
So we have done the salt dough ornaments before, but this time we made garland and a wreath out of our painted Easter ones!

img_3244-1

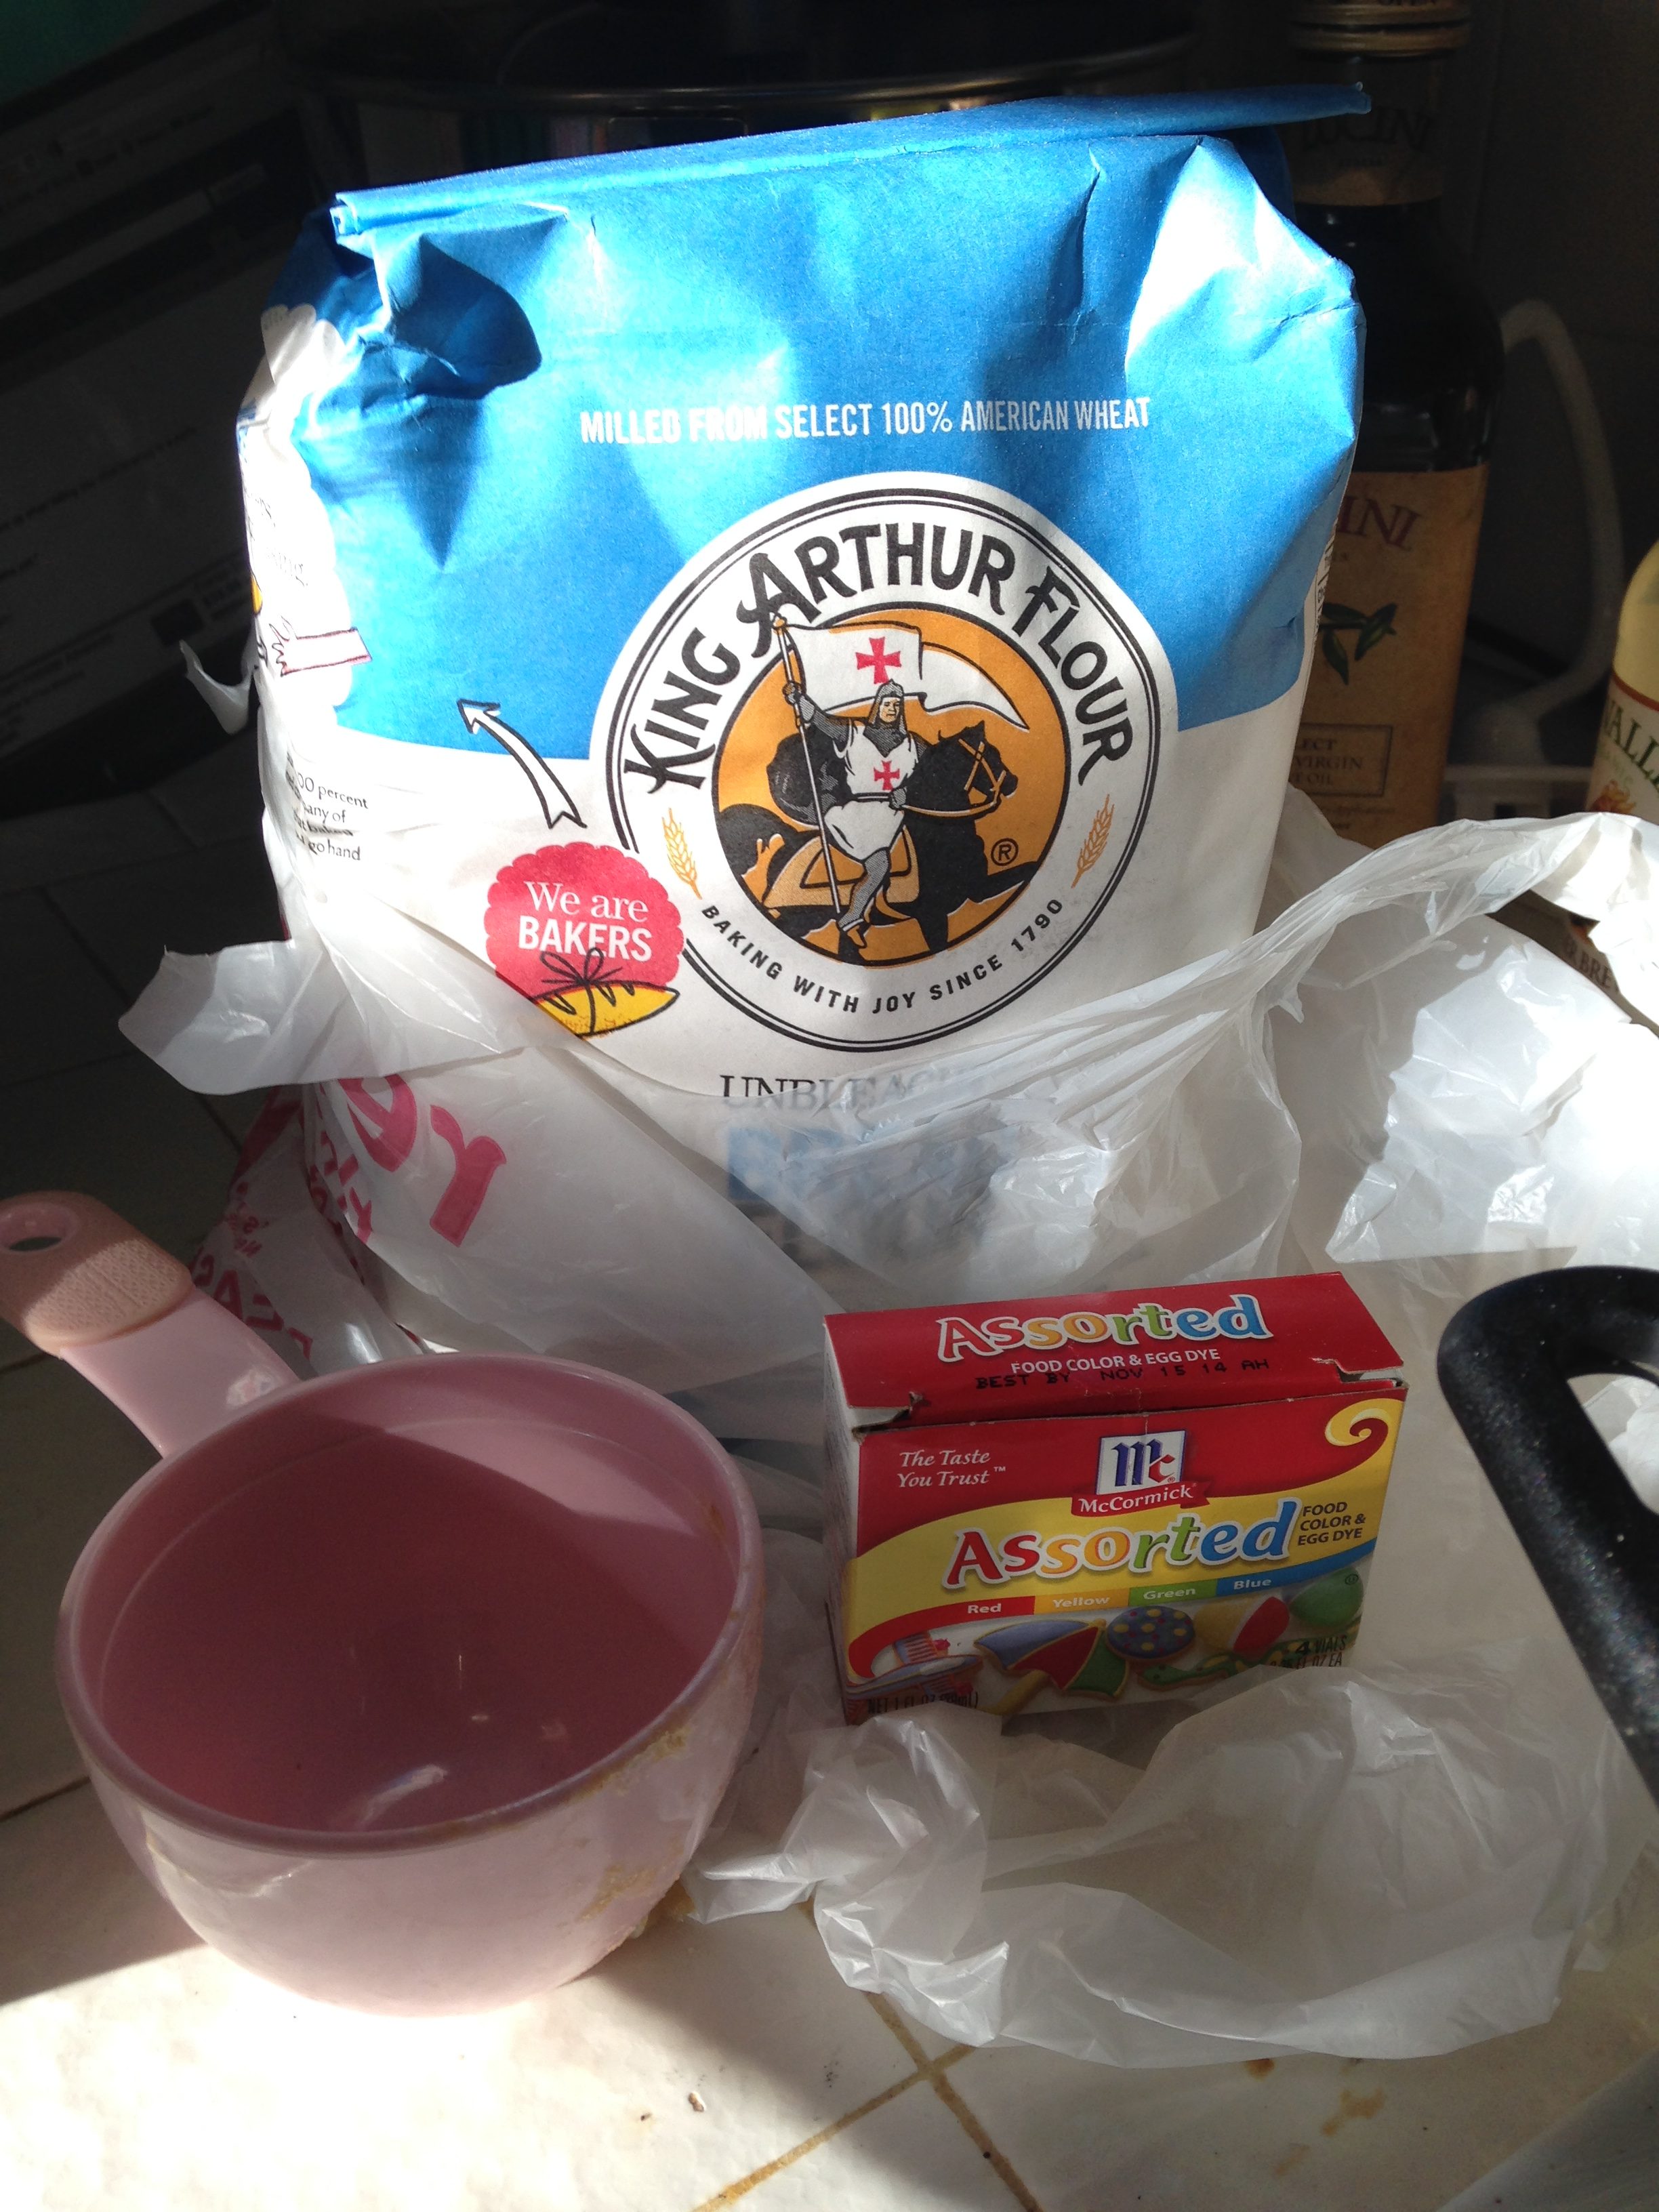
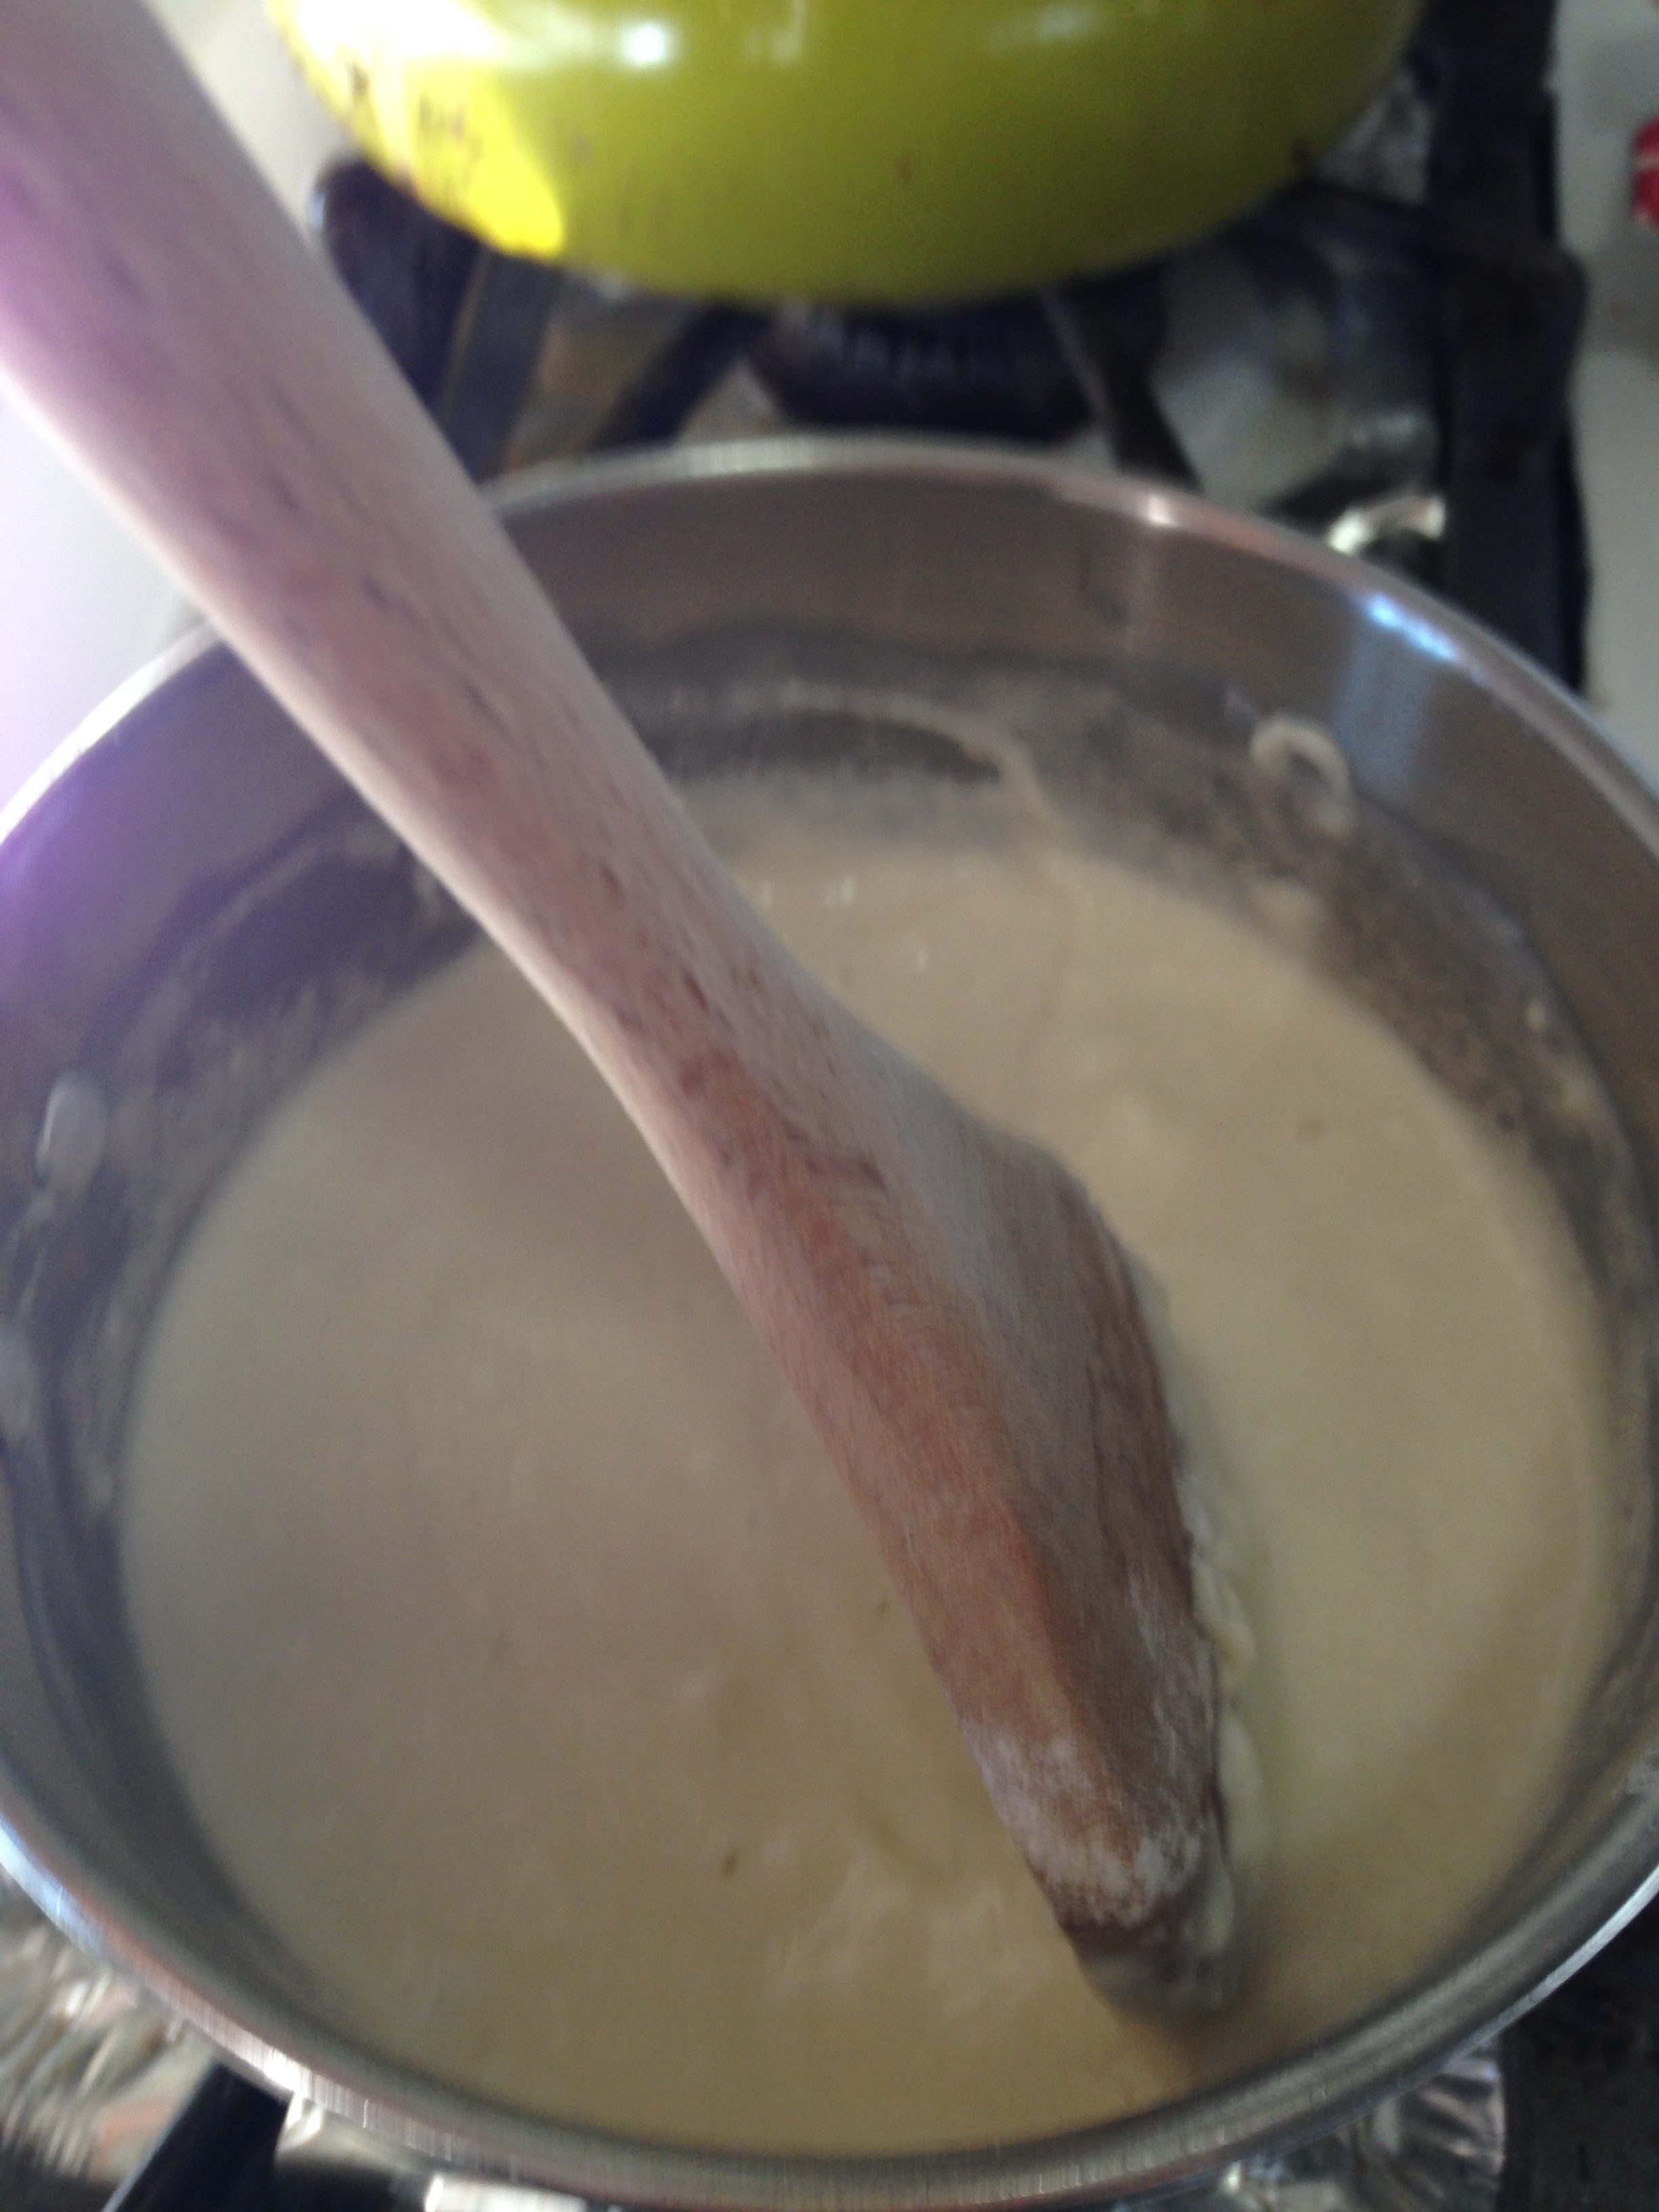
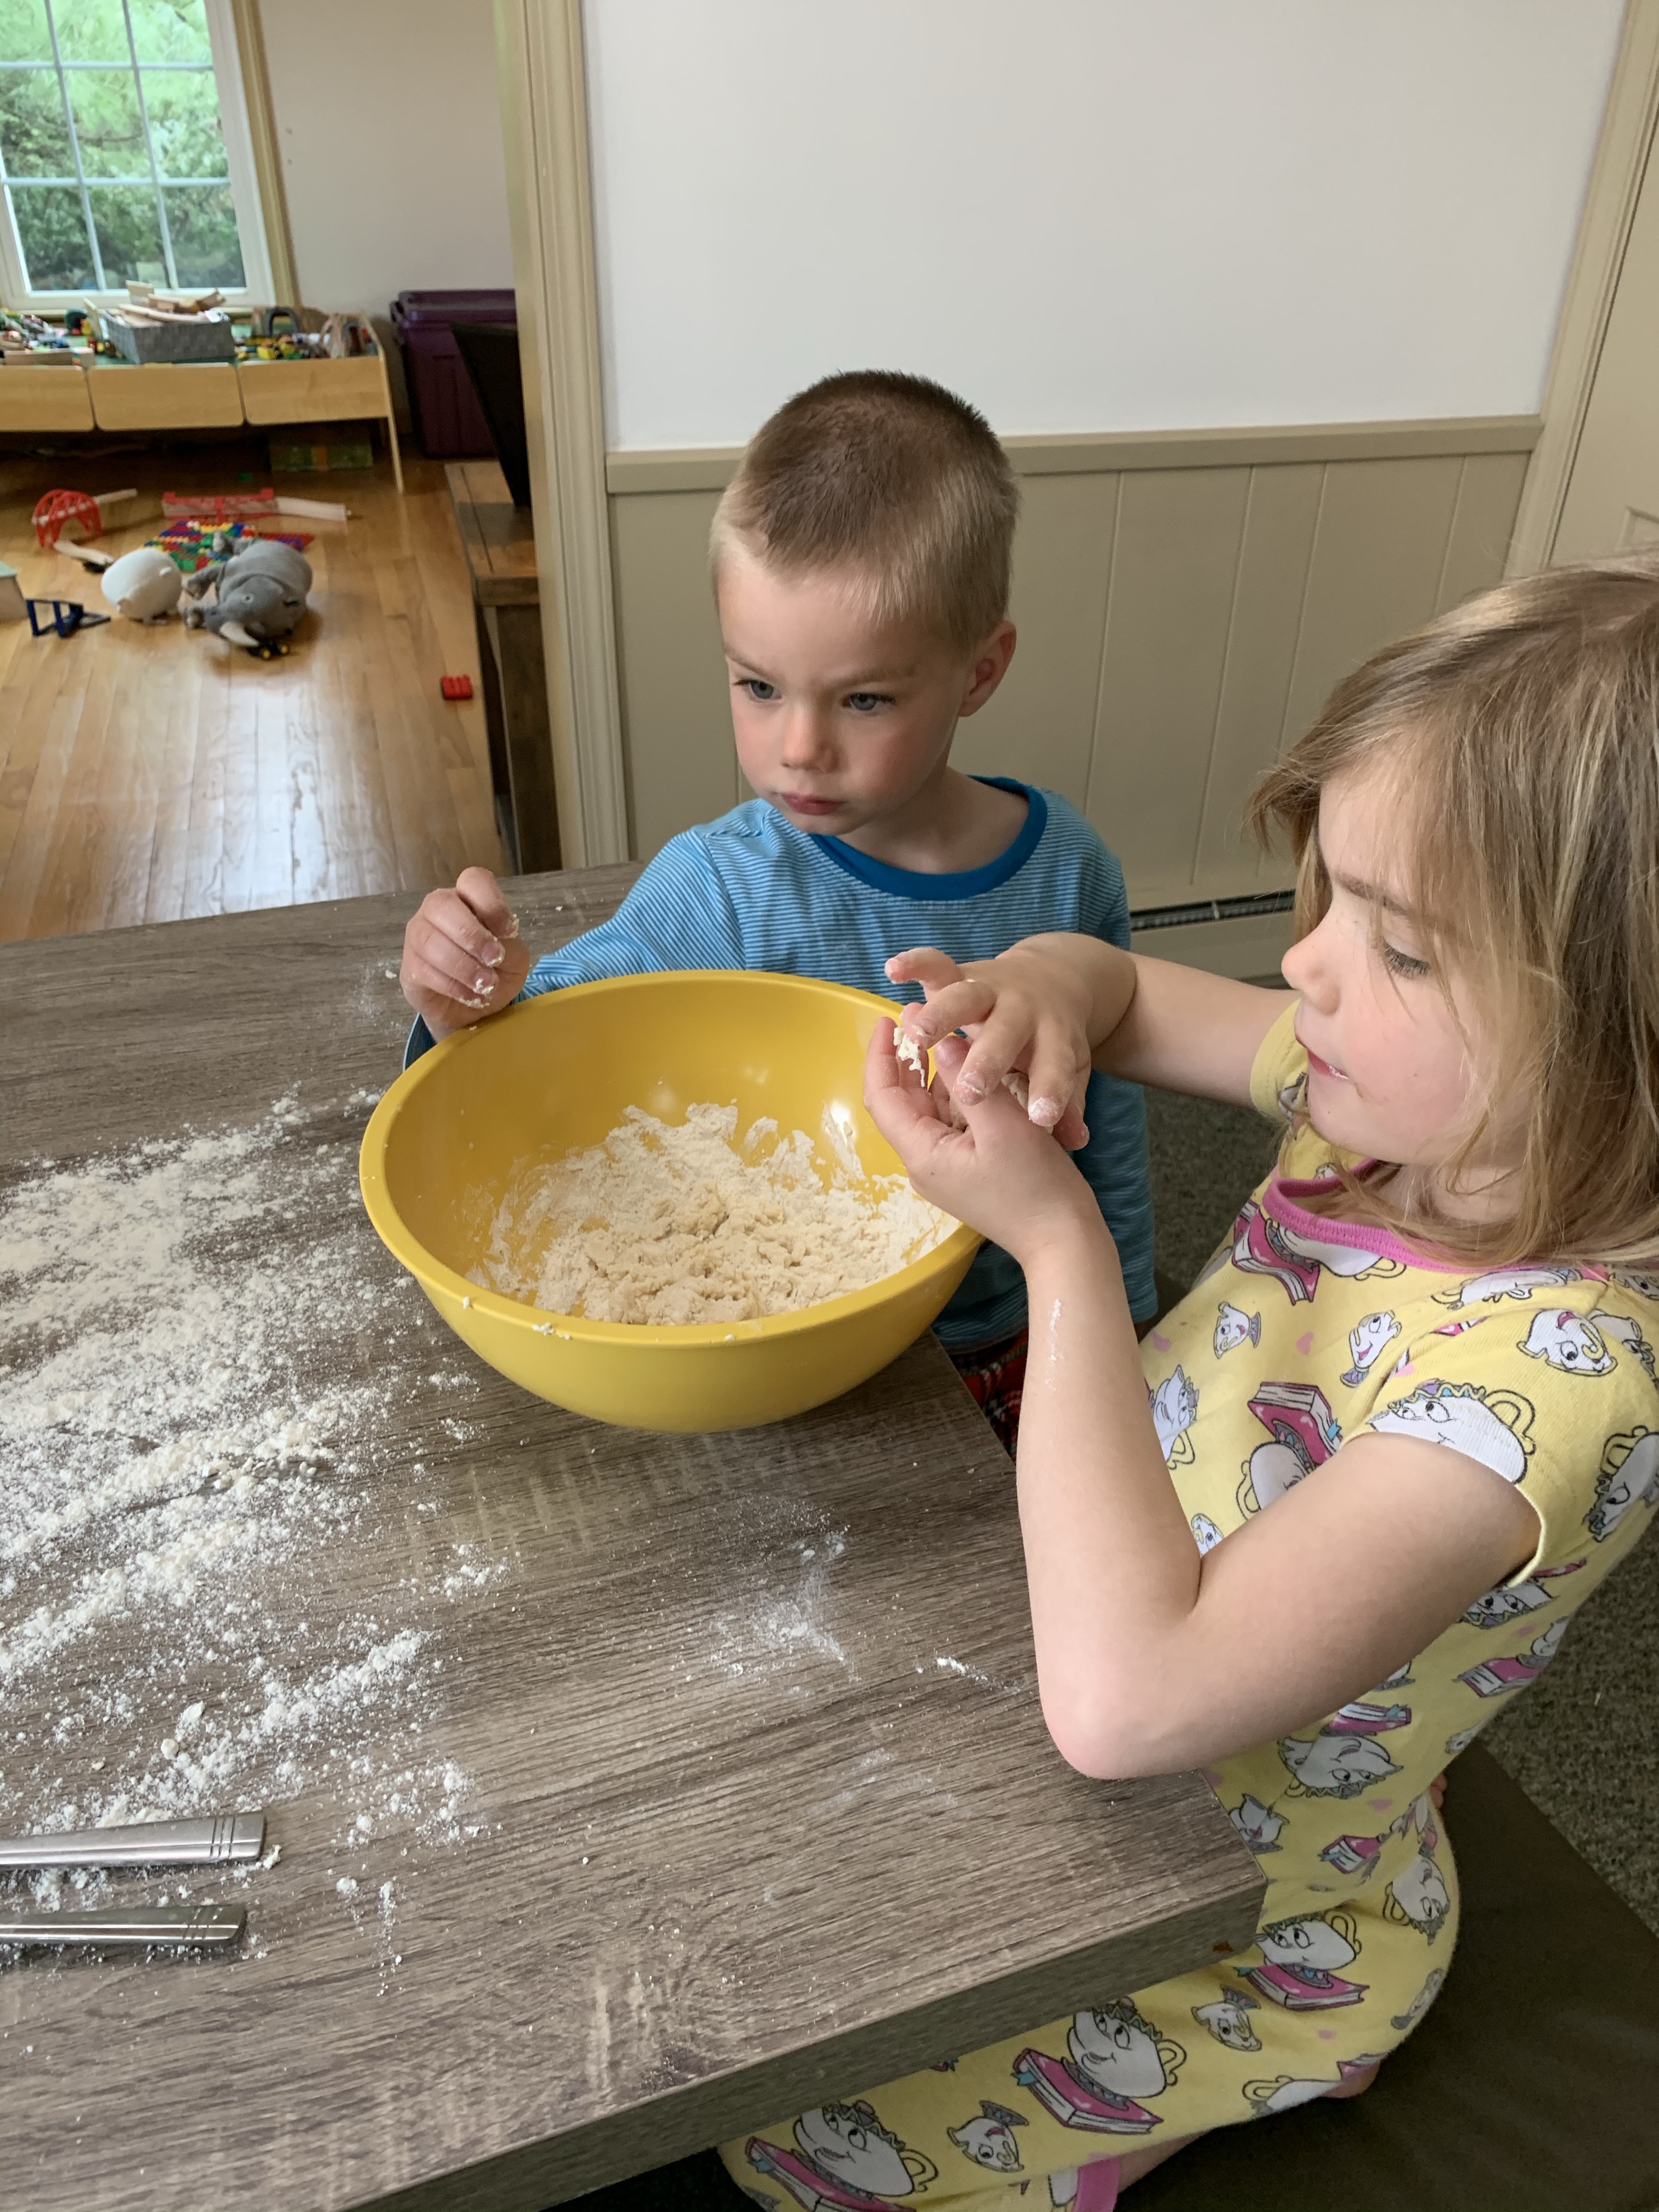
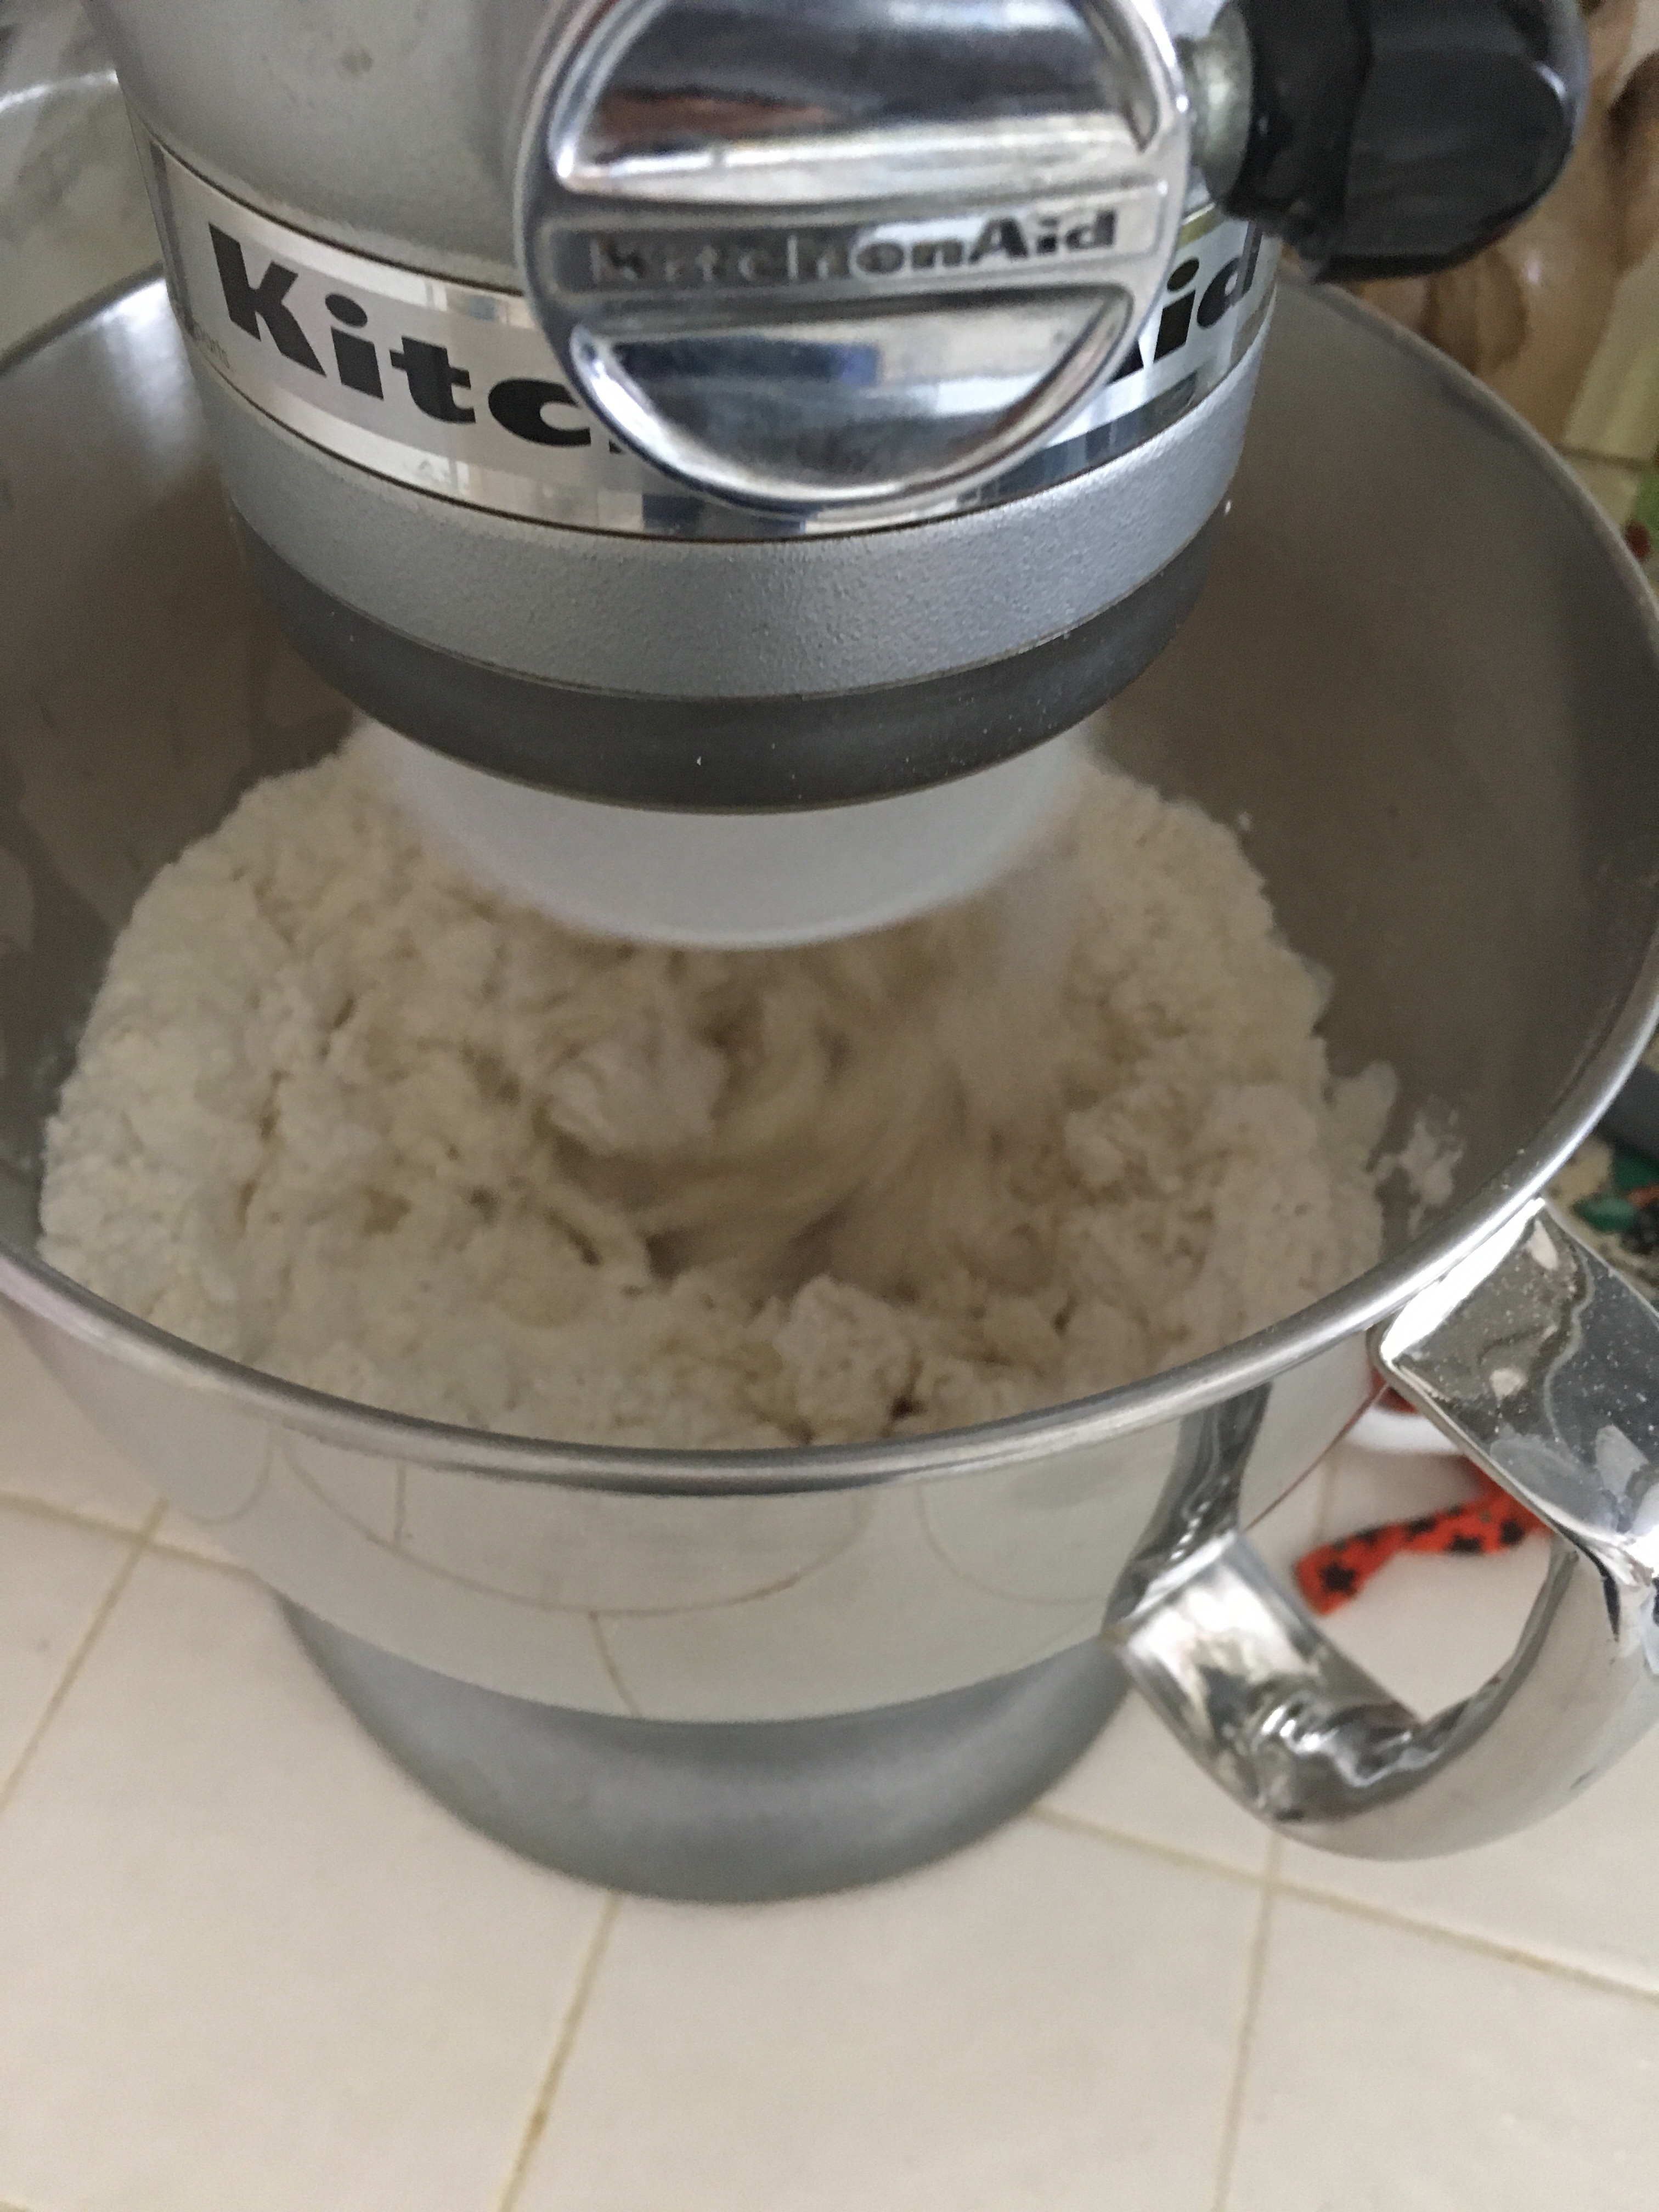
All you need to make salt dough ornaments is flour, water, and salt. So, start with two cups of flour, 1 cup and salt and mix. Then add water slowly until it is a play dough like consistency.  We ended up using our hands to mix it up. If it is too sticky, add more flour, too dry add more water.

img_3147

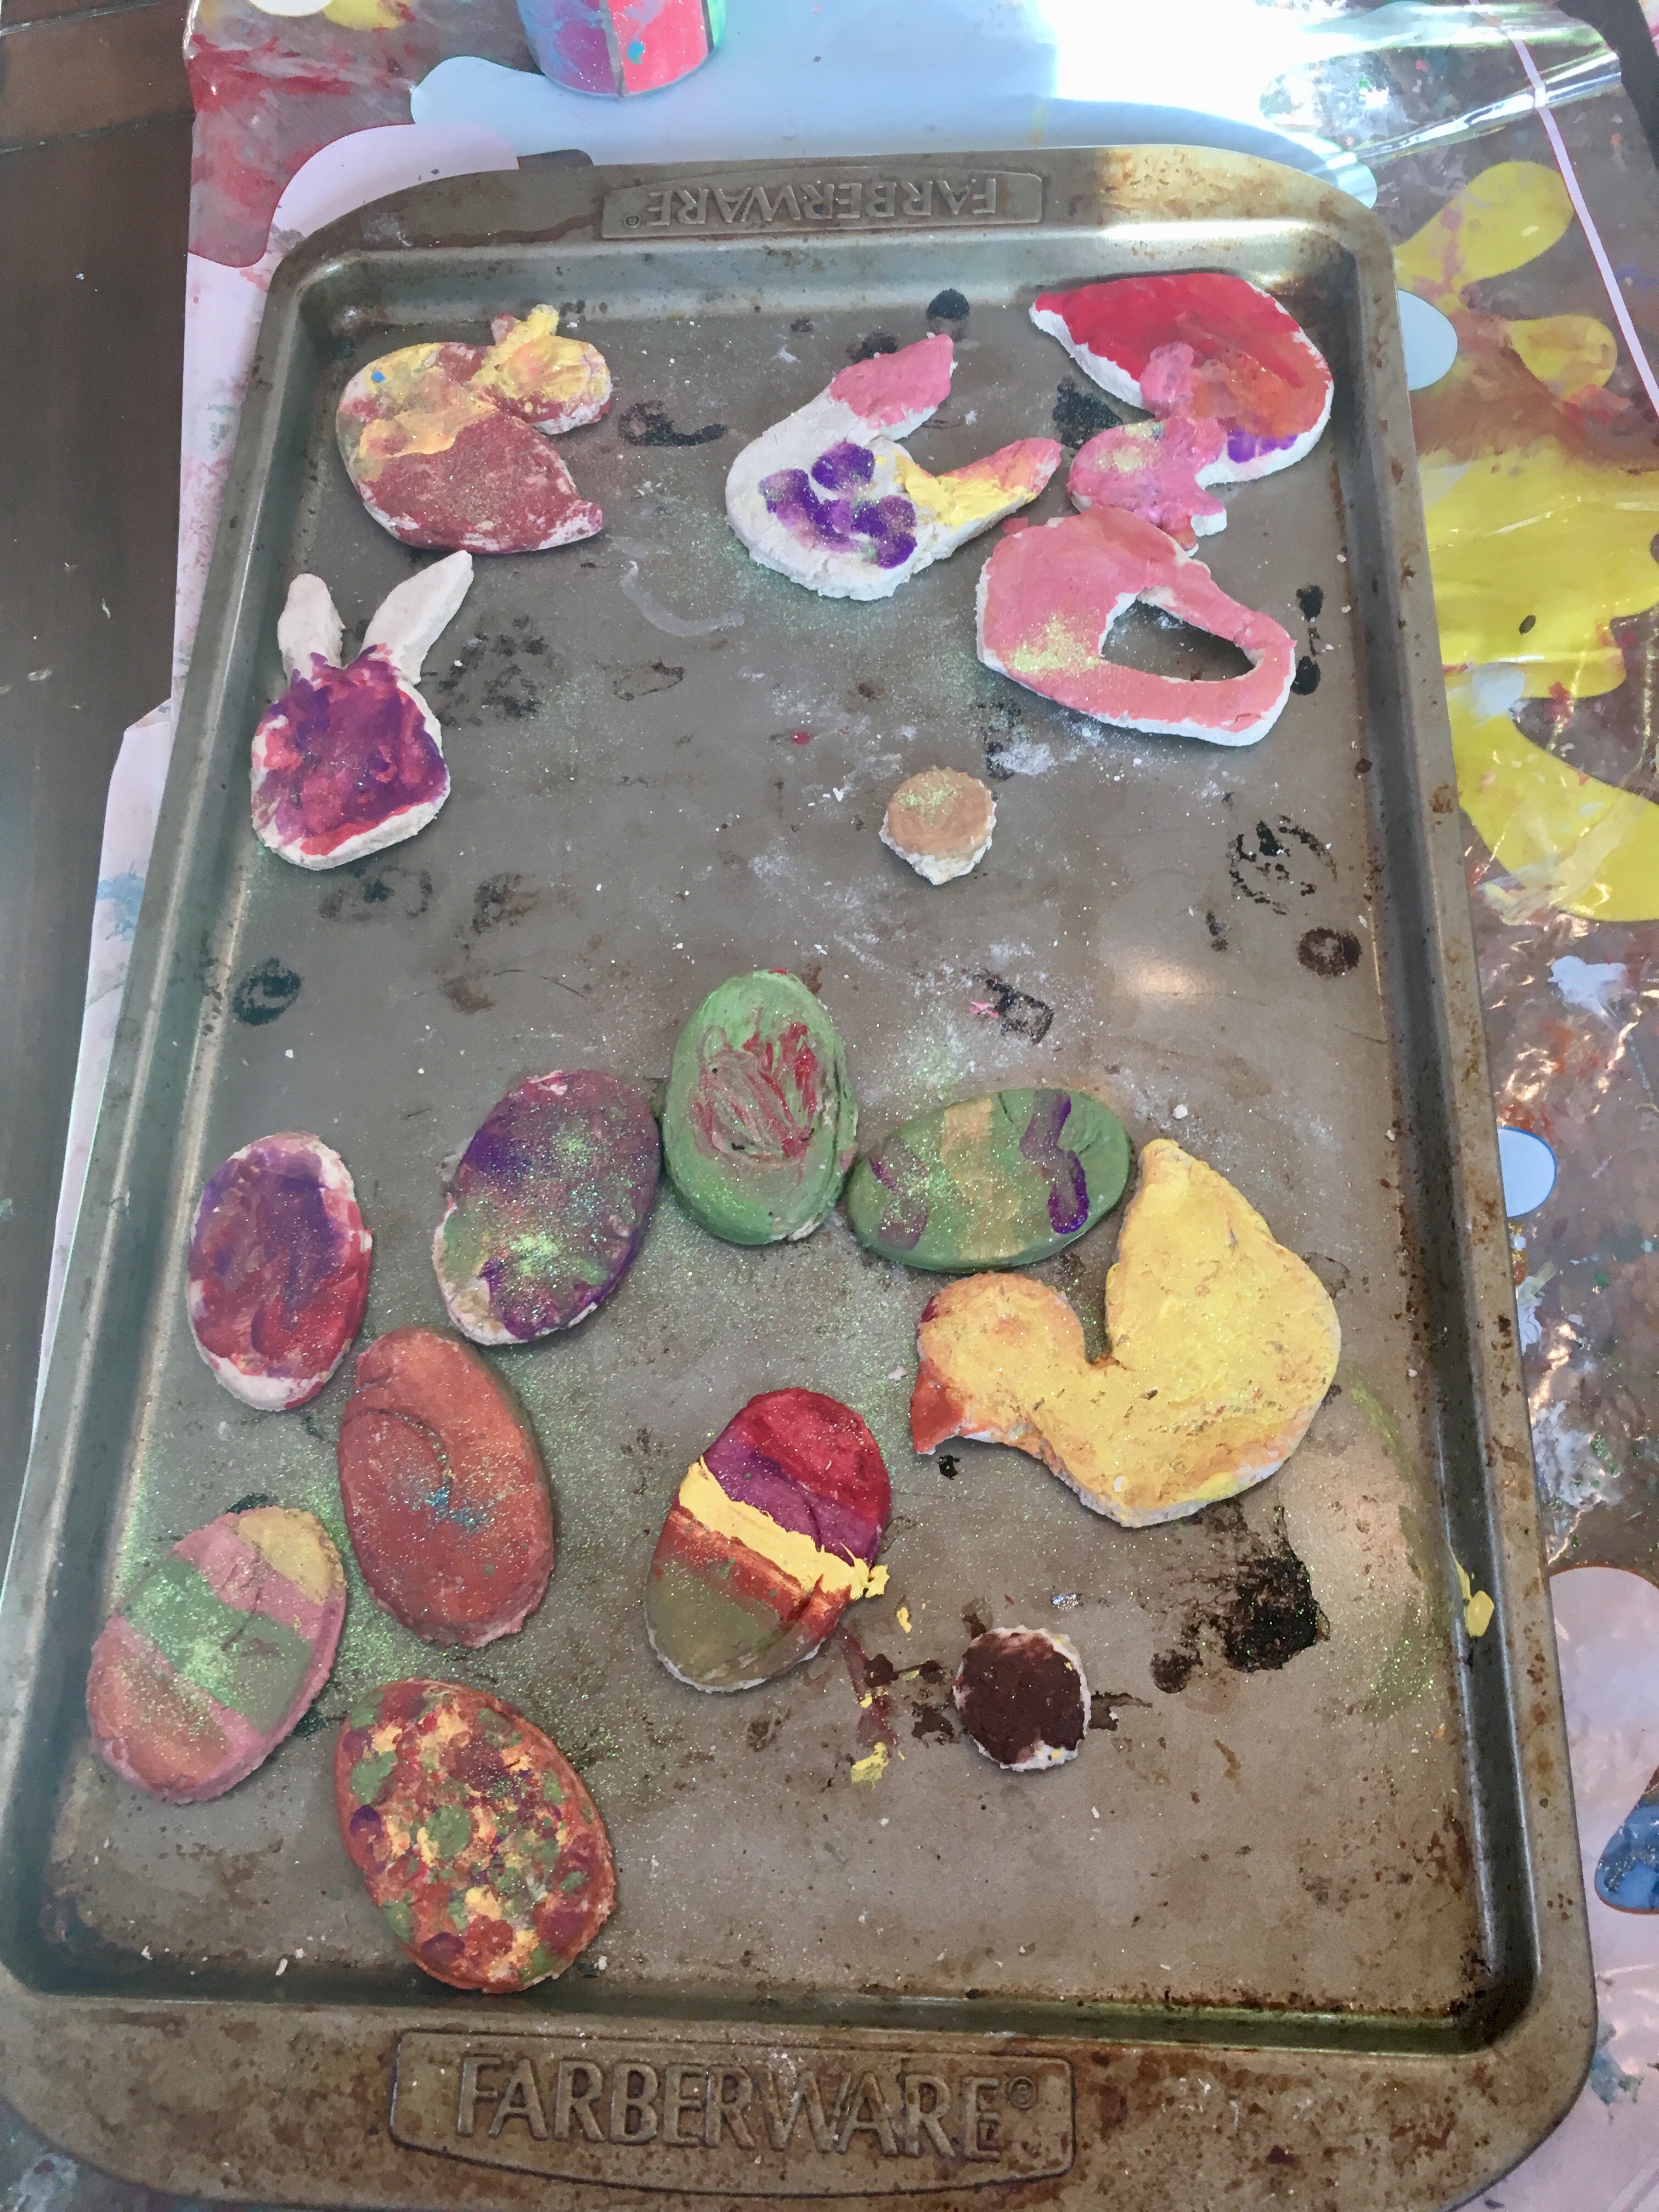
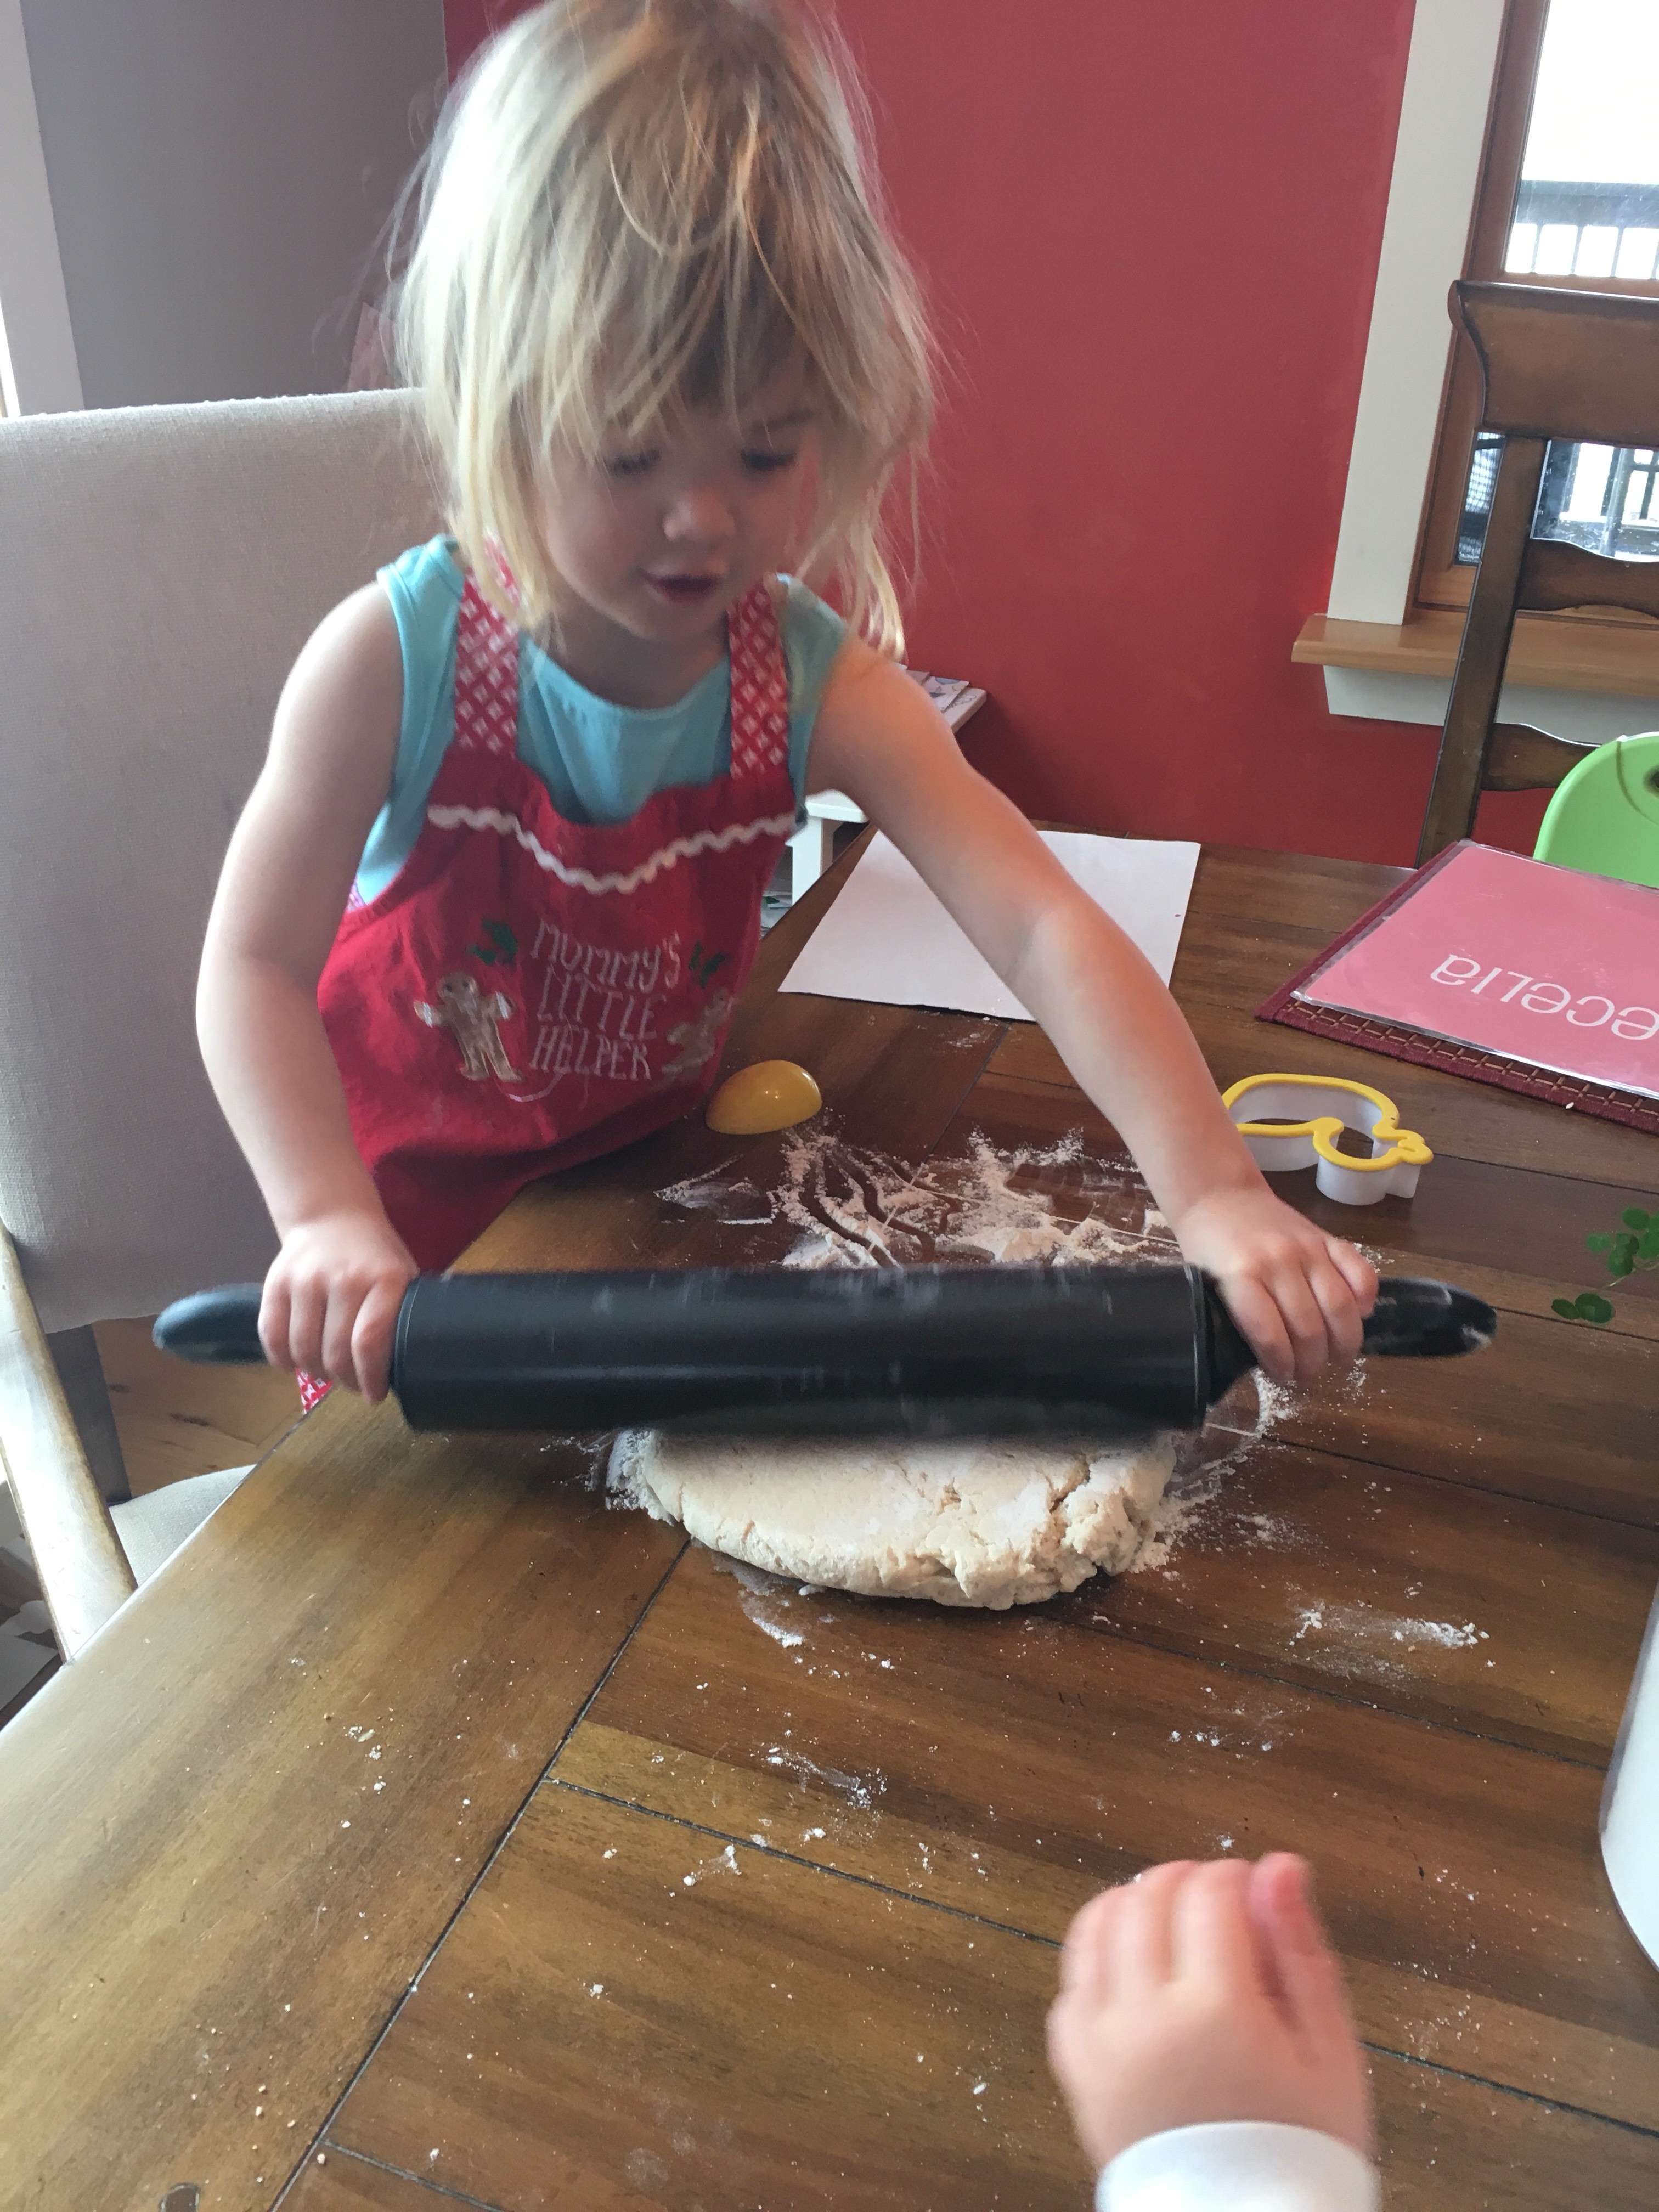
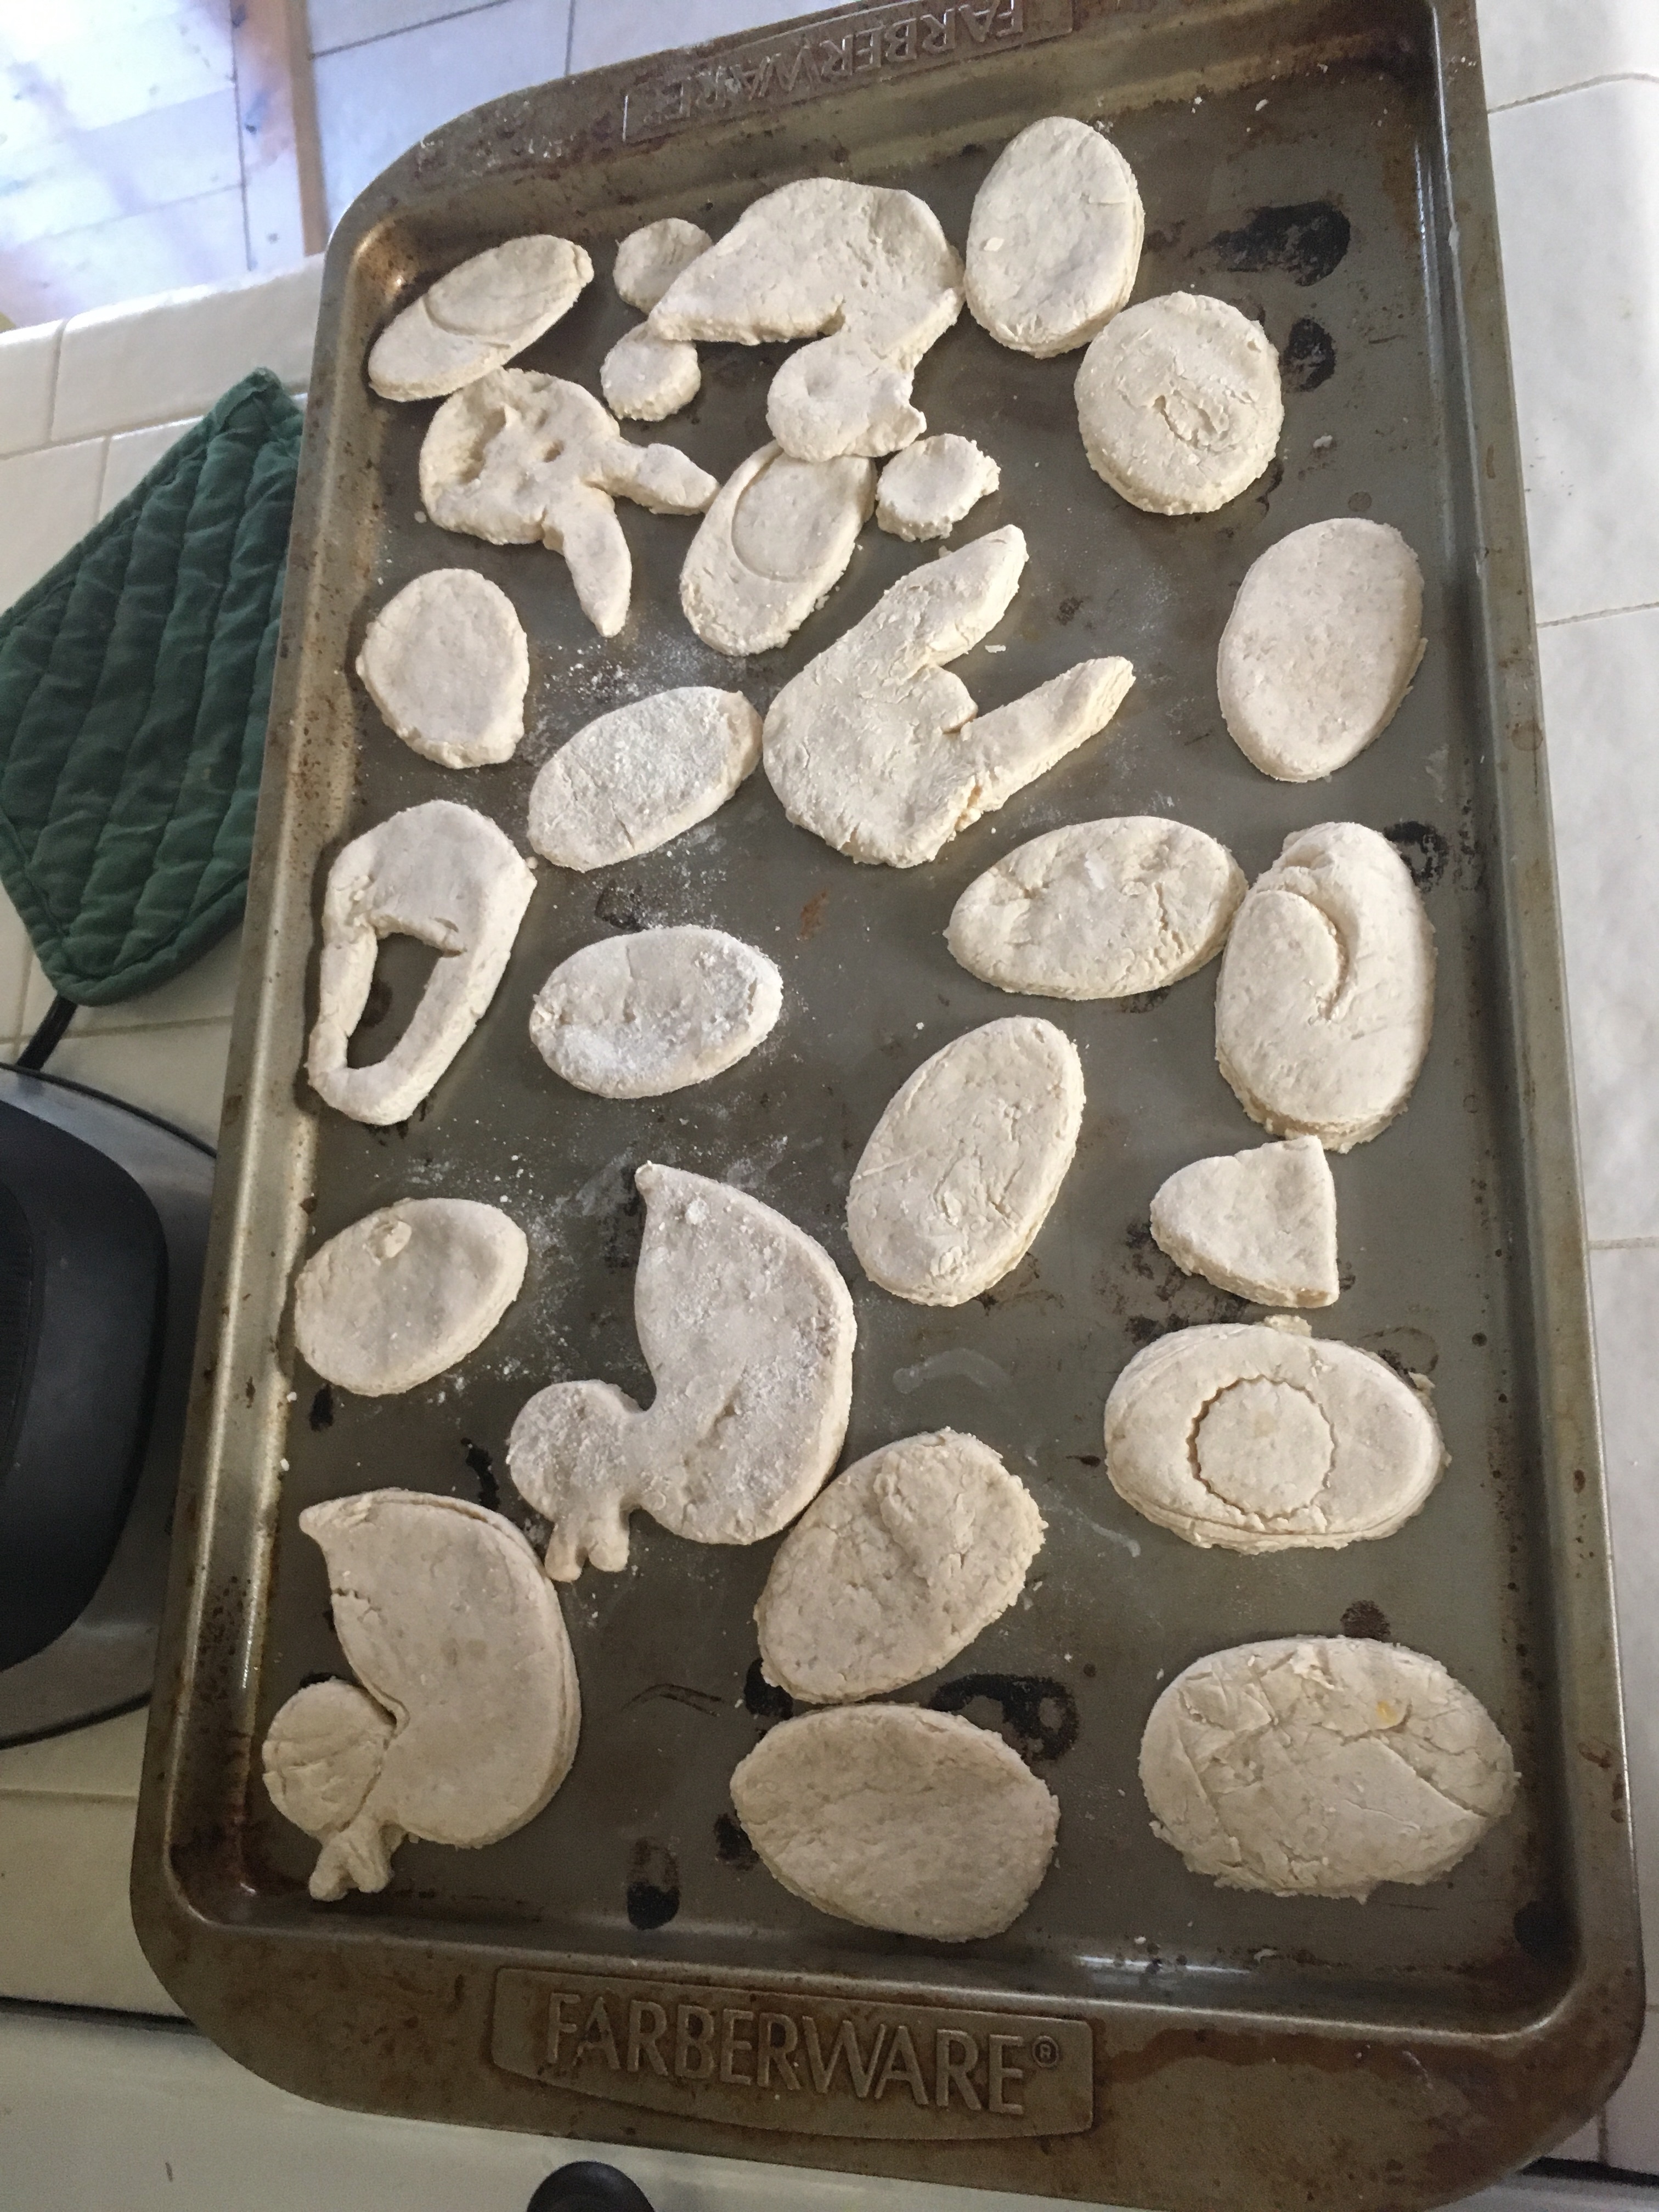
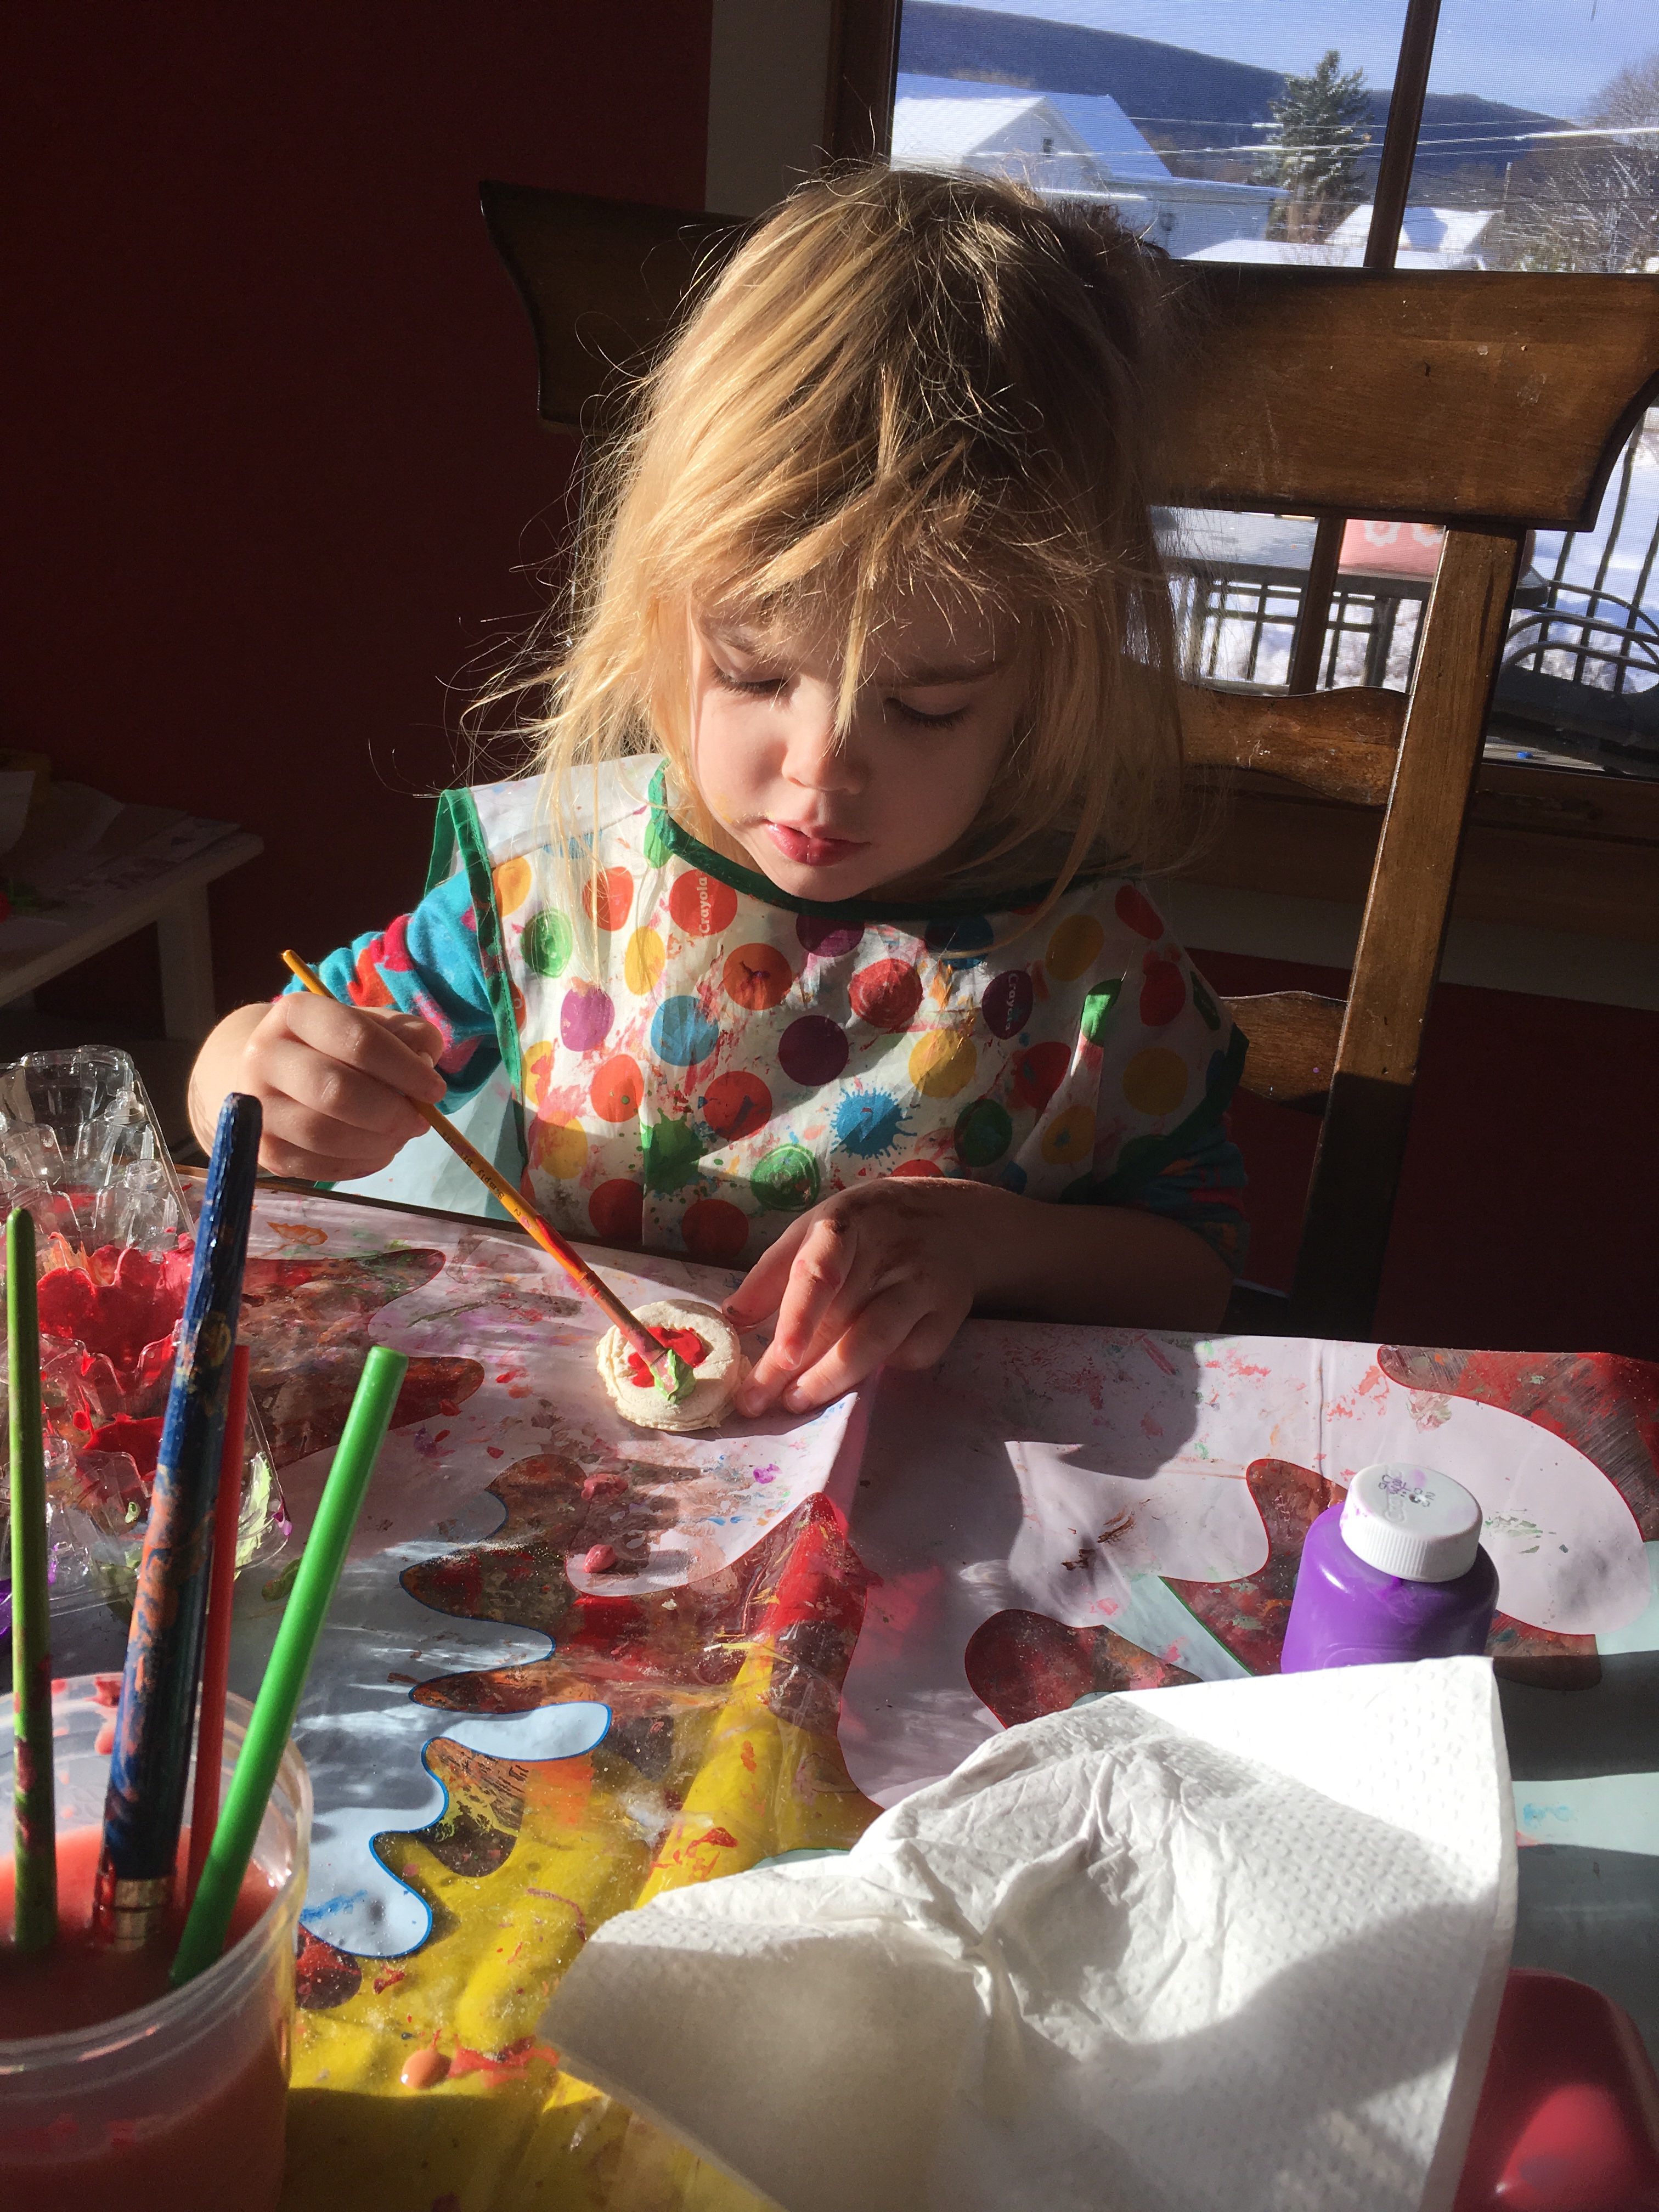
Then we rolled out the dough to a 1/4 inch thin, and used some Easter egg halves, including a bunny, chick, and jelly bean shape. You can of course just use cookie cutters as well. Use a straw to make a circle hole at the top of each ornament so you can add string later.

img_3148

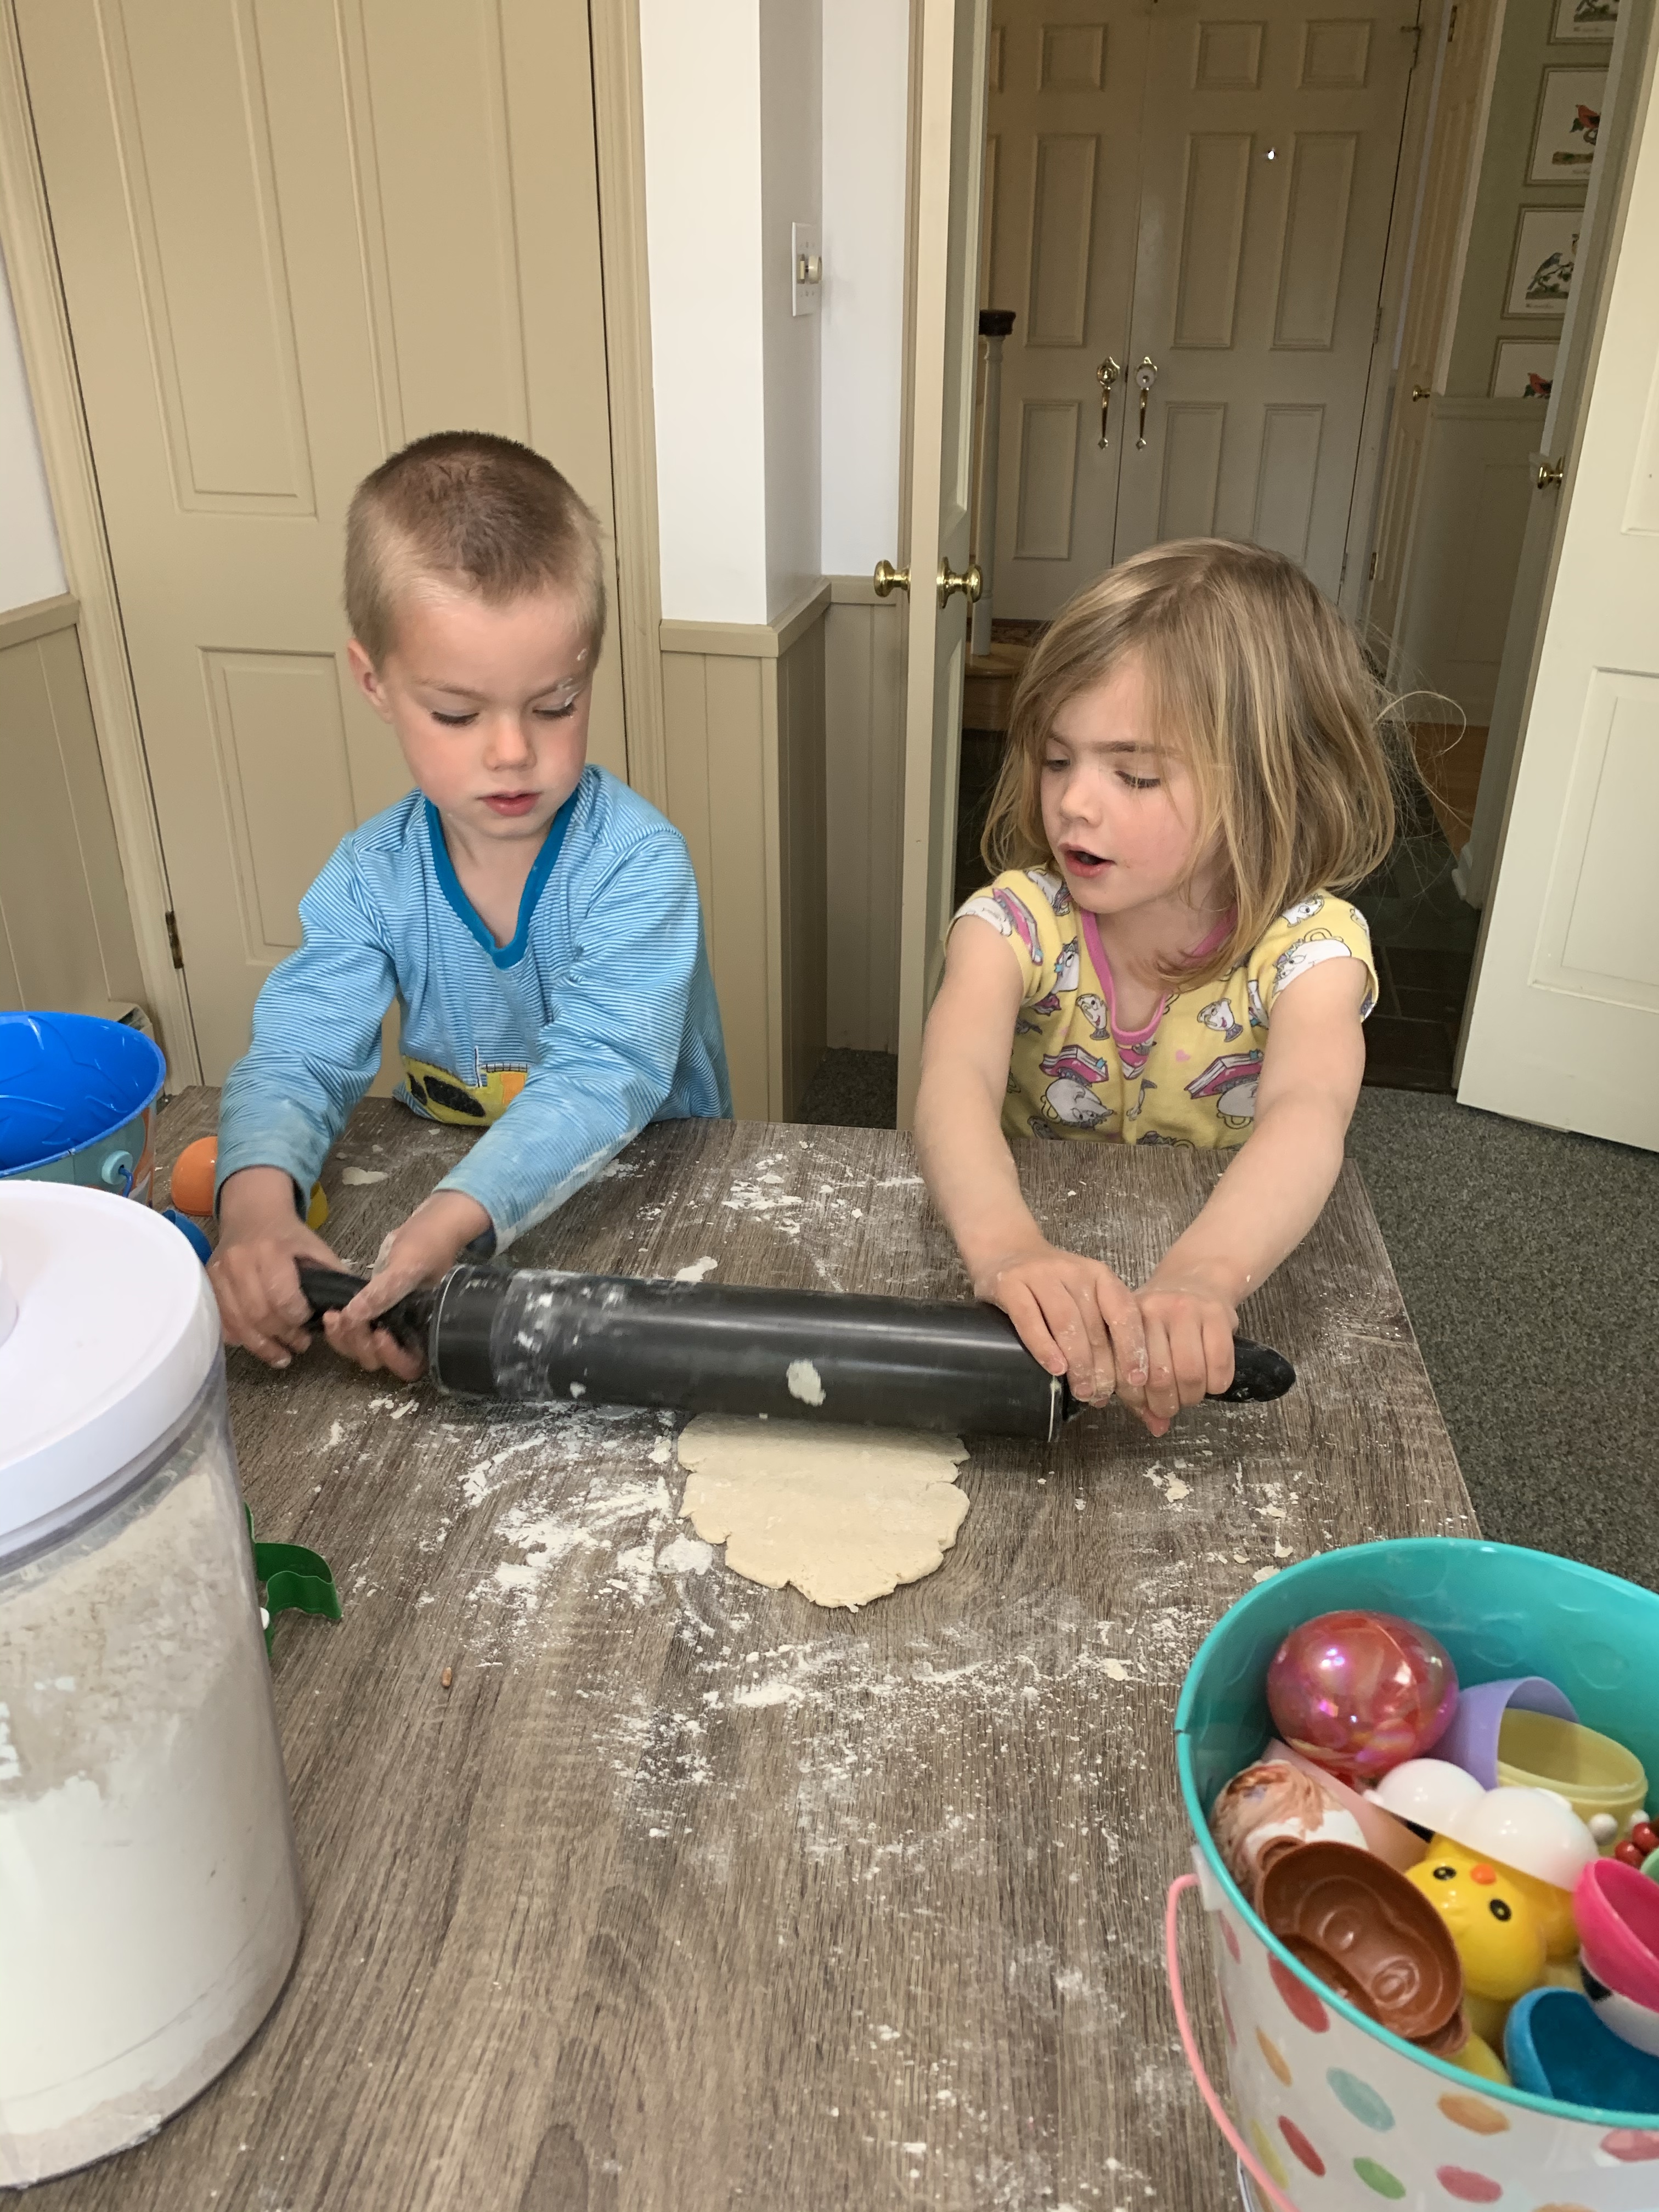
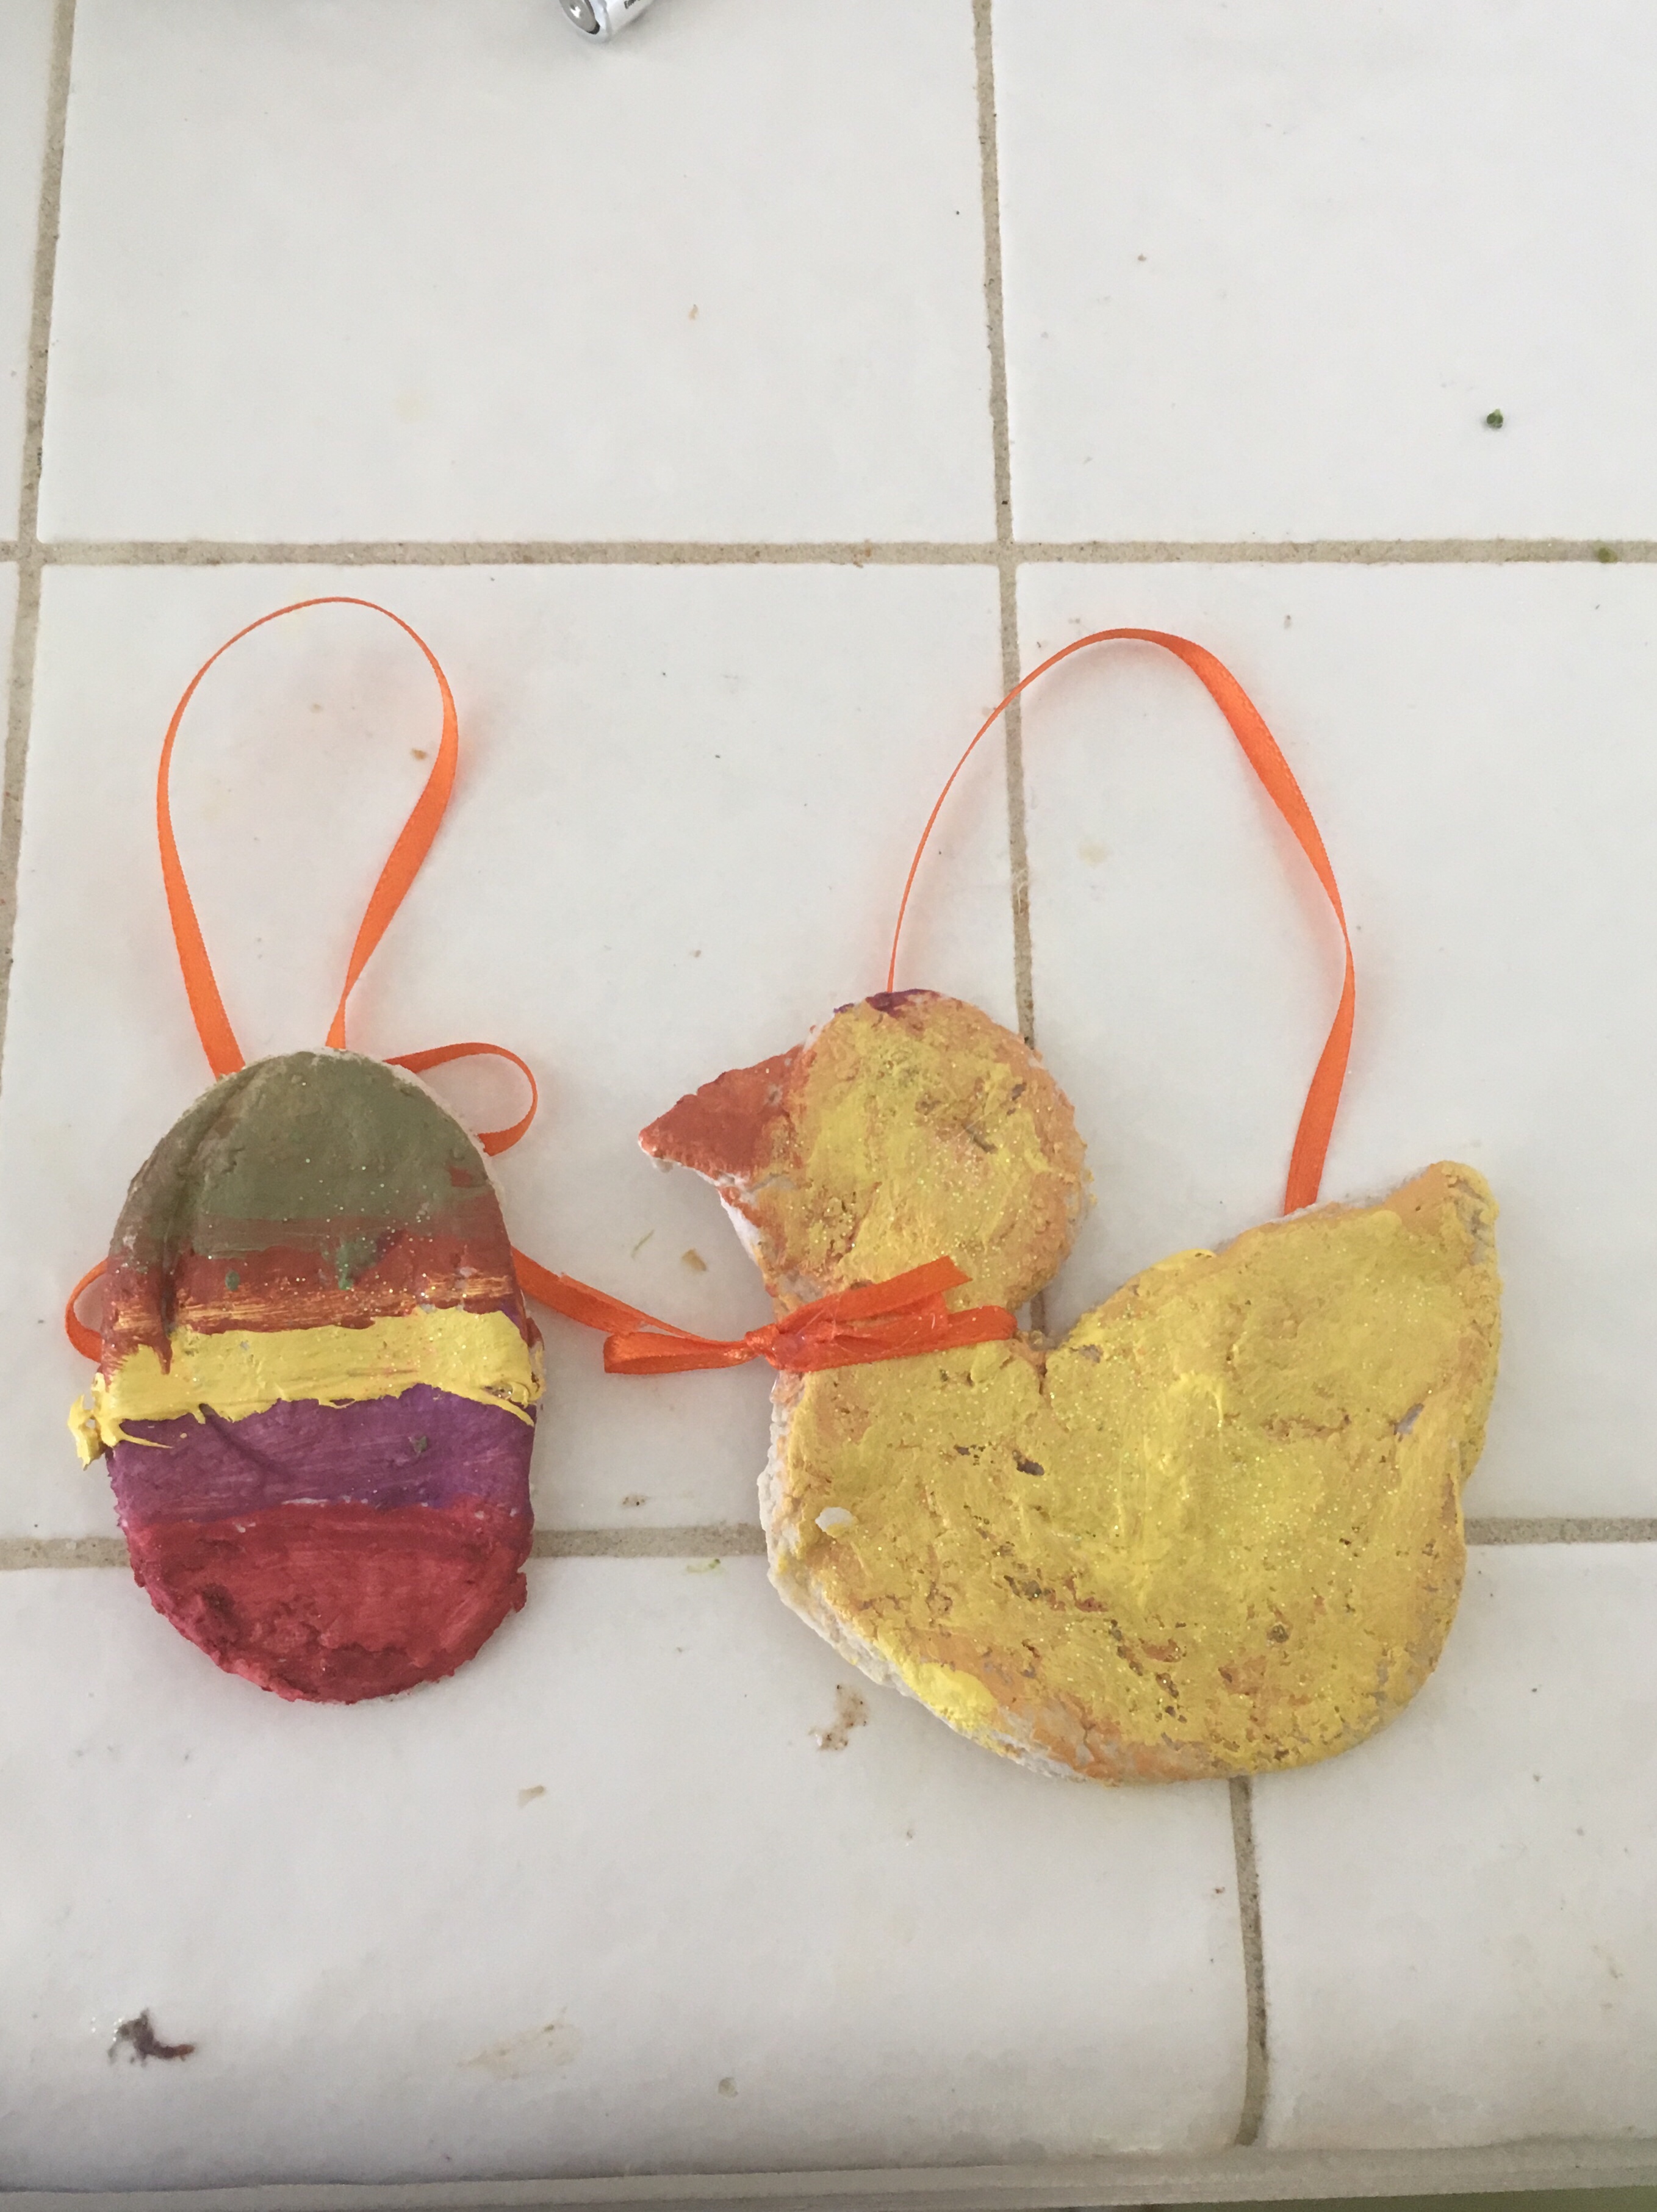
Turn the oven on at 200 degrees and put parchment paper on the tray and leave in the oven for 2-3 hours. If you don’t have parchment paper just move the ornaments with a pie lifter to make sure they don’t stick about an hour in. Time depends on how thick the ornaments are. Once cooled and dried, paint them as you wish.  You can add sparkles if you want. Once all dried, use string or ribbon through the hole and tie.  After that hang them up!

img_3249

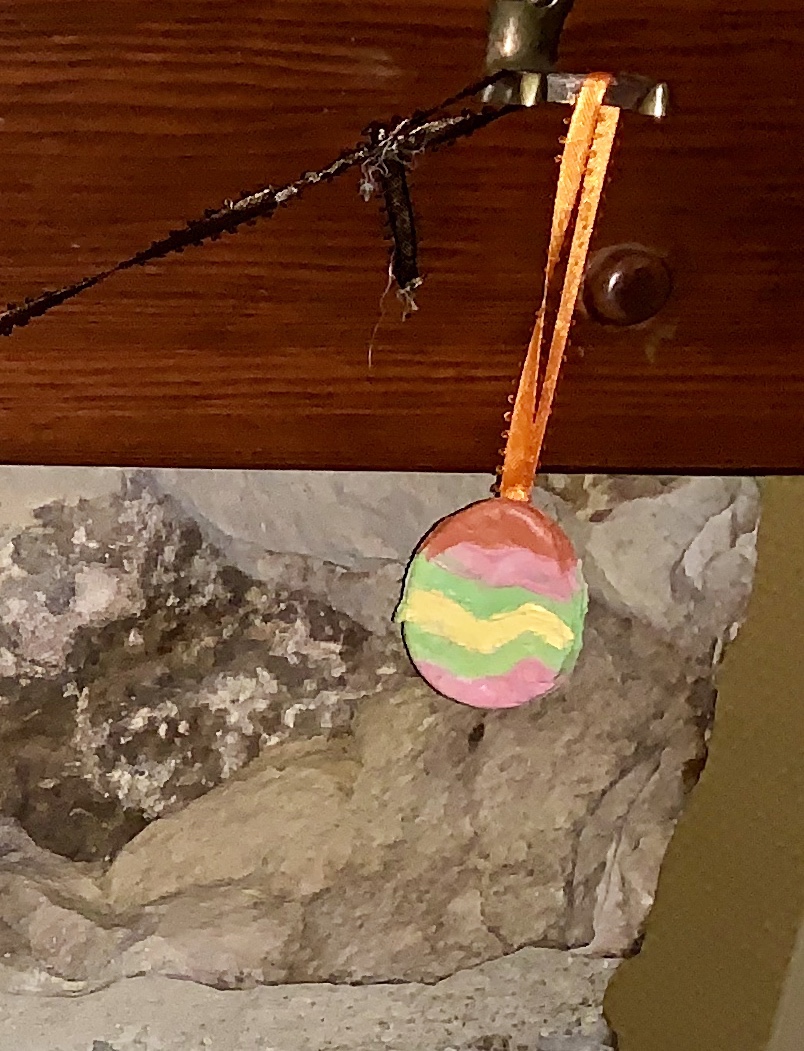
Or, you can make garland by putting one ornament through the string and then tying it in place and continuing until desired effect.

img_3249-1

If you want to make a wreath, we just used 2 paper plates glued together and cut out the inner circle then used a hot glue gun. Of course you can use cardboard or other material, but this is what we had on hand with the quarantine.

img_3242

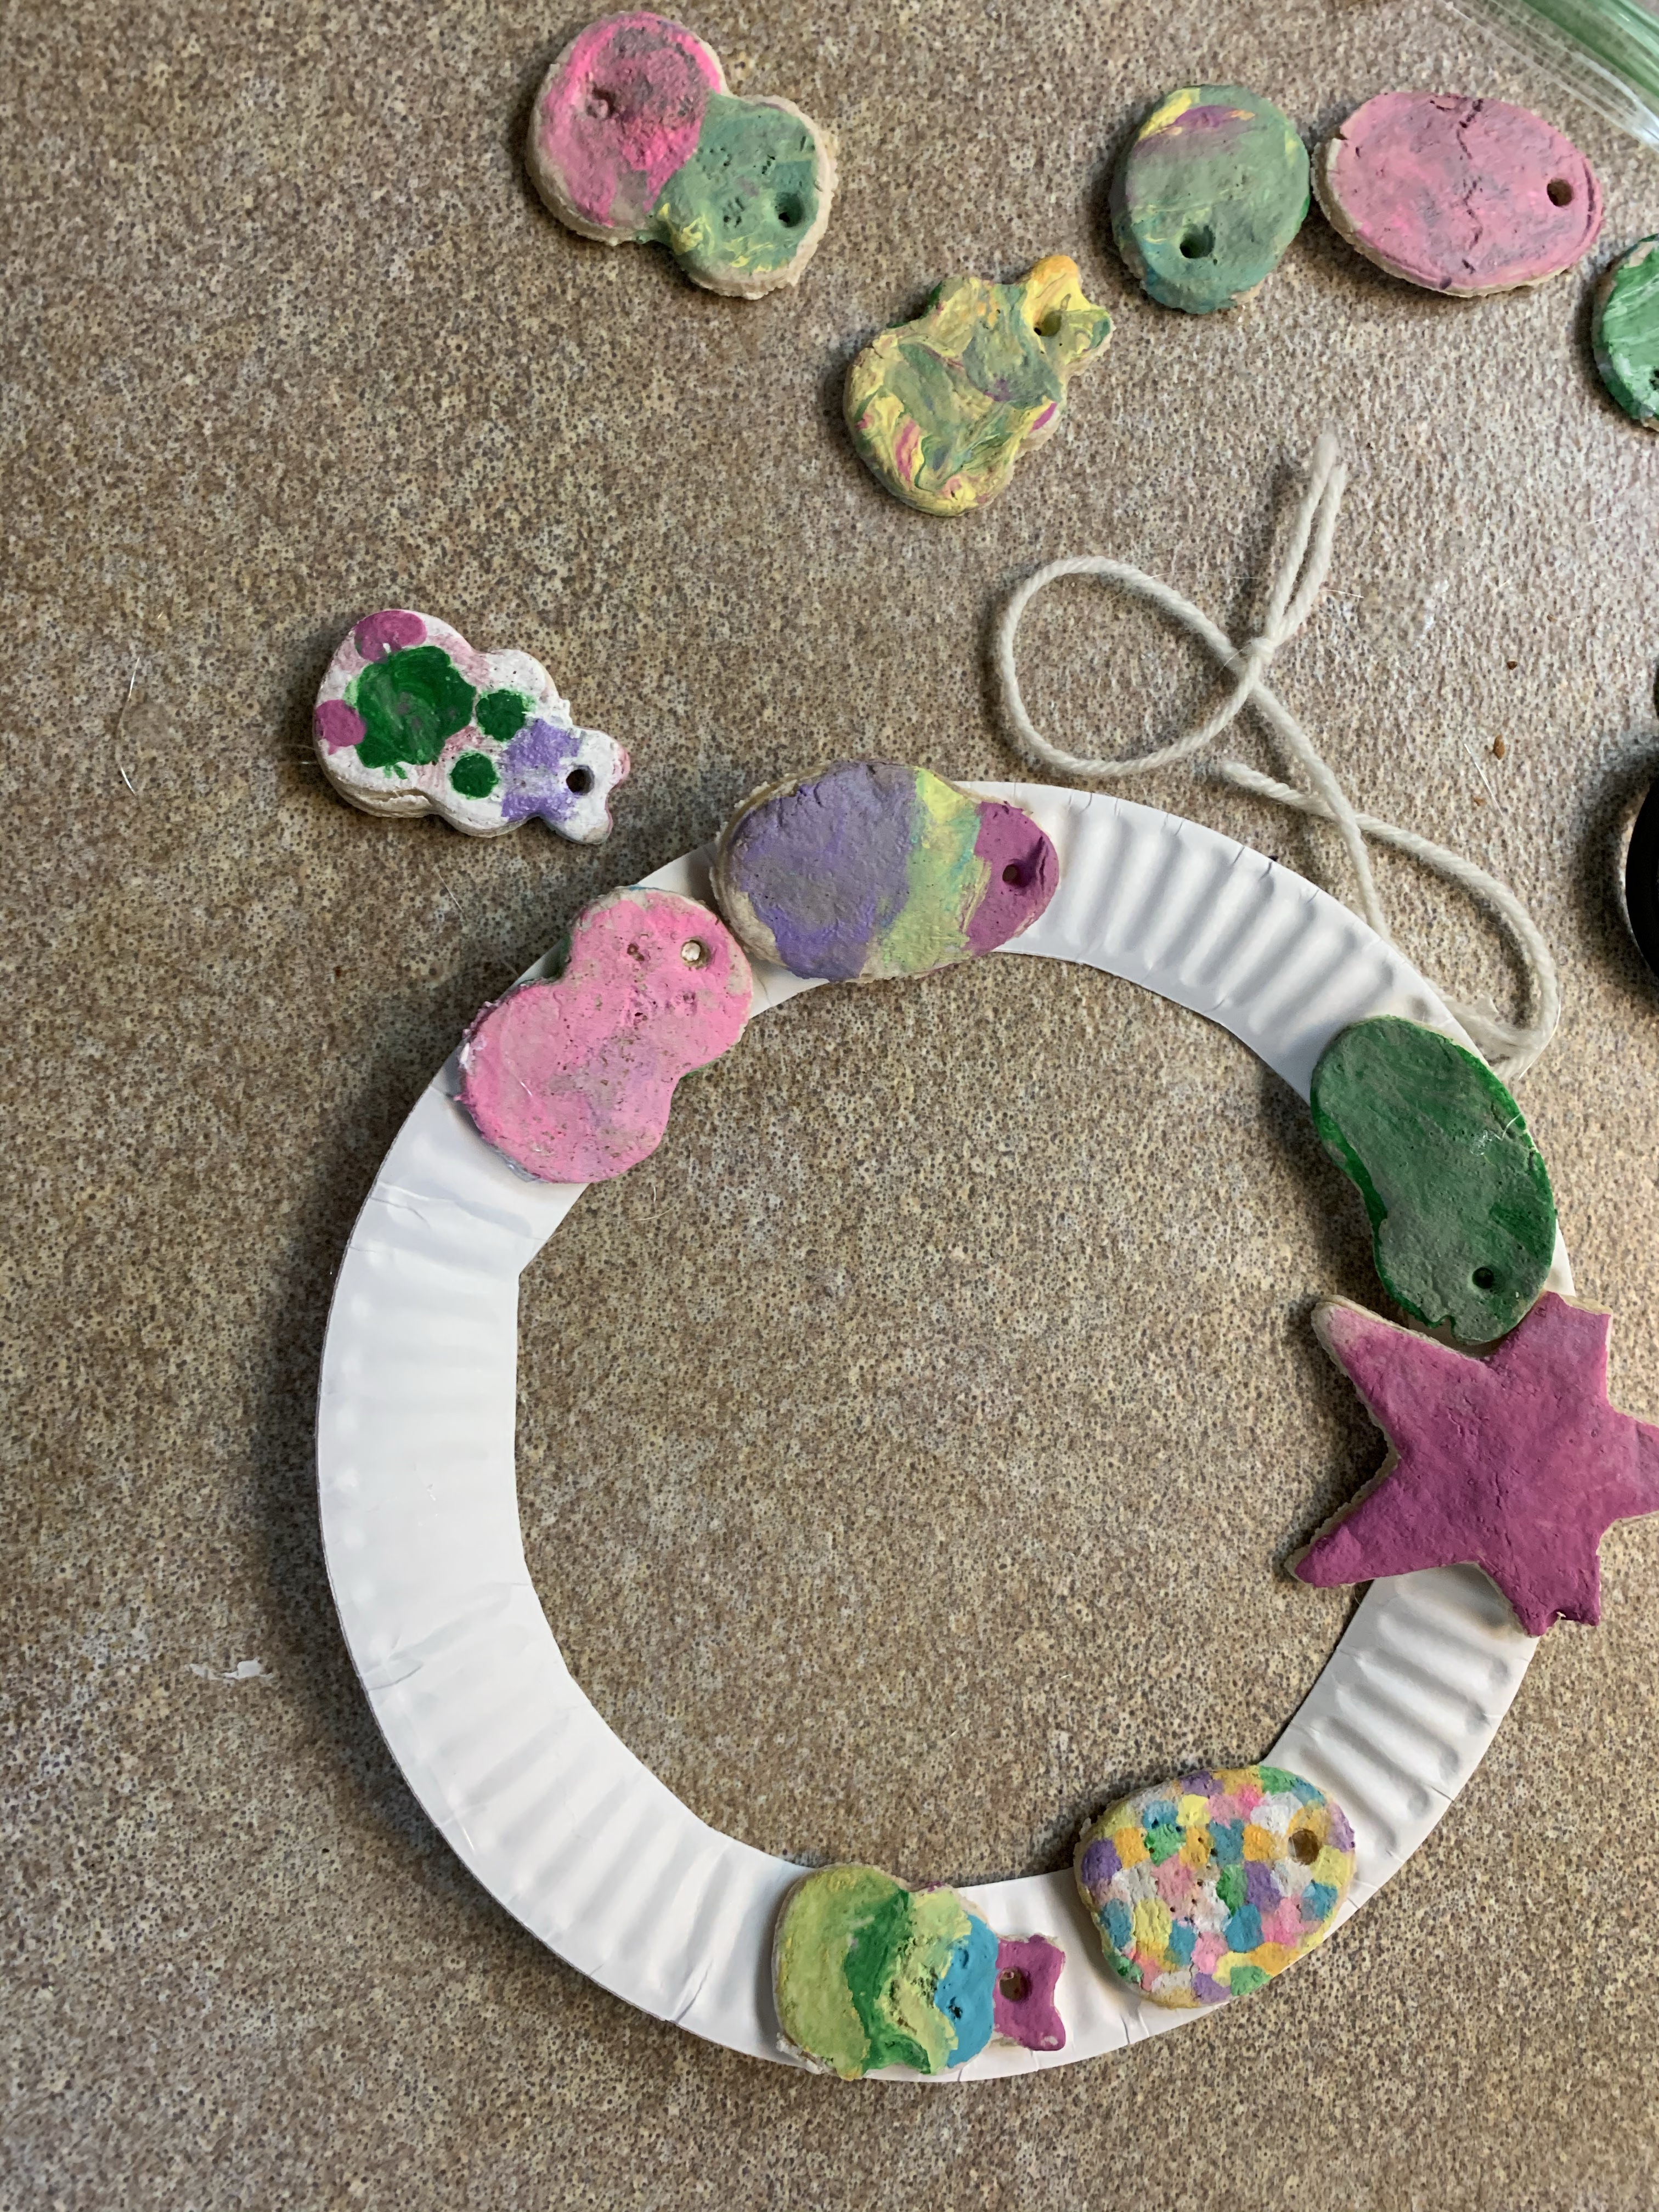
We used the glue gun to glue on some ribbon and add pom poms.

img_3244

FollowFacebookpinterestrssyoutube
ShareFacebookpinterest

+Pomander Ball: A fun fine motor experience

A craft using fine motor skills, creativity, and your child’s senses is making a Christmas Pomander Ball!  There are several ways to make them and we will go through some examples!

img_2460

Pomander Balls were originally used to ward away illness with the strong scents of cloves and other spices.  Today, we make pomander balls with citrus fruits and cloves as a decoration, gift, centerpiece, or for scenting the room.

What you need:

Citrus fruit: clementine or oranges work best (make sure they are on the harder side)

Whole cloves (you can get a large bag that will last for years at the food store)
Ribbon for decoration

To make holes you can use a fork, pushpin, or toothpick (optional): my kids like to use a small fork to poke several holes at once

  1. Pour some whole cloves into a small bowl for the kids to chose fromimg_2440-1
  2. Next, have your child use a fork to poke holes
  3. img_2442-1
  4. Take the whole cloves and poke them through the holes
  5. Make a design as you chose, and hang with ribbon
  6. img_2453
  7. Dry out in a dark place, preferably in a brown bag for a week or two until dry then hang them or decorate with them!  If you chose not to dry them, then they usually last a week before they brown and get moldy. You can also place them in the fridge at night if you want them to last a little longer.
  8. img_2459
  9. If you fill the whole fruit with cloves completely, it will dehydrate the fruit and you wont need to place it in a bag at all (my kids don’t usually have the patience for this yet)

img_2458

My kids wanted to law shapes on their clementines with the cloves!

img_2460

Enjoy and let me know how they turn out!!!


FollowFacebookpinterestrssyoutube
ShareFacebookpinterest

DIY Placemat Place Setting

IMG_1805

My daughter loves to assert her independence, even at meal time! So I thought, why not make a placemat that she can set her own place setting at? There are many ways to make placemats.

One way is simply laminating a printed out version of a placemat setting such as this…

placemat
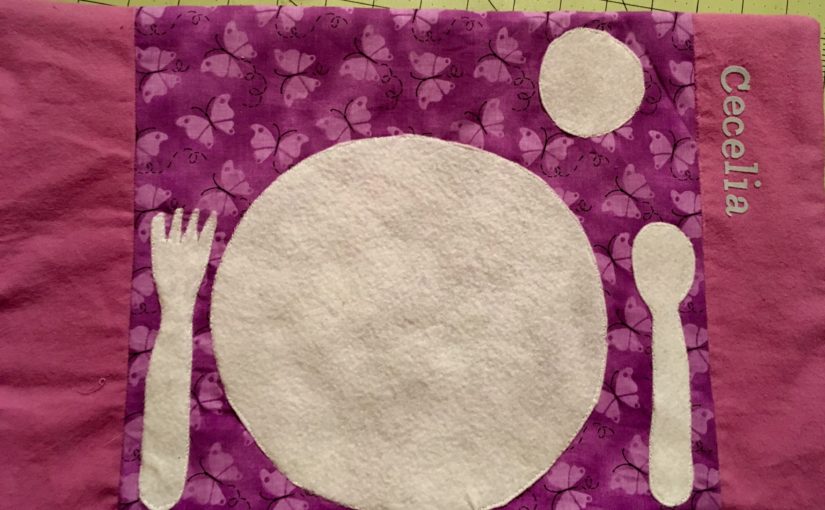
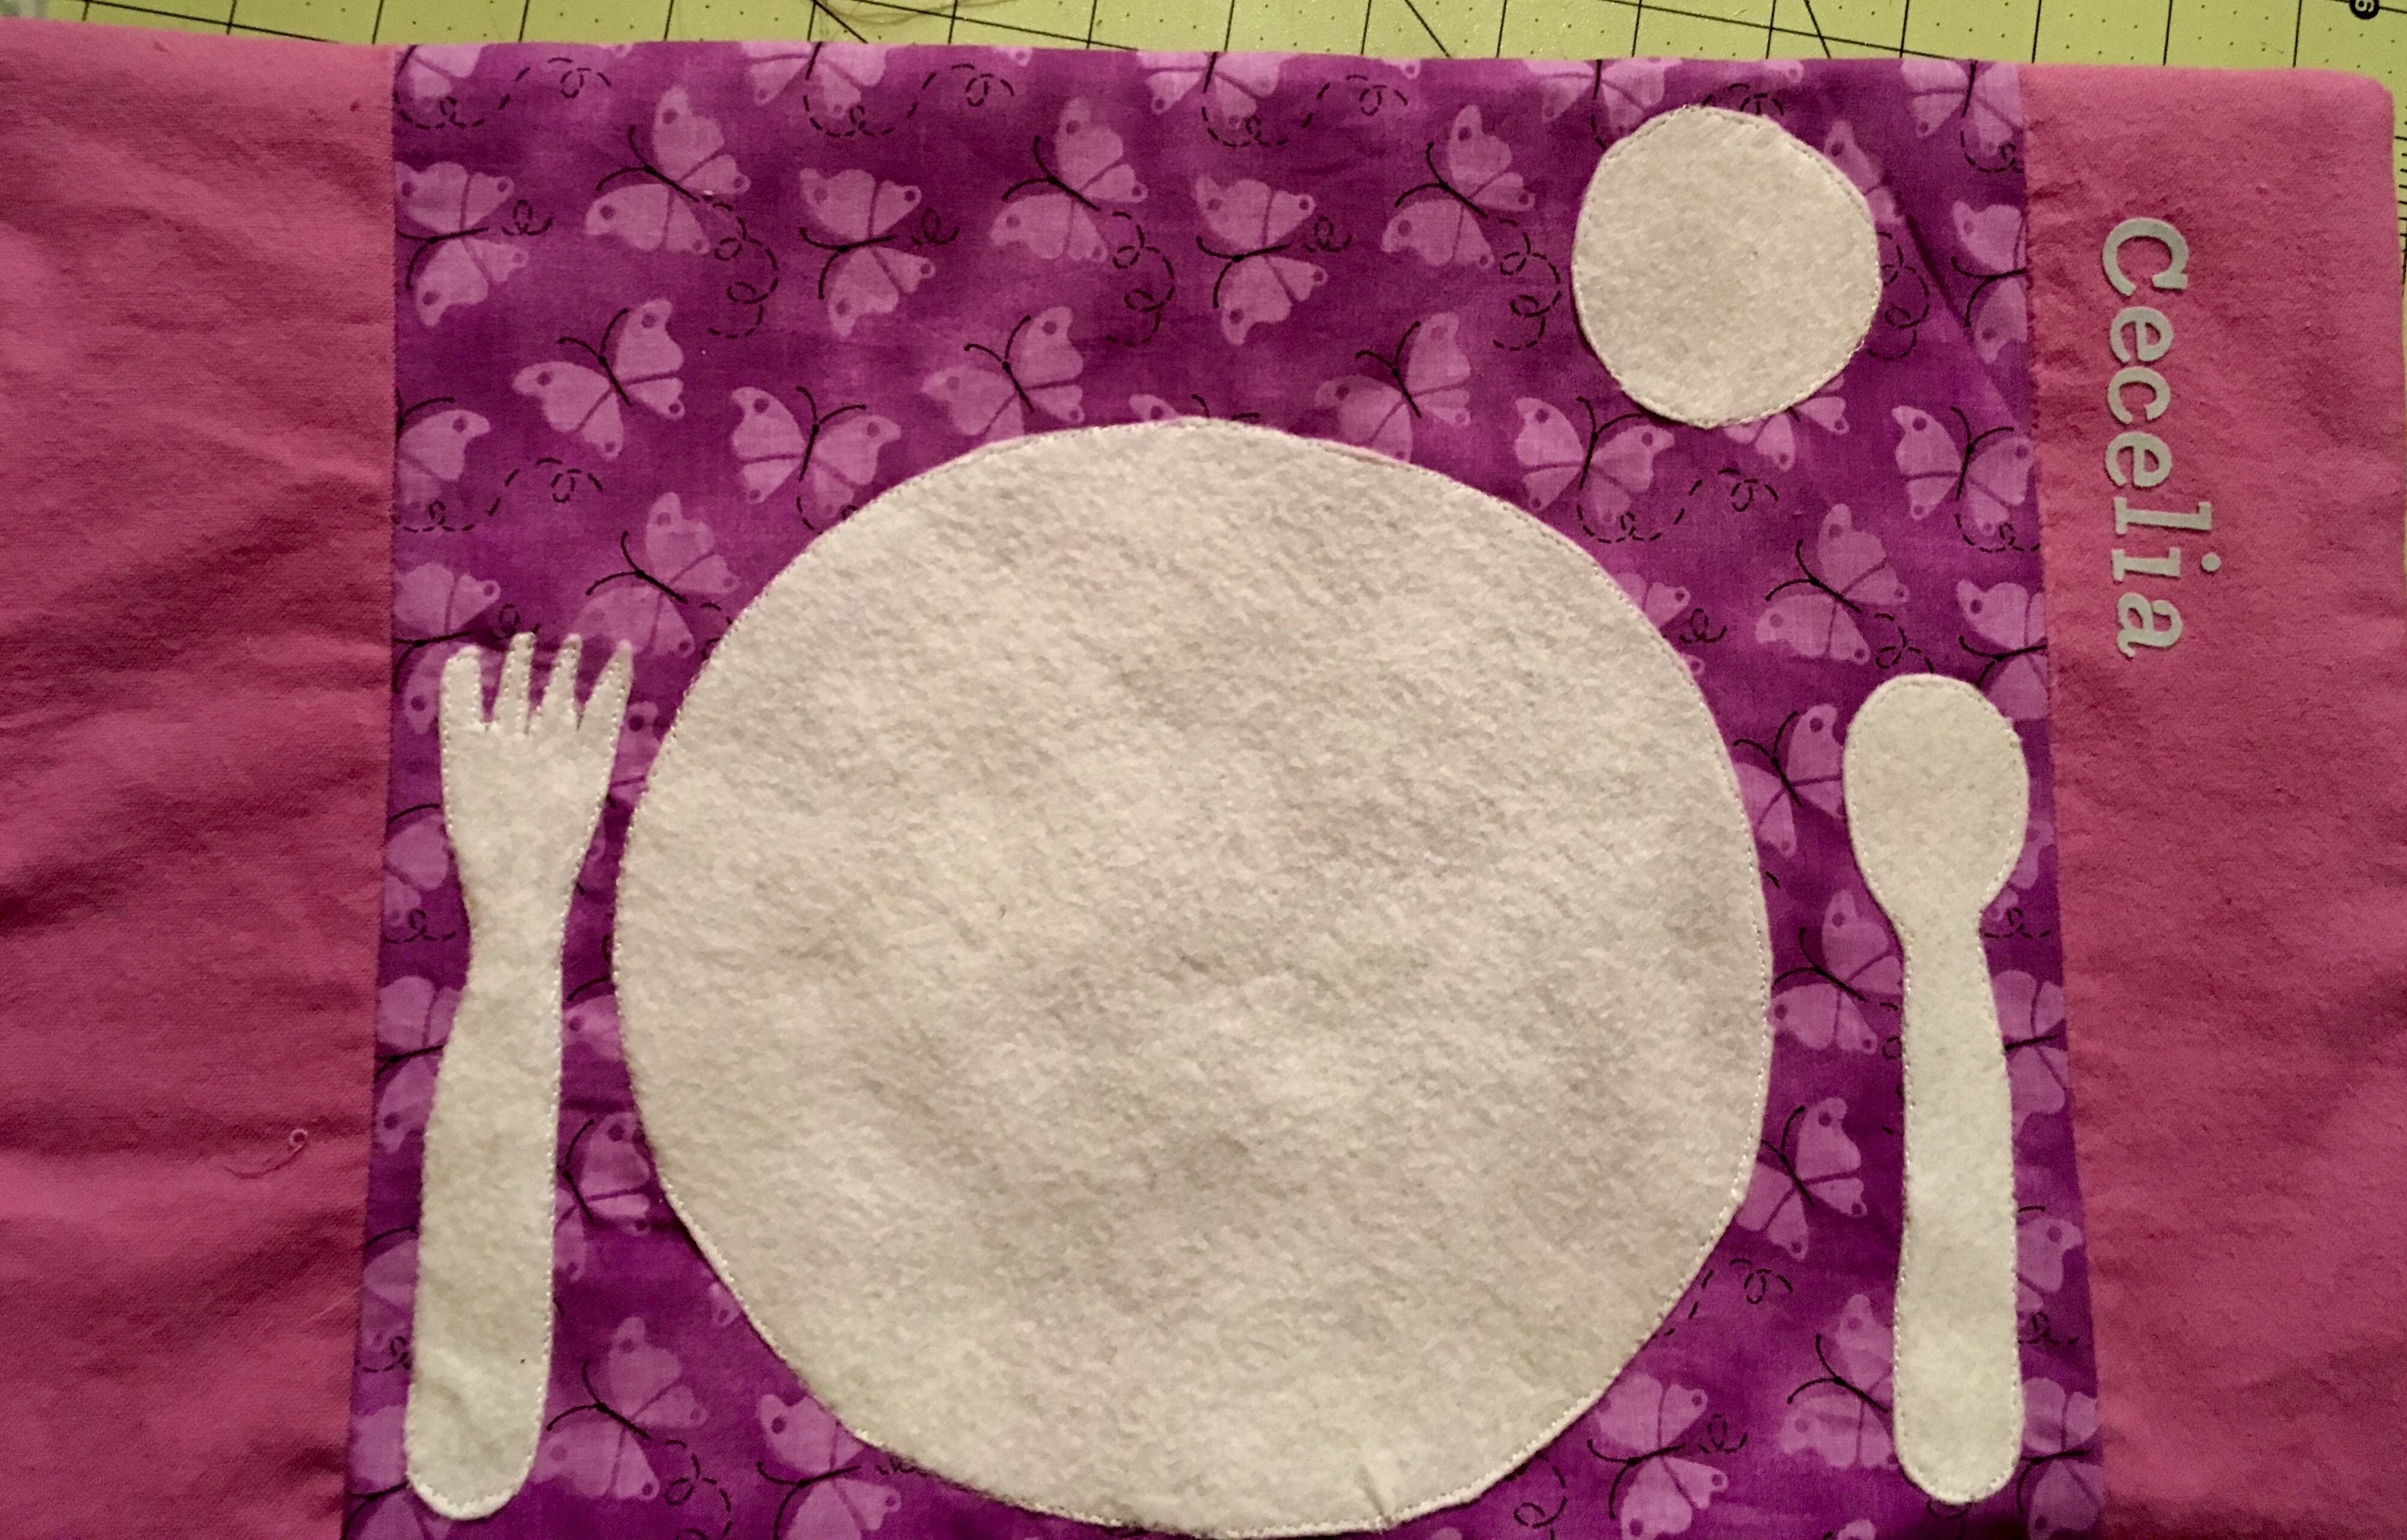
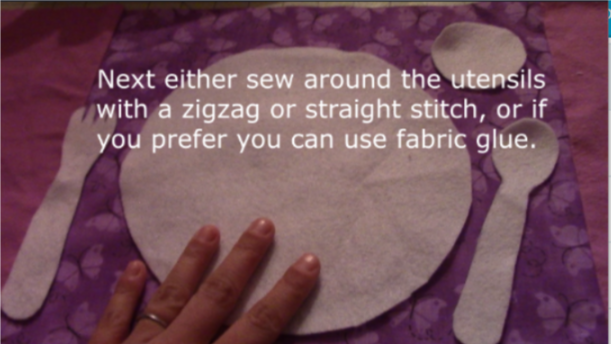
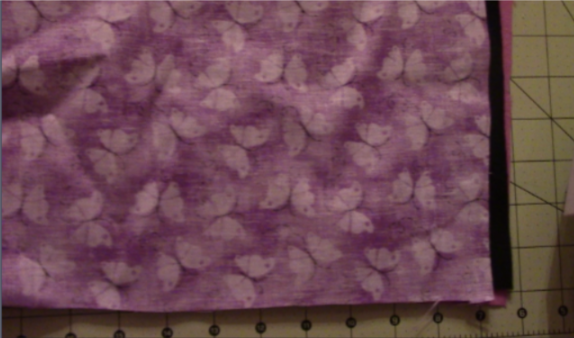
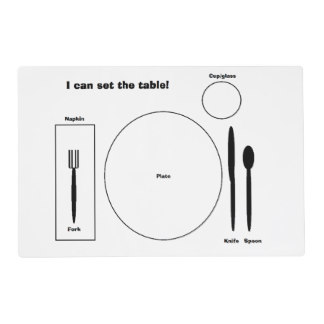
However, my laminator is only big enough for a regular printer sized paper. You can take it to your local staples or office store to get laminated. You can even make your own placemat out of fabric and have it laminated.

I decided to go with the fabric version and just use the washer to clean it.

So you want to prewash the fabric to make sure it does not shrink.

IMG_1805

As always there is a video youtube tutorial and a written one below.

What you need for this placemat place setting is…

1) fabric: it will end up being 12×16 inches.

  • 1 batting or felt for the middle or back side 12×16
  • 1 center front piece 12×12
  • 2 outside front pieces 4×12
  • 1 back side
  • felt or non fraying material to cut out fork, spoon, cup, and plate

2) Next, take your front center piece and your side front pieces and pin them fabric facing fabric on the sides and sew. Then iron the seems.

3) Following that, you want to use your felt or nonfraying material to outline a plate, cup, fork, spoon, and any other utensils that you want on your placemat.  Then cut them out and sew them directly on the front piece.  You can also use fabric glue if you like.

Sketch

4) ***You want to put the piece of fabric you want as the backing down first facing the front fabric and then the basting or felt behind that (as you can see I did it opposite and ended up with my black fabric as the back outside as you will see). However, if you are using felt, it ends up rather nice as a backing since it prevents sliding.

Sketch2

5) Sew all the way around leaving a 3-4 inch opening so you can pull it out the right way. Don’t forget to backstitch. Once this is done, pull the inside out and make sure all the sides and corners are all the way out.  Iron it all out and sew the remaining opening with either a hand stitch, or if you want to use your machine then sew around the whole placemat to give it that look.

IMG_1805

You can add any other embellishments, I used my daughter’s name on the side. Enjoy and check out the other videos and tutorials!  Let me know if you have any questions!


FollowFacebookpinterestrssyoutube
ShareFacebookpinterest

Salt dough Easter crafts!

My daughter loves painting! However, she was growing tired of painting paper. So this year, we made cookie cutter Easter shapes! Actually, we had a duck and used a half of a plastic egg as a cutout. I also used a knife to create bunny faces and baskets.

First things first, you have to make the salt dough! This is super simple. all you need is salt, flour, and warm water. You can knead the dough by hand, or use a mixer with the kneading attachment like I did.

So here is the recipe I used:

*this made a lot more than I expected! So you may want to make only half!

•4 cups all purpose flour

•1 cup salt

•1 3/4 cup warm water (add more of its too dry)

Combine the ingredients and knead for about 6 minutes. If it’s not forming into a nice soft ball add more water (or if it’s too sticky add more flour).

Then it’s time to roll out the dough! Just like you would for sugar cookies! Beware, your child may think you are making cookies! My 19 month old just kept pointing yelling cook-ies!

This is a great activity for your toddler to help you with. Next, get out your cookie cutters or Easter shapes and start making those eggs! I used a half of an Easter egg that opened sideways, a duck mold, and then made a couple baskets and bunny heads using a knife. **one thing I forgot to do was to use a straw to make a hole on the top of the eggs for the string to go through. So I ended up hot glue gunning ribbon.

Put your oven on 200 degrees. Place your salt doughs on a cookie sheet and place them in the oven for 2 hours (depending on the thickness you may need a little less or a little more). Once they are done they should be rock hard.

Then the fun, painting time! We used a combination of acrylic paint (which is best but hardest to come off and not non toxic) and water proof fingerprint. My son attempted to paint and did decent for his age, but when he kept trying to eat the painted cookies we had to end the painting time.

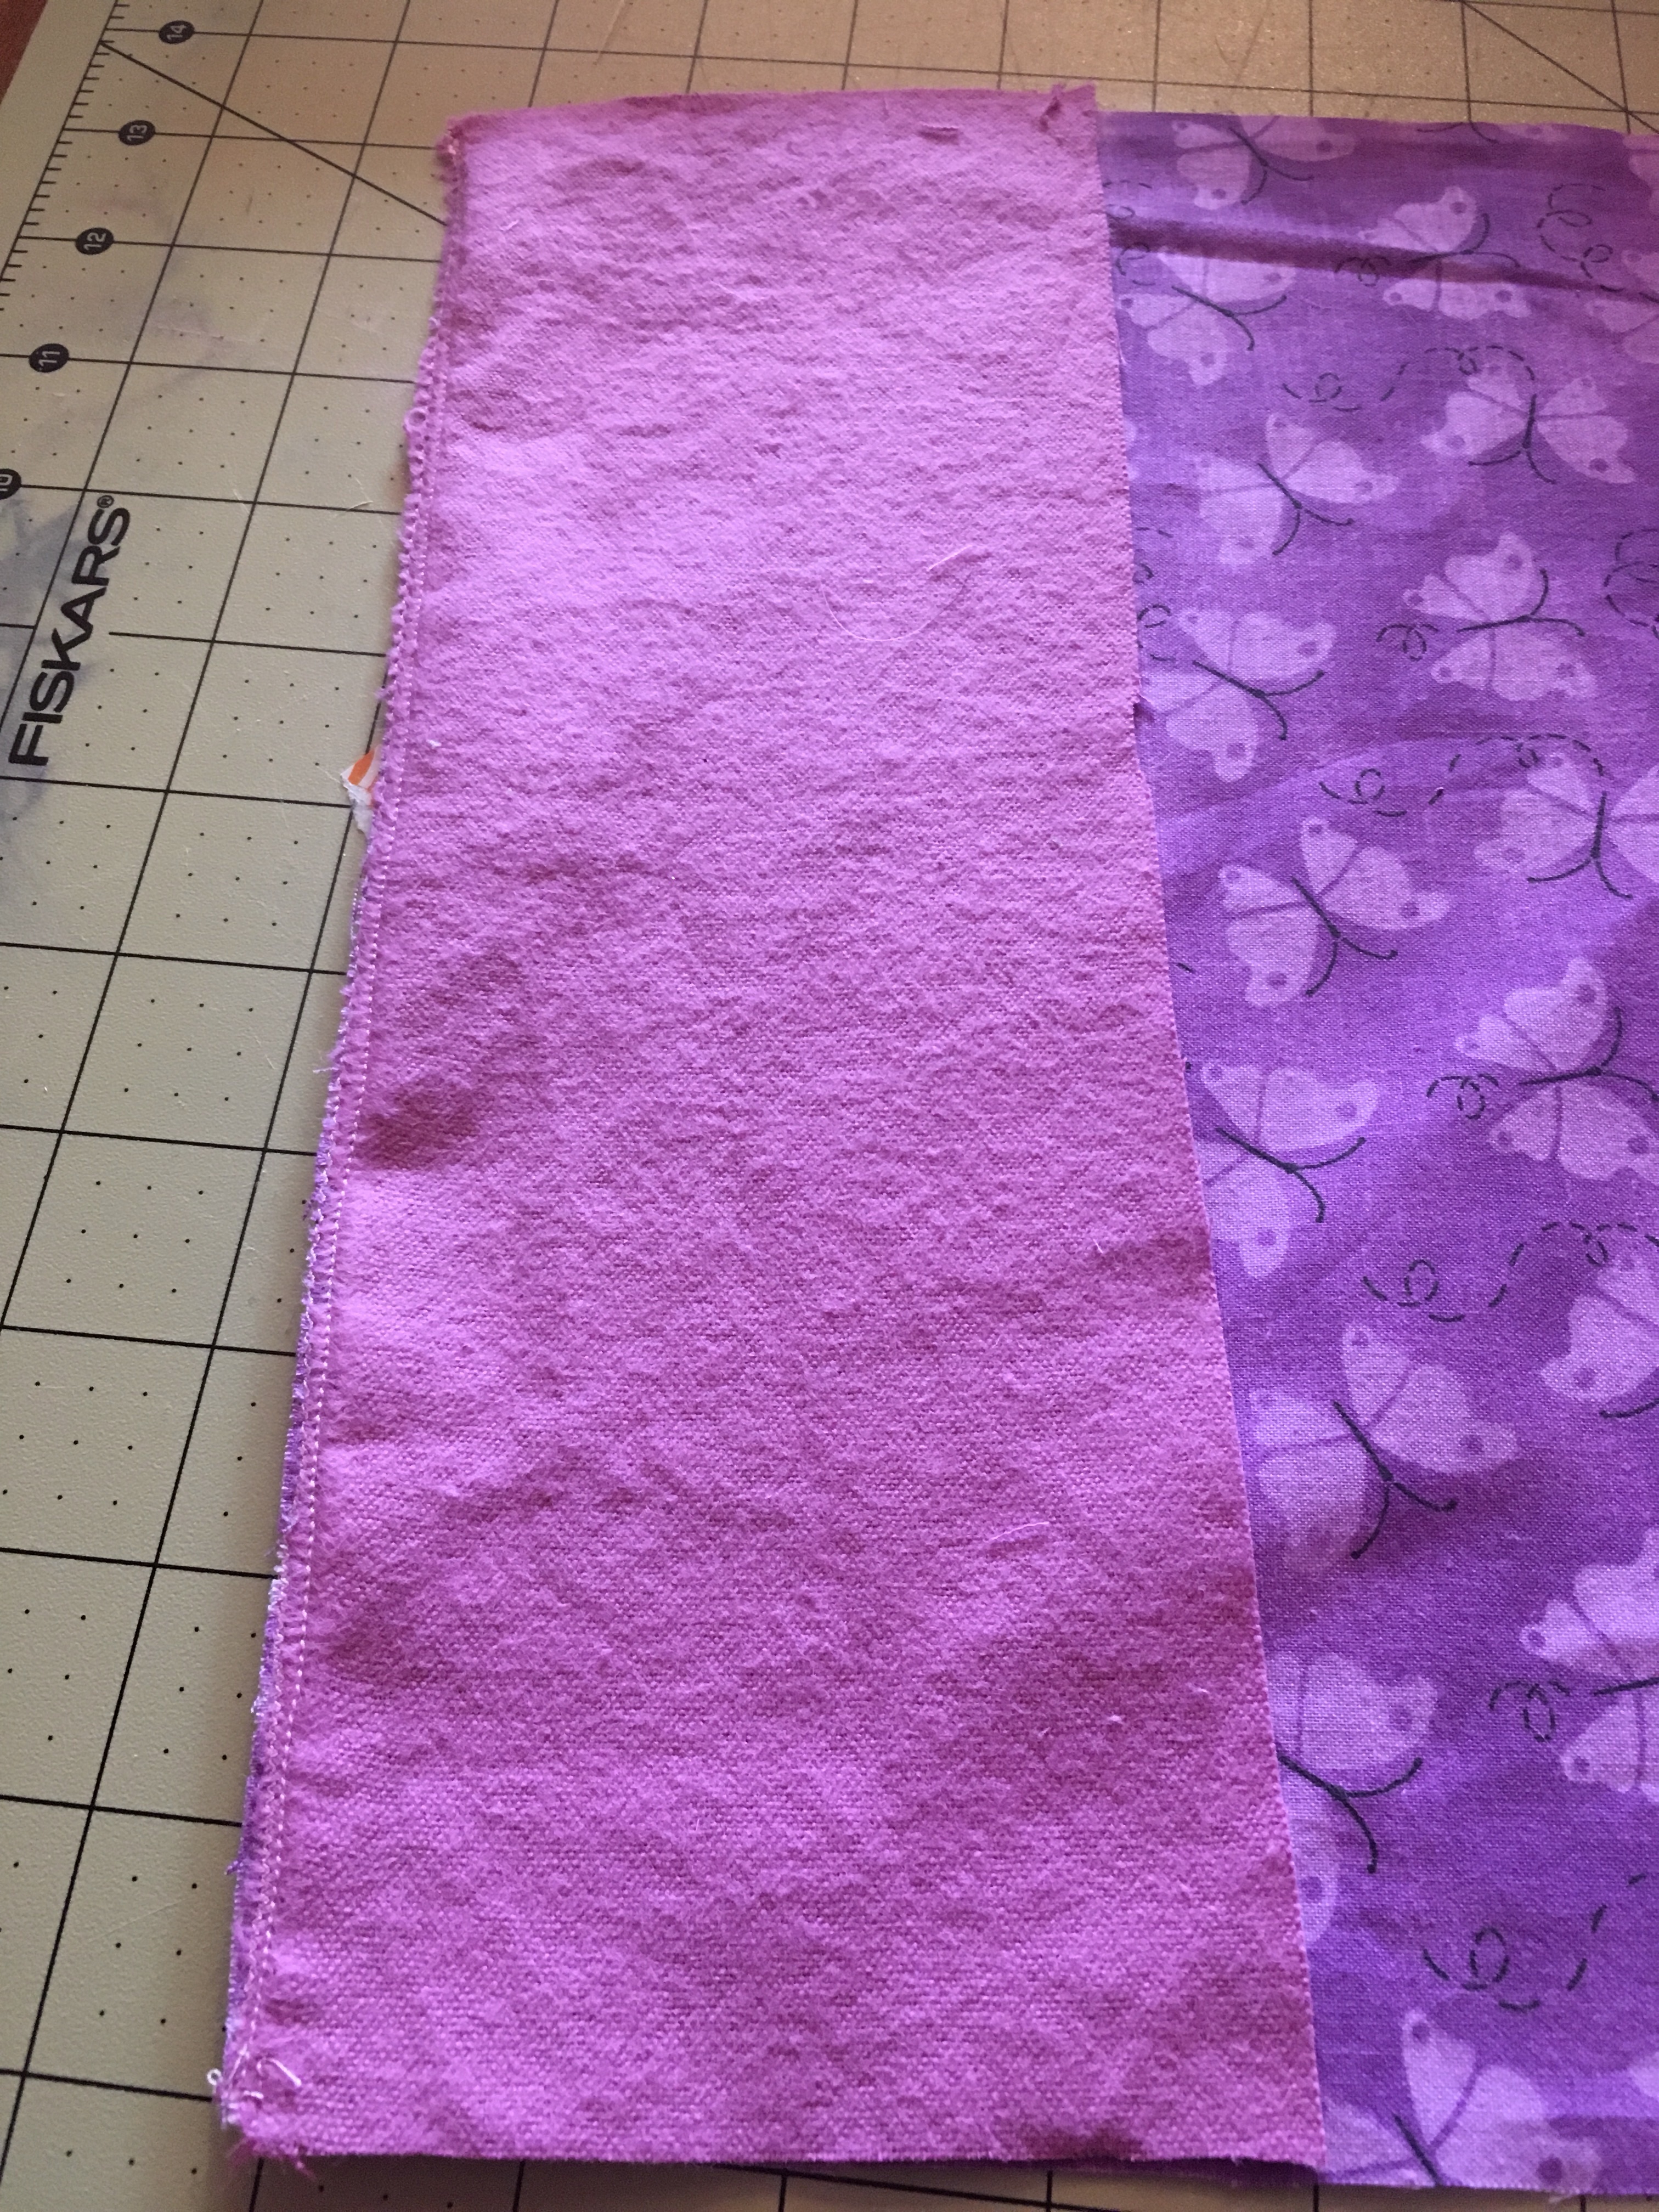
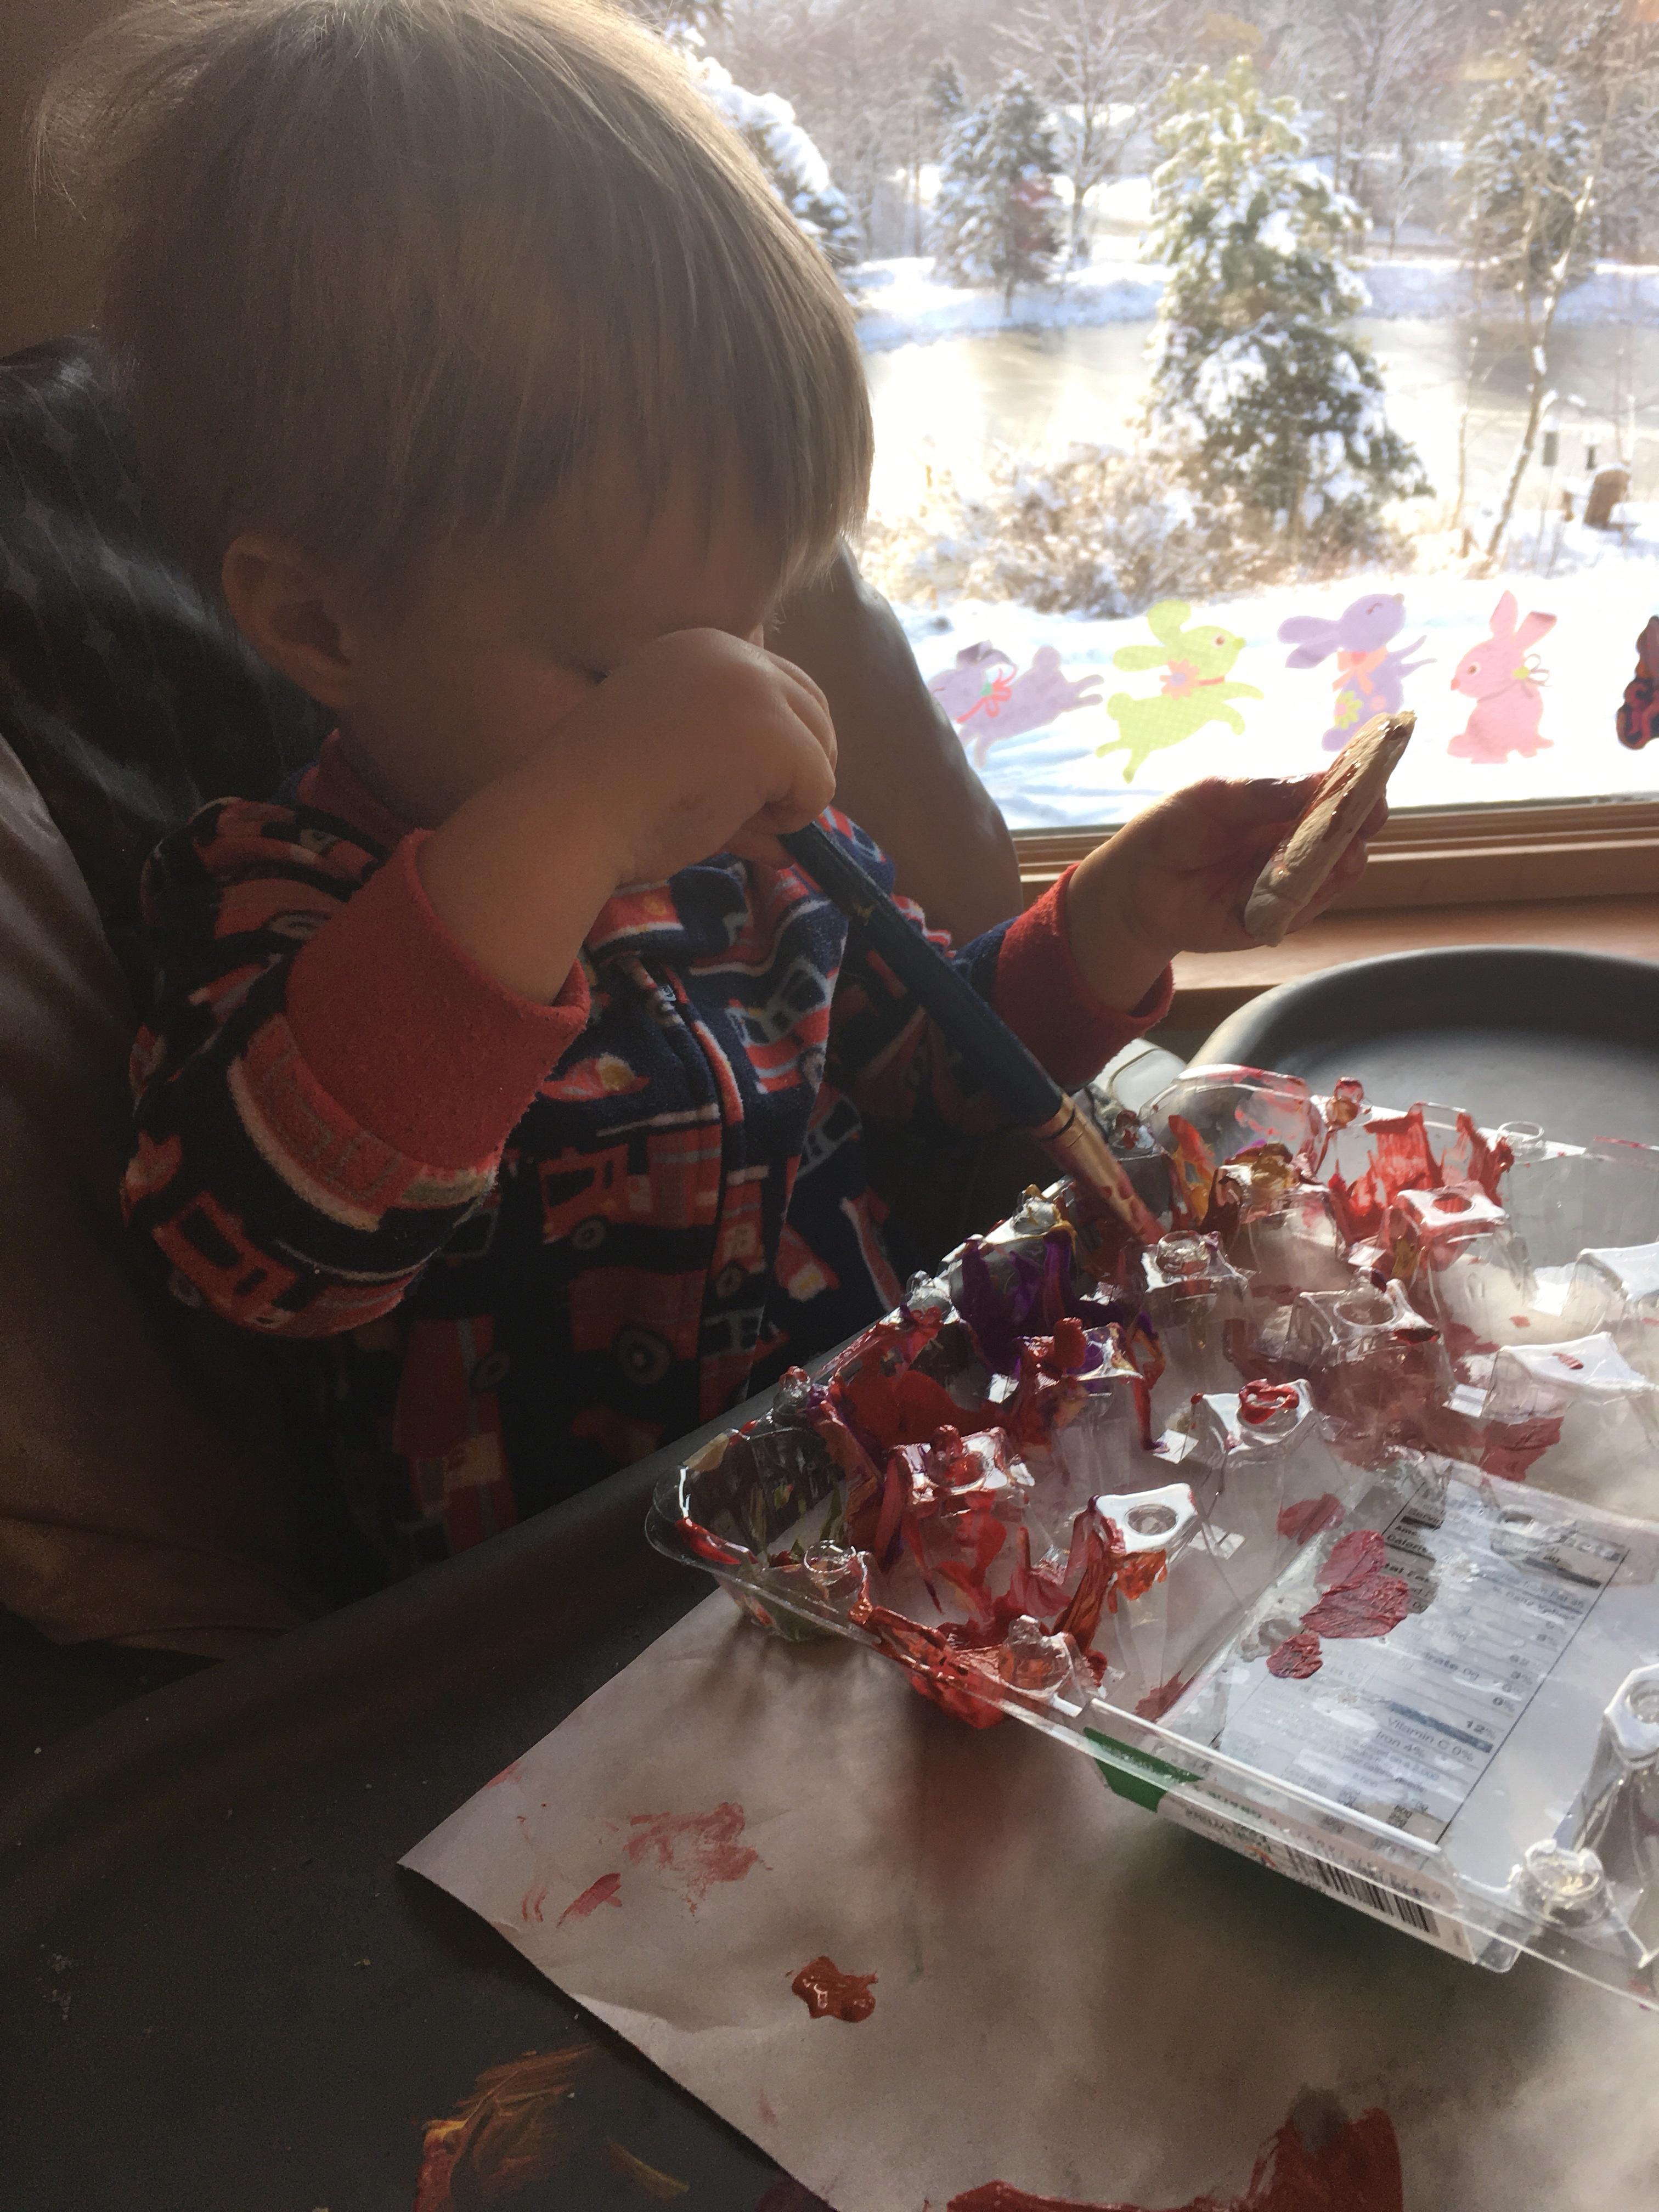
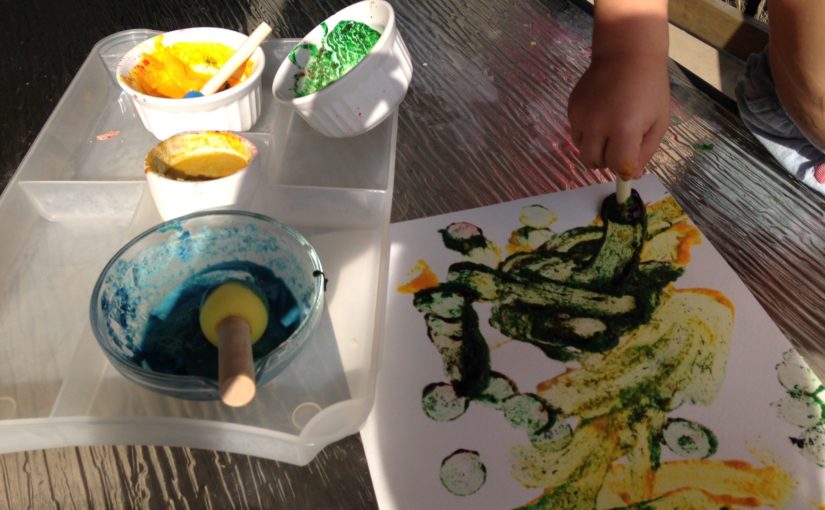
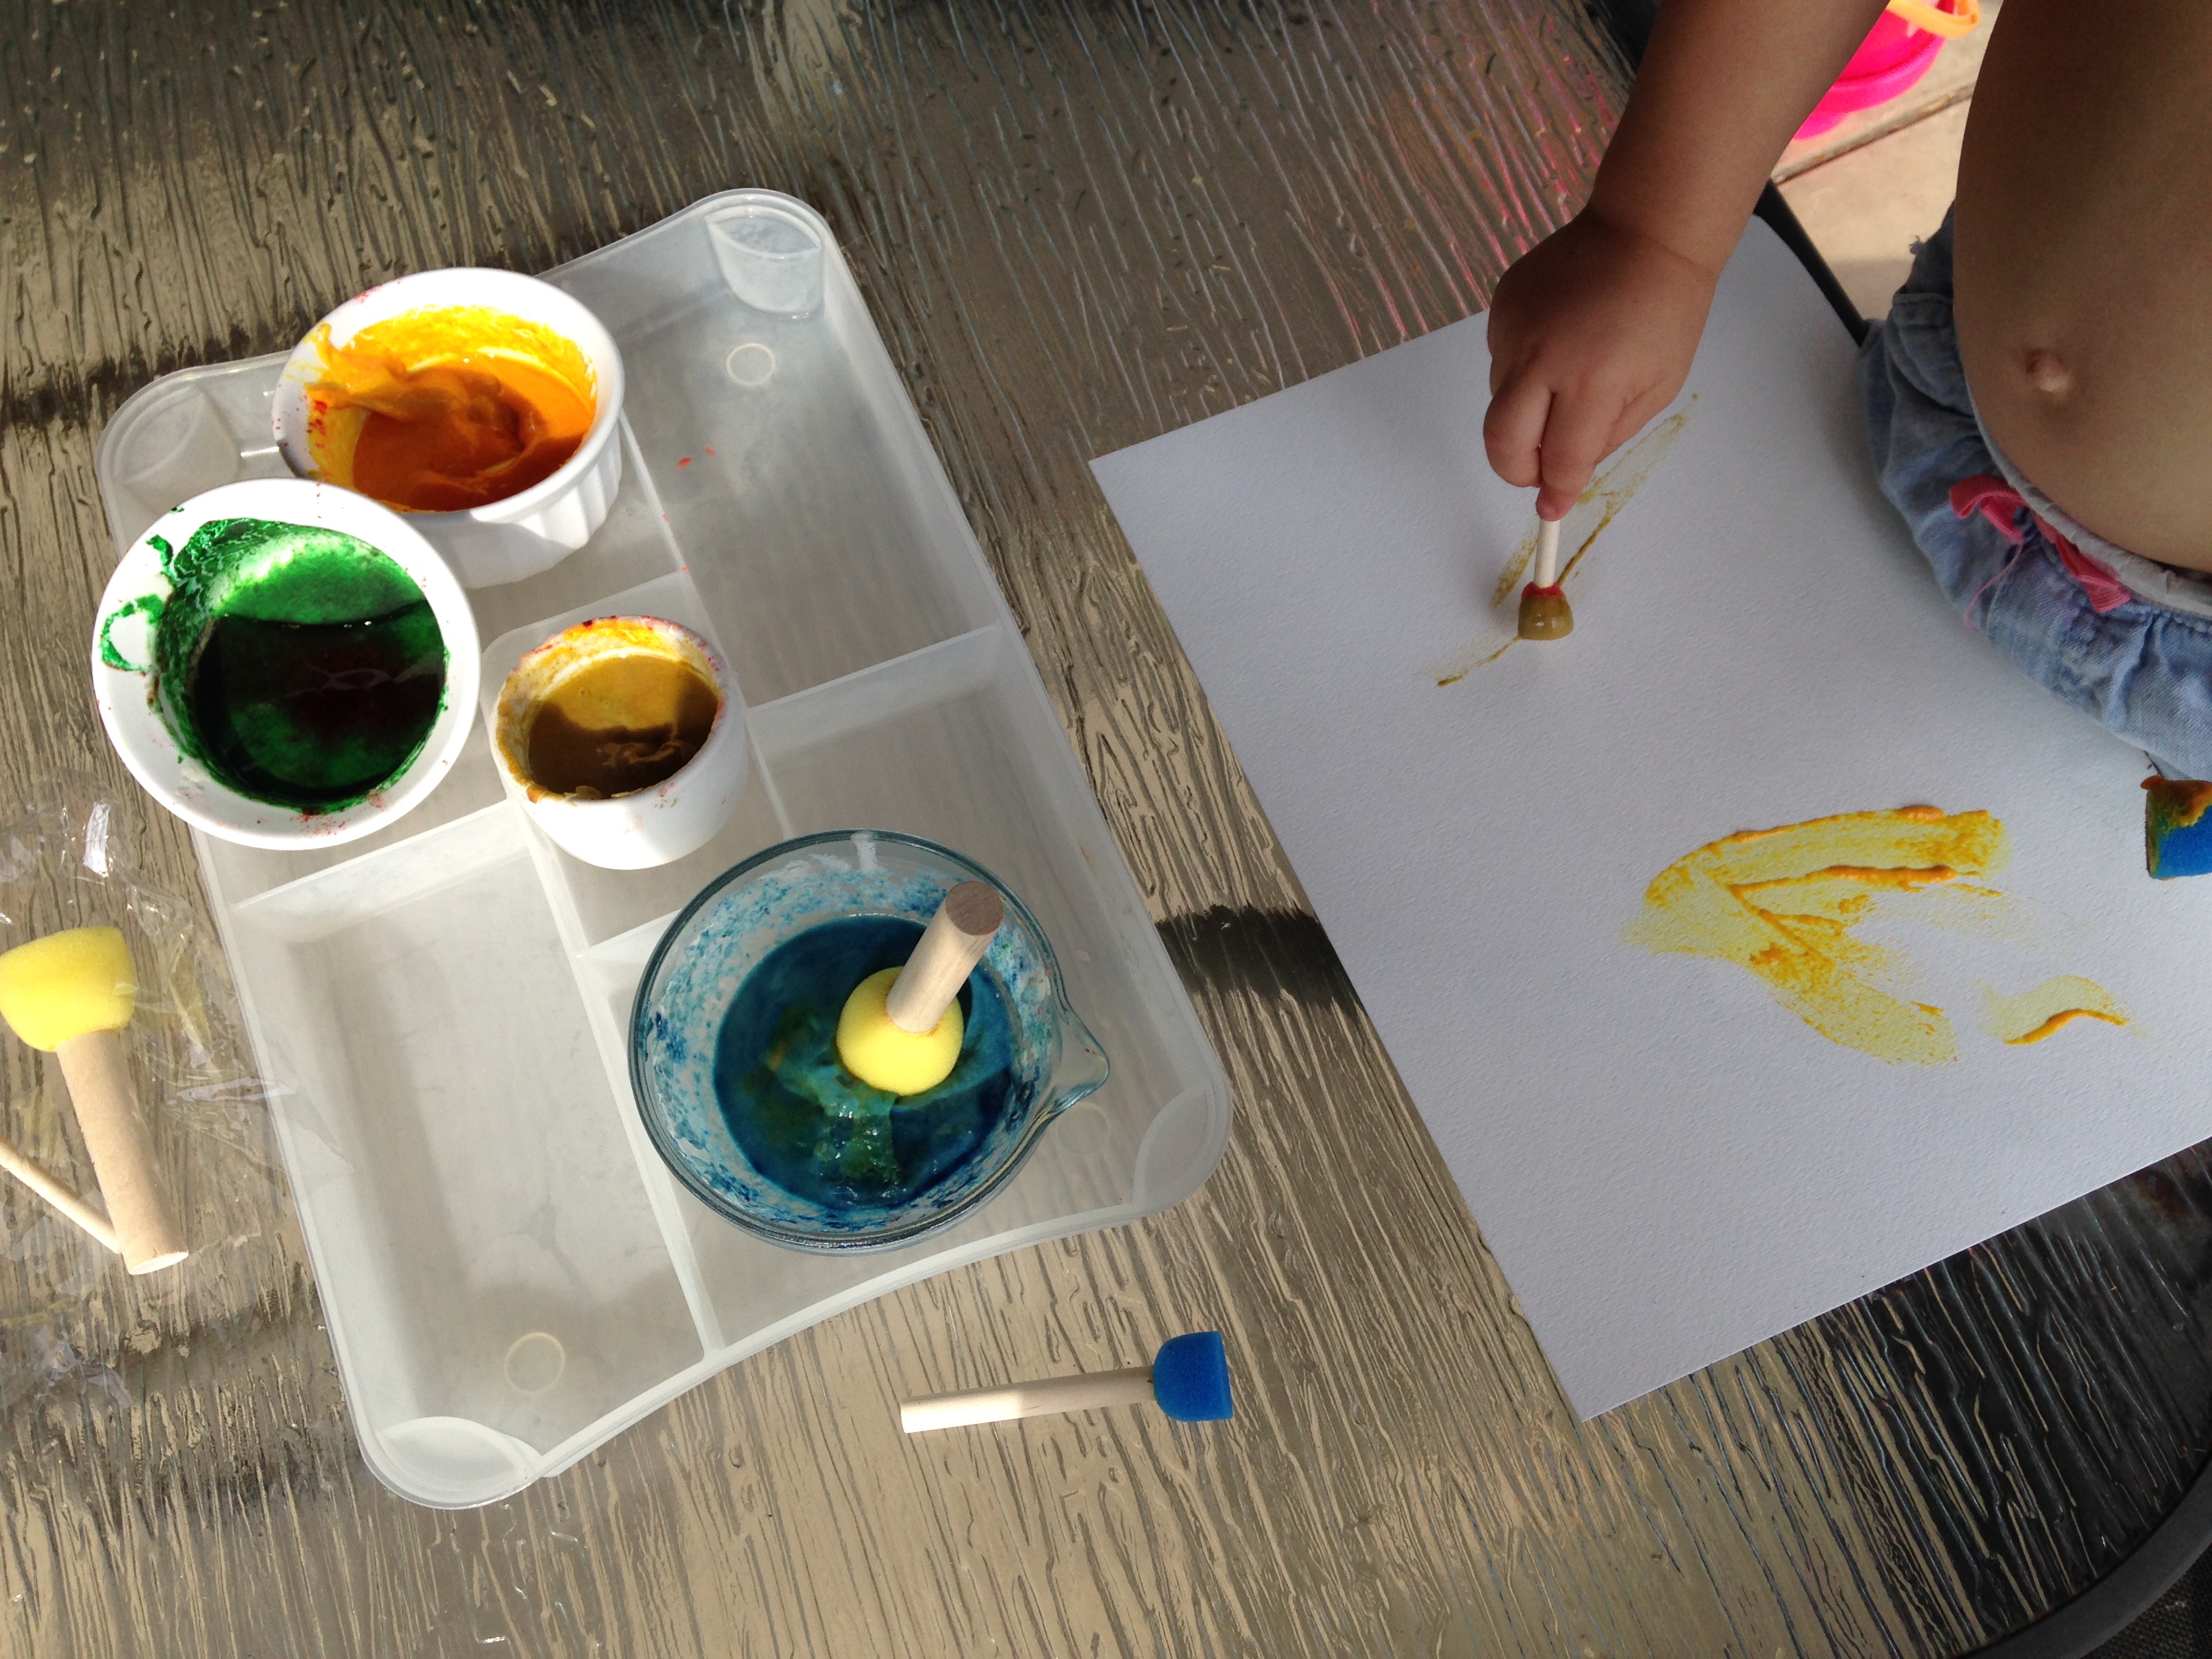
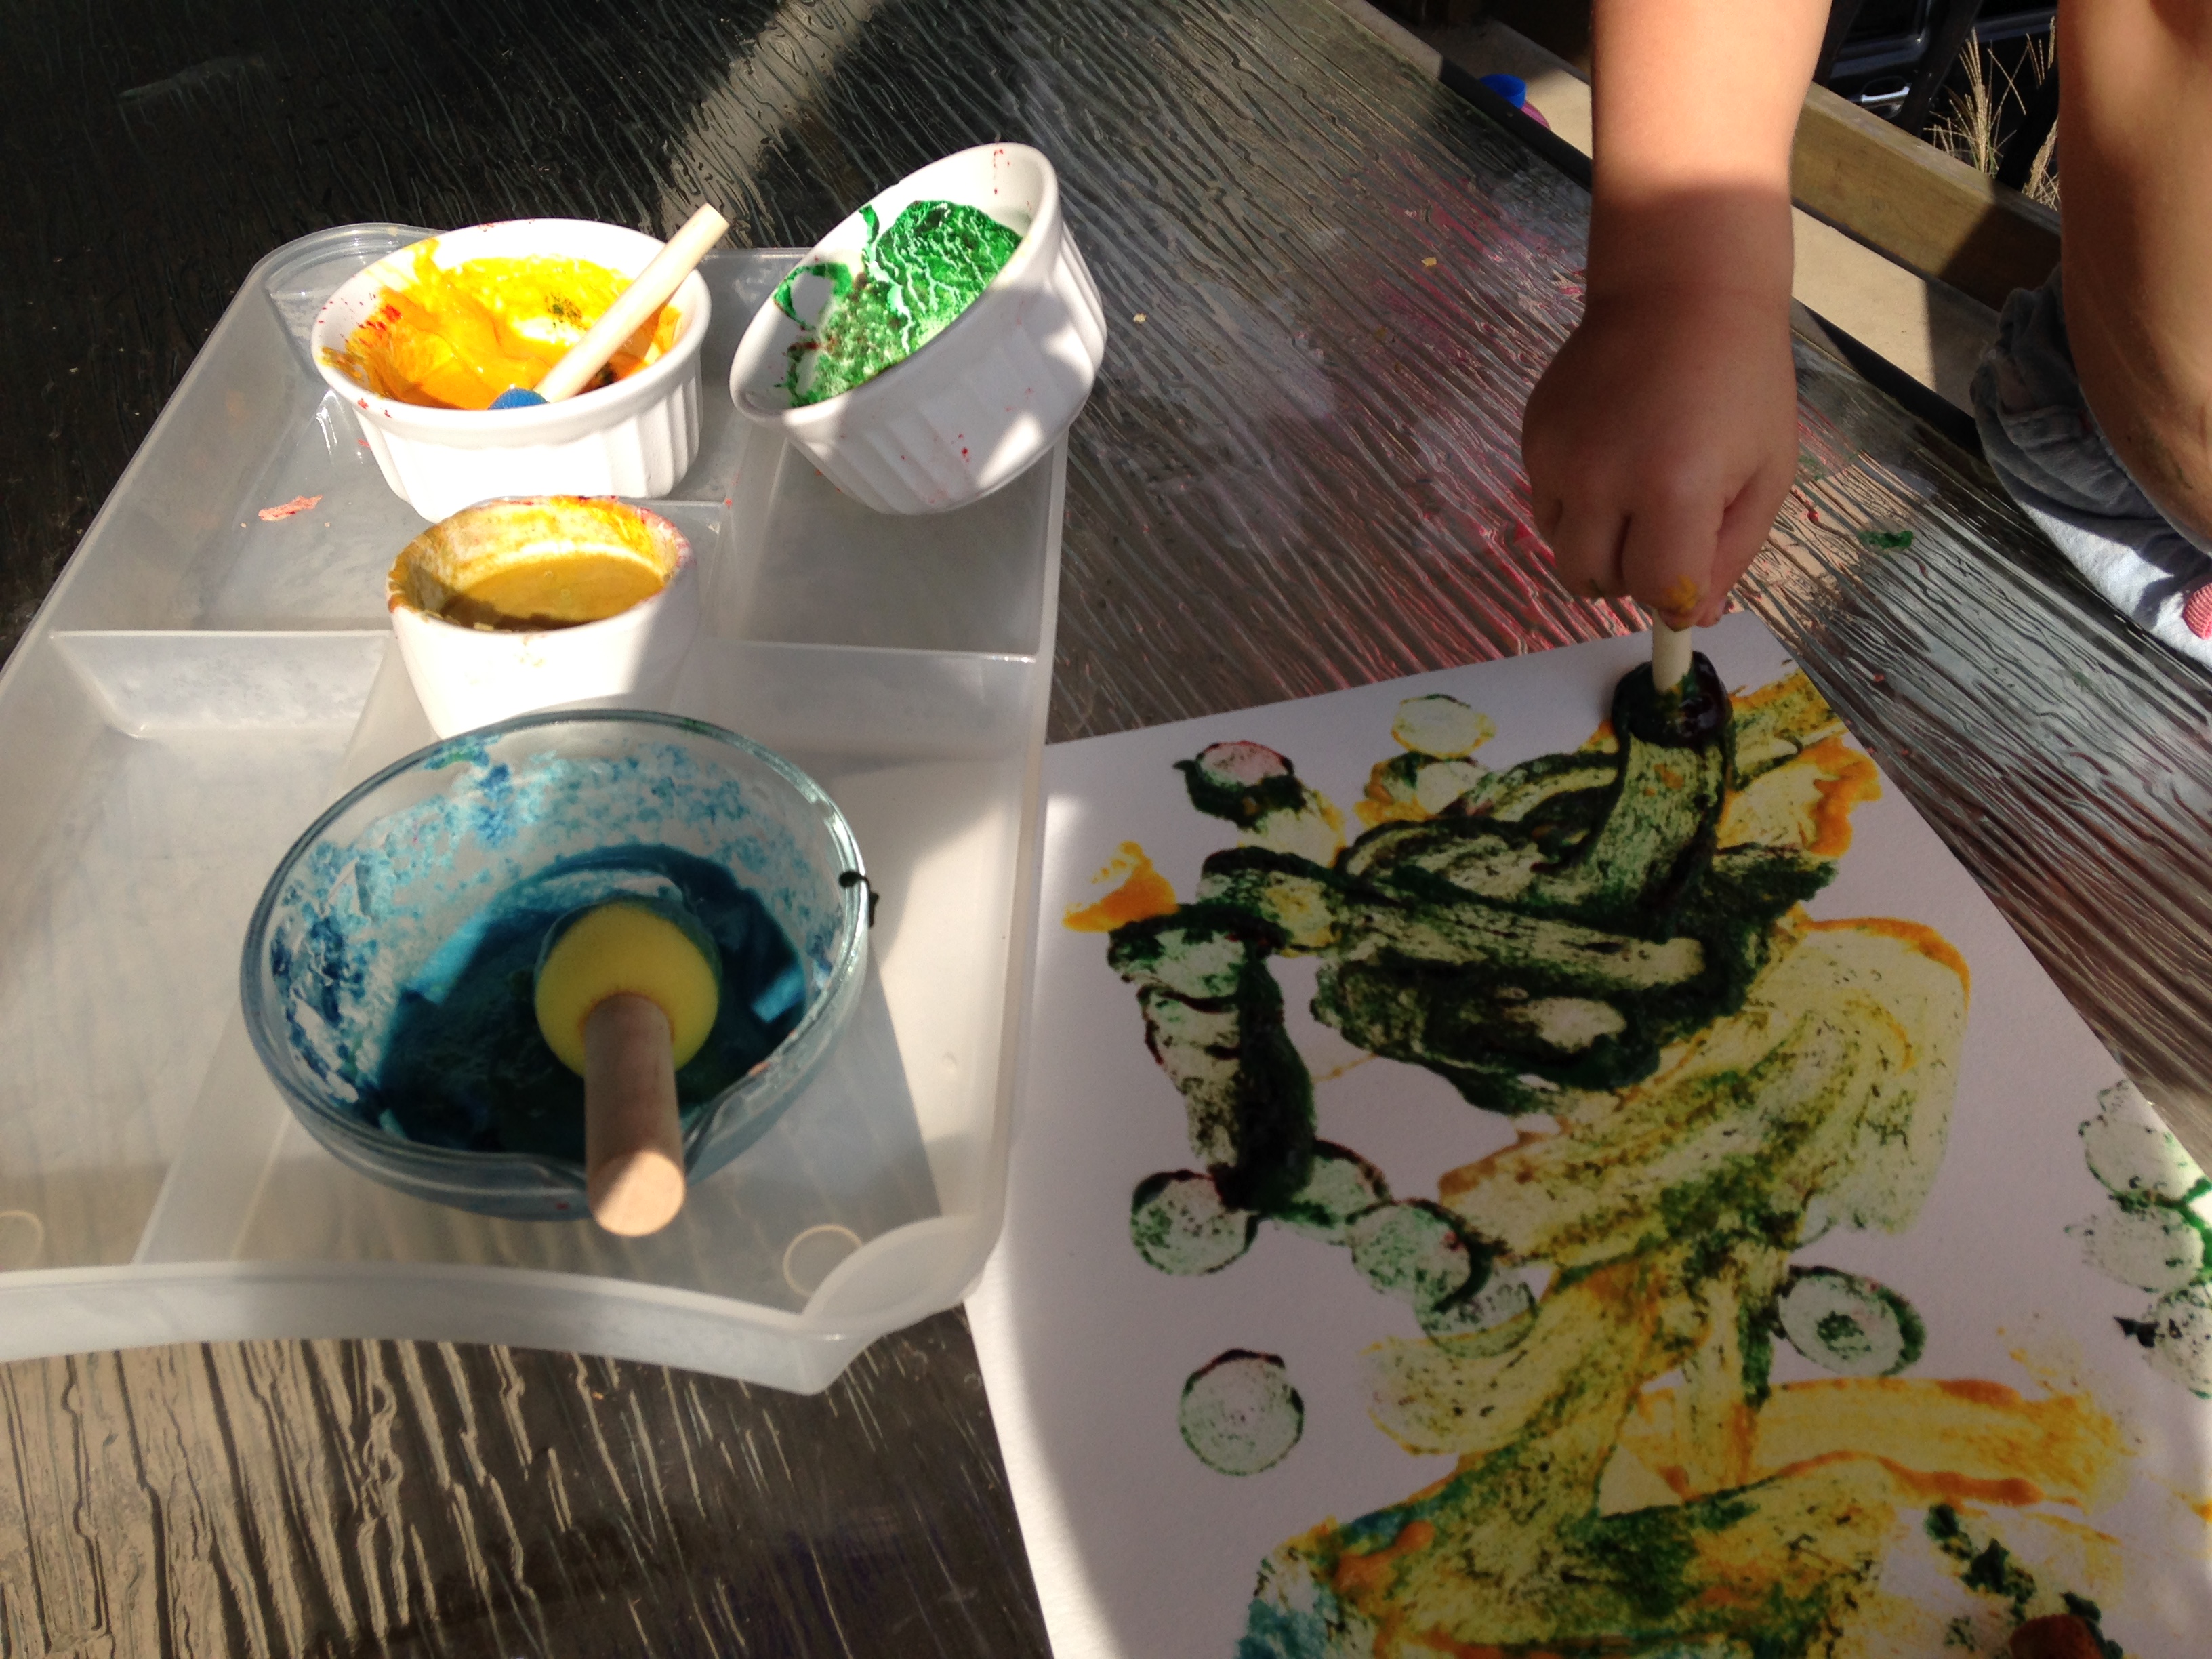
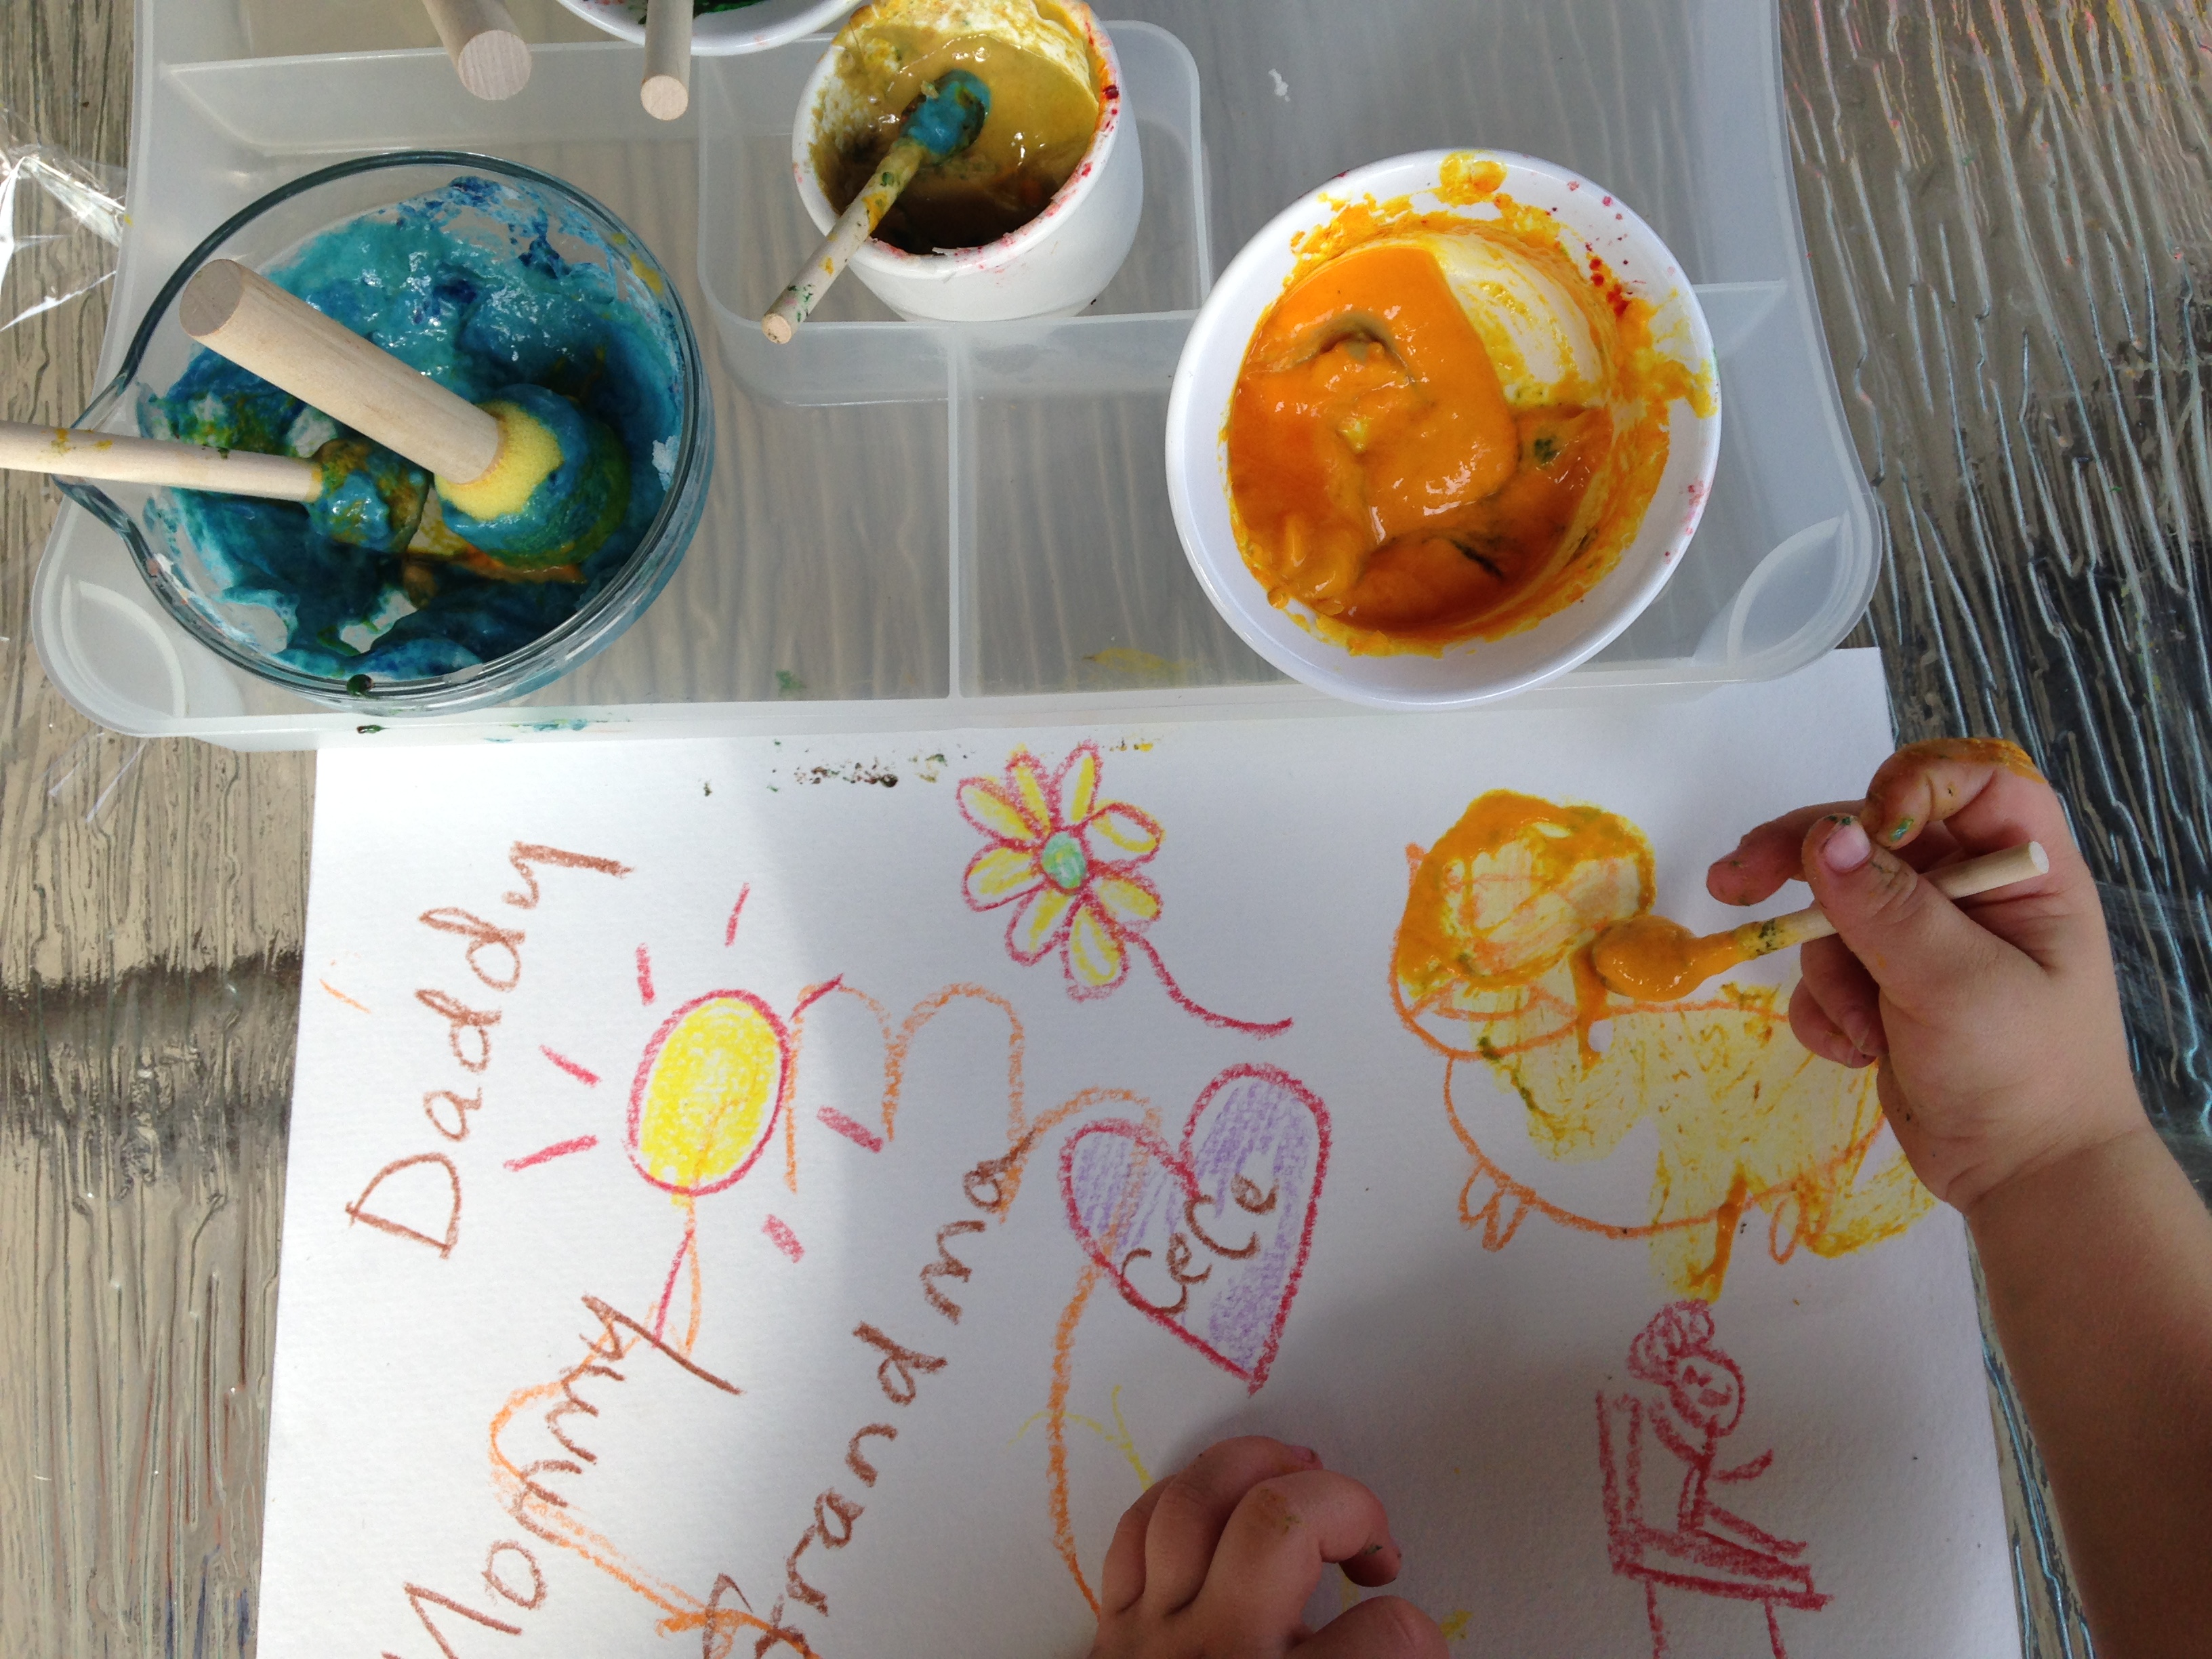
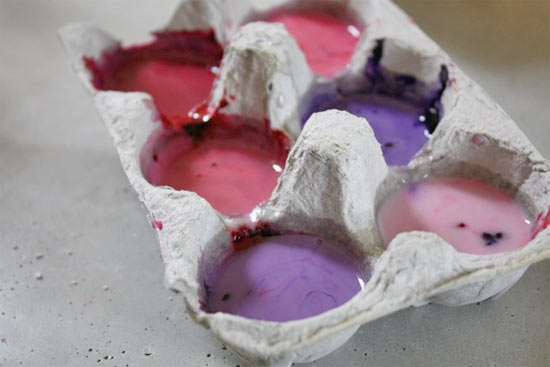
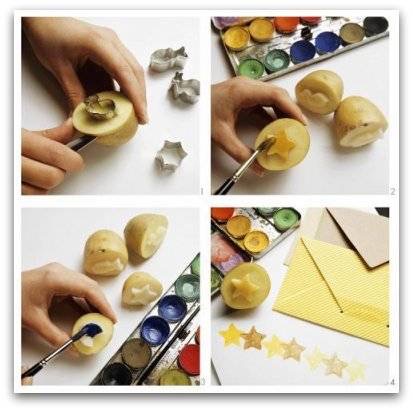
my daughter likes to squirt the paint in an old egg carton that way the colors stay separated.

Once we finished painting she sprinkled on some glitter. Unfortunately we don’t have any mod podge or clear finish to put on top right now, but we still love them!

If you have any clear finish or modge podge this is the time to coat it in that for a nice shiny finish!

Since we forgot to make the holes for the ribbon, I used the hot glue gun to attach the ribbons. Then we hung them around the house (high enough that my son couldn’t reach these “cookies.”

Enjoy!!!

FollowFacebookpinterestrssyoutube
ShareFacebookpinterest

DIY Rudolph Slippers!


DIY RUDOLPH SLIPPERS

This easy DIY sewing project can be made for any size shoe!  All you need to do is trace the shoe (or foot) size and create!  Easy peezey Christmas fun! Also makes a great gift!

IMG_0405

As always, there is a video tutorial on the ceceliasspot channel and here is the link… 

rudolphslippers

Baby Slippers Tutorial! this has a pattern for baby slippers if you don’t want to trace a shoe or foot

And there is the written format below.  ENJOY AND HAPPY HOLIDAYS!


First, what you need for this project:

  1. Non-skid fabric
  2. Fabric colors (I used cotton and fleece)
  3. 1/4 or 1/8 elastic
  4. Sewing tools, googley eyes, red cotton ball, and any accessories you would like to add

IMG_0299

  1. Next, trace your subject’s shoe or foot (if you are using their actual foot add 1/2 inch all the way around).


2. Trace the top of your childs shoe to make the front of the slipper. Cut four of these pieces. Then trace the back and cut 4 of these (add 1 inch to the long length side so you can overlap)

IMG_0387 - Copy - Copy


3.  Take pattern facing pattern and sew the two front pieces together only on the straight side as shown (do this for both slippers).

IMG_0332

4. Trim excess and turn right side out, iron right side out and sew across the top you ant on outside (this makes it look nicer.

5. Take pattern facing pattern for both back pieces and sew across one long side for both slippers.

6. Take your elastic and cut it about 2.5 to 3 inches shorter than the length of the back piece and pin it and pull it tight while sewing across to the end. This is still on the wrong side. Sketch

7. Flip the fabric over the elastic with right side out and iron and then sew right below the elastic and down the sidesSketch2

8. Freehanded antlers by looking at a picture of antlers. cut 4 sew around except bottom and stuff it.

IMG_0331


9. Check sizing and put front and back piece pinned together with pattern facing down (right now you should only see (the side that is up) what will be on the inside when you are finished done).

Sketch3

10. After pinning the front to the back and the antlers in between the front and back piece, sew across front to attach front and back piece

IMG_0389 - Copy - Copy

This is what it should look like now.

11. Line up the sole two pieces with the patterns on the outside (not the usual, but it doesn’t matter since its on the bottom) You can see it in the back there with the nonskid on top.

Sketch4

12. Line up the sole with the top piece (nonstick sole facing upwards to the reindeer face) by finding the middle of the front and back (you can fold to find this). Then sew all the way around. And turn right side out and WAH-LA!!IMG_0398 - Copy.JPG

I sewed on the red cotton ball nose and hot glue gunned the eyes on.  If you have a little one then please don’t use googely eyes since they might try and eat them!

Don’t forget to check out our facebook site and subscribe to our youtube videos!  ENJOY! MERRY CHRISTMAS!

FollowFacebookpinterestrssyoutube
ShareFacebookpinterest

Summer Bee Dress

Cecelia’s Summer Bee Dress

This lovely summer spaghetti strap dress was suppose to be made in time for my sister in laws baby shower in June.  However, I was unable to finish it due to my water breaking early and being hospitalized.  I finally finished it and love how it turned out!  I free handed the design and sizing.  I meant for it to end up as a 2t size, but as you can see it’s a bit big!  This works out great since its winter and not summertime!  She can wear it this upcoming summer.  I can’t wait for the warm spring and summer to come!  Bulbs and flowers emerging and gardening time, but let’s get back on track.

As always there is a youtube tutorial and this written one.  I do not have a pattern as a freehanded it and designed the pattern myself as I went.  I used one of my Cece’s dresses to size it and make part of the pattern to guess the sizing.

Unfortunately, a lot of the video tutorial was accidentally videotaped over with my baby boys arrival home (sorry more important anyways!).  So I videotaped again trying to explain the best I could.  If you have questions please let me know!  More great videos to come soon!

What you need:

  • Chose of fabric colors and types (I chose three colors
  • 1/4 inch elastic (for gathering of the top of back of the dress)
  • Bias tape (or you can make your own like I did)
  1.  First you want to cut out your fabric pieces.  I looked at another dress I have for my little one and based the main front and back piece by measuring and estimating the sizing.  Then I cut the bottom piece I needed which ended up being about 40inches long and 4 inches wide (for the ruffle on the bottom). I ended up added another color (black) on the two sides of the dress.  Then I also cut out fabric to make bias tape (here is a good tutorial on making bias tape if you’ve never made it before..BIAS TAPE TUTORIAL. )
  2. Take your strap (black piece) and sew it to the top piece and bottom piece.  Pattern piece to pattern piece (facing each other) sew the bottom to the strap
    then the top.
  3. I made my own bias tape by cutting and ironing the fabric.  Then you proceed to use it to line the top of the dress (sew it on!). Then sew up the armholes and long to tie…estimate how long you want the straps to be to tie behind the neck (longer the better!)
  4.  
  5. Take the back side and sew two black (or whatever color you choose) by sewing
    facing pattern sides together
  6. I decided to add a small piece of fabric above the black strap to make it higher .  If you want, sew and connect.  Then place from and back piece facing each other and sew to connect from and back.
  7. Add elastic to back piece if you want it ruched and tighter.
  8. The last part is the bottom ruffled part.
  9. Hem the bottom first about 1/8inch
  10. To gather your fabric put your machine on the longest thread setting make two
    straight lines (Do not reverse!). Roughly 1/4 and 1/8 inch away from the top.
    Leave long threads on the ends.
  11. Next you knot the bottom of the back side of the threads so you can gather, just the two in the back (not the front).
  12. Pull the bottom threads from the other end and slide the cloth along the threads toward your knot making small folds. When your cloth has been
    gathered the way you want it, knot the ends securely with each other.
  13. Sew pattern side to pattern side all the way around.  Then you can zig zag around (or you can zig zag before attaching (this prevents fraying).
  14. Then you are finished! Great Job!  Have fun! Post your pics!
FollowFacebookpinterestrssyoutube
ShareFacebookpinterest

Homemade Paint!

Looking for an easy homemade nontoxic paint for your little one to be creative?  Well, look no further!  We experimented with several types of homemade paint and below are our favorite recipes!


Kids of all ages love painting!  You can have your little one finger paint, use brushes, sponges, or even potatoes!

So we started off making completely edible finger paint with only a couple ingredients!

img_5388

Here is what you will need: (this makes enough for about 4-5 different colors depending on how much you want for each)…

img_5362

  • 1 cup water
  • 1/2 cup of flour
  • extra water to thin out
  • food coloring, watercolors, or natural colors such as beet, carrot, tumeric

Instructions:

img_5363

  1. Place pot over medium heat and pour flour and water into pot and continuously stir the ingredients until it becomes a thick paste.
  2. Take the pot away from the heat when it no longer sticks to the sides
  3. Add cold water to the blob until it reaches the consistency you like and place the amount you desire into separate bowls to color.
  4. Add food coloring, watercolors, natural colorants such as beet or carrot juice, turmeric spice
  5. img_5364
  6. These can be enjoyed right away or stored in the fridge!!

img_5390img_5391

This paint works well for fingerpainting or sponge painting.  You can also use brushes but as you see in the photo, the colors come out thinner and lighter than traditional paint.  The color dries on without fading. We used the paint several days in a row.


And who doesn’t love watercolors?  The problem with watercolors is that the colors can mix and you only get very small amounts of each color.  However, this can all change with homemade watercolor paints!

photo by factorydirectcraft
tbsp. baking soda
2 tsp. white vinegar
1/2 tsp. light corn syrup
2 tsp. corn starch
food colors*
containers for storing paints*
something to stir with (toothpicks)

photo from happyhooligans

You can use a muffin pain, disposable cups, egg cartons, or any other container that you aren’t going to use for a couple days.

Instructions:

1)Mix baking soda & vinegar in a cup with a spout.  I used my Pyrex measuring glass.  Let the kids watch as it fizzes

2) Add in light corn syrup and stir.

3) Stir in the corn starch until well combined.  (If it gets too thick, add a little more vinegar.)

4)Pour into your paint containers- not too full, you need room for the food colors.

5)Add the food colors and stir until you reached your desired color!

6) Now if you want them to harden into hockey pucks you have to let them sit almost two days!  If you plan on using it right away that’s fine too!


Sponges and potatoes!! 


You can cut out designs in potatoes or out of sponges and dip into paint and press just like a stamp! I remember doing this as a child! 


You can also use cookie cutters and paint the potato. This picture was taken from Fun stuff
Dollar store sponges are great to cut out designs for painting! 

Enjoy! 

FollowFacebookpinterestrssyoutube
ShareFacebookpinterest

DIY Child Bean Bag!

I don’t know about your little one, but mine sure does love to read!  Well at this age, it is more like browse through the pages and pictures!  She sits by the book shelf and pulls out book by book looking at each page.

At first I thought maybe I should purchase her a bean bag chair, and then I thought, well lets just make one! This can also be a great gift for anyone!  I actually sometimes sit in it too (shhhh!)

So of course I have the video tutorial on youtube below and then the written and picture tutorial below that.  Let me know if you have any questions!

IMG_3968

What you need:

  1. Fabric (you can use two or one color) 2 yards total of each color (or 4 yards of one color)
  2. A 24 inch zipper (or you can use velcro or buttons)
  3. 4 yards of muslin or cheap fabric
  4. Bean bag filling (100L) (I couldn’t find a large bag at my local craft store so I bought mine on amazon with free shipping)
  5.      Snapshot 1 (3-14-2016 7-40 AM)
  6. Make panels of 40×16 inches. You should do 6 outside (3 of one color and 3 of the other color) and 6 inner panels.
  7. Take one of your panels and fold once long way and once width. Have your fold on top and side when measuring to cut. Measure bottom to 6 inches (the long side) and start a curve and cut right up to the right corner. See picture below.
  8. Snapshot 2 (3-14-2016 6-41 PM)
  9. IMG_3931
  10. Line up two inside pieces and sew up and down one side.  I did this twice for more strength.  For the outside you will have the patterns facing inside towards each other and sew.
  11. IMG_3932
  12. Once sewn open the panel up. Then place another panel on the original piece and sew the opposite side (you will end up with three pieces sewn together)
  13. IMG_3933
  14. Then sew the other 3 inside pieces together and you will have two sets of three.
  15. Take the two sewn together pieces and face pattern side in (doesn’t matter with the inside bean bag layer) and sew all the way around the outside leaving a couple inches hole.
  16. Turn right side out.  Then you will put the bean bag filling it!  Ah what a challenge!
    Note: I did not completely fill and sew this until I was sure the outside would fit over properly.  I waited to finish this until the end of the project.
  17. Take one of your outside panels and face the zipper down on the pattern.  Line it up on your machine and sew the zipper on.Take one of your outside panels and face the zipper down on the pattern.  Line up the right outside part of the zipper to the outside of the panel (as shown) and sew the zipper on.
  18. snap
  19. See the video for more of a demonstration on how to attach a zipper
  20. Sew pattern and right side of the next panel to zipper right sides facing each other (inside) and sew together.
  21. Line up the part below and above the zipper with patterns facing each other and sew
  22. zipper
  23. Then sew your 3rd panel on…complete another 3 panels together as done with the inside pieces.
  24.  **Open your zipper all the way.  Take each 3 piece panel set and place them facing each other (inside) and sew all the way around the edges.  Do not leave a hole this time, you will pull it out through the zipper opening!
  25. Next you will place your inside bean bag that is partially full inside.  If its full then you are done!  However, if you partially filled…continue to fill all the way and sew the inside bag shut.
  26. IMG_3966
  27. Congrats you are done! Enjoy!  Post your pics below!


IMG_3968

FollowFacebookpinterestrssyoutube
ShareFacebookpinterest

Easy Sock Snowmen!

What’s an easy gift that can be personalized and made in 15mins?  A sock snowman of course!

IMG_3866A what?  A Sock Snowman? What is that????

Well, let me tell you.  A sock snowman is a snowman made with rubber bands, rice, men’s socks, a hot glue gun, and personalized items.  It is easy, fast, and I love that you can personalize it any way you want for any time of the year!  I made 10 of them for Christmas gifts.  You can see the harry potter and eagles one above.  I also made a hunter, patriots, and princess snowman.  Then I made the usual Christmas snowman for decorations as well.  I even got most of my supplies at the dollar store!

Snapshot 1 (1-23-2016 2-55 PM)

As usual, there is a youtube video tutorial and the written instructions below.  These make great gifts for any occasion and are quick and easy! Enjoy!


What you need:

-Hot glue gun
-Crew socks or longer
-Any type of rice
-Rubber bands
-Decorations such as eyes, stick ons, felt, buttons, bows, pins

  1. Take your crew sock and cut below the ribbed area (the bigger the snowman the lower you want to cut (the bottom part will be the hat of the snowman).
  2. Turn the top ribbed part inside out and place a rubber band tightly on one end
  3. Snapshot 1 (1-23-2016 6-23 PM)
  4. Turn it right side out and pack with rice. Make sure you continuously pack it down with your hands to give the snowman a fuller shape.  Leave a small area on the top and then close it with another rubber band.
  5. Put a rubber band on the top then 1/3 of the way down place another rubber band as tight as you can and adjust the rice to form the body and head of the snowman.
  6. Snapshot 1 (1-23-2016 6-33 PM)
  7. Now time for the fun part- decorating!
  8. The scarf can be made out of felt, scrap fabric, or even a crocheted or knitted scarf!  I did this with camo yarn for a hunter snowman.
  9. I used the hot glue gun to make sure everything stayed in place including the scarf and hat!
  10. IMG_3865
  11. Take the bottom part of the sock and fold top of it and place on top of the snowman’s head for the hat!  Feel free to decorate the hat as well.
  12. Snapshot 2 (1-23-2016 6-49 PM)
  13. I made my sister a harry potter snowman.  I also made a hunter camo snowman, princess snowman, patriots snowman, soccer player, and Christmas themed
    snowmen.
  14. Congrats you are done!  Good job!  Post your pics!
FollowFacebookpinterestrssyoutube
ShareFacebookpinterest

Truck Pillow Tutorial

I have a nephew who absolutely loves trucks, cars, and any other type of vehicle.  As Christmas approached I was unsure of what to get my nephew.  I searched the internet for ideas of sewing projects with trucks, but it was only to my dismay. None of the projects peaked my interest.  I found a car tutorial but that was it.  So I decided to make my own pattern and tutorial on a truck pillow.  I also decided that putting his name on with iron on letters would be fantastic!IMG_3727

As usual, there is a video tutorial on my youtube site, and written instructions with pictures below.

What you will need:
*Your choice of fabric colors
*poly-fil or any type of stuffing
*Choice of thread colors
*Optional: Iron on letters

Pattern: Use one whole piece of printer paper 8x10inches as the trailer part.  Make a circle for the wheels.  And make a from cab as you like.  The pattern I made is so easy I’m not even going to try and retrace it and scan it and turn it into a pdf because it takes much longer…if you are really having issues please let me know and I will take the time do that for you.

  1. Cut out your fabric pieces
  2. IMG_3717
  3. Iron on letters or if you want to sew on letters that works as well!
  4. Sew on your hubcaps, windows and any other details you want to add
  5. Sew each side together.  The front cab to the trailer and the wheelsSnapshot 1 (1-4-2016 9-28 PM)
  6. Time to sew the middle strip part! I made mine 2 inches thick but you can make it as big as you like!
  7. You can switch colors to match or just use one color.
  8. If you do not want to do the middle section then you can just take the two truck sides facing each other (inside) and sew around leaving a 3 inch opening.  Turn right side out, stuff, and hand-sew shut.
  9. To do the middle strip, line it up with the truck where you want to start and back-stitch and go forward all the way around switch colors as needed.  Curve the middle strip around the corners.
  10. Snapshot 2 (1-4-2016 9-32 PM)
  11. Now take the other side of the truck and have the sides facing inwards towards
    each other, and sew the second side to the strips on the first side.
  12. IMG_3726
  13. Turn right side out and make sure there are no holes in the outside, if there are turn inside out and fix them.
  14. Fill with your choice of stuffing and hand-sew shut.
  15. Congrats you are done!
  16. If you have any questions or concerns please leave them below.  If you have trouble with the middle strip please watch the youtube tutorial.
FollowFacebookpinterestrssyoutube
ShareFacebookpinterest