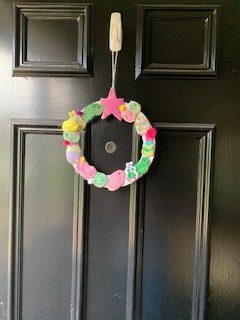
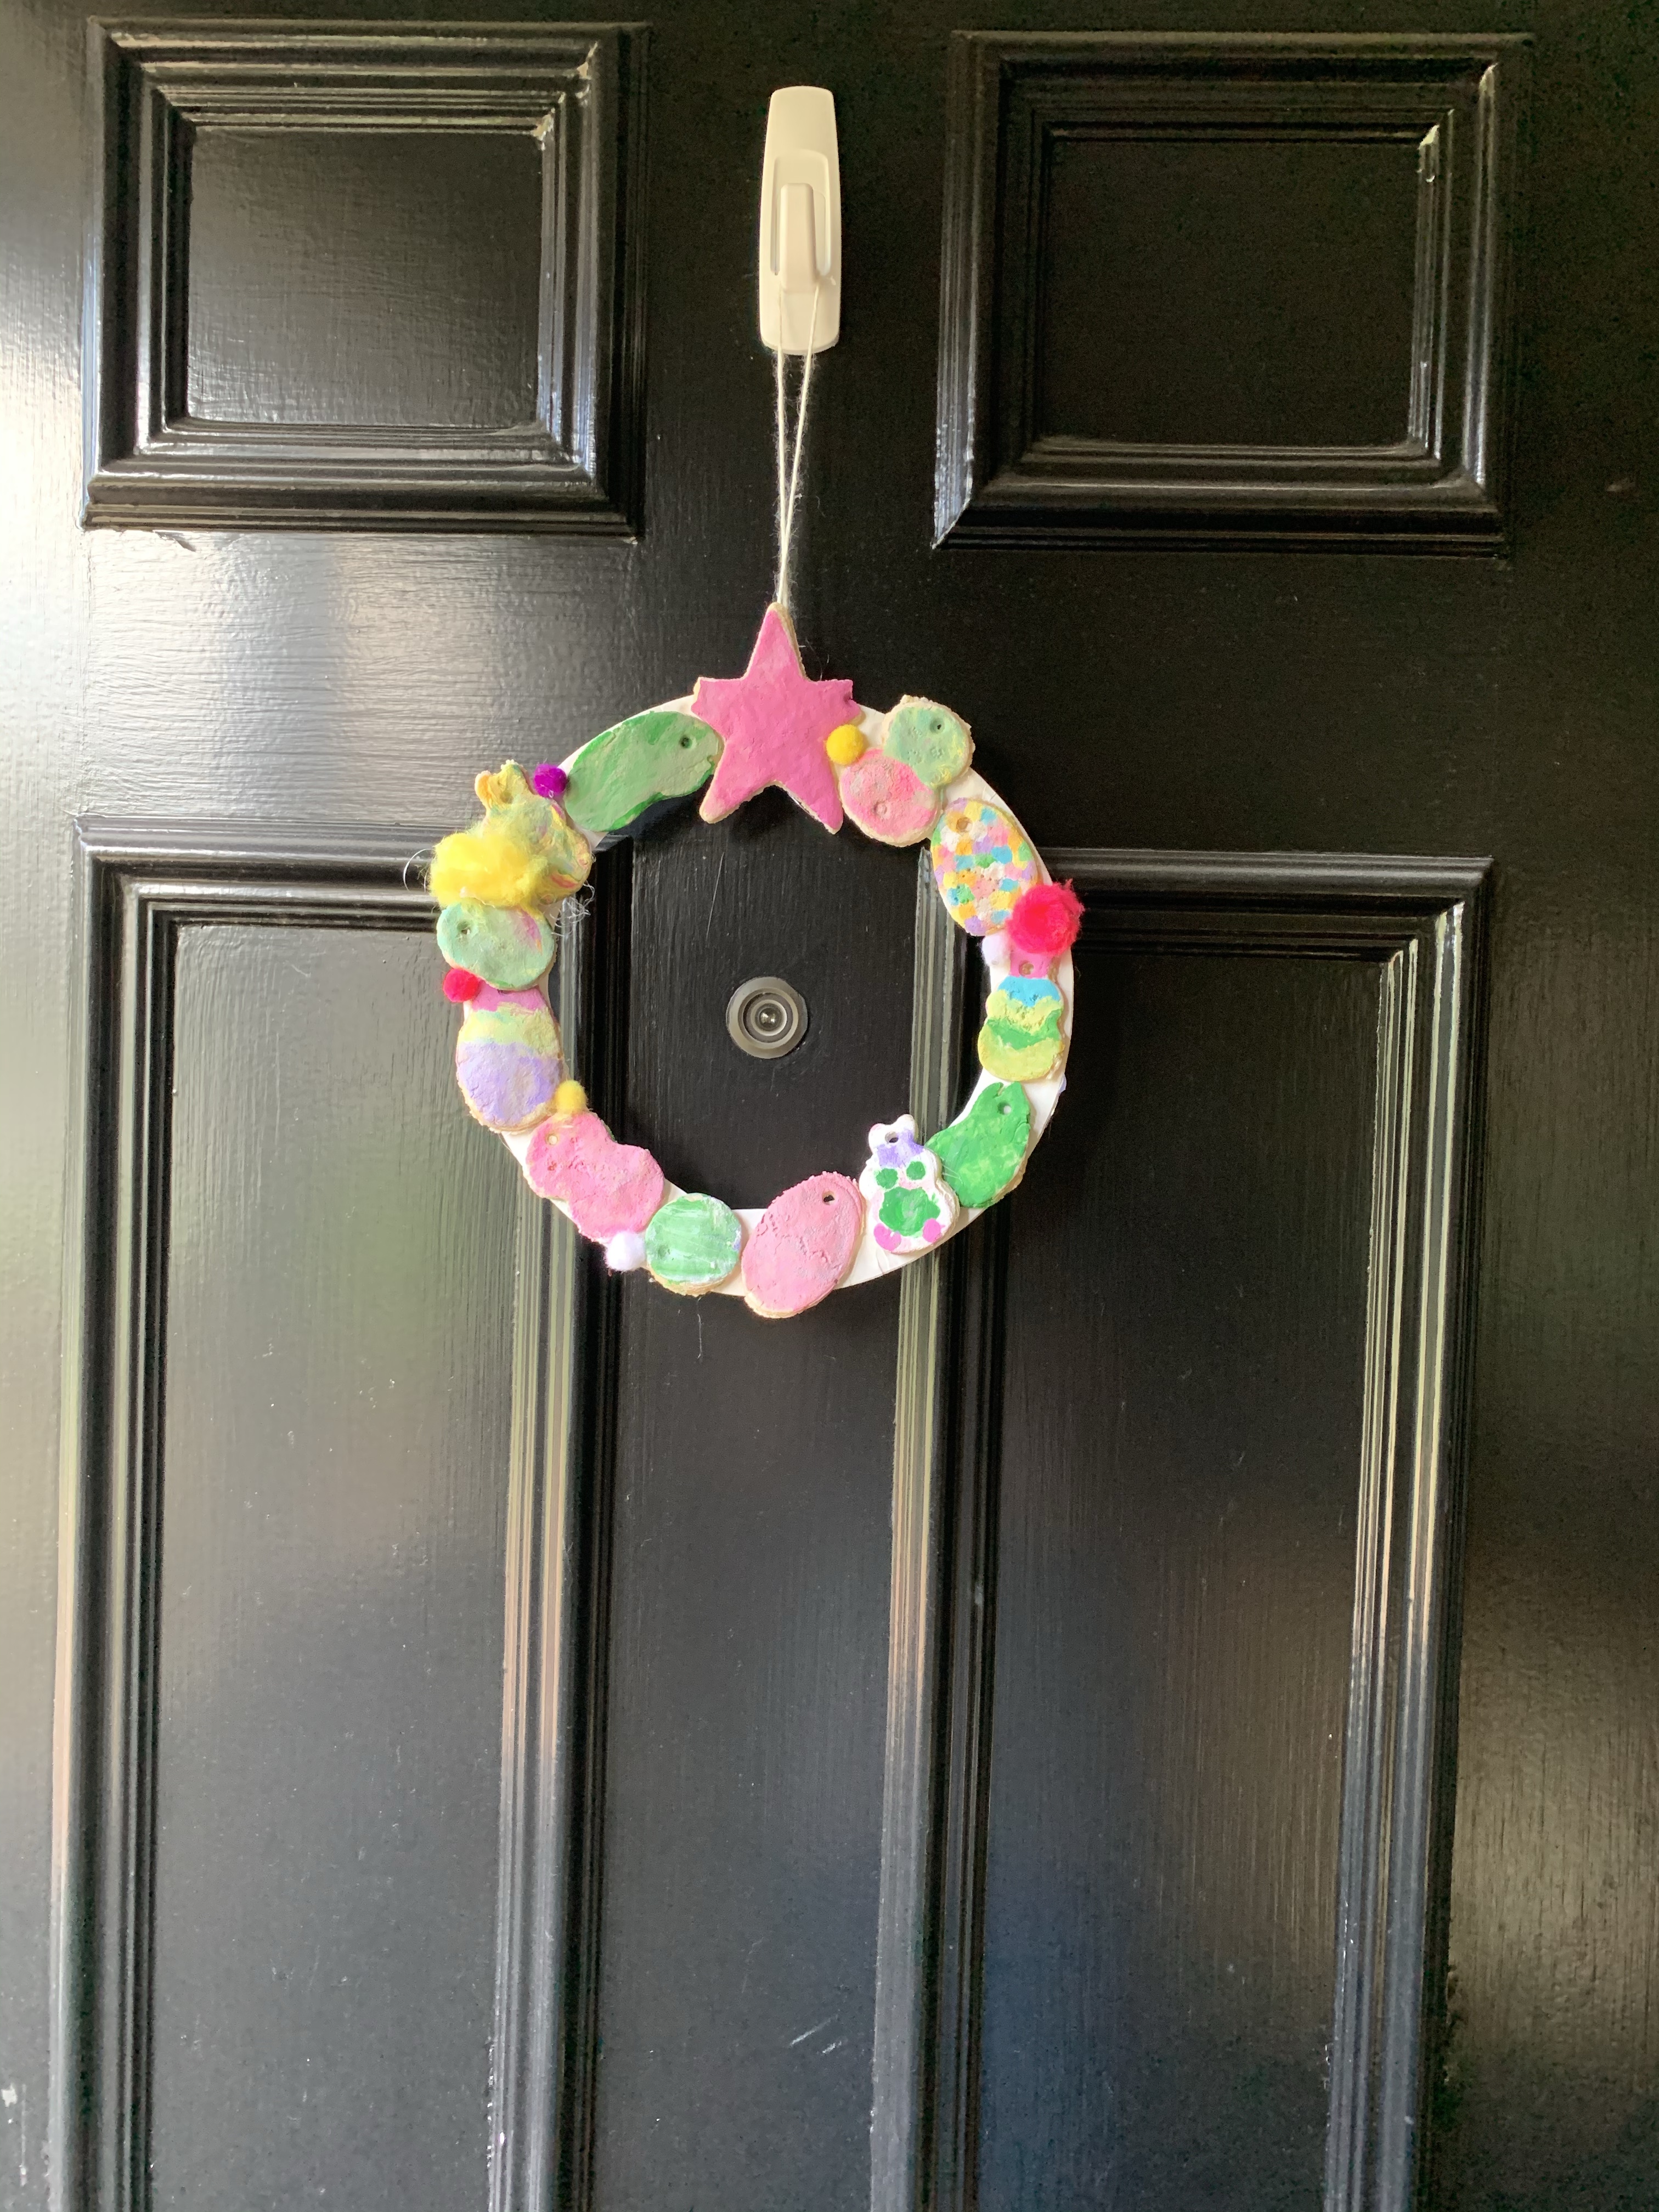
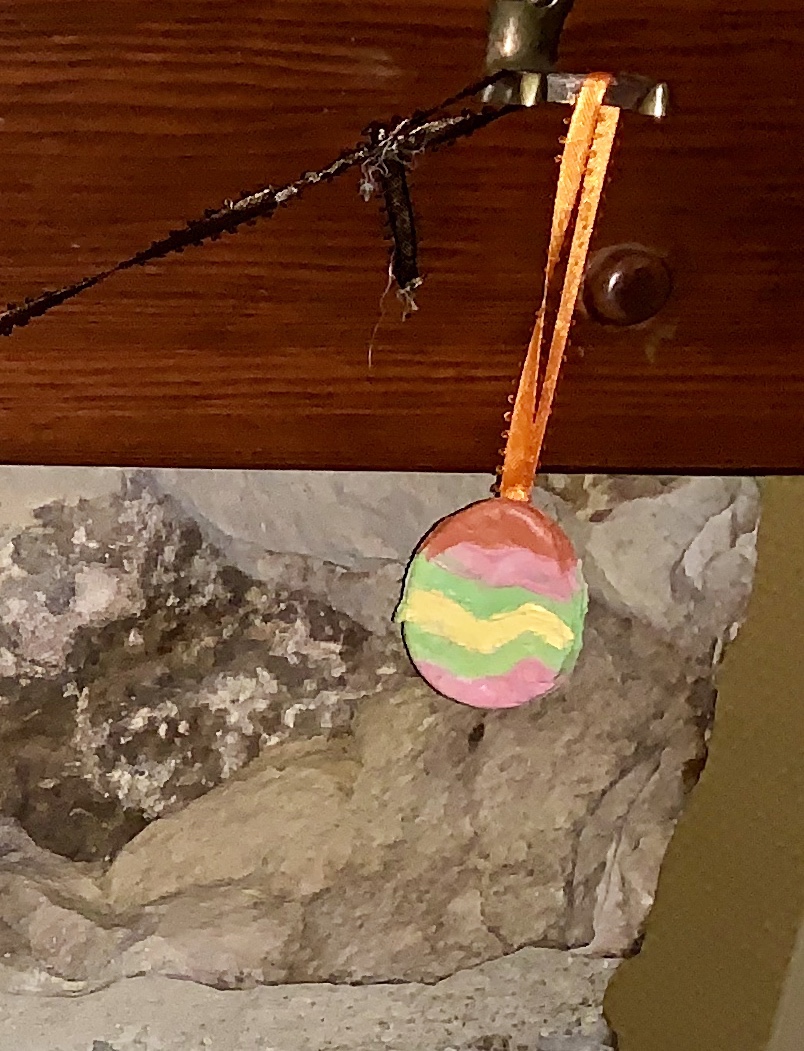
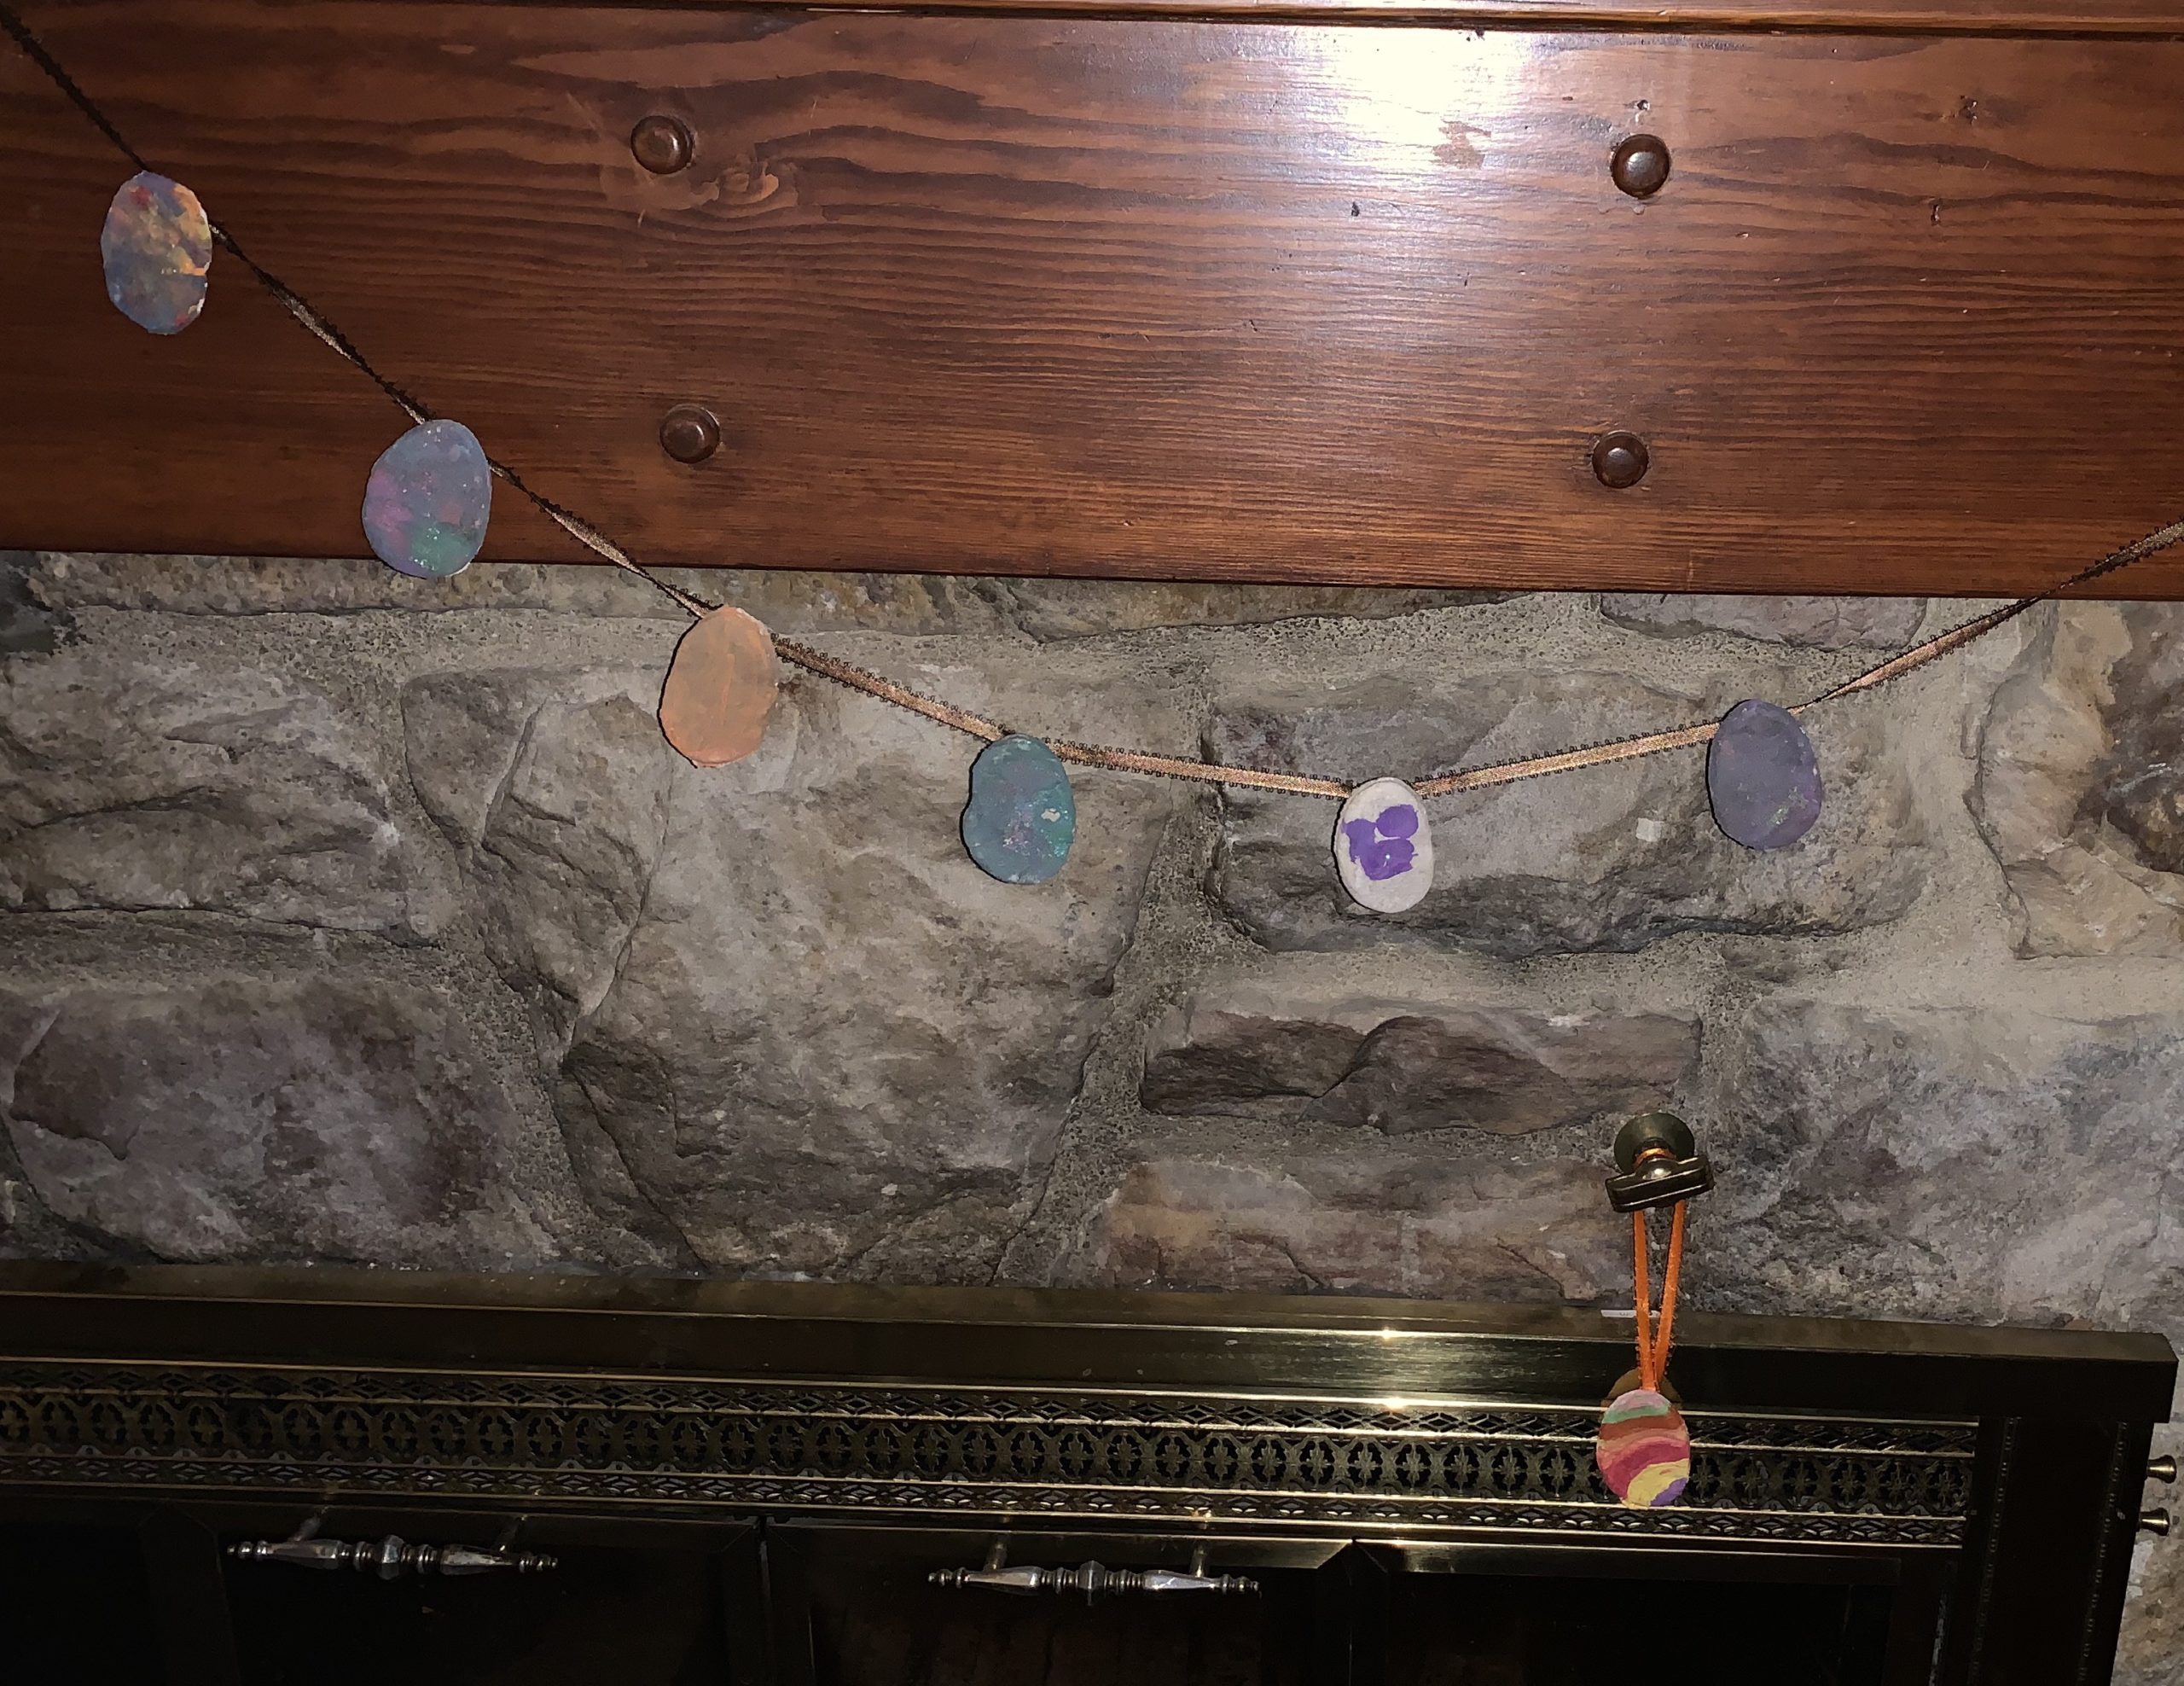
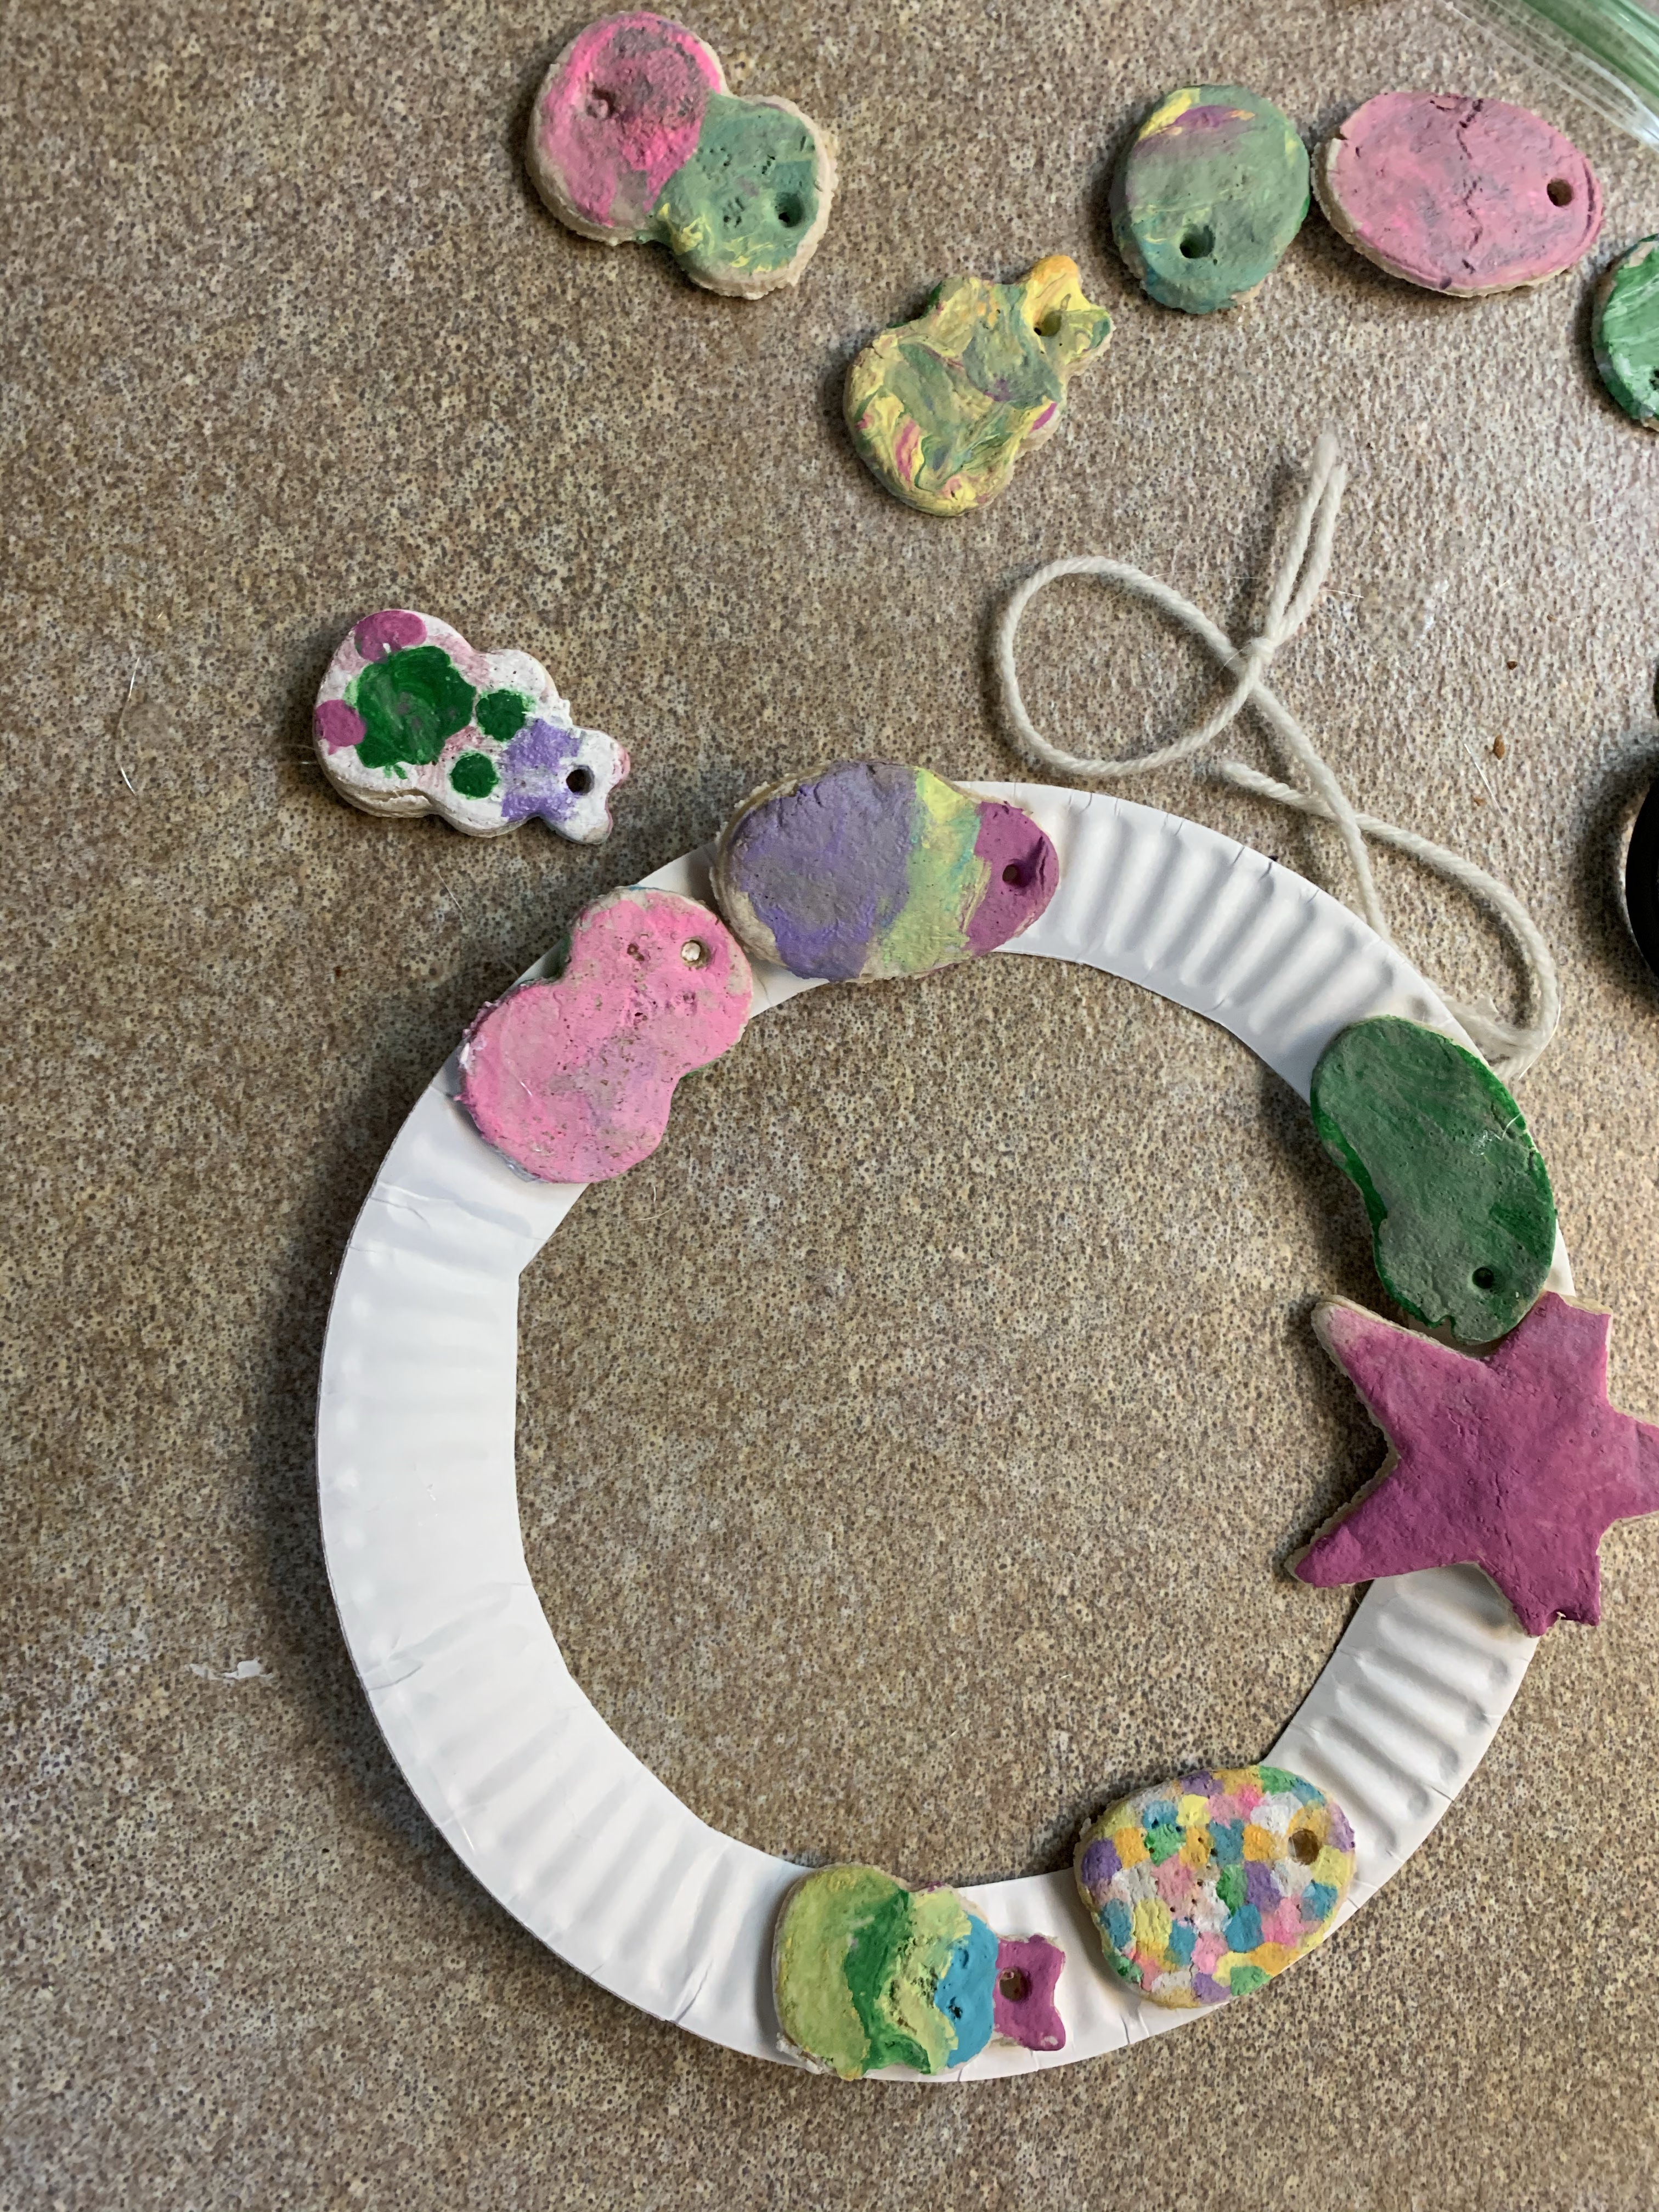
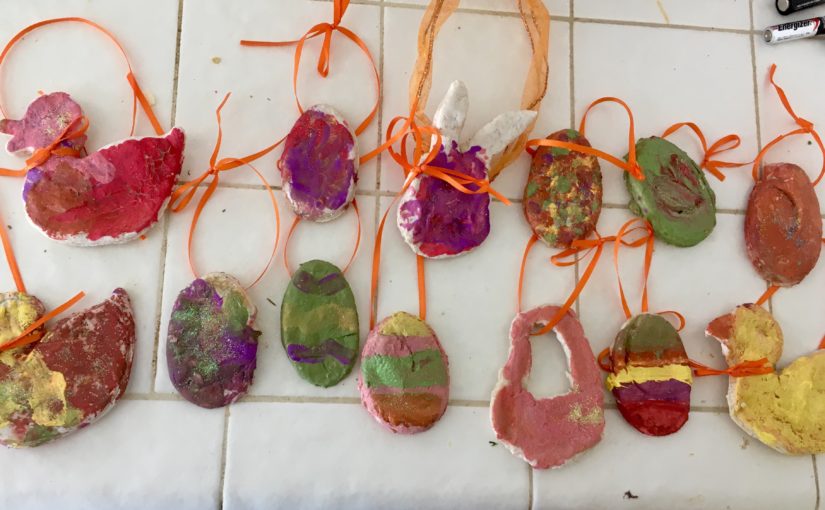
So we have done the salt dough ornaments before, but this time we made garland and a wreath out of our painted Easter ones!
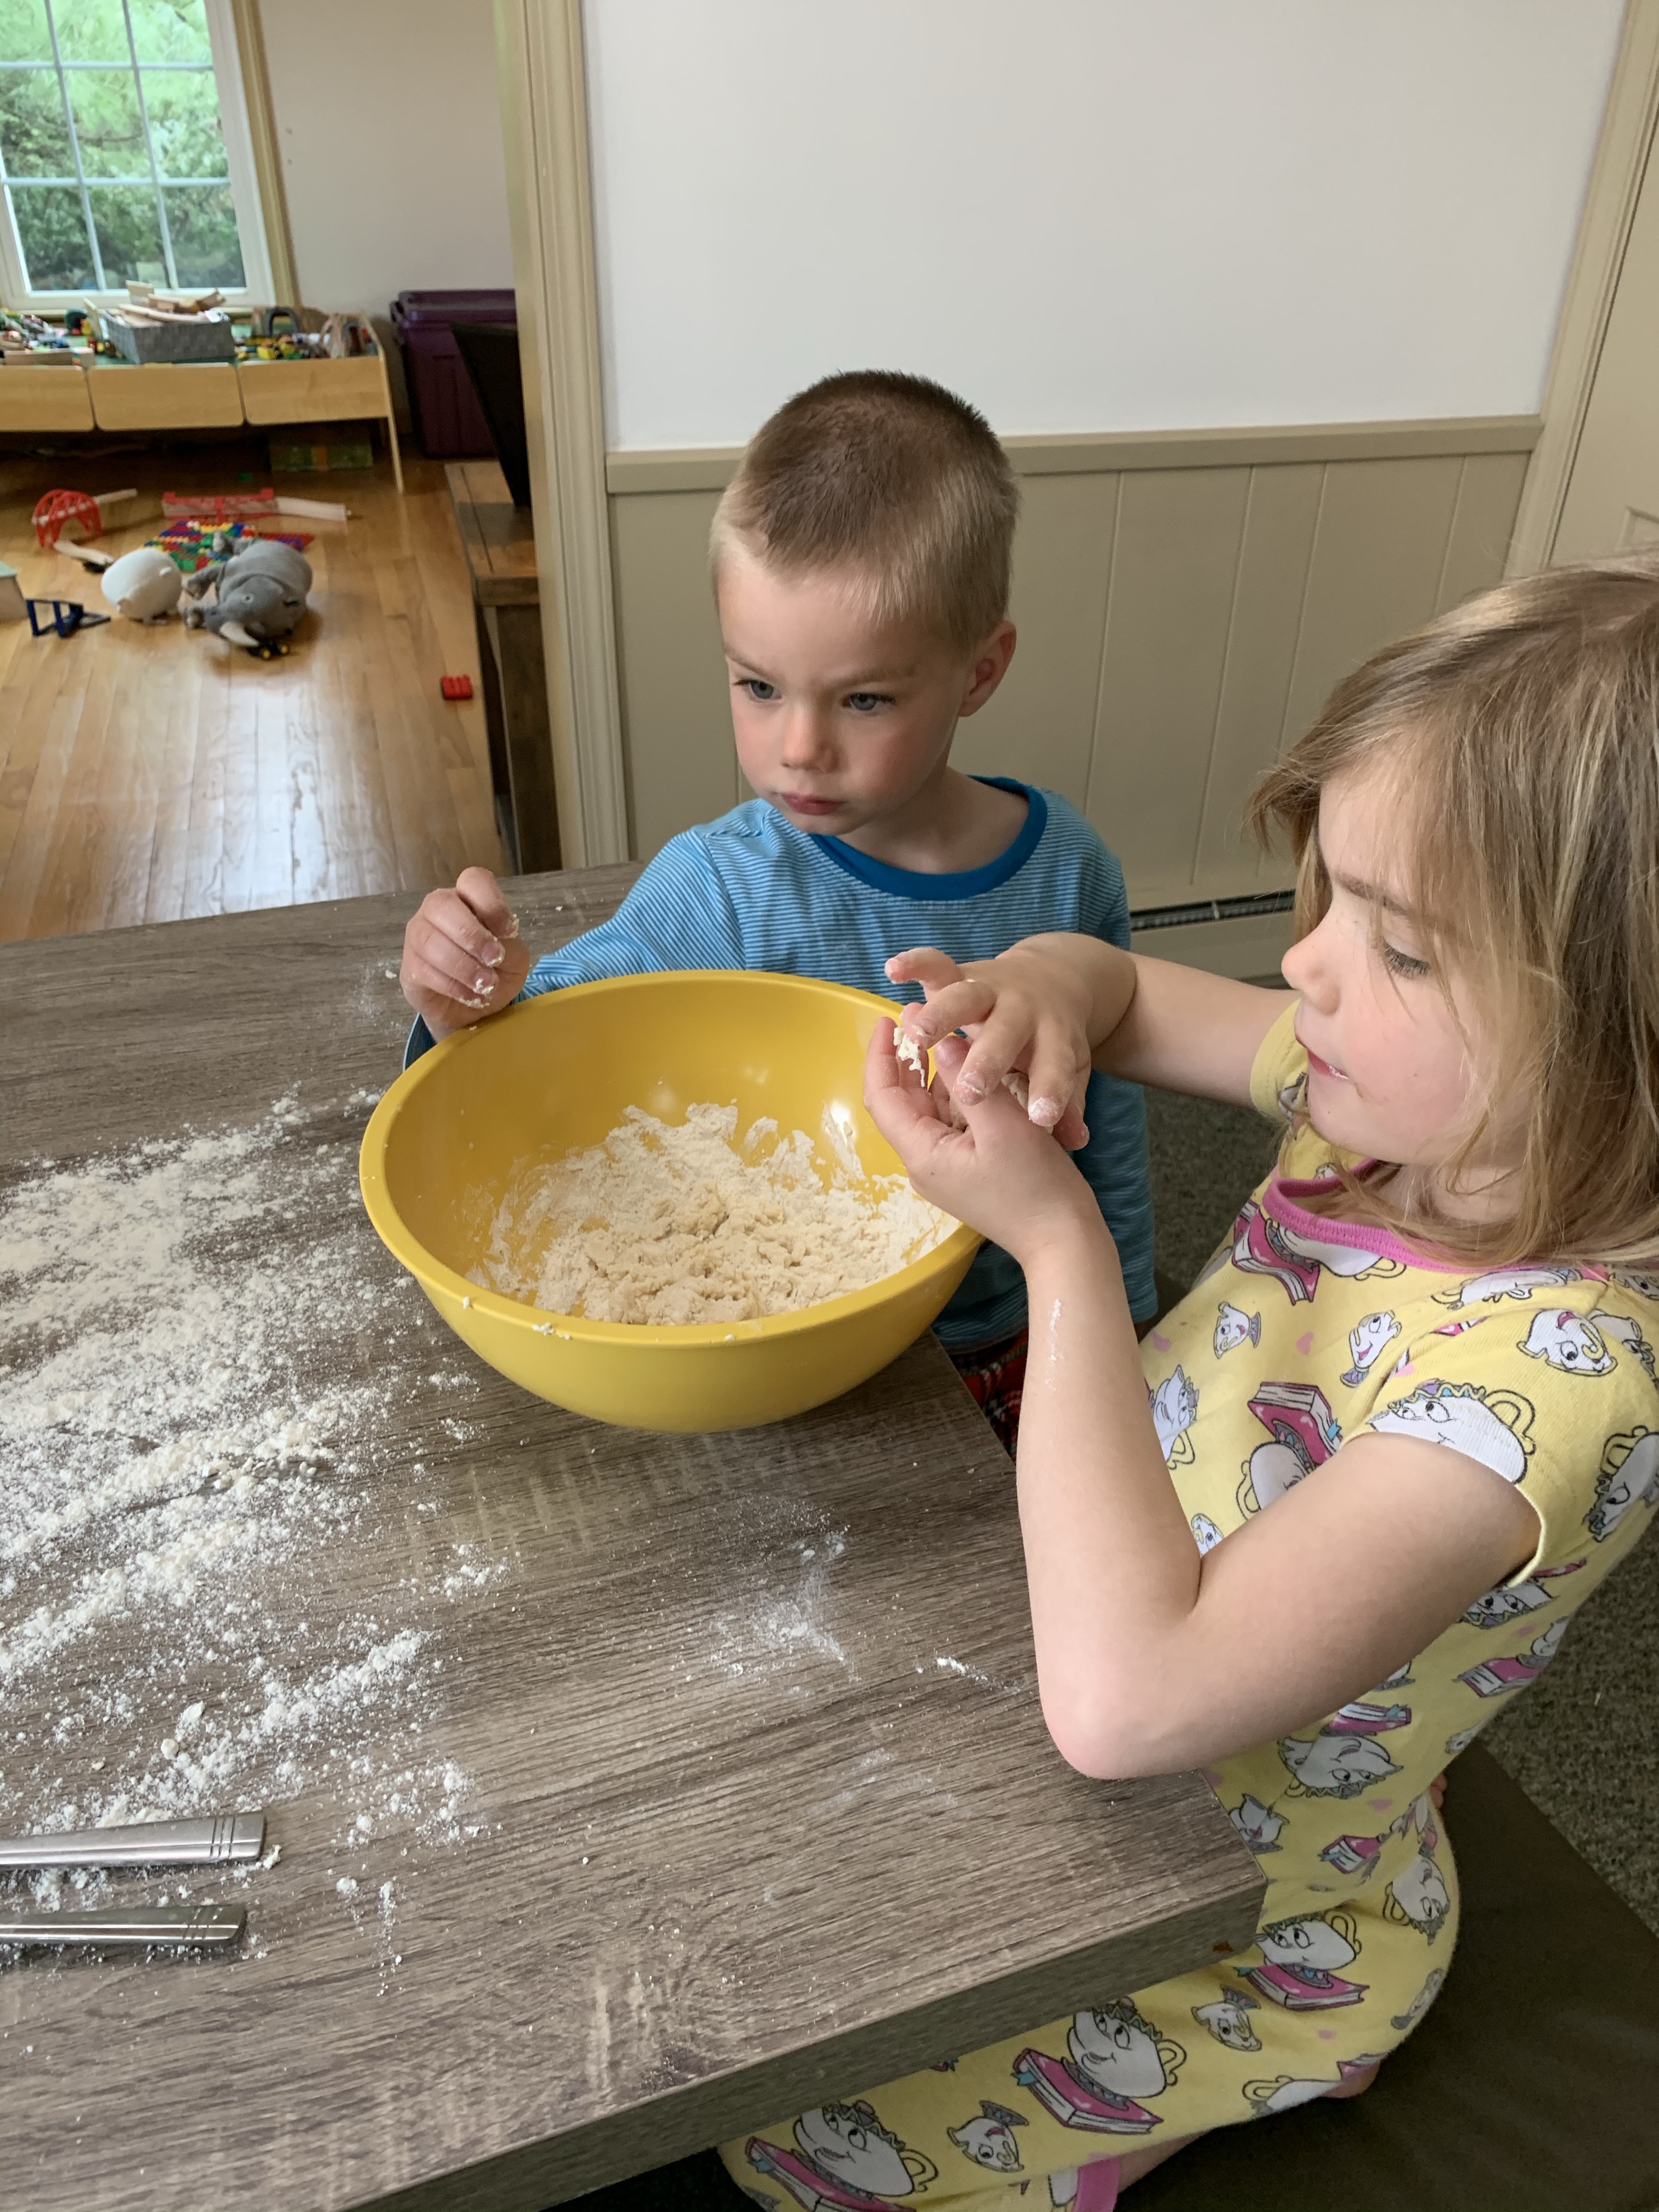
All you need to make salt dough ornaments is flour, water, and salt. So, start with two cups of flour, 1 cup and salt and mix. Then add water slowly until it is a play dough like consistency. We ended up using our hands to mix it up. If it is too sticky, add more flour, too dry add more water.
Then we rolled out the dough to a 1/4 inch thin, and used some Easter egg halves, including a bunny, chick, and jelly bean shape. You can of course just use cookie cutters as well. Use a straw to make a circle hole at the top of each ornament so you can add string later.
Turn the oven on at 200 degrees and put parchment paper on the tray and leave in the oven for 2-3 hours. If you don’t have parchment paper just move the ornaments with a pie lifter to make sure they don’t stick about an hour in. Time depends on how thick the ornaments are. Once cooled and dried, paint them as you wish. You can add sparkles if you want. Once all dried, use string or ribbon through the hole and tie. After that hang them up!
Or, you can make garland by putting one ornament through the string and then tying it in place and continuing until desired effect.
If you want to make a wreath, we just used 2 paper plates glued together and cut out the inner circle then used a hot glue gun. Of course you can use cardboard or other material, but this is what we had on hand with the quarantine.
We used the glue gun to glue on some ribbon and add pom poms.
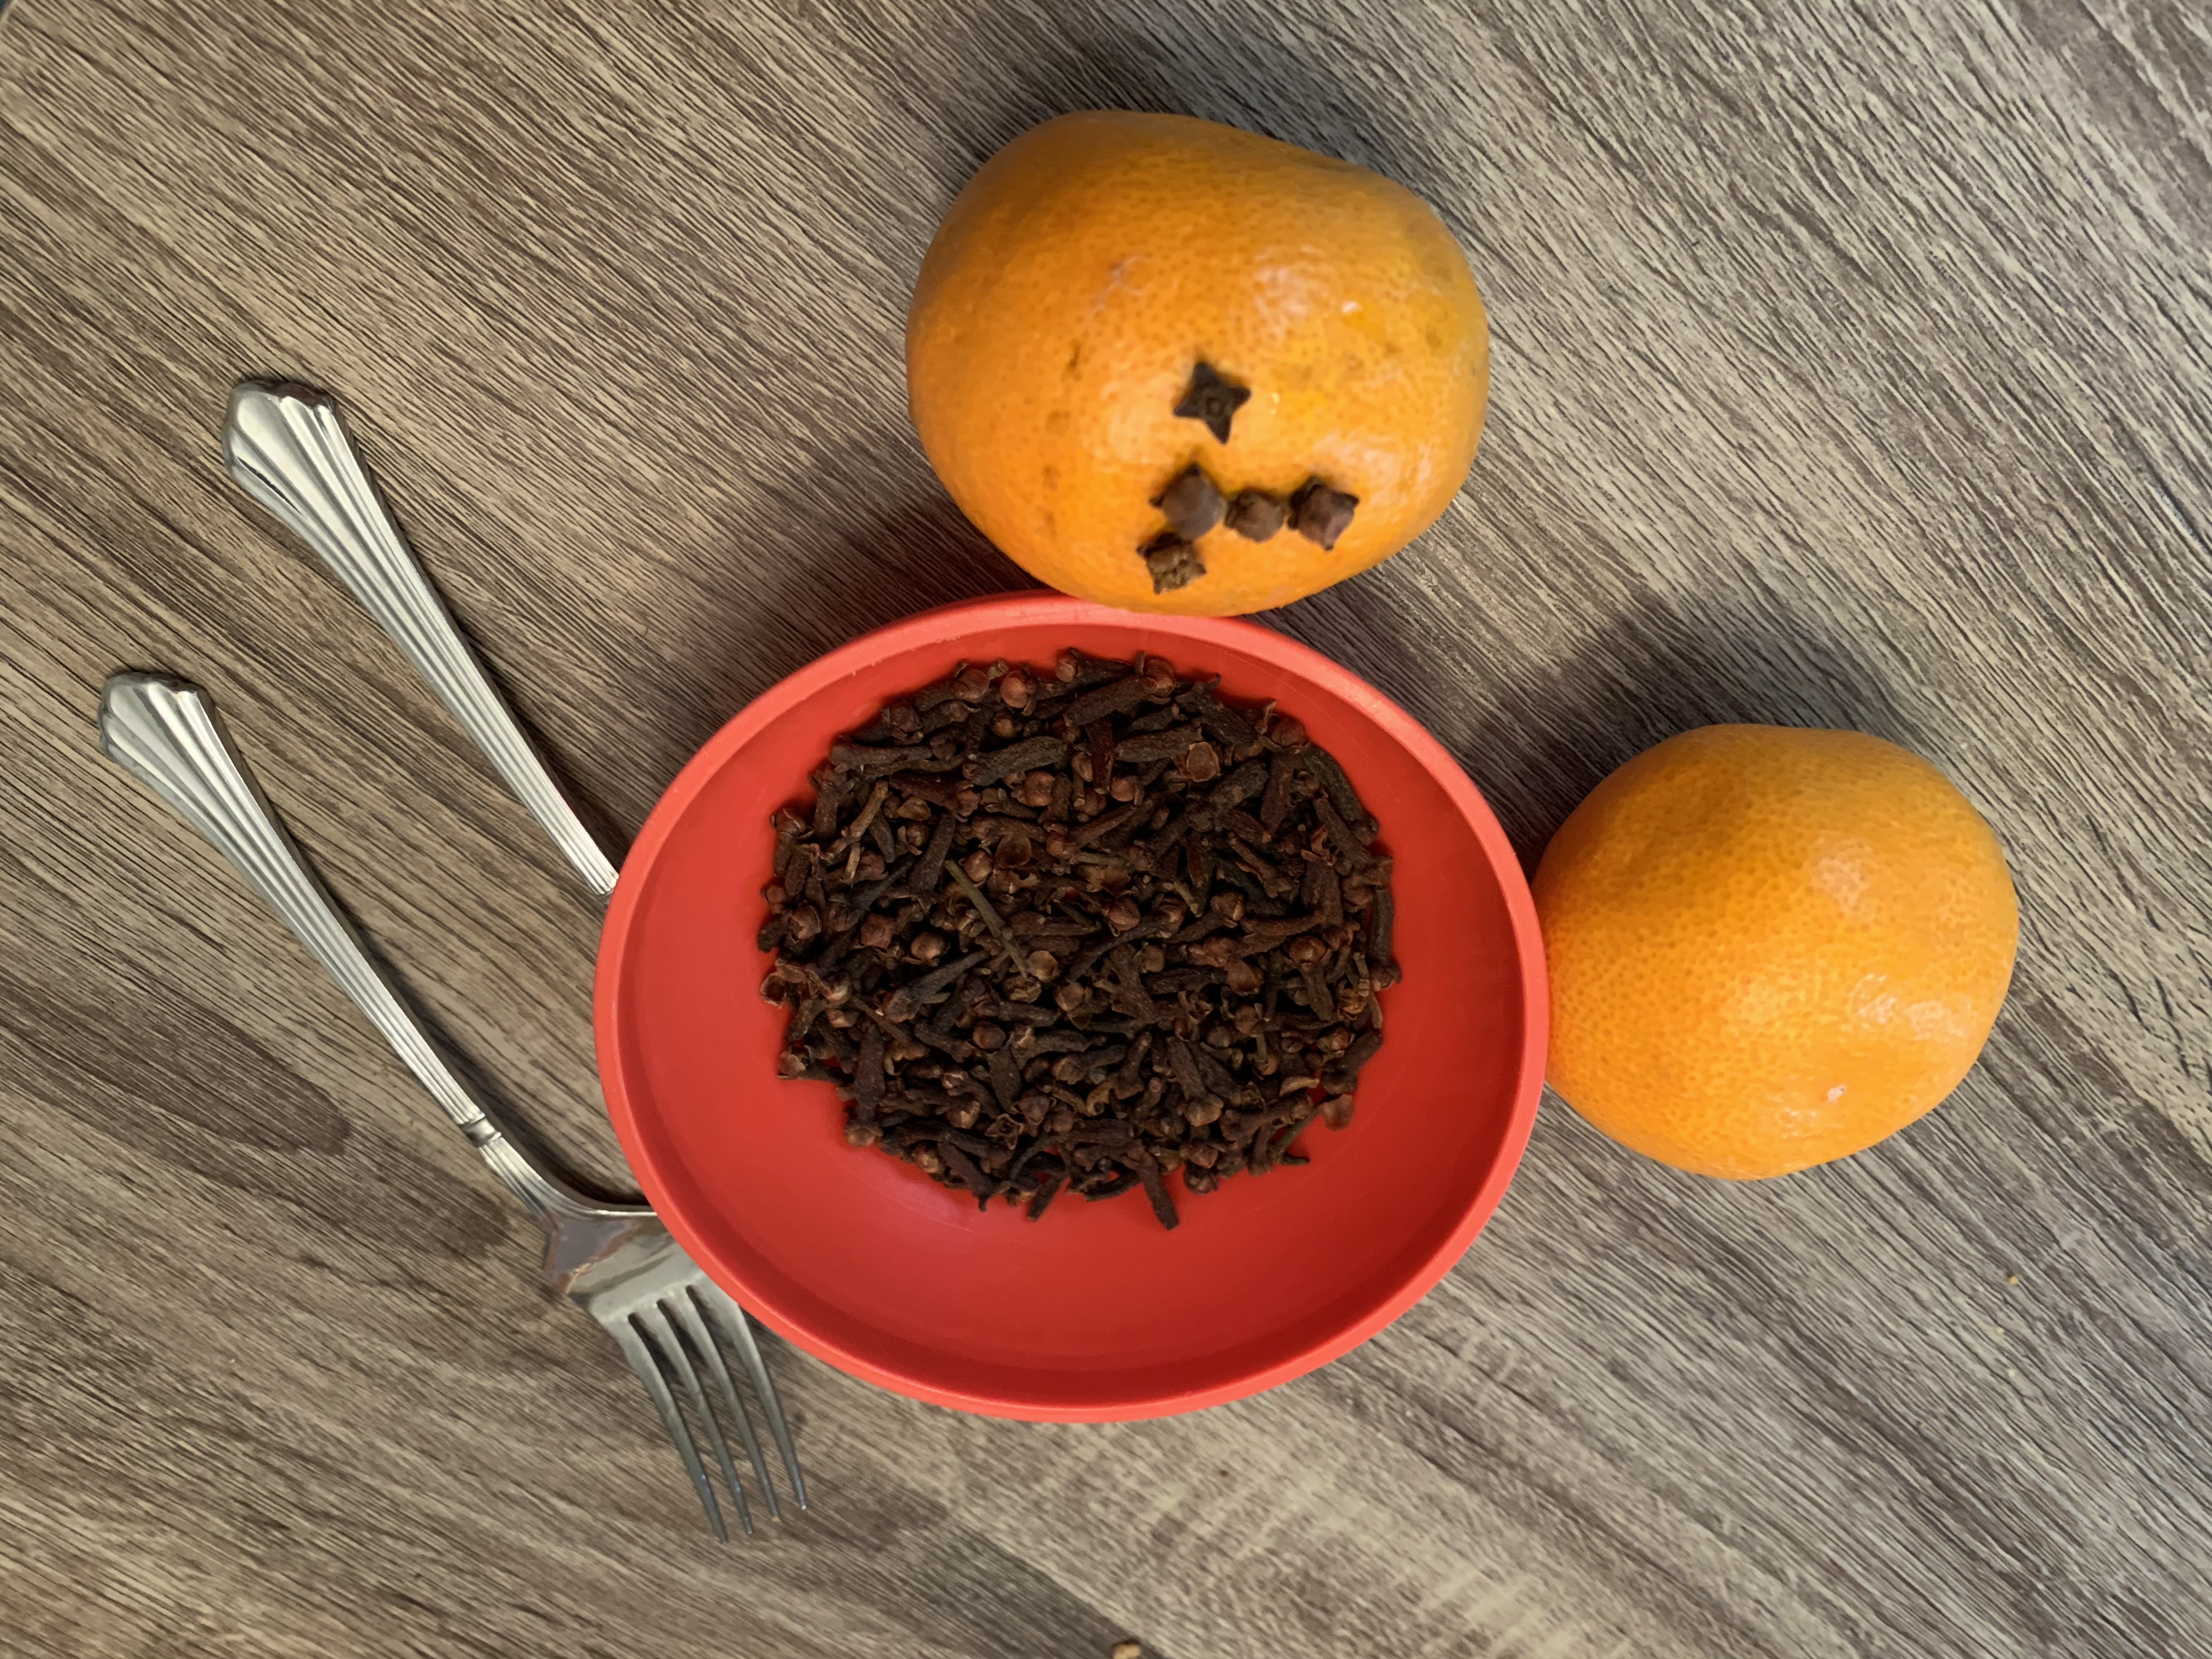
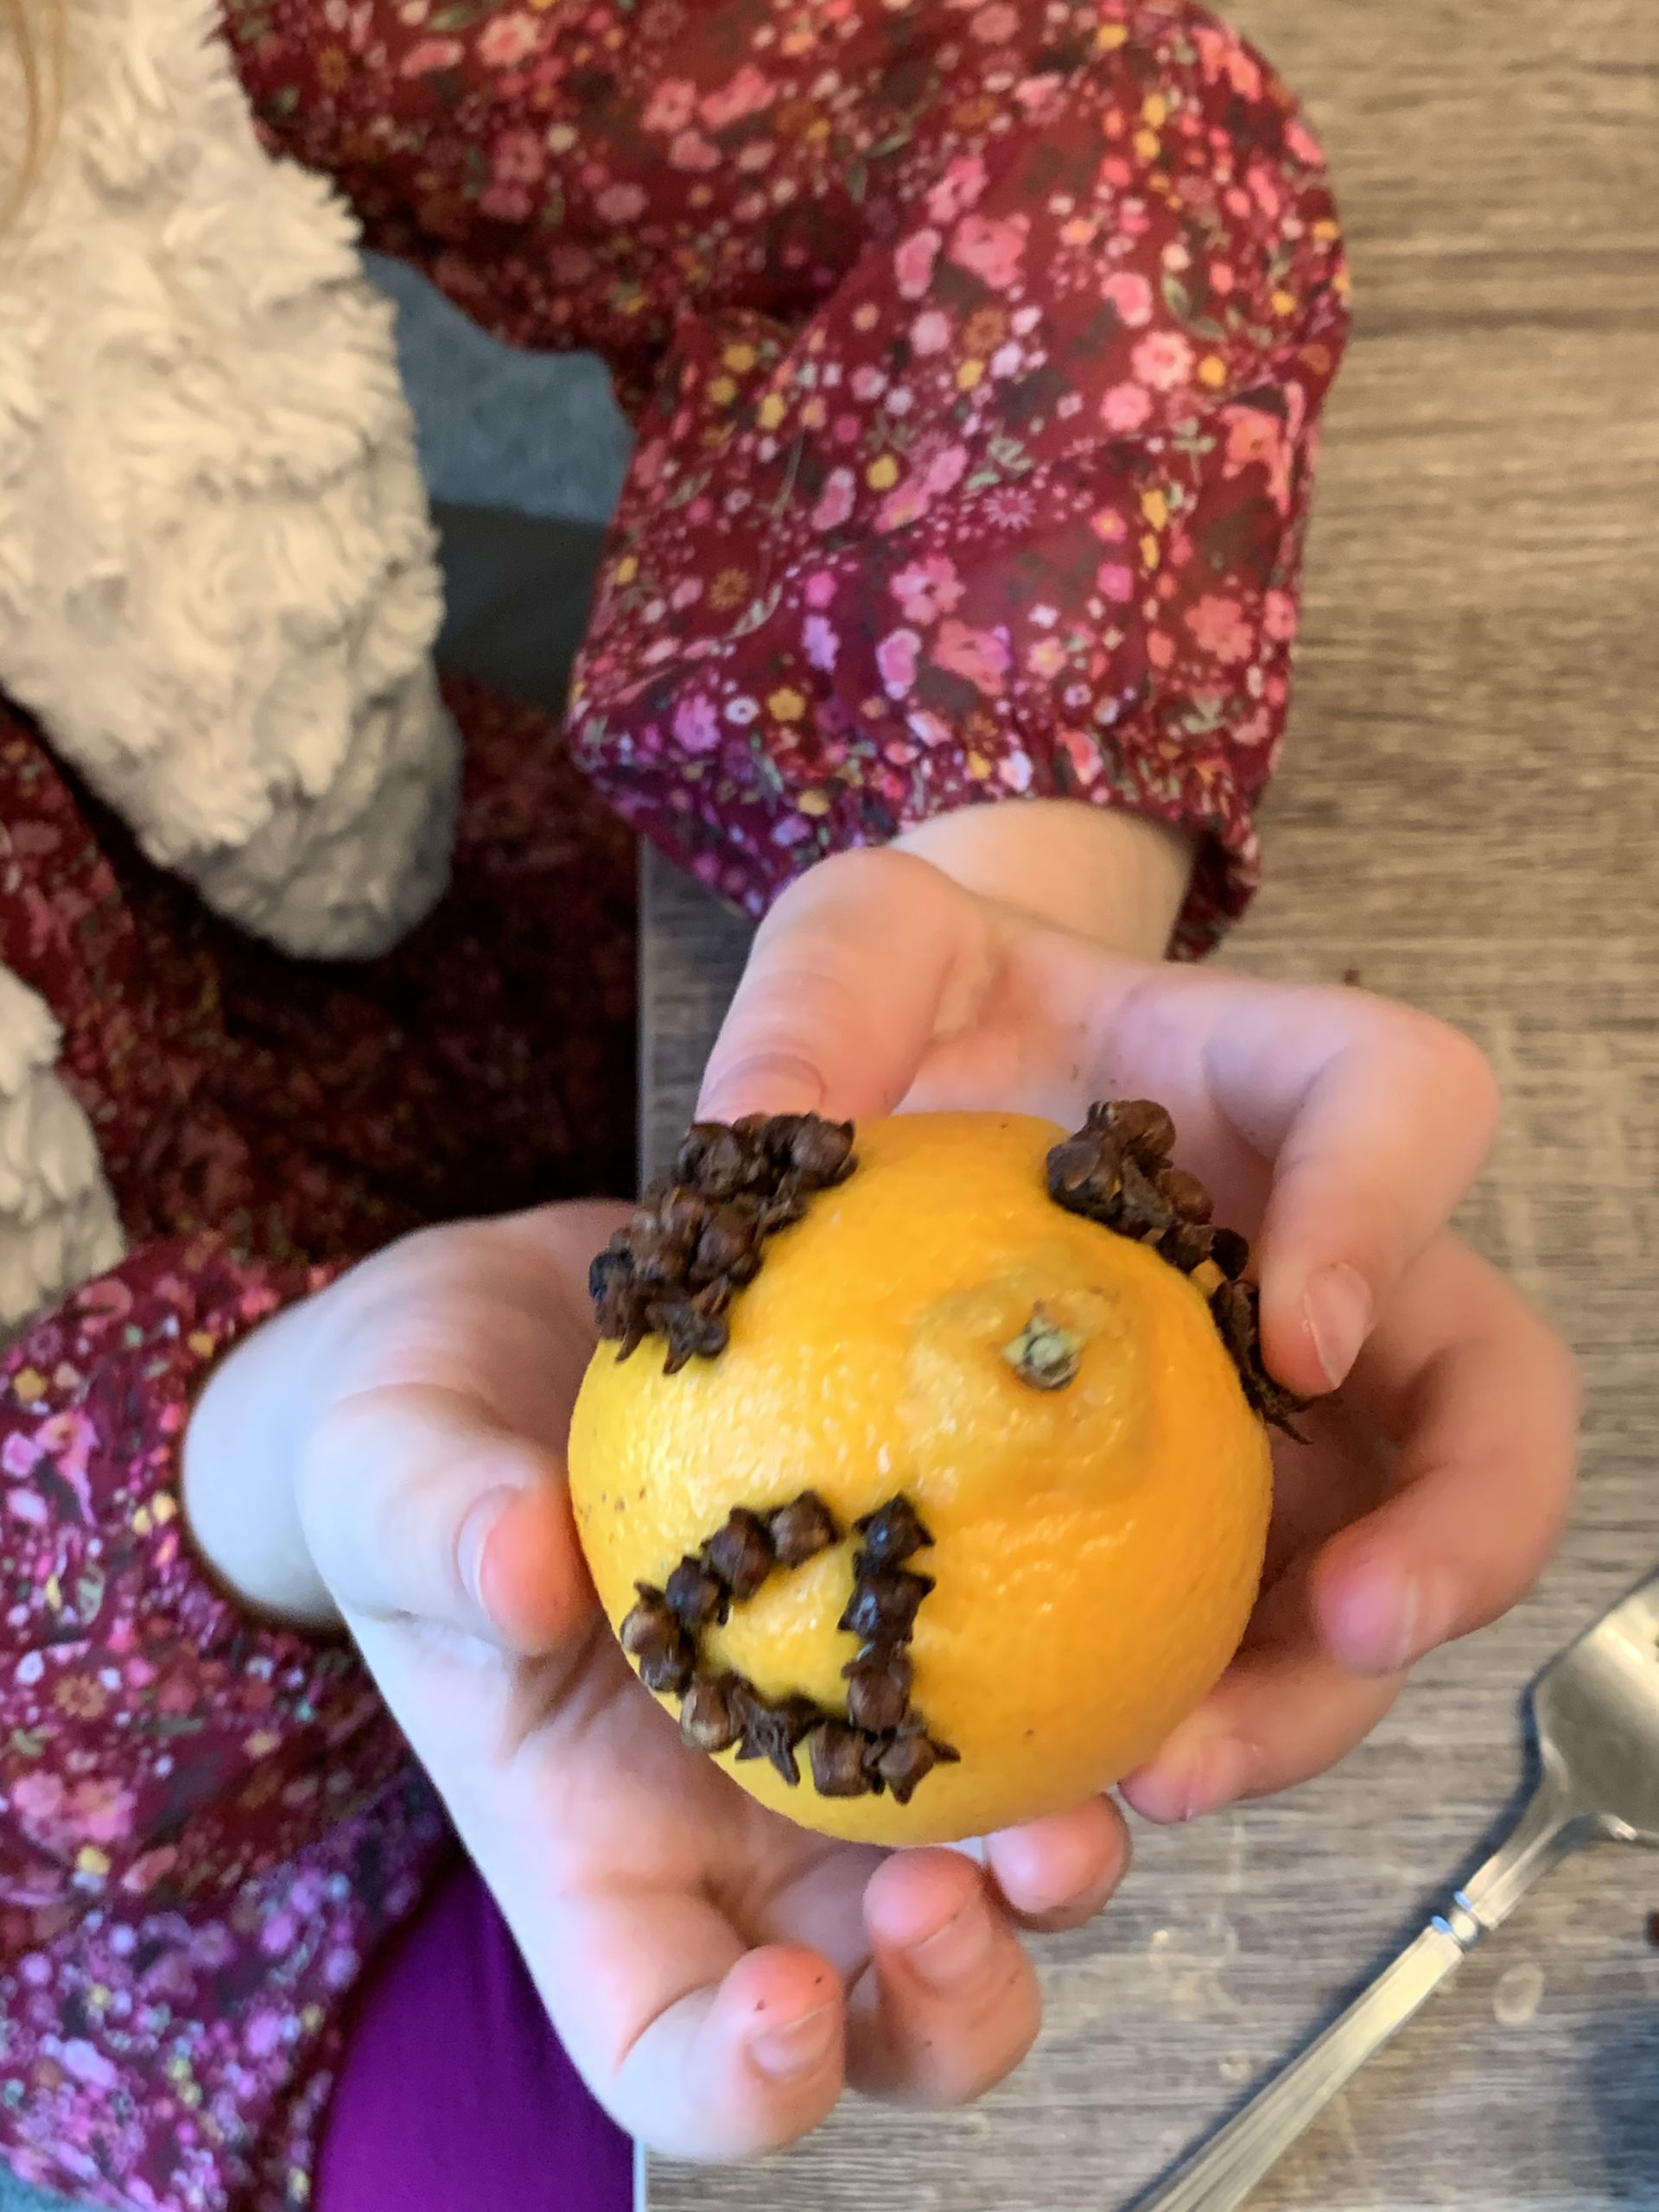
A craft using fine motor skills, creativity, and your child’s senses is making a Christmas Pomander Ball! There are several ways to make them and we will go through some examples!
Pomander Balls were originally used to ward away illness with the strong scents of cloves and other spices. Today, we make pomander balls with citrus fruits and cloves as a decoration, gift, centerpiece, or for scenting the room.
What you need:
Citrus fruit: clementine or oranges work best (make sure they are on the harder side)
Whole cloves (you can get a large bag that will last for years at the food store)
Ribbon for decoration
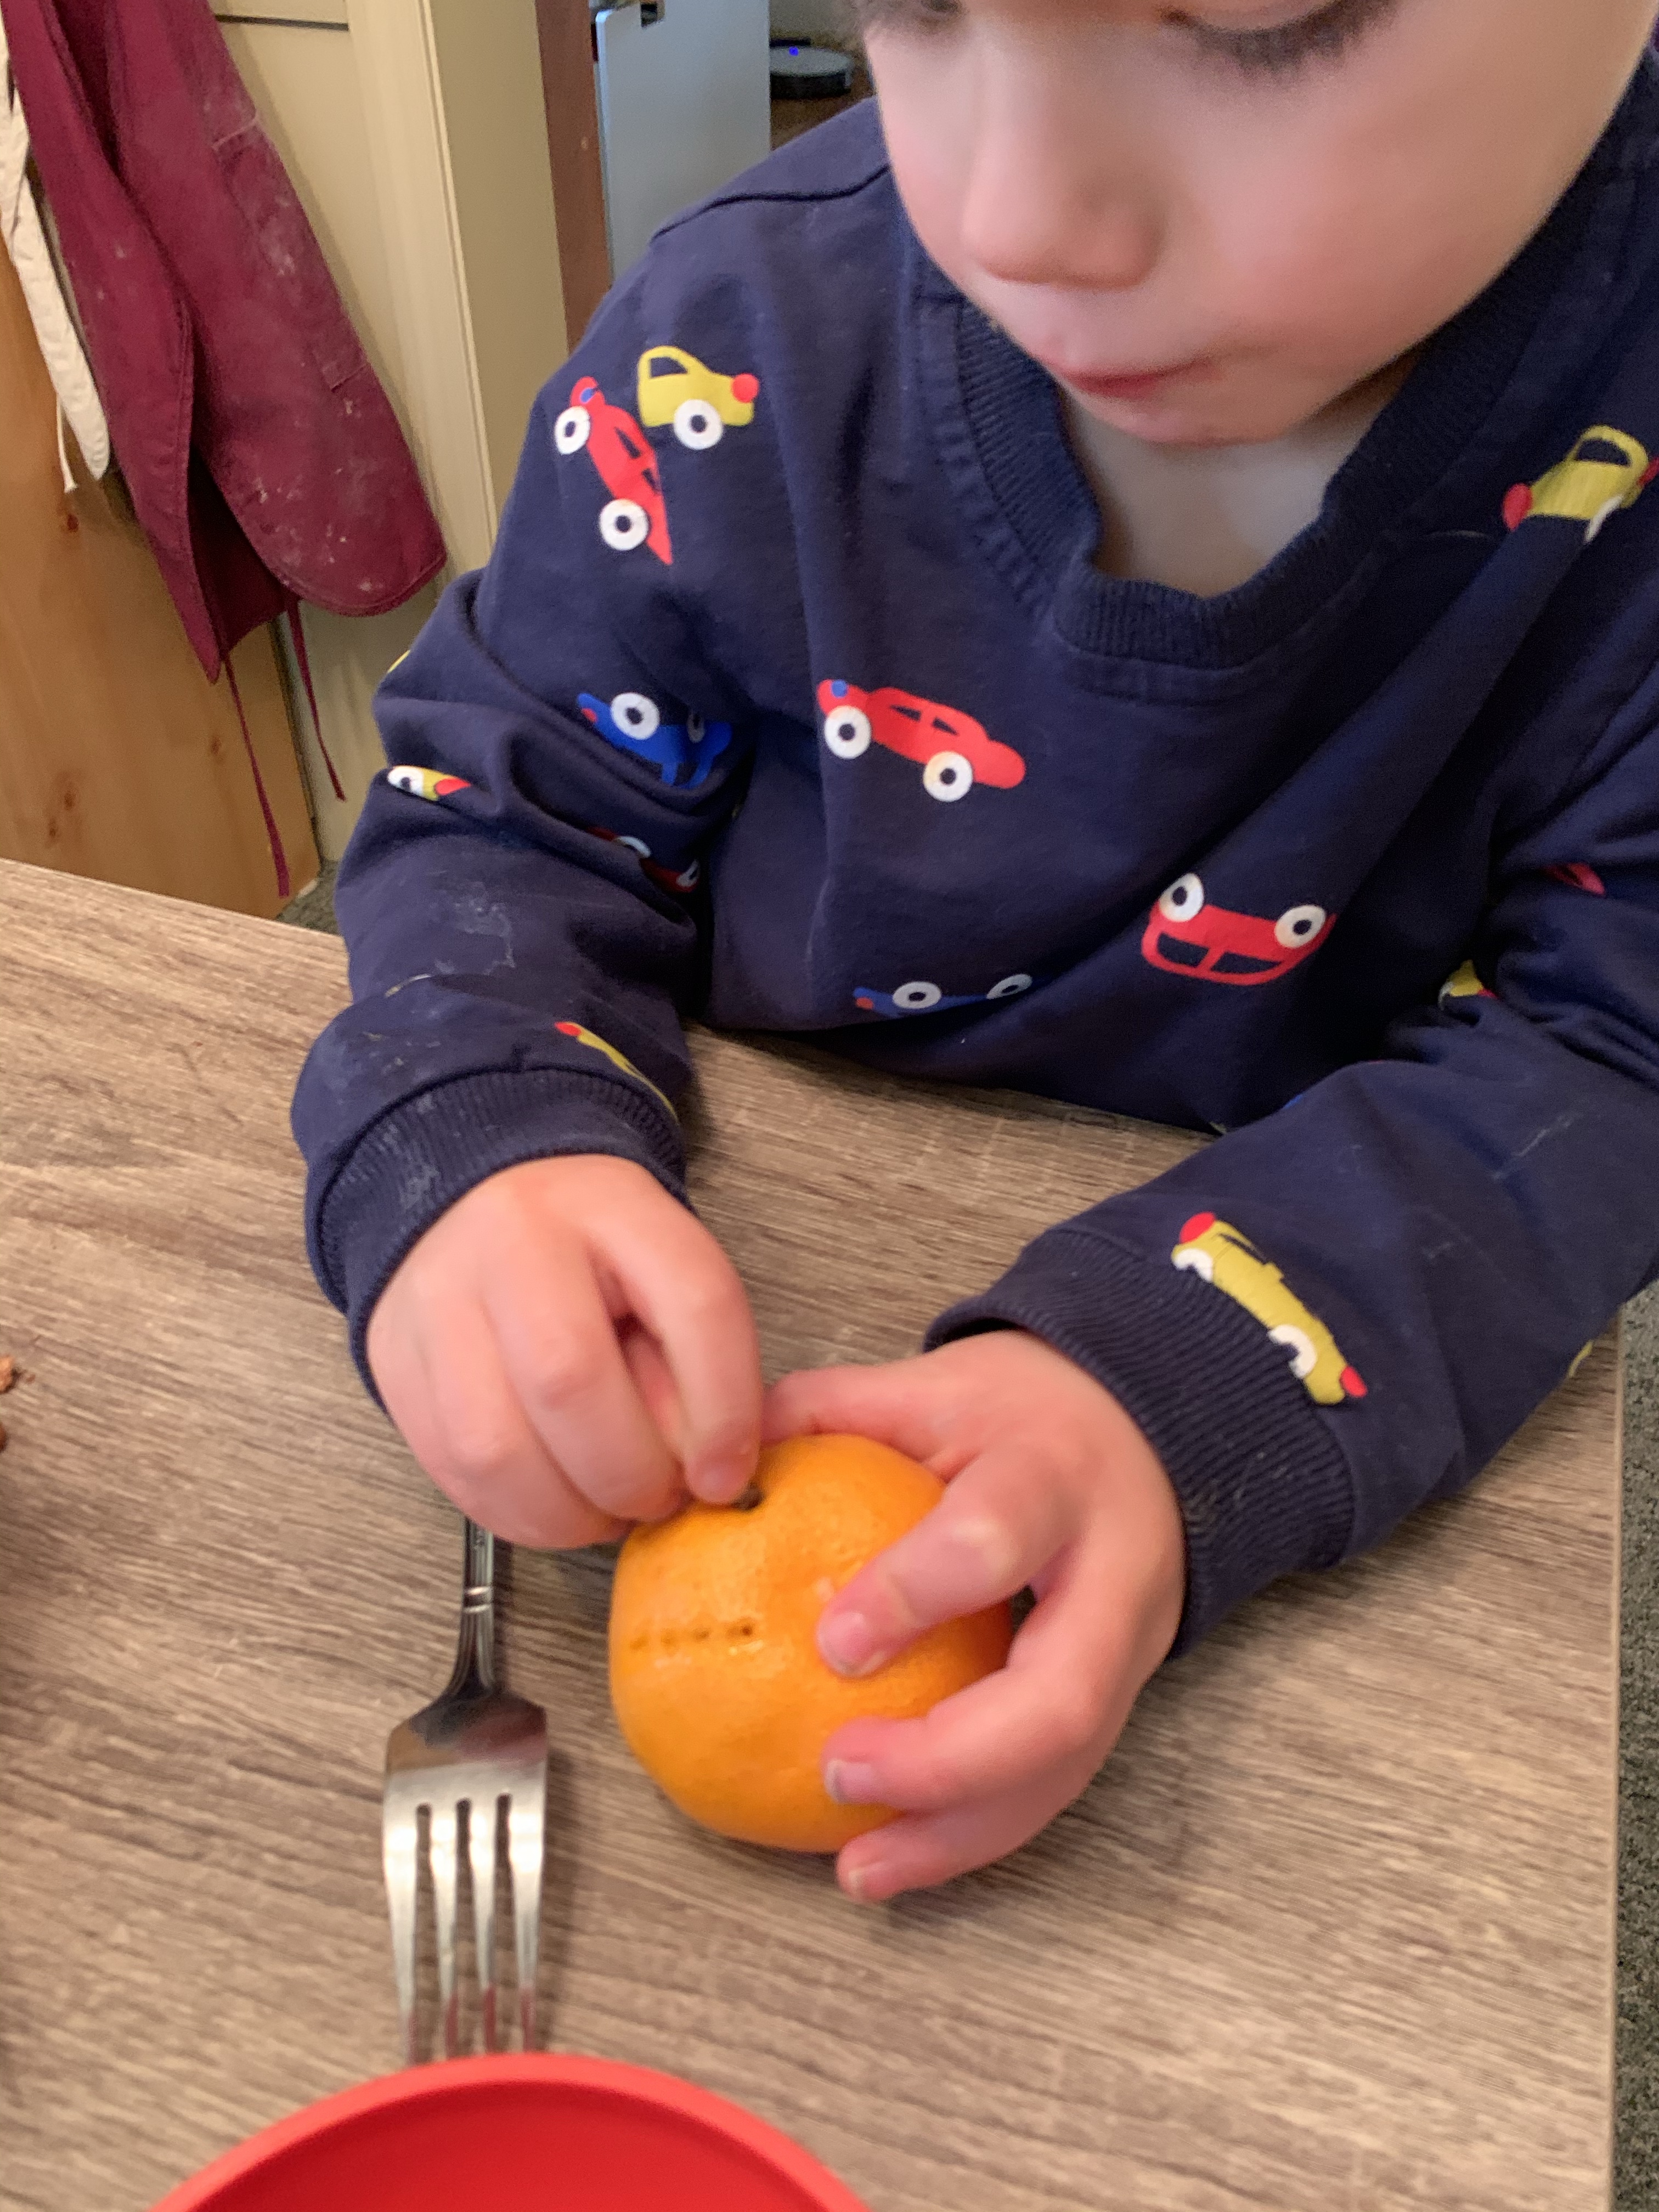
To make holes you can use a fork, pushpin, or toothpick (optional): my kids like to use a small fork to poke several holes at once
Pour some whole cloves into a small bowl for the kids to chose from
Next, have your child use a fork to poke holes
Take the whole cloves and poke them through the holes
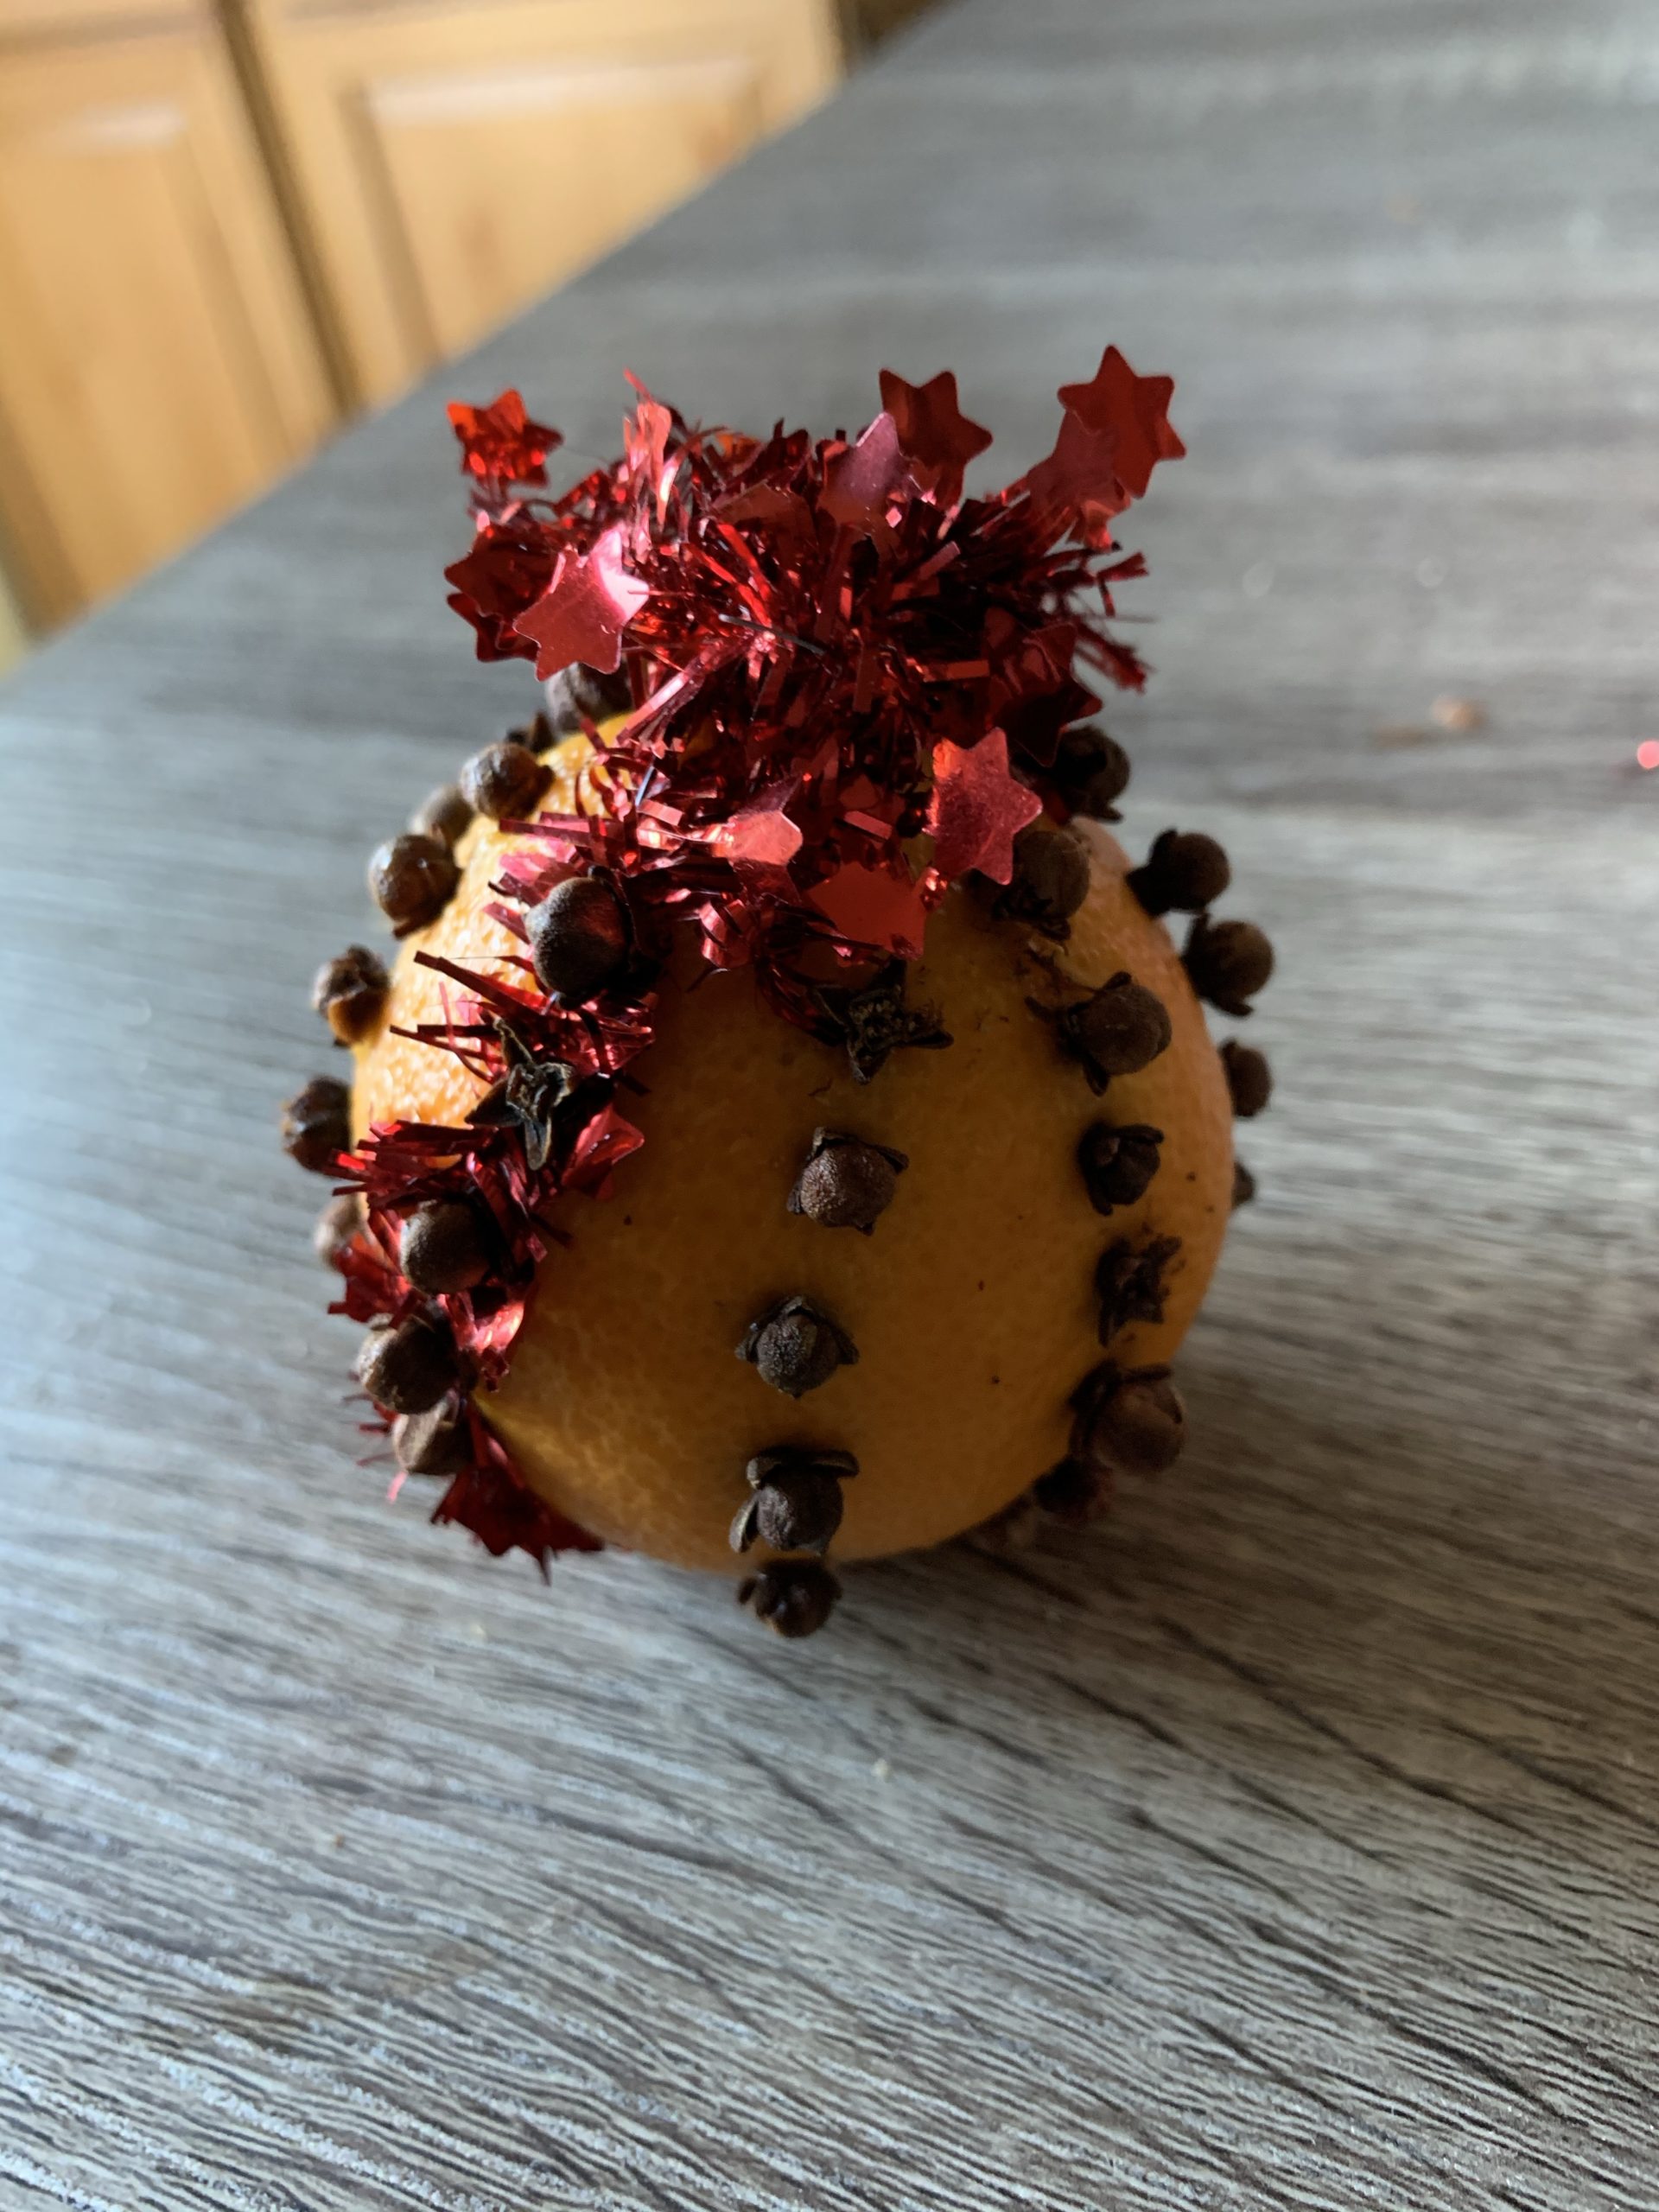
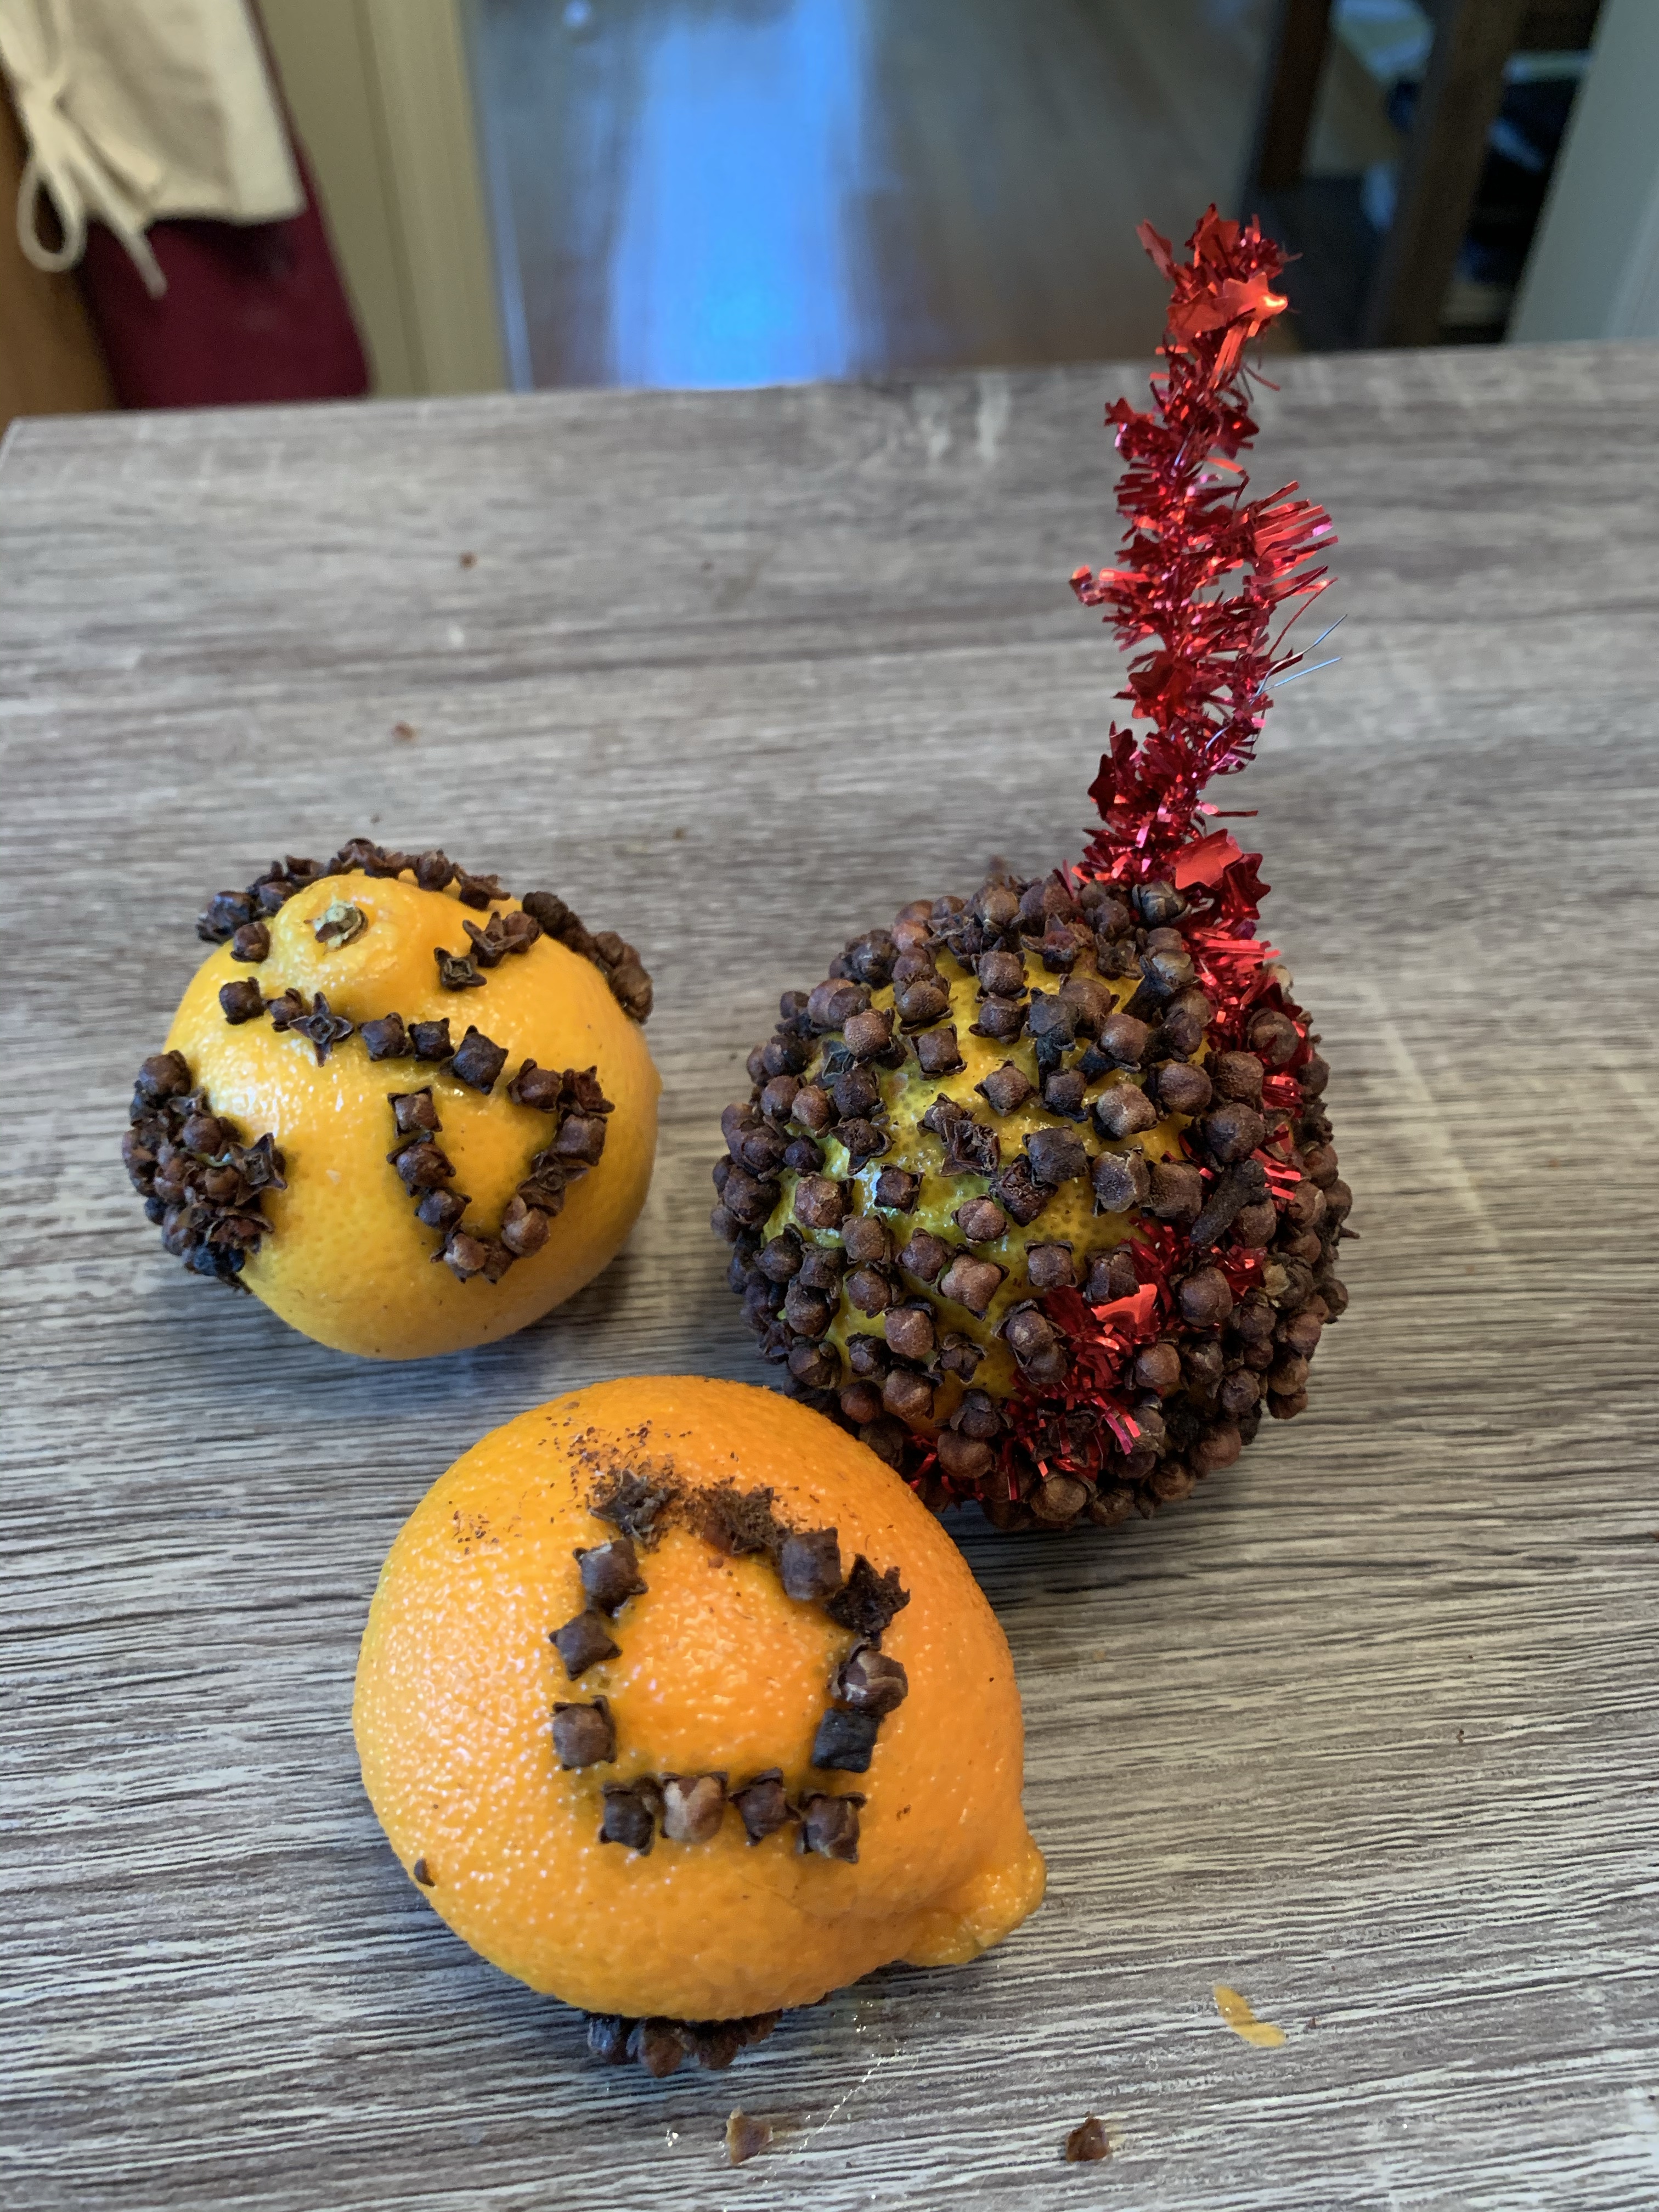
Make a design as you chose, and hang with ribbon
Dry out in a dark place, preferably in a brown bag for a week or two until dry then hang them or decorate with them! If you chose not to dry them, then they usually last a week before they brown and get moldy. You can also place them in the fridge at night if you want them to last a little longer.
If you fill the whole fruit with cloves completely, it will dehydrate the fruit and you wont need to place it in a bag at all (my kids don’t usually have the patience for this yet)
My kids wanted to law shapes on their clementines with the cloves!
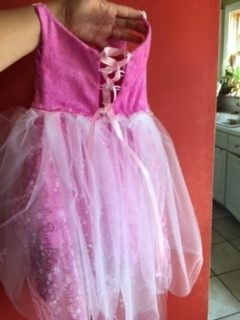
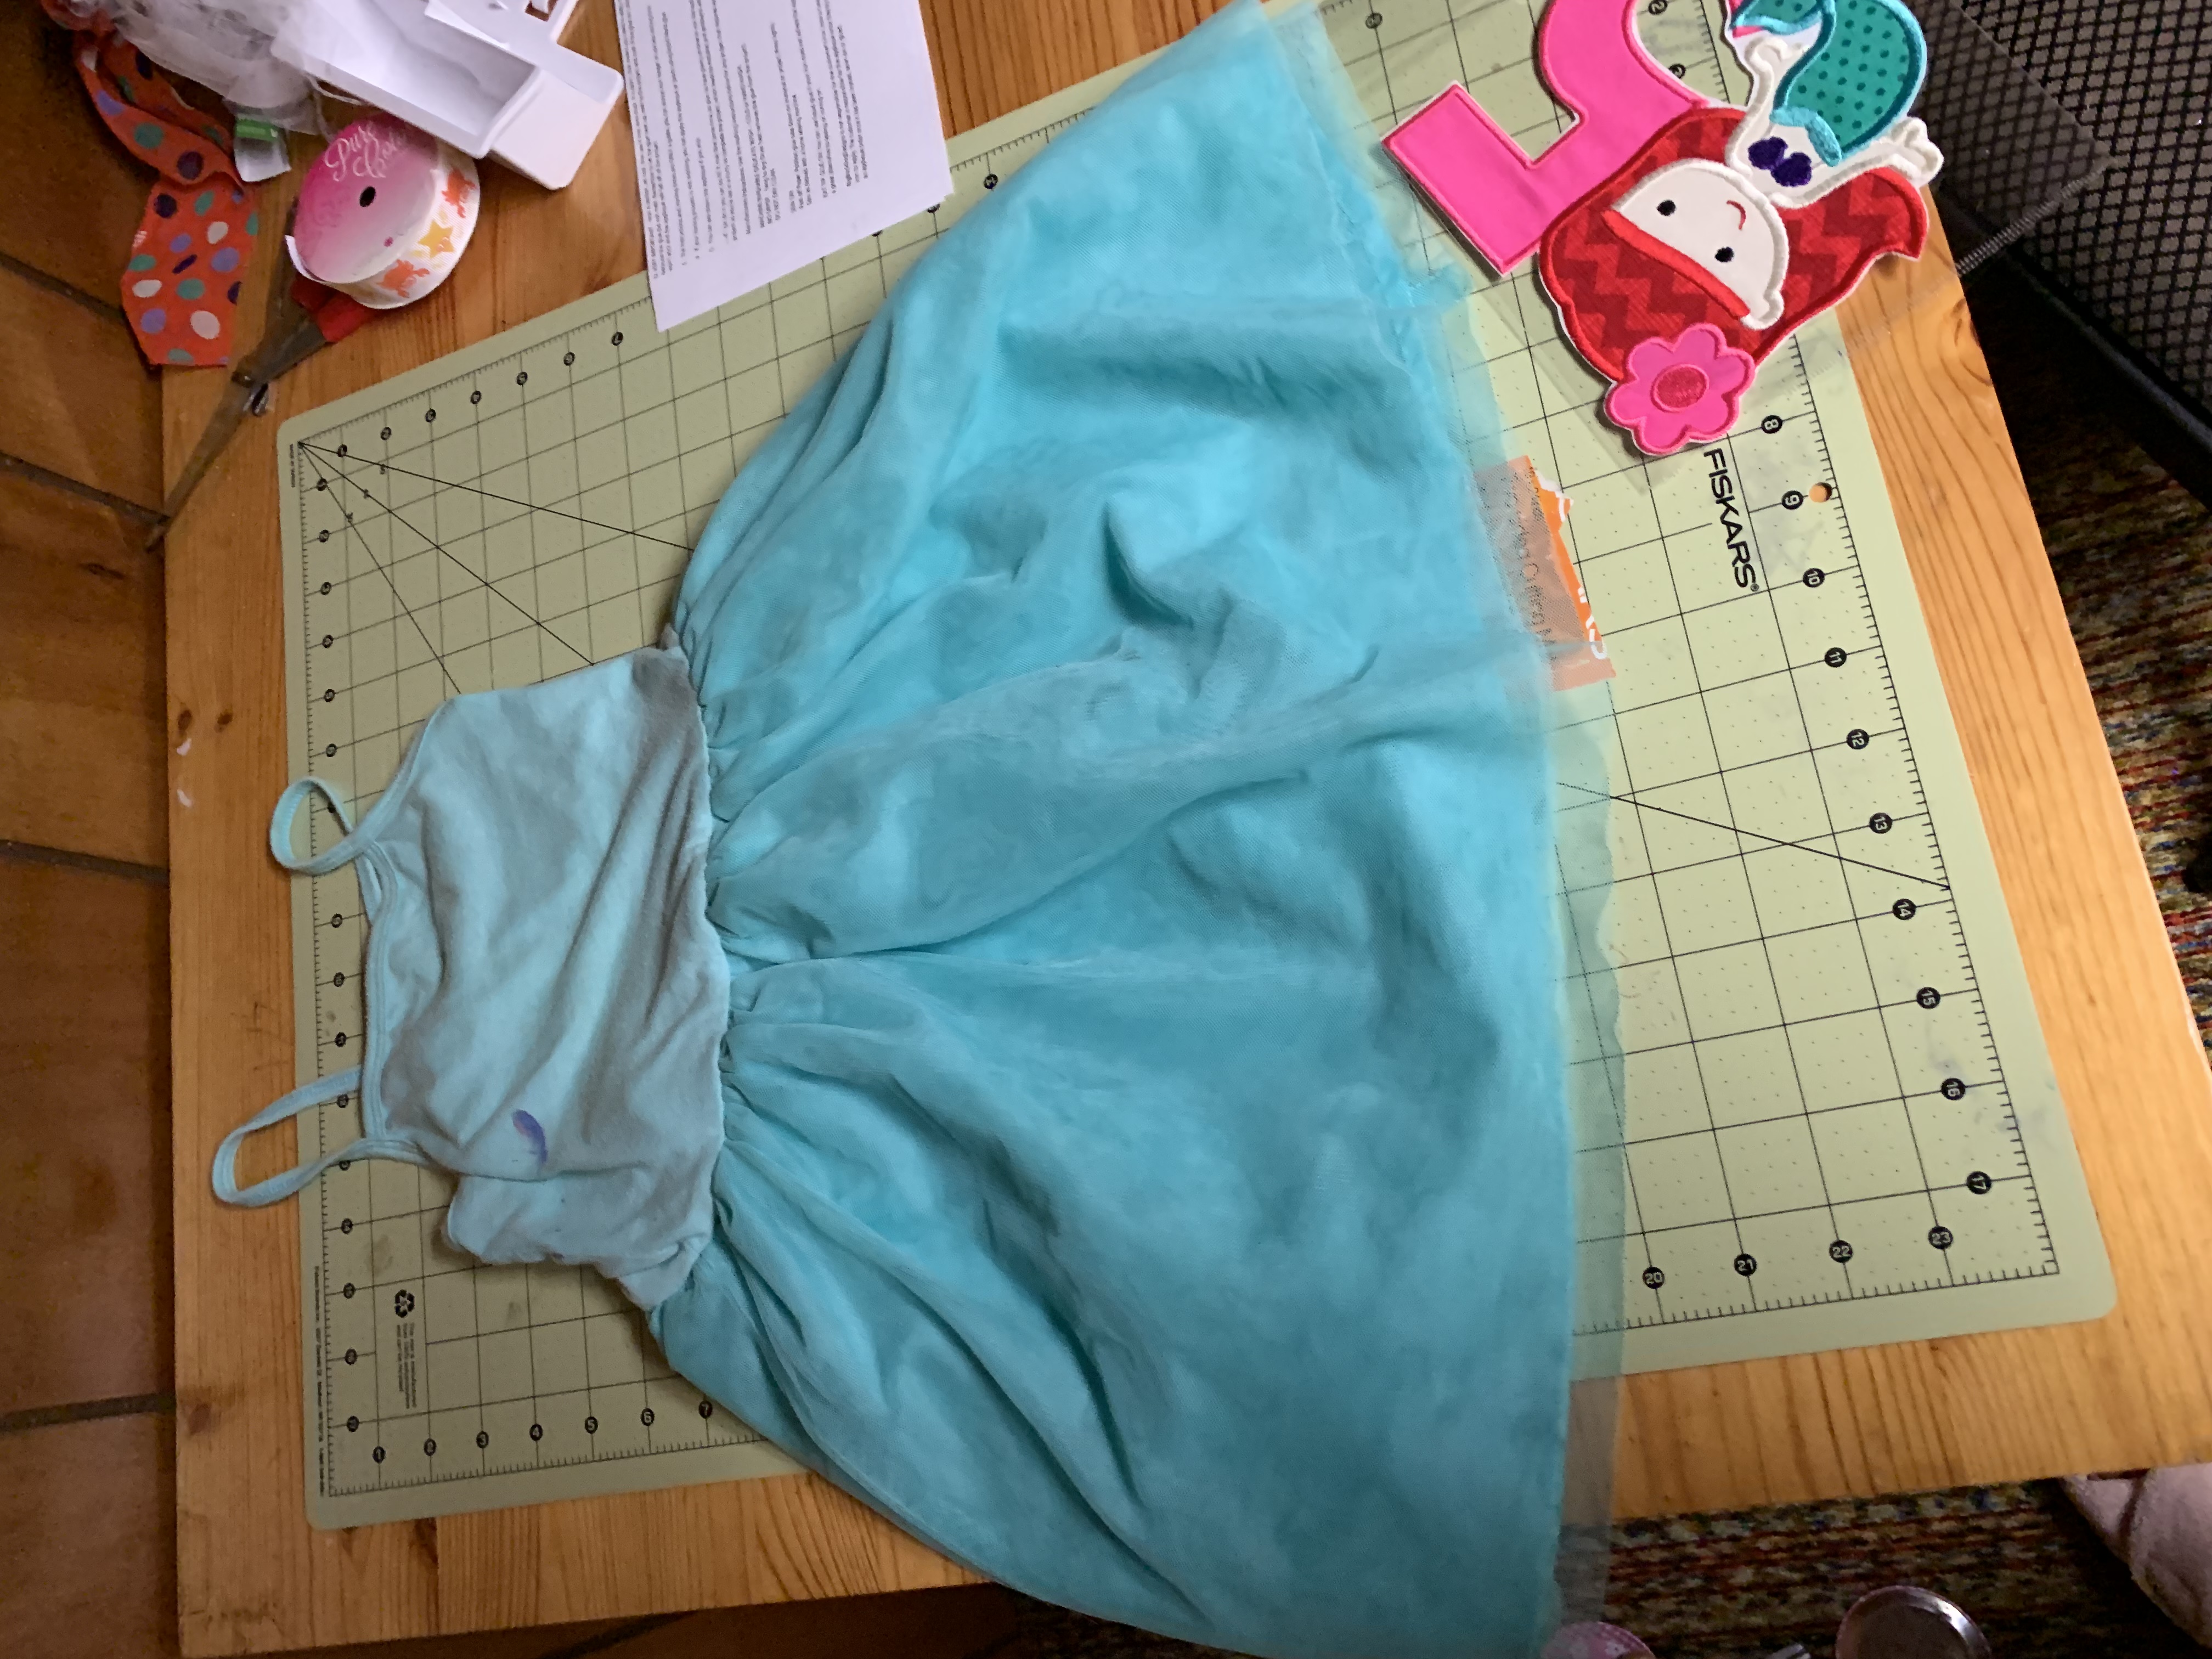
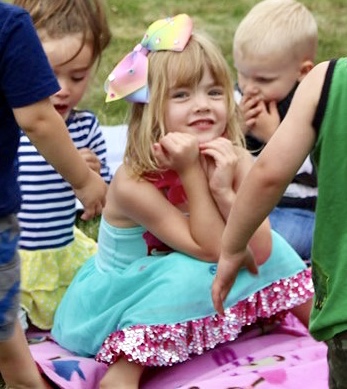
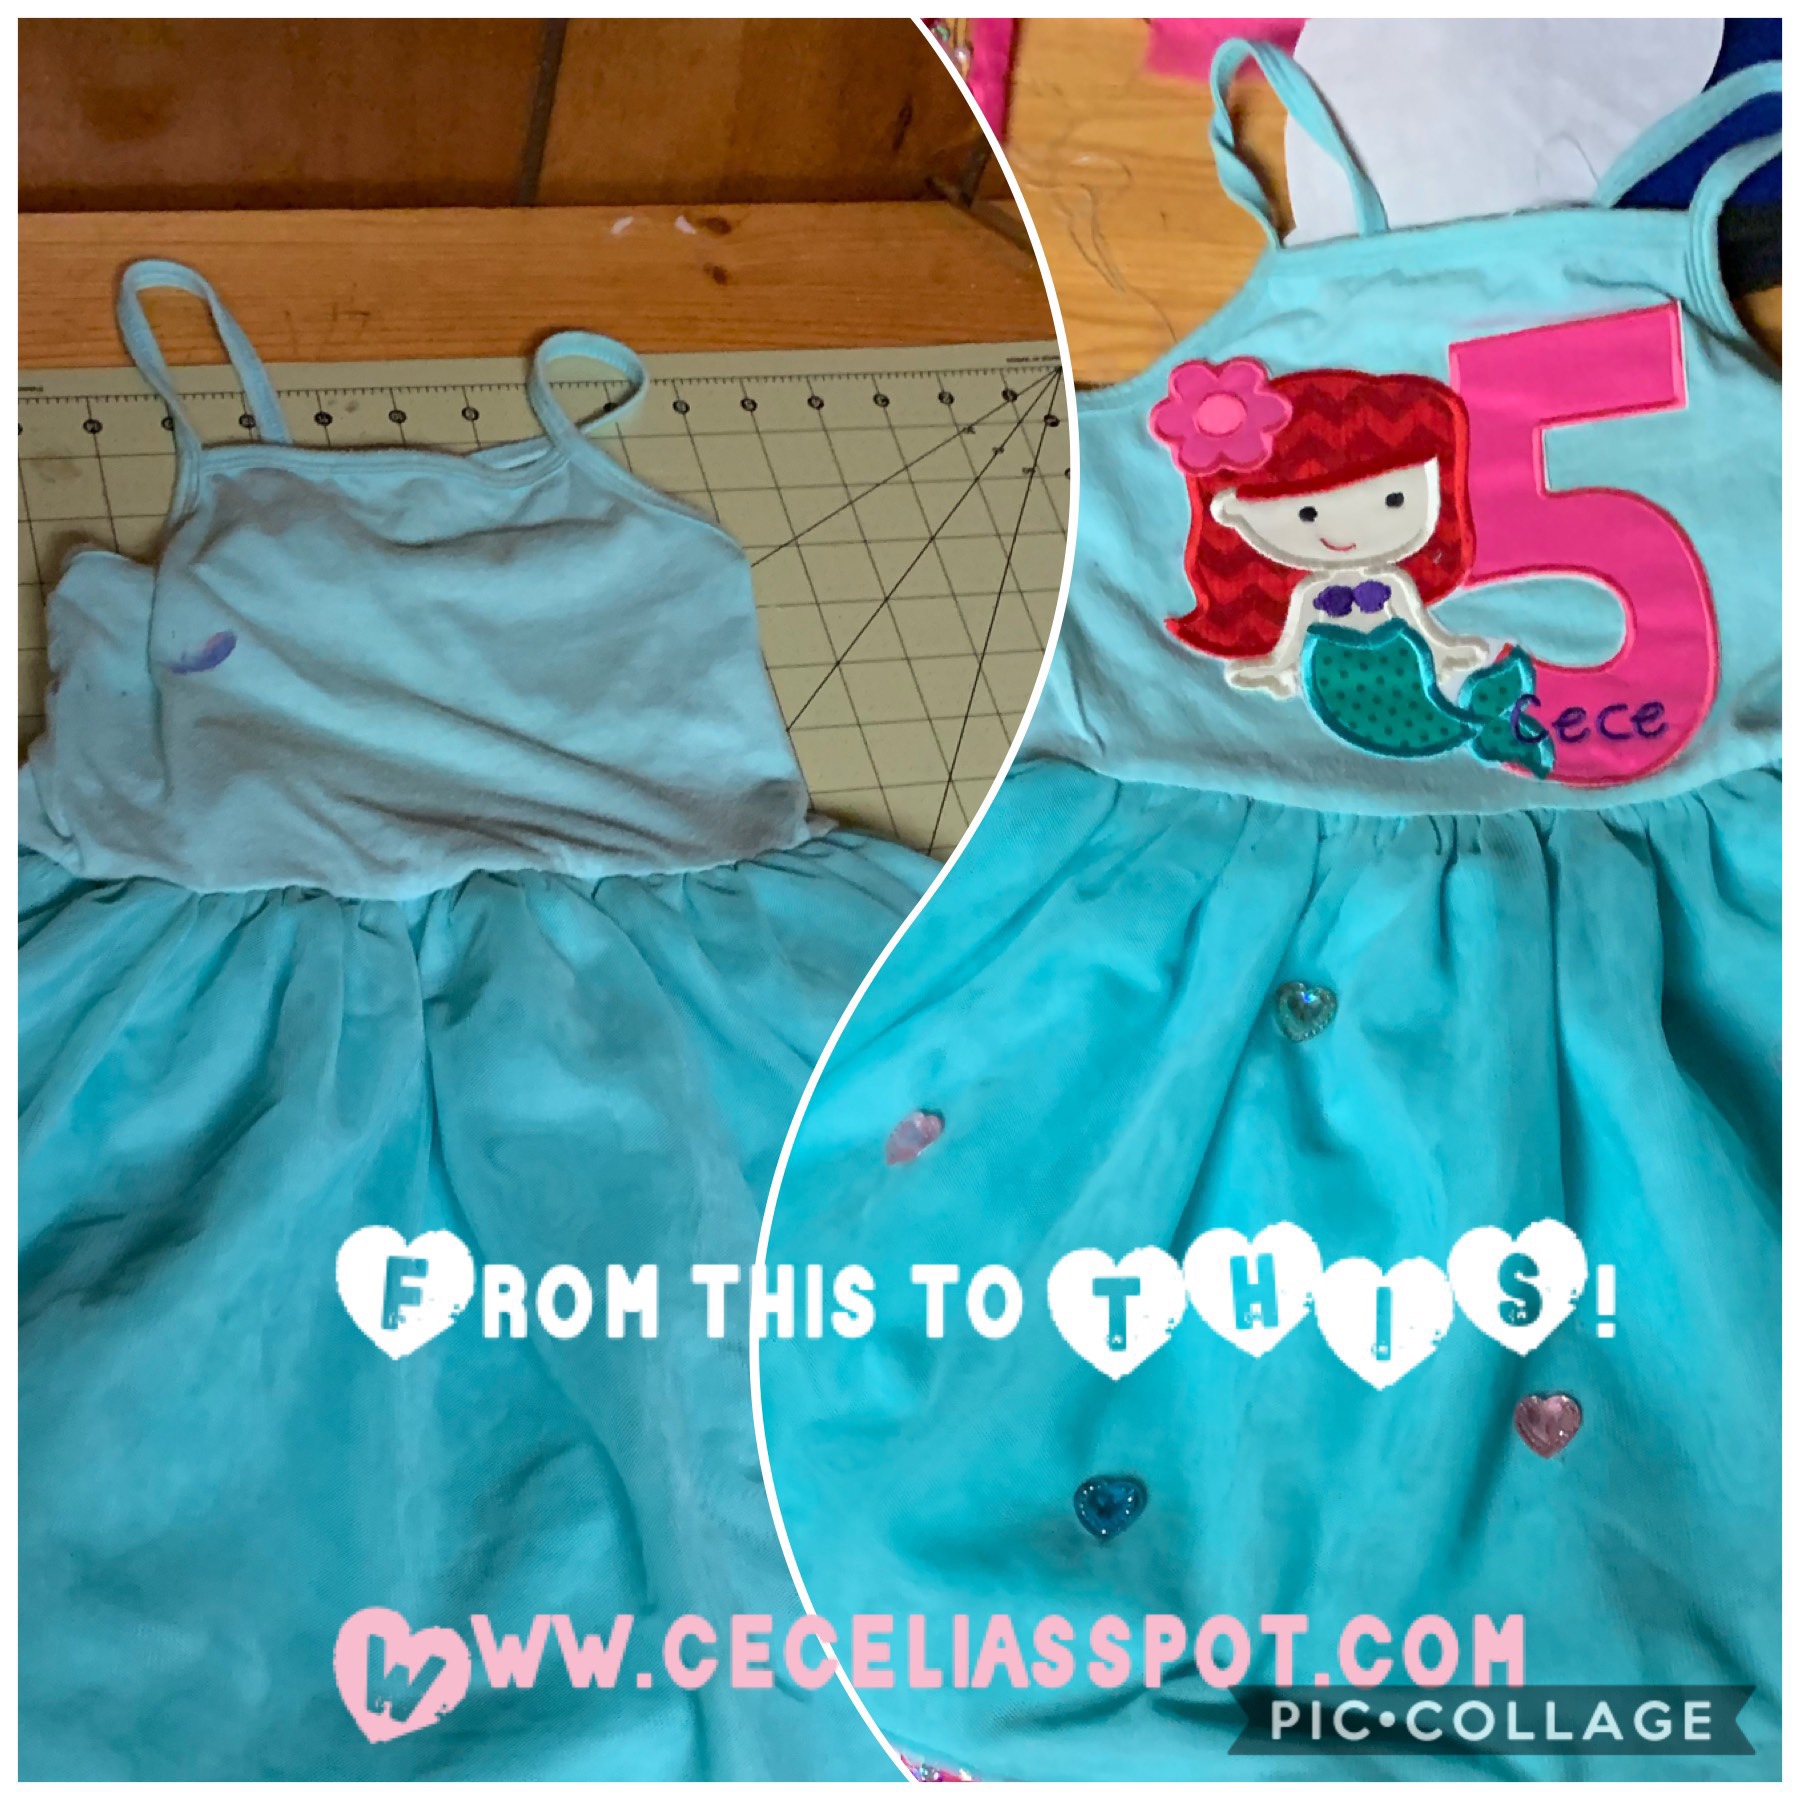
This time I just didn’t have time to make a full princess dress, who does when the kids are little? So last minute I used a plain tutu dress that actually has paint stains I couldn’t get out on it! Don’t worry, they get covered up!
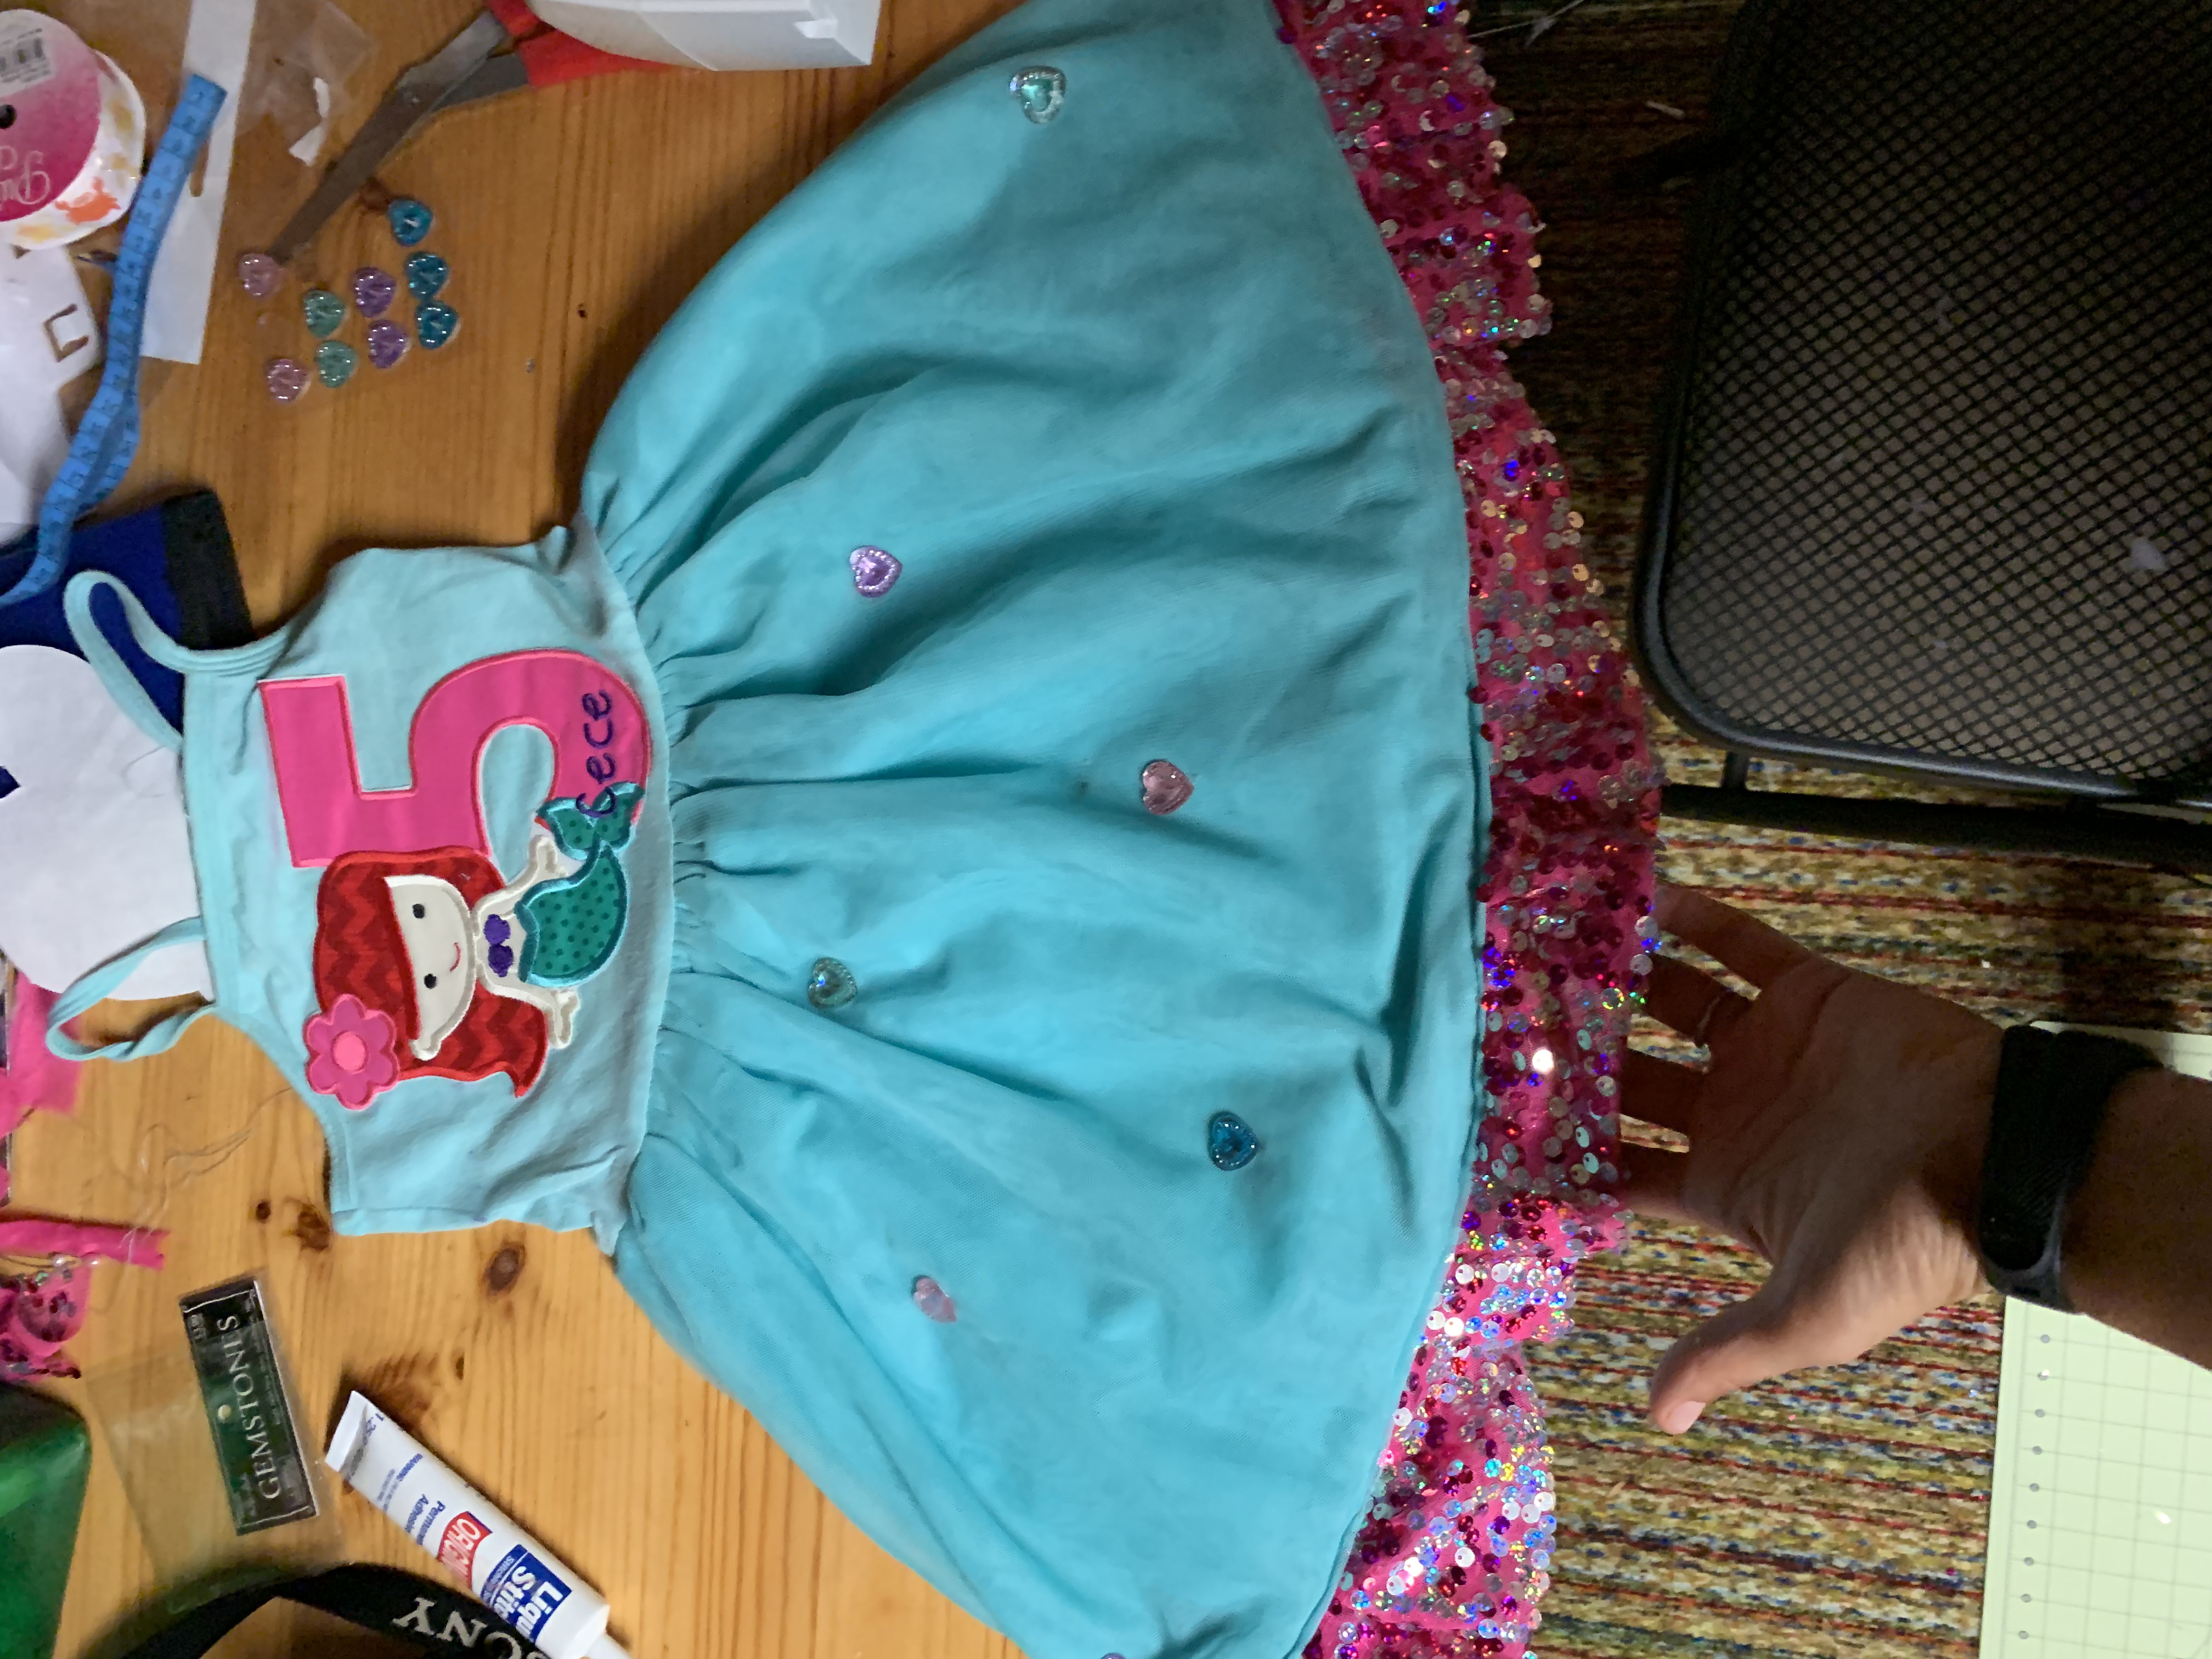
Then I ordered a special mermaid appliqué with the number 5 for my daughters birthday off of Etsy. I also had some leftover sequin fabric I wanted to add to the dress.
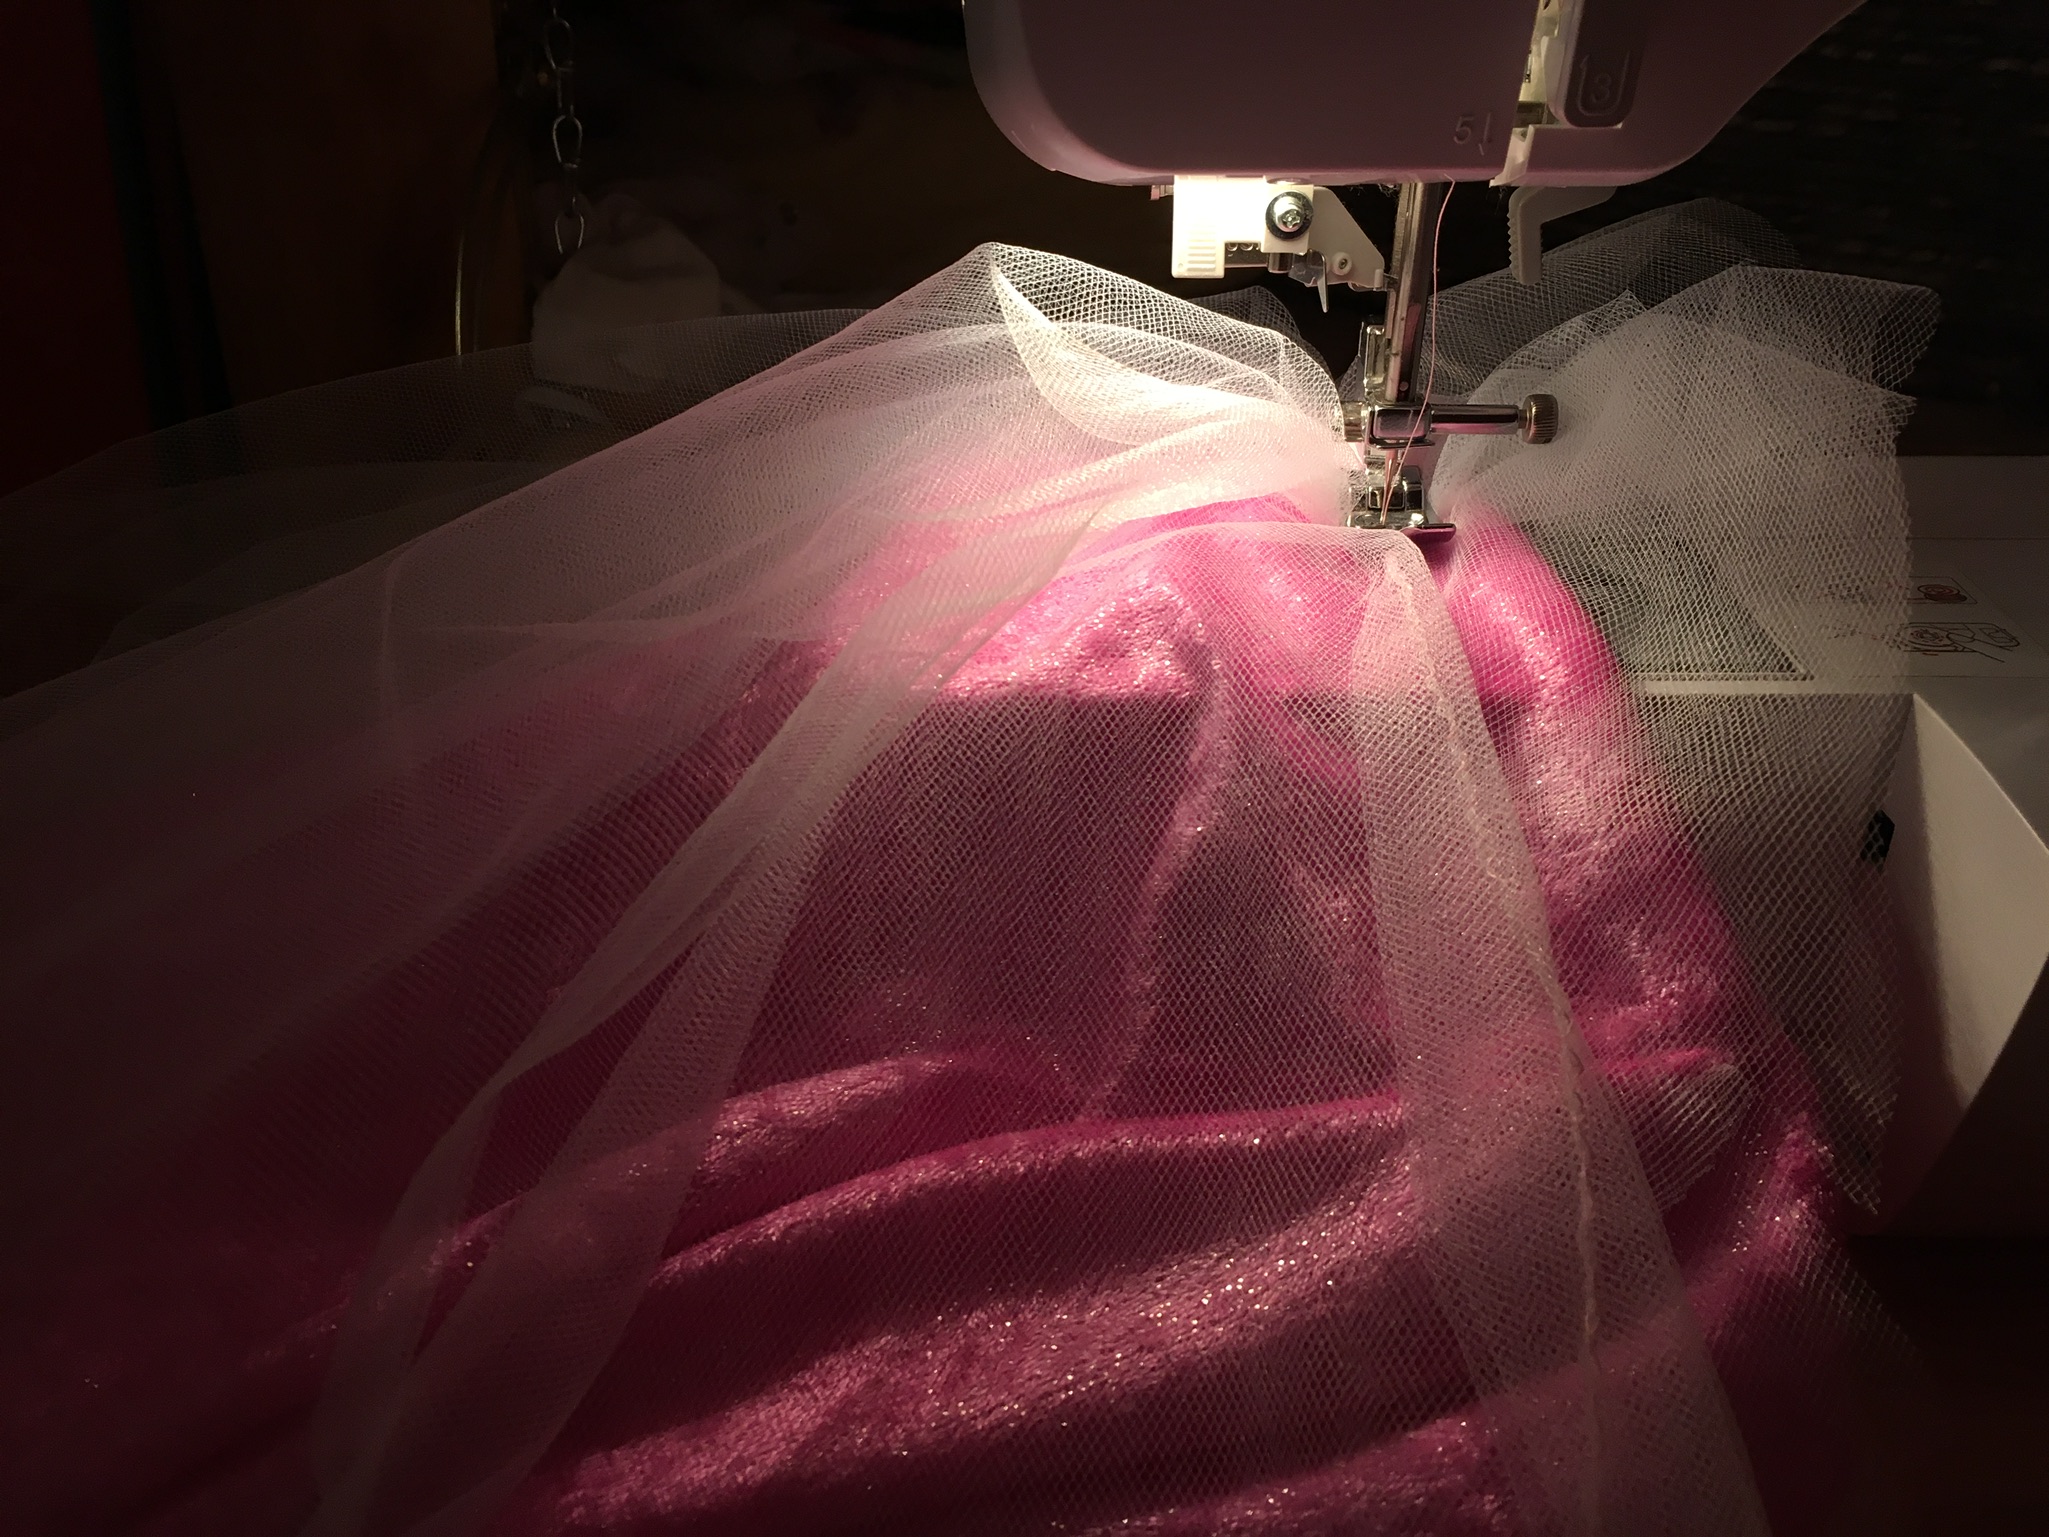
I used the sequin fabric and sewed it all
Around the bottom inner layer of the dress. Then I added the patch and wow what a difference with that easy change! I was going to add some puff sleeves but the weather was warm so I ended up keeping it sleeveless.
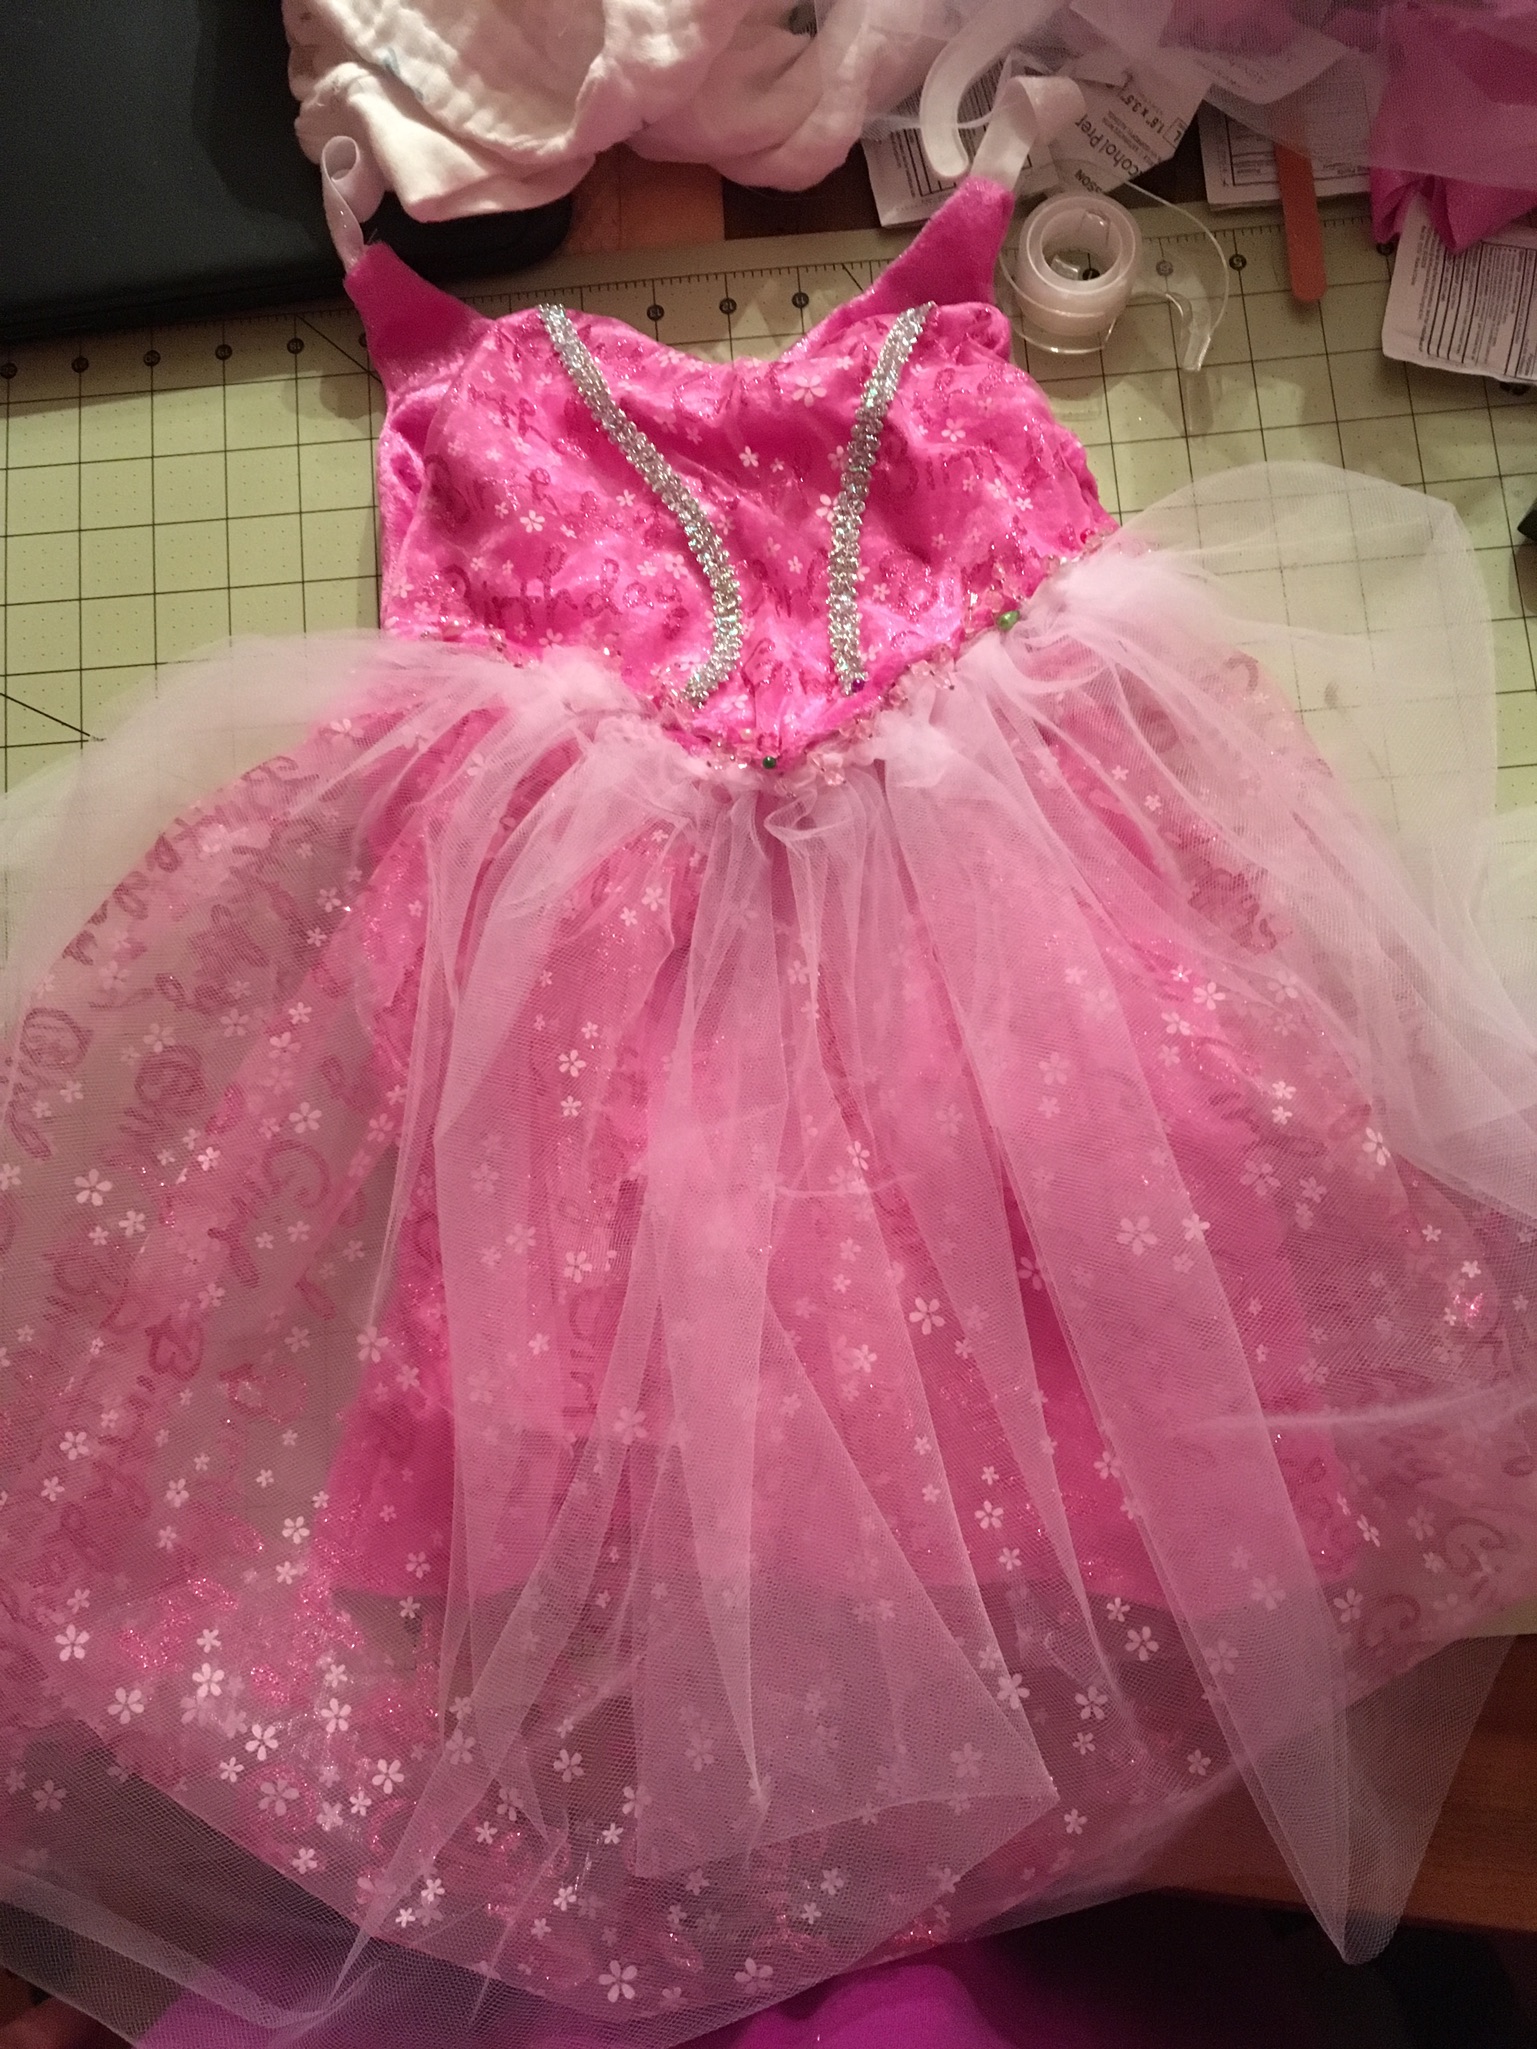
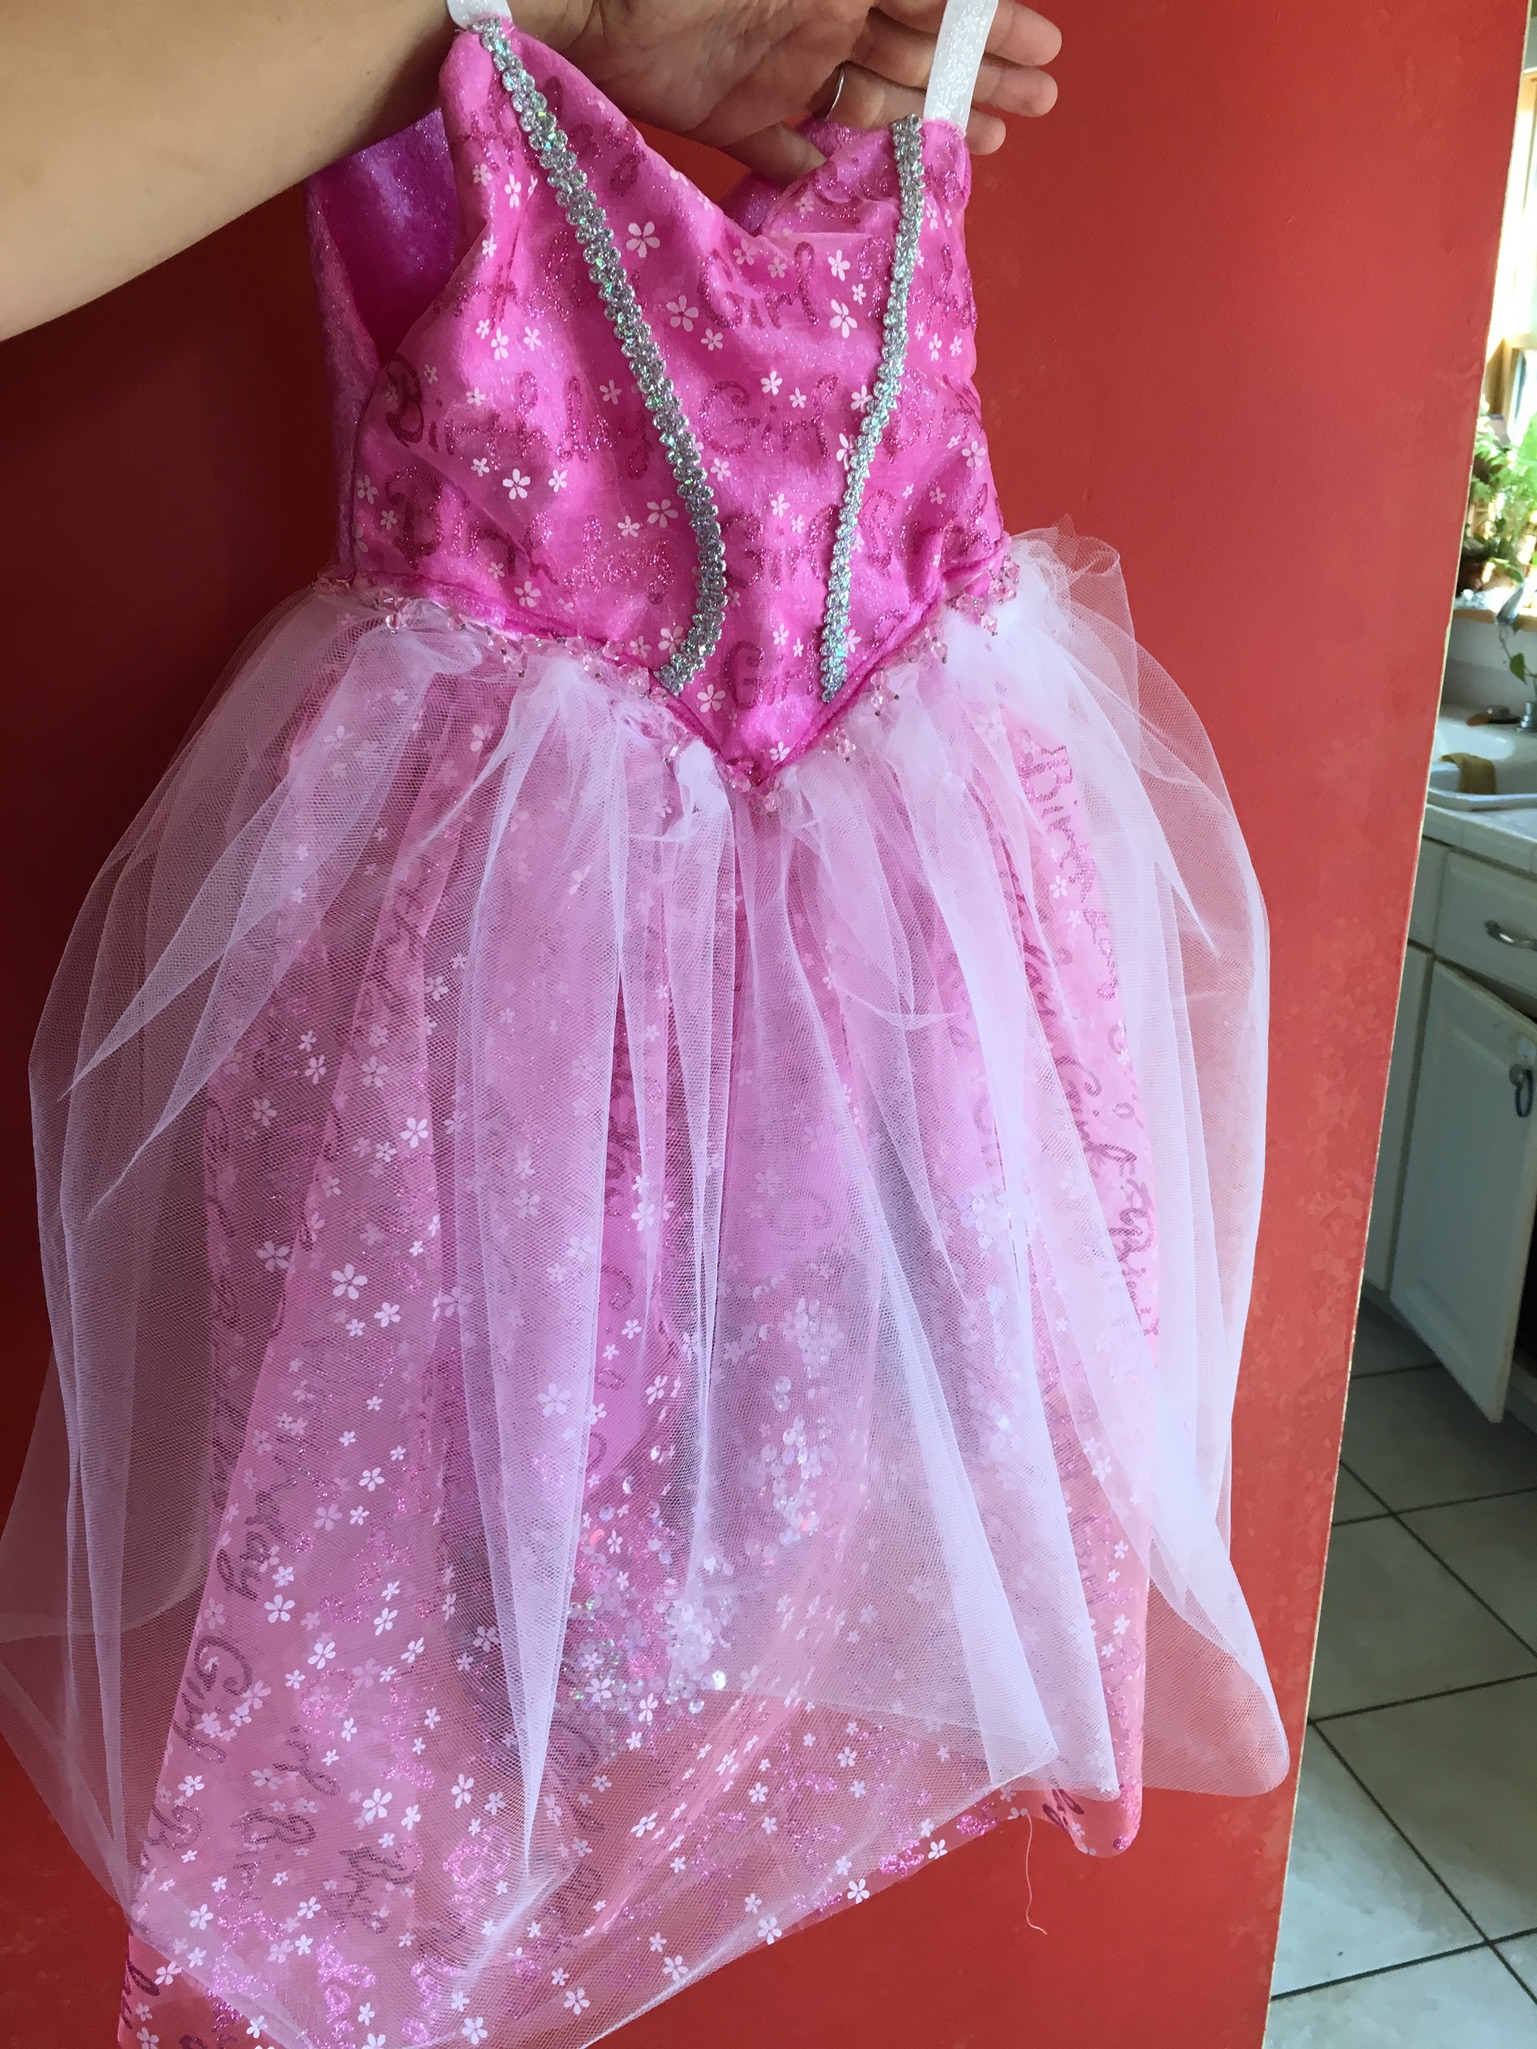
Purchased an assortment of gem heart stickers and used fabric stitch glue to place them on the dress!
This can be done easily and quickly and you have a birthday dress! You can add sleeves, bows, a sash or belt!
If you have a special occasion coming up and are looking for a gift from your baby, toddler, or child, I have an easy peasy present idea!
Paint…UGH PAINT! The word can invoke fear in any parent, except this is mess free! Okay, almost mess free.
My mom’s birthday was coming up and I wanted to give her something from her granddaughter. I searched online and found this simple craft. I will admit I improvised because I was missing some of the items and I will mention what worked & what didn’t as I go through the steps.
First, gather your materials. You will need:
-Paint in various colors (I used finger paint)
-cardstock (I used regular paper but it didn’t work so well)
-gallon ziplock bag
-picture frame (if you choose to use it as a gift)
-Heart stencil (or you could just draw it yourself)
-scissor
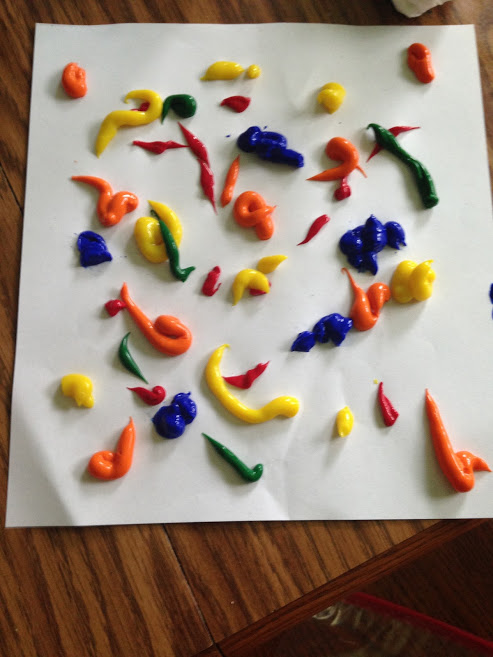
Next, put your choice of colors on your cardstock paper. Note: I didn’t use cardstock and it ripped easily and you could see through some of it. SO USE CARDSTOCK paper or thicker paper. If you are in a pinch you can use regular paper but you will have to be very gentle with it.
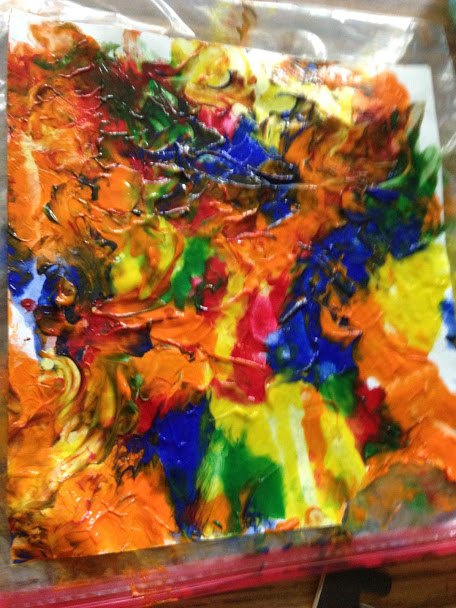
YES, I USED WAYYYYY TOO MUCH PAINT!!! My paint came jumping out of the bottle super fast, I’m really not sure how that happened (haha). It takes longer to dry with all that paint. It took days for it to dry when it should’ve taken overnight.
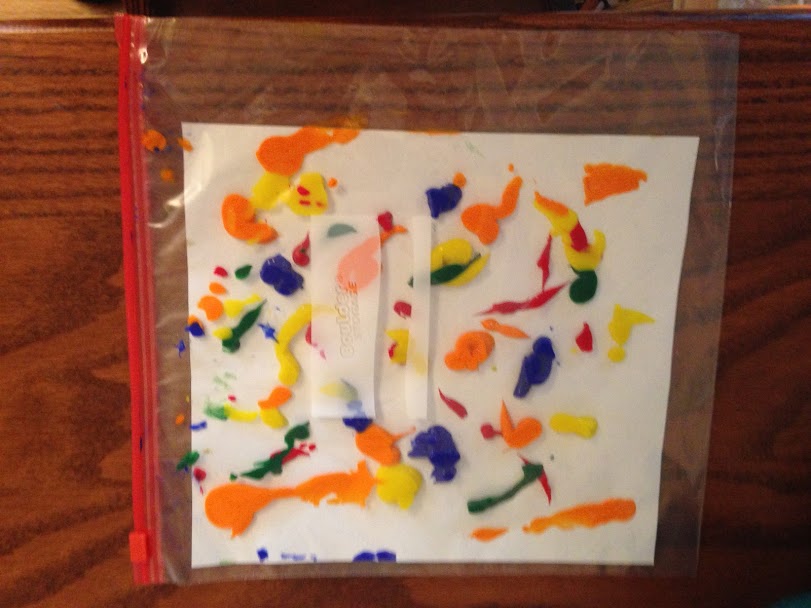
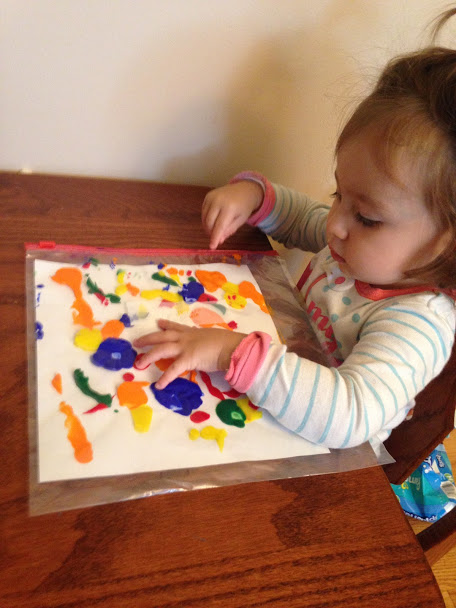
Take your cardstock paper and put it in a gallon sized ziplock. This insures your project will be mostly mess free! If you need to cut down the paper a little, go for it.
Now it’s time for fun!!! Let your child smear the paint!
Your child will love smearing the paint and you will love that it’s mess free!
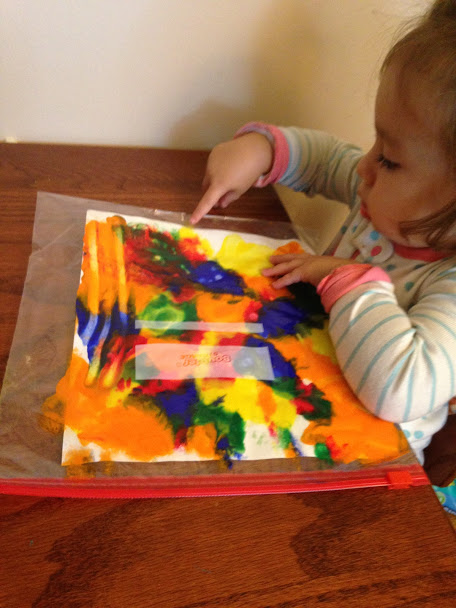
When you like the smeared look your child has made, carefully take it out of the bag and leave it in a safe place to dry.
Look at all of that paint!!! TOOO MUCH! If you put way too much on like me, you can either dab it off with a paper towel or give it days to dry.
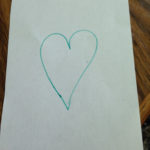
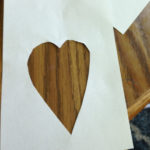
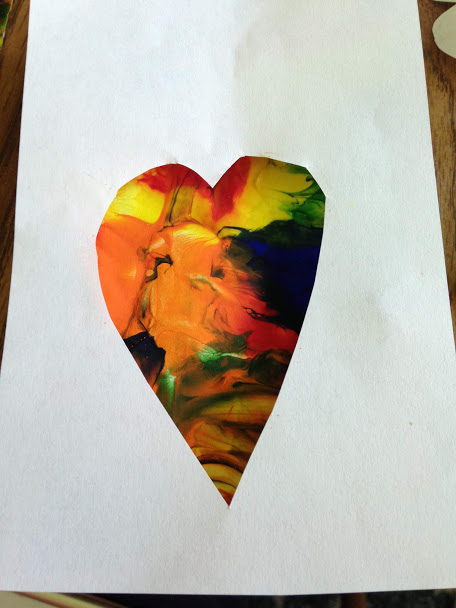
Here’s where you can vary the project. I drew a heart on a new piece of paper (use cardstock) and cut it out. You can pick any shape you like! If you are super crafty you could even cut out a name or shape of an animal. Cut down the paper to whatever size you would like it to fit. I cut it down to fit a frame. However, you could also make this into wall art, a card, or anything you can imagine!
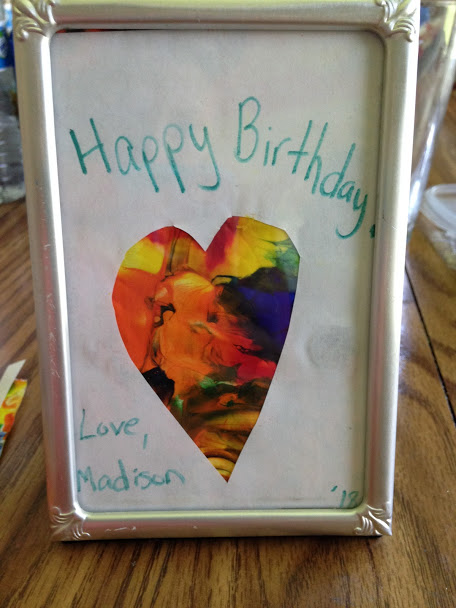
Place the cut out on top of your painted paper. I moved mine around to find which colors I wanted to show. Cut the back painted piece to fit the frame. If you would like to write a message on the paper, go for it! Put in it a frame or glue and fold for a card!
Easy Peasy Paint Present! Note: I used regular paper and you can see that there are places you can see through the top paper. I highly recommend cardstock or thicker paper.
This project is perfect for any occasion!!! This could be done for birthdays, anniversaries, and holidays.
I’m thinking green colors with a Christmas tree or wreath cutout for Christmas! You could also use the paint bag trick for ornaments. Instead of using a top layer, just let the painted paper dry, cut out a tree shape, hole punch and use a ribbon and wallah!
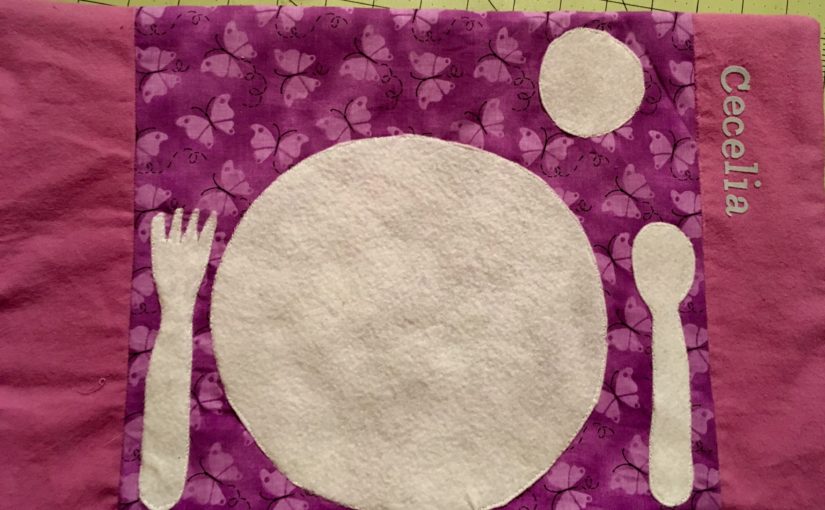
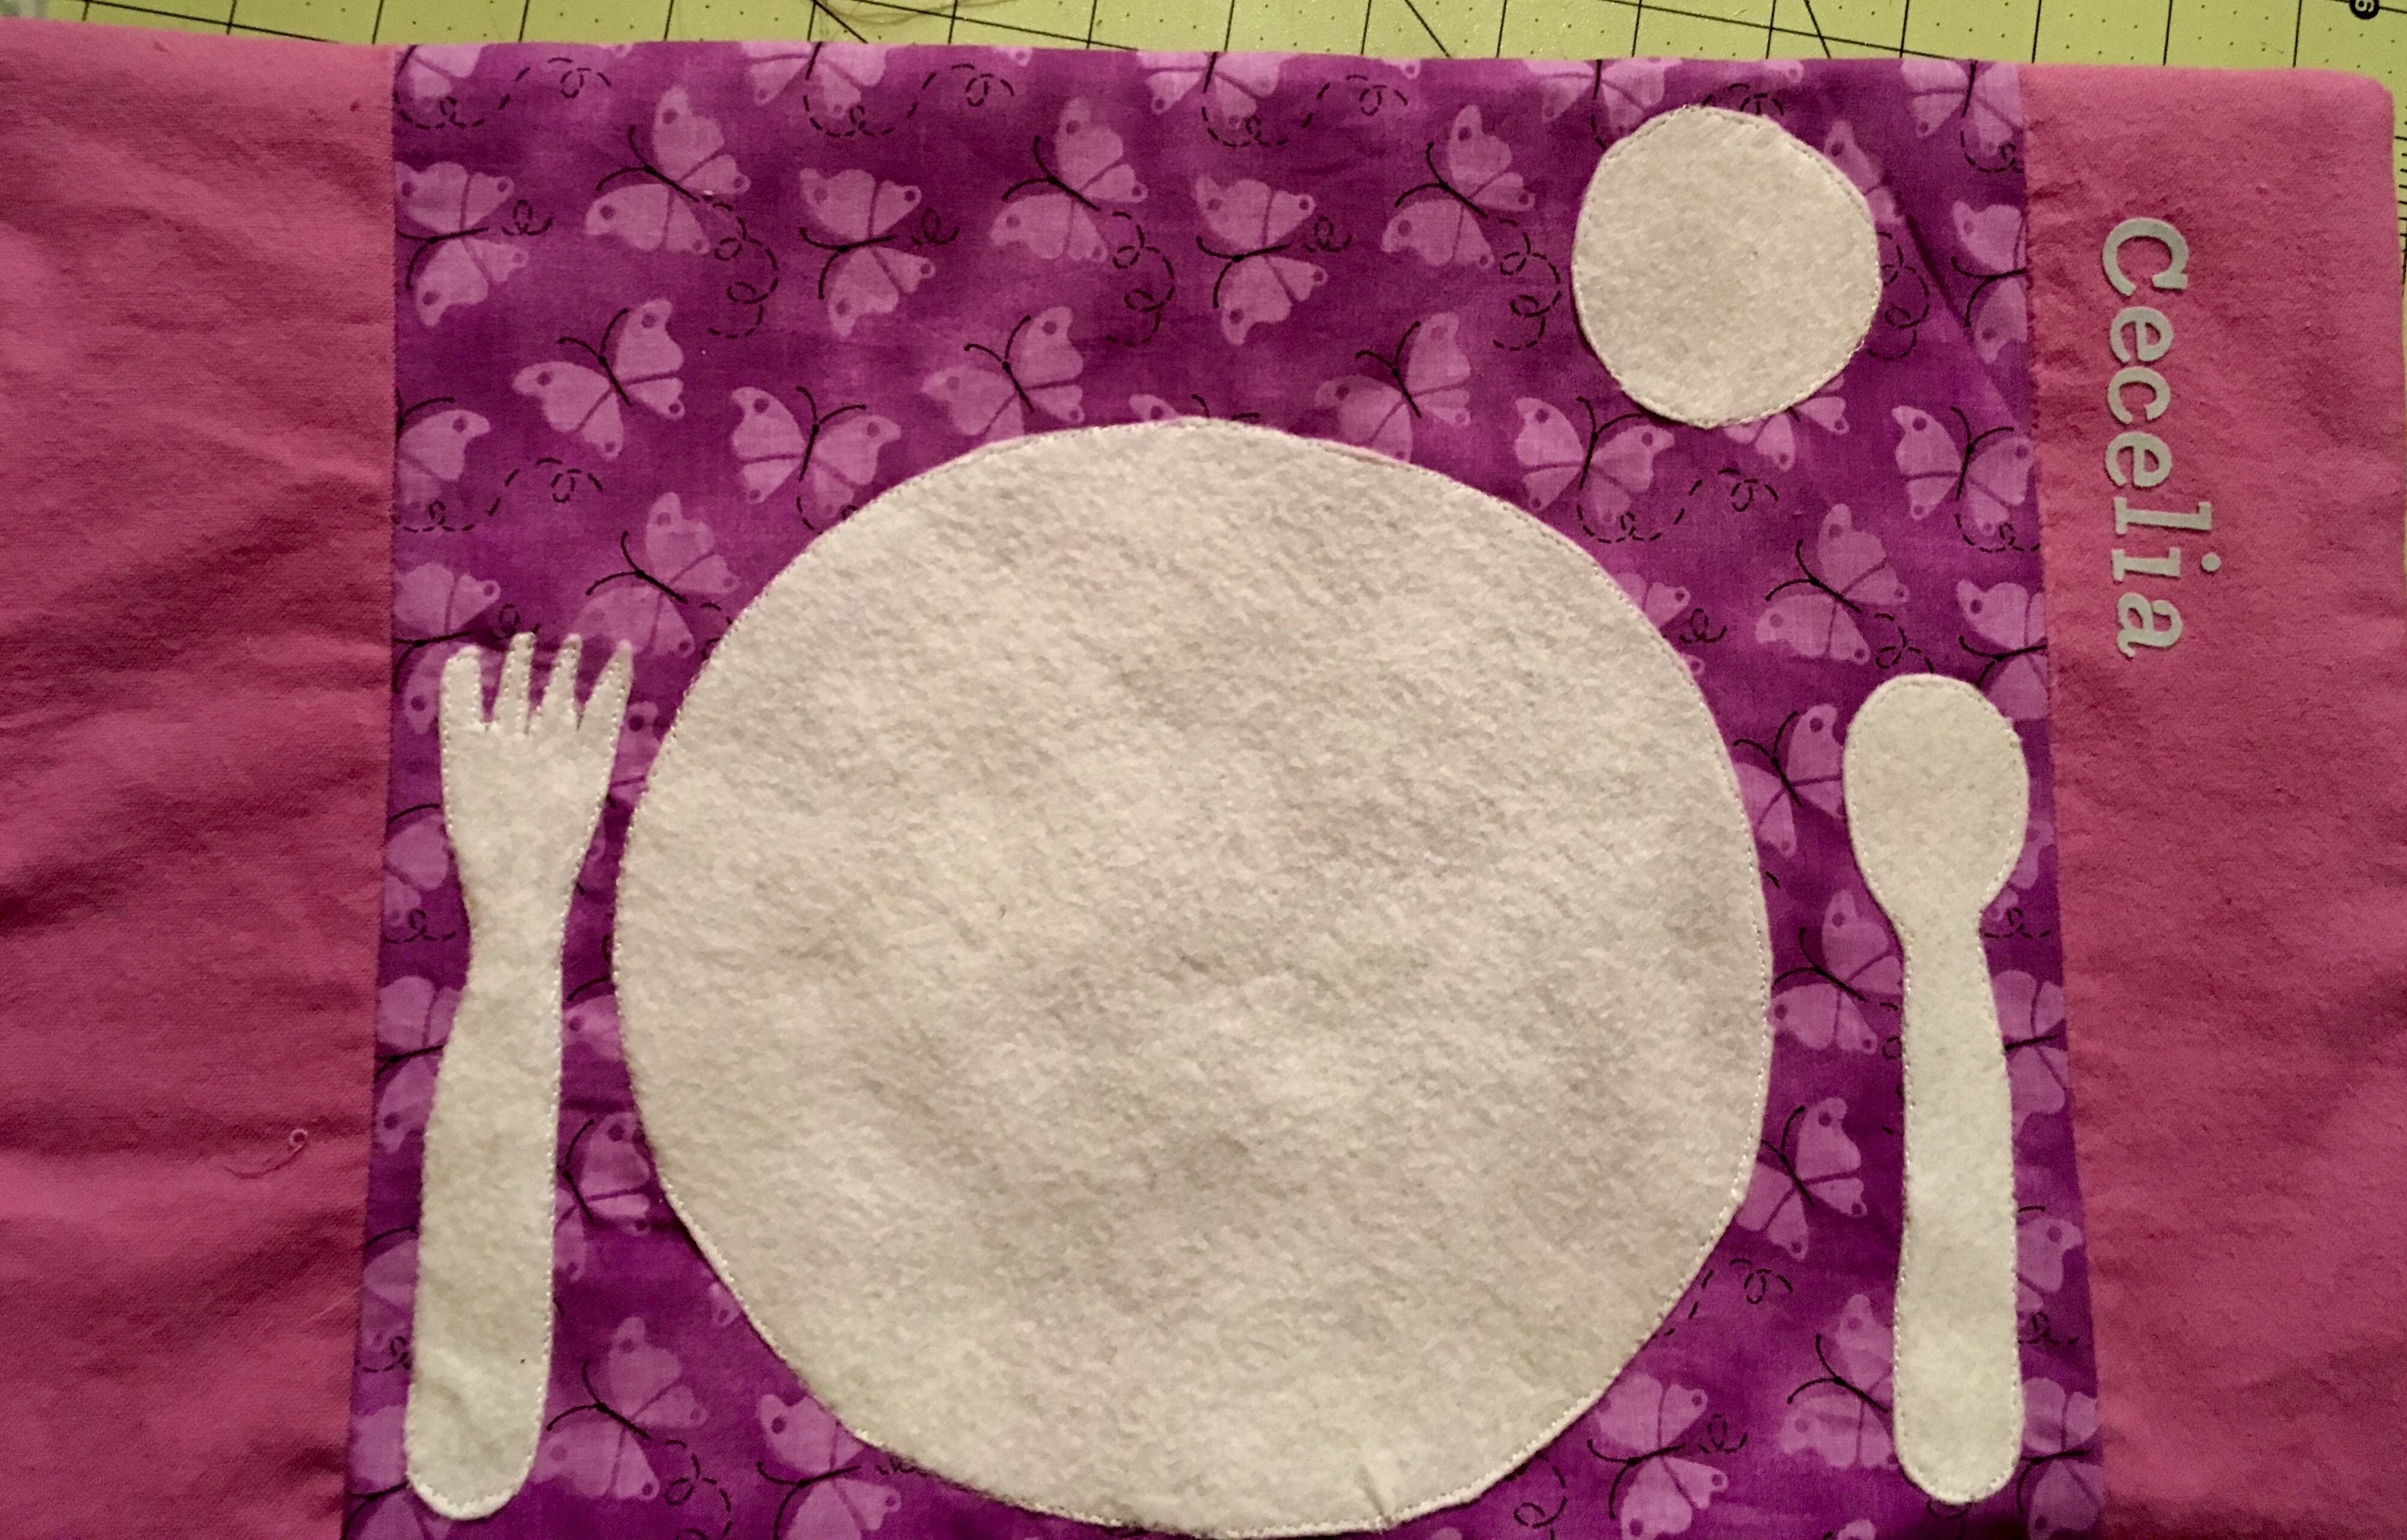
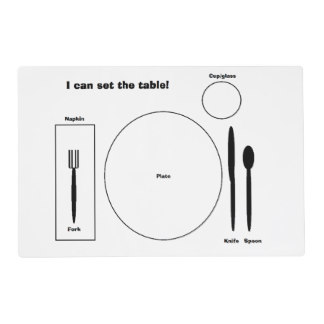
My daughter loves to assert her independence, even at meal time! So I thought, why not make a placemat that she can set her own place setting at? There are many ways to make placemats.
One way is simply laminating a printed out version of a placemat setting such as this…
However, my laminator is only big enough for a regular printer sized paper. You can take it to your local staples or office store to get laminated. You can even make your own placemat out of fabric and have it laminated.
I decided to go with the fabric version and just use the washer to clean it.
So you want to prewash the fabric to make sure it does not shrink.
As always there is a video youtube tutorial and a written one below.
What you need for this placemat place setting is…
1) fabric: it will end up being 12×16 inches.
1 batting or felt for the middle or back side 12×16
1 center front piece 12×12
2 outside front pieces 4×12
1 back side
felt or non fraying material to cut out fork, spoon, cup, and plate
2) Next, take your front center piece and your side front pieces and pin them fabric facing fabric on the sides and sew. Then iron the seems.
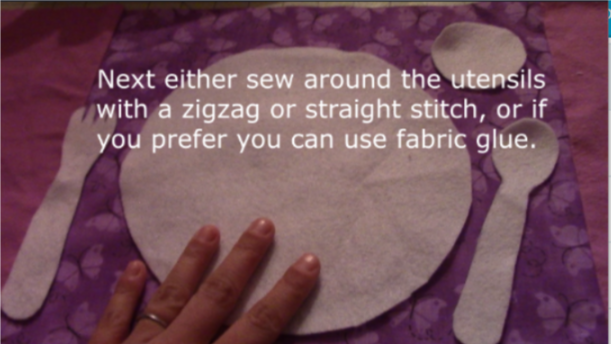
3) Following that, you want to use your felt or nonfraying material to outline a plate, cup, fork, spoon, and any other utensils that you want on your placemat. Then cut them out and sew them directly on the front piece. You can also use fabric glue if you like.
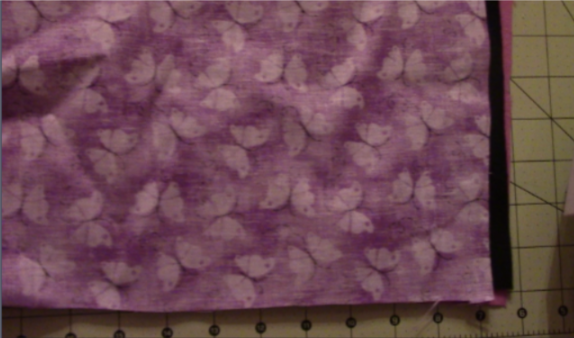
4) ***You want to put the piece of fabric you want as the backing down first facing the front fabric and then the basting or felt behind that (as you can see I did it opposite and ended up with my black fabric as the back outside as you will see). However, if you are using felt, it ends up rather nice as a backing since it prevents sliding.
5) Sew all the way around leaving a 3-4 inch opening so you can pull it out the right way. Don’t forget to backstitch. Once this is done, pull the inside out and make sure all the sides and corners are all the way out. Iron it all out and sew the remaining opening with either a hand stitch, or if you want to use your machine then sew around the whole placemat to give it that look.
You can add any other embellishments, I used my daughter’s name on the side. Enjoy and check out the other videos and tutorials! Let me know if you have any questions!
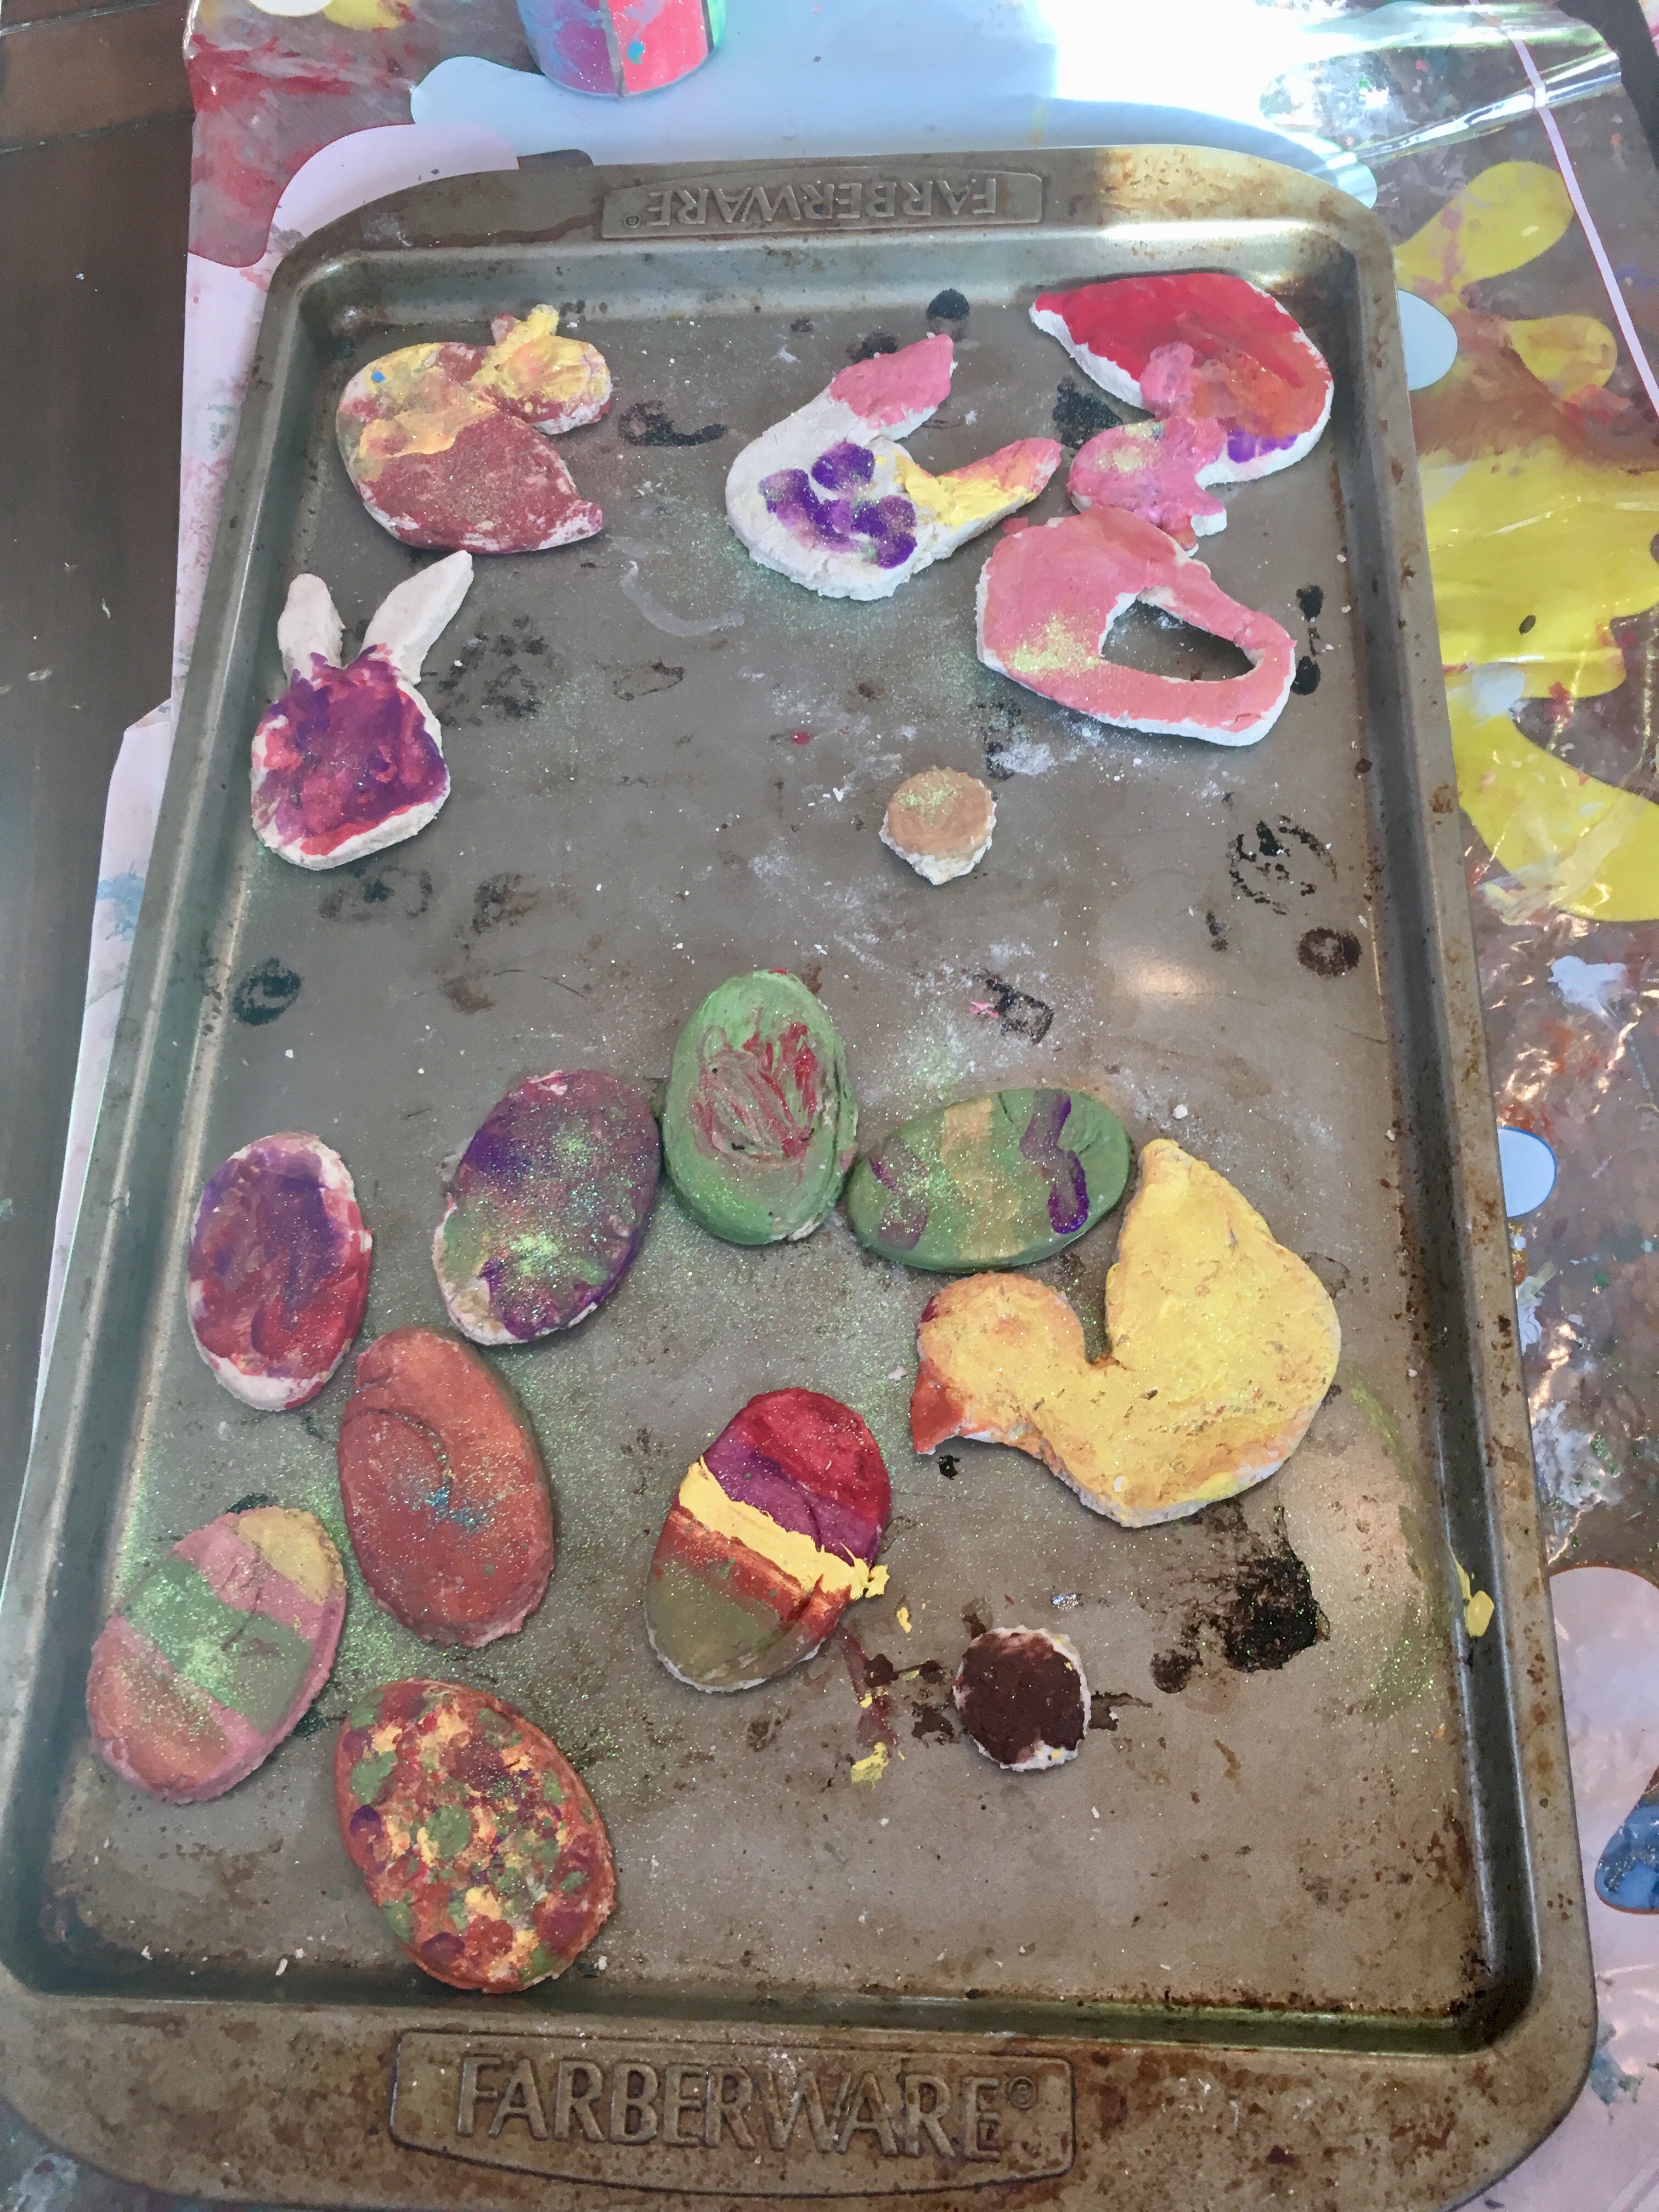
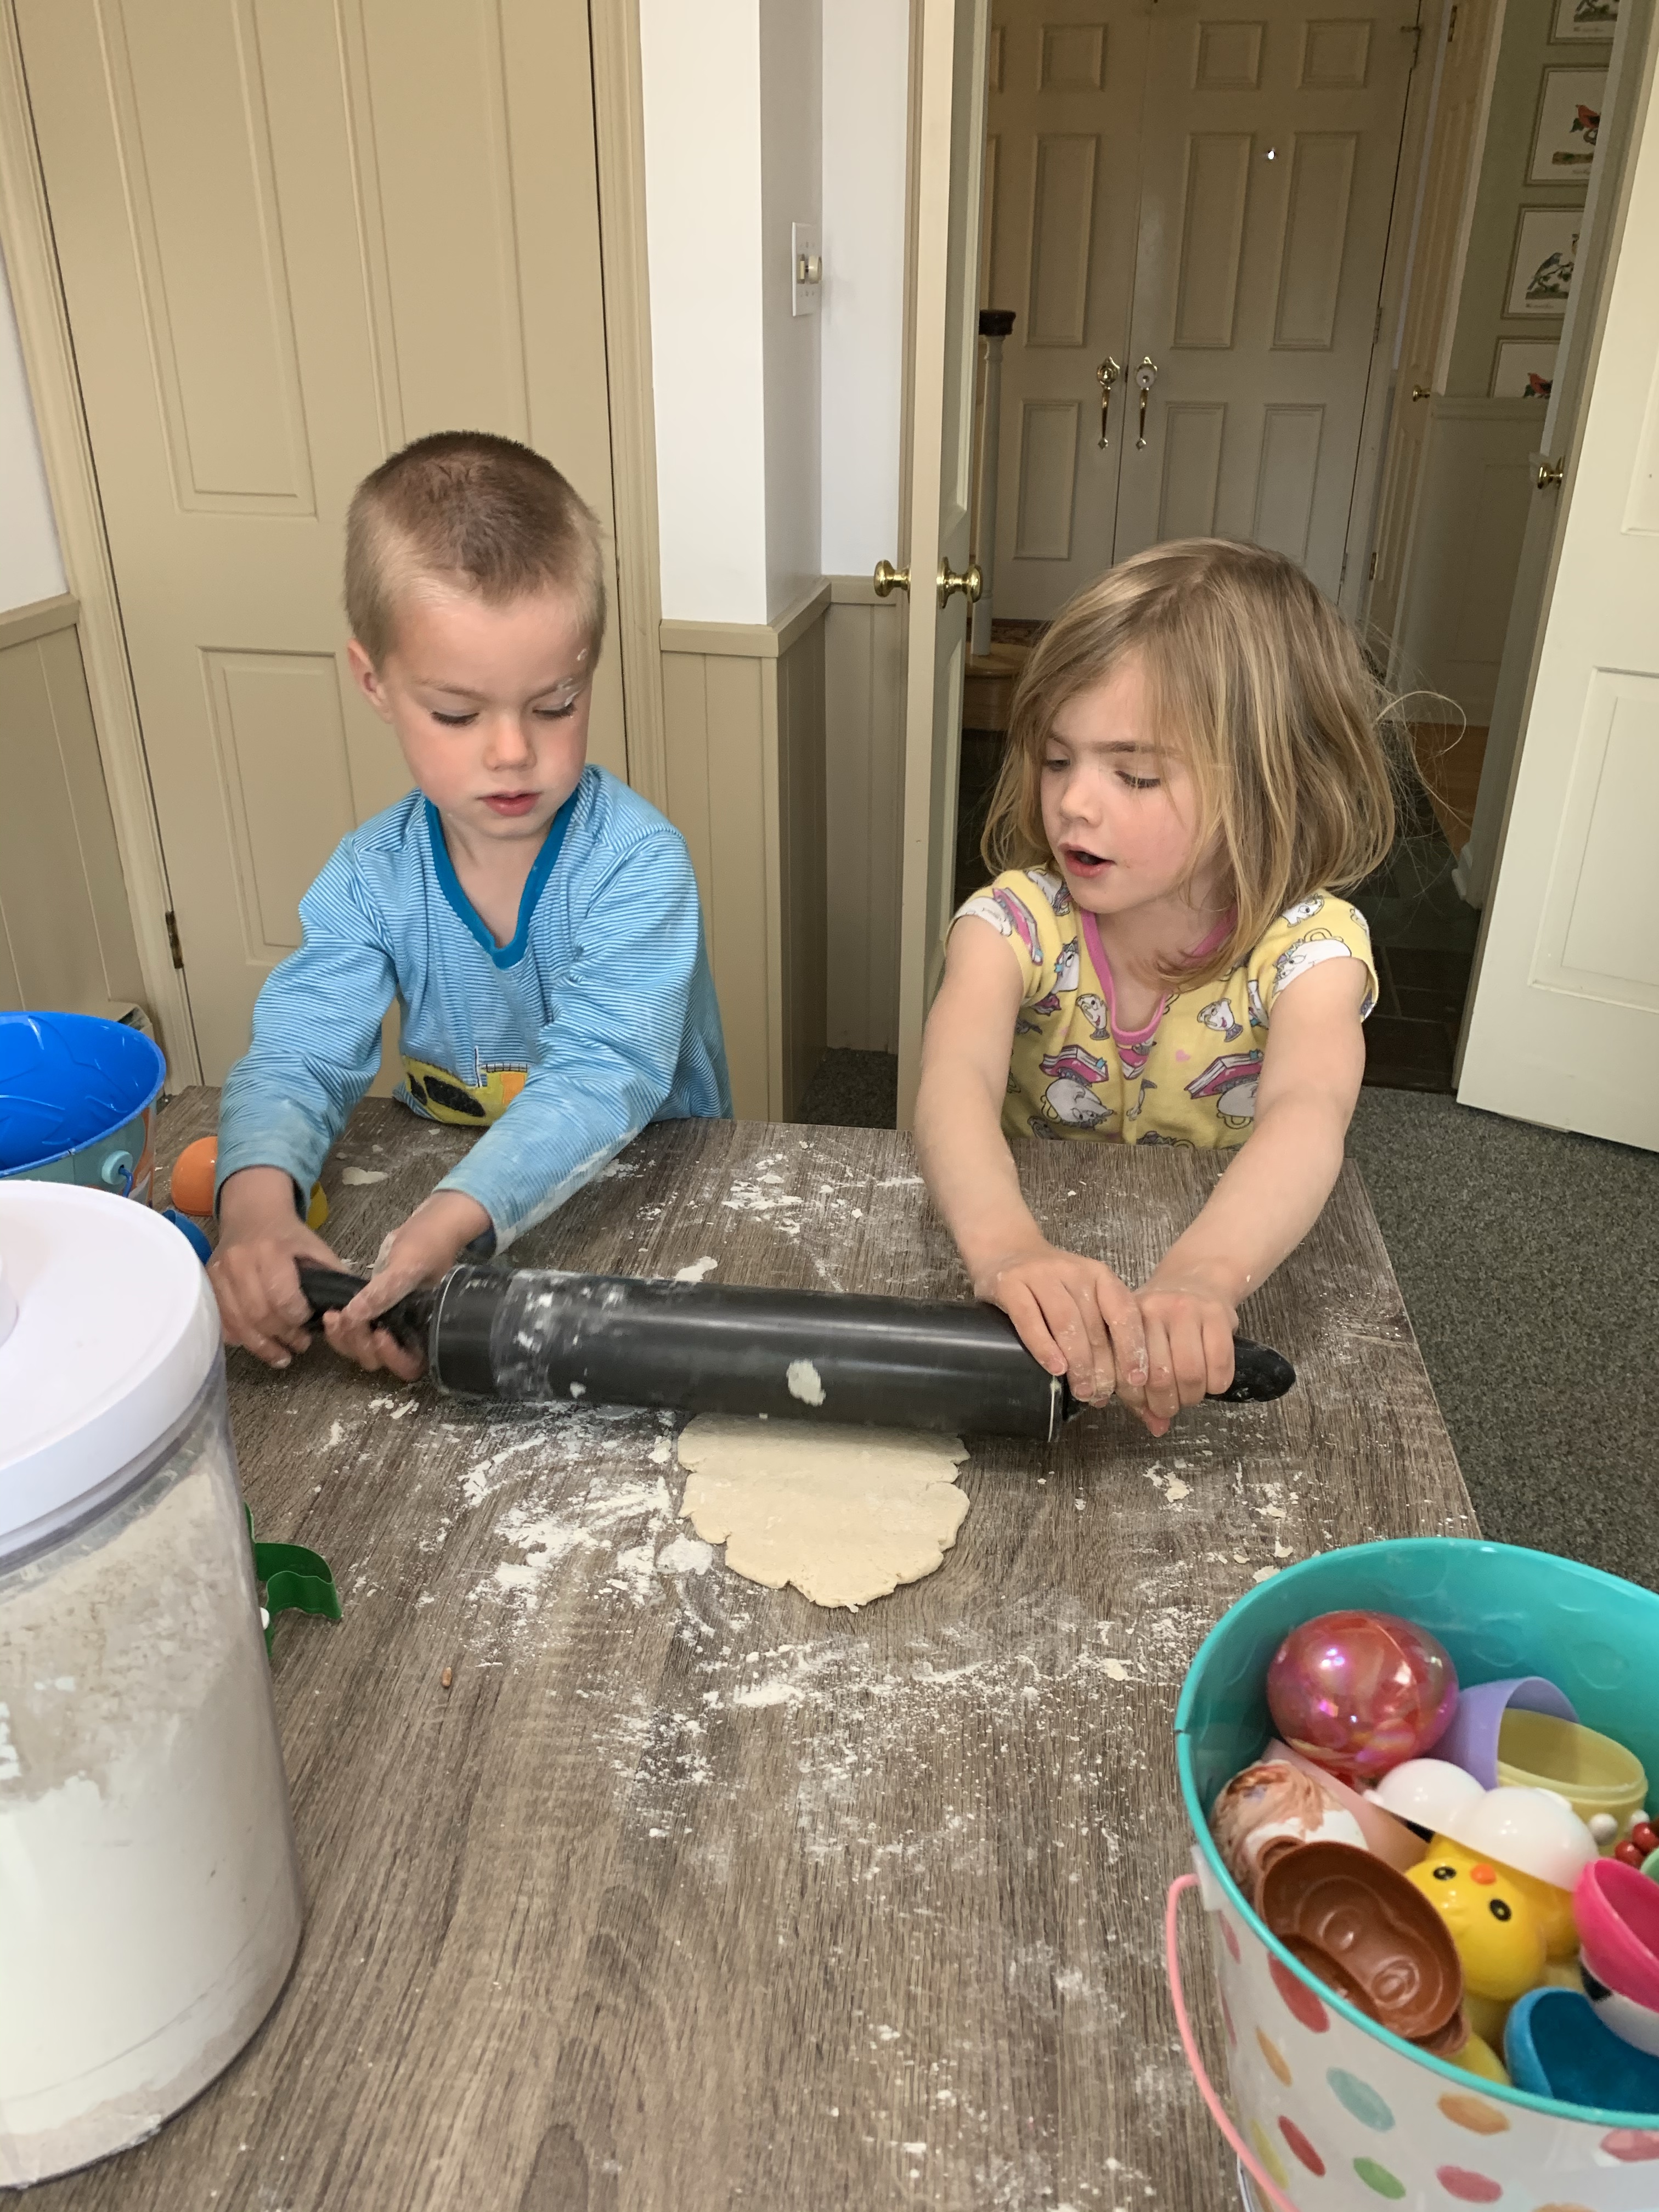
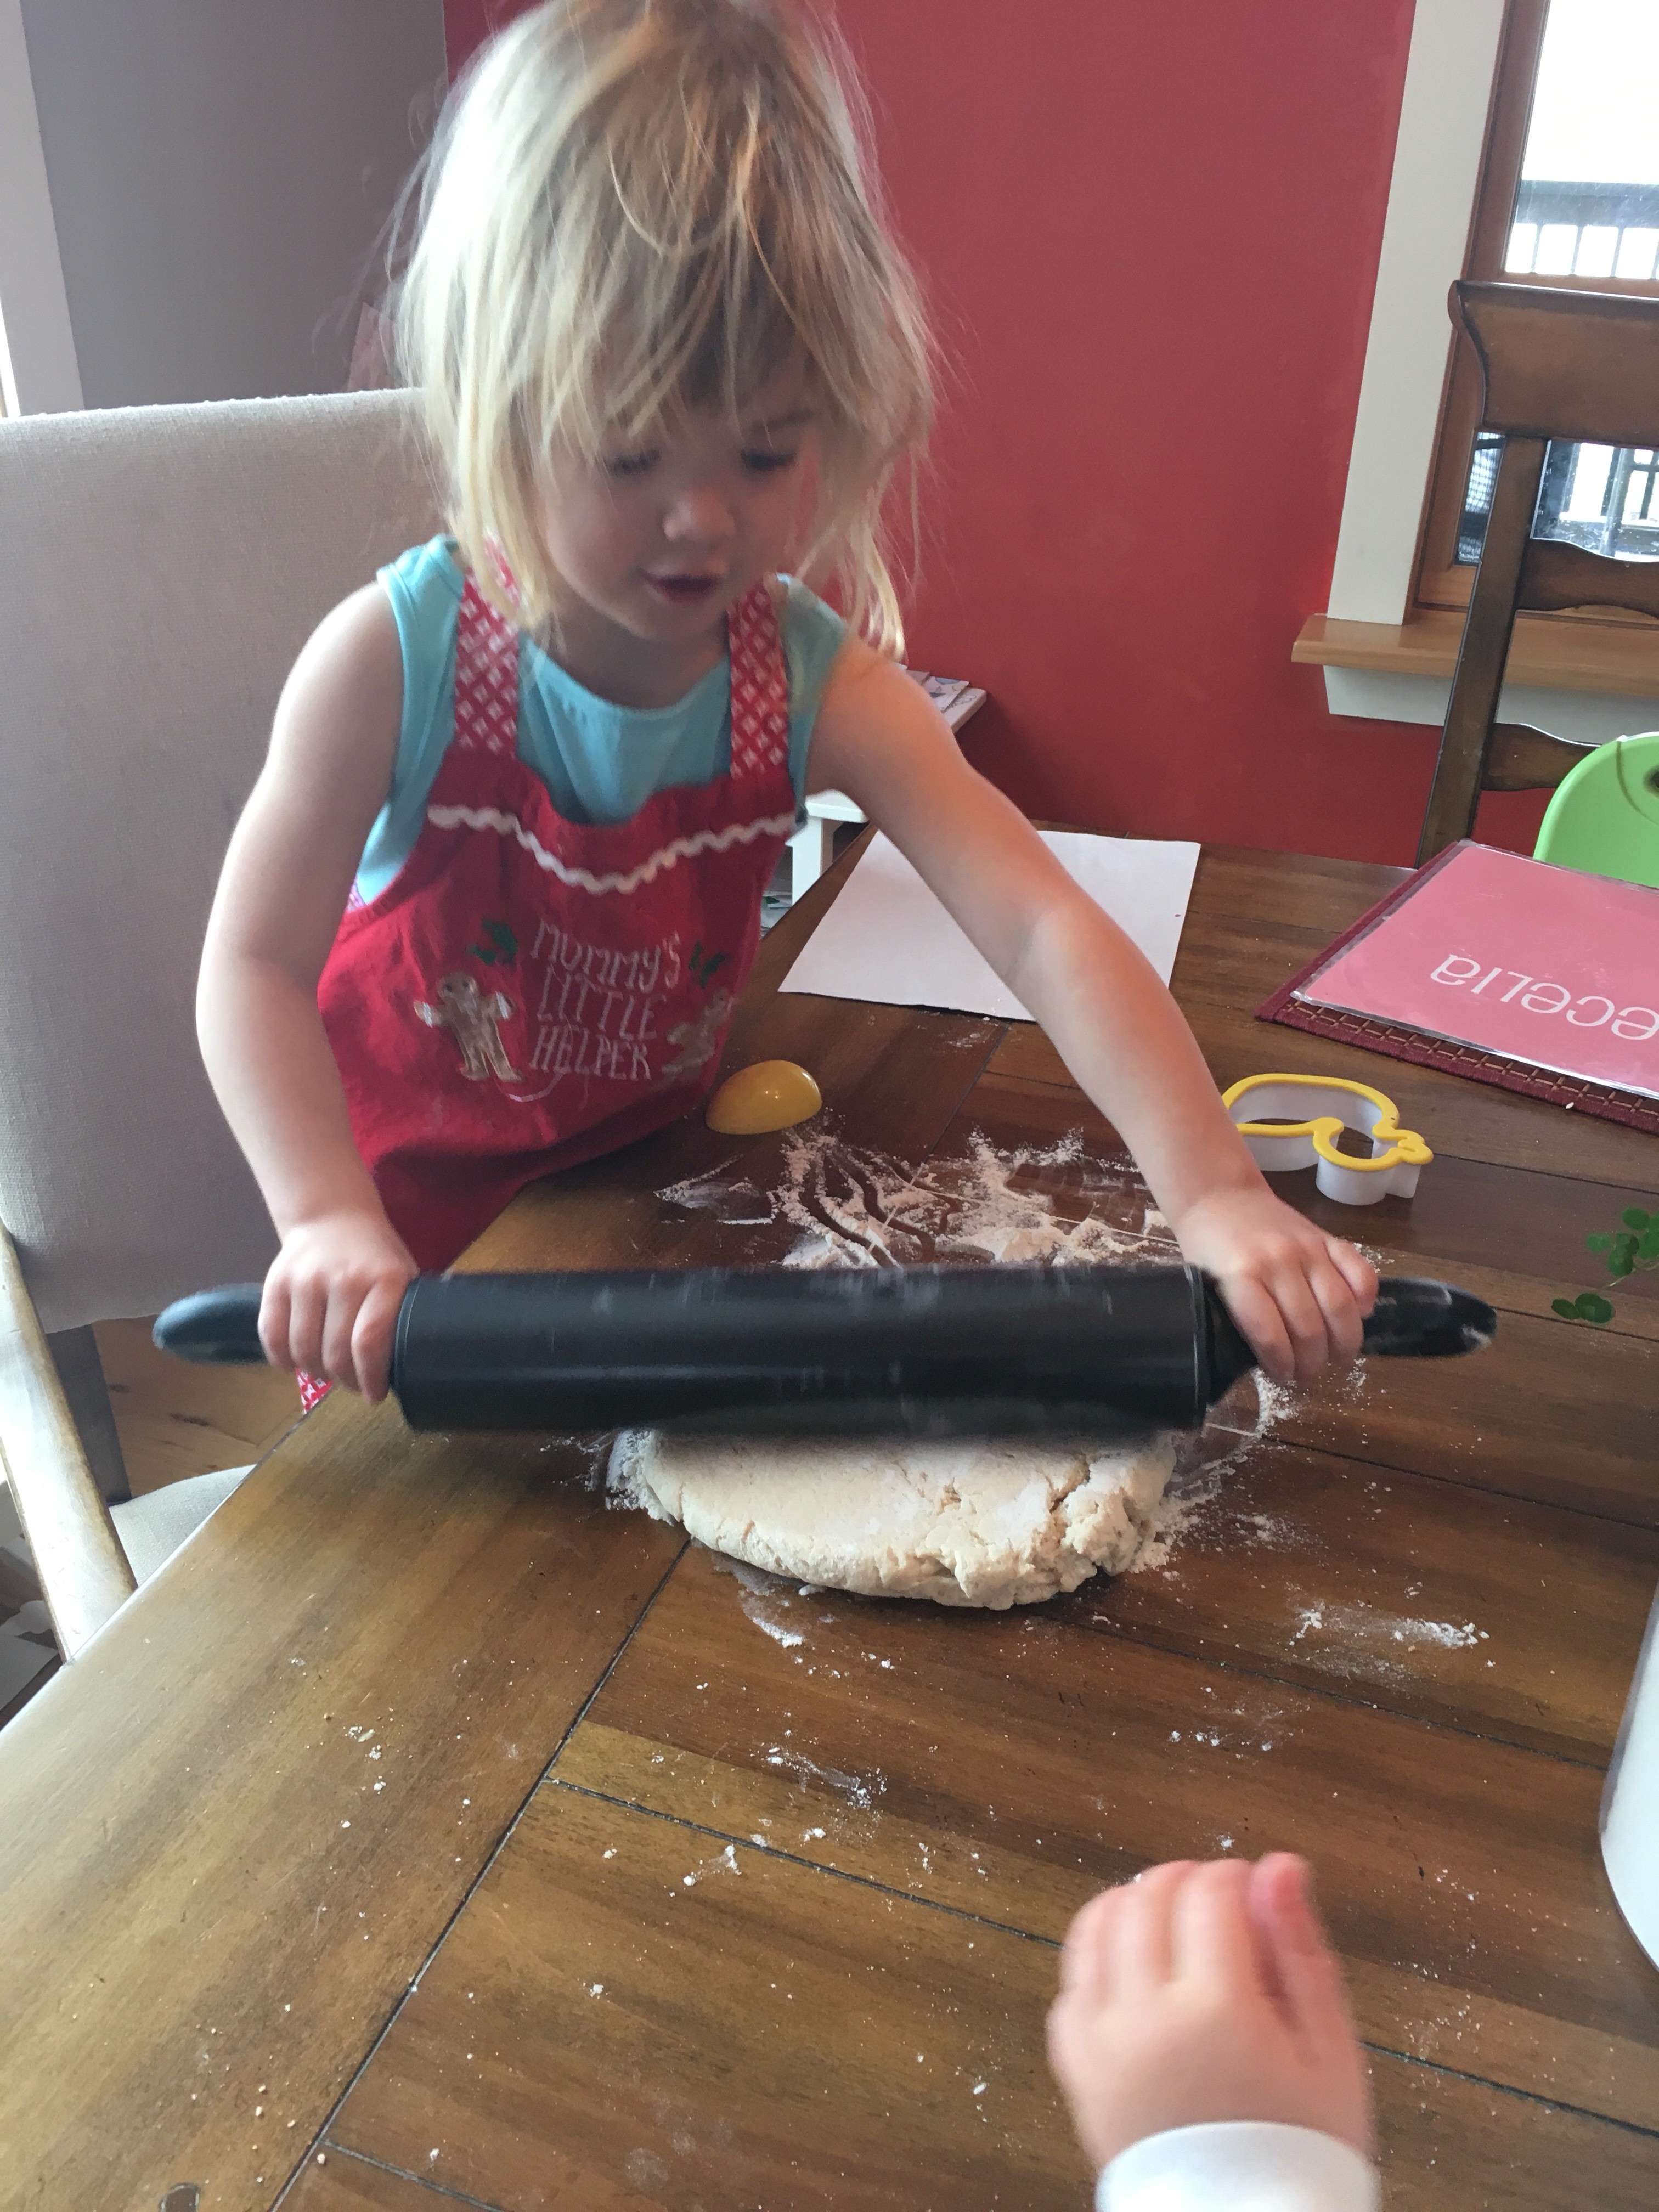
My daughter loves painting! However, she was growing tired of painting paper. So this year, we made cookie cutter Easter shapes! Actually, we had a duck and used a half of a plastic egg as a cutout. I also used a knife to create bunny faces and baskets.
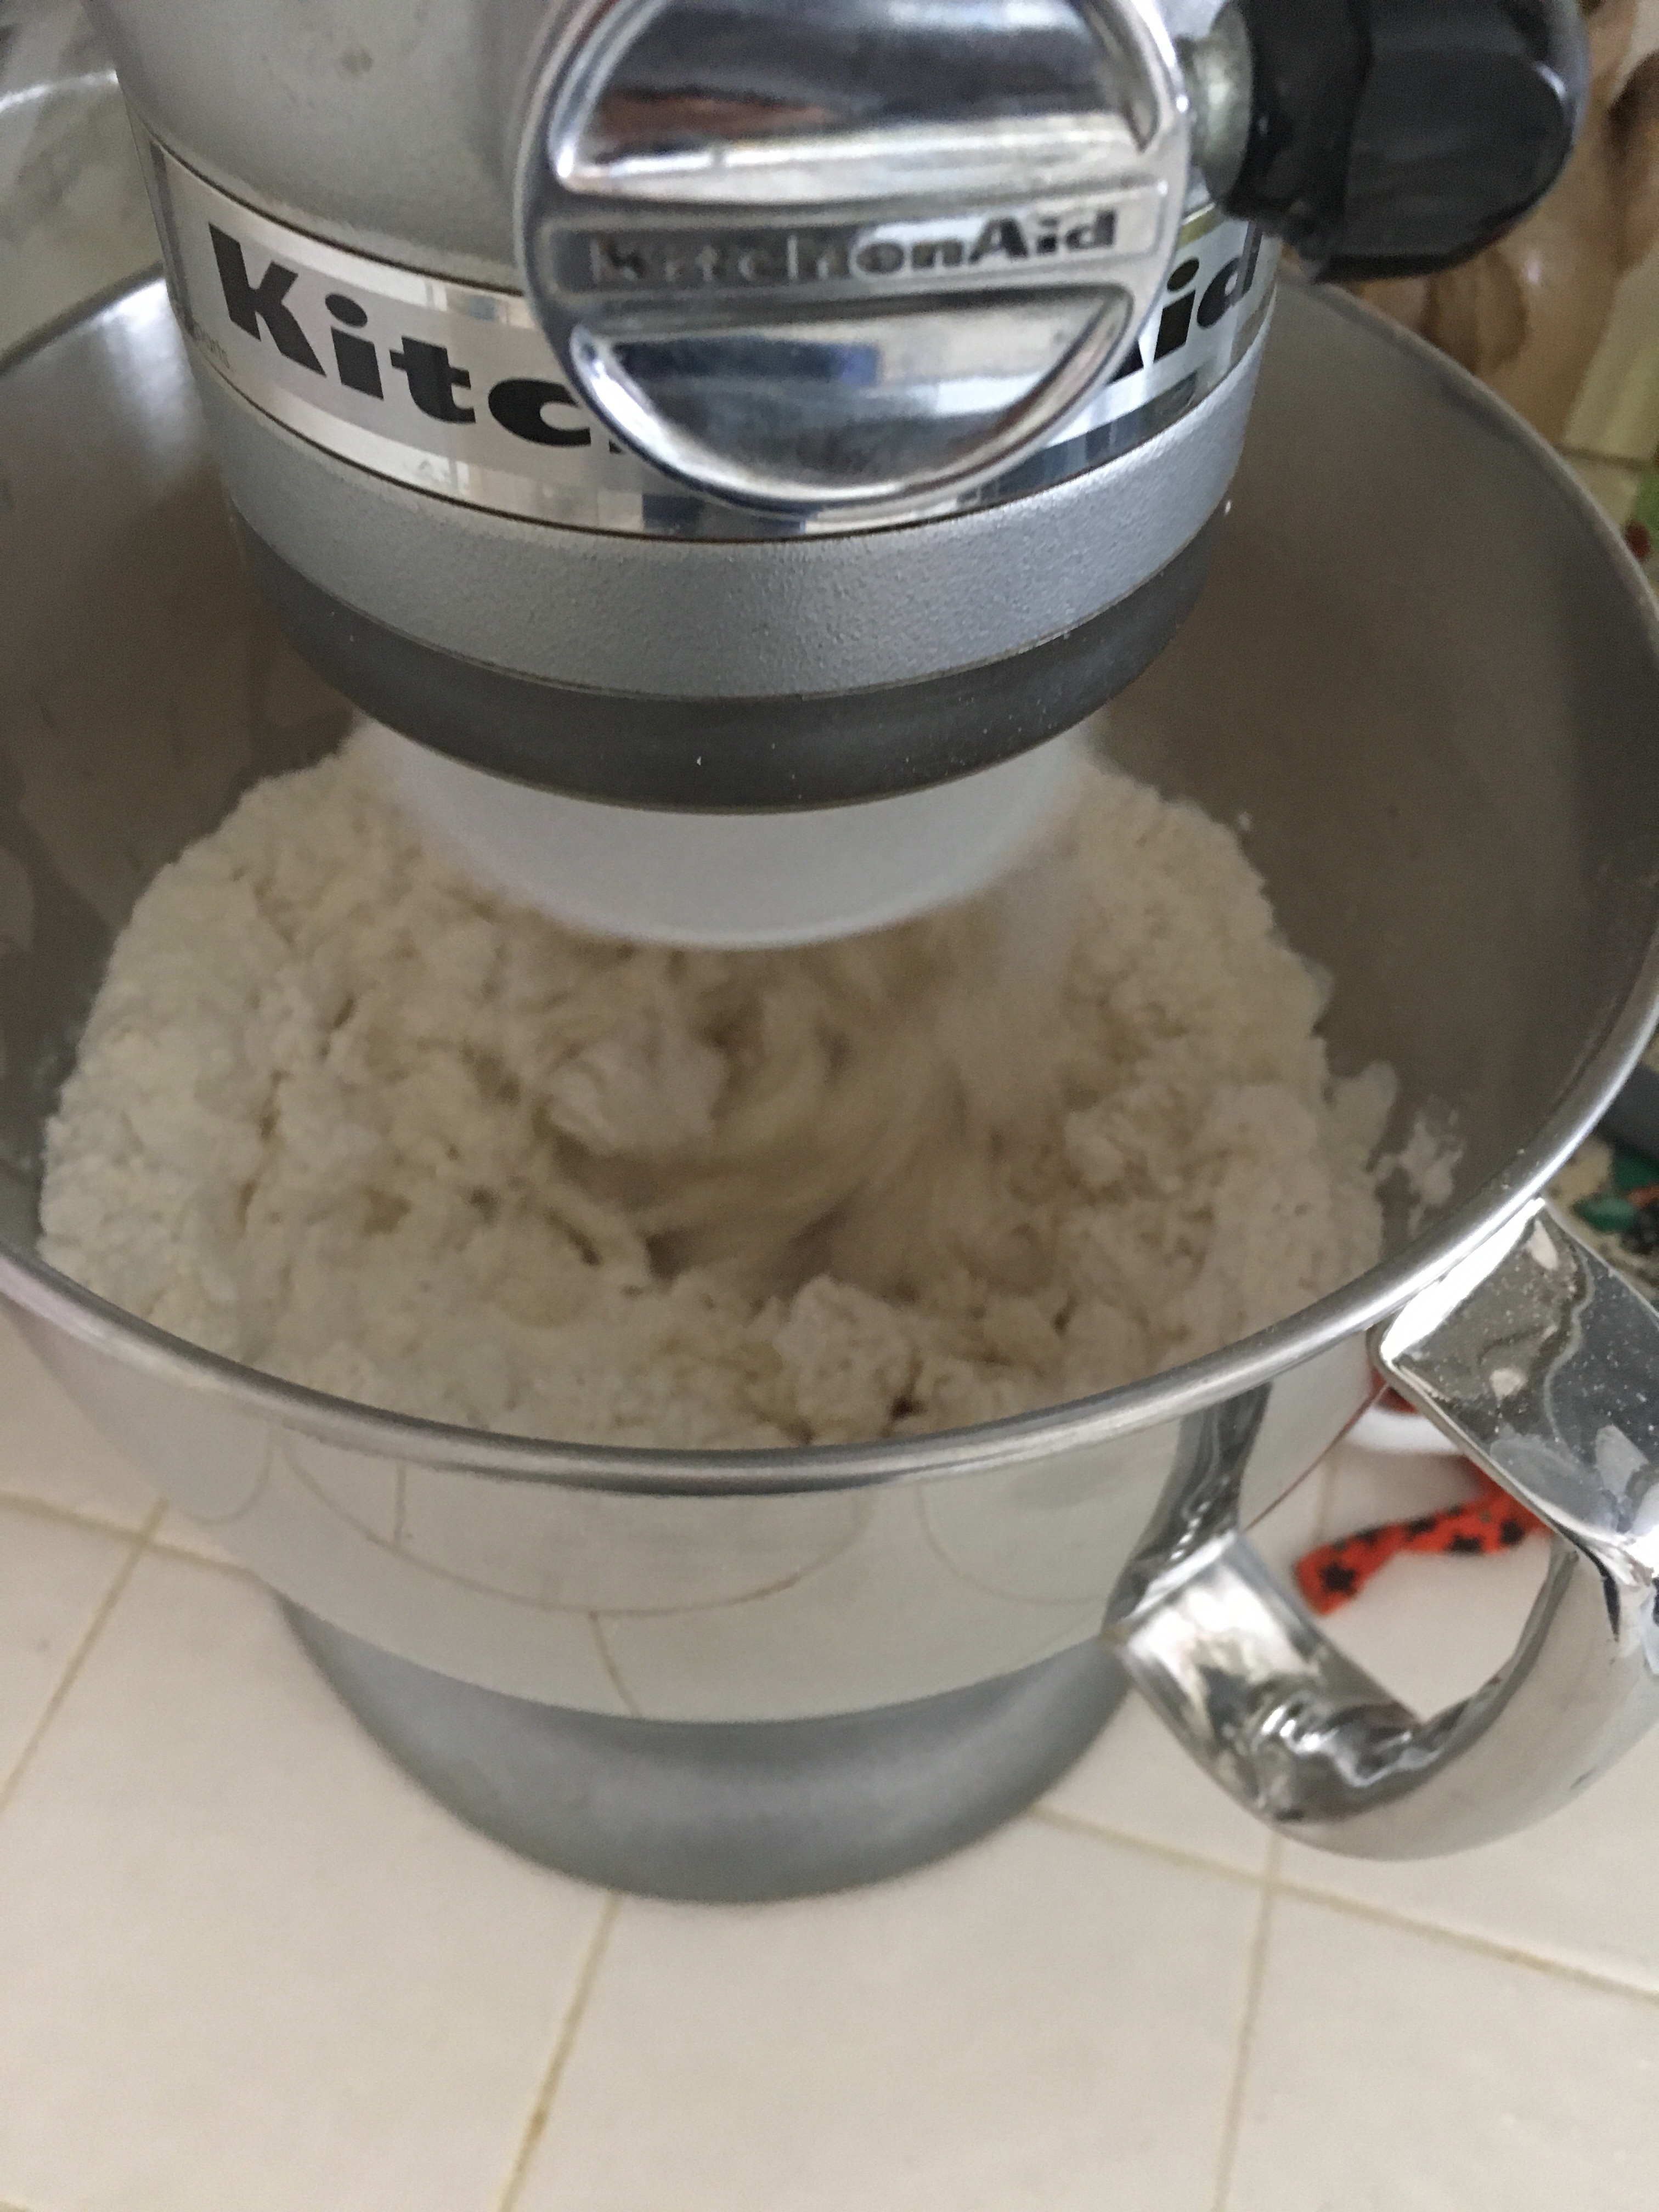
First things first, you have to make the salt dough! This is super simple. all you need is salt, flour, and warm water. You can knead the dough by hand, or use a mixer with the kneading attachment like I did.
So here is the recipe I used:
*this made a lot more than I expected! So you may want to make only half!
•4 cups all purpose flour
•1 cup salt
•1 3/4 cup warm water (add more of its too dry)
Combine the ingredients and knead for about 6 minutes. If it’s not forming into a nice soft ball add more water (or if it’s too sticky add more flour).
Then it’s time to roll out the dough! Just like you would for sugar cookies! Beware, your child may think you are making cookies! My 19 month old just kept pointing yelling cook-ies!
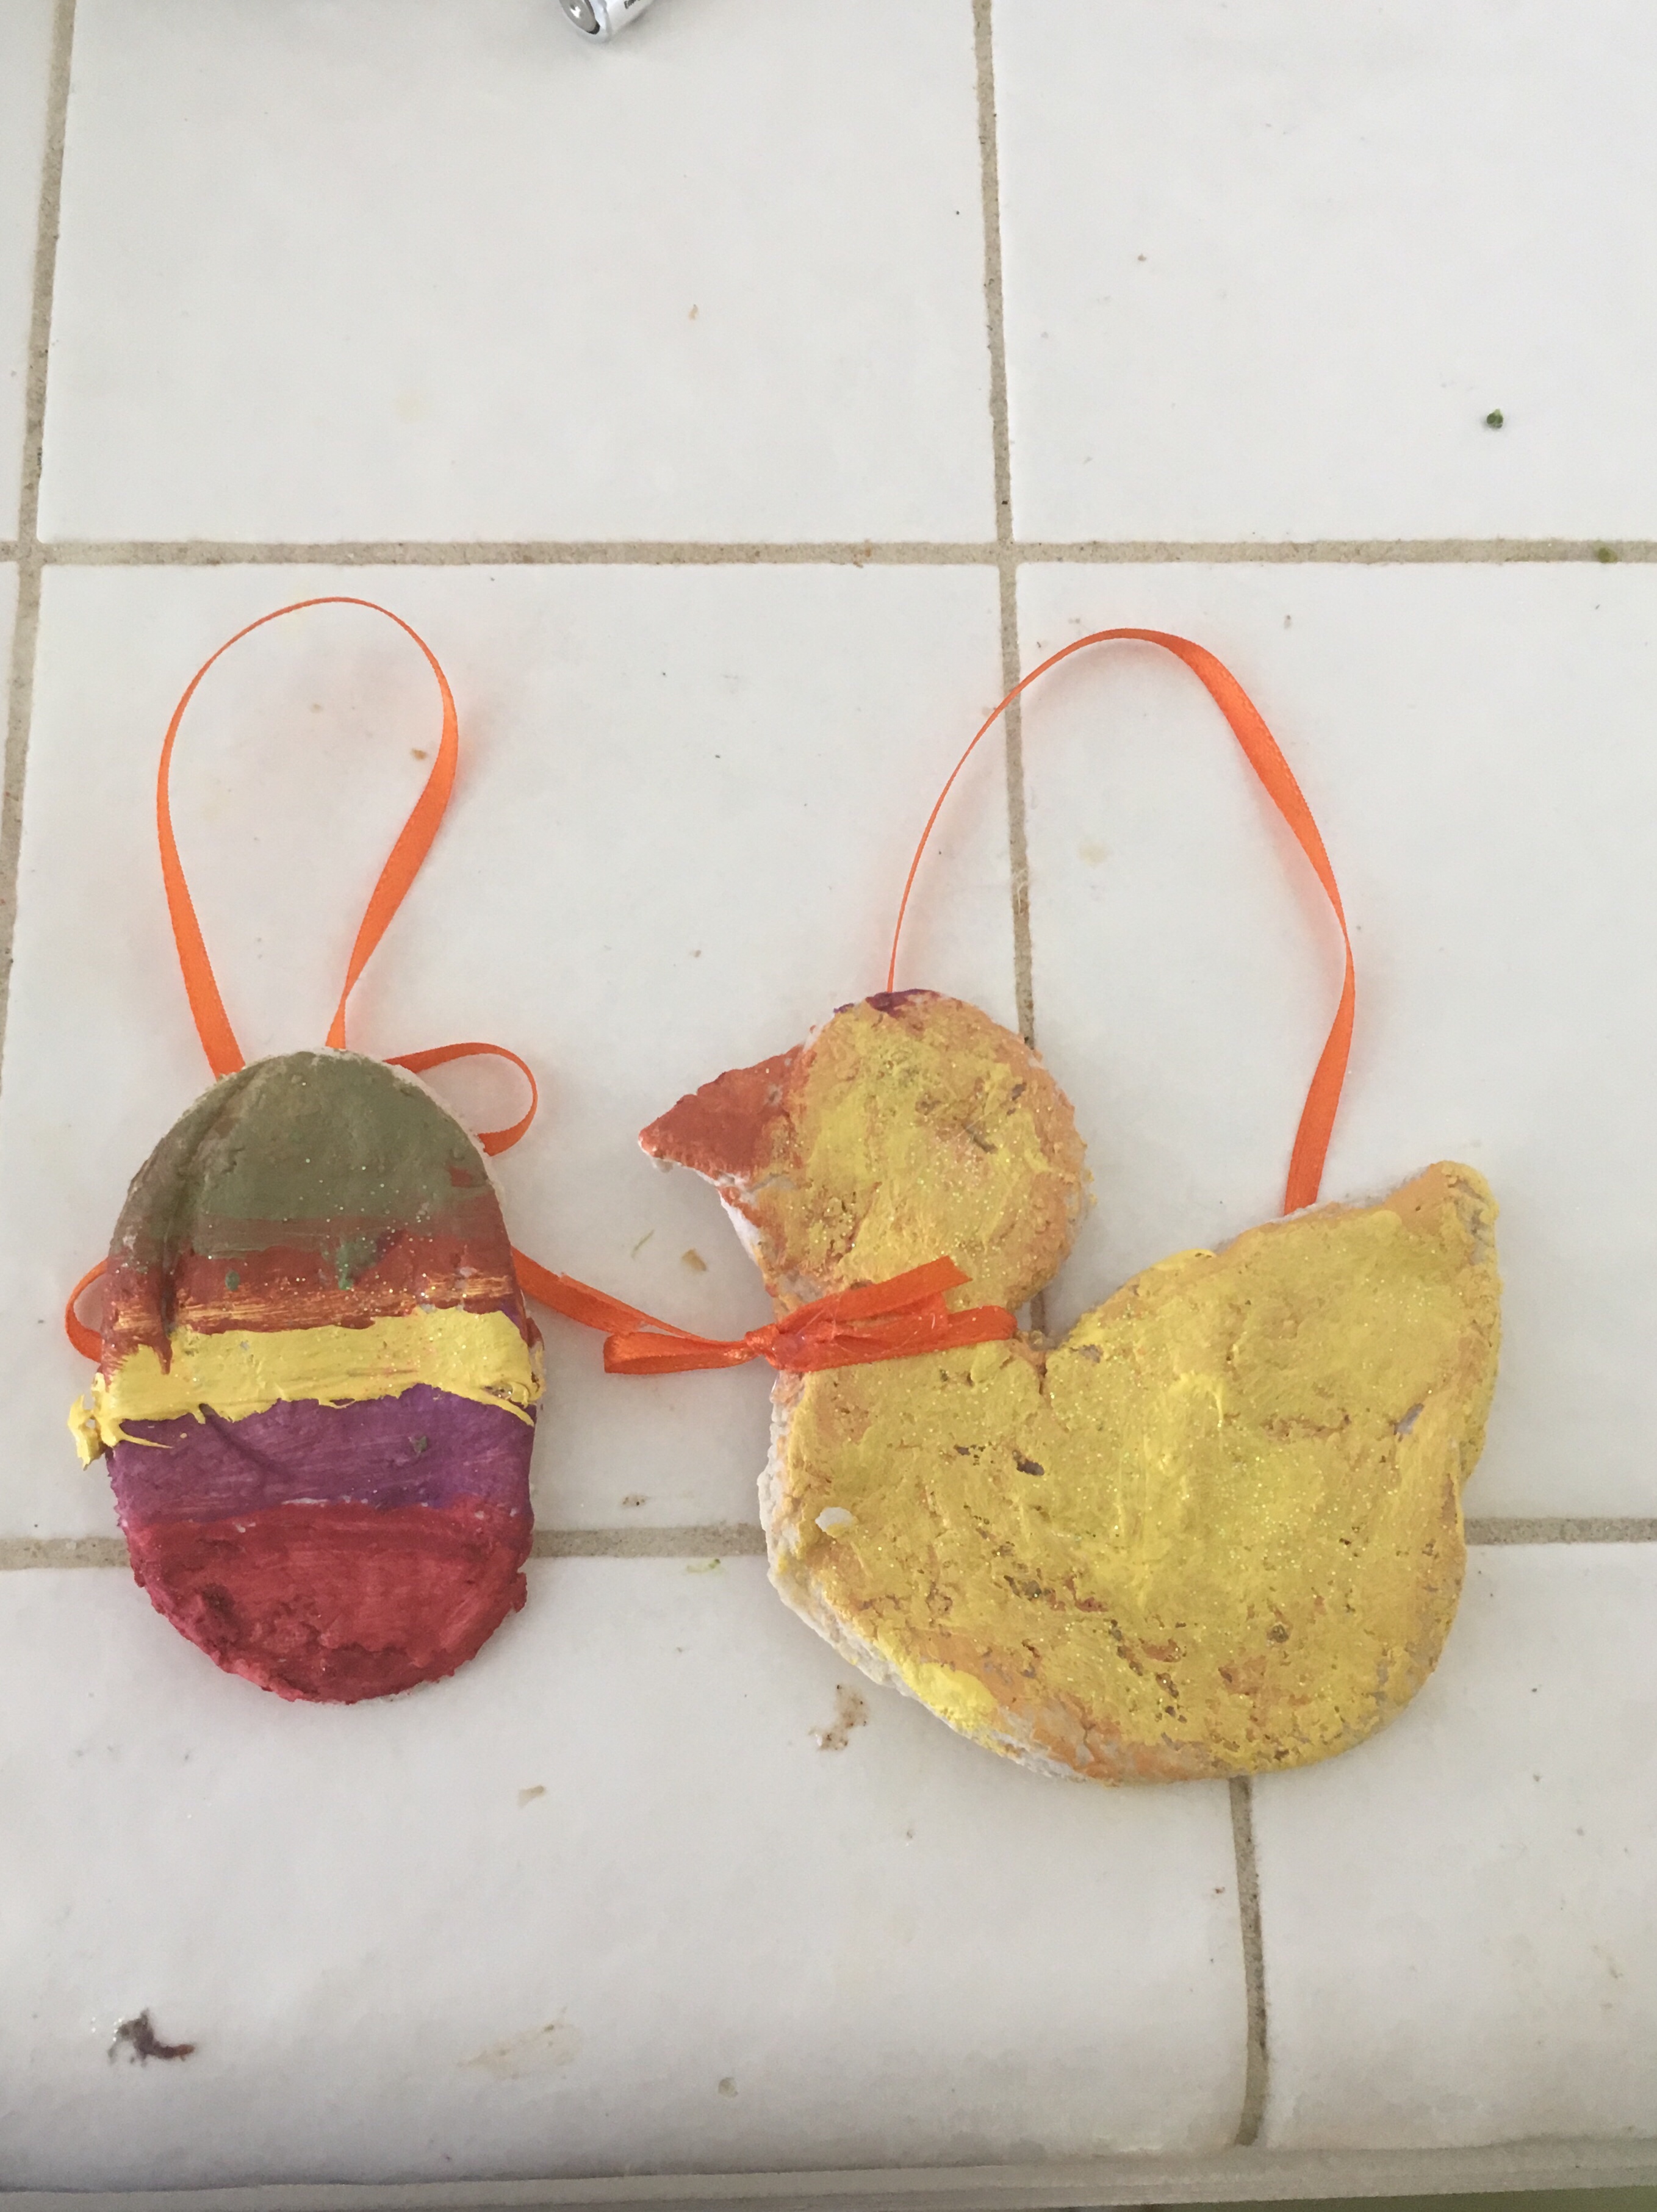
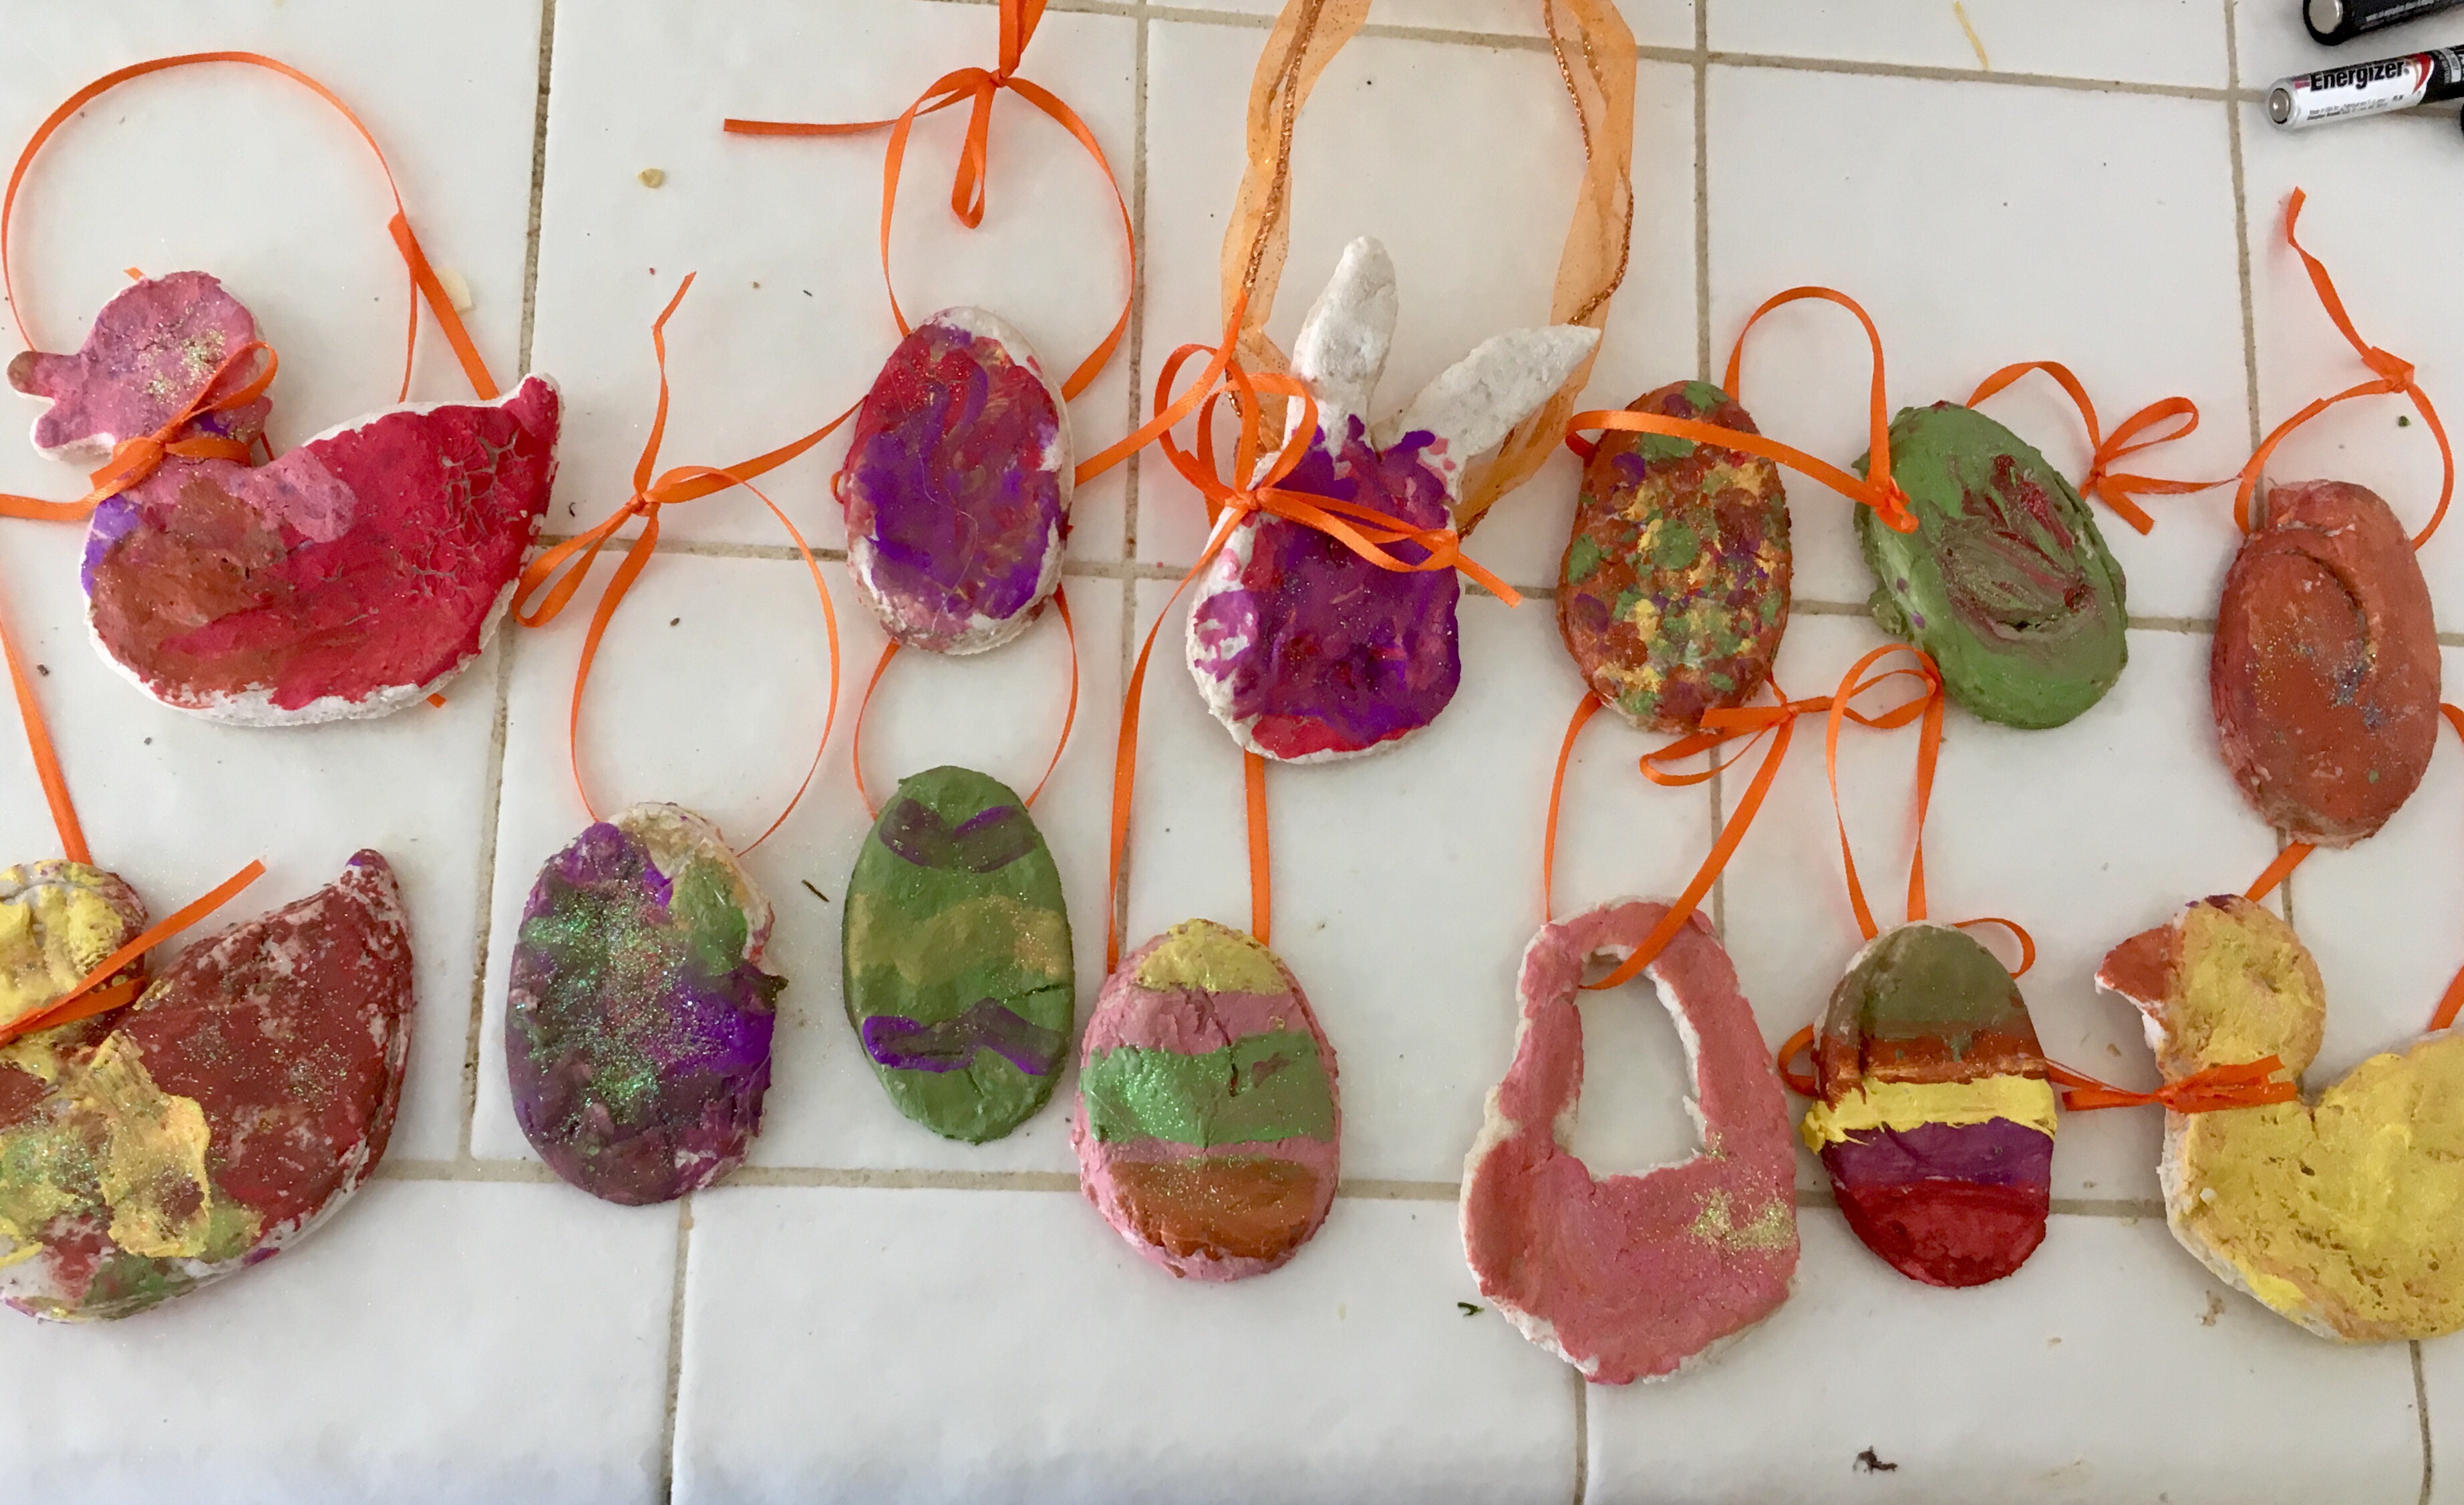
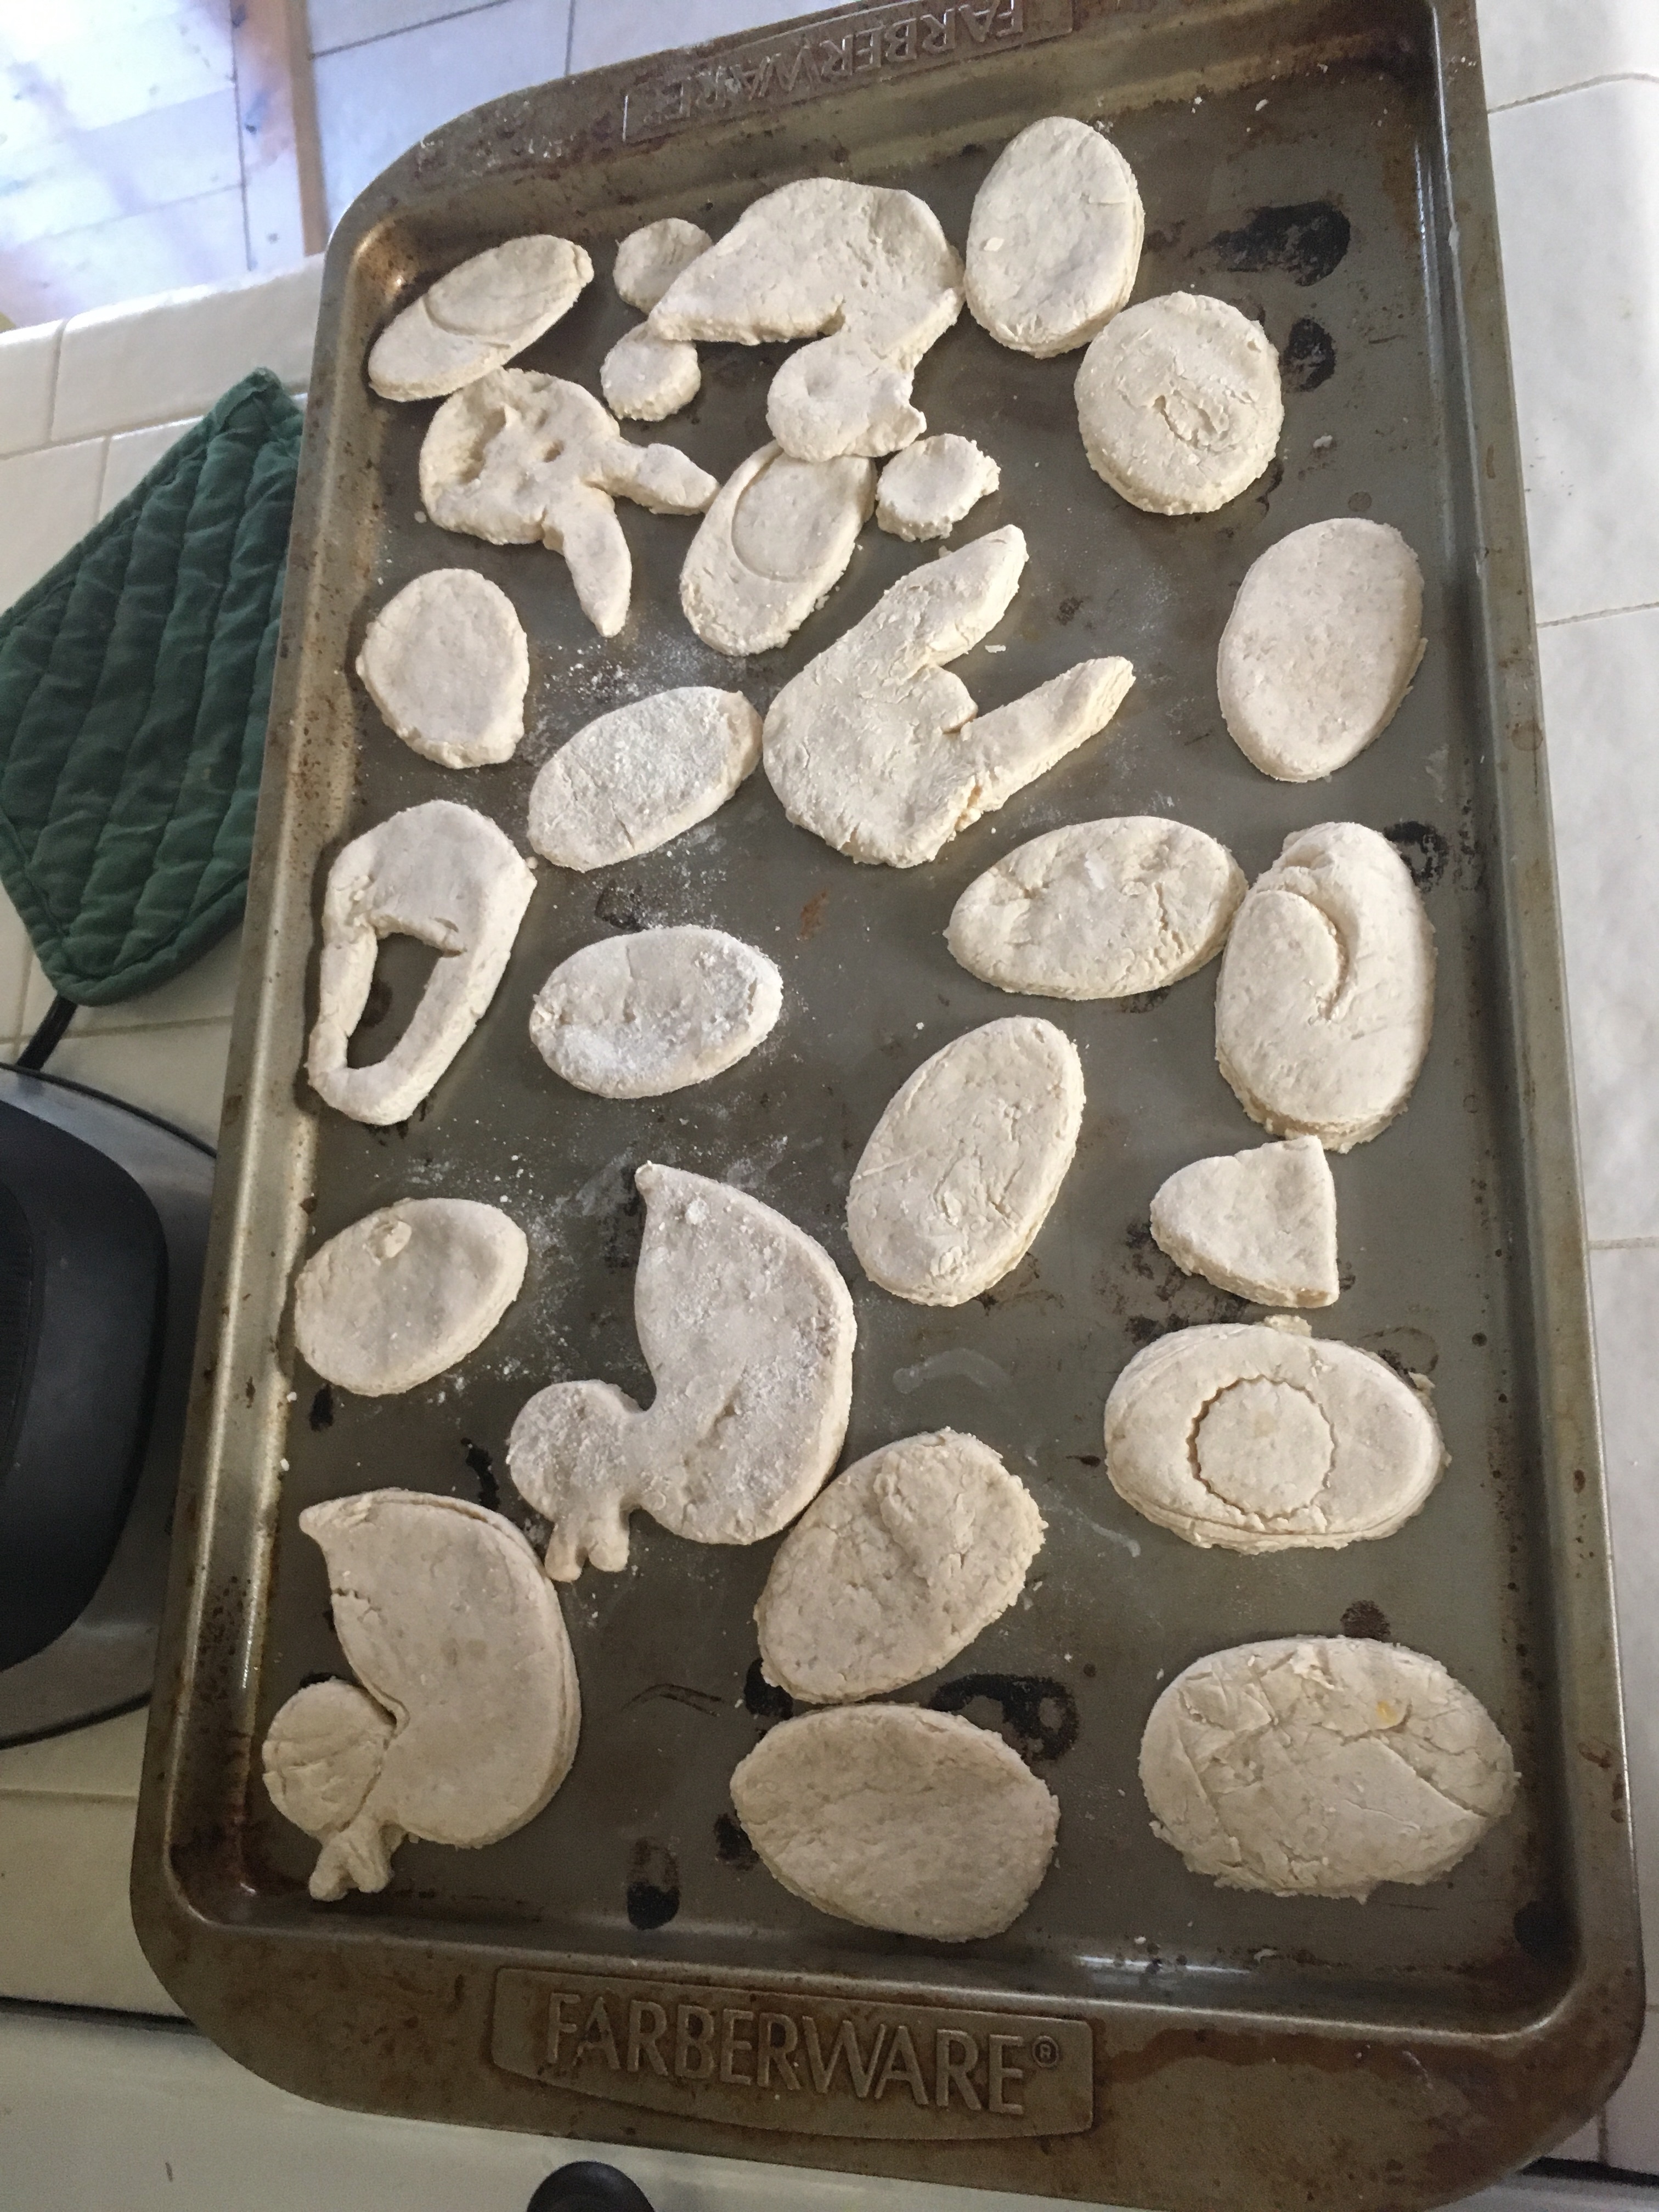
This is a great activity for your toddler to help you with. Next, get out your cookie cutters or Easter shapes and start making those eggs! I used a half of an Easter egg that opened sideways, a duck mold, and then made a couple baskets and bunny heads using a knife. **one thing I forgot to do was to use a straw to make a hole on the top of the eggs for the string to go through. So I ended up hot glue gunning ribbon.
Put your oven on 200 degrees. Place your salt doughs on a cookie sheet and place them in the oven for 2 hours (depending on the thickness you may need a little less or a little more). Once they are done they should be rock hard.
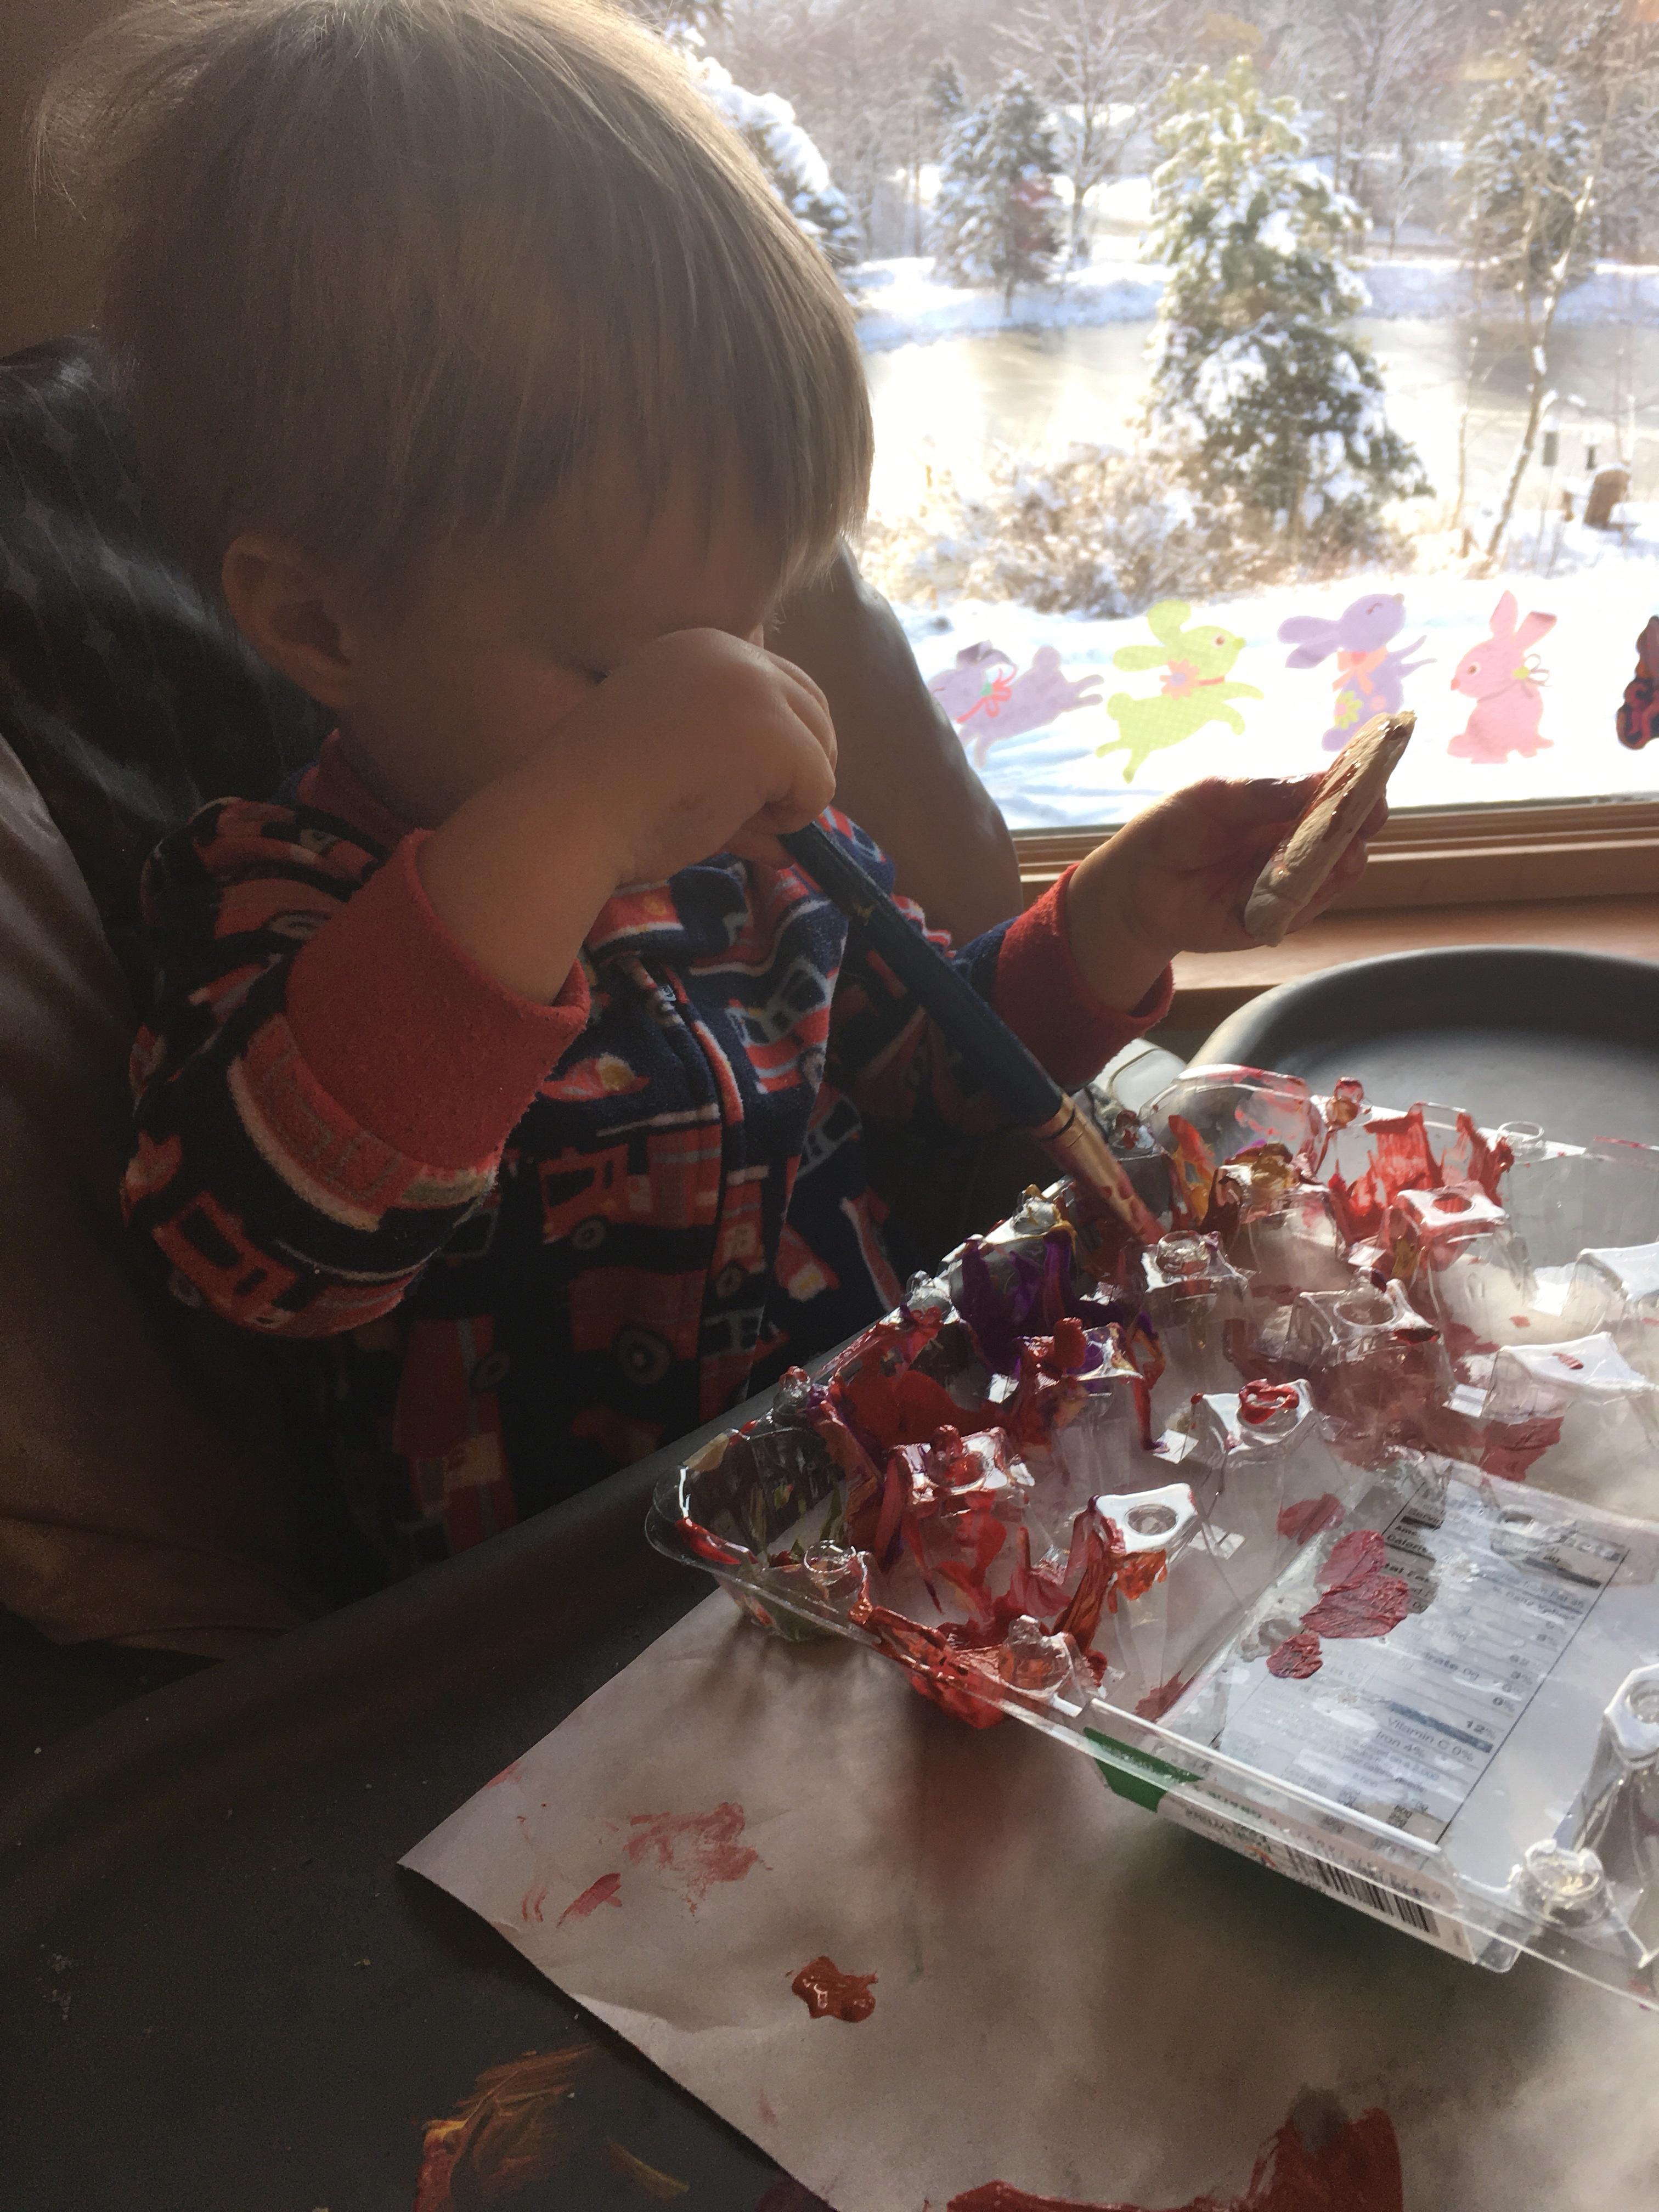
Then the fun, painting time! We used a combination of acrylic paint (which is best but hardest to come off and not non toxic) and water proof fingerprint. My son attempted to paint and did decent for his age, but when he kept trying to eat the painted cookies we had to end the painting time.
my daughter likes to squirt the paint in an old egg carton that way the colors stay separated.
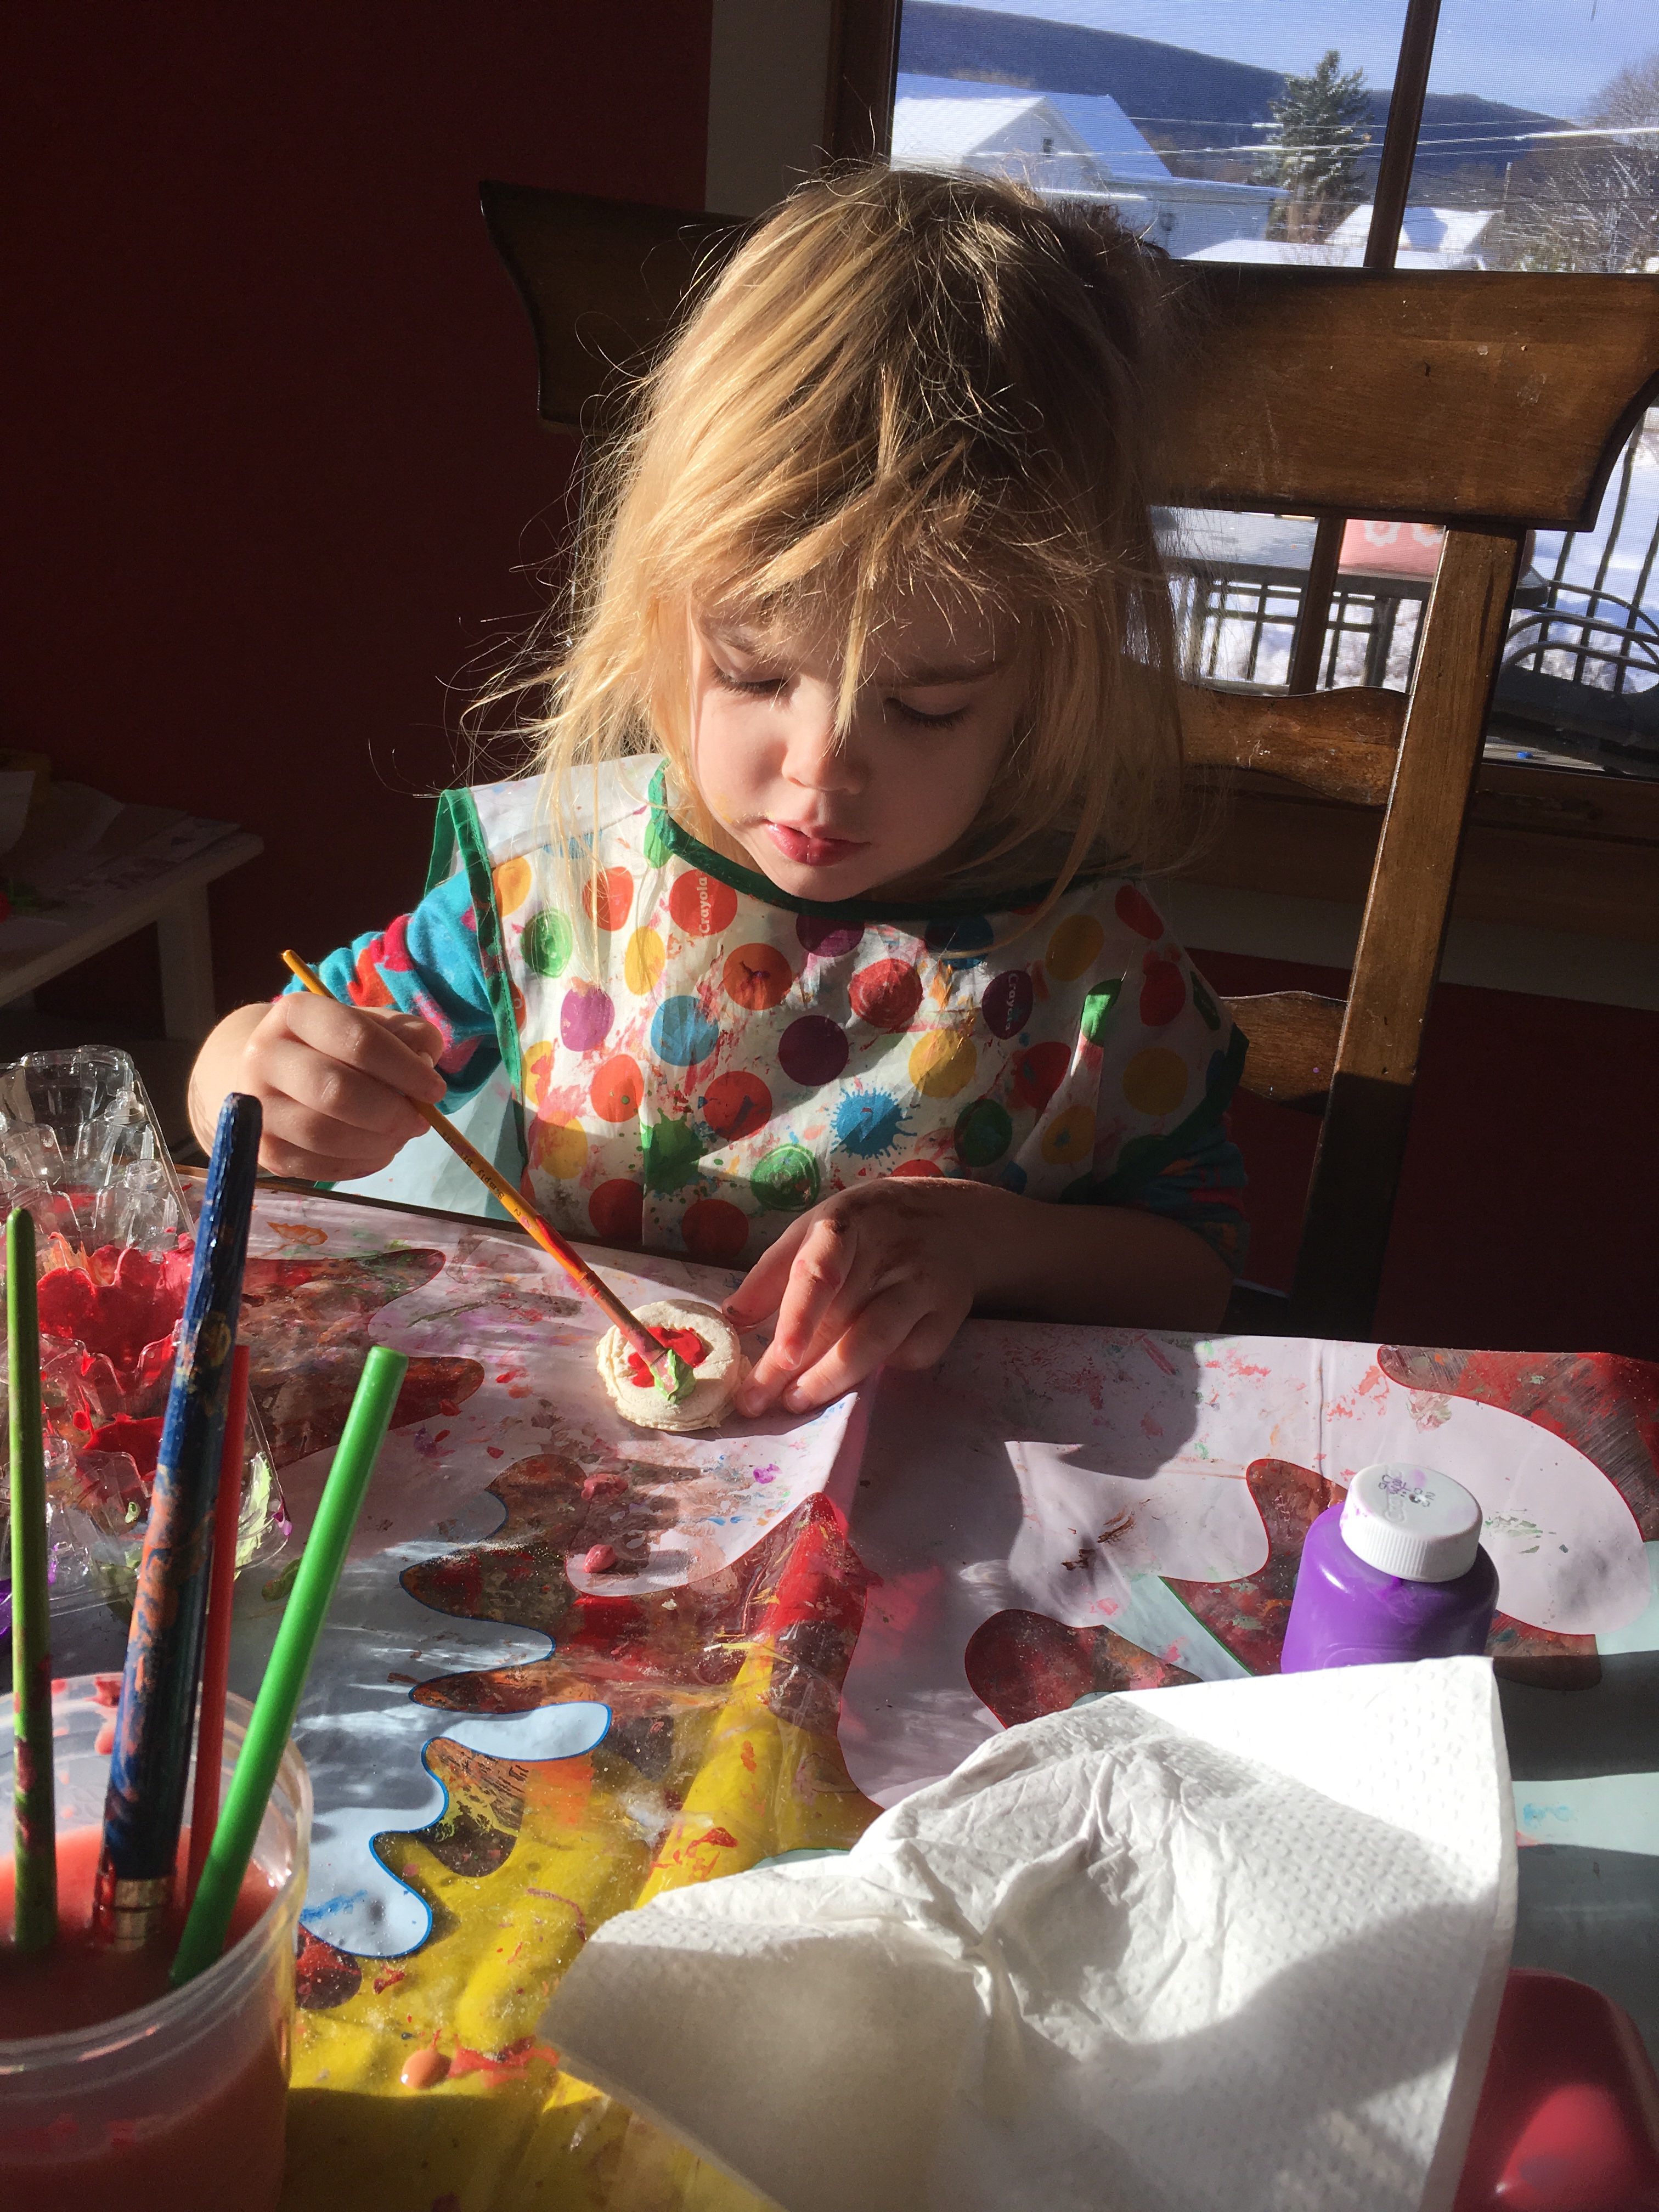
Once we finished painting she sprinkled on some glitter. Unfortunately we don’t have any mod podge or clear finish to put on top right now, but we still love them!
If you have any clear finish or modge podge this is the time to coat it in that for a nice shiny finish!
Since we forgot to make the holes for the ribbon, I used the hot glue gun to attach the ribbons. Then we hung them around the house (high enough that my son couldn’t reach these “cookies.”
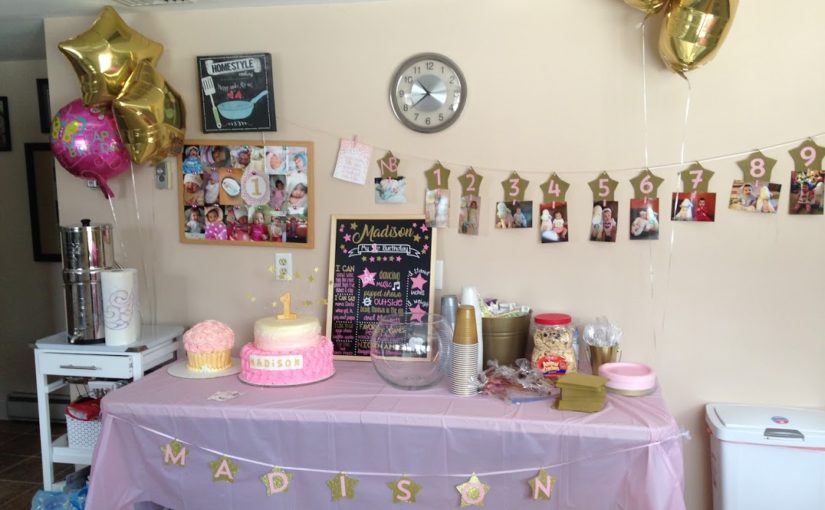
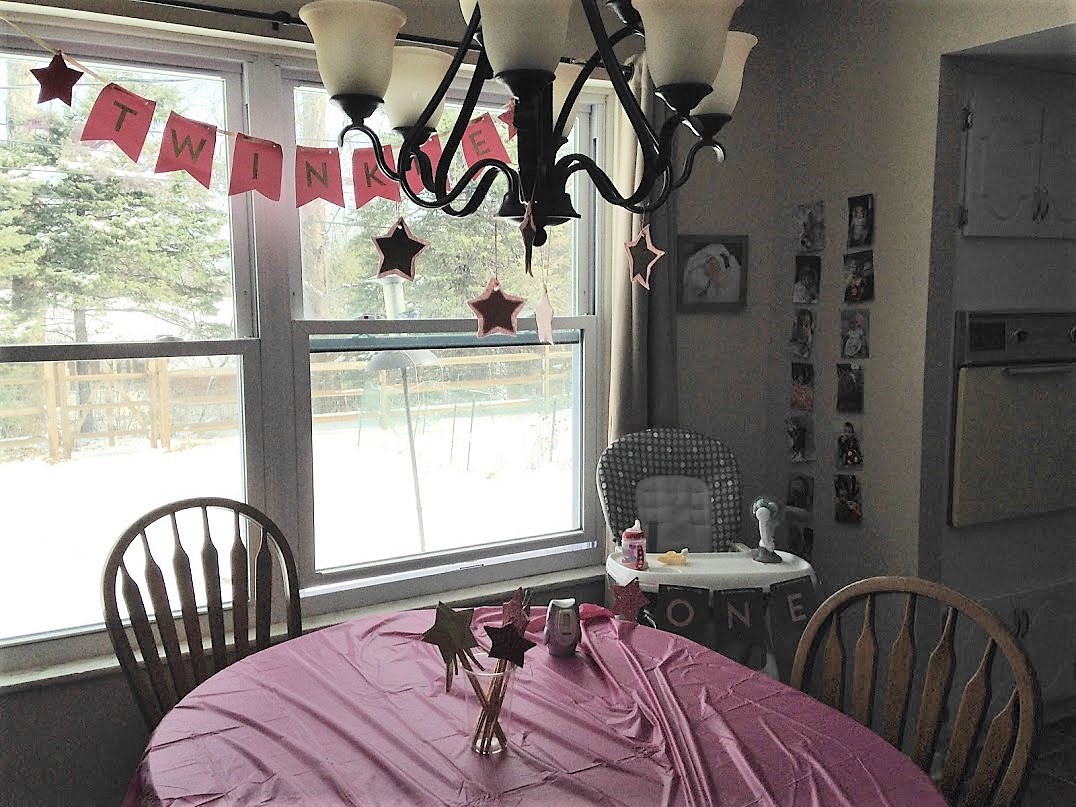
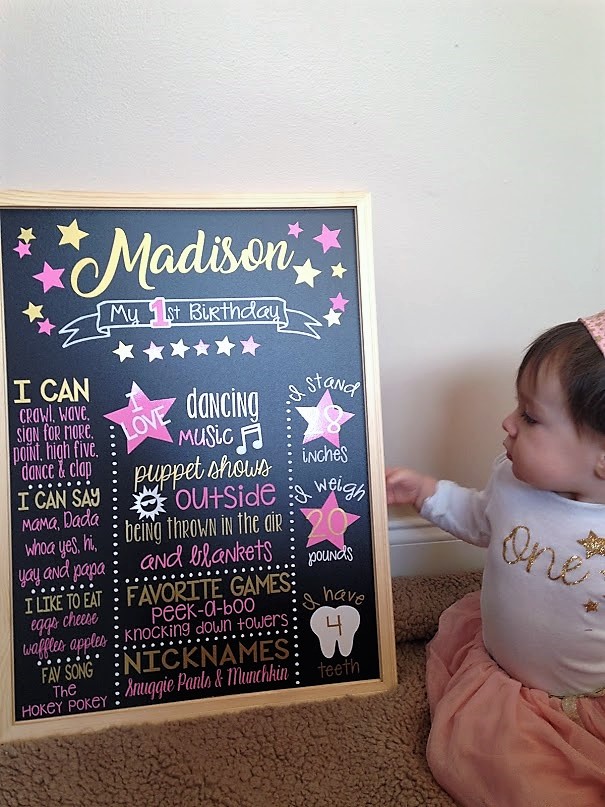
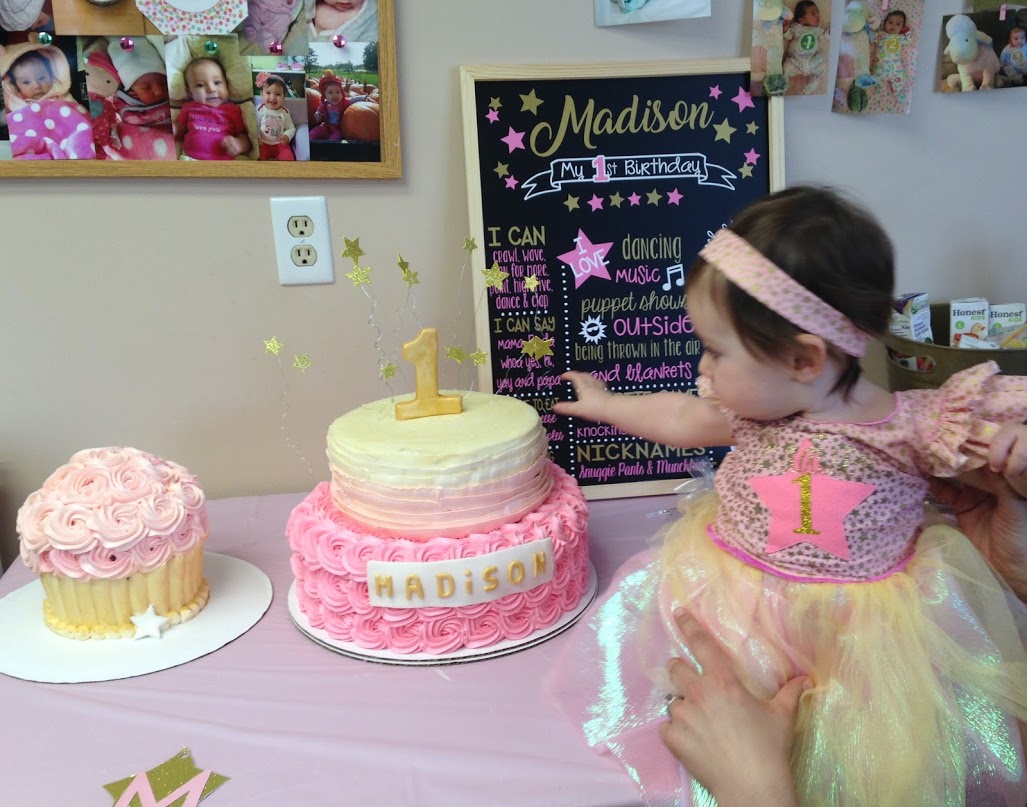
Hello! Guest writer here! I am the blog founder’s twin sister, Jessie, and I’m here to share my decorations and ideas from my little girl Madison’s first birthday party. You can use these decoration ideas for anything from baby showers, birthday parties, to graduation parties depending on what your theme is. If your theme involves stars, pink, or gold then you are in luck!
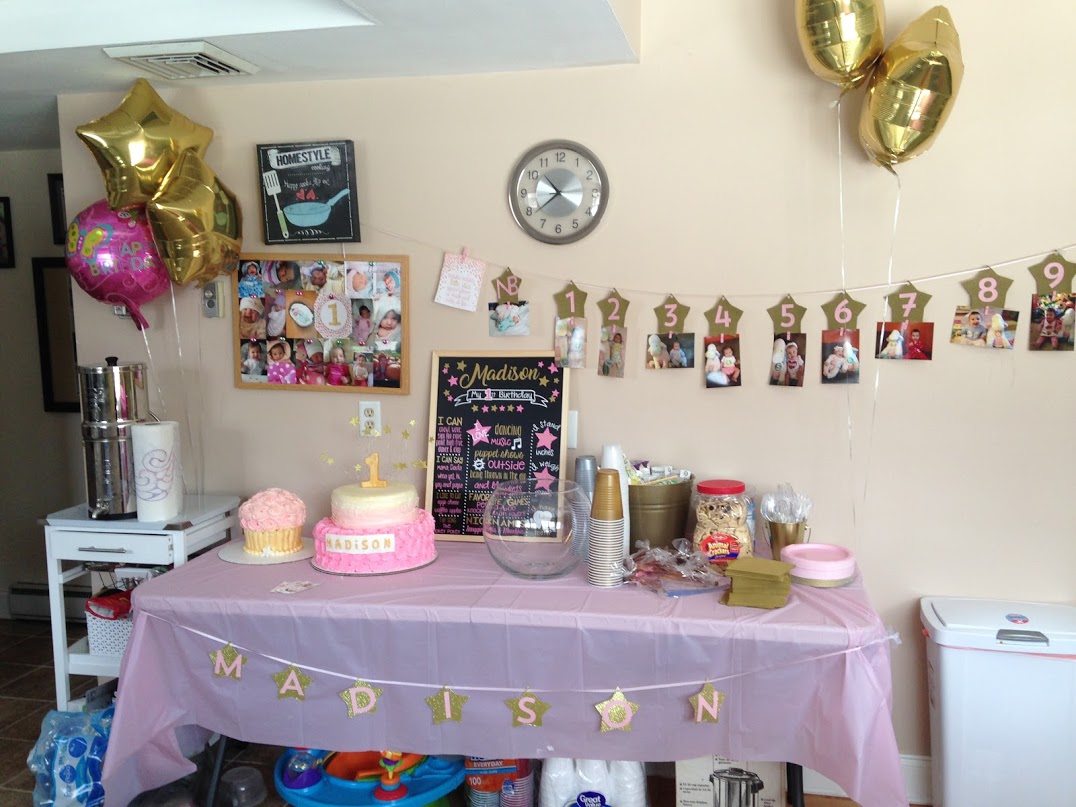
The dessert table before the desserts!
Let’s first start with the pink and gold theme. All of the tablecloths, plates, napkins, and containers are from Walmart. I wanted a good deal, but also wanted it to look good and found the best deals there. Michaels was another store I frequented for ideas and supplies. All of the numbers, letters, and banner supplies were purchased there.
Okay, before we dive too deep into how each decoration was made, let’s check out some pictures!
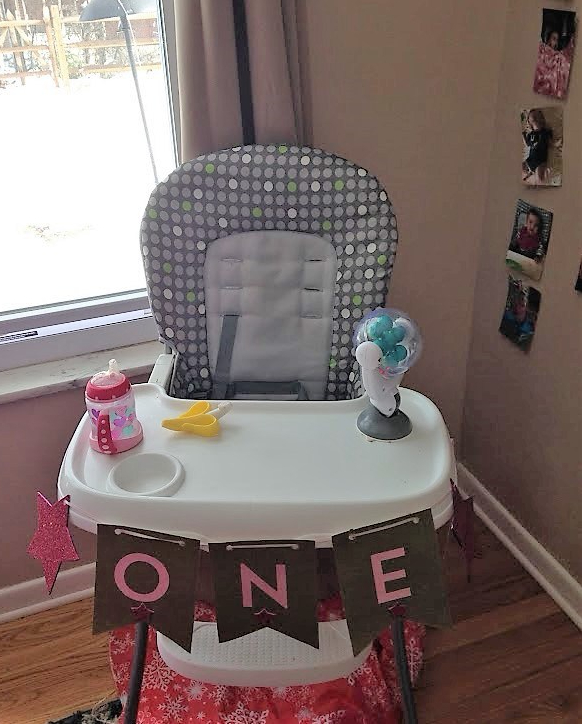
The birthday girl’s chair!
All of the banner pennants in this article were purchased from Michaels. The letters on all of the banners are stick on letters from Michaels too. However, they don’t stay on the thick fabric of the pennants so need to be glued on. I used a hole puncher to make 2 holes at the top of each pennant and put string through them. I purchased some glitter foam sheets from Walmart to make the stars and used a cookie cutter to trace them.
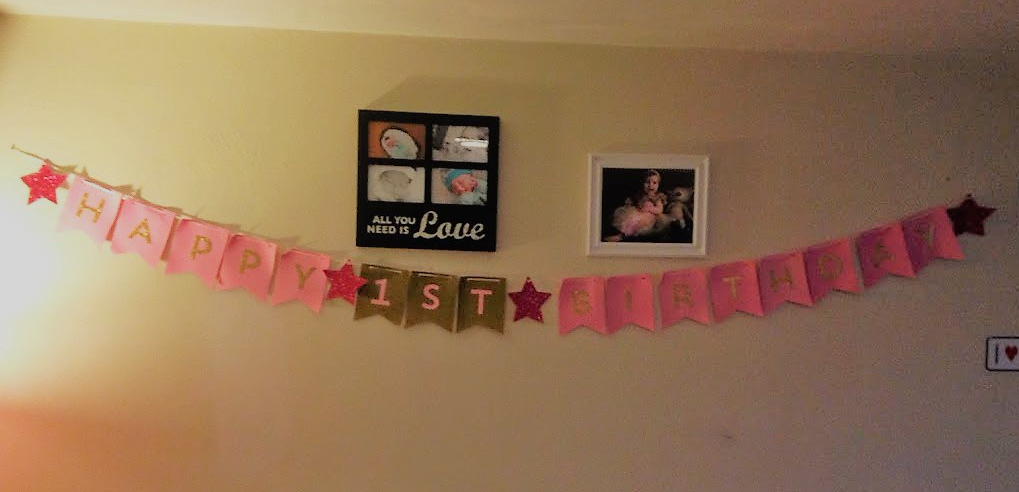
The happy birthday banner hanging above the food table.
Again, I used the materials I purchased to make this banner and it was fairly easy because everything was cut out besides the stars. This banner was definitely worth the time to put it together, it was super cute and personalized to her party. I moved the pictures that were originally above the banner and replaced them with picture frames of Madison.
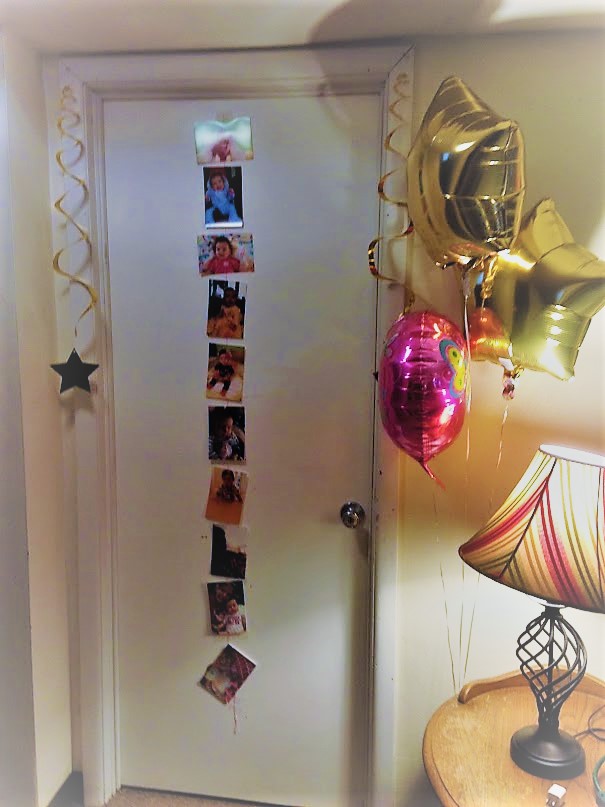
Balloons were purchased at the dollar store. I used the cork board from the kitchen to put pictures of her from the first year-a simple and affordable decoration. The 12 month banner was also made from the pennants. I simply traced the star cookie cutter and cut out stars instead of using the pennant shape. If you don’t have a cookie cutter you could print out a star from a computer and trace it! I found little pink clothespins at Michaels and hot glued them to the stars so the pictures could be added below the banner. This could also be a cute idea for other types of parties. You could write someone’s name and have pictures of them beneath it or for graduation with pictures from each school year. The options are endless!
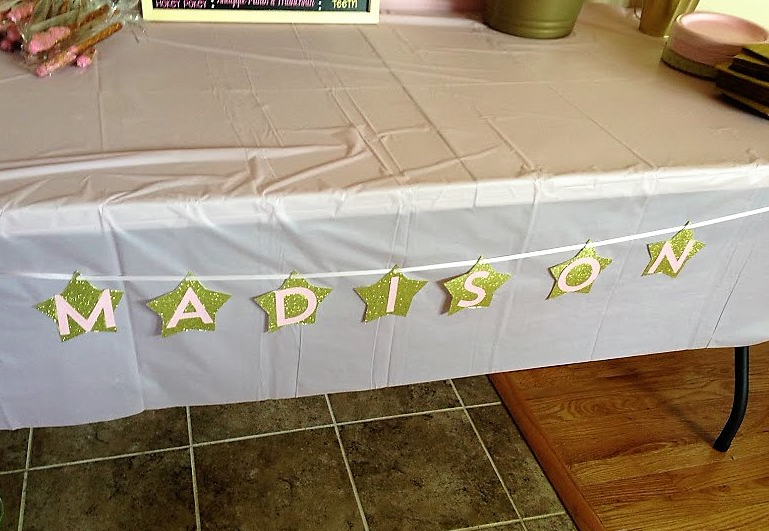
Again, I cut out stars and added the stick on letters with glue. These stars were cut from glitter foam paper.Stars, stars, everywhere!
I made the twinkle banner, the stars hanging from the chandelier and the star wands on the table that I used as party favors and a centerpiece. For the stars hanging from the light, I cut out stars from the foam paper and attached it to felt pink cloth I had. I cut the outline of the pink cloth around the gold star so it looks like an outline for the stars.
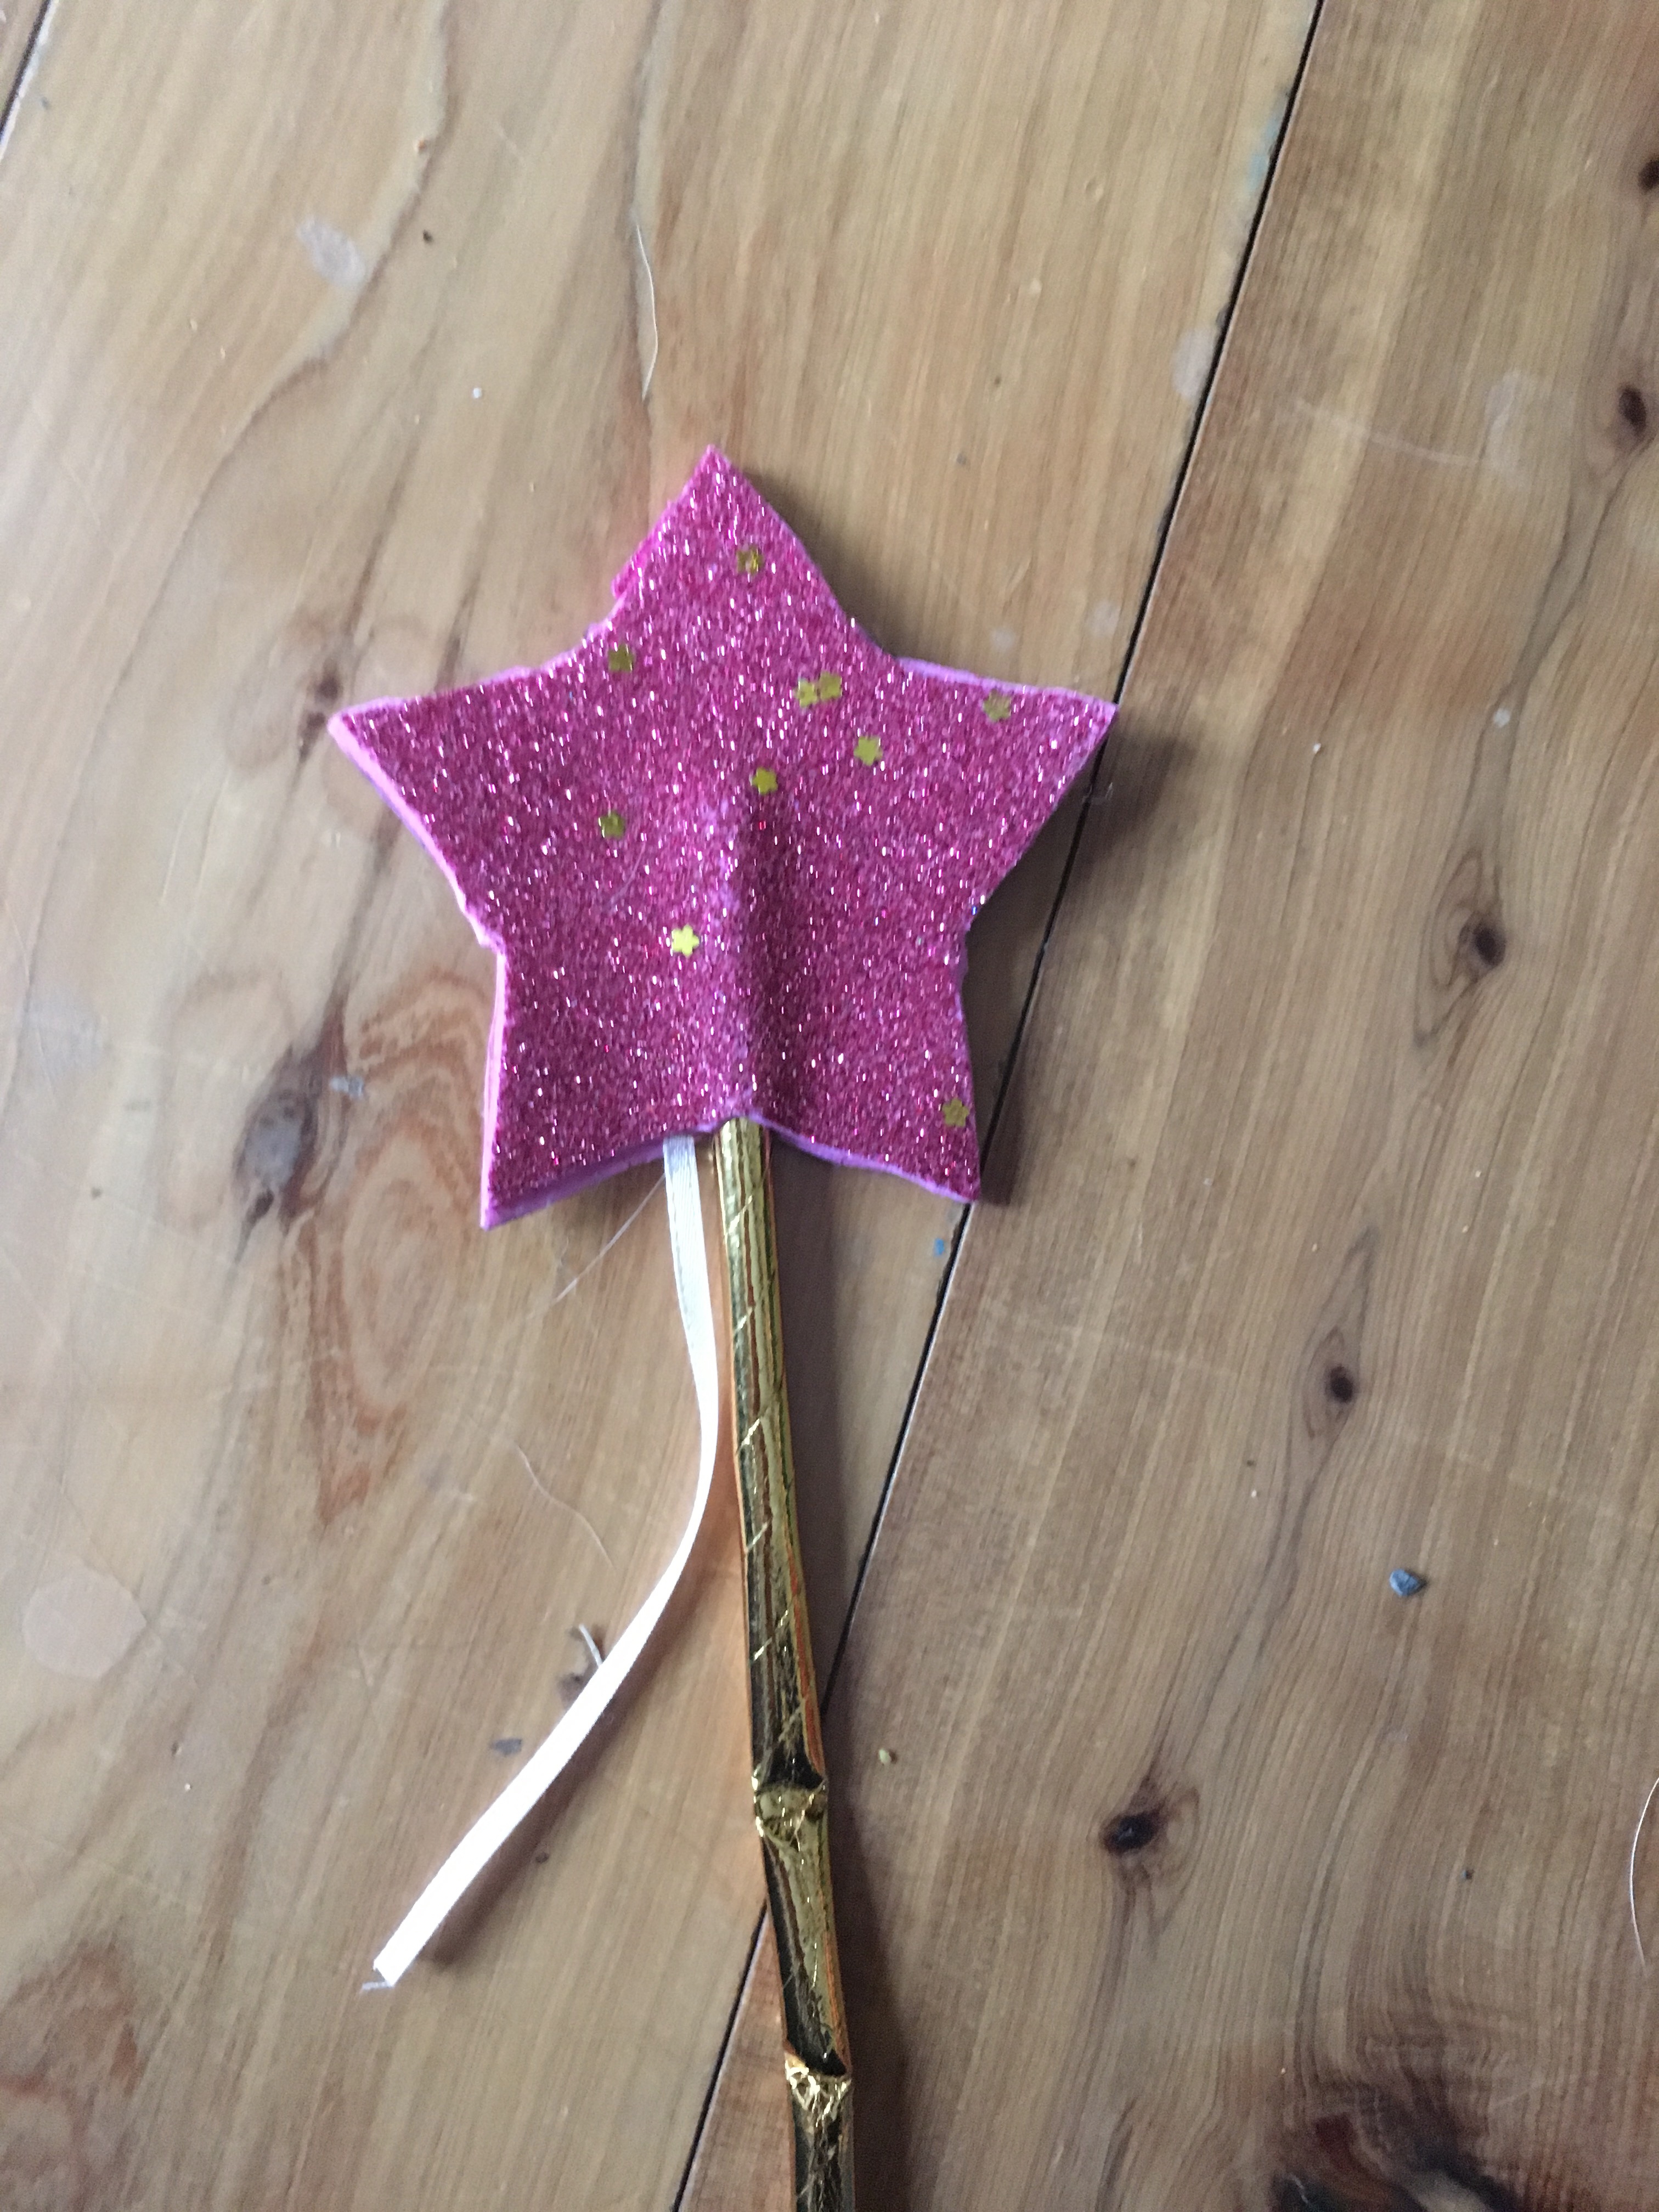
As for the wands, I purchased gold straws from Michaels and they were very sturdy made from cardboard and didn’t bend. I decided to use the foam paper to cut out two stars and stick them together around the top of the straw. I also included 2 cut pieces of ribbon on the wand. I put one on each side of the star and pushed the stars together (they have sticky backs, but you could easily glue them). They were a hit!
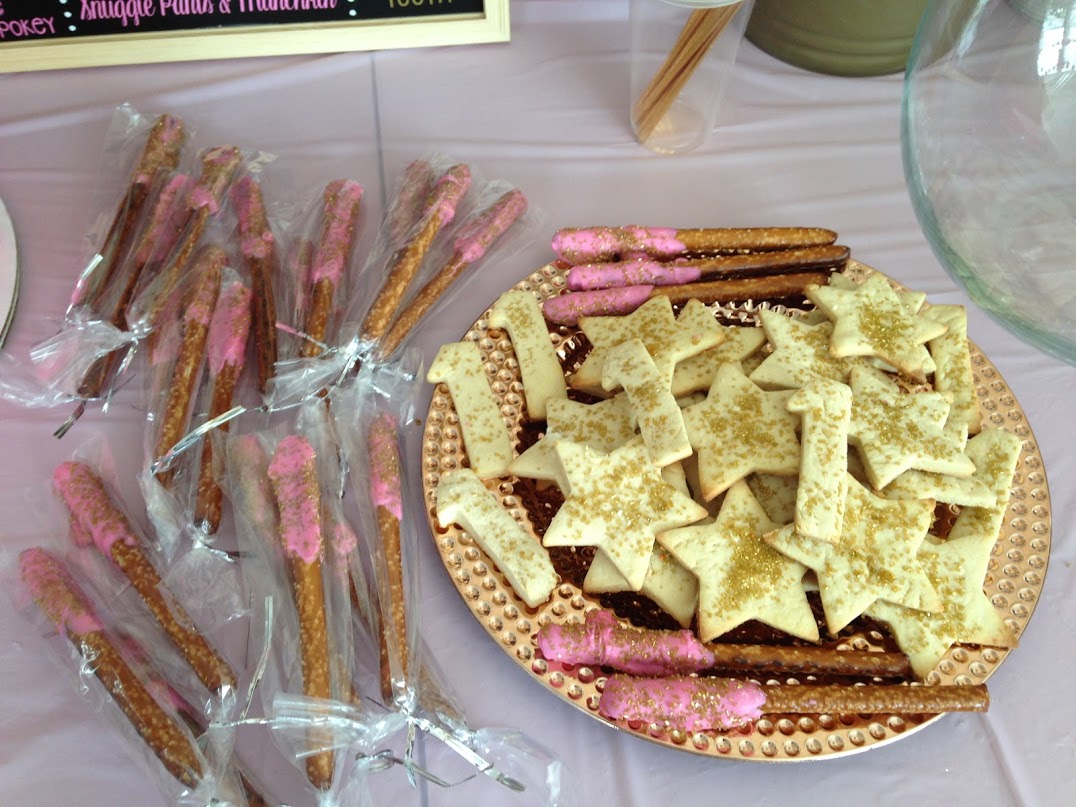
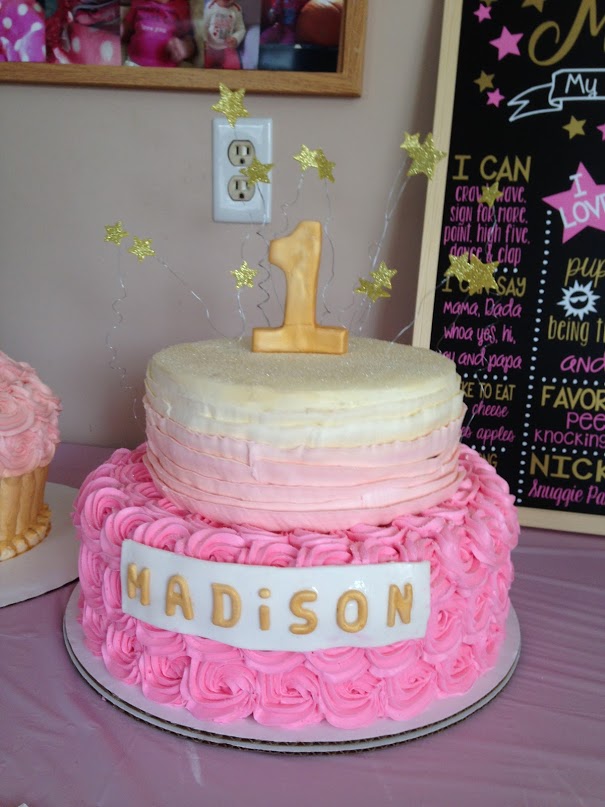
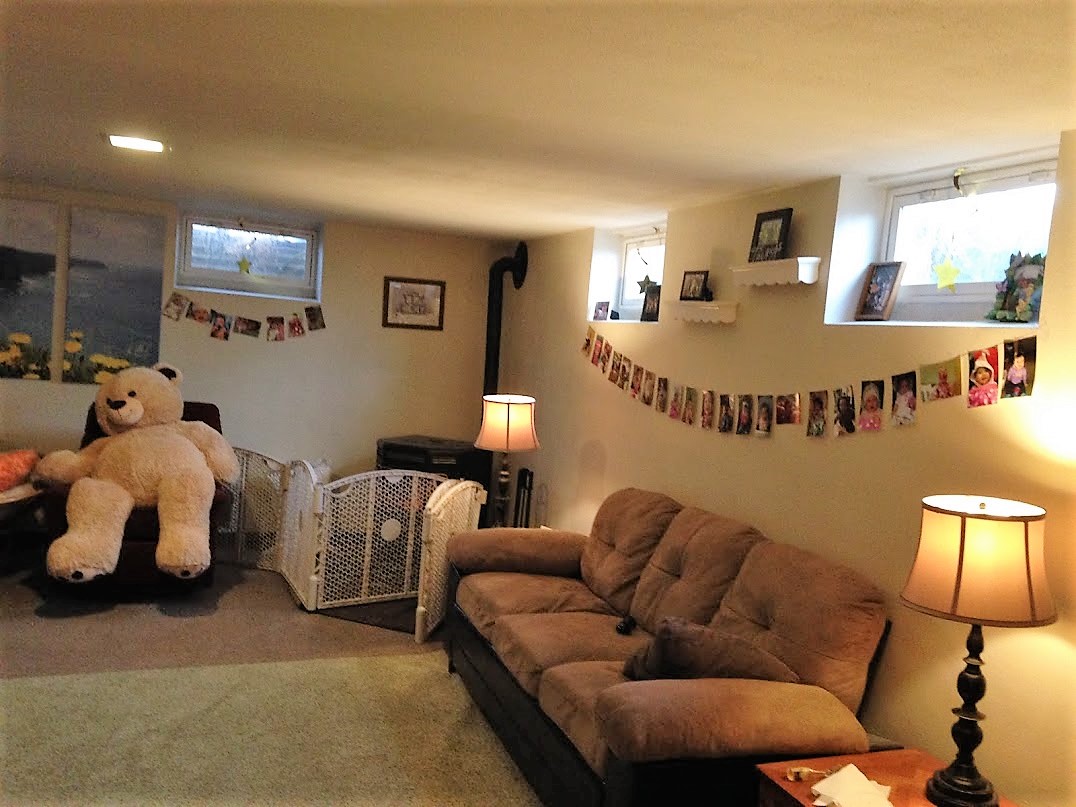
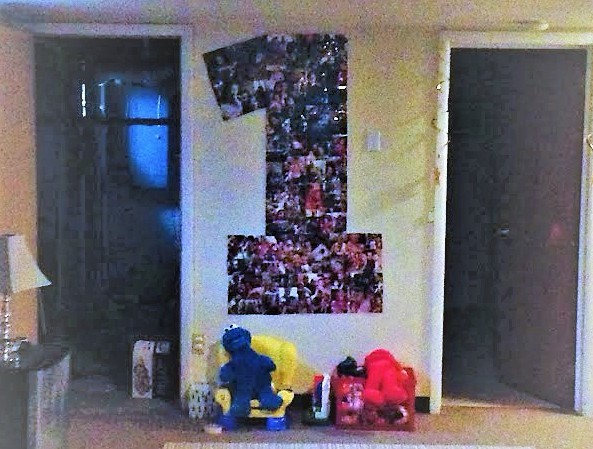
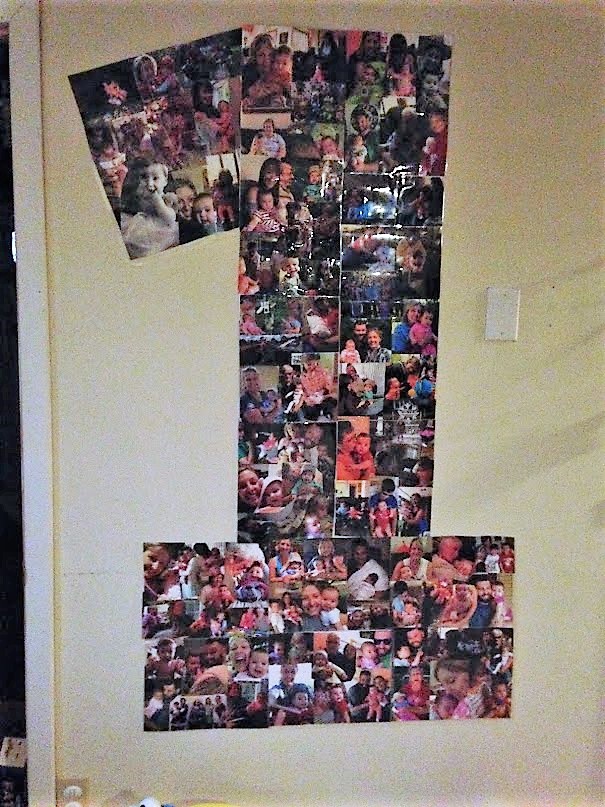
Yum! I made chocolate covered pretzels with pink chocolate melts and gold sprinkles. I also made the sugar cookies with star and number one cookie cutters!No, I didn’t make this beautiful cake. However, I thought the stars sticking out of the top were so cute and easy to make! They simply used some wire and cut out stars they hot glued to the wire! Pictures, pictures, everywhere! Super cheap decoration-pictures on string! I used pink string and taped the pictures. For a twinkle twinkle theme you could also use string lights around the house for decorations!A giant number one made with pictures!
There are great tutorials online about making the number one with pictures for your baby’s first birthday. Most people recommend using cardboard from a large appliance box. I didn’t have any available, so used regular printer paper. I simply cut pictures and fit them on the paper with glue, then laminated the paper. I am a teacher so I happen to have a small scotch laminator at home that worked perfectly. I lined up all the papers to make the number one and adhered it to the wall with tape!
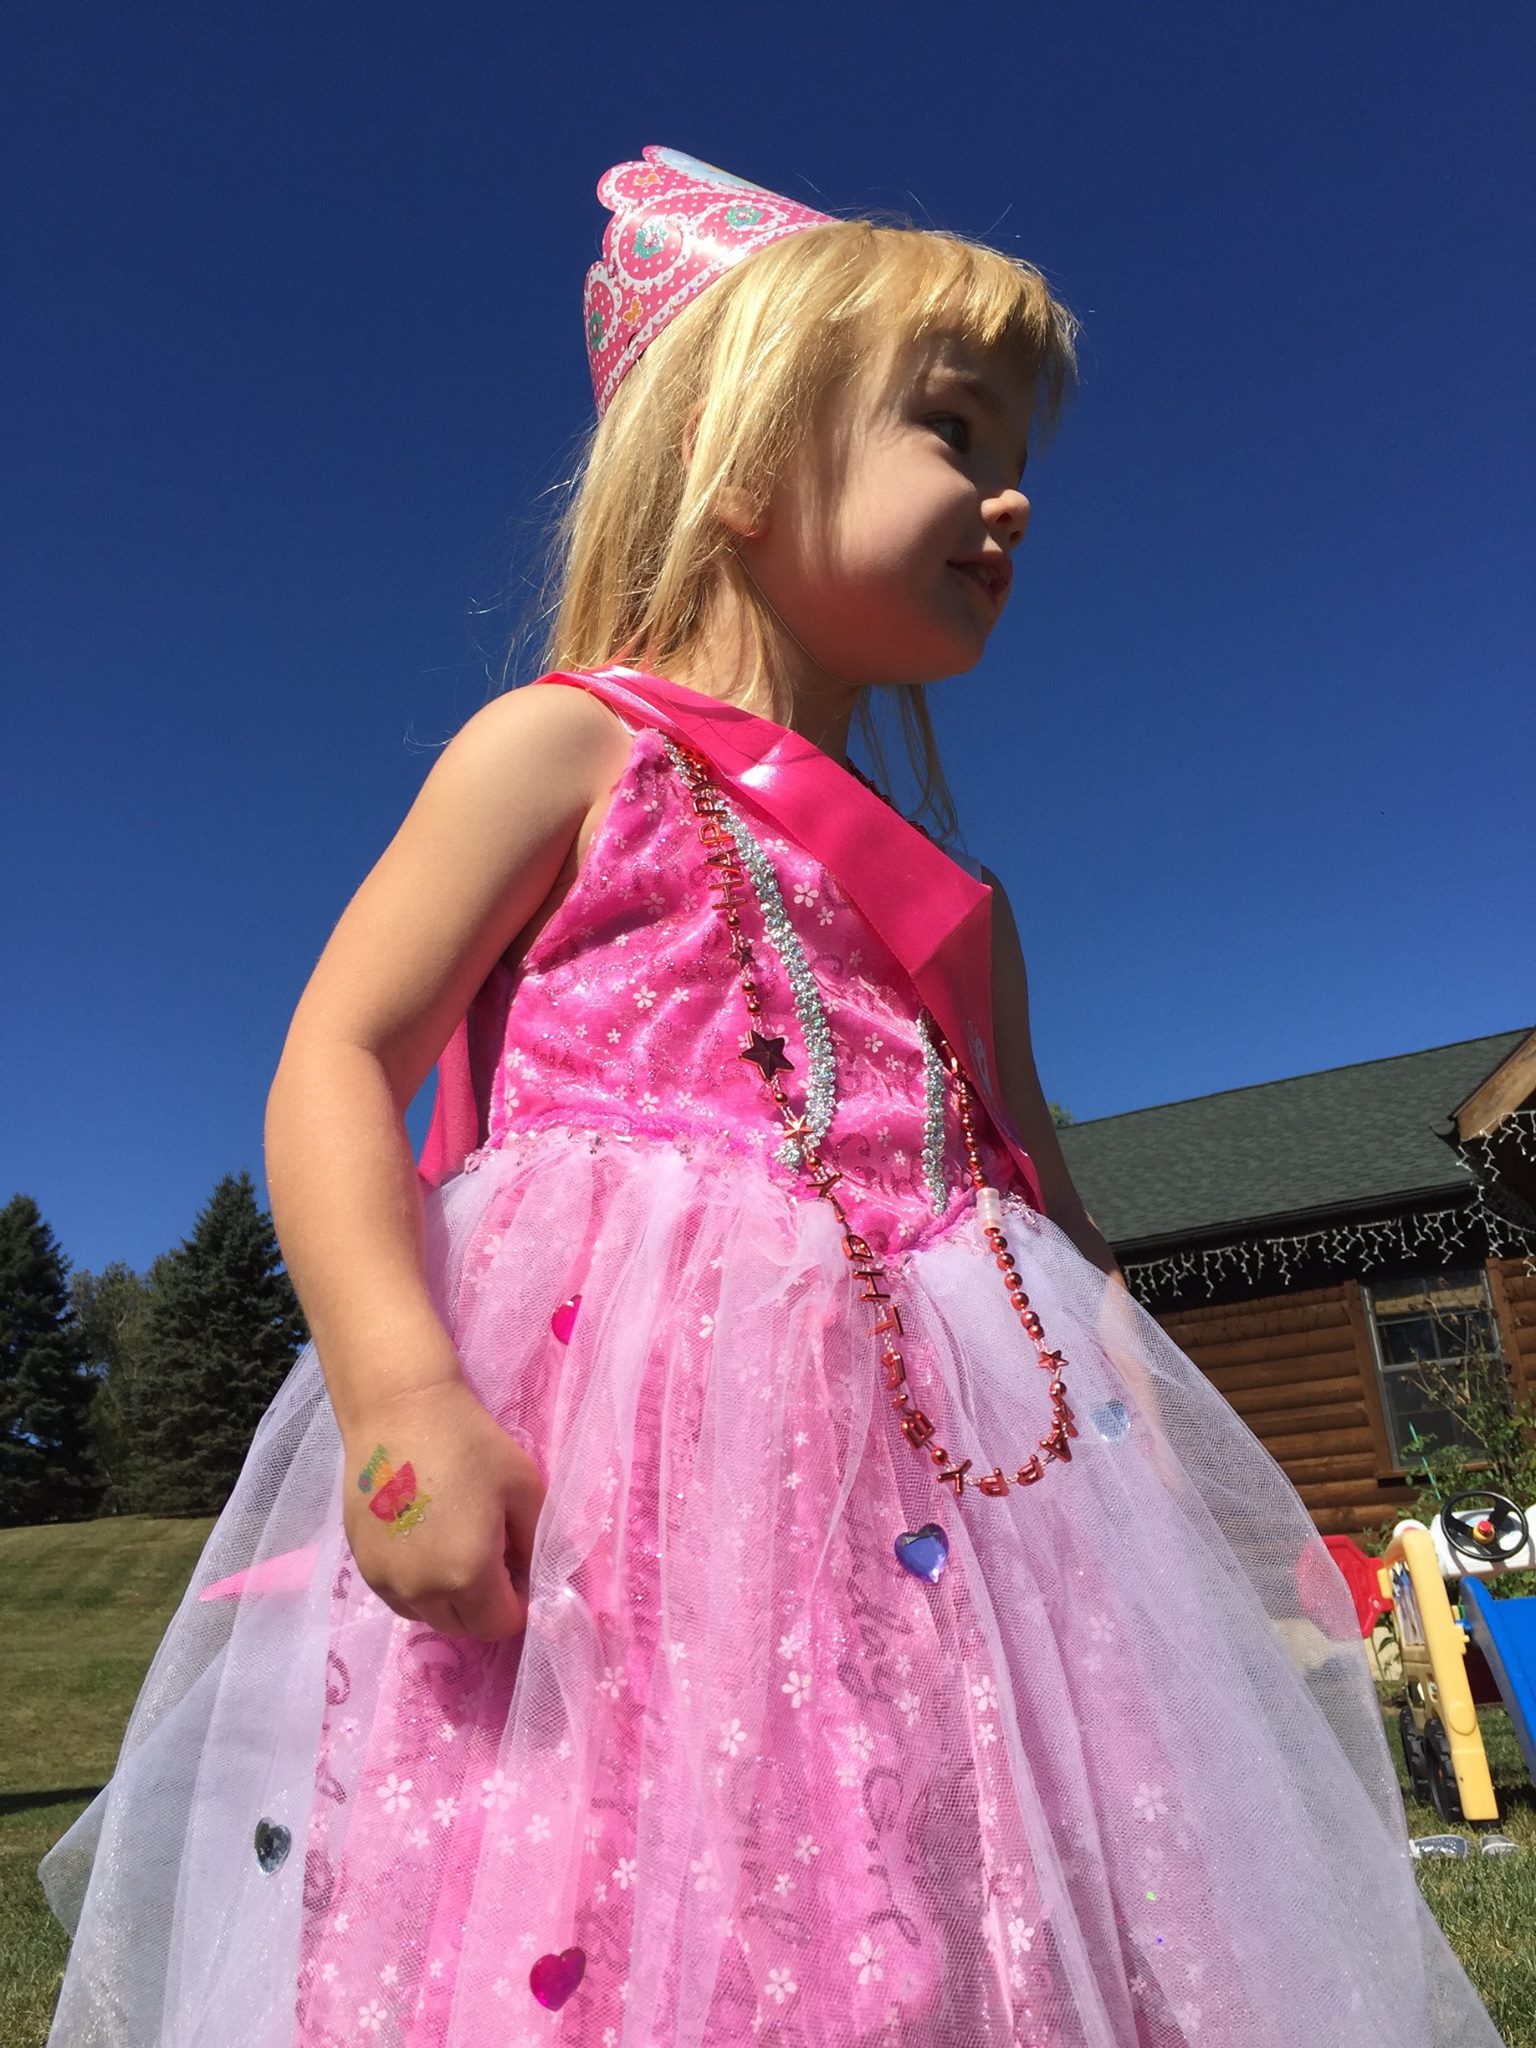
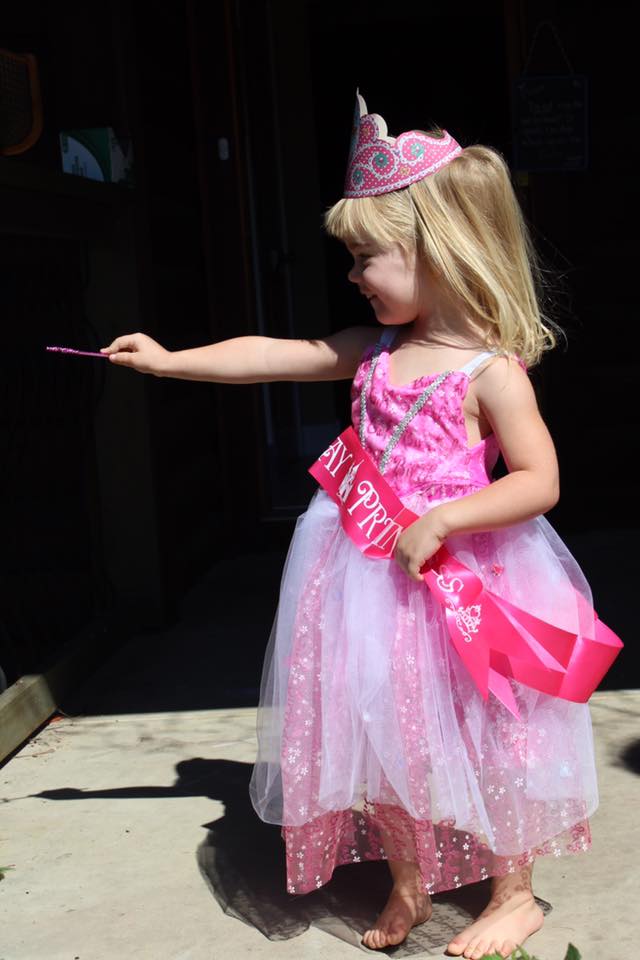
You might be wondering about her outfit and this wonderful sign. I’m sorry to tell you that I didn’t make them. A local woman made them both for me. My sister (aka the blog writer) made her beautiful dress and headband. Hopefully there will be a post on that coming up soon! Yes, Madison wanted the cake.
If you are a very busy person with many kids, making all of these decorations might be too time consuming. However, even making a small amount of them is very rewarding. It not only adds a personal touch, but can be used as a keepsake or for future parties!
Thank you for visiting this blog and YOU can make these decorations too with a little time and effort!
Follow Share
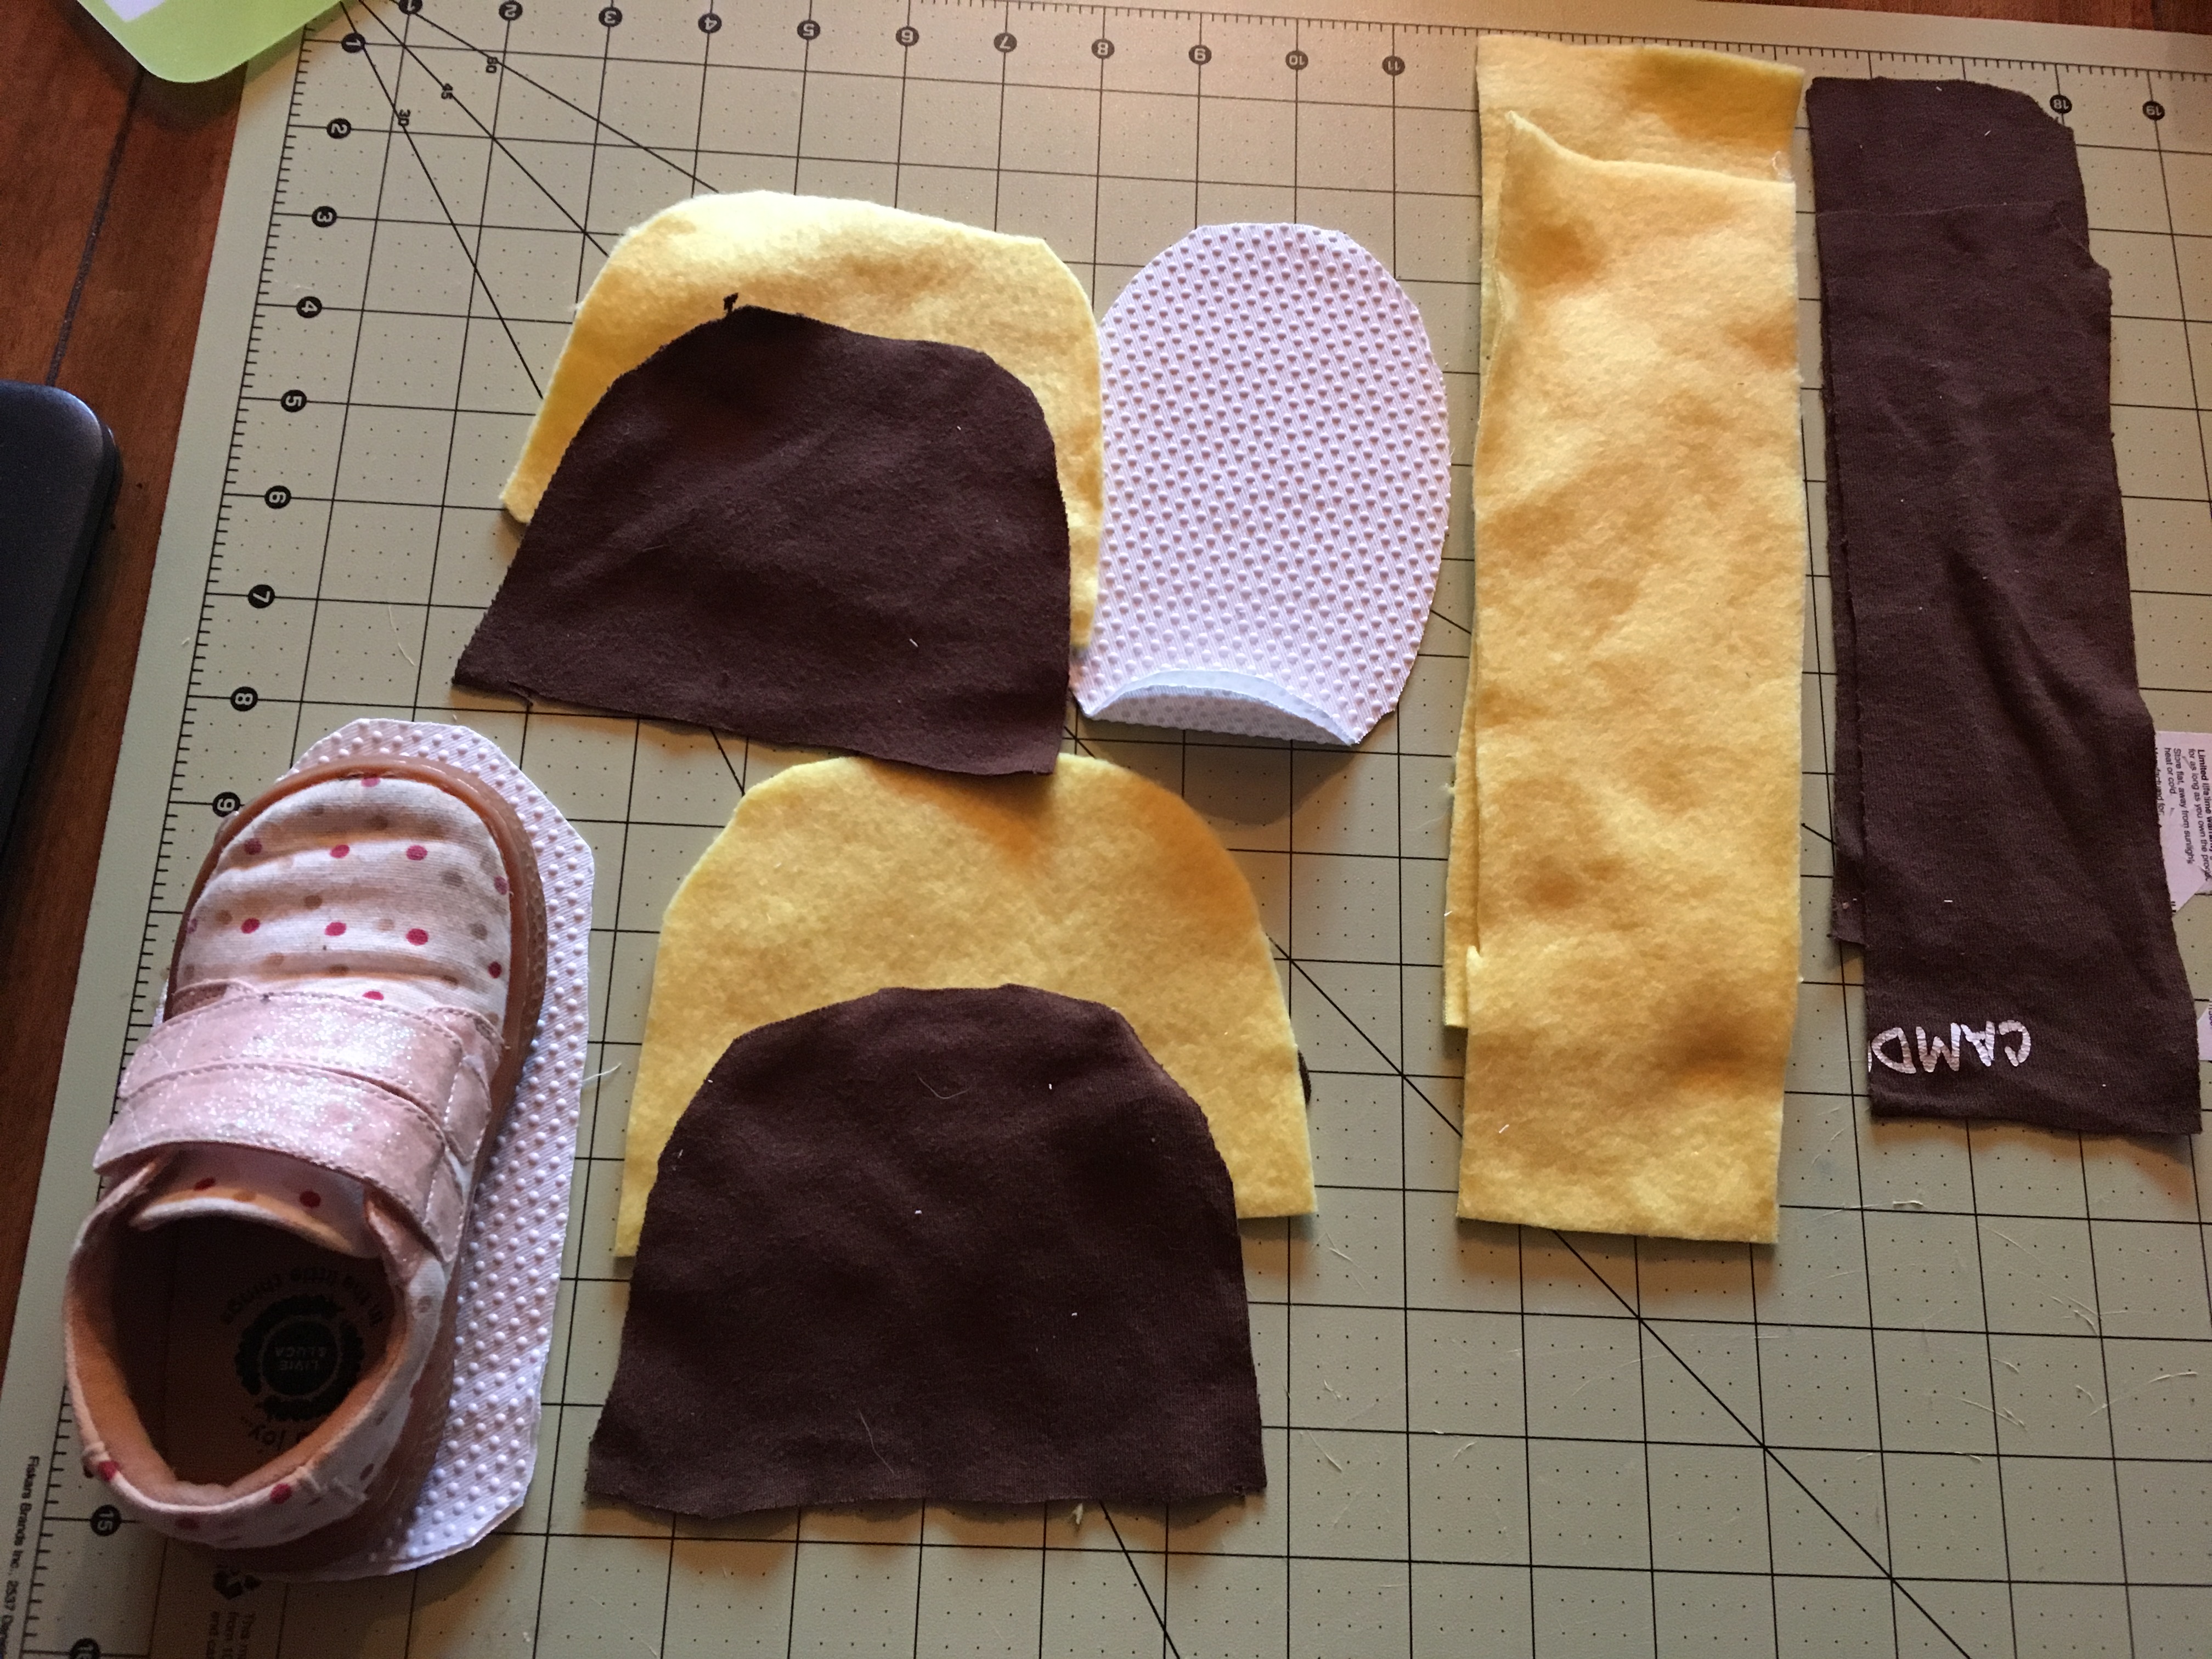
This easy DIY sewing project can be made for any size shoe! All you need to do is trace the shoe (or foot) size and create! Easy peezey Christmas fun! Also makes a great gift!
As always, there is a video tutorial on the ceceliasspot channel and here is the link…
Baby Slippers Tutorial! this has a pattern for baby slippers if you don’t want to trace a shoe or foot
And there is the written format below. ENJOY AND HAPPY HOLIDAYS!
First, what you need for this project:
Non-skid fabric
Fabric colors (I used cotton and fleece)
1/4 or 1/8 elastic
Sewing tools, googley eyes, red cotton ball, and any accessories you would like to add
Next, trace your subject’s shoe or foot (if you are using their actual foot add 1/2 inch all the way around).
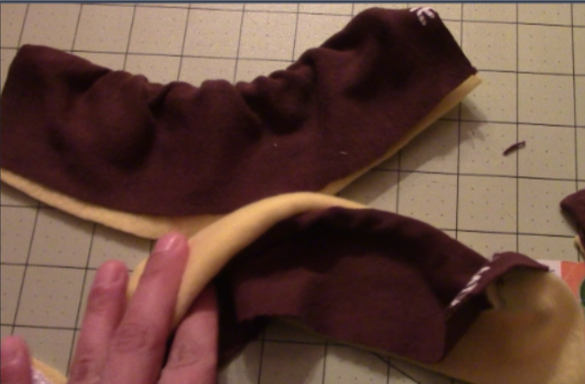
2. Trace the top of your childs shoe to make the front of the slipper. Cut four of these pieces. Then trace the back and cut 4 of these (add 1 inch to the long length side so you can overlap)
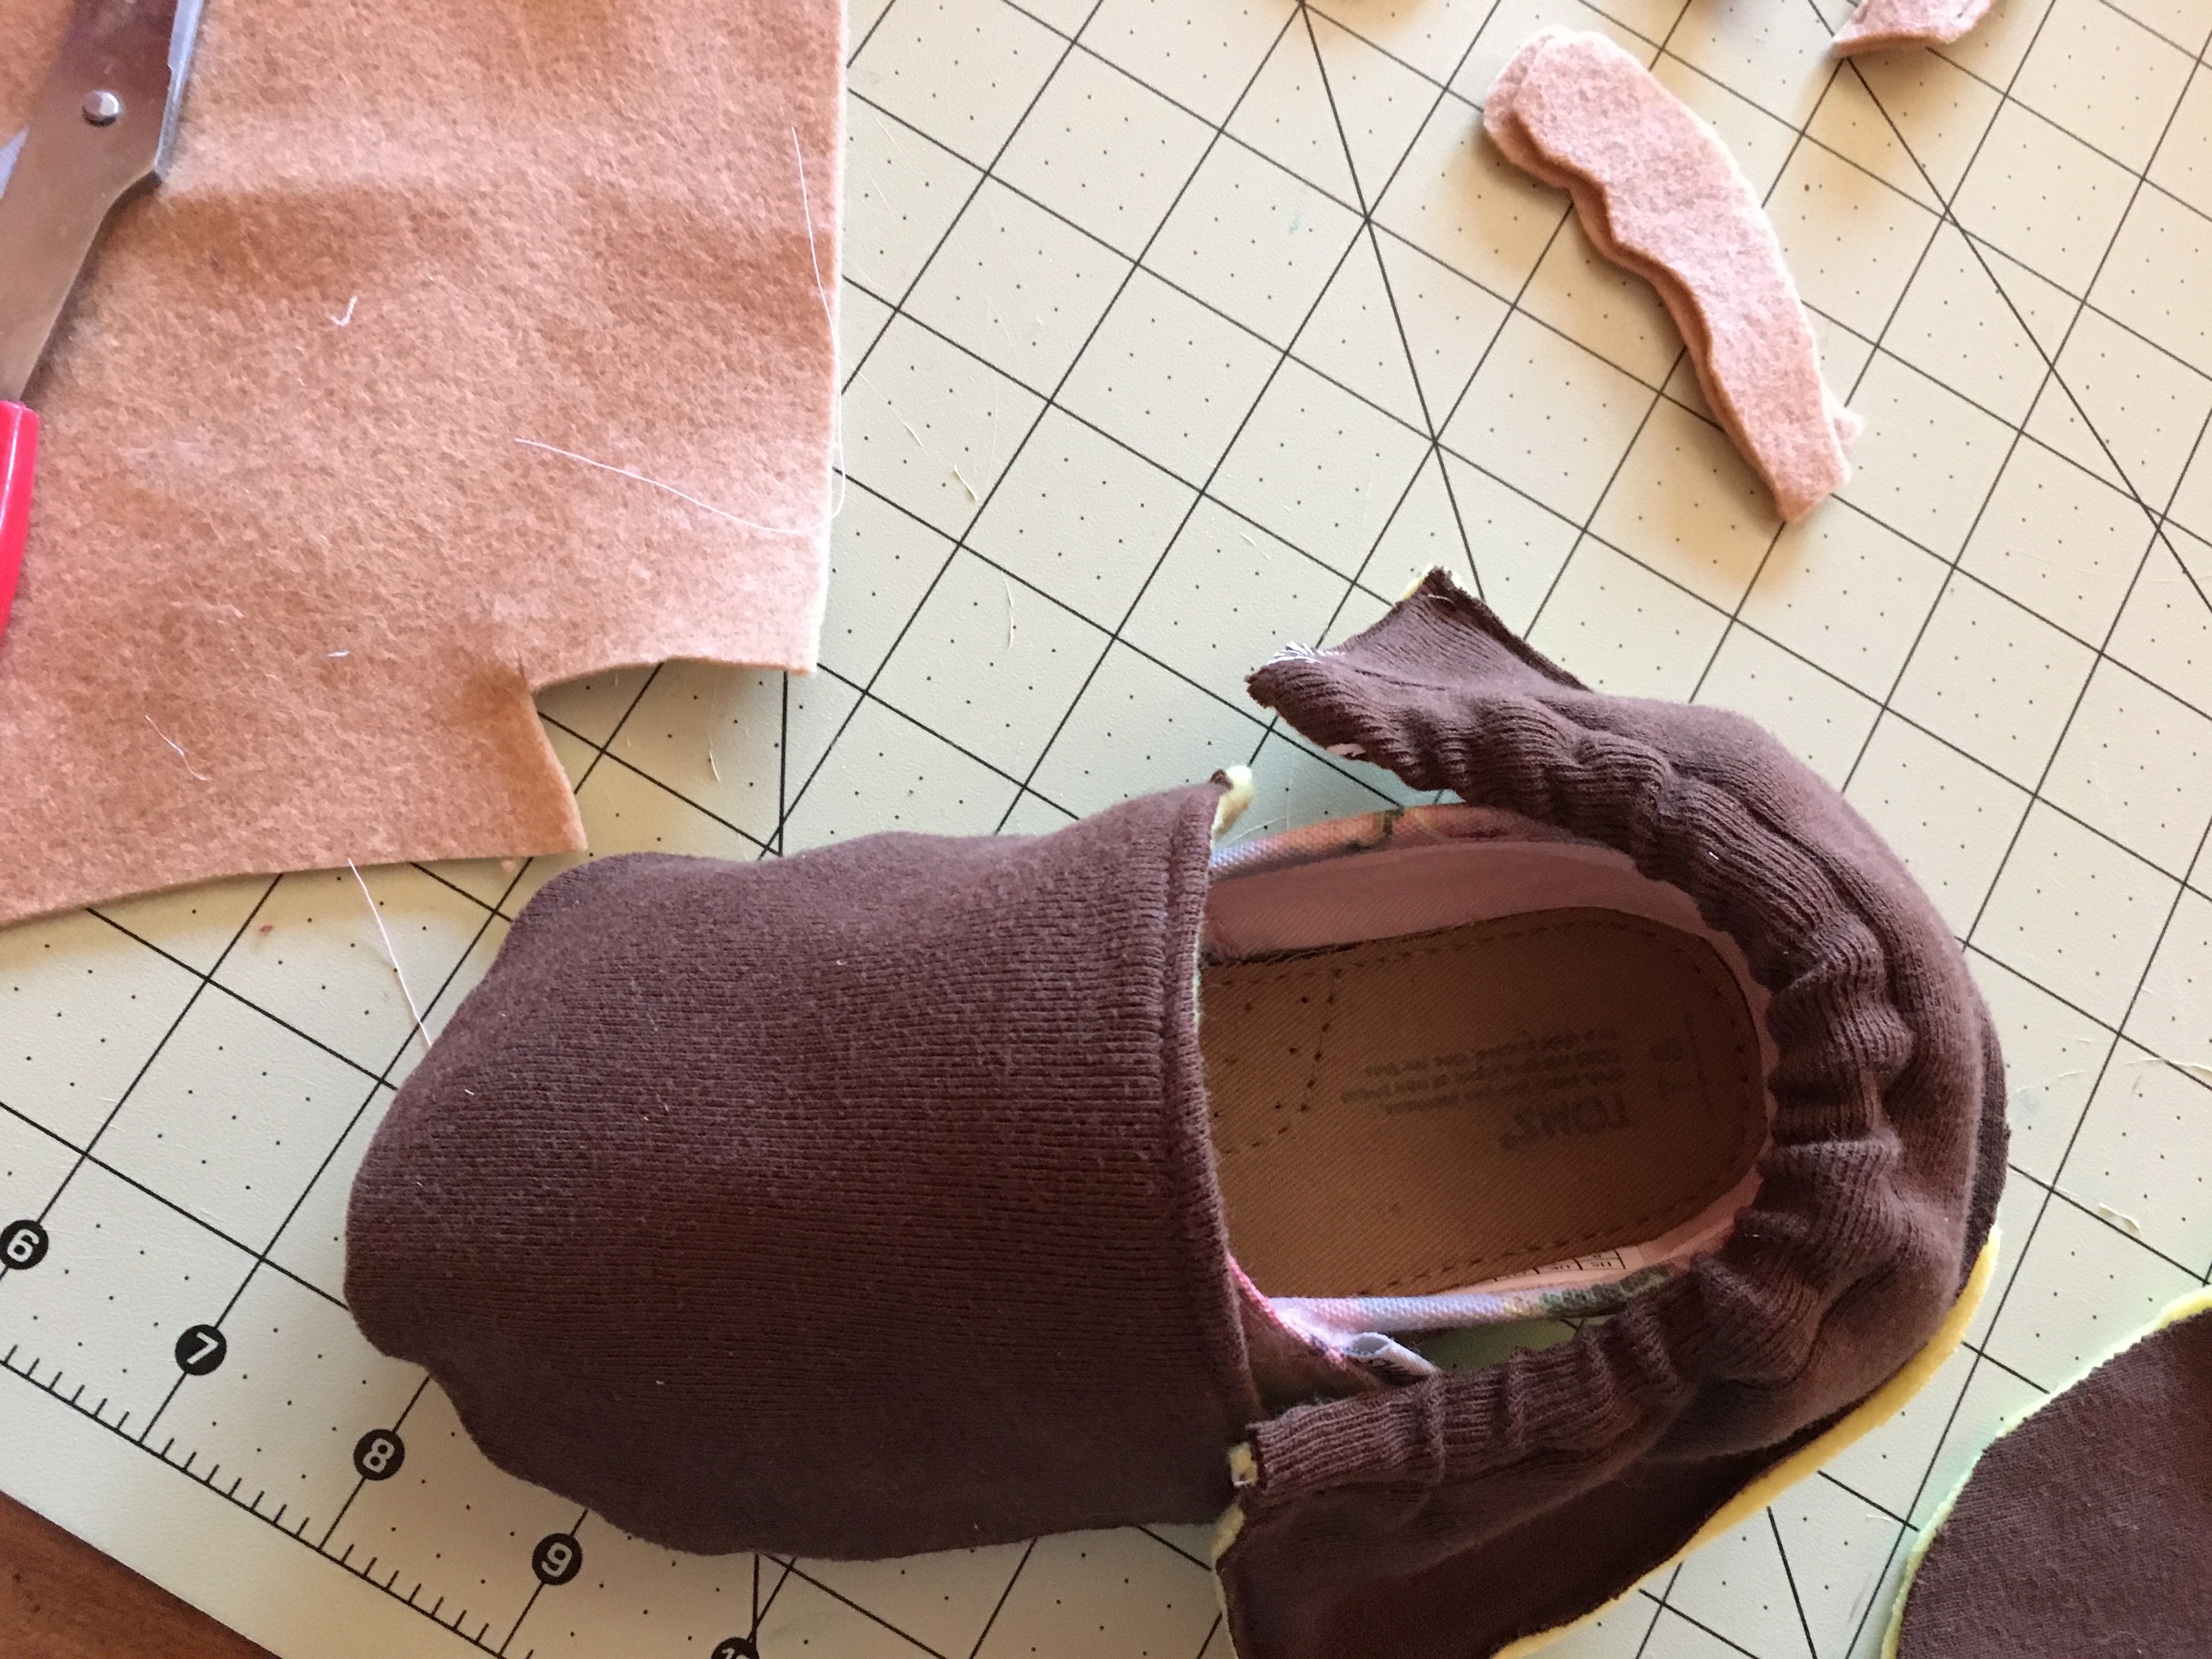
3. Take pattern facing pattern and sew the two front pieces together only on the straight side as shown (do this for both slippers).
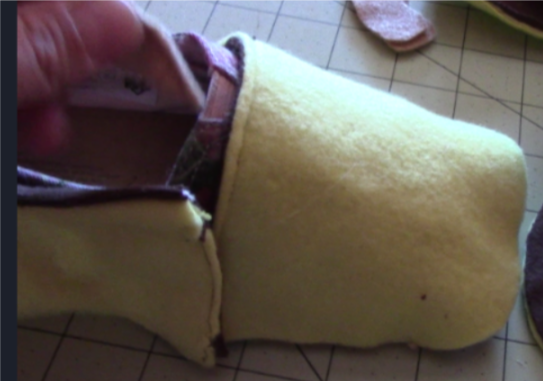
4. Trim excess and turn right side out, iron right side out and sew across the top you ant on outside (this makes it look nicer.
5. Take pattern facing pattern for both back pieces and sew across one long side for both slippers.
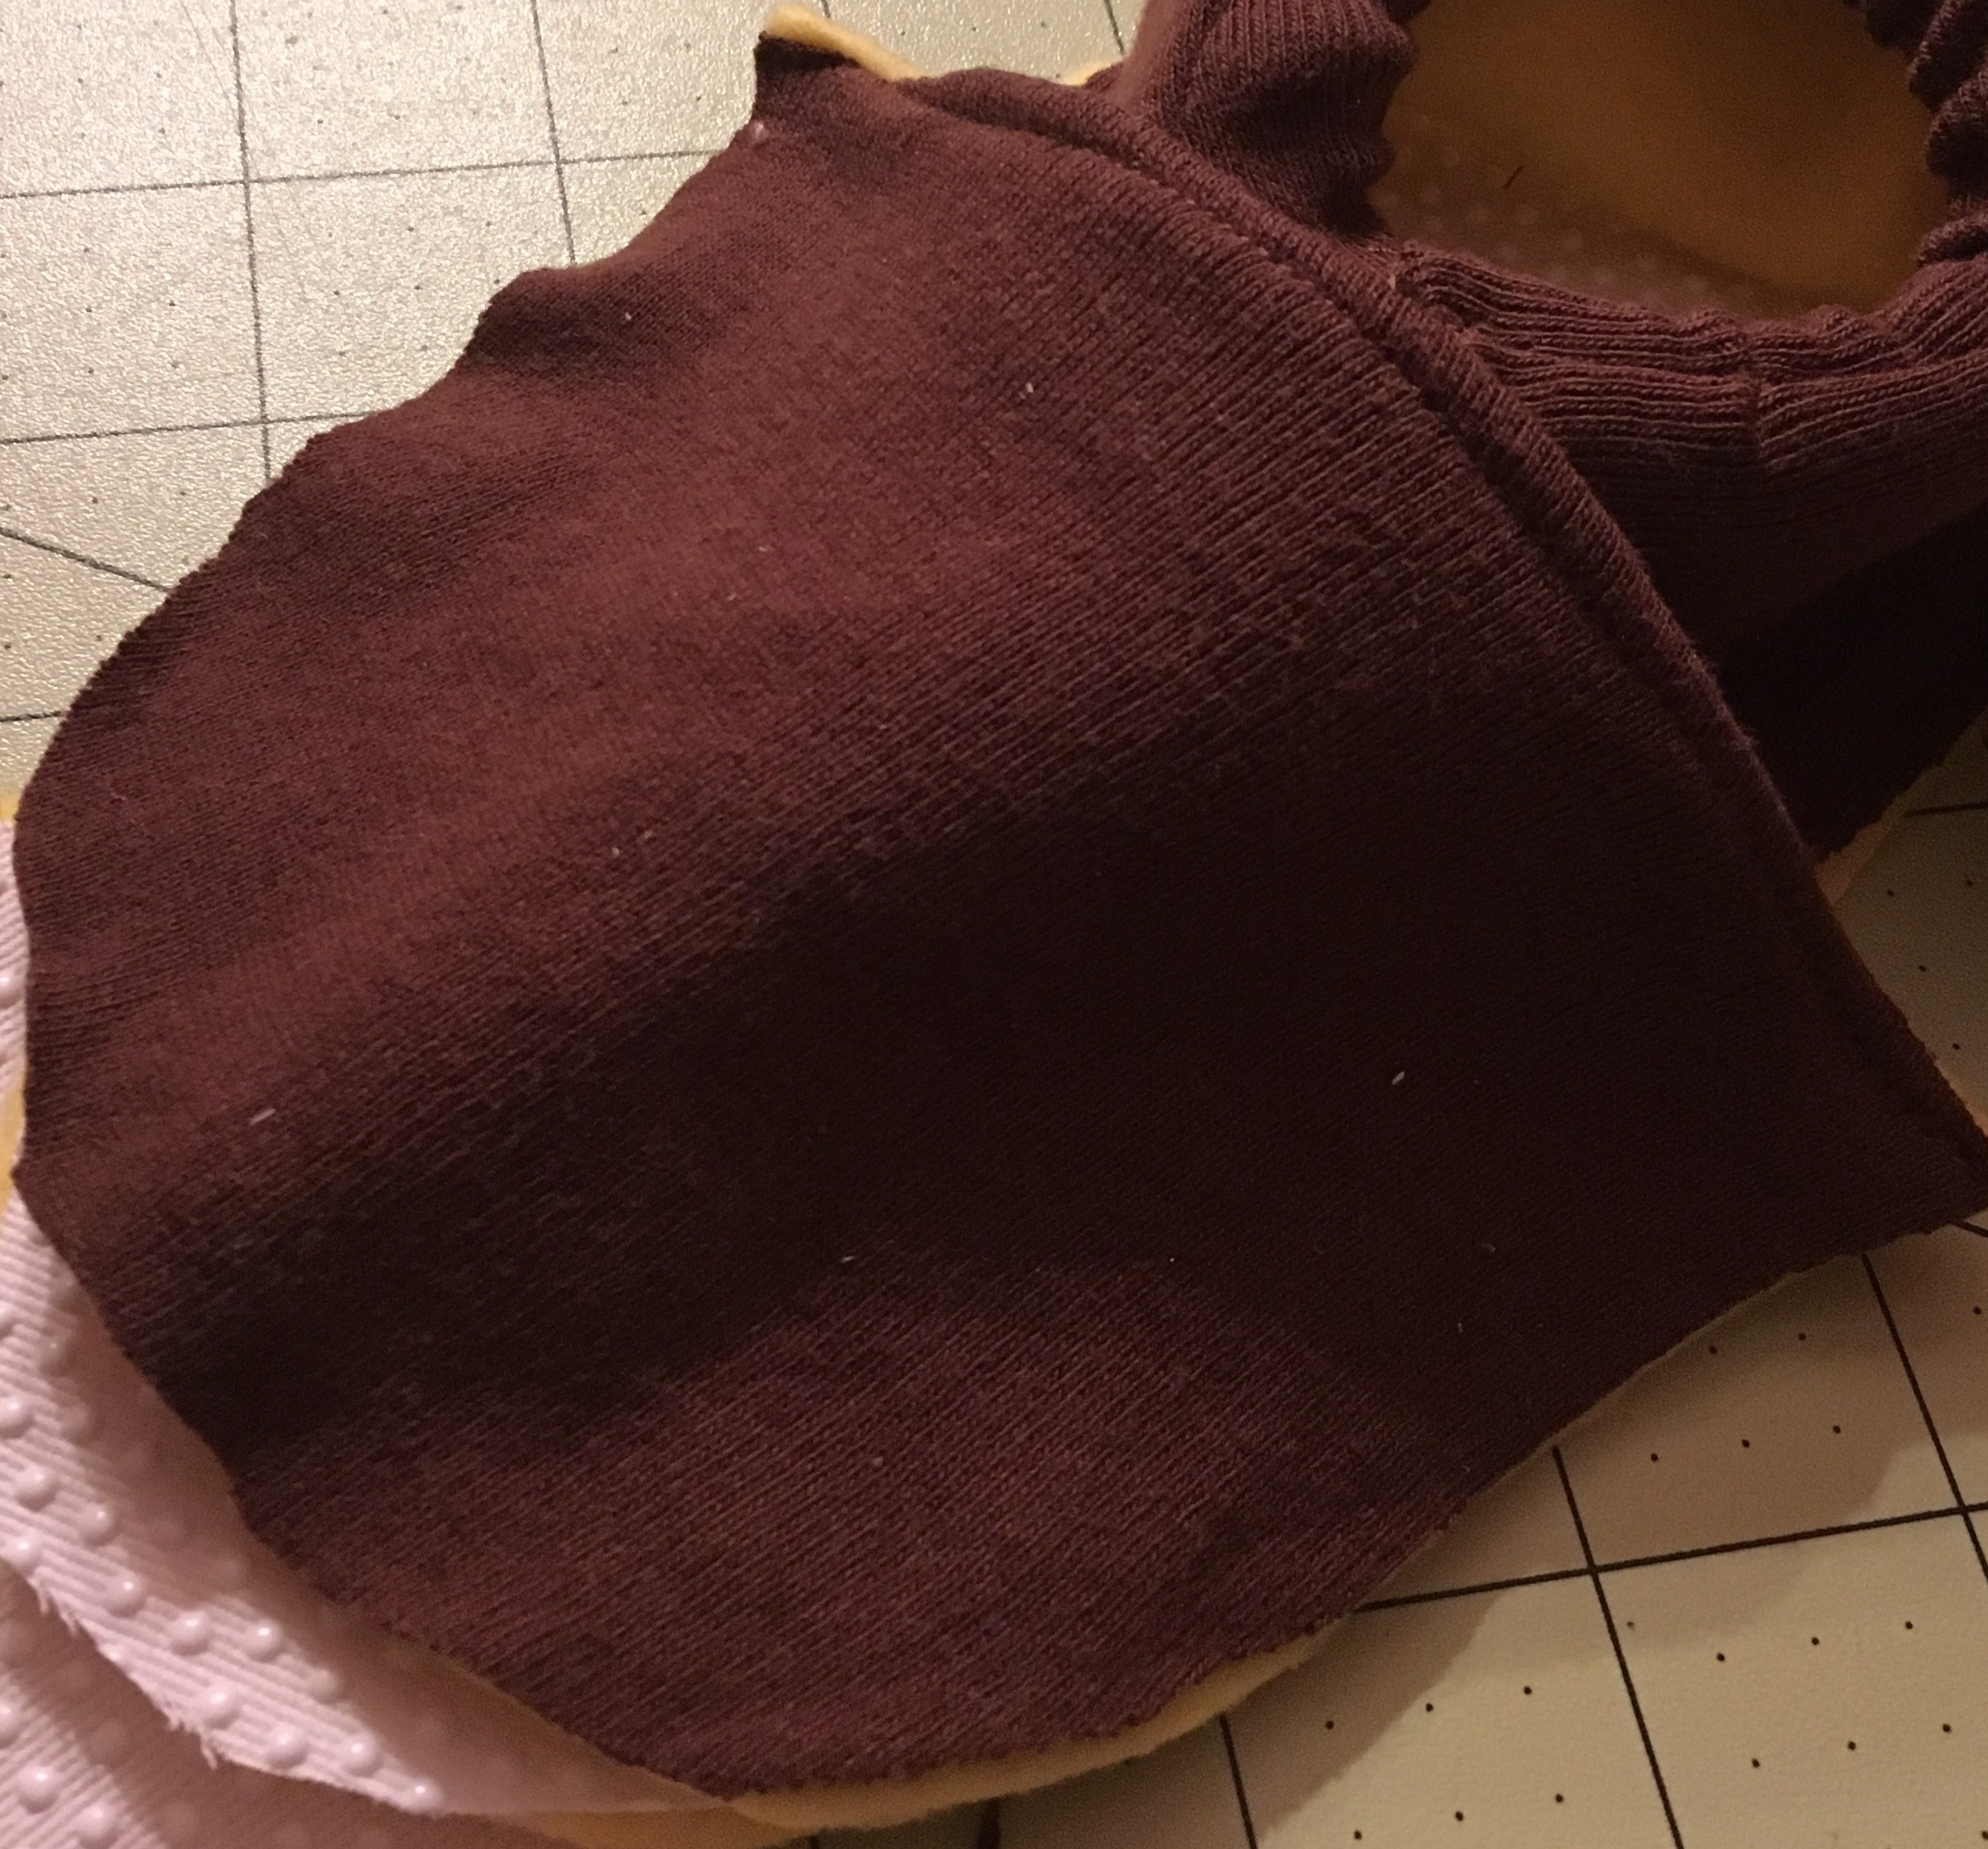
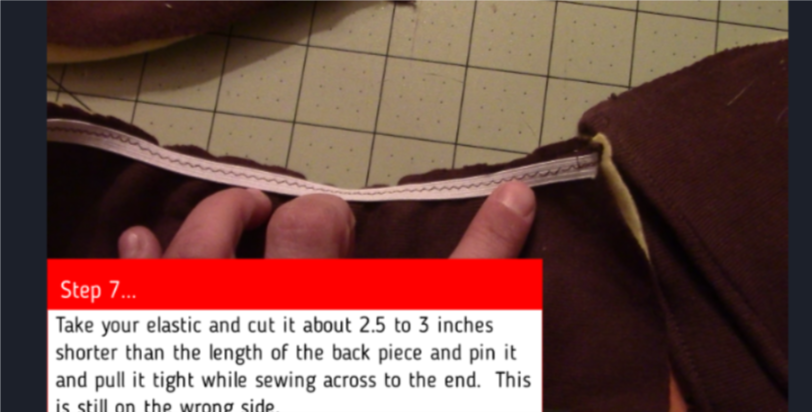
6. Take your elastic and cut it about 2.5 to 3 inches shorter than the length of the back piece and pin it and pull it tight while sewing across to the end. This is still on the wrong side.
7. Flip the fabric over the elastic with right side out and iron and then sew right below the elastic and down the sides
8. Freehanded antlers by looking at a picture of antlers. cut 4 sew around except bottom and stuff it.
9. Check sizing and put front and back piece pinned together with pattern facing down (right now you should only see (the side that is up) what will be on the inside when you are finished done).
10. After pinning the front to the back and the antlers in between the front and back piece, sew across front to attach front and back piece
This is what it should look like now.
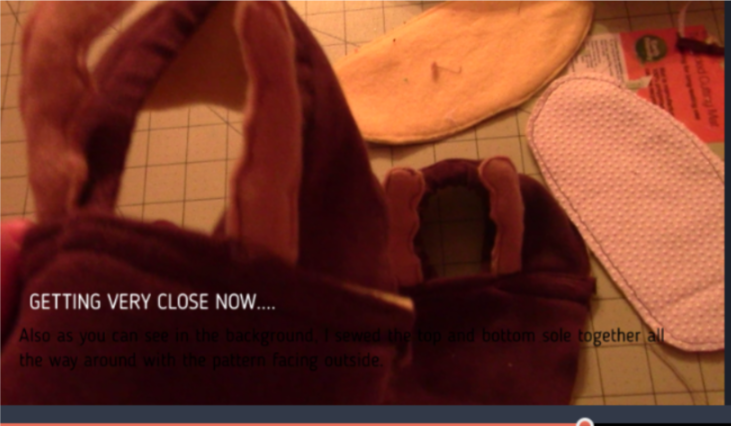
11. Line up the sole two pieces with the patterns on the outside (not the usual, but it doesn’t matter since its on the bottom) You can see it in the back there with the nonskid on top.
12. Line up the sole with the top piece (nonstick sole facing upwards to the reindeer face) by finding the middle of the front and back (you can fold to find this). Then sew all the way around. And turn right side out and WAH-LA!!
I sewed on the red cotton ball nose and hot glue gunned the eyes on. If you have a little one then please don’t use googely eyes since they might try and eat them!
Don’t forget to check out our facebook site and subscribe to our youtube videos! ENJOY! MERRY CHRISTMAS!
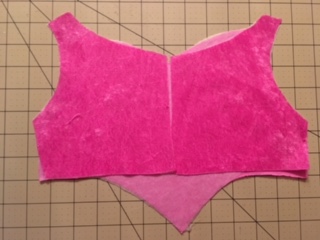
My daughter has recently developed an interest in princesses and playing dress up. I decided to take on the challenge of sewing a princess dress. I’ve made many dresses, including the princess-like 1st birthday dress, but I wanted to make something different, so I did some research and then bought fabric I thought she would love, and designed a dress. I made several adjustments during the process and added embellishments.
Since I did this all during the process of making it, I decided to take pictures instead of video like I usually do.
There is no pattern for this since I designed the dress as I went. I used one of her regular party dress to eyeball the correct sizing for a 3t dress. (This is what you can do too!)
So below are pictures and some steps. If you want to design a similar one just use a dress to get an idea of the sizing. I don’t work with a lot of tulle sewing, so it didn’t turn out the best, but I’m proud of the end results, and she loves it too!
So I first made the front and two back pieces. You can copy these shapes from the picture and use a dress for sizing.
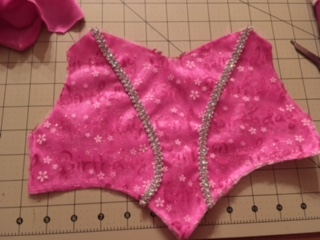
I ended up making another three pieces (another front and two back pieces) and using it as the inside of the dress. So I took pattern facing pattern for the front piece and left a 3 inch space to pull it right side out. Then I sewed this shut and ironed it all. I also used sparkly elastic and pinned it in between the pattern facing pattern (this is what I should have done but forgot and ended up just sewing it to the top).
I also added a tulle happy birthday and two pieces of silver design on the front. You can add or not add as many embellishments as you want.
Next, I used interfacing ironed on both back pieces and then used white hair ties cut in half. I pinned the half hair ties facing inwards in between the pattern facing pattern pieces then sewed all the way around except a 3 inch area and pulled it right side out and sewed then ironed it.
Following that, I placed the two back pieces on the front pattern piece and sewed the sides and then folded them back to have the top finished.
I then measured the skirt by measuring from the top down to the right length for my daughter with a measuring tape. I used the soft fabric of the top for the under-skirt and then cut happy birthday tulle and tulle for the skirt. i made the white tulle width three times the width length since I will gather it to make the skirt more “poofy.” I then gathered the tulle using the easy method of dental floss, on top of the soft under skirt. With this method, you use a large zigzag over the floss and then at the end you pull the floss out and it is gathered!
Next I decided to use the happy birthday tulle and sewed it on as well. Then, I put the layers together and I put pattern facing pattern and sewed it all together.
I ended up sewing on a bead embellishments on ribbon in between the top and bottom.
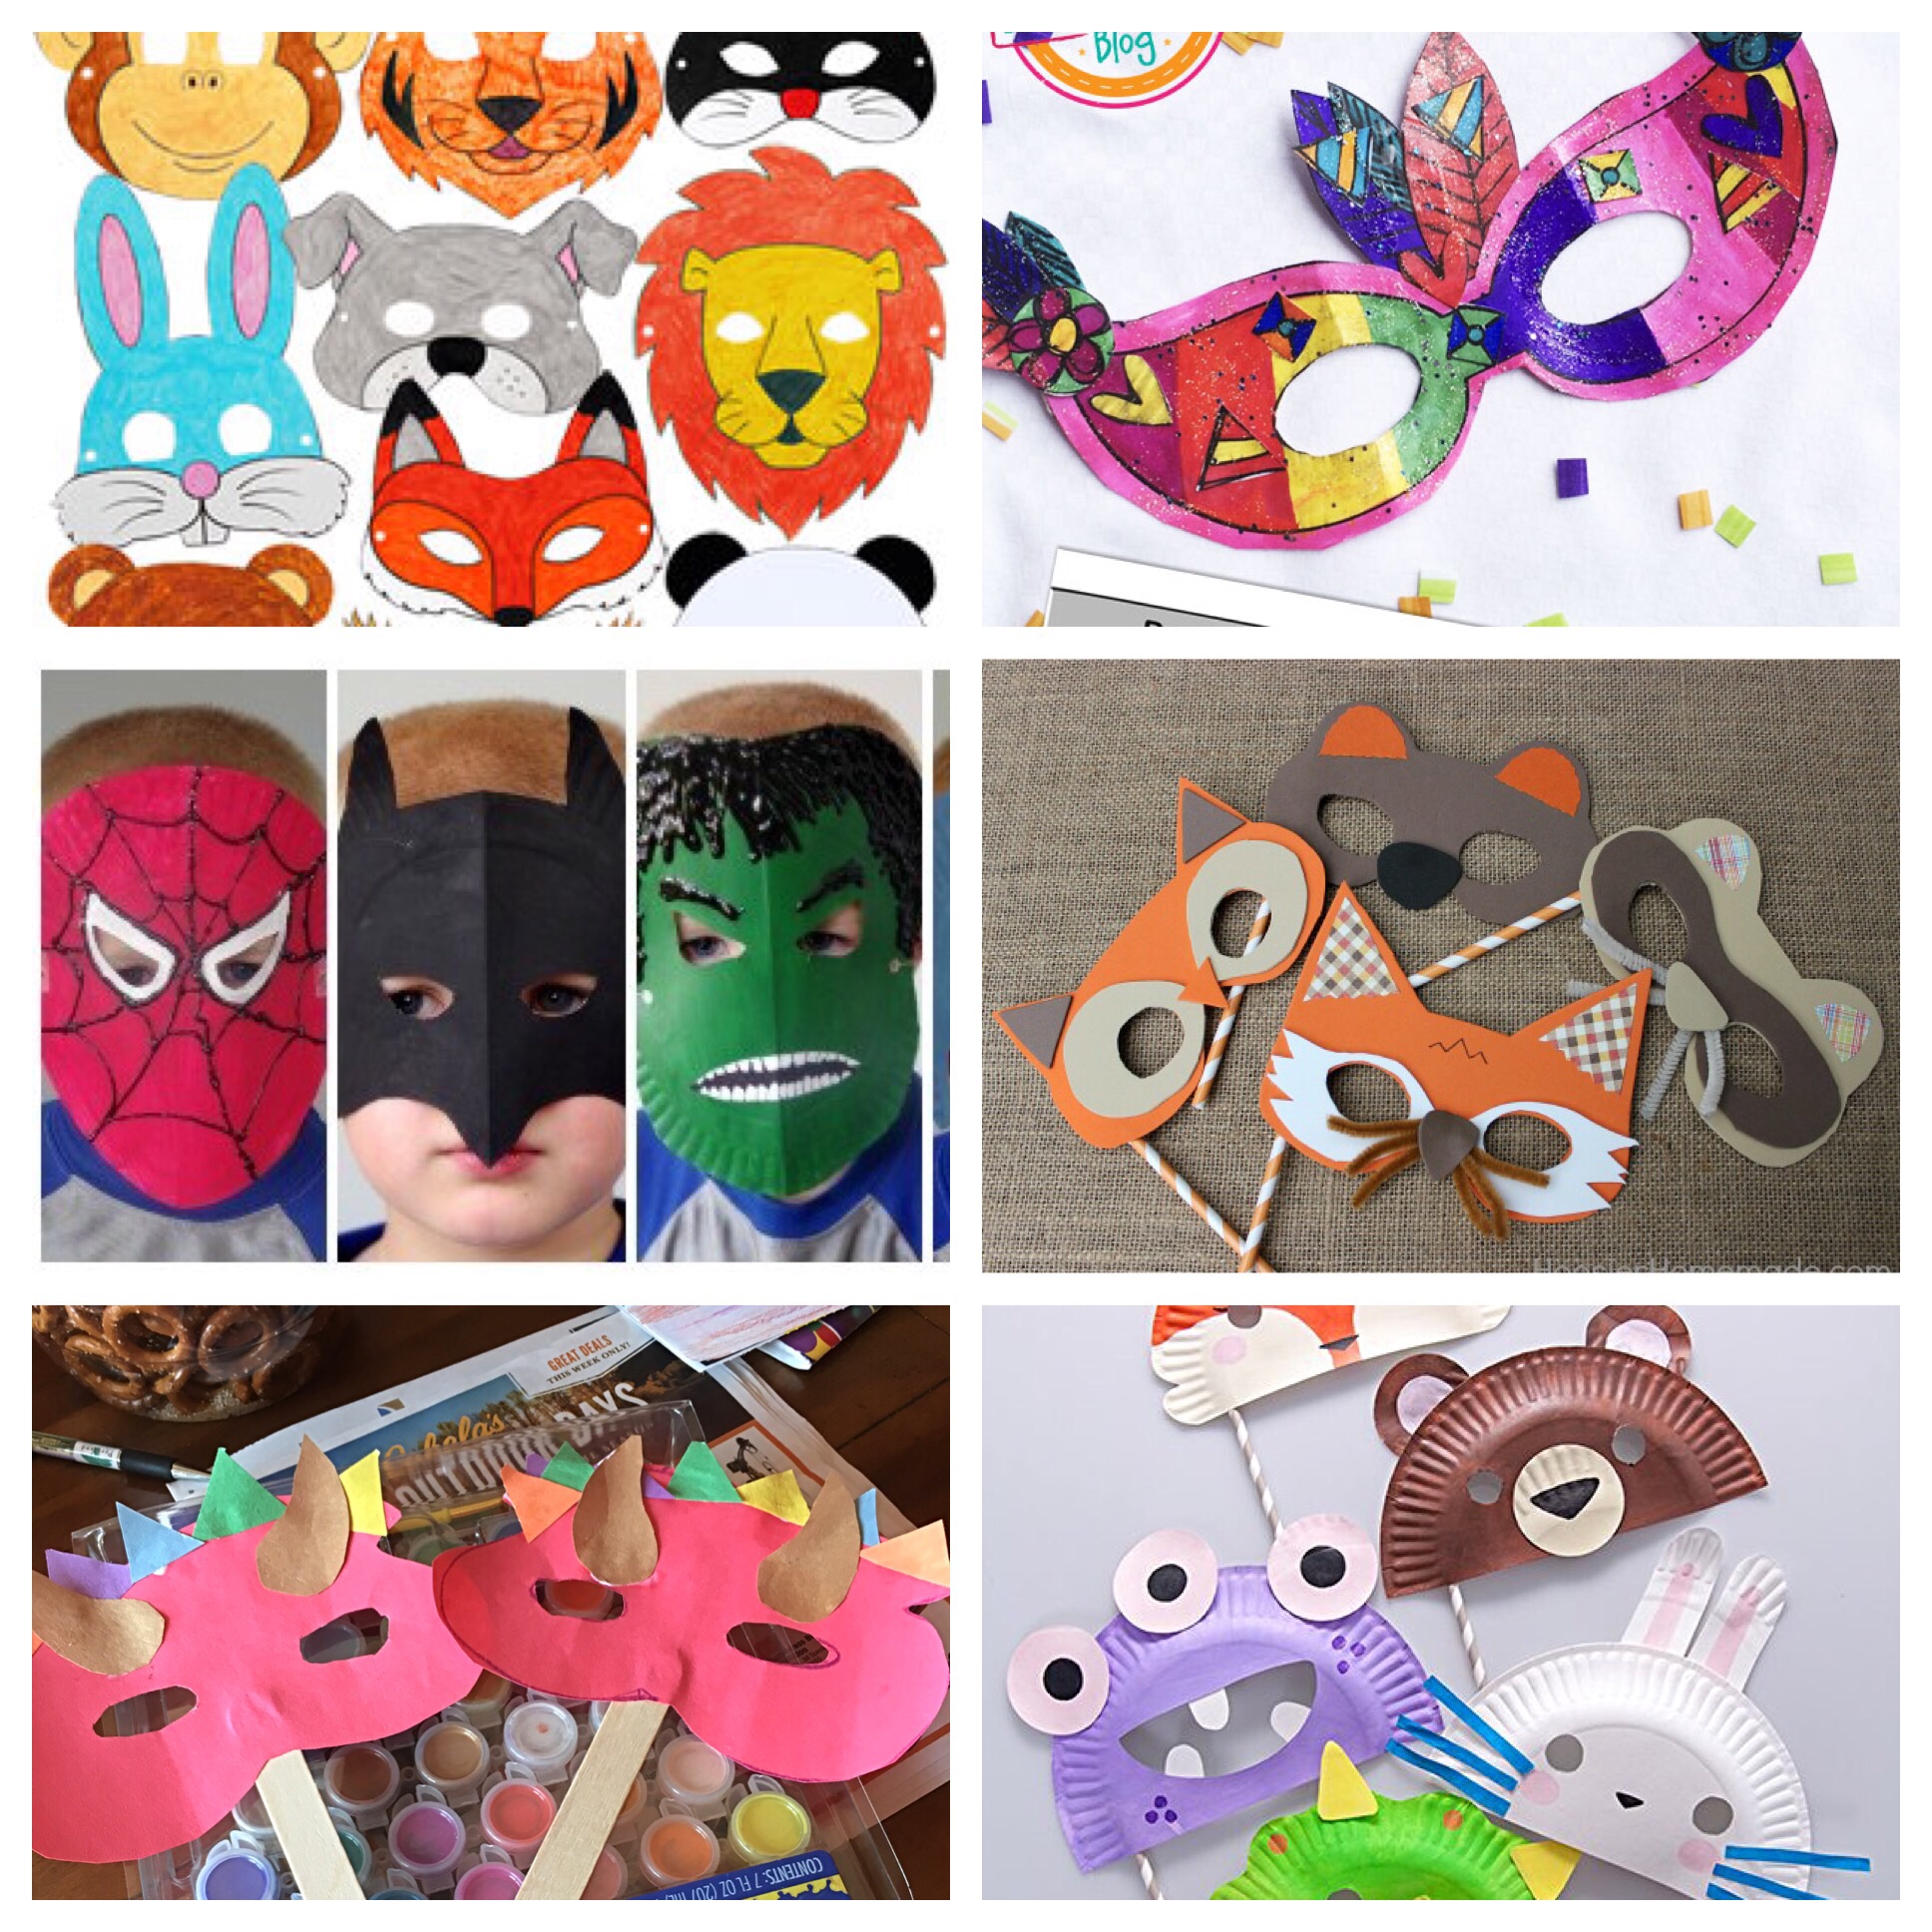
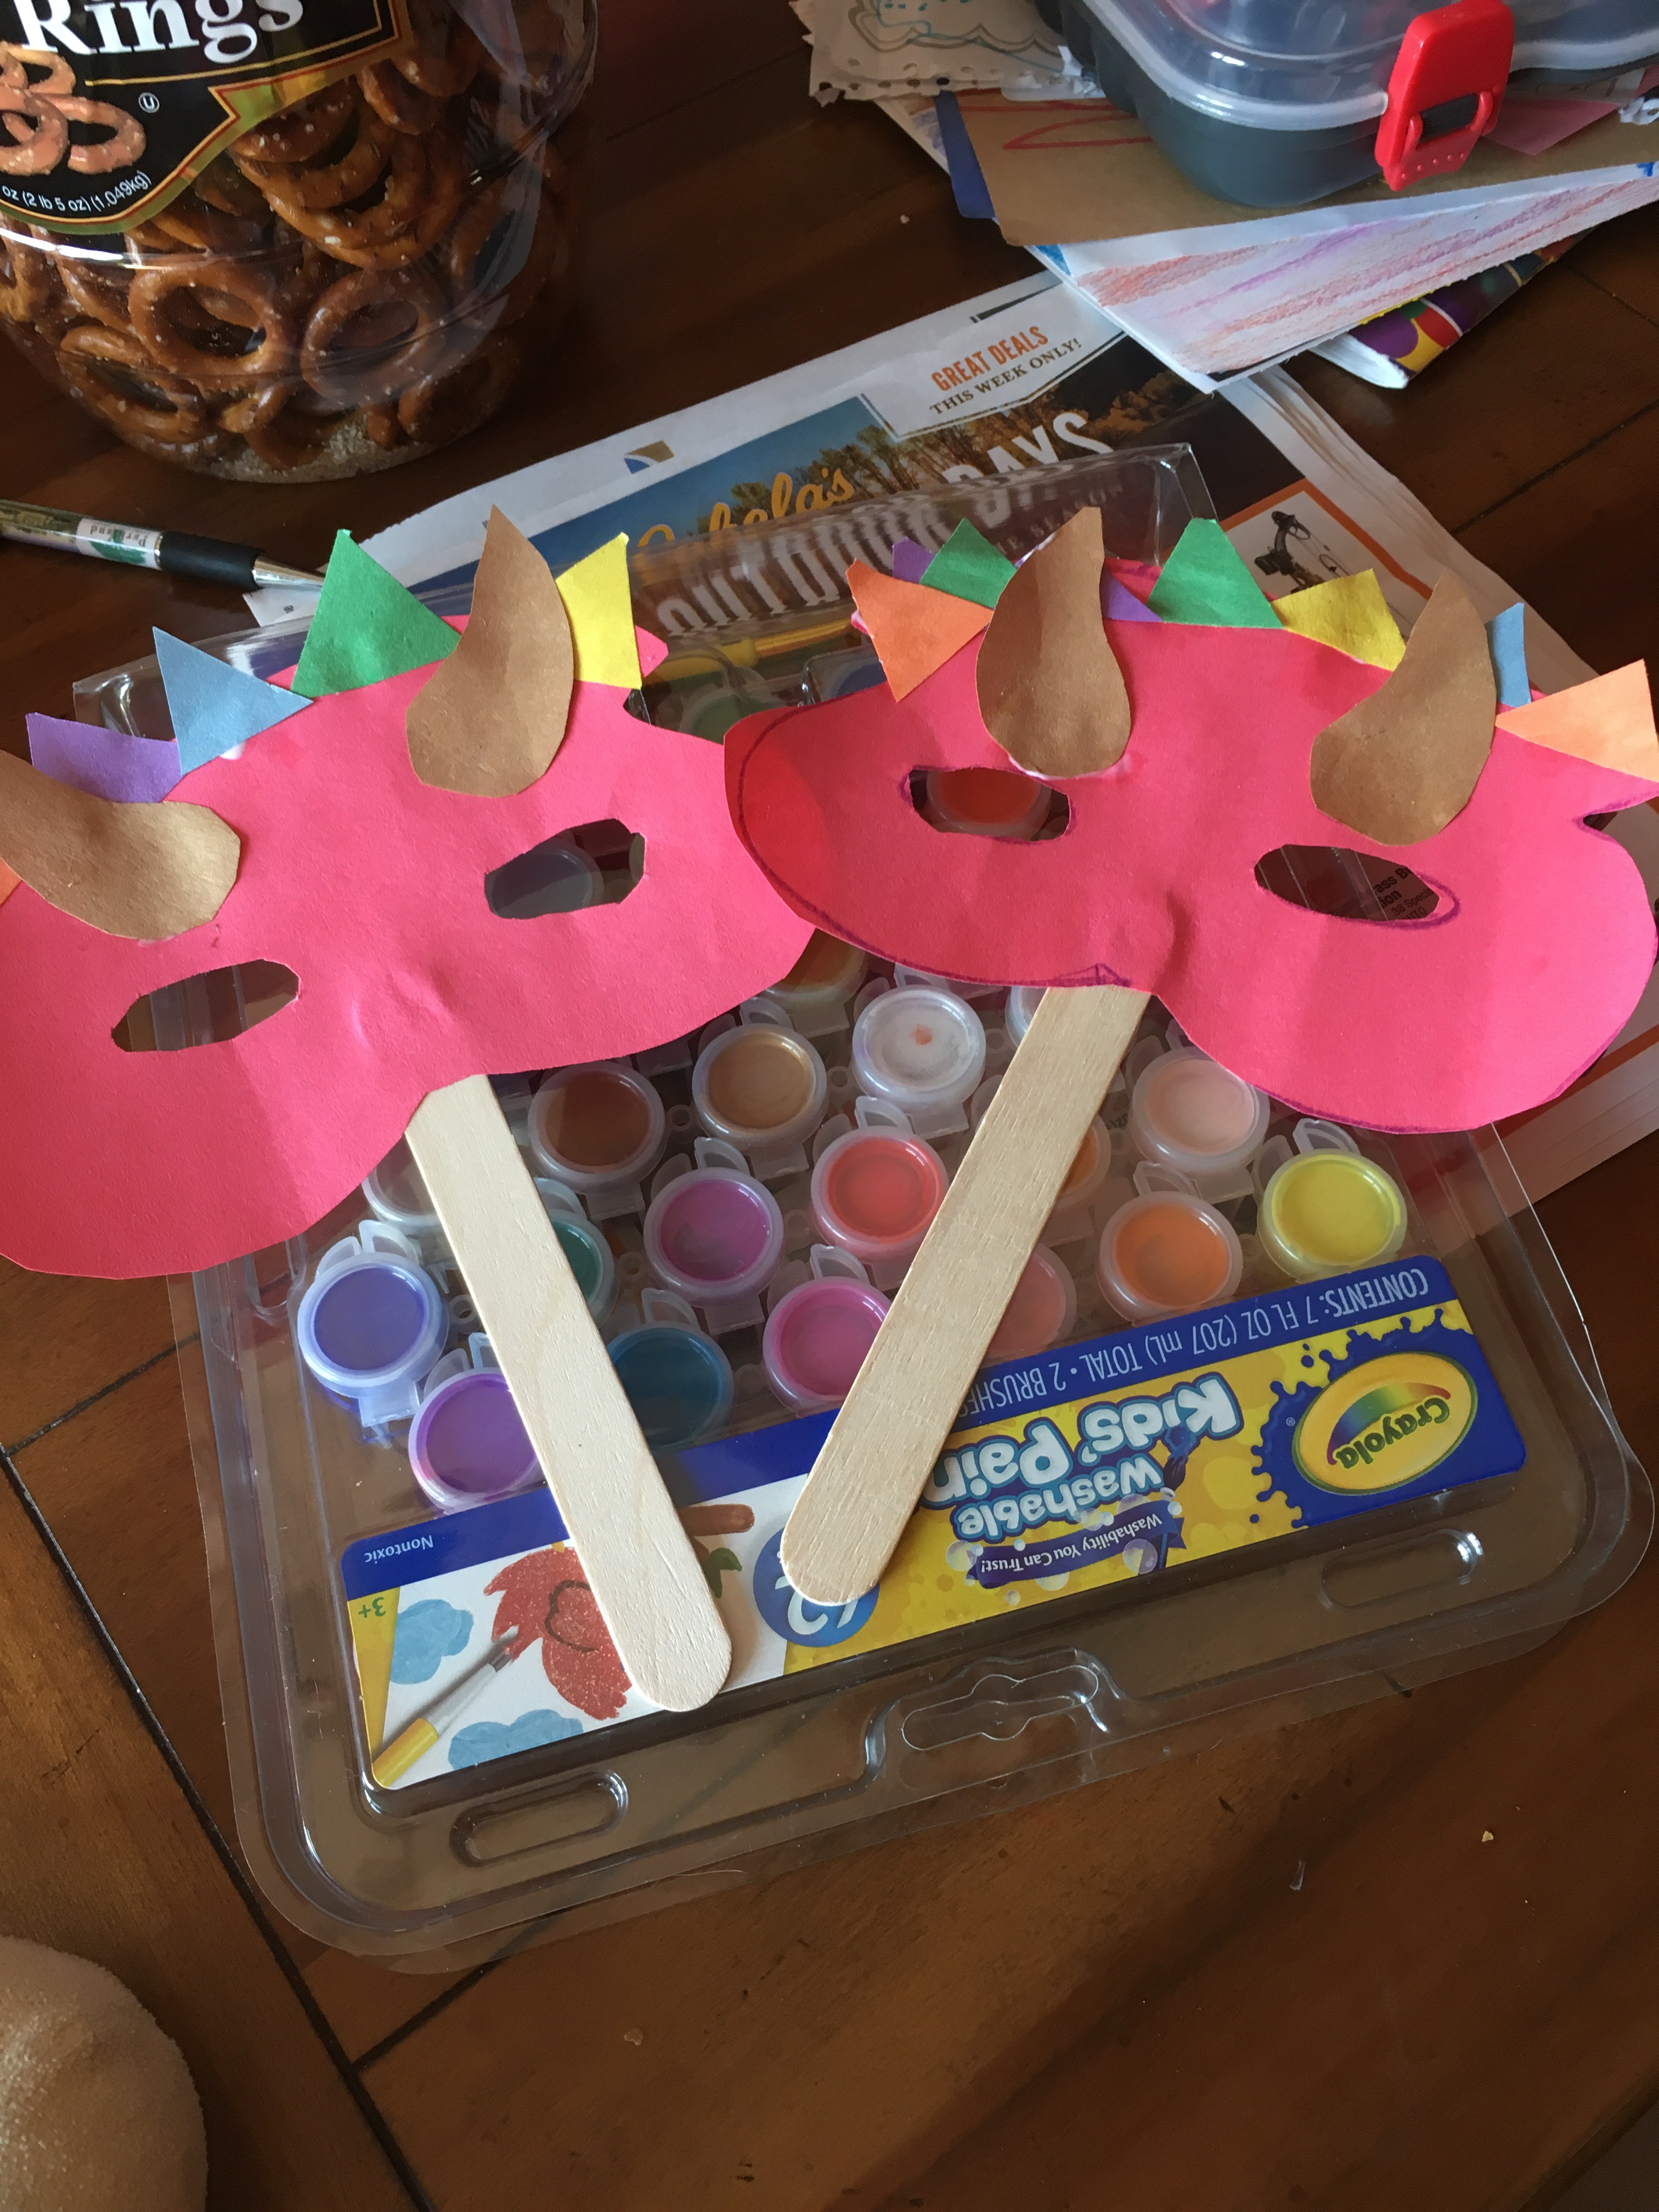
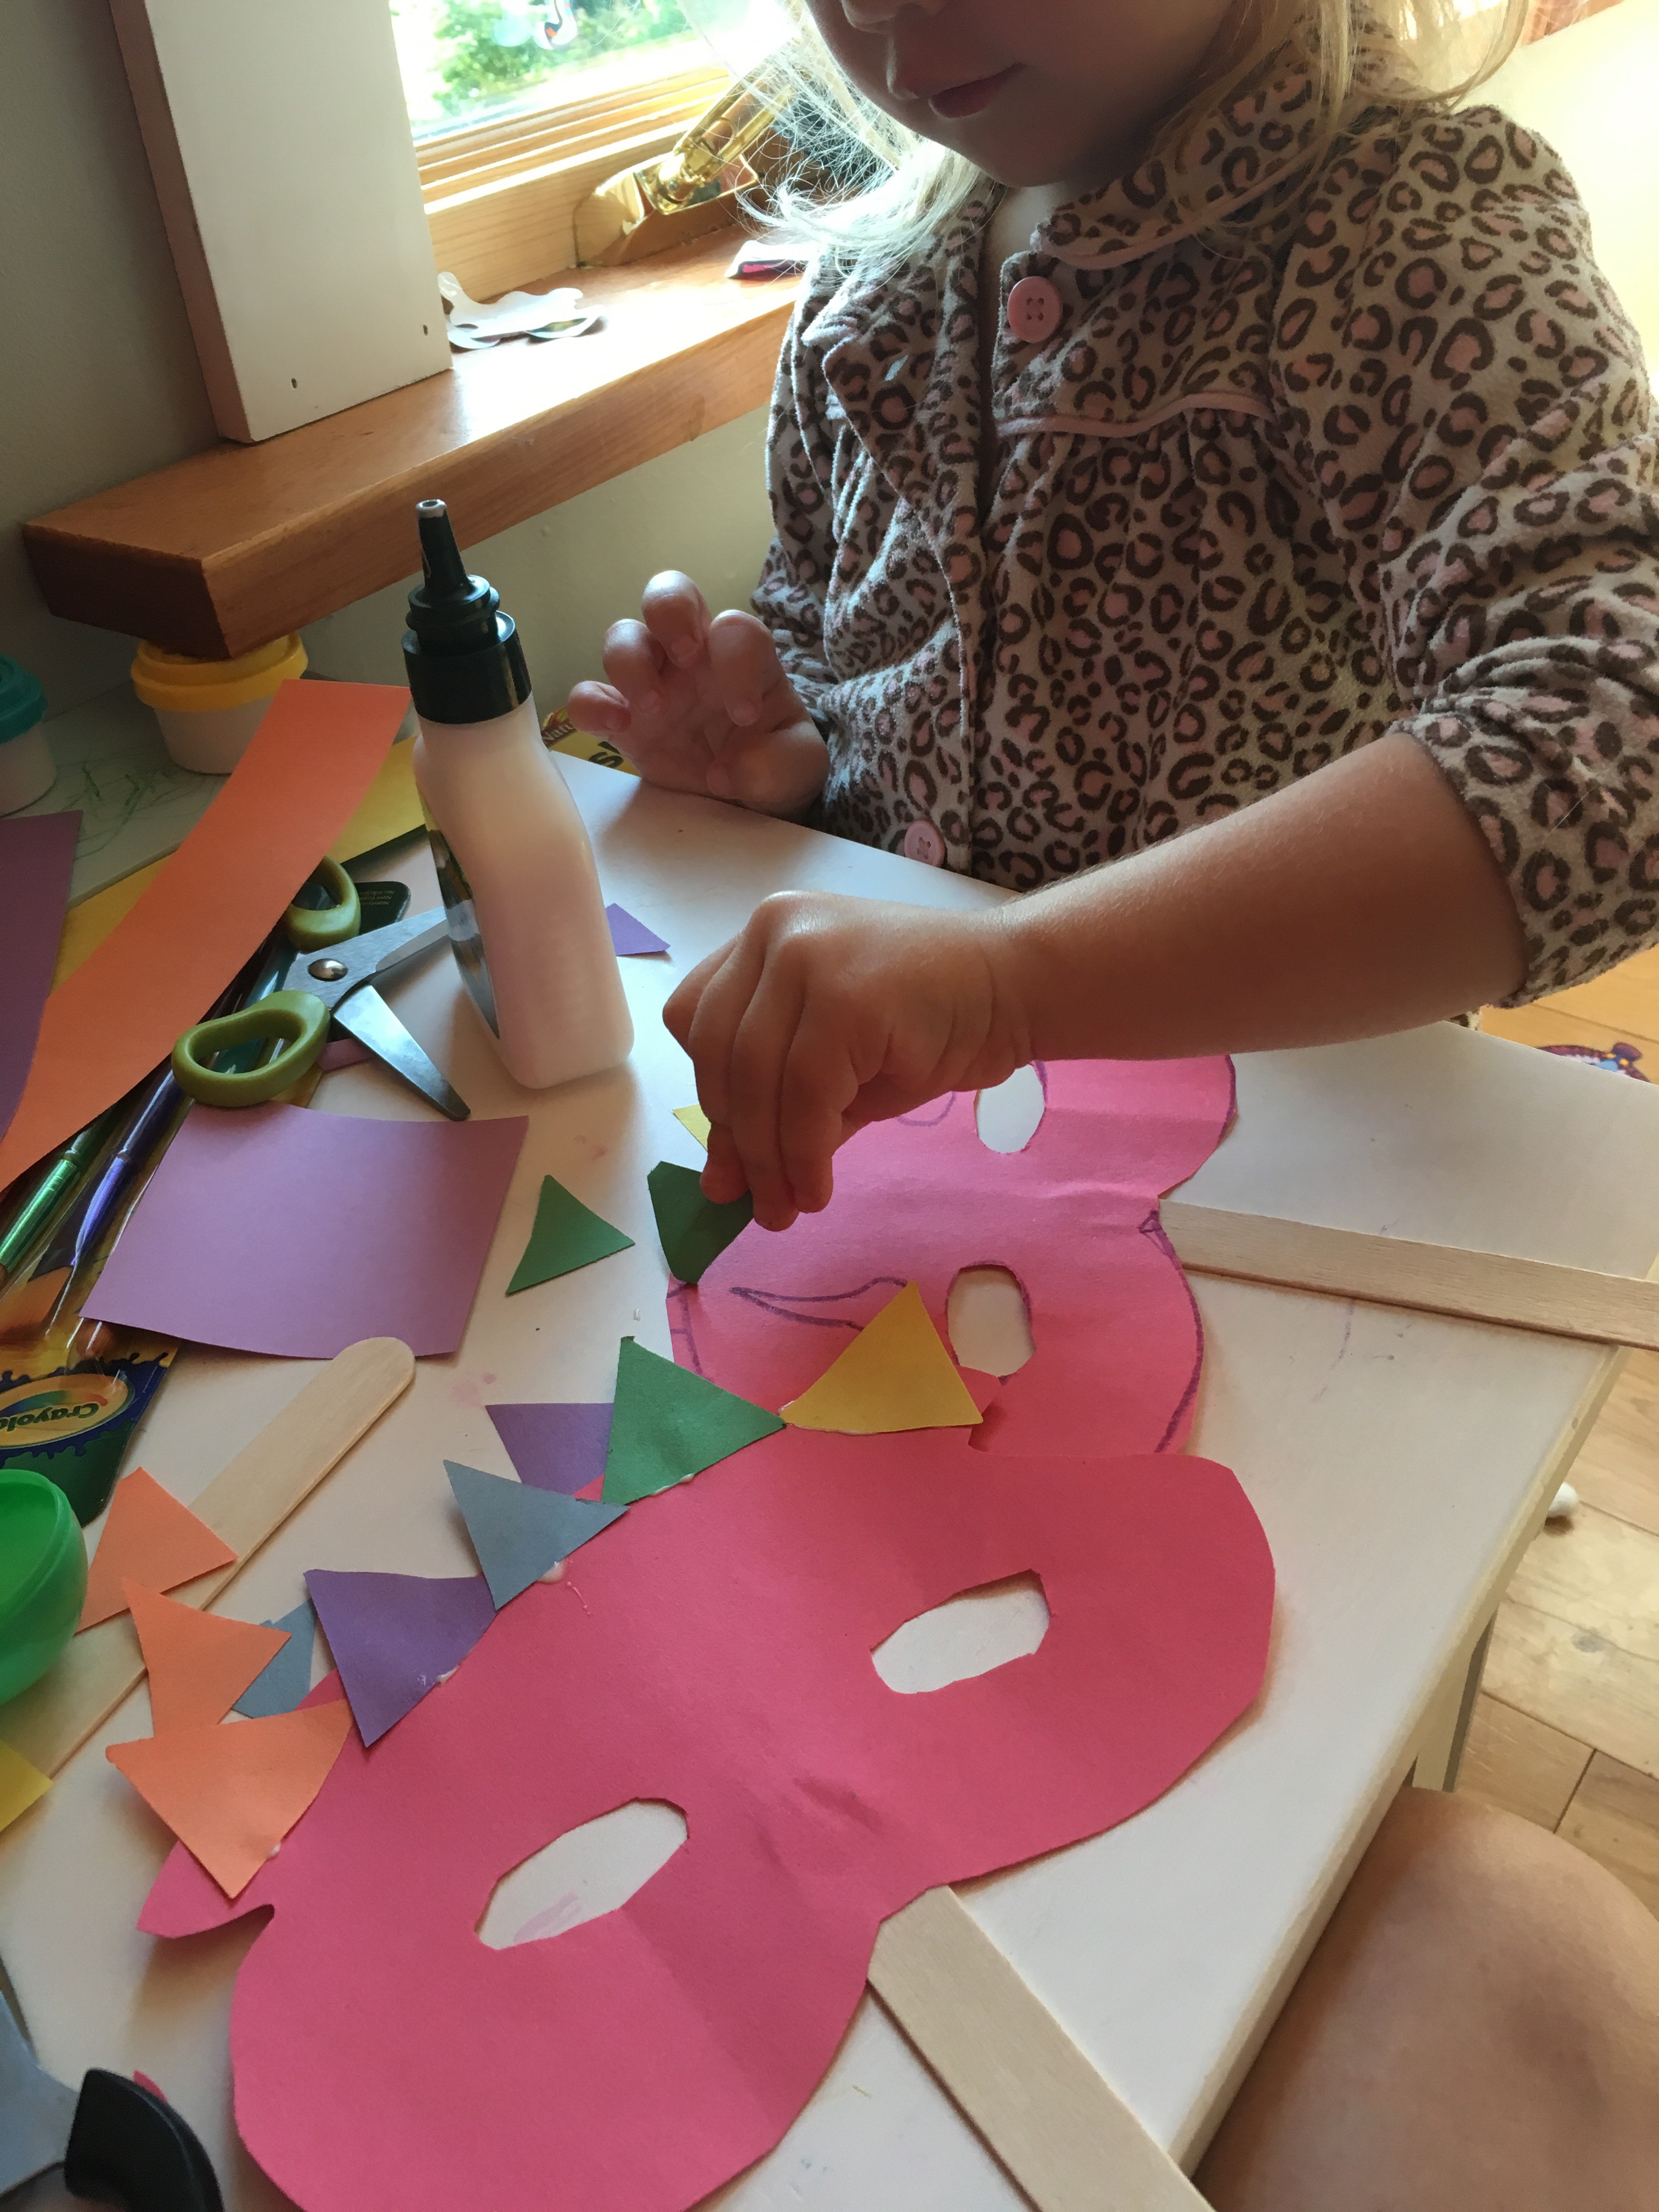
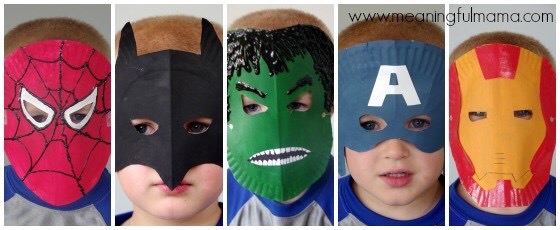
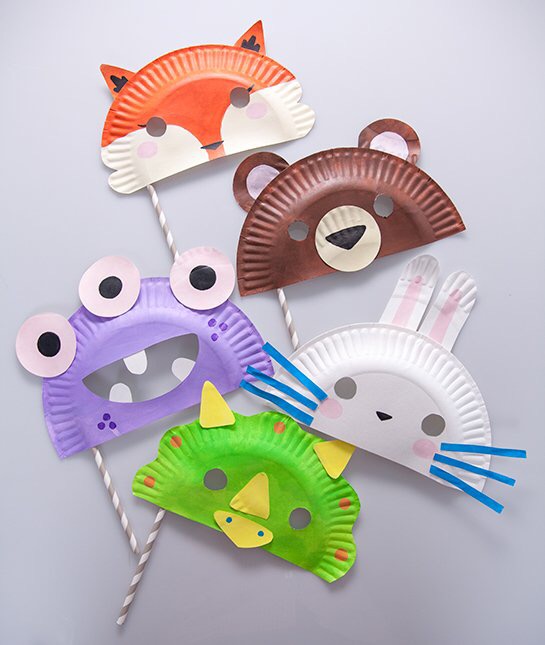
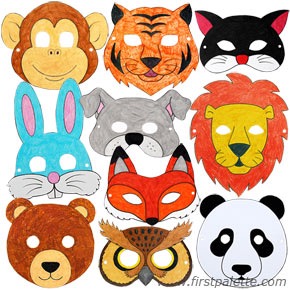
My daughter loves running around in her cat mask saying she’s Cece cat. She also wanted to be Cece dinosaur, cece giraffe, and many other cece animals. So I had a couple extra crafting materials nearby and we created these easy masks! Also, masks are great for parties or as a craft at a party!
There are many ways to make many different masks, the first way is simply with
1) popsicle sticks or tongue depressor sticks (or you can use elastic or string)
2) construction paper
3) scissors and glue
4) crayons, ribbons, stickers or any other decoration you would like to add
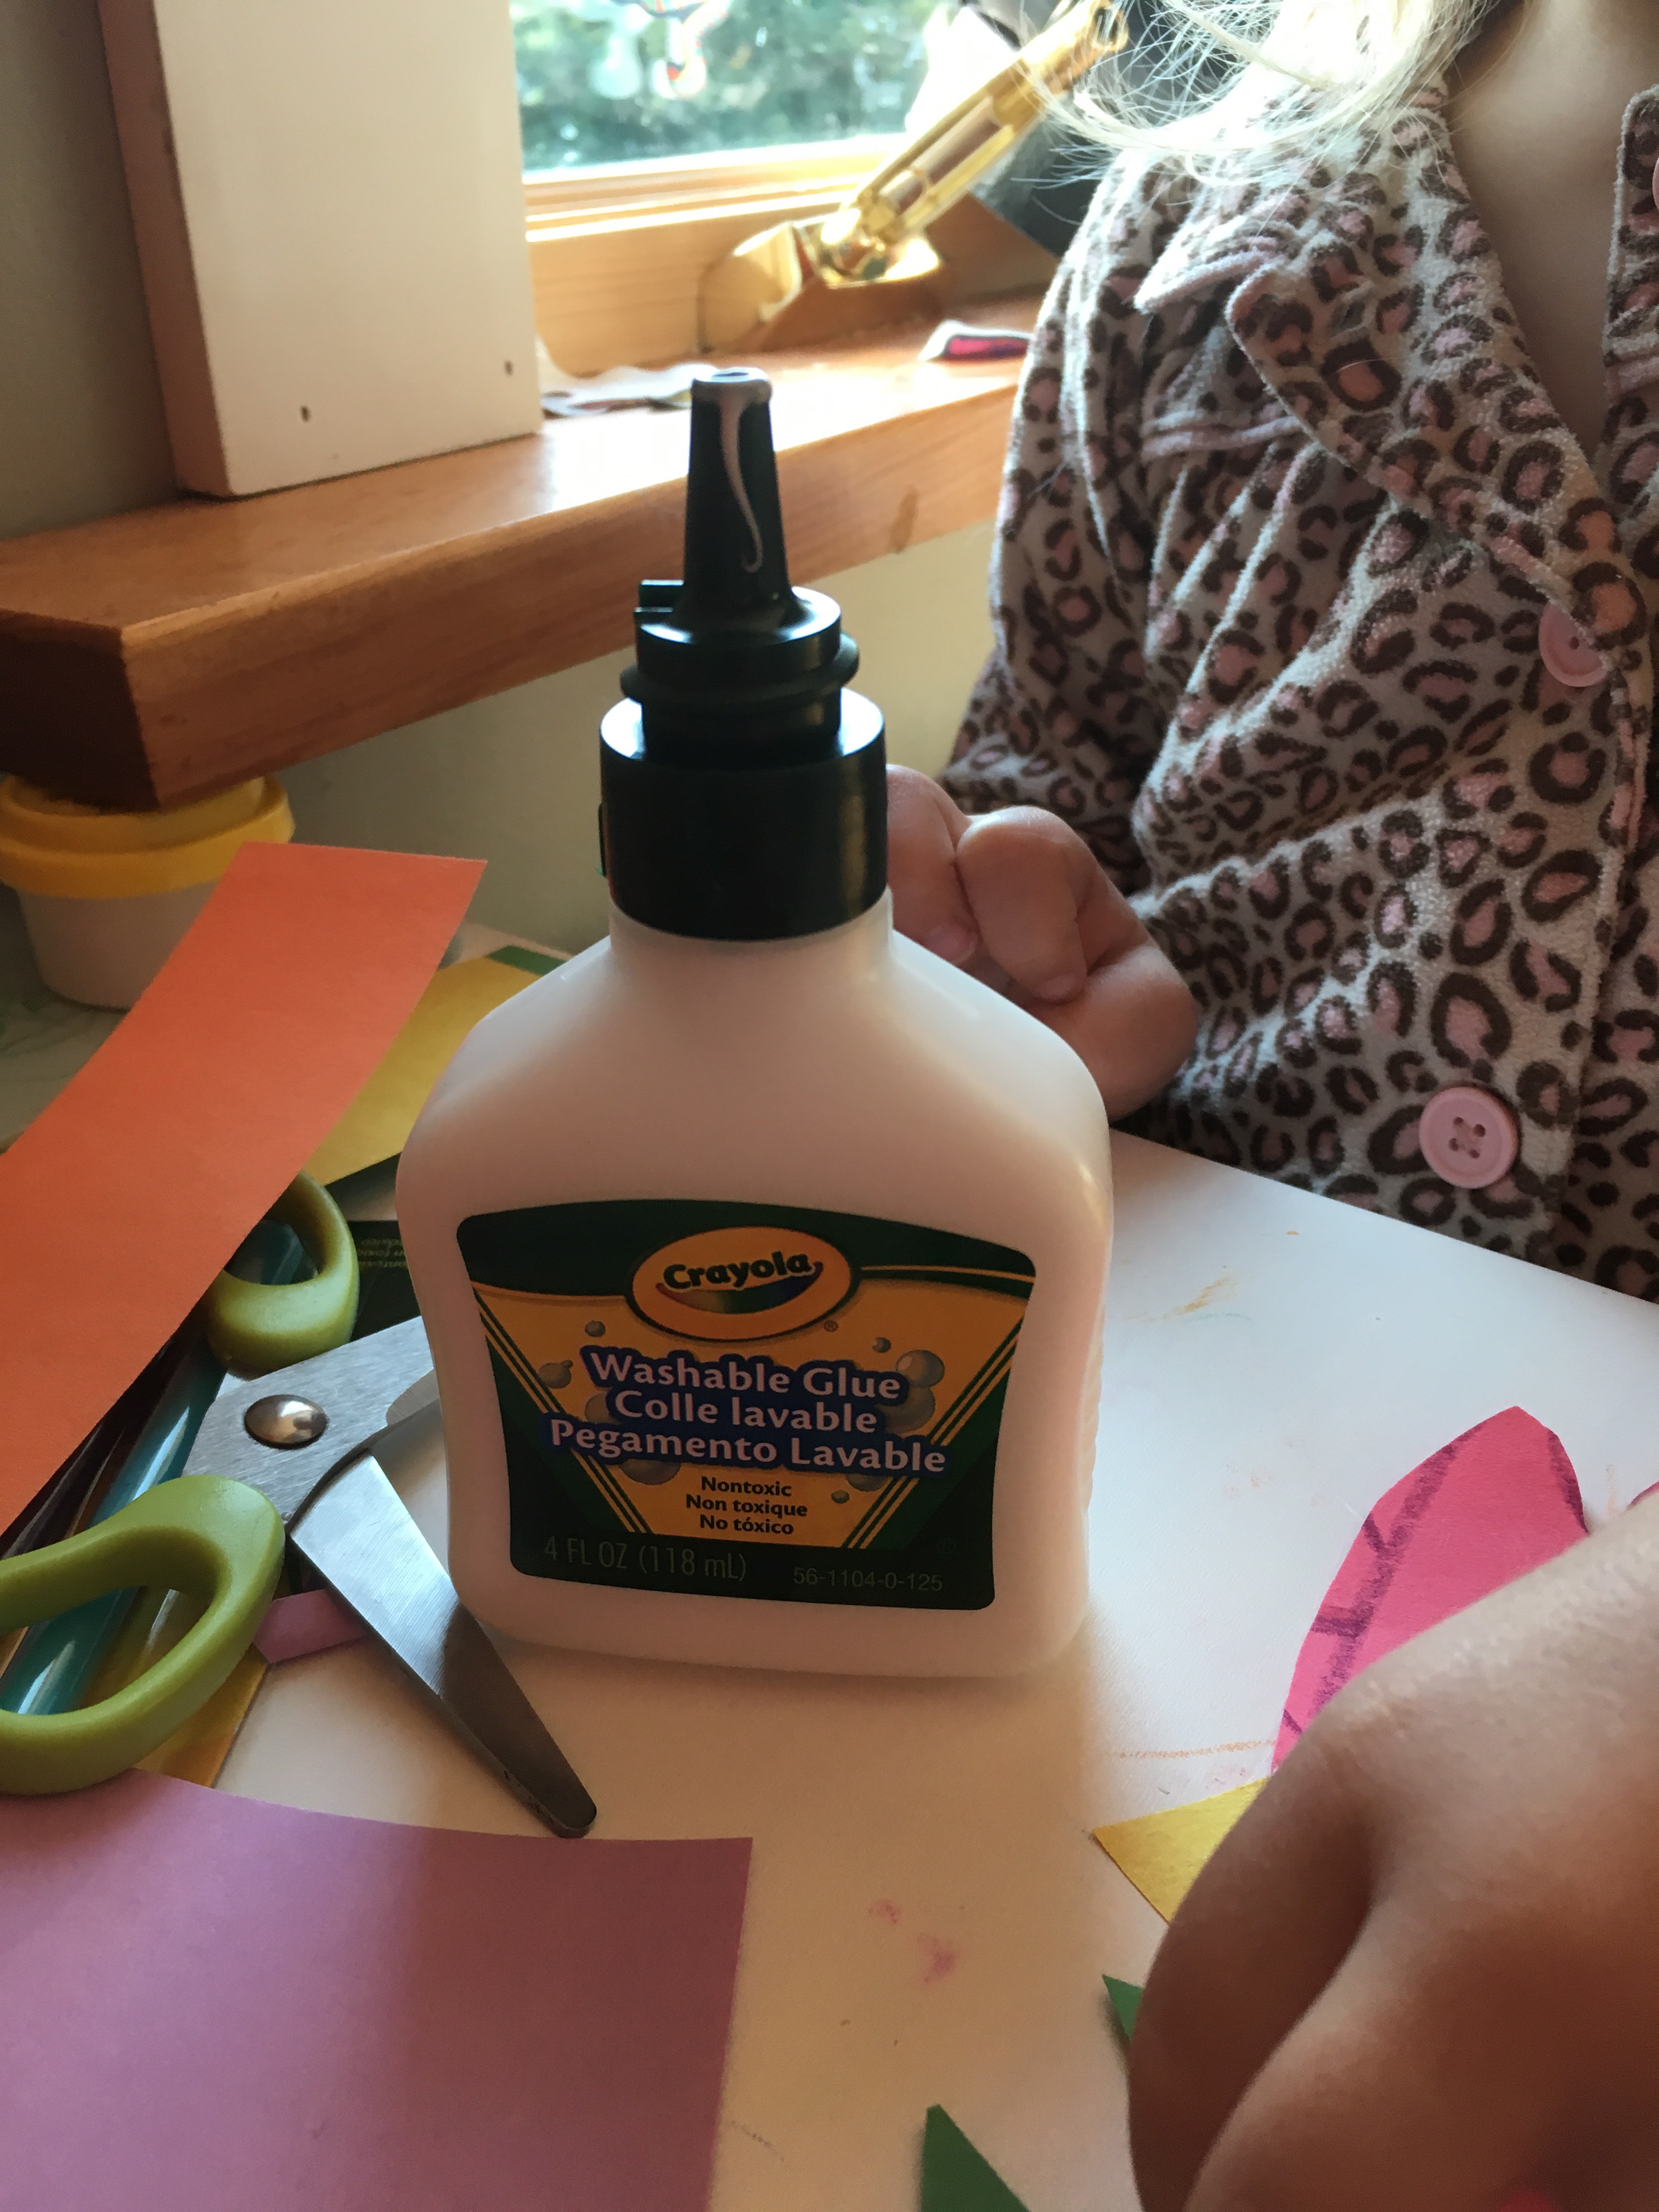
I absolutely love this new glue I got from crayola, it is so easy for my toddler to use herself and its washable!
I simply held the construction paper up and estimated where the eye holes needed to be and cut them out then made my own design and let her glue the pieces together and decorate! Such a simple and easy project for your little one.
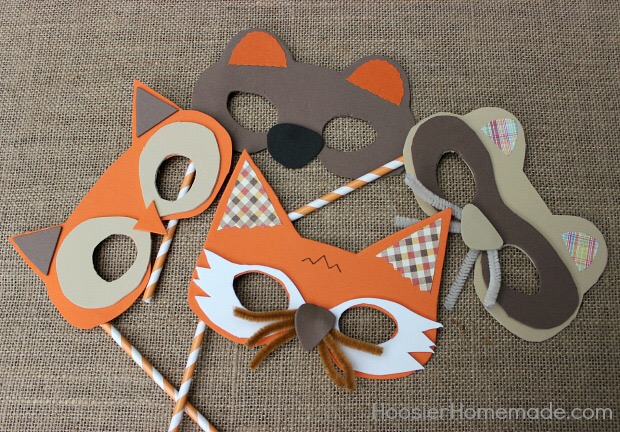
Now if you are looking for a particular pattern or don’t know how to make an animal let me suggest a couple tutorials I found:
Animal masks by Hoosier
These cute masks are perfect for your little fall creature! There’s a pattern for them too!
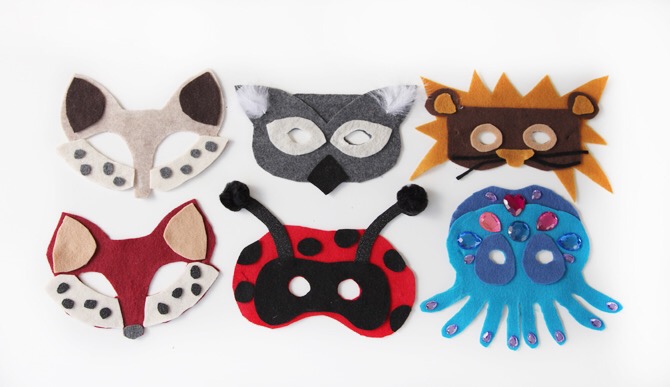
Next are easy felt masks that are perfect for Halloween costumes!


 However, my laminator is only big enough for a regular printer sized paper. You can take it to your local staples or office store to get laminated. You can even make your own placemat out of fabric and have it laminated.

 my daughter likes to squirt the paint in an old egg carton that way the colors stay separated.