A felt weather board is a great way for a toddler/preschooler to learn the days of the week and the weather! I ended up having a few pieces of felt, some thread, and ribbon left over from other projects so I thought, why not? Weather board time!

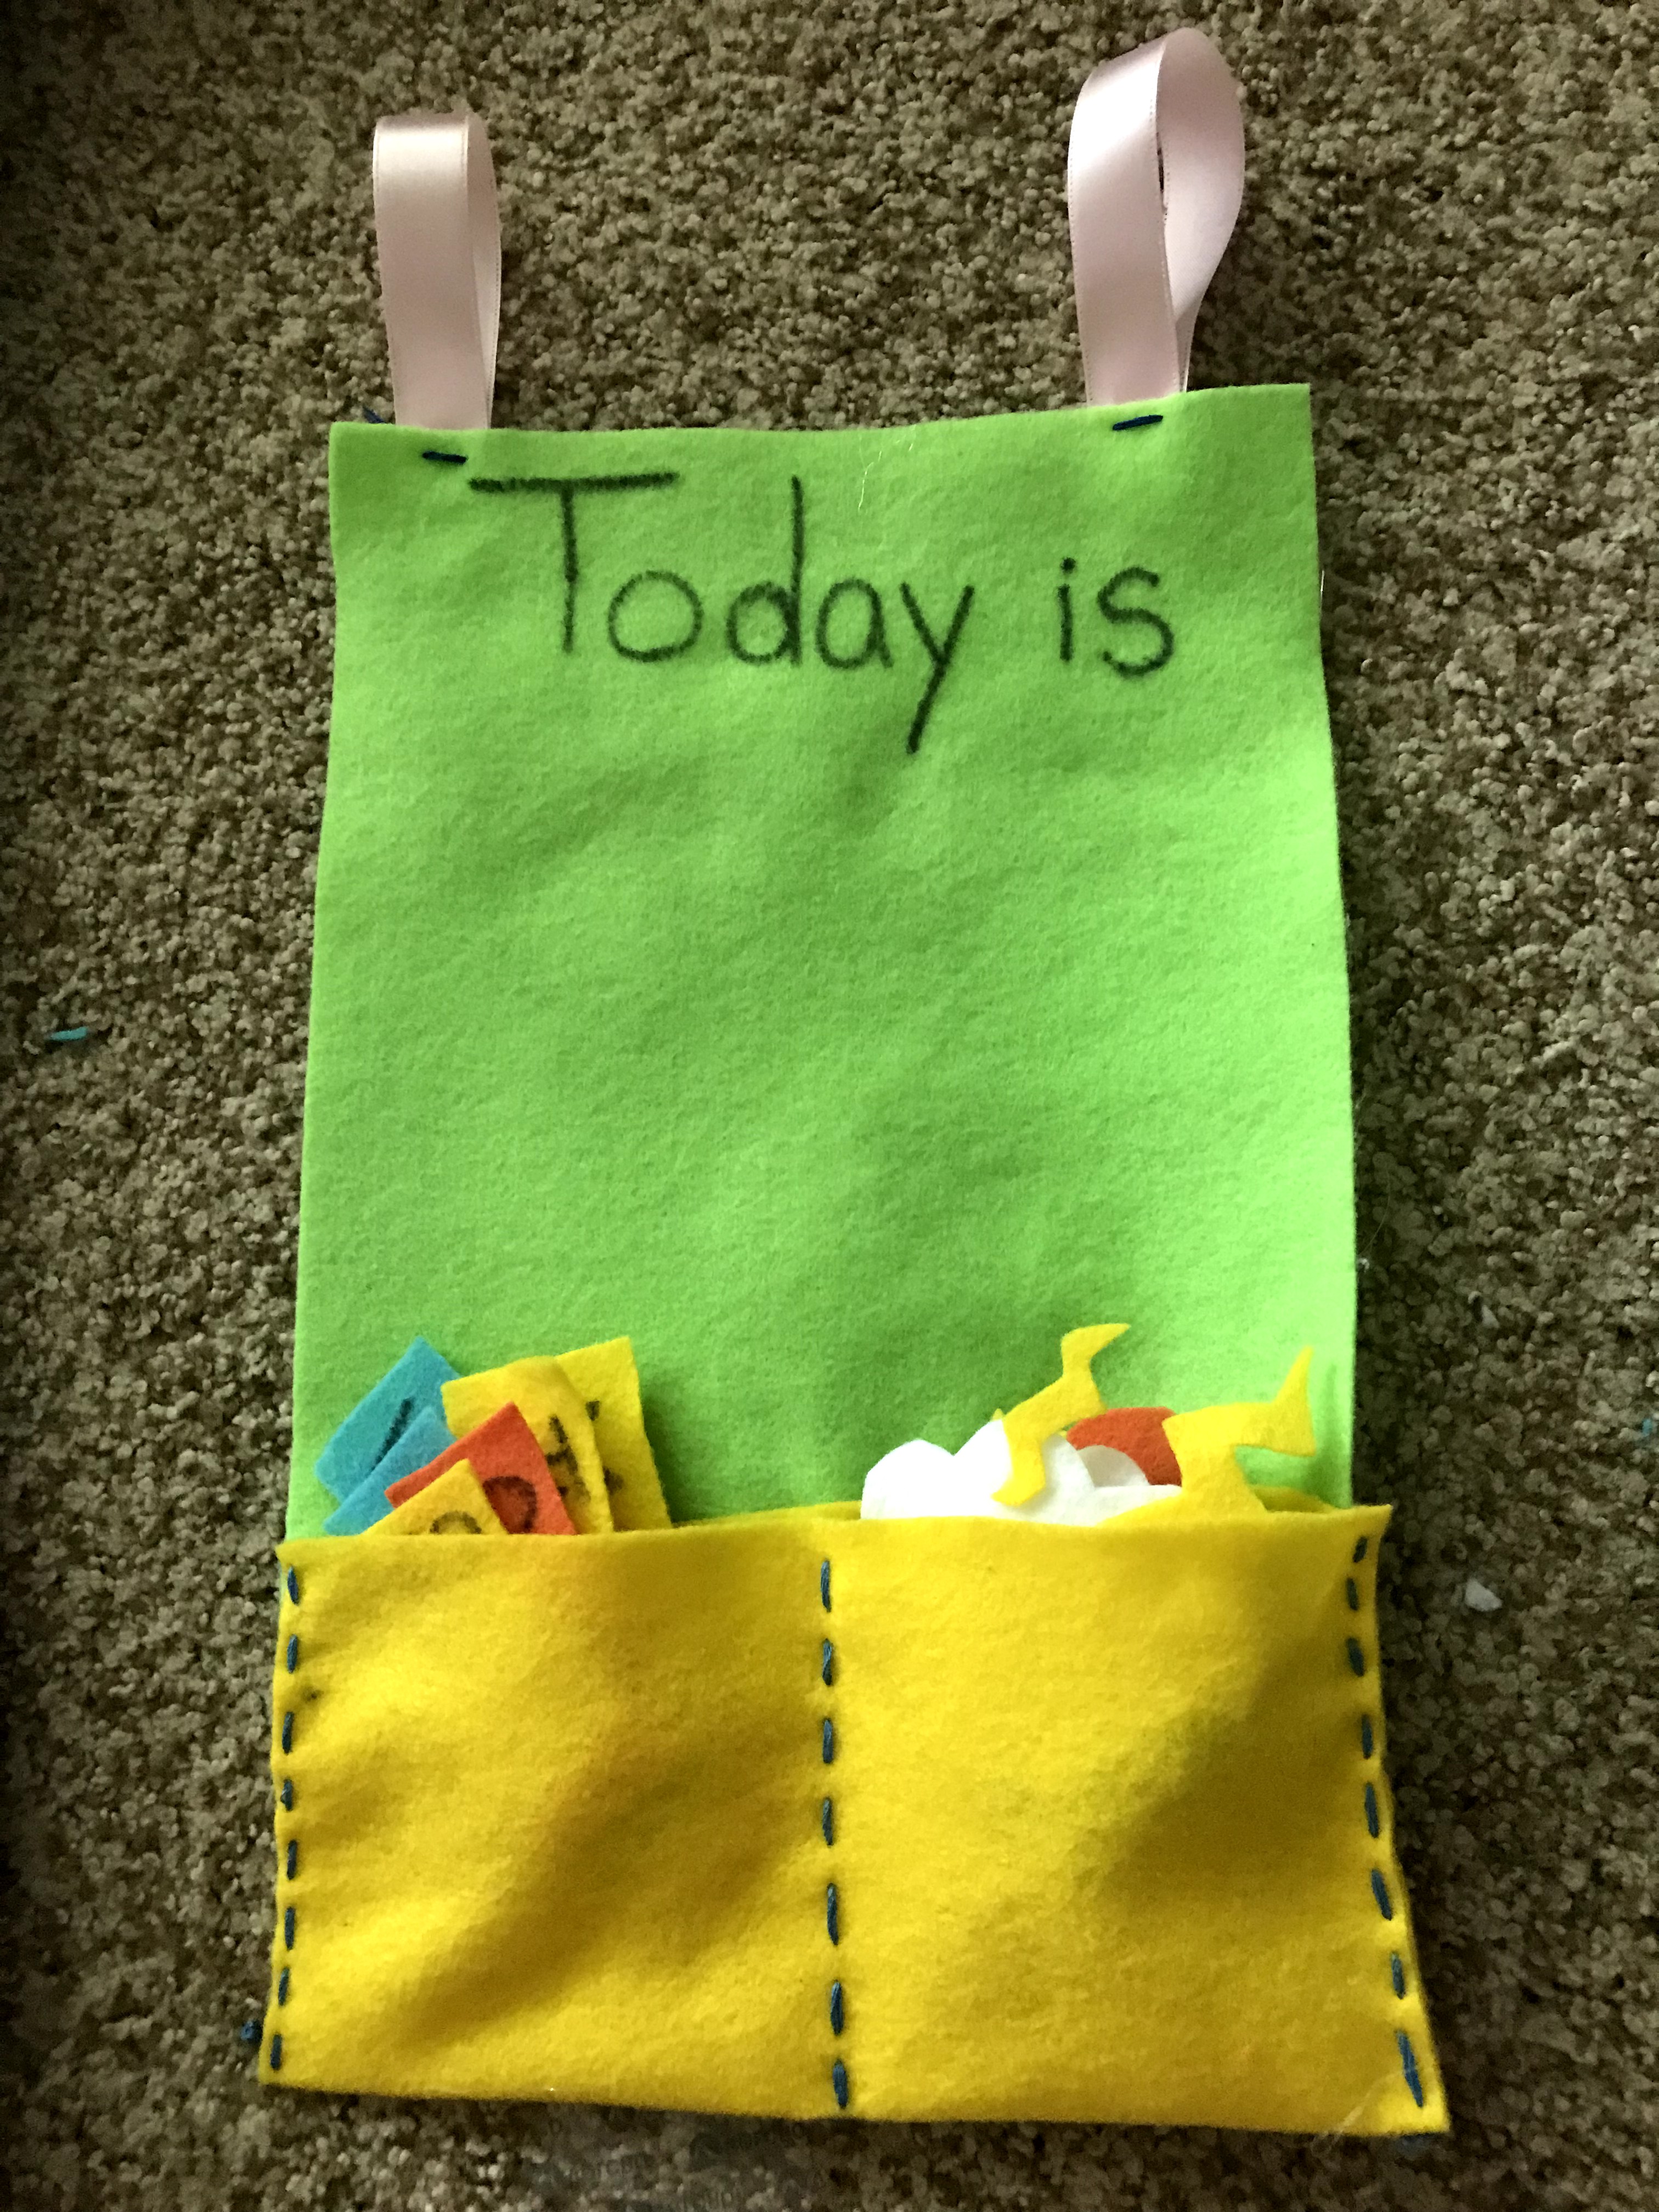
The first thing I did was fold a piece of felt in half, horizontally. I decided to make 2 pockets to hold the weather icons. Sew the two sides together, going through both layers of felt, then do the same in the middle.
Next, decide on a background color. Lay the felt pockets on the bottom overlapping the background color. I overlapped 2 inches then hand sewed the sides 2 inches down (only on the inner layer which you can’t see) and along the top.


Next, I used a sharpie and wrote “Today is” at the top. I didn’t intend to do the days of the week as my girl is only 2, so she won’t really grasp that, but I had more felt and space! This weather chart can grow with her. Not only will I add more weather icons such as hail, sleet, moon phases, but I will also add the days of the week as she gets older. For now I will store them to the side to focus on weather!
Time for the fun part, making the weather symbols! There are countless ways to create them, I decided on these.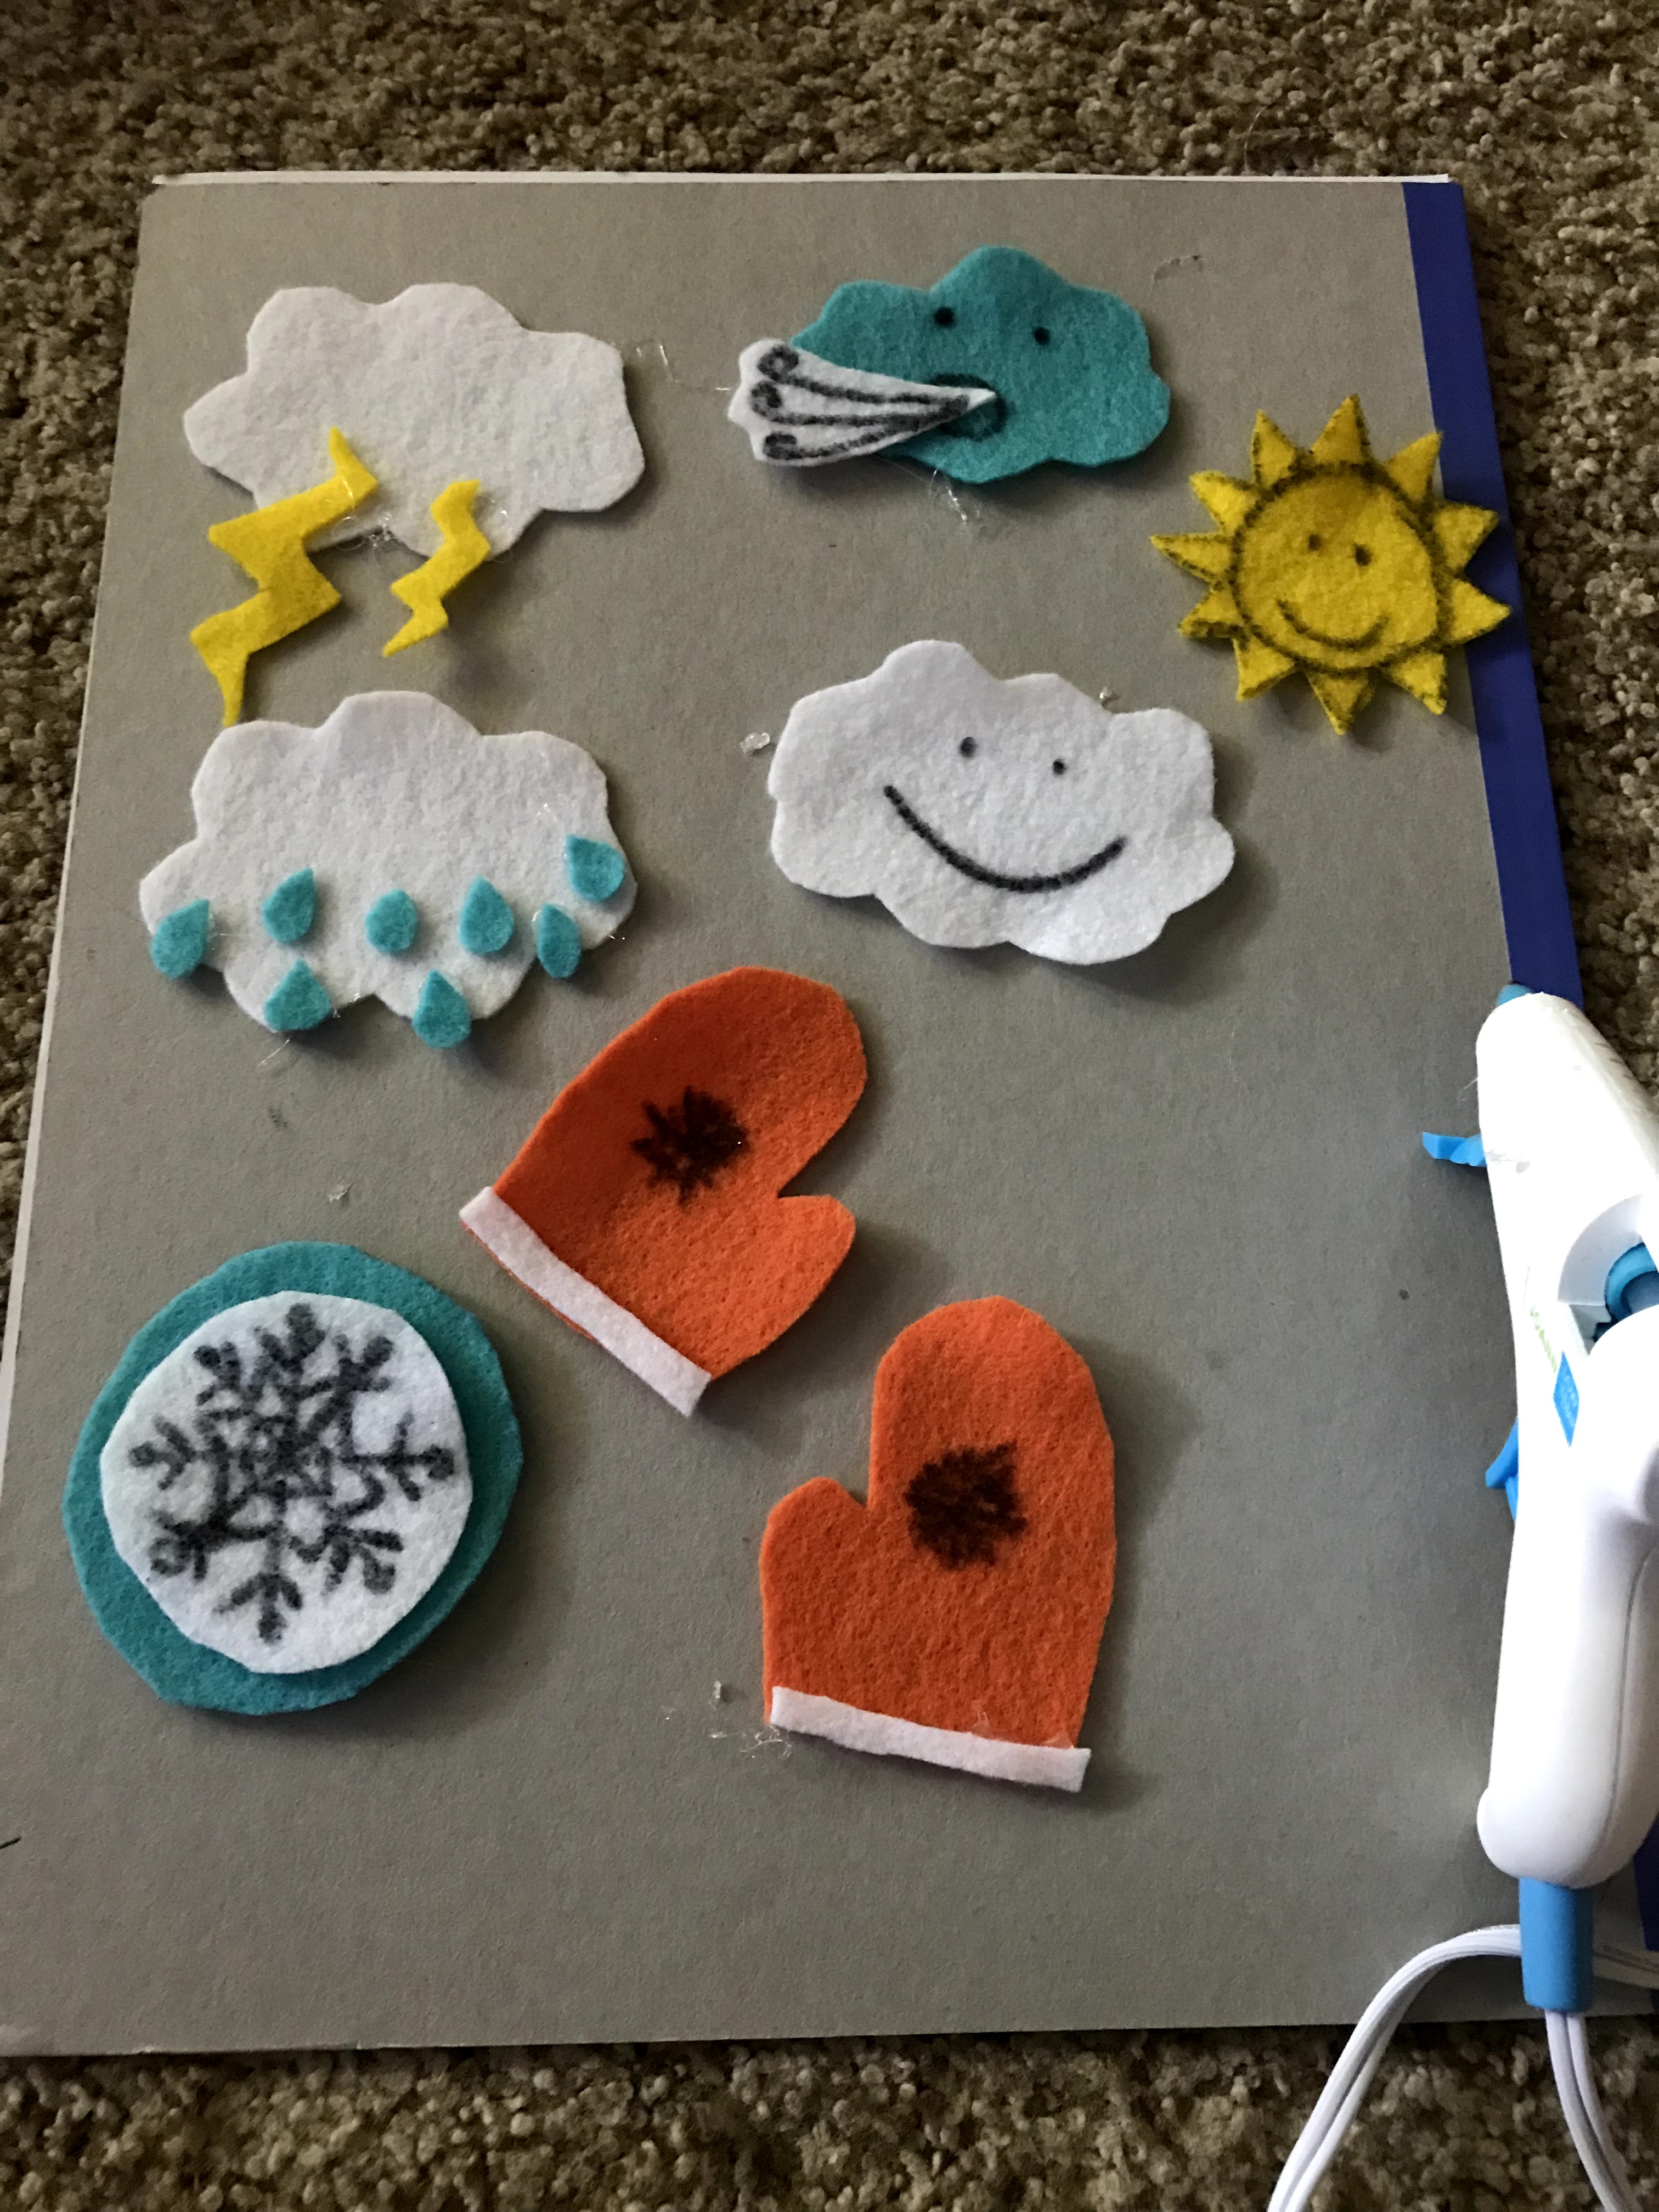
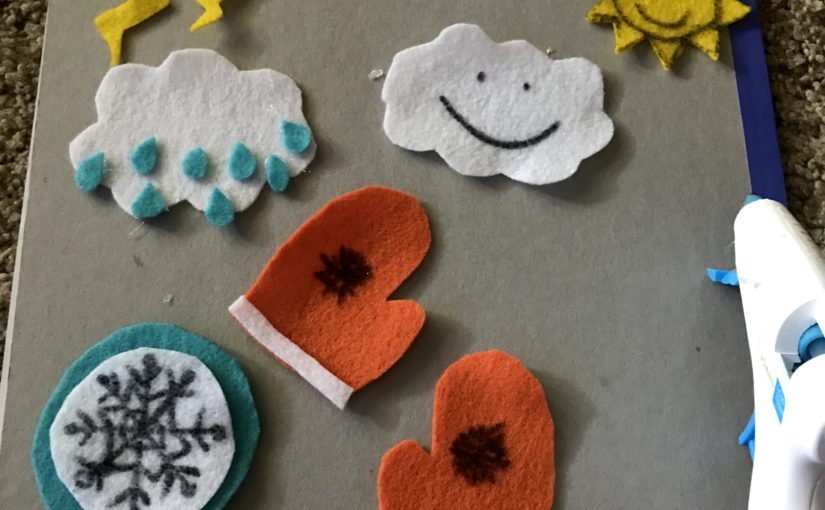
I also added a partly sunny symbol which you will see in later pictures. I did all of these by hand, sometimes outlining the pattern I wanted on the felt first, then cutting them out. I used the glue gun to add some different colors such as the white on the snowflake, the mittens, wind, lightning and rain.
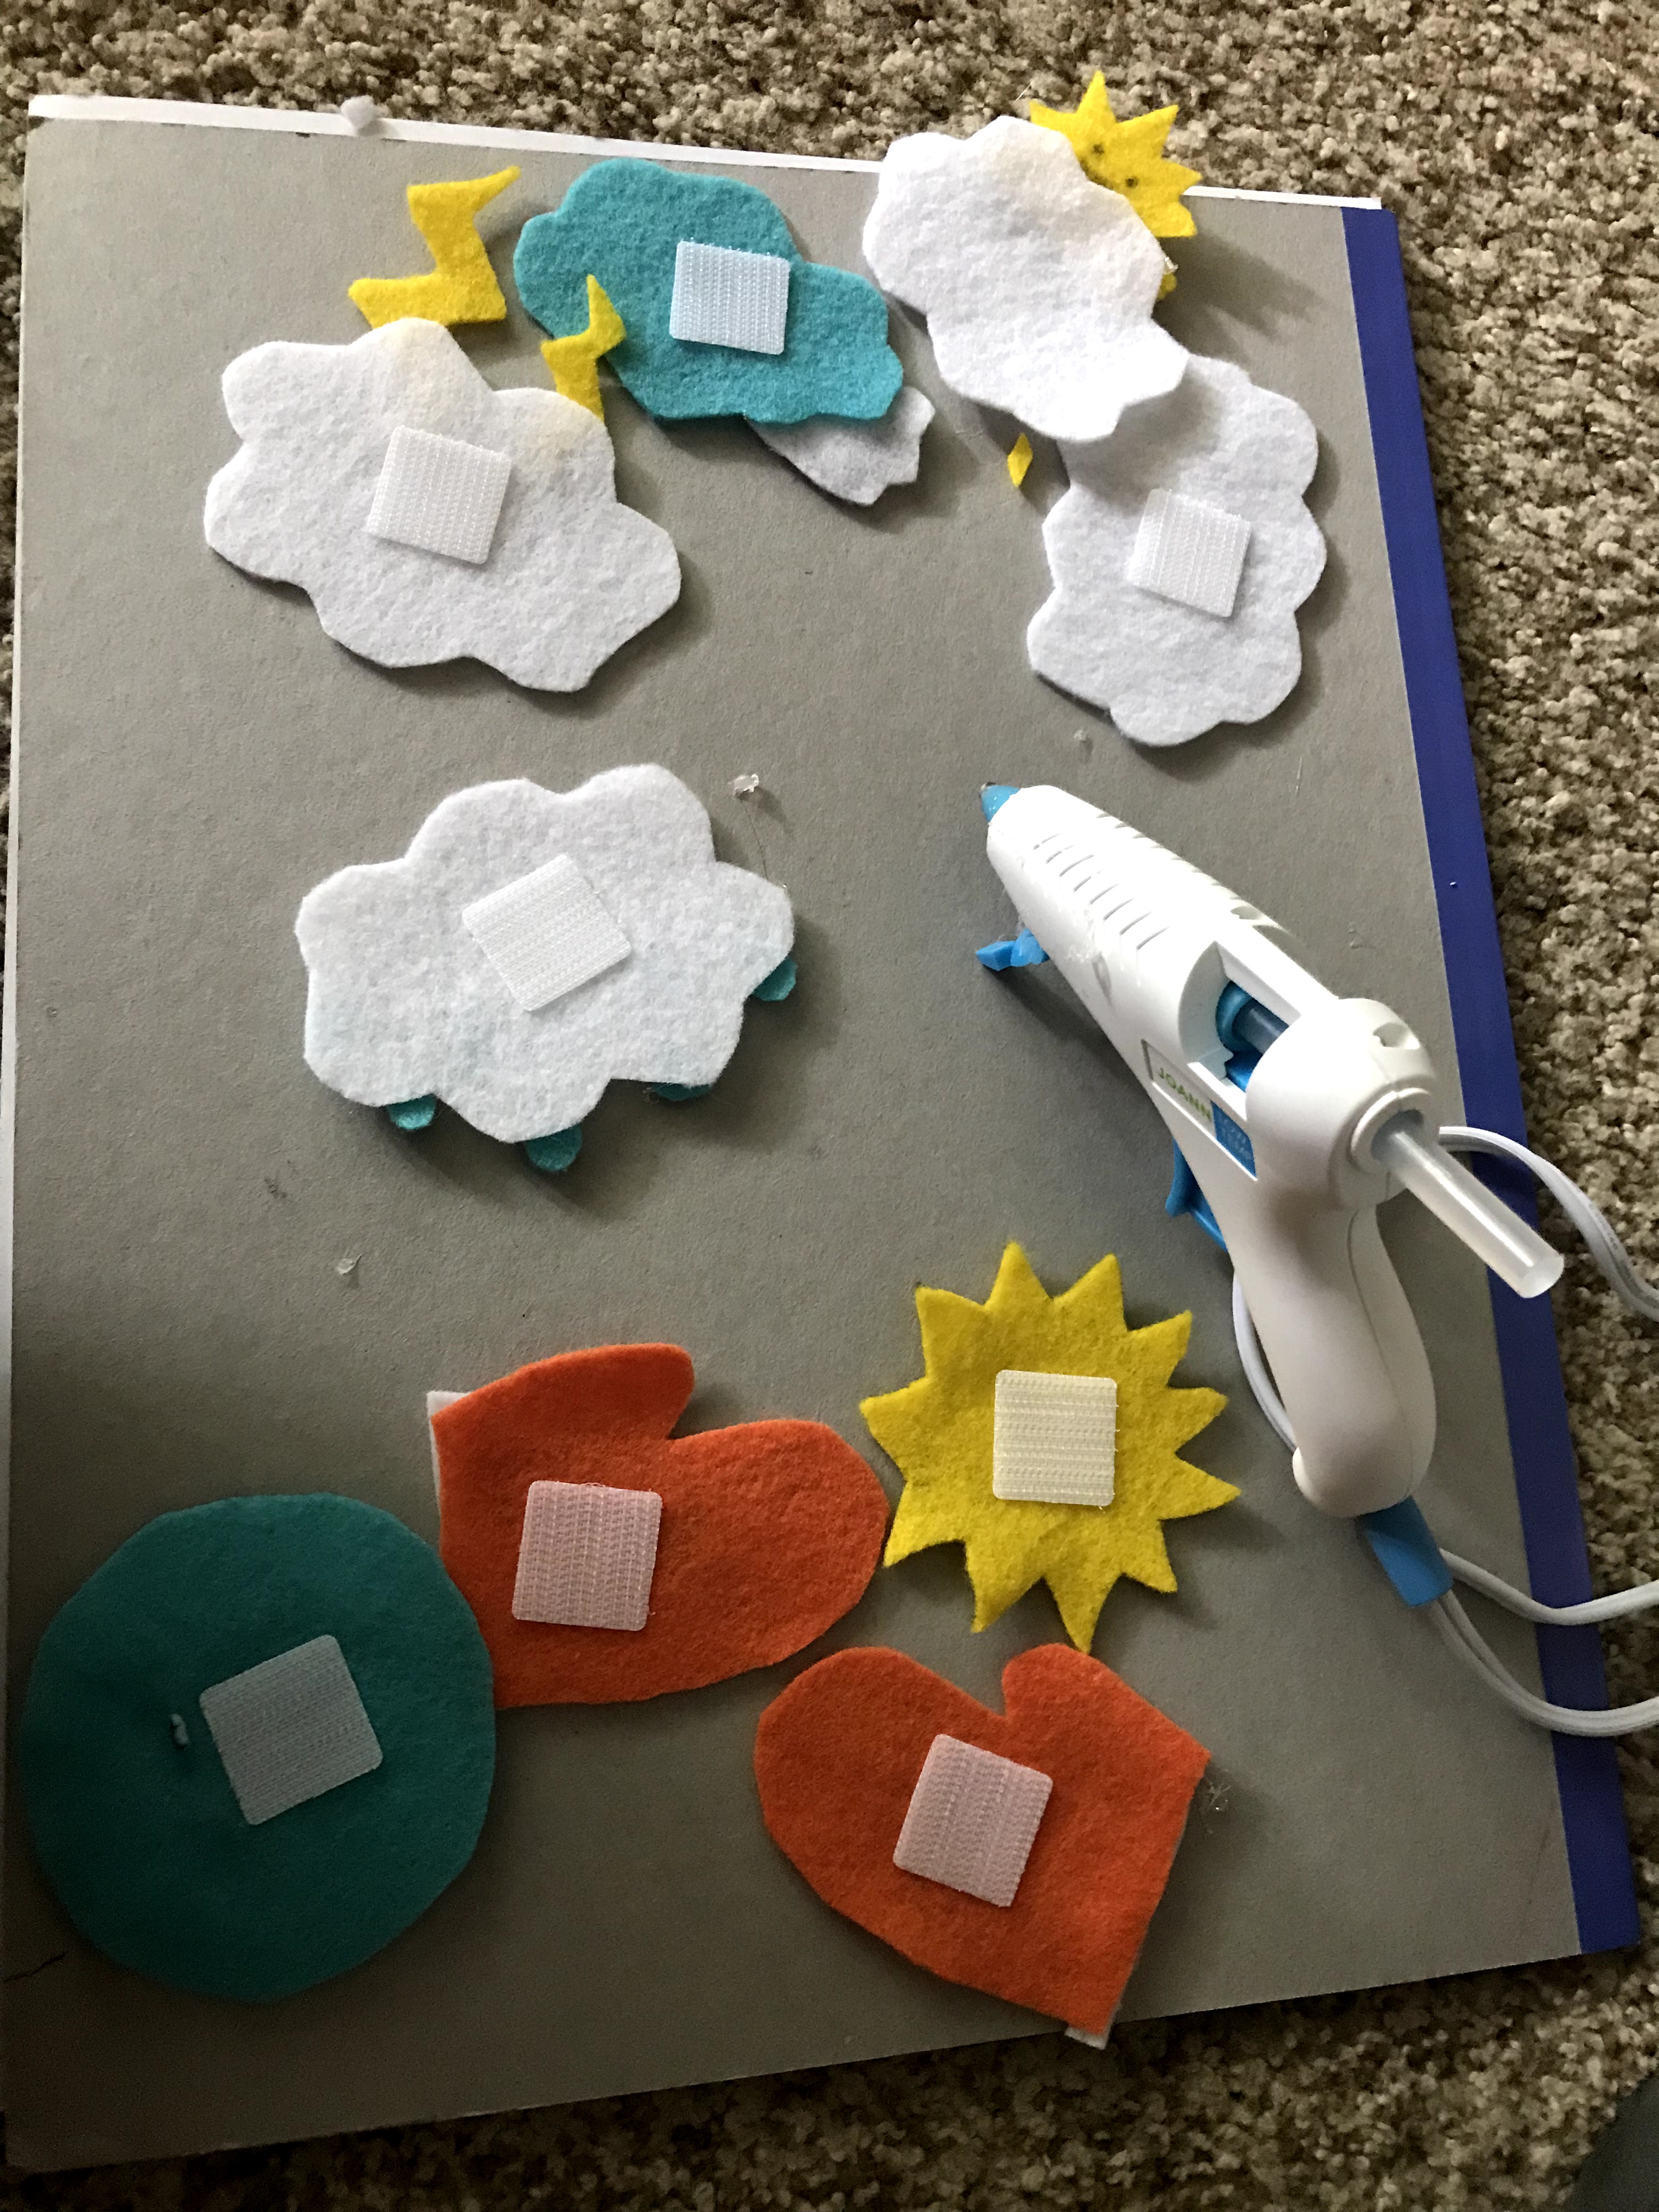
I bought some velcro from Michaels. You can use the scratchy side on the back of the weather symbols. This scratchy side will stick to the felt that is the background, you don’t need the soft side of the velcro at all.
I also added a partly sunny symbol you can see at the top of the picture. I did not use the hot glue for the velcro, it just happens to be in the picture. The velcro has a sticky side that will adhere to the felt.

I had extra felt so I made days of the week!
My daughter won’t really grasp the days of the week but we can practice anyway. I can also store them until she’s ready. I might have to do that! She loves the felt weather board so much she puts them all up and takes them all down. Her favorite symbols are the sun and partly sunny. She had to take them to my sister’s house. Luckily I convinced her to leave them in the car so we didn’t lose them and I returned them to her board!
I ended up adding ribbon by making a stitch at the top. To make it extra sturdy I decided to hot glue the bottom of the ribbon to the felt too! You can use string, small ribbon, or anything you choose for this! I hung it above her work table using the clear command hooks that will easily come off of the wall if I want to remove them.
You can make the weather board a daily routine! Do it in the morning, or change it throughout the day based on the weather. Enjoy!!! 
Follow
Share