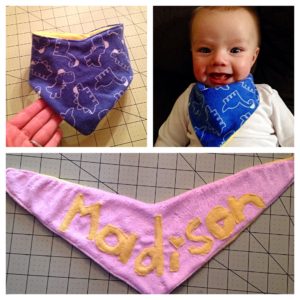
DIY Bandana Drool Bib

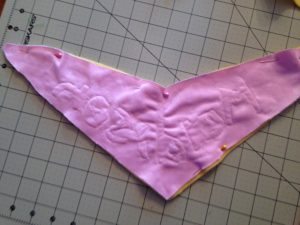
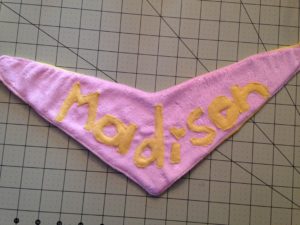
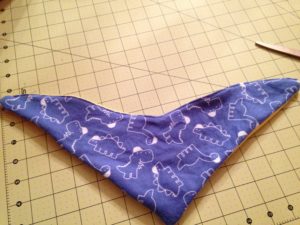
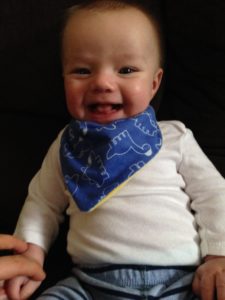
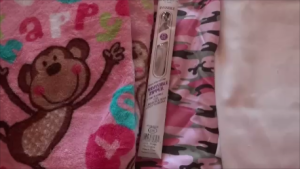
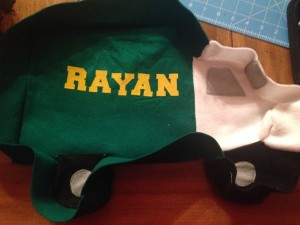
Once the drool starts it doesn’t stop!  I saw an adorable bandana drool bib in a store and thought, I could easily make that!  And you can too!  It is a simple 5 to 10 minute project that makes a great gift and a fantastic accent and cute and functional accessory for your little one.


As always, there is a youtube tutorial and the written steps on here!  Hope you enjoy!


This is for size 6months to 12months.

What you will need:
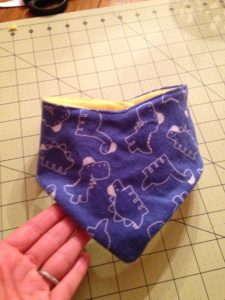
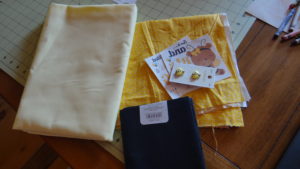
1) Two Fabrics (one side needs to be absorbent). I used a cute flannel fabric and then a yellow fleece material for the back.
2) Velcro or snaps to hold it shut

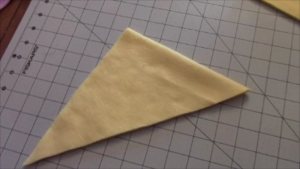
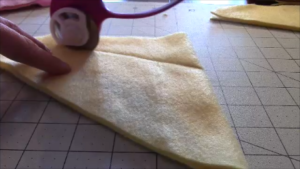
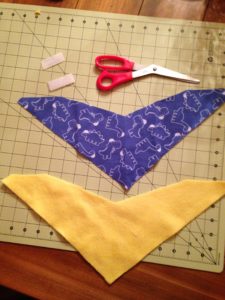
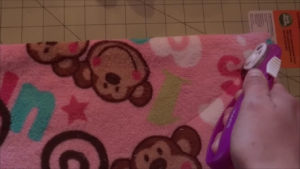
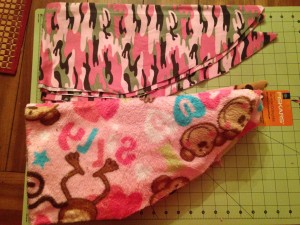
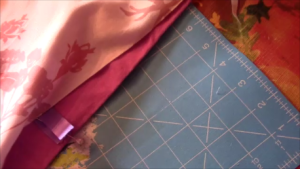
  1.  Fold your fabric in half. Cut out two triangles, one with each fabric (you can use my measurements or compare to your bib size for your little one) .  I used the measurements of  9in long and 7 1/2in on the fold.
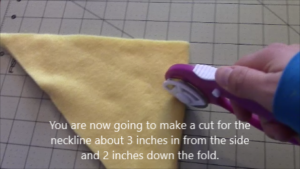
  2. Next, you are going to make a cut for the neckline about 3 inches in from the side
    and 2 inches down the fold.
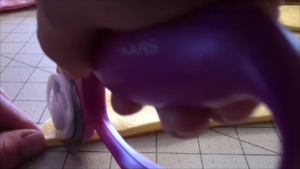
  3. Cut the little triangle off the very end, abut half an inch, this is where the velcro will connect.
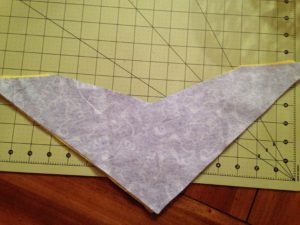
  4. Take pattern side facing pattern side and sew all the way around leaving a small
    opening around 2 inches (this is where you will pull it right side out)
  5. Now pull it right side out and hand sew the hole shut and VOILA! drool bib
    complete!
  6. Iron press it!  You can also go around the whole outside and sew it if you like for the design look!
  7. Next you want to attach either your velcro or snaps.  I have iron on velcro I used.

Hope you enjoyed this tutorial, if you have questions just post! Thanks


FollowFacebookpinterestrssyoutube
ShareFacebookpinterest

Summer Bee Dress

Cecelia’s Summer Bee Dress

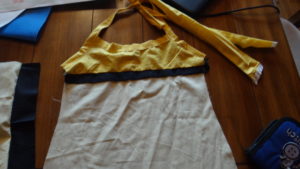
This lovely summer spaghetti strap dress was suppose to be made in time for my sister in laws baby shower in June.  However, I was unable to finish it due to my water breaking early and being hospitalized.  I finally finished it and love how it turned out!  I free handed the design and sizing.  I meant for it to end up as a 2t size, but as you can see it’s a bit big!  This works out great since its winter and not summertime!  She can wear it this upcoming summer.  I can’t wait for the warm spring and summer to come!  Bulbs and flowers emerging and gardening time, but let’s get back on track.

As always there is a youtube tutorial and this written one.  I do not have a pattern as a freehanded it and designed the pattern myself as I went.  I used one of my Cece’s dresses to size it and make part of the pattern to guess the sizing.

Unfortunately, a lot of the video tutorial was accidentally videotaped over with my baby boys arrival home (sorry more important anyways!).  So I videotaped again trying to explain the best I could.  If you have questions please let me know!  More great videos to come soon!

What you need:

  • Chose of fabric colors and types (I chose three colors
  • 1/4 inch elastic (for gathering of the top of back of the dress)
  • Bias tape (or you can make your own like I did)
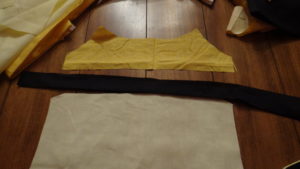
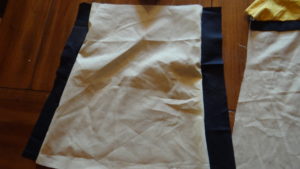
  1.  First you want to cut out your fabric pieces.  I looked at another dress I have for my little one and based the main front and back piece by measuring and estimating the sizing.  Then I cut the bottom piece I needed which ended up being about 40inches long and 4 inches wide (for the ruffle on the bottom). I ended up added another color (black) on the two sides of the dress.  Then I also cut out fabric to make bias tape (here is a good tutorial on making bias tape if you’ve never made it before..BIAS TAPE TUTORIAL. )
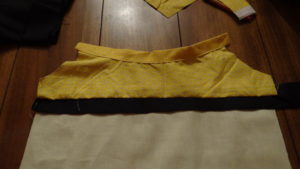
  2. Take your strap (black piece) and sew it to the top piece and bottom piece.  Pattern piece to pattern piece (facing each other) sew the bottom to the strap
    then the top.
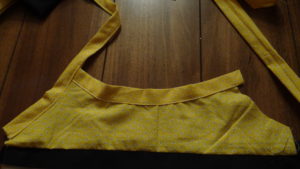
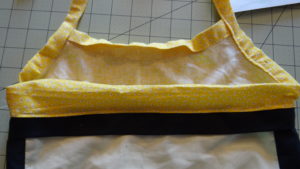
  3. I made my own bias tape by cutting and ironing the fabric.  Then you proceed to use it to line the top of the dress (sew it on!). Then sew up the armholes and long to tie…estimate how long you want the straps to be to tie behind the neck (longer the better!)
  4.  
  5. Take the back side and sew two black (or whatever color you choose) by sewing
    facing pattern sides together
  6. I decided to add a small piece of fabric above the black strap to make it higher .  If you want, sew and connect.  Then place from and back piece facing each other and sew to connect from and back.
  7. Add elastic to back piece if you want it ruched and tighter.
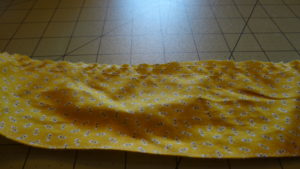
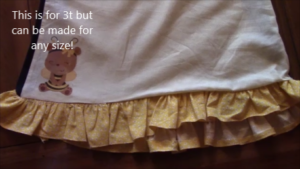
  8. The last part is the bottom ruffled part.
  9. Hem the bottom first about 1/8inch
  10. To gather your fabric put your machine on the longest thread setting make two
    straight lines (Do not reverse!). Roughly 1/4 and 1/8 inch away from the top.
    Leave long threads on the ends.
  11. Next you knot the bottom of the back side of the threads so you can gather, just the two in the back (not the front).
  12. Pull the bottom threads from the other end and slide the cloth along the threads toward your knot making small folds. When your cloth has been
    gathered the way you want it, knot the ends securely with each other.
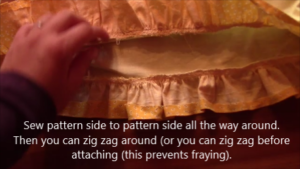
  13. Sew pattern side to pattern side all the way around.  Then you can zig zag around (or you can zig zag before attaching (this prevents fraying).
  14. Then you are finished! Great Job!  Have fun! Post your pics!
FollowFacebookpinterestrssyoutube
ShareFacebookpinterest

DIY Child Bean Bag!

I don’t know about your little one, but mine sure does love to read!  Well at this age, it is more like browse through the pages and pictures!  She sits by the book shelf and pulls out book by book looking at each page.

At first I thought maybe I should purchase her a bean bag chair, and then I thought, well lets just make one! This can also be a great gift for anyone!  I actually sometimes sit in it too (shhhh!)

So of course I have the video tutorial on youtube below and then the written and picture tutorial below that.  Let me know if you have any questions!

IMG_3968

What you need:

  1. Fabric (you can use two or one color) 2 yards total of each color (or 4 yards of one color)
  2. A 24 inch zipper (or you can use velcro or buttons)
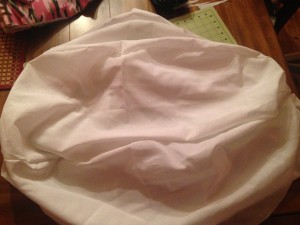
  3. 4 yards of muslin or cheap fabric
  4. Bean bag filling (100L) (I couldn’t find a large bag at my local craft store so I bought mine on amazon with free shipping)
  5.      Snapshot 1 (3-14-2016 7-40 AM)
  6. Make panels of 40×16 inches. You should do 6 outside (3 of one color and 3 of the other color) and 6 inner panels.
  7. Take one of your panels and fold once long way and once width. Have your fold on top and side when measuring to cut. Measure bottom to 6 inches (the long side) and start a curve and cut right up to the right corner. See picture below.
  8. Snapshot 2 (3-14-2016 6-41 PM)
  9. IMG_3931
  10. Line up two inside pieces and sew up and down one side.  I did this twice for more strength.  For the outside you will have the patterns facing inside towards each other and sew.
  11. IMG_3932
  12. Once sewn open the panel up. Then place another panel on the original piece and sew the opposite side (you will end up with three pieces sewn together)
  13. IMG_3933
  14. Then sew the other 3 inside pieces together and you will have two sets of three.
  15. Take the two sewn together pieces and face pattern side in (doesn’t matter with the inside bean bag layer) and sew all the way around the outside leaving a couple inches hole.
  16. Turn right side out.  Then you will put the bean bag filling it!  Ah what a challenge!
    Note: I did not completely fill and sew this until I was sure the outside would fit over properly.  I waited to finish this until the end of the project.
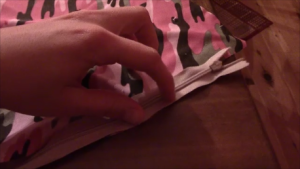
  17. Take one of your outside panels and face the zipper down on the pattern.  Line it up on your machine and sew the zipper on.Take one of your outside panels and face the zipper down on the pattern.  Line up the right outside part of the zipper to the outside of the panel (as shown) and sew the zipper on.
  18. snap
  19. See the video for more of a demonstration on how to attach a zipper
  20. Sew pattern and right side of the next panel to zipper right sides facing each other (inside) and sew together.
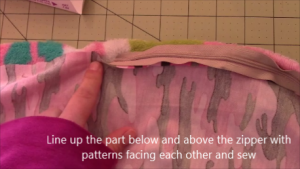
  21. Line up the part below and above the zipper with patterns facing each other and sew
  22. zipper
  23. Then sew your 3rd panel on…complete another 3 panels together as done with the inside pieces.
  24.  **Open your zipper all the way.  Take each 3 piece panel set and place them facing each other (inside) and sew all the way around the edges.  Do not leave a hole this time, you will pull it out through the zipper opening!
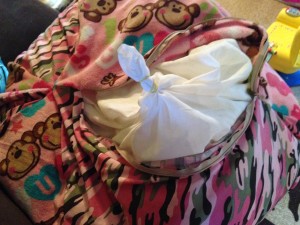
  25. Next you will place your inside bean bag that is partially full inside.  If its full then you are done!  However, if you partially filled…continue to fill all the way and sew the inside bag shut.
  26. IMG_3966
  27. Congrats you are done! Enjoy!  Post your pics below!


IMG_3968

FollowFacebookpinterestrssyoutube
ShareFacebookpinterest

Truck Pillow Tutorial

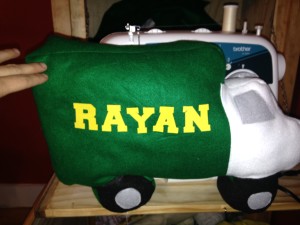
I have a nephew who absolutely loves trucks, cars, and any other type of vehicle.  As Christmas approached I was unsure of what to get my nephew.  I searched the internet for ideas of sewing projects with trucks, but it was only to my dismay. None of the projects peaked my interest.  I found a car tutorial but that was it.  So I decided to make my own pattern and tutorial on a truck pillow.  I also decided that putting his name on with iron on letters would be fantastic!IMG_3727

As usual, there is a video tutorial on my youtube site, and written instructions with pictures below.

What you will need:
*Your choice of fabric colors
*poly-fil or any type of stuffing
*Choice of thread colors
*Optional: Iron on letters

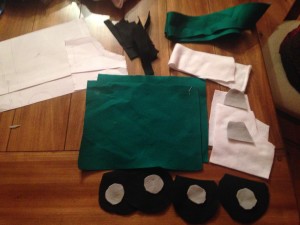
Pattern: Use one whole piece of printer paper 8x10inches as the trailer part.  Make a circle for the wheels.  And make a from cab as you like.  The pattern I made is so easy I’m not even going to try and retrace it and scan it and turn it into a pdf because it takes much longer…if you are really having issues please let me know and I will take the time do that for you.

  1. Cut out your fabric pieces
  2. IMG_3717
  3. Iron on letters or if you want to sew on letters that works as well!
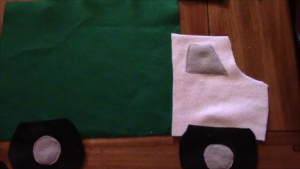
  4. Sew on your hubcaps, windows and any other details you want to add
  5. Sew each side together.  The front cab to the trailer and the wheelsSnapshot 1 (1-4-2016 9-28 PM)
  6. Time to sew the middle strip part! I made mine 2 inches thick but you can make it as big as you like!
  7. You can switch colors to match or just use one color.
  8. If you do not want to do the middle section then you can just take the two truck sides facing each other (inside) and sew around leaving a 3 inch opening.  Turn right side out, stuff, and hand-sew shut.
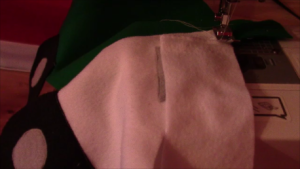
  9. To do the middle strip, line it up with the truck where you want to start and back-stitch and go forward all the way around switch colors as needed.  Curve the middle strip around the corners.
  10. Snapshot 2 (1-4-2016 9-32 PM)
  11. Now take the other side of the truck and have the sides facing inwards towards
    each other, and sew the second side to the strips on the first side.
  12. IMG_3726
  13. Turn right side out and make sure there are no holes in the outside, if there are turn inside out and fix them.
  14. Fill with your choice of stuffing and hand-sew shut.
  15. Congrats you are done!
  16. If you have any questions or concerns please leave them below.  If you have trouble with the middle strip please watch the youtube tutorial.
FollowFacebookpinterestrssyoutube
ShareFacebookpinterest

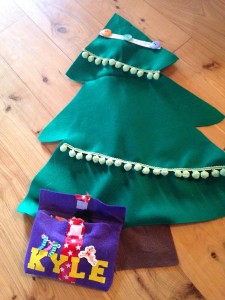
DIY Felt Christmas Tree!

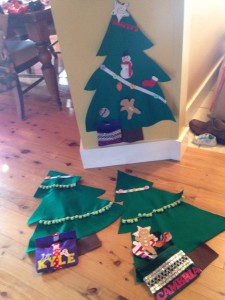
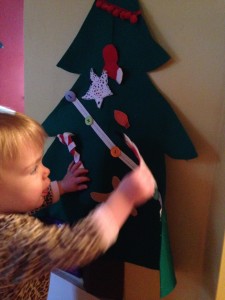
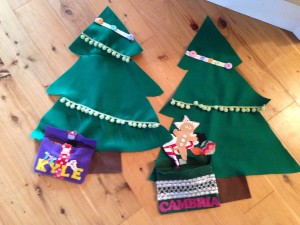
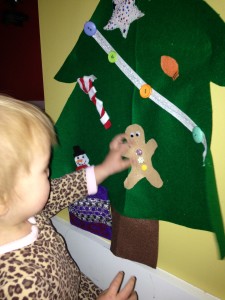
Cece bear loves to pull toys out of baskets and put them back in.  She also likes to build blocks and figure out other puzzles.  So I thought to myself, what can I make for Christmas that she can play with?  And a mini Christmas tree came to mind.  Eventually, I figured out a felt Christmas tree with all sorts of sensory stimulation and Velcro ornaments would work!  So I decided to get to work.

IMG_3608

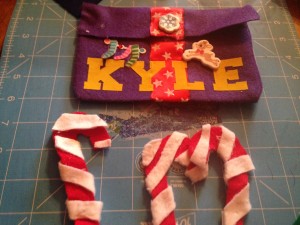
I decided to make three trees, one for each of Cece’s friends.  It also made a great birthday gift for her friend Kyle’s first birthday!  This is a great activity to do with older children as well.  They can make their own ornaments and decorate the tree!  There are a variety of ways to put the tree, ribbons, buttons, and ornaments together.  The two I used were sewing and hot glue gun, but you can do one or the other as well.  Just make sure if you have a baby, infant, or toddler, to make sure everything is very secure so they can’t pull it off!

IMG_3625

As always, there is a youtube video and written steps and pictures.  Feel free to add your own creativity and pizzazz!!!

If you have an older child, instead of using velcro to stick the ornaments on, you can use string or twine looped on the ornament and they can put them around buttons on the tree!


What you need:
*Green felt fabric (I used 1.5
yards for three trees)
*velcro
*Brown felt fabric (stump)
*Felt fabrics of various colors for
ornaments of your choice and design
*optional: buttons, ribbons,
and other accessories

IMG_35381) Fold your green felt and make a tree outline on the fold (so half of it traced on).  Then cut your tree out!

IMG_3539

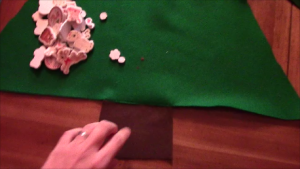
2) Next, if you want a stump, use brown fabric to cut one out!  Once again you can trace it out.  You can either sew it on the bottom or hot glue gun.

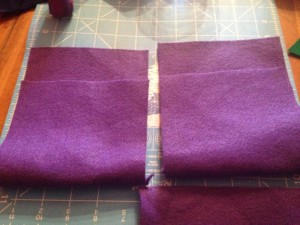
Snapshot 1 (12-8-2015 1-58 PM)3) I wanted to make something to hold the ornaments besides just having them stick to the tree.  So I decided a present with the child’s name on it would be perfect!  So next I chose a color of felt I had and cut about 11x 7 inches.

IMG_3552

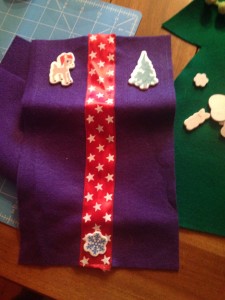
4) Next, for one of the presents I made I wanted the bow long ways down so I sewed a piece of ribbon straight down the piece. (the other two I made have it across the box which you can sew on now or later)

IMG_3553

5) The next step would be to turn it right sides facing inwards and sew to the length you want so you have the top of the present flap long enough.  Check out the picture to see what I mean. Then turn right side out.

IMG_3581

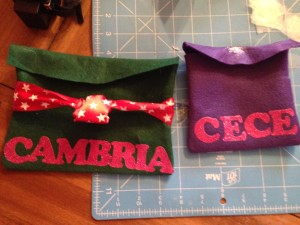
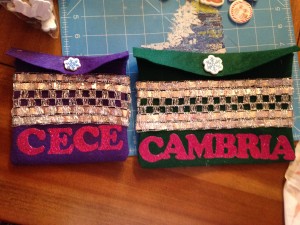
6) As you can see, I decided to iron on letters for the name of the child.  These two presents are different sizes.  Also, if you want to put a piece of iron on or sew on or glue gun on Velcro to the top of the present to have it stick now is the time.

7)  Then decorate the present at will.  I added some adhesive Rudolph stickers.  I did hot glue them so they would be more secure.

IMG_3582

8) Follow that, I sewed the present onto the tree.  This is optional, you can have it separate or not have a present at all.  I opened the top flap and sewed right along the fold to the tree.  You can also hot glue gun it.


IMG_3612

8) Now, back to the tree.  Now is the time to get even more creative!  Use ribbons, garland, buttons, or whatever you want on the tree!  You can sew or hot glue gun them on.  If you have an older child and want to have hanging ornaments on buttons then align your buttons!

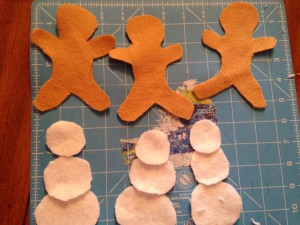
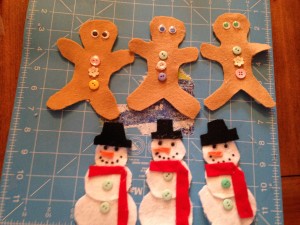
9) Next, it is time to make ornaments.  If your child is older they can help decorate and make ornaments.  I chose actually Christmas items and one ornament and one light bulb.  I used whatever felt scraps I had to make them.  I also made a star at the end.  Remember to Velcro your ornaments on the back using the hard side of the Velcro.  You want to iron them on before you decorate the front!  Otherwise you might melt or damage your decorations.

IMG_3555

IMG_3583IMG_3584

To hang the tree, I used 3m adhesive strips, but I have heard that the blue paint tape works well on walls.  You can also use suction cups if its on the window or door.  Ok enjoy!  Feel free to post your tree below!

IMG_3609IMG_3627


FollowFacebookpinterestrssyoutube
ShareFacebookpinterest

Hooded Dress (Christmas Theme)

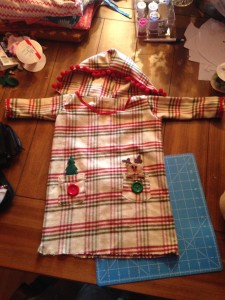
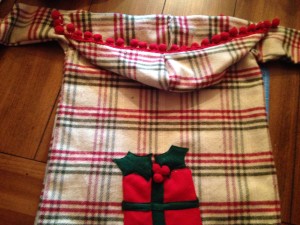
So I didn’t want the same old fancy dresses for Christmas that take FOREVER to make and are uncomfortable.  Therefore, I strolled around the fabric store looking for inspiration.  A tan plaid red and green pattern caught my eye.  For some time I have wanted to make a plaid dress for my little one, but haven’t found the right fit.  However, today, I thought to myself, “How about a comfy hooded dress in plaid?”  And so, the Christmas Plaid dress was born!!!

IMG_3377 IMG_3379 - Copy


I designed the dress myself, so be patient with the video since sometimes I change my mind after completing part of the dress.  Oh, you’ll see what I mean when you watch it!  As always, there is a youtube video tutorial and a written and picture form.  The dress pattern is listed below and is a sketch I made of it.  There are several sizes on there, but you can always adjust it by measuring your little one or making it bigger or smaller by moving the lines.


What you will need:

  1. The pattern found here–> dress.jpg
  2. Fabric (around 1 yard)
  3. Thread
  4. Sewing machine and scissors
  5. Optional: ribbon, bias tape, buttons, felt, any other decorations, Velcro for hood


Lets get started!

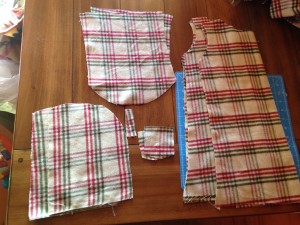
  1. Print the pattern and cut out the right size (note: make sure it is the right size for your little one by measuring)
  2. Cut your fabric patterns out as instructed (decide if you want a hood and if you want it detachable.  Also decide if you want long sleeves or no sleeves)
  3. You can serge or zigzag stitch around all the pieces of fabric to prevent fraying. IMG_3287
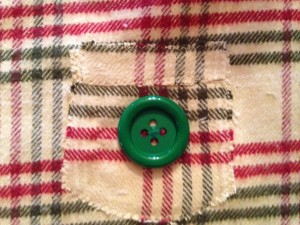
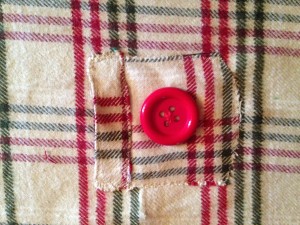
  4. After zigzaging or serging, sew the top part of the pocket on the main pocket
    parts
  5. If you want a button on your pocket sew them on now before you attach it
  6. Next, make sure you align your pockets on the dress front by measuring in from the sides and from the top and bottom to get them as even as possible.
  7. You can either fold your pocket edges and sew either a straight or zigzag stitch around the pocket leaving the top open, or you can just stitch around it as I have done since I liked the look for the plaid dress.
  8. IMG_3310 IMG_3311
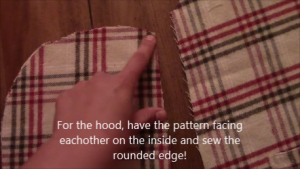
  9. For the hood, have the pattern facing each other on the inside and sew the rounded edge!
  10. Snapshot 1 (11-17-2015 10-01 AM)
  11. Flip right side out and hem or add bias tape to outside
  12. You can sew your hood on fabric pattern facing fabric pattern and sew across and flip right side out, or you can use buttons or velco. You will need to either make button holes or put velcro on the back of the dress to hold the hood.  I used iron on velco.  Note**If you are sewing it on wait until after you sew the front to back**
  13. The front collar of the dress needs to be hemmed or sew bias tape on it
  14. Snapshot 2 (11-17-2015 12-39 PM)
  15. Next, is to sew the front to back of the dress.  If you want the top of the dress to be velcro as well, you can have a jumper (but you wouldn’t have sleeves so skip the sleeve part).
  16. To sew it together, turn patterns facing each other and sew . Also line up sides and pin and sew down underneath the sleeve opening. Then turn right side out.
  17. Snapshot 3 (11-17-2015 1-23 PM)
  18. If you are not doing sleeves, you want to hem or use bias tape on the sleeve holes after sewing down the side. If you are not doing sleeves then hem or use bias tape around the bottom and you are all done!
  19. If you are doing sleeves, turn pattern facing pattern and sew.  Then turn right side out.
  20. Sew the sleeve sides together by facing pattern side to pattern inside. Do not sew the curved part as pointed to in the picture below. Then turn right side out
  21. Snapshot 4 (11-17-2015 7-51 PM)
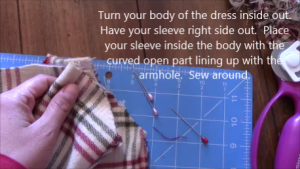
  22. Turn your body of the dress inside out. Have your sleeve right side out.  Place your sleeve inside the body with the curved open part lining up with the
    armhole.  Sew around.
  23. Snapshot 5 (11-17-2015 7-57 PM)
  24. This picture shows that you want the sleeve facing downward inside the body of the dress.  the larger end to the hole and the smaller end (where the hand comes out) facing downwards.
  25. You can hem or use bias tape on cuffs of sleeves and bottom of dress.  Then add any embellishments you want and wah-la you are done!IMG_3446
  26. Congrats! Feel free to post your pics below!
FollowFacebookpinterestrssyoutube
ShareFacebookpinterest

Crib Rail Protector! GRR

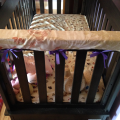
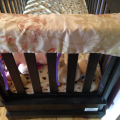
One day I put my little munchkin down to nap and a couple minutes later I go to check on her and she is gnawing the crib side rail!  And you know how expensive cribs are, so I was not a happy camper.  I was also concerned about the stain getting in her mouth.  So, I got right to work making a crib rail cover and protector!  So far, she has only gnawed on the one rail, and that is because this rail faces the hallway that she enjoys looking out and crying to see if anyone will come to her rescue!

8867faf8-b143-4eca-b6be-d3c9f7f728b5          This is a simple project that should take no more than 15 to 20 minutes.  As always, I have a Youtube video and a written and picture explanation.


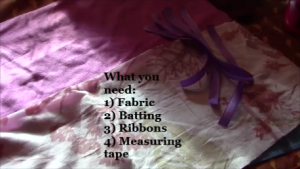
  • What you need:
  • Fabric with your chosen pattern
  • Batting (fleece or any type of padding)
  • Ribbon
  • Measuring tape
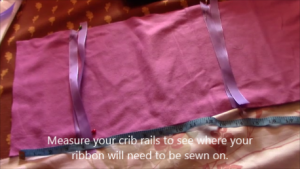
  1. First you want to measure your crib rail that you will be making this for.  Measure the inside from side to side for the length and then the width and add 2 inches (or measure downwards for how long you want it to go down).
  2. Snapshot 2 (10-29-2015 7-41 PM)
  3. Also measure where your ties will tie onto your railing.  Mark this all down so you remember.
  4. Then cut the length and width of the fabrics and also cut your ribbon.  Now you may want to make your ribbon longer for bigger bows but keep in mind your little one may pull at them if they are too long.  I recommend about 6-8 inches long. I used 6 pieces of ribbon (so 3 ties) total for the side rail.
  5. Pin your ribbon onto your batting facing inwards.  Have the two ribbons across from each other and make sure to measure out the spots. Pin them down with the shiny side or pattern side up.
  6. Snapshot 3 (10-29-2015 7-41 PM)
  7. Line up your other fabric piece with right side down (right sides facing eachother).
  8. Now you want to sew all the way around the edges leaving a 2 to 3 inch opening.  Make sure you backstitch!
  9. Snapshot 4 (10-29-2015 6-55 PM)
  10. Pull the inside out and make sure the corners are popped out.  Then sew this area shut.
  11. You are done congrats! Go put it on and save your crib!
  12. 3025a26b-14f2-4259-bf75-fb3c6d496bf6
FollowFacebookpinterestrssyoutube
ShareFacebookpinterest

1st Birthday Ducky Theme!

As I searched the internet for ideas for my munchkins first birthday, I noticed a lack of imagination for the rubber ducky birthday theme!  So I have decided to share what I came up with in hopes of giving others ideas as well.

duck

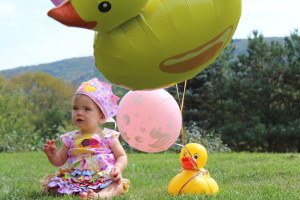
My little Cecelia loves rubber duckies.  She has since she was introduced in the bathtub to them.  Now, besides just the rubber duckies, she loves everything ducky!  She crawls right over to any books that contain ducks; especially, the duck and goose series!  I even got her a large rubber duck down at the shore.
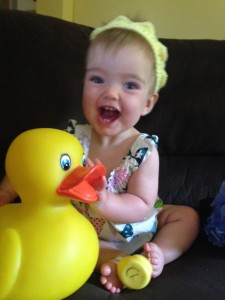
IMG_1693

So I didn’t want to go overboard on her first birthday since she won’t remember it, but…of course we had to have rubber ducks everywhere!
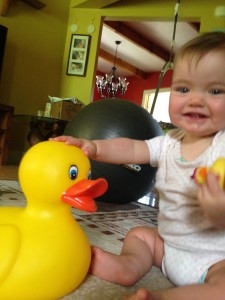
 IMG_1456

First, I made Cece a 1st birthday dress. You can click here to see some of the details however right now I do not have a full tutorial. If you are interested in purchasing one you can private message me.  My Etsy site is upcoming.
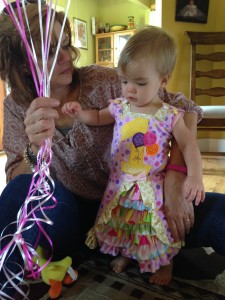
IMG_2545IMG_2457IMG_0192

First I thought to myself, well if it is a rubber duck party, then I definitely need rubber ducks for favors!  So I searched the web for the cheapest, yet best rubber duckies for about 35 people.  I ended up going with an assortment of 2 inch rubber ducks from amazon.  There were some bad reviews that they were not a good assortment; however, I found them very varied in theme.
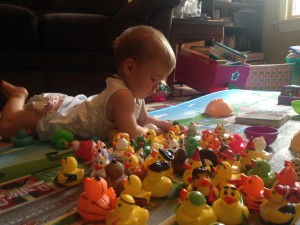
IMG_2020

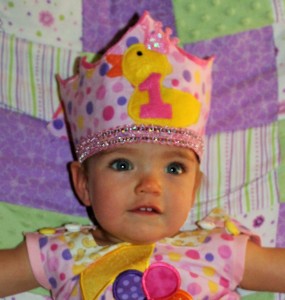
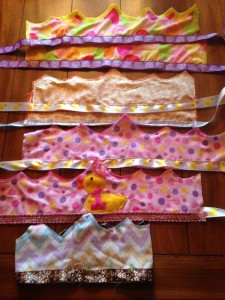
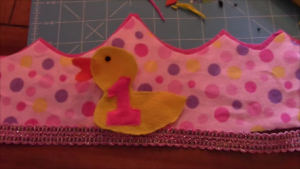
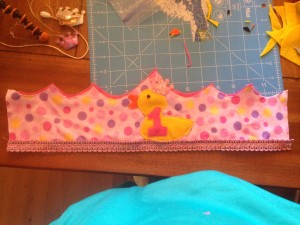
Last minute, I decided to make birthday crowns!  This tutorial can show you how to make easy quick crowns!  Of course, if you have a large amount of kids coming you may want to just buy party hats or completely skip this.  I used scrap pieces to make the crowns and just did ribbon along the bottom that could be tied.  You of course can do buttons, Velcro, or if you know the head size, sew it all the way around.
IMG_2475IMG_0058 (2) IMG_2478

Next, of course I needed party decorations!  I didn’t want to spend 10 dollars for 8 fancy paper plates with cute ducks on them.  So, I made a trip to my dollar store and bought yellow napkins, plates, cups, and silverware.  They also had cute I’m one plates, so I bought a couple of those as well.  Since the weather is nice, we had lots of tables outside and I bought yellow tablecloths.

plates

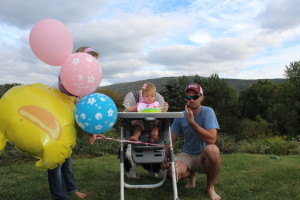
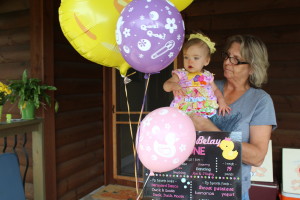
As far as balloons, I ended up buying balloons on amazon, ones with little ducks on them and then two large Mylar duck balloons.  They did not carry these type at my local stores.  The only place around to fill the balloons was the dollar store.  Do you see a theme here?  **Note: it does cost more to have Mylar balloons filled, so if you are saying a buck or two you can skip the Mylar and go for the regular smaller balloons.

 balloons

IMG_0145

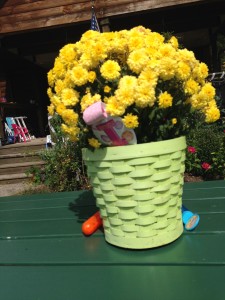
I also used the rubber duckies to decorate everywhere!  I had a couple mums and vases in the house and added little ducks to them!
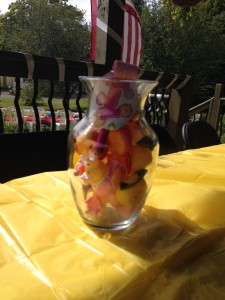
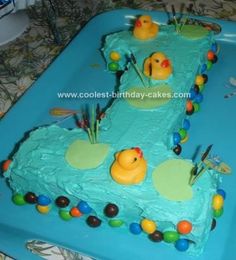
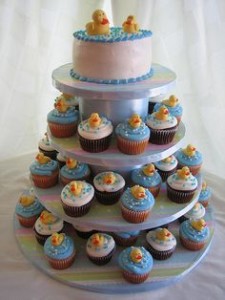
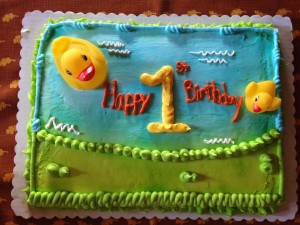
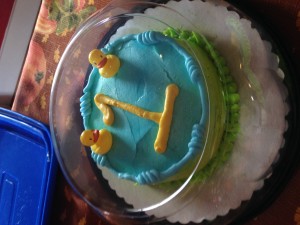
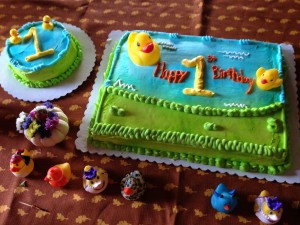
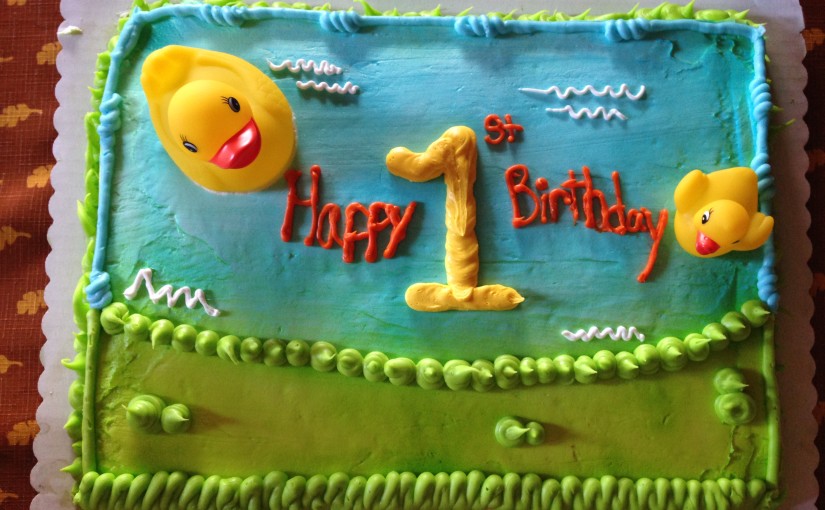
IMG_2559 IMG_2560Food…of course this is key for a party.  I wanted to save some time but not spend too much money either.  So, I decided to order a couple small party trays and then do crock pot recipes.  I didn’t go crazy with the duck theme food since there weren’t a lot of kids coming to the party.  However, if you want to see some duck themed food check out pinterest for lots of ideas.  Yes, we did deviled eggs and some quacky snack mix that I used small duck cups for.  Cake. Originally I was thinking of making my own cake, there are tons of ideas on pinterest.  However, with more than 40 people coming, and cheap but tasty sheet cakes with a free smash cake included, I decided to save myself the stress and space in my fridge, and order a cake with a duck theme.  However, let me show you some of the ideas I picked up from pinterest. 

cake2 cake3Duck Birthday Ideas: click for more pinterest ideas.

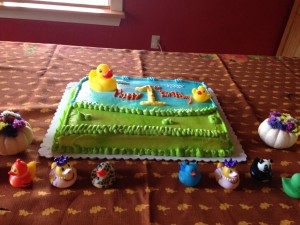
I was GIVEN THE WRONG CAKE WITH NO SMASH CAKE when I went to pickup the cake two hours before the party!  I was given a mere 1/4 sheet cake (wrong size) with the wrong duck design on it, and NO smash cake!  Don’t panic I told myself as my mind reminded me I only ordered this a month in advance to make it was done right!  After several minutes of panic, the manager apologized and stated they could make my cake and smash cake in about two hours.  I agreed but would have to send someone else back to pick it up.  Lukily, my brother in law agreed to pick it up and got fifty percent off the cake.  Phew, added stress you don’t need!

I ended up addin some small ducks to the smash cake! Note: it was a HUGE SMASH CAKE!
IMG_2576 IMG_2577 IMG_2578 IMG_2579IMG_0257

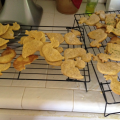
I also made duck shaped cookies with a duck cookie cutter!  And then I used yellow icing to make the number one of them!  Half were pumpkin sugar cookies and the other half regular sugar cookies
4c8a5e03-6c2c-44c9-be3f-3adc2c0edd95

Drinks. Duck punch of course!  There are a variety of recipes to make blue punch.  I ended up doing half blue hawiian punch, half 7up, and then putting in vanilla ice cream to make it look like bubbles!  You can clean rubber ducks up well and put them in, or freeze them in ice!  I also had a punch server that I put ice and ducks in the middle and then put water in it! 
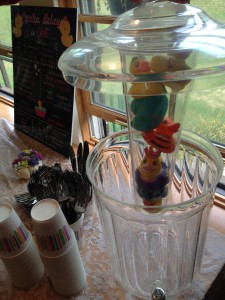
IMG_2532punch

Play.
Since there were a handful or two of kids coming, I decided to buy a couple items and also set up items for the kids to play with.  Of course we had games such as bean bag toss, bacchi ball, redneck golf, and Frisbee setup for adults.
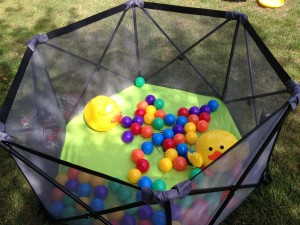
IMG_2555

I bought some duck beach balls off amazon.  They came in a 12 pack so I got them cheap enough and gave them away as favors too.

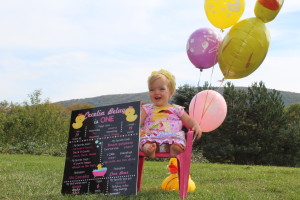
Birthday chalkboard!  I love this idea!  And it is so easy to make!  Now again, I needed to save myself some time with this project, but also not spend too much money.  My handwriting is awful, so making a chalkboard myself was out of the question.  I also wanted it on a poster board to have it as a keepsake.  So if you are into graphic design you can make your own up and have it printed at an office store.  However, I am not into graphic design so I investigated the options at etsy.  I ended up going with a 5.99 graphic for ducks and edited the sections myself with adobe.  I took it to staples to have it mounted on a poster board and enlarged.
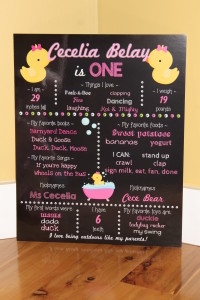
IMG_0084

HOWEVER, **Note: the file was locked due to the seller having a password.  The staples I went to could not print it so I had to have it turned into a JPEG.  The seller offered to do it, but I didn’t want to wait, so I just changed it myself on a free online program.  Just type in change to JPEG and you can easily find a free site.  For these pre-made designs you cannot change the pictures or the design, only the words can be edited.  For mounting on a thick foam poster board and enlarging to 16×20, it cost me 16.99 online.  I am very pleased with the way it turned out and now it is displayed in her room as a great keepsake!IMG_0108 IMG_0154
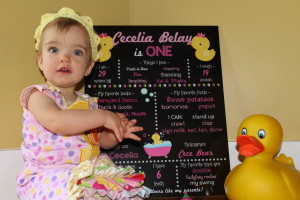
You can of course buy a chalkboard and make your own.  You can even print out different fonts and trace them onto the board.  You can also buy a cheap graphic design program and make your own.  Again, for the price, and since it was last minute, it was easiest for me to order it.
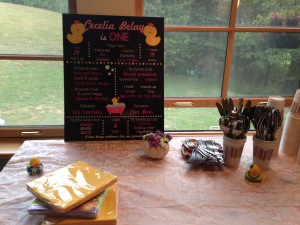
IMG_2528

So that is it folks!  Although she won’t remember this, I have lots of pictures and we had lots of fun!

Hope you enjoyed the post and I hope it gave you some good ideas!  You can check out my pinterest site for more ideas!  Follow us on facebook too!


FollowFacebookpinterestrssyoutube
ShareFacebookpinterest

1st birthday dress!

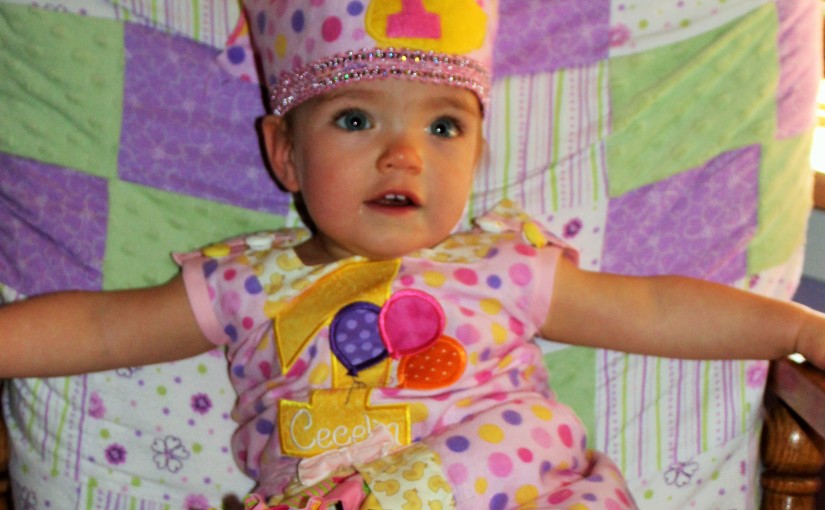
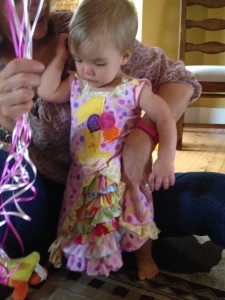
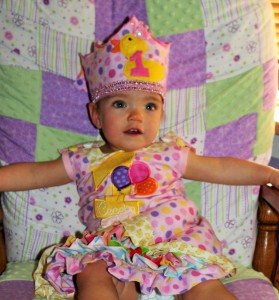
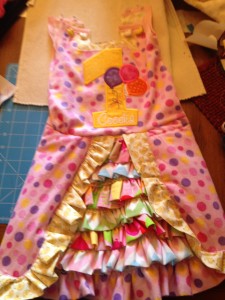
I wanted that special 1st birthday dress, but not that especially high price that comes with most of them!  So once again, I searched pinterest, etsy, and other sites to find ideas.  I ended up combining ideas, as well as making up my own, to design with the dress I created. The theme was rubber duckies for her party.  Therefore, I wanted to incorporate duckies as well as other birthday fabrics.  I went to the store and examined numerous fabrics, buying  a yard of my favorites!  The extra fabric I ended up using to create the crowns!
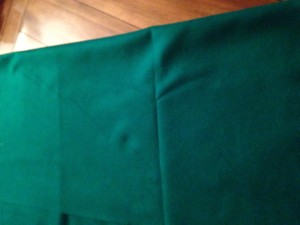
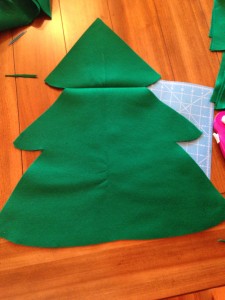
IMG_2549

I purchased the iron on birthday 1 and ducky from etsy.  The number is even personalized with her name!  I also bought the duck buttons from the store.  I used white hair bands that I cut to make the loop holes for the buttons on the top of the shoulders.

IMG_0057 (2)

So how did I make this dress?  Well that’s a secret! But I can give you some hints.  If you are truly interested in a dress like this you can private message me or come back and look for my future etsy link!

IMG_2455 IMG_2453

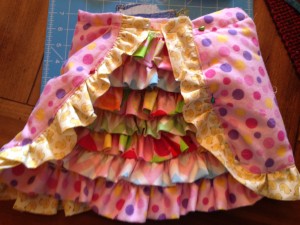
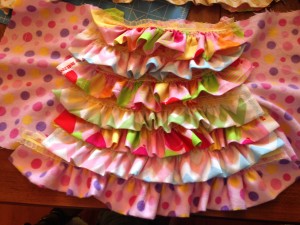
The skirt of course took the longest because of the detail.  I added yellow ribbon in between the rows as well.

IMG_2459

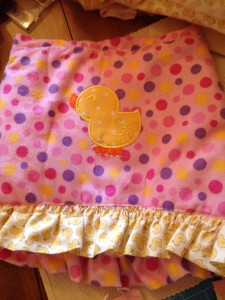
Then I added the cute duck to the back of the dress.  Personally, this dress could be used as a 2 in 1 dress because the back is also so cute!  However, the 1 in the front personalized this as a 1st birthday dress.


IMG_2457Well check out the other tutorials, as well as the 1st birthday party theme page for more ideas! Feel free to share pictures of your little one’s first birthday dress!

FollowFacebookpinterestrssyoutube
ShareFacebookpinterest

Easy Birthday Crowns!

Want to sew quick and easy crowns for a party or get together?  Then you’ve come to the right place!  I made a last minute decision days before my daughters’ first birthday party that we needed crowns!  The theme was rubber ducky, so I decided to make birthday crowns instead of hats!  Young kids and babies don’t enjoy hard hats on their head and also shouldn’t have a rubber band or elastic around their neck.

IMG_0058 (2)As you can see they are very cute for photo shoots as well!  She didn’t particularly like keeping it on, but I got a couple good shots!

As usual, there is a YouTube video and also a written explanation below.  I didn’t have a lot of time to embellish the other crowns but you can always spice things up with some ribbons, bows, glitter, rhinestones, or buttons!

To get started you need:
1) Choice of fabric and design
2) Scisscors
3)Thread
4) Closure for crown (velcro, button, ribbon) or you can sew all the way around if you know the exact size


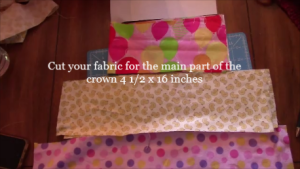
  1. Cut your fabric for the main part of the crown 4 1/2 x 18 inches
  2. Snapshot 1 (10-7-2015 8-50 AM)
  3. Make your own crown pattern by drawing the top on a piece of paper and cutting it out!
  4. Cut your design onto your fabric to make the shape of your crown! If you want a felt backing with another color cut that out as well.
  5. Next, pick out your ribbon if you are using one, if you want any other embellishments get them ready!  I made a felt duck that I sewed onto
    the crown.
  6. Snapshot 2 (10-7-2015 9-02 AM)
  7. Line up your crown pieces and sew all the way around!  Then you are done! If you want to add button loops and buttons you can sew them on as well.
  8. IMG_2478Congrats and enjoy the party!  Check back often for new crafts or subscribe below!


FollowFacebookpinterestrssyoutube
ShareFacebookpinterest