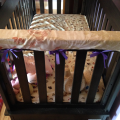
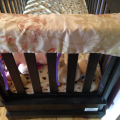
One day I put my little munchkin down to nap and a couple minutes later I go to check on her and she is gnawing the crib side rail! And you know how expensive cribs are, so I was not a happy camper. I was also concerned about the stain getting in her mouth. So, I got right to work making a crib rail cover and protector! So far, she has only gnawed on the one rail, and that is because this rail faces the hallway that she enjoys looking out and crying to see if anyone will come to her rescue!
 This is a simple project that should take no more than 15 to 20 minutes. As always, I have a Youtube video and a written and picture explanation.
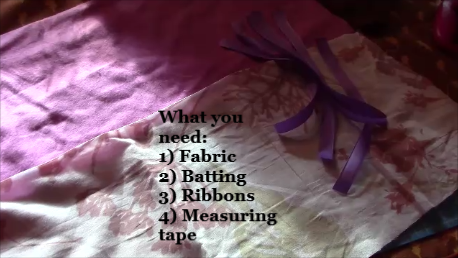
- What you need:
- Fabric with your chosen pattern
- Batting (fleece or any type of padding)
- Ribbon
- Measuring tape
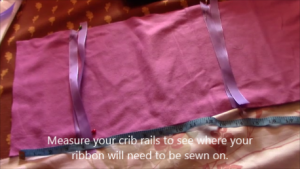
- First you want to measure your crib rail that you will be making this for. Measure the inside from side to side for the length and then the width and add 2 inches (or measure downwards for how long you want it to go down).

- Also measure where your ties will tie onto your railing. Mark this all down so you remember.
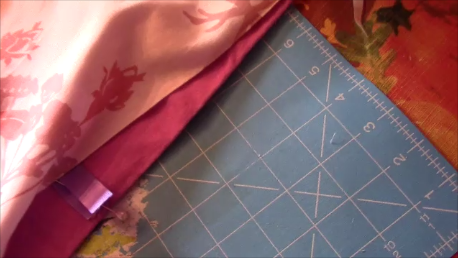
- Then cut the length and width of the fabrics and also cut your ribbon. Now you may want to make your ribbon longer for bigger bows but keep in mind your little one may pull at them if they are too long. I recommend about 6-8 inches long. I used 6 pieces of ribbon (so 3 ties) total for the side rail.
- Pin your ribbon onto your batting facing inwards. Have the two ribbons across from each other and make sure to measure out the spots. Pin them down with the shiny side or pattern side up.
- Line up your other fabric piece with right side down (right sides facing eachother).
- Now you want to sew all the way around the edges leaving a 2 to 3 inch opening. Make sure you backstitch!

- Pull the inside out and make sure the corners are popped out. Then sew this area shut.
- You are done congrats! Go put it on and save your crib!

Share