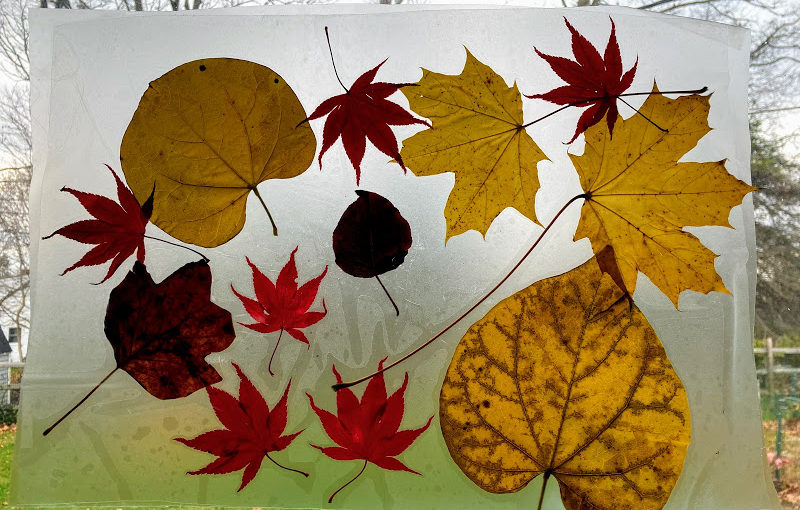
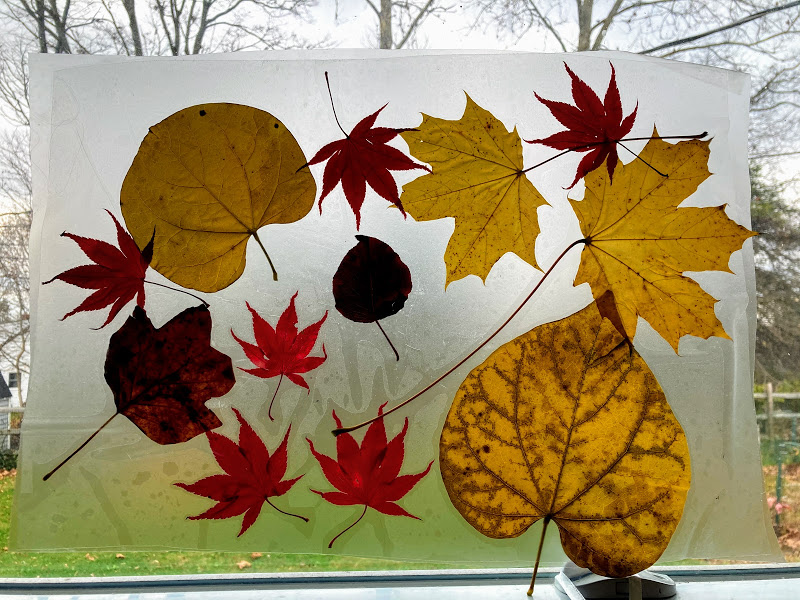
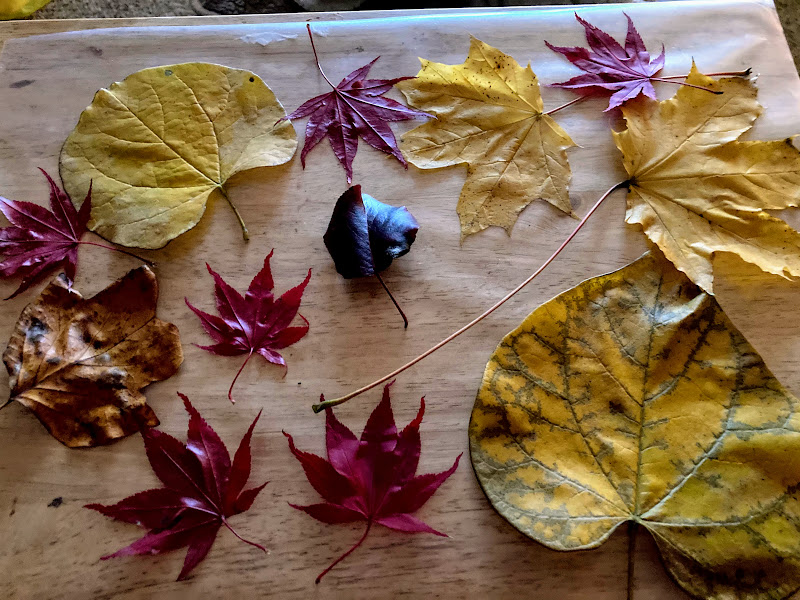
Make a beautiful fall collage with leaves from around your yard or neighborhood! My 3 year old LOVED it!
Our family likes to take walks and LOVE to collect things from nature for crafting. The other day we decided to find some colorful leaves.
To make a collage you need:
-various leaves
-contact paper
That’s it! It’s very simple, but so much fun! We made 3 of them so far and gave them as gifts!
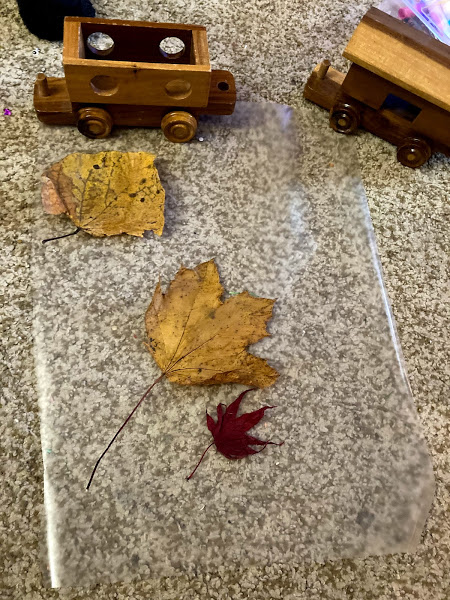
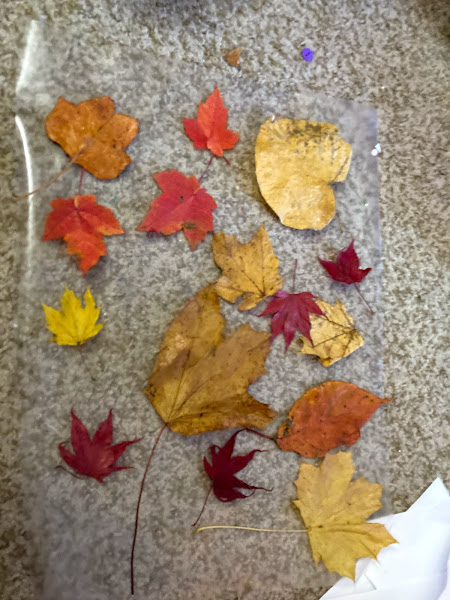
First, cut a piece of clear contact paper and take off the sticky side. Lay it on a flat surface.
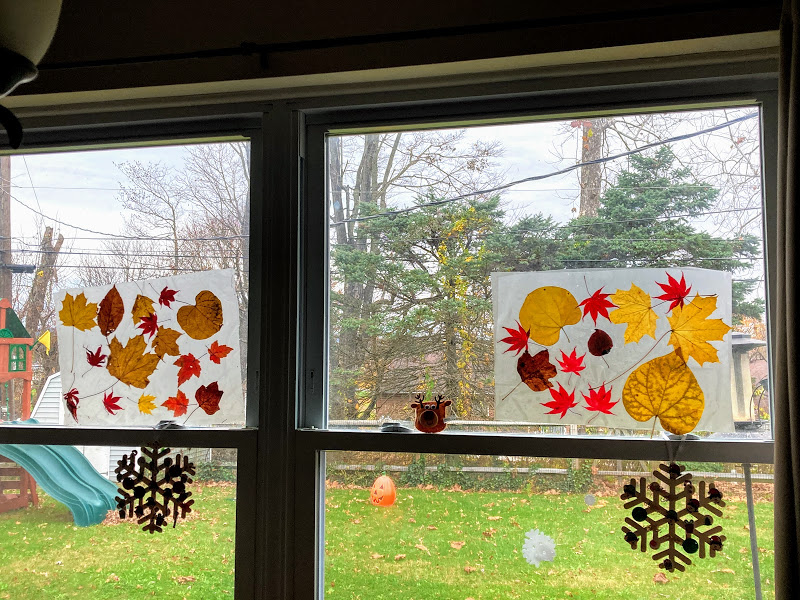
Lay the leaves on the sticky side of the contact paper and arrange them in any way you like. When you are happy with the way your leaves look, cut another contact paper sheet the same size as the original one. Lay it flat on top of the leaves and smooth it out with your hands. Then boom, you are done! Hang it in a window to admire it or give it to someone as a gift! Madison gave some to her cousins, grandparents and her family!
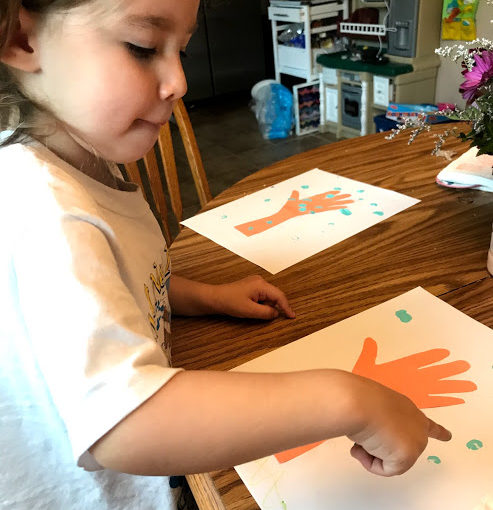
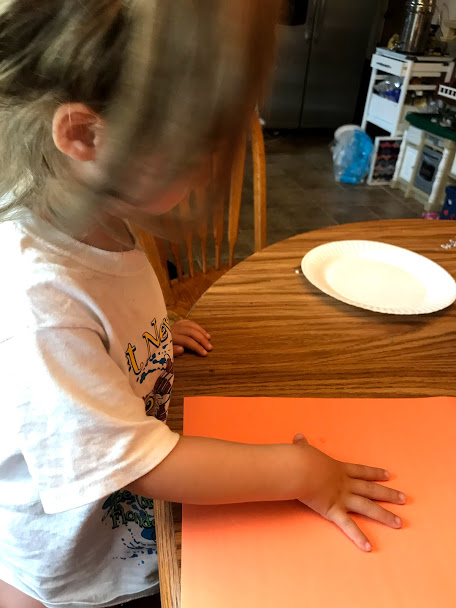
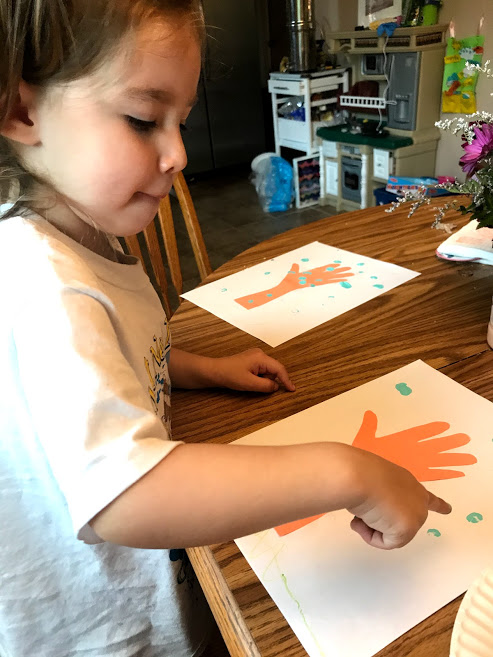
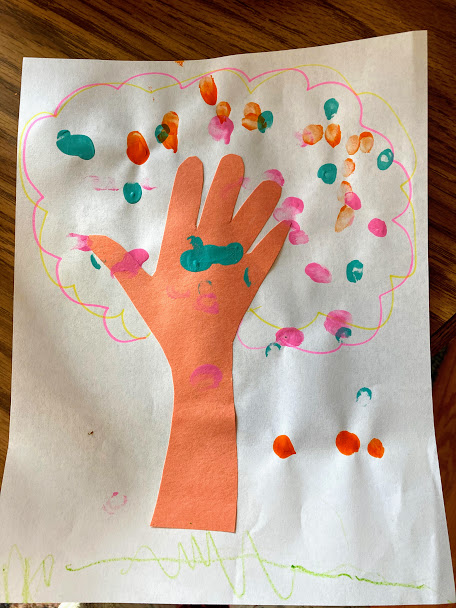
Madison loves painting and gluing, so this craft is the perfect combination! I wanted something that we could easily mail to grandparents and this fit the bill!
Materials:
construction paper in the color of your choice for the “trunk” of the tree
white paper
paint in various colors for the “leaves”
assorted markers or crayons
glue
Trace your child’s hand and arm for the branches and trunk of the tree.
Next, cut out the trunk and branches and glue them to the white paper.
Choose different colors of paint and have your child use their thumb or fingers to make “leaves.” Madison liked making the leaves all over the place. You can vary the colors based on the season you are creating.
For summer, use lots of different green colors. For fall, use browns, reds and yellows. For winter ,use a different color background like blue and do white snowflake prints. For spring, choose colors like pink, purple, green, and yellow!
If your child is a little older then they can draw different scenery, animals and clouds. Your child could also add stickers. We sent these to her grandparents and they loved them!
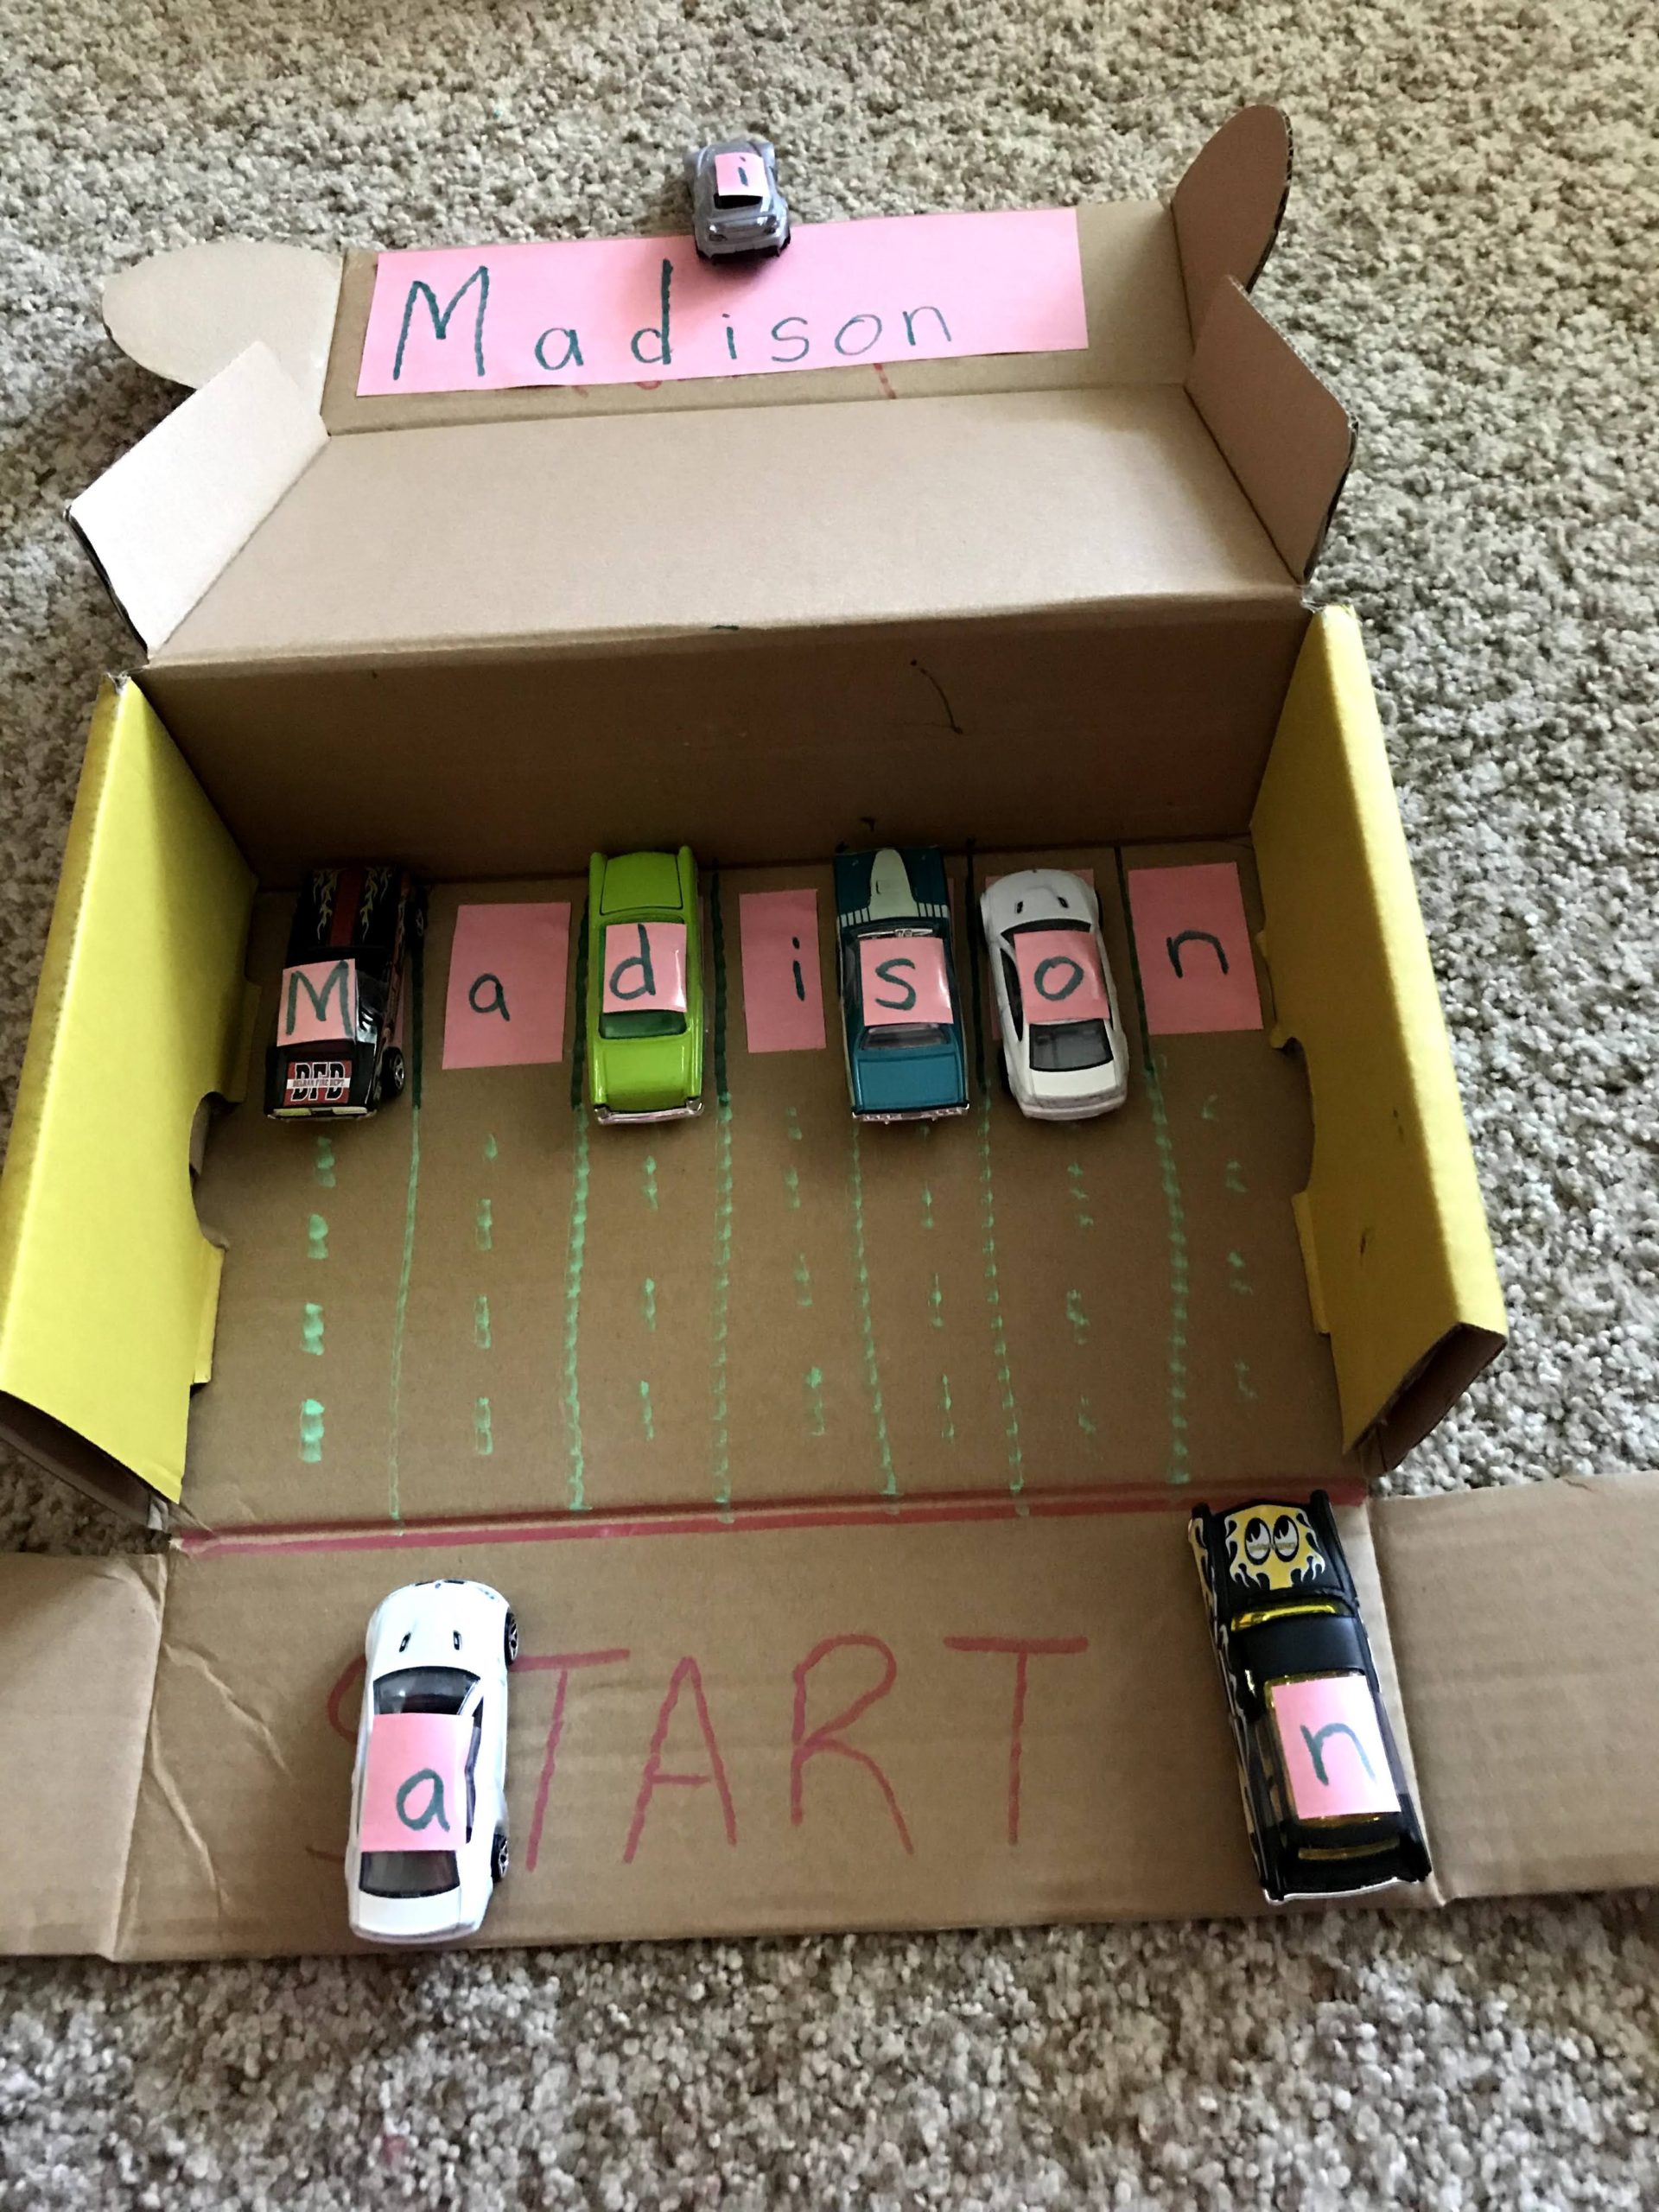
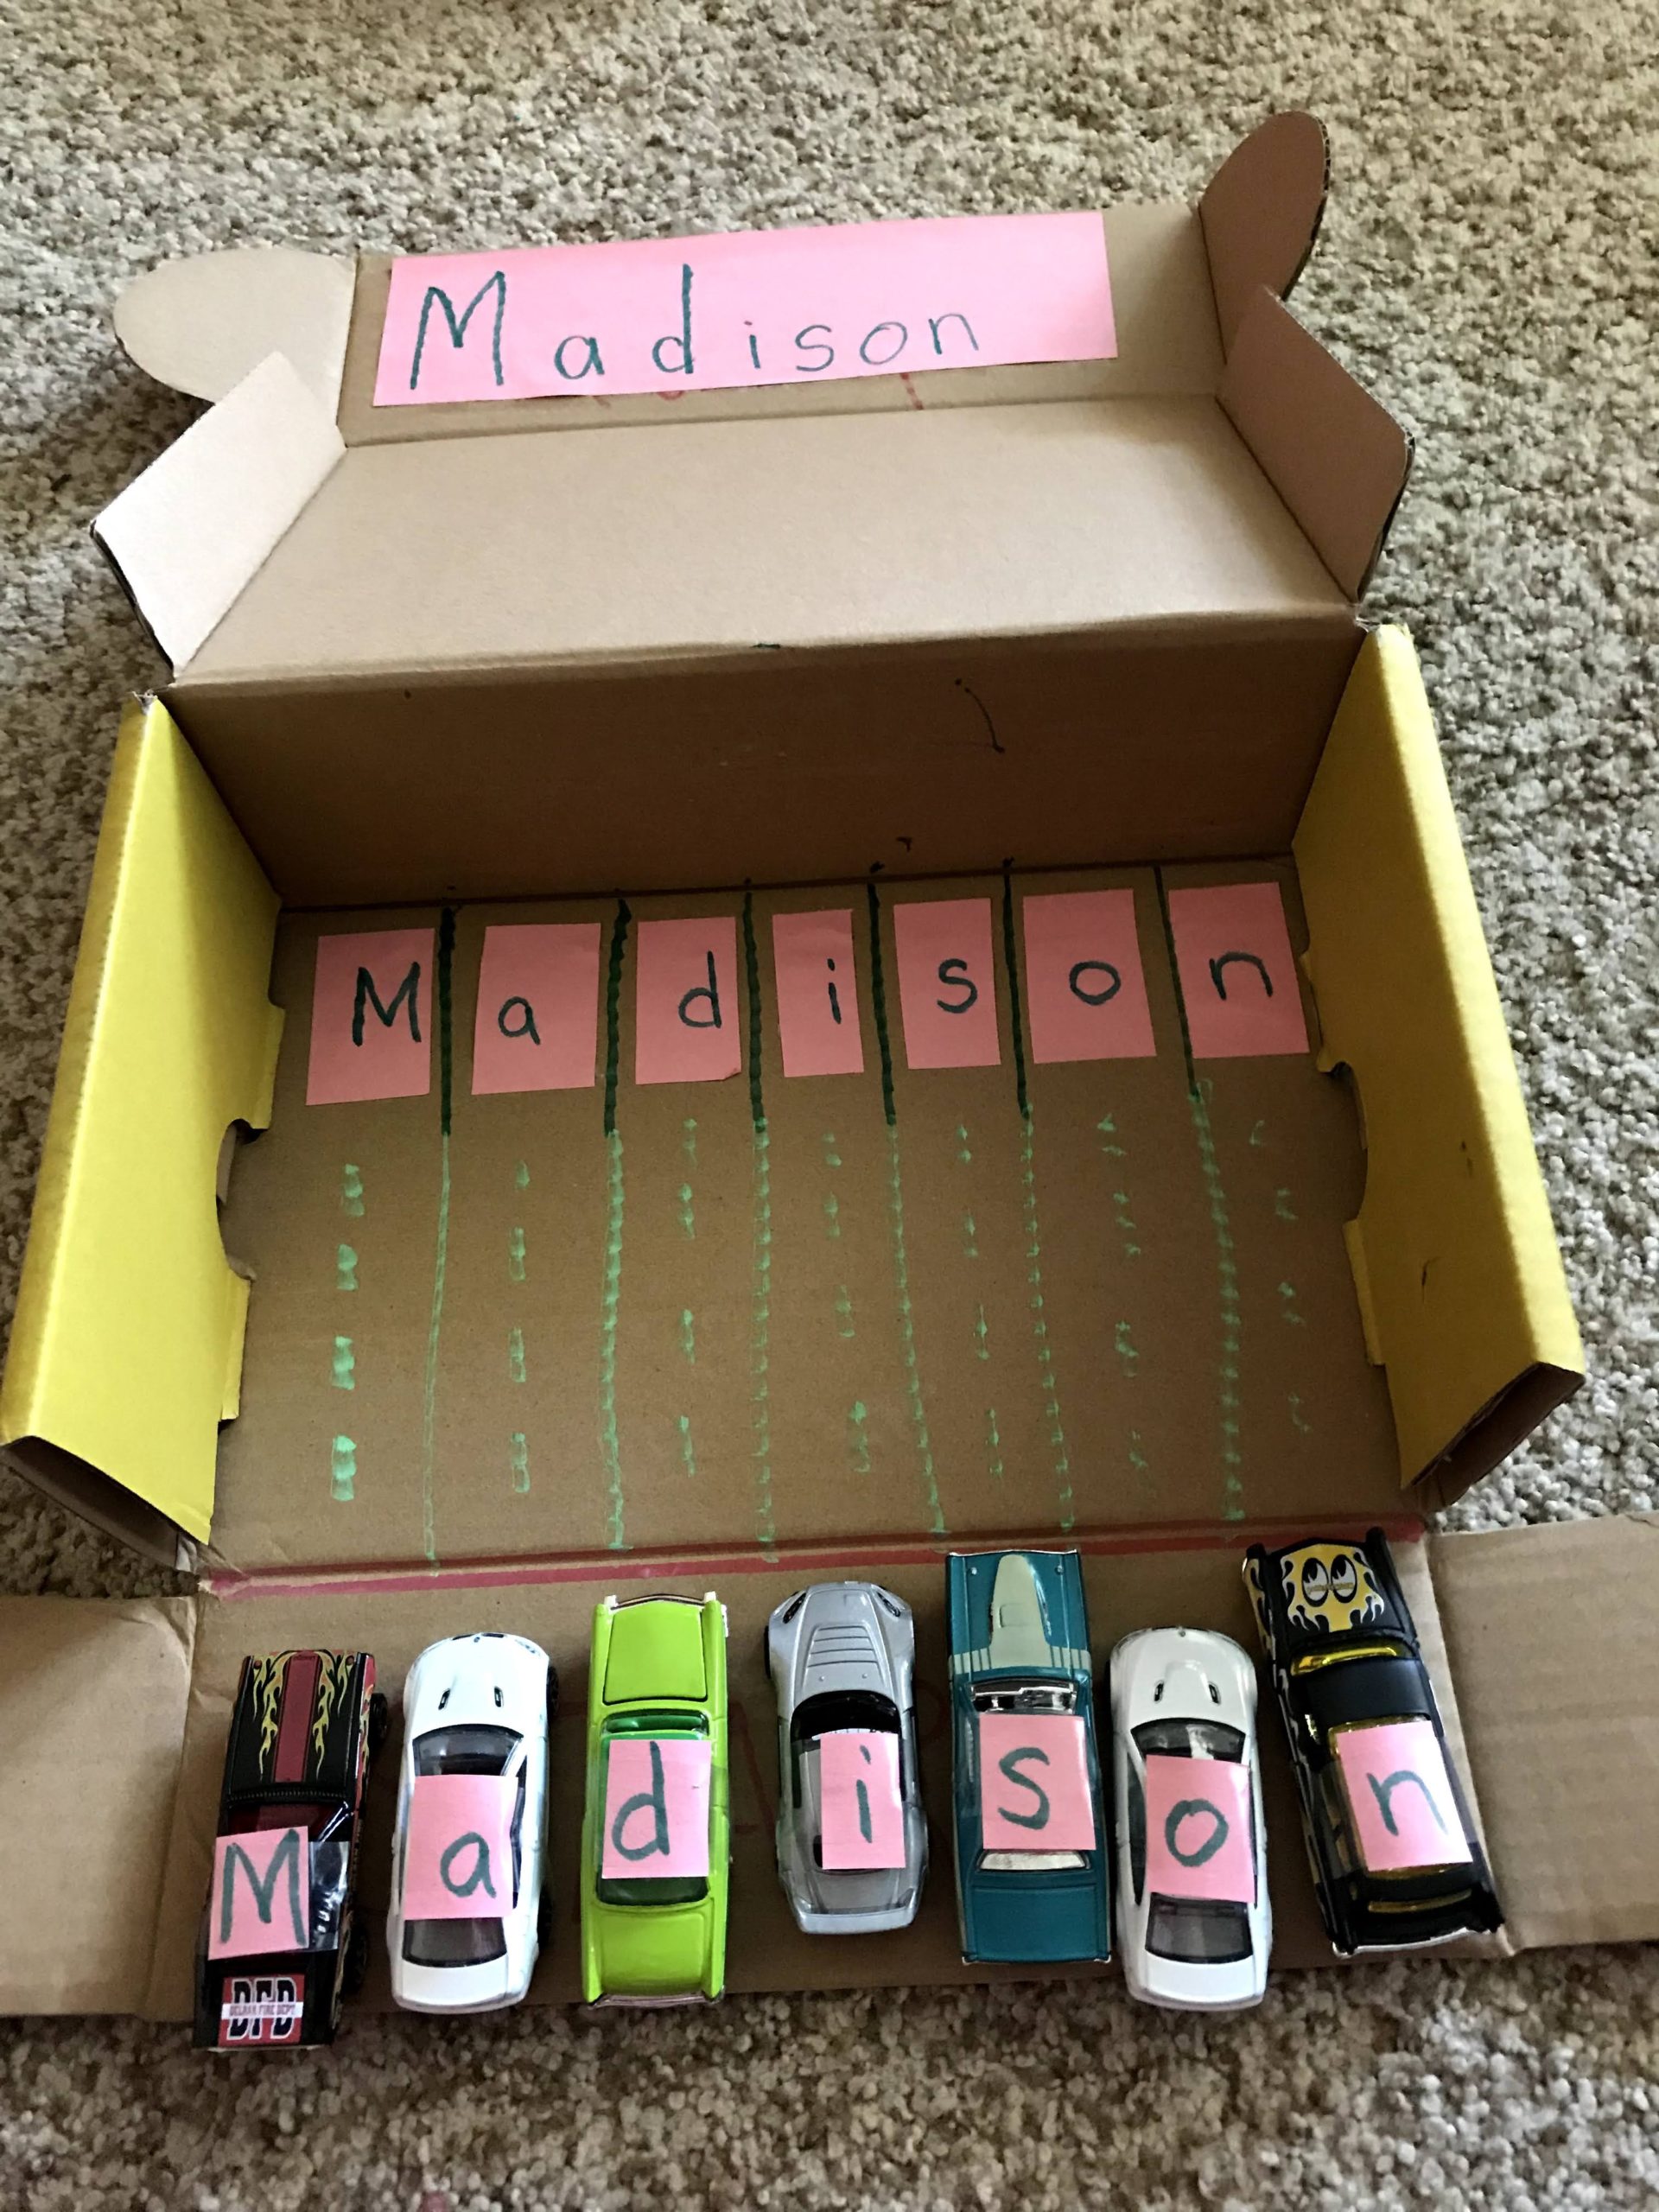
The schools in Pennsylvania will be closed for at least 2 weeks due to the coronavirus, so I am home with my family. I hope to do a lot of crafts and activities with my toddler to keep her busy & happy! You can look at previous posts and check back for more frequent posts during this time on things to do with your child! Today’s craft/activity will help your child learn letters and the spelling of their name (it will also be fun for them to play with)!
All you need is a box, marker, cars, and some paper and glue or tape.
You can use any box you have, I just happened to have one with a folding cover so added a ramp to it.
Next, I wrote the letters of her name on construction paper and cut them out. Remember to space each letter out so you can cut them into rectangles or squares.
Next, I wrote start and made a line. I also made lanes for the cars to go to their parking spots. I figured Madison can then have them go on the ramp and race down to the letters at the bottom. Just a fun, quick, and easy activity if your kiddo likes cars!
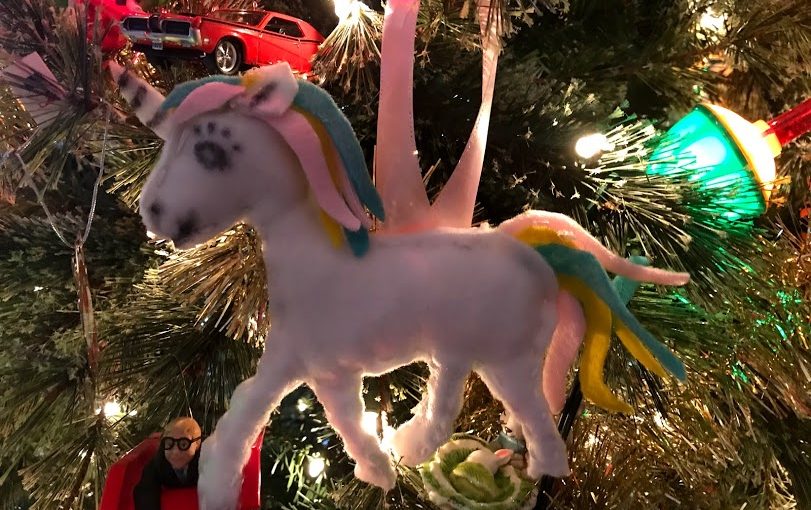
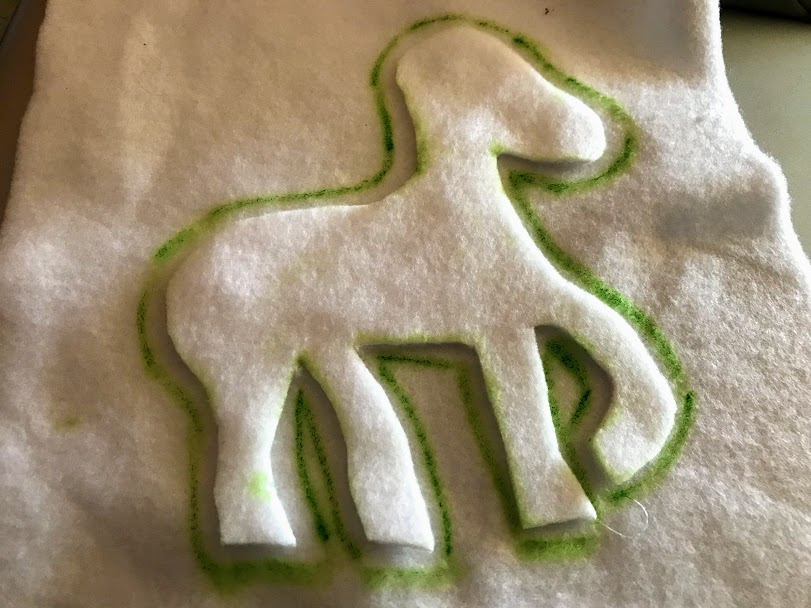
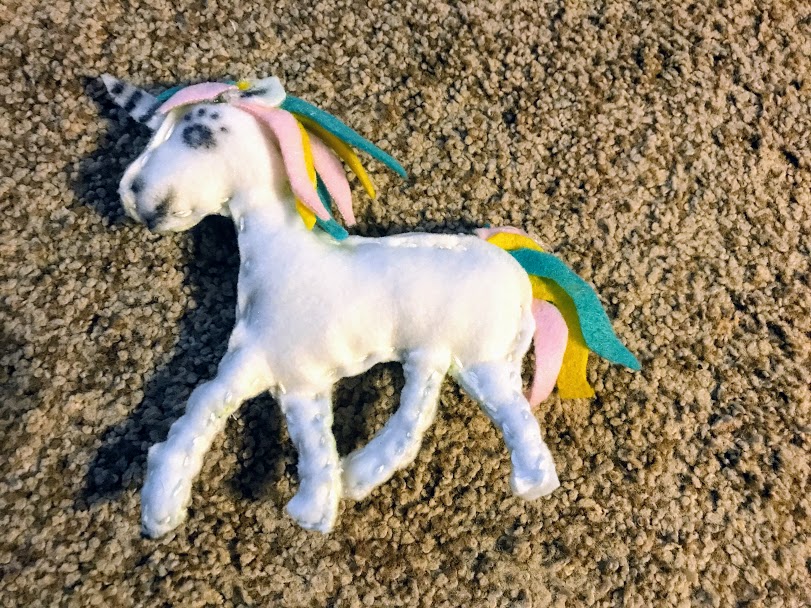
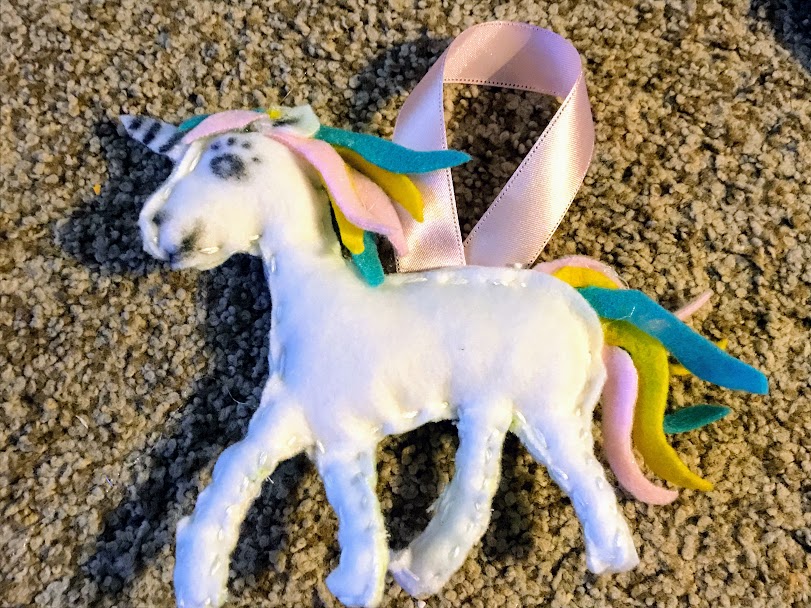
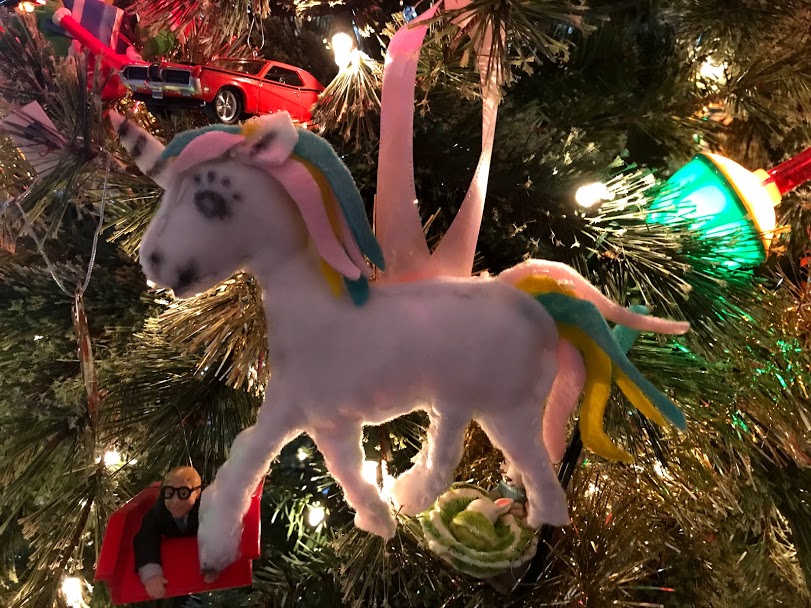
My daughter saw the cutest ornament at Boscov’s the other day…a unicorn. It was made from felt and I thought, “I can make that!” If you know anyone who loves unicorns then this simple felt ornament can be made for Christmas, or enlarged as a stuffed animal!
Materials needed:
-Felt in various colors: I used leftover felt I had from other projects. Any colors will work. I used white, yellow, blue, and pink.
-scissors, needle, thread
-hot glue gun, felt marker, cotton for stuffing
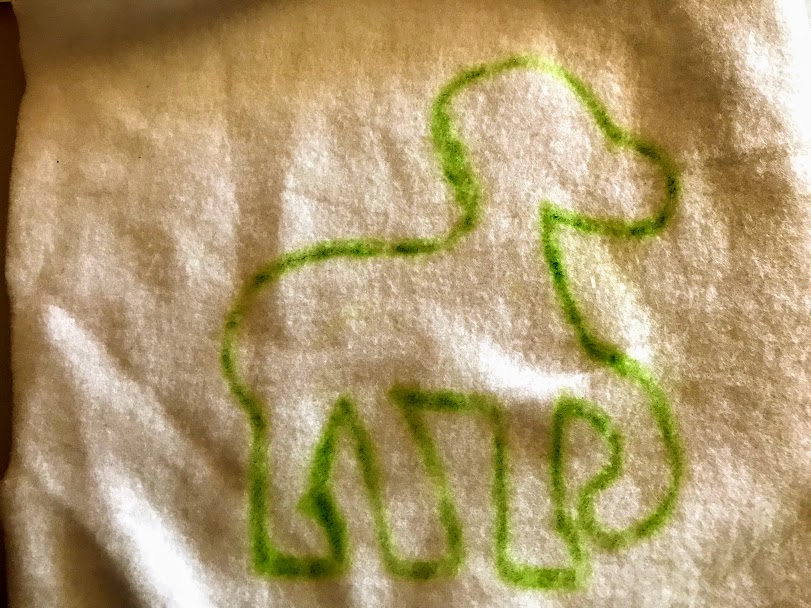
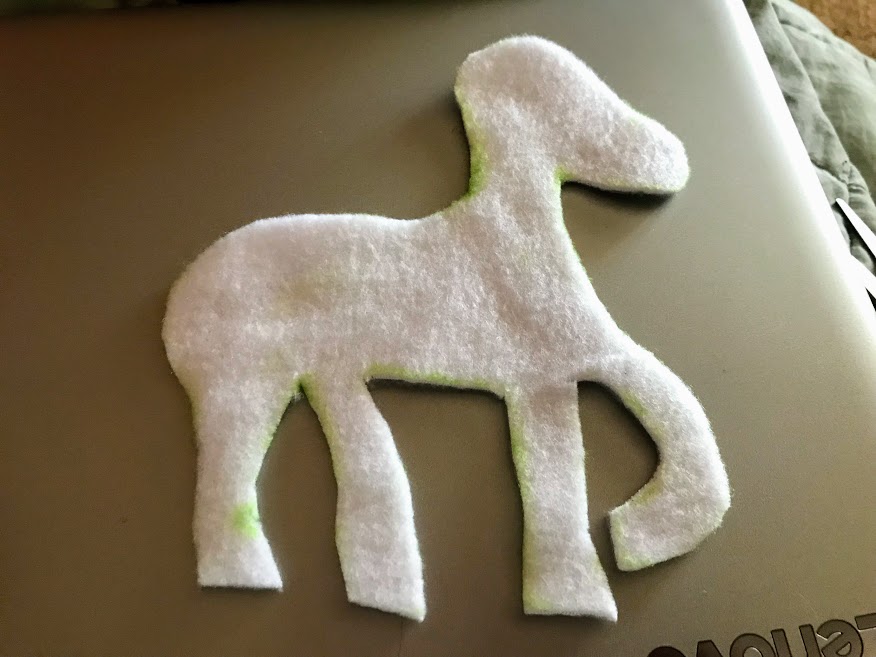
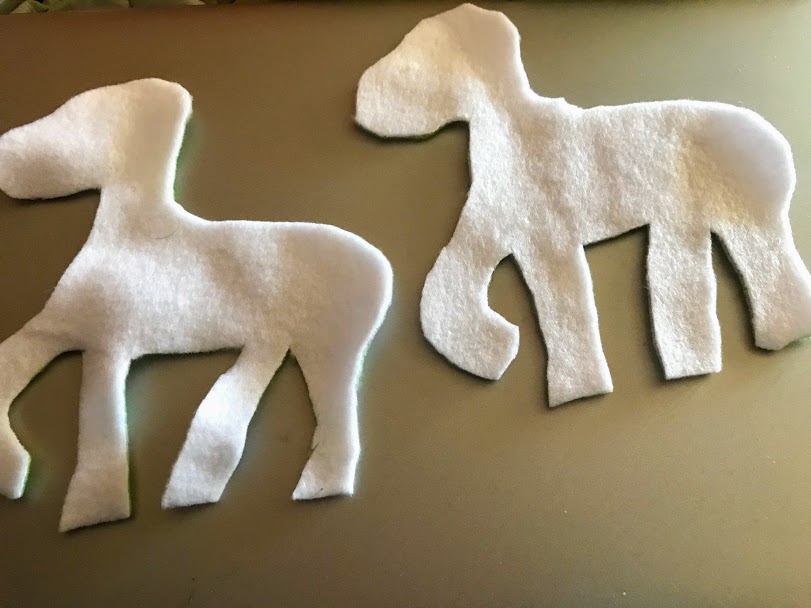
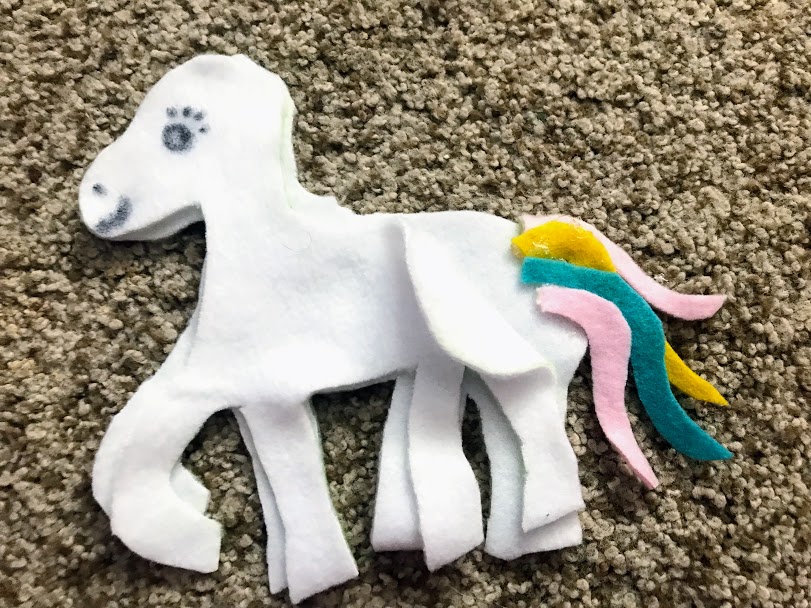
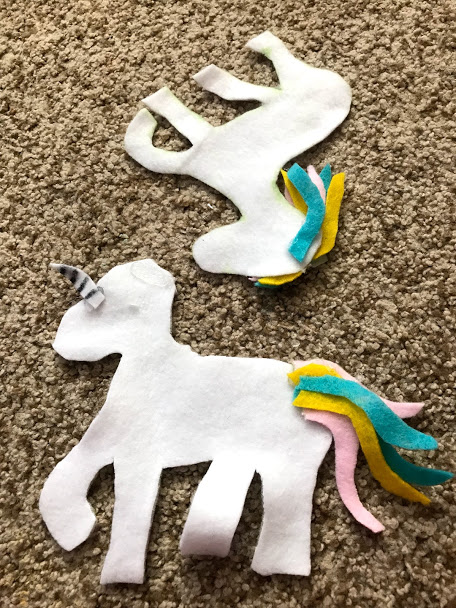
First I laid out a white piece of felt and drew the body. I didn’t use a printout or pattern, I just eyeballed it by looking at pictures. I cut it out, then laid it on top of another piece of white felt to trace and again cut out. This way I had both sides of the unicorn’s body.
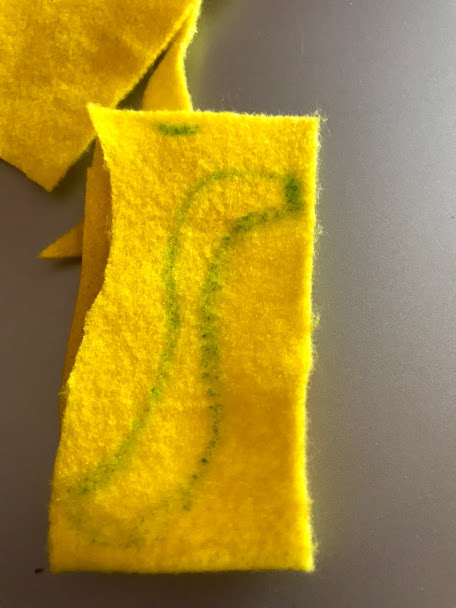
The second cut out of the unicorn body ended up a little larger, but I just cut and adjusted the size as I was sewing it. Next, I moved onto cutting out the hair for the mane and tail. I also cut out an ear and horn. I looked at pictures and drew it freehand on the colors of felt I desired. They ended up looking like little worms.
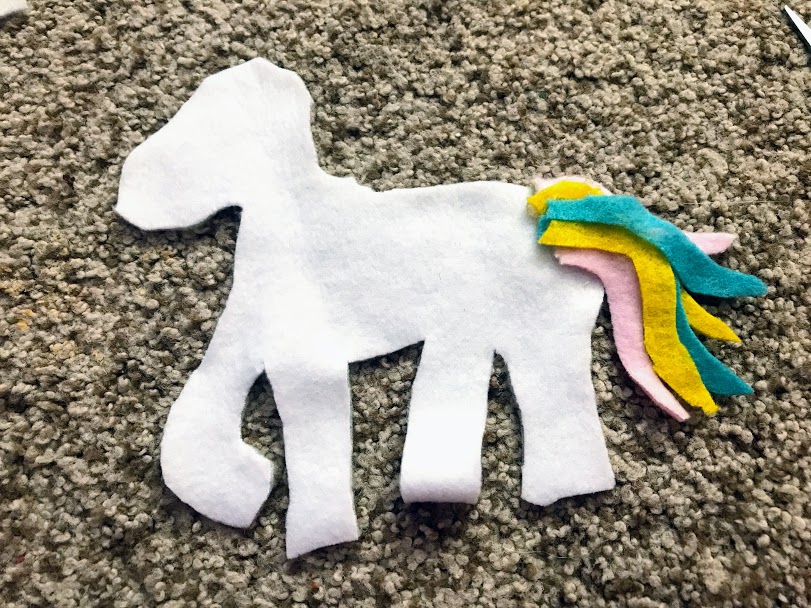
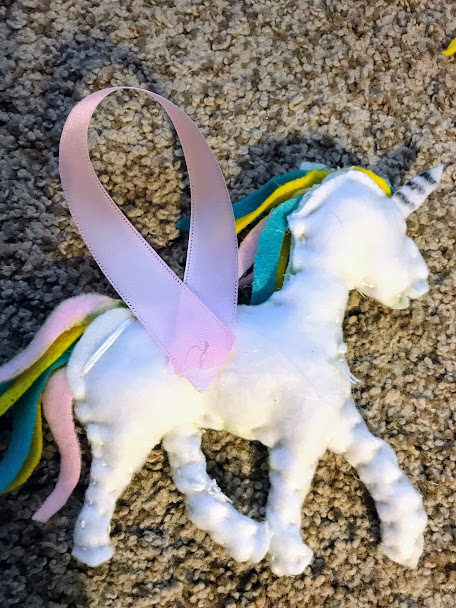
I placed my tail pieces on the back to make sure they looked okay and hot glued them to the back piece of the body. I did not glue them to BOTH body pieces, just the front of the back piece of the body (see picture).
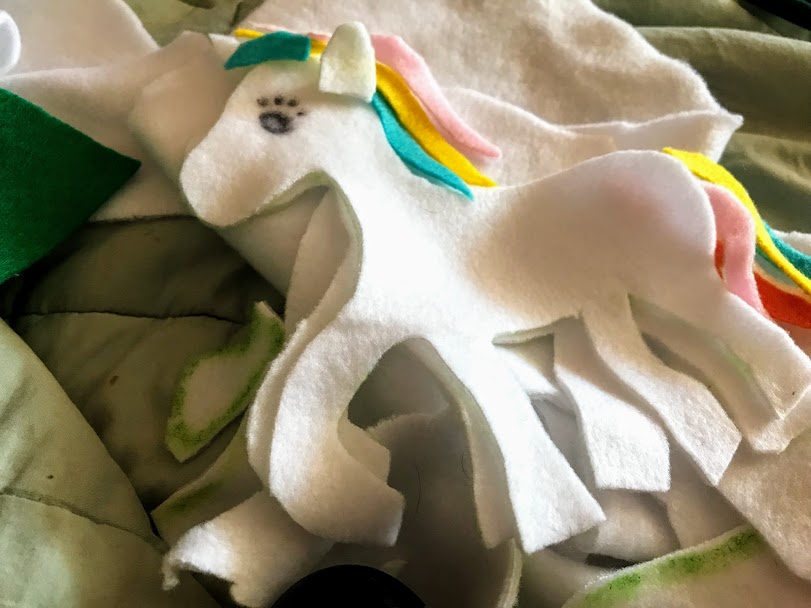
Next, I placed the hair and ear on the unicorn to make sure it looked correct. I didn’t glue it, but just placed it there to make sure it was to my liking. I drew on eyes, a mouth and nose with a felt marker.
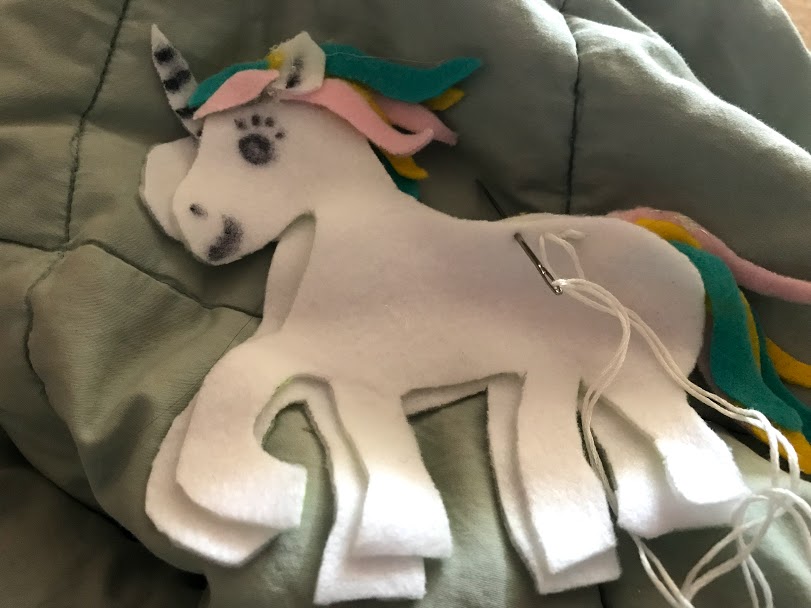
I hot glued the horn onto the front of the back piece of the body. I hot glued the mane and ear onto the front body piece. Next I sewed the unicorn together. As I was sewing, I stuffed it. Don’t wait until the end or your won’t be able to fill the smaller spaces like the legs.
After sewing and stuffing the unicorn, I cut a piece of ribbon and hot glued it to the back of the unicorn.
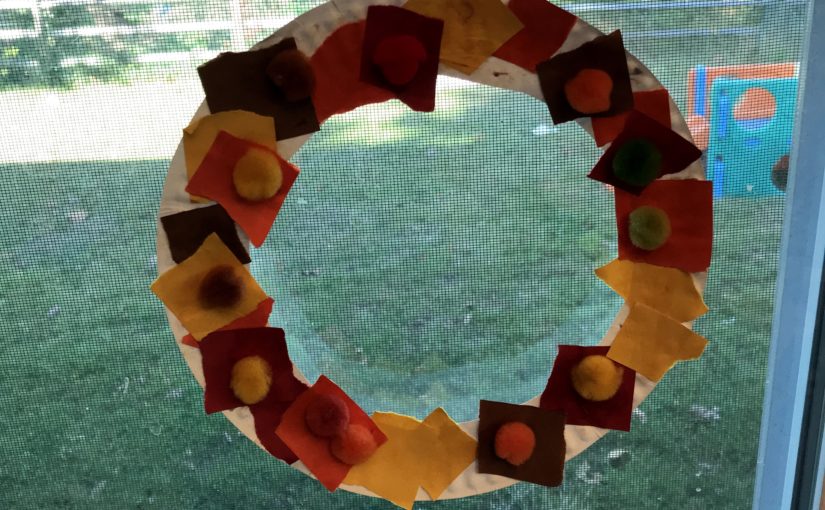
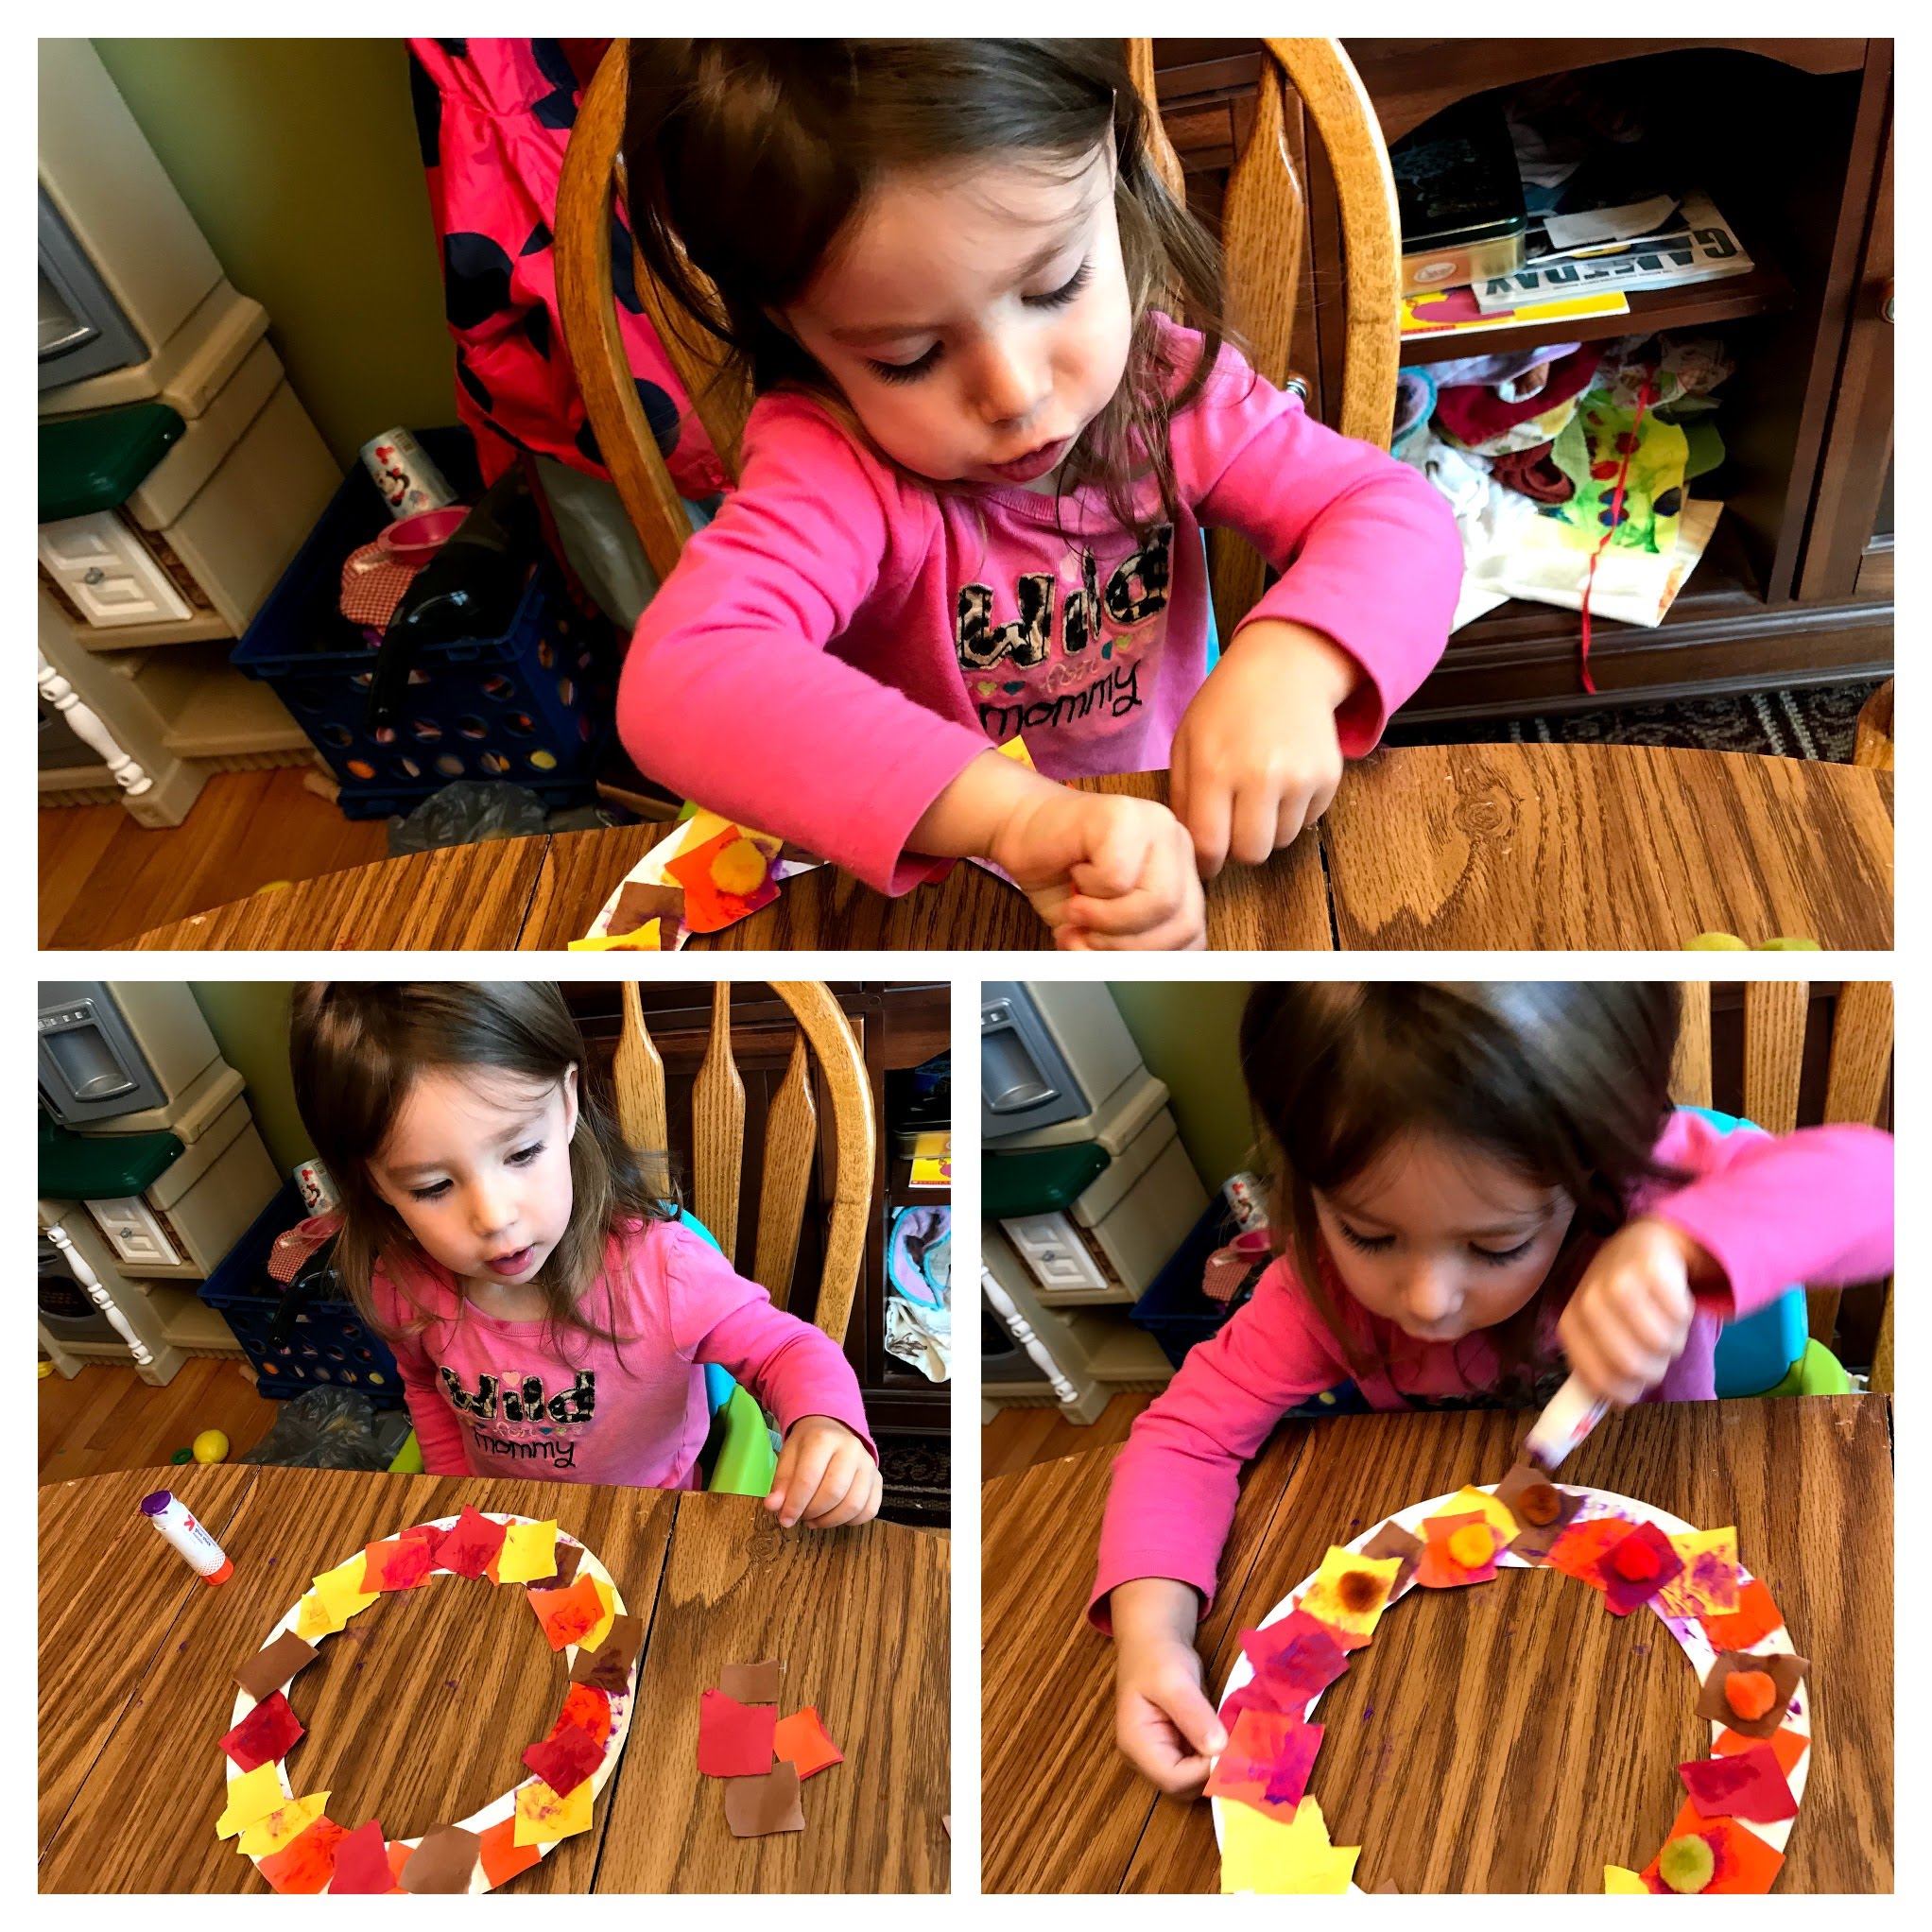
We always hang a wreath on our door for each season or holiday. Madison wanted in on the fun, so we decided to make our own fall wreath! It’s very simple and easy!
Materials:
paper plate
glue
assorted fall construction paper colors
string
pom poms (optional)
You could also add glitter or any other extras!
First, cut out the middle of the paper plate so you have a circle left. Next, I cut the construction paper in strips, then cut it into small squares she could glue onto the “wreath”. We pretended the squares of construction paper were leaves. You can use your scissors for this or if you want more of a messy look you can rip the paper or have your child do it.
Madison had a lot of fun gluing on all of the pieces. She loved using the glue stick. We covered the paper plate then we added fall colored pom poms on top of the “leaves” (construction paper). She LOVED this project and after it dried we hung it up on the window. She points it out proudly every time we go by!
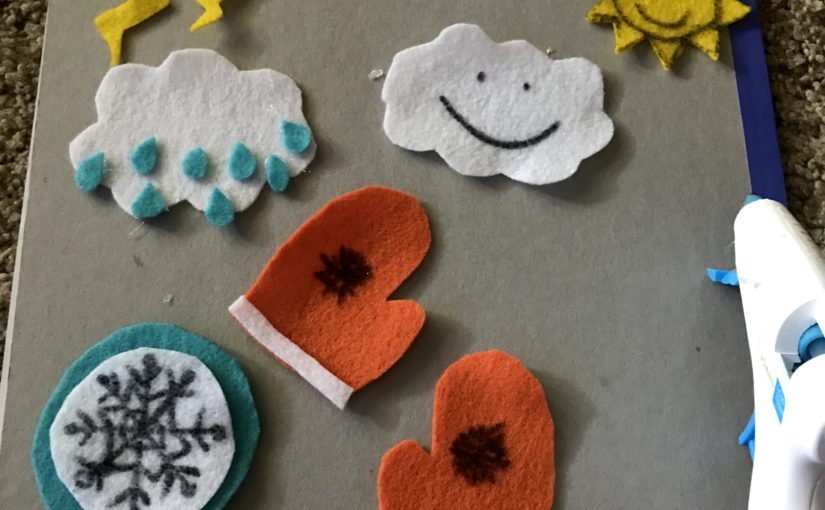
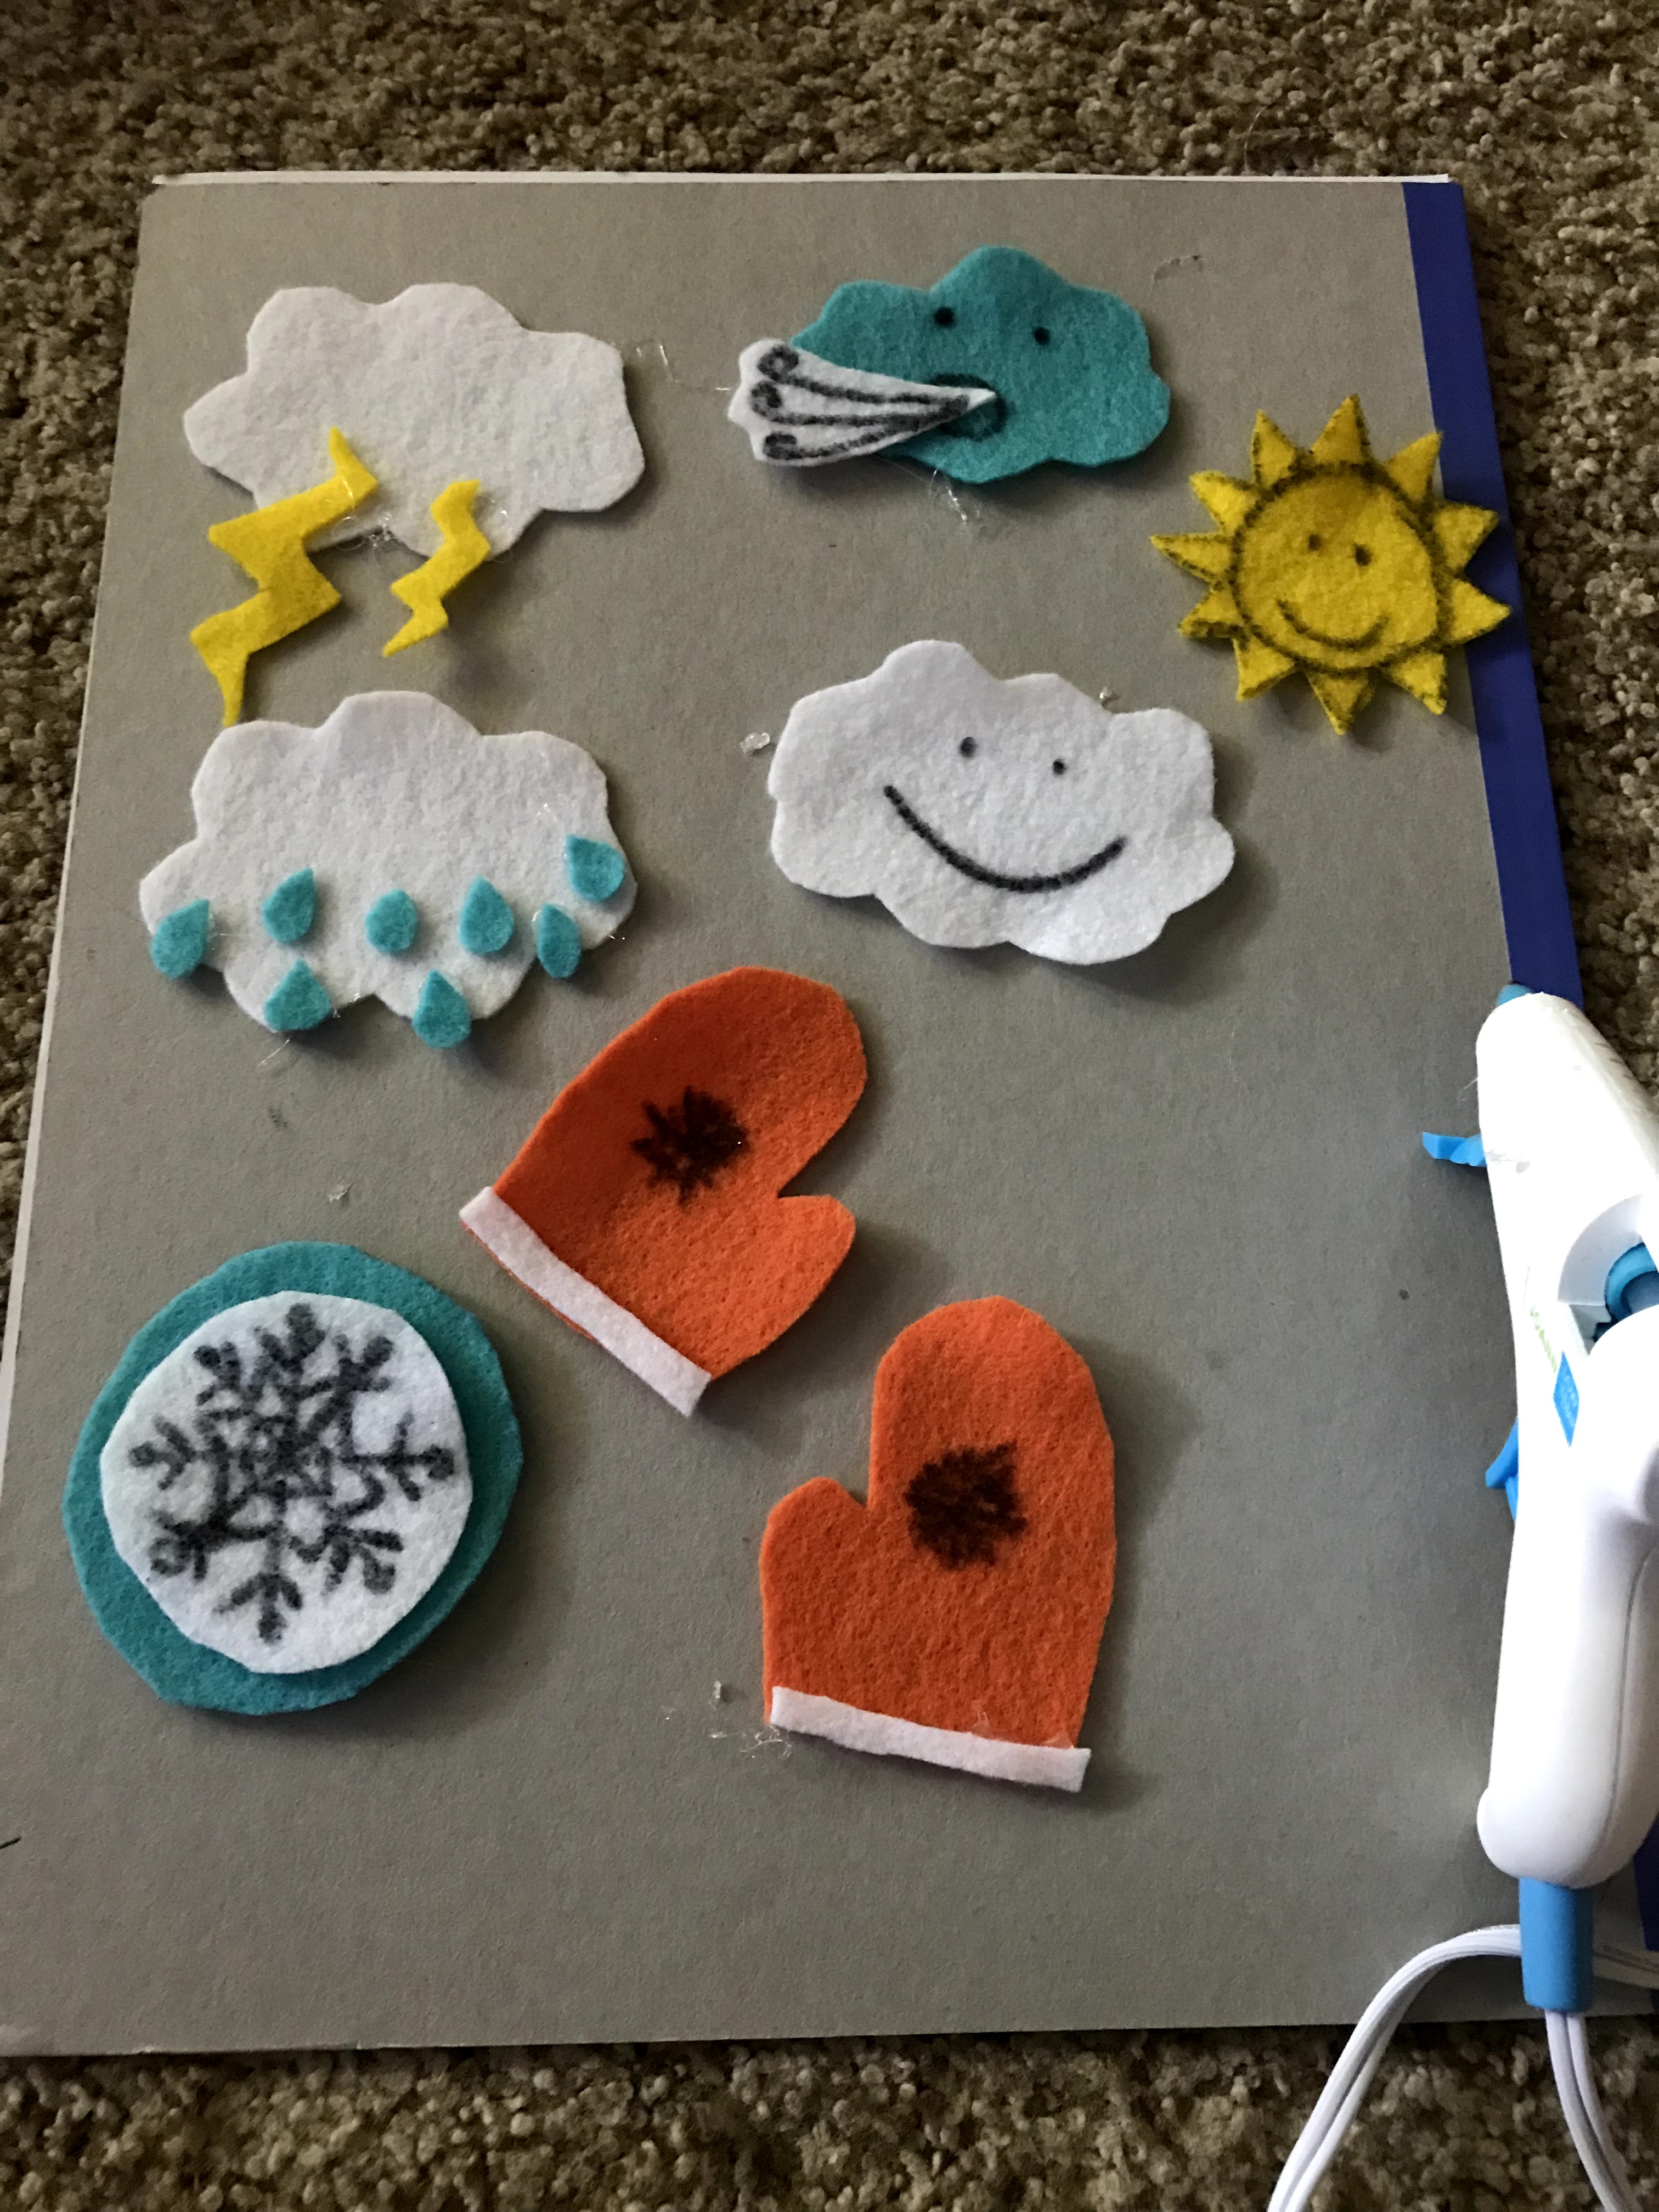
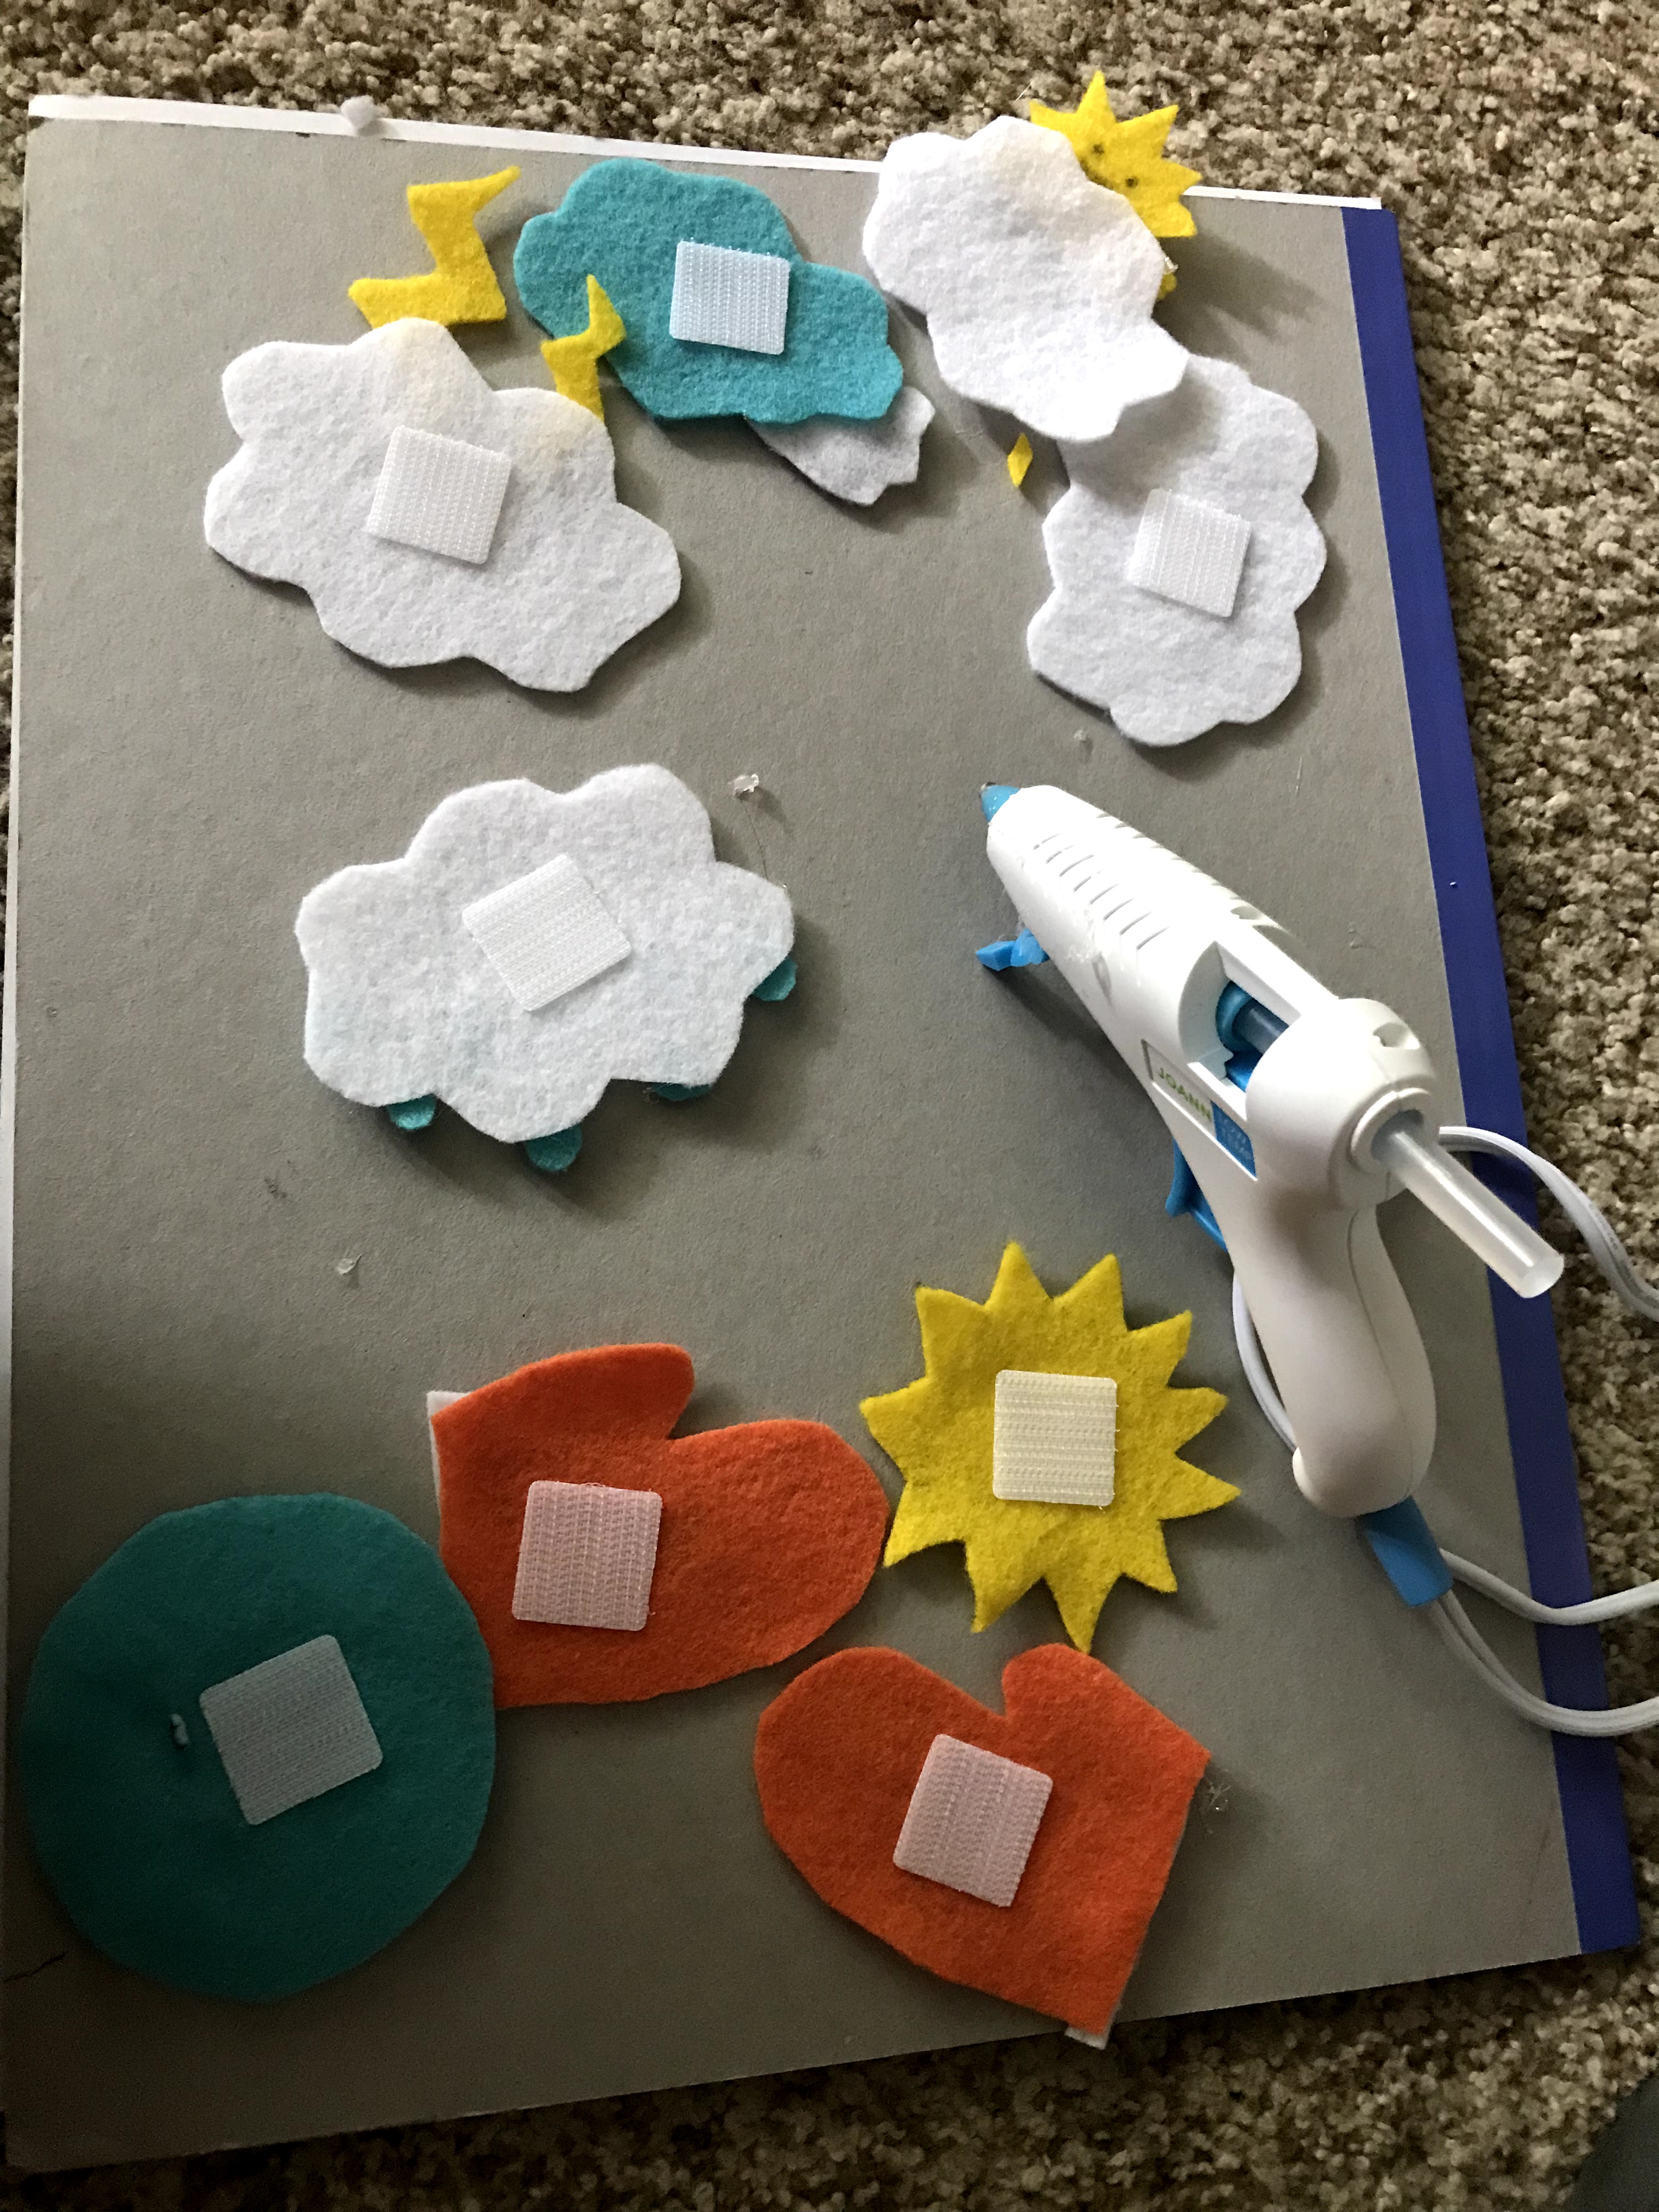
A felt weather board is a great way for a toddler/preschooler to learn the days of the week and the weather! I ended up having a few pieces of felt, some thread, and ribbon left over from other projects so I thought, why not? Weather board time!
The first thing I did was fold a piece of felt in half, horizontally. I decided to make 2 pockets to hold the weather icons. Sew the two sides together, going through both layers of felt, then do the same in the middle.
Next, decide on a background color. Lay the felt pockets on the bottom overlapping the background color. I overlapped 2 inches then hand sewed the sides 2 inches down (only on the inner layer which you can’t see) and along the top.
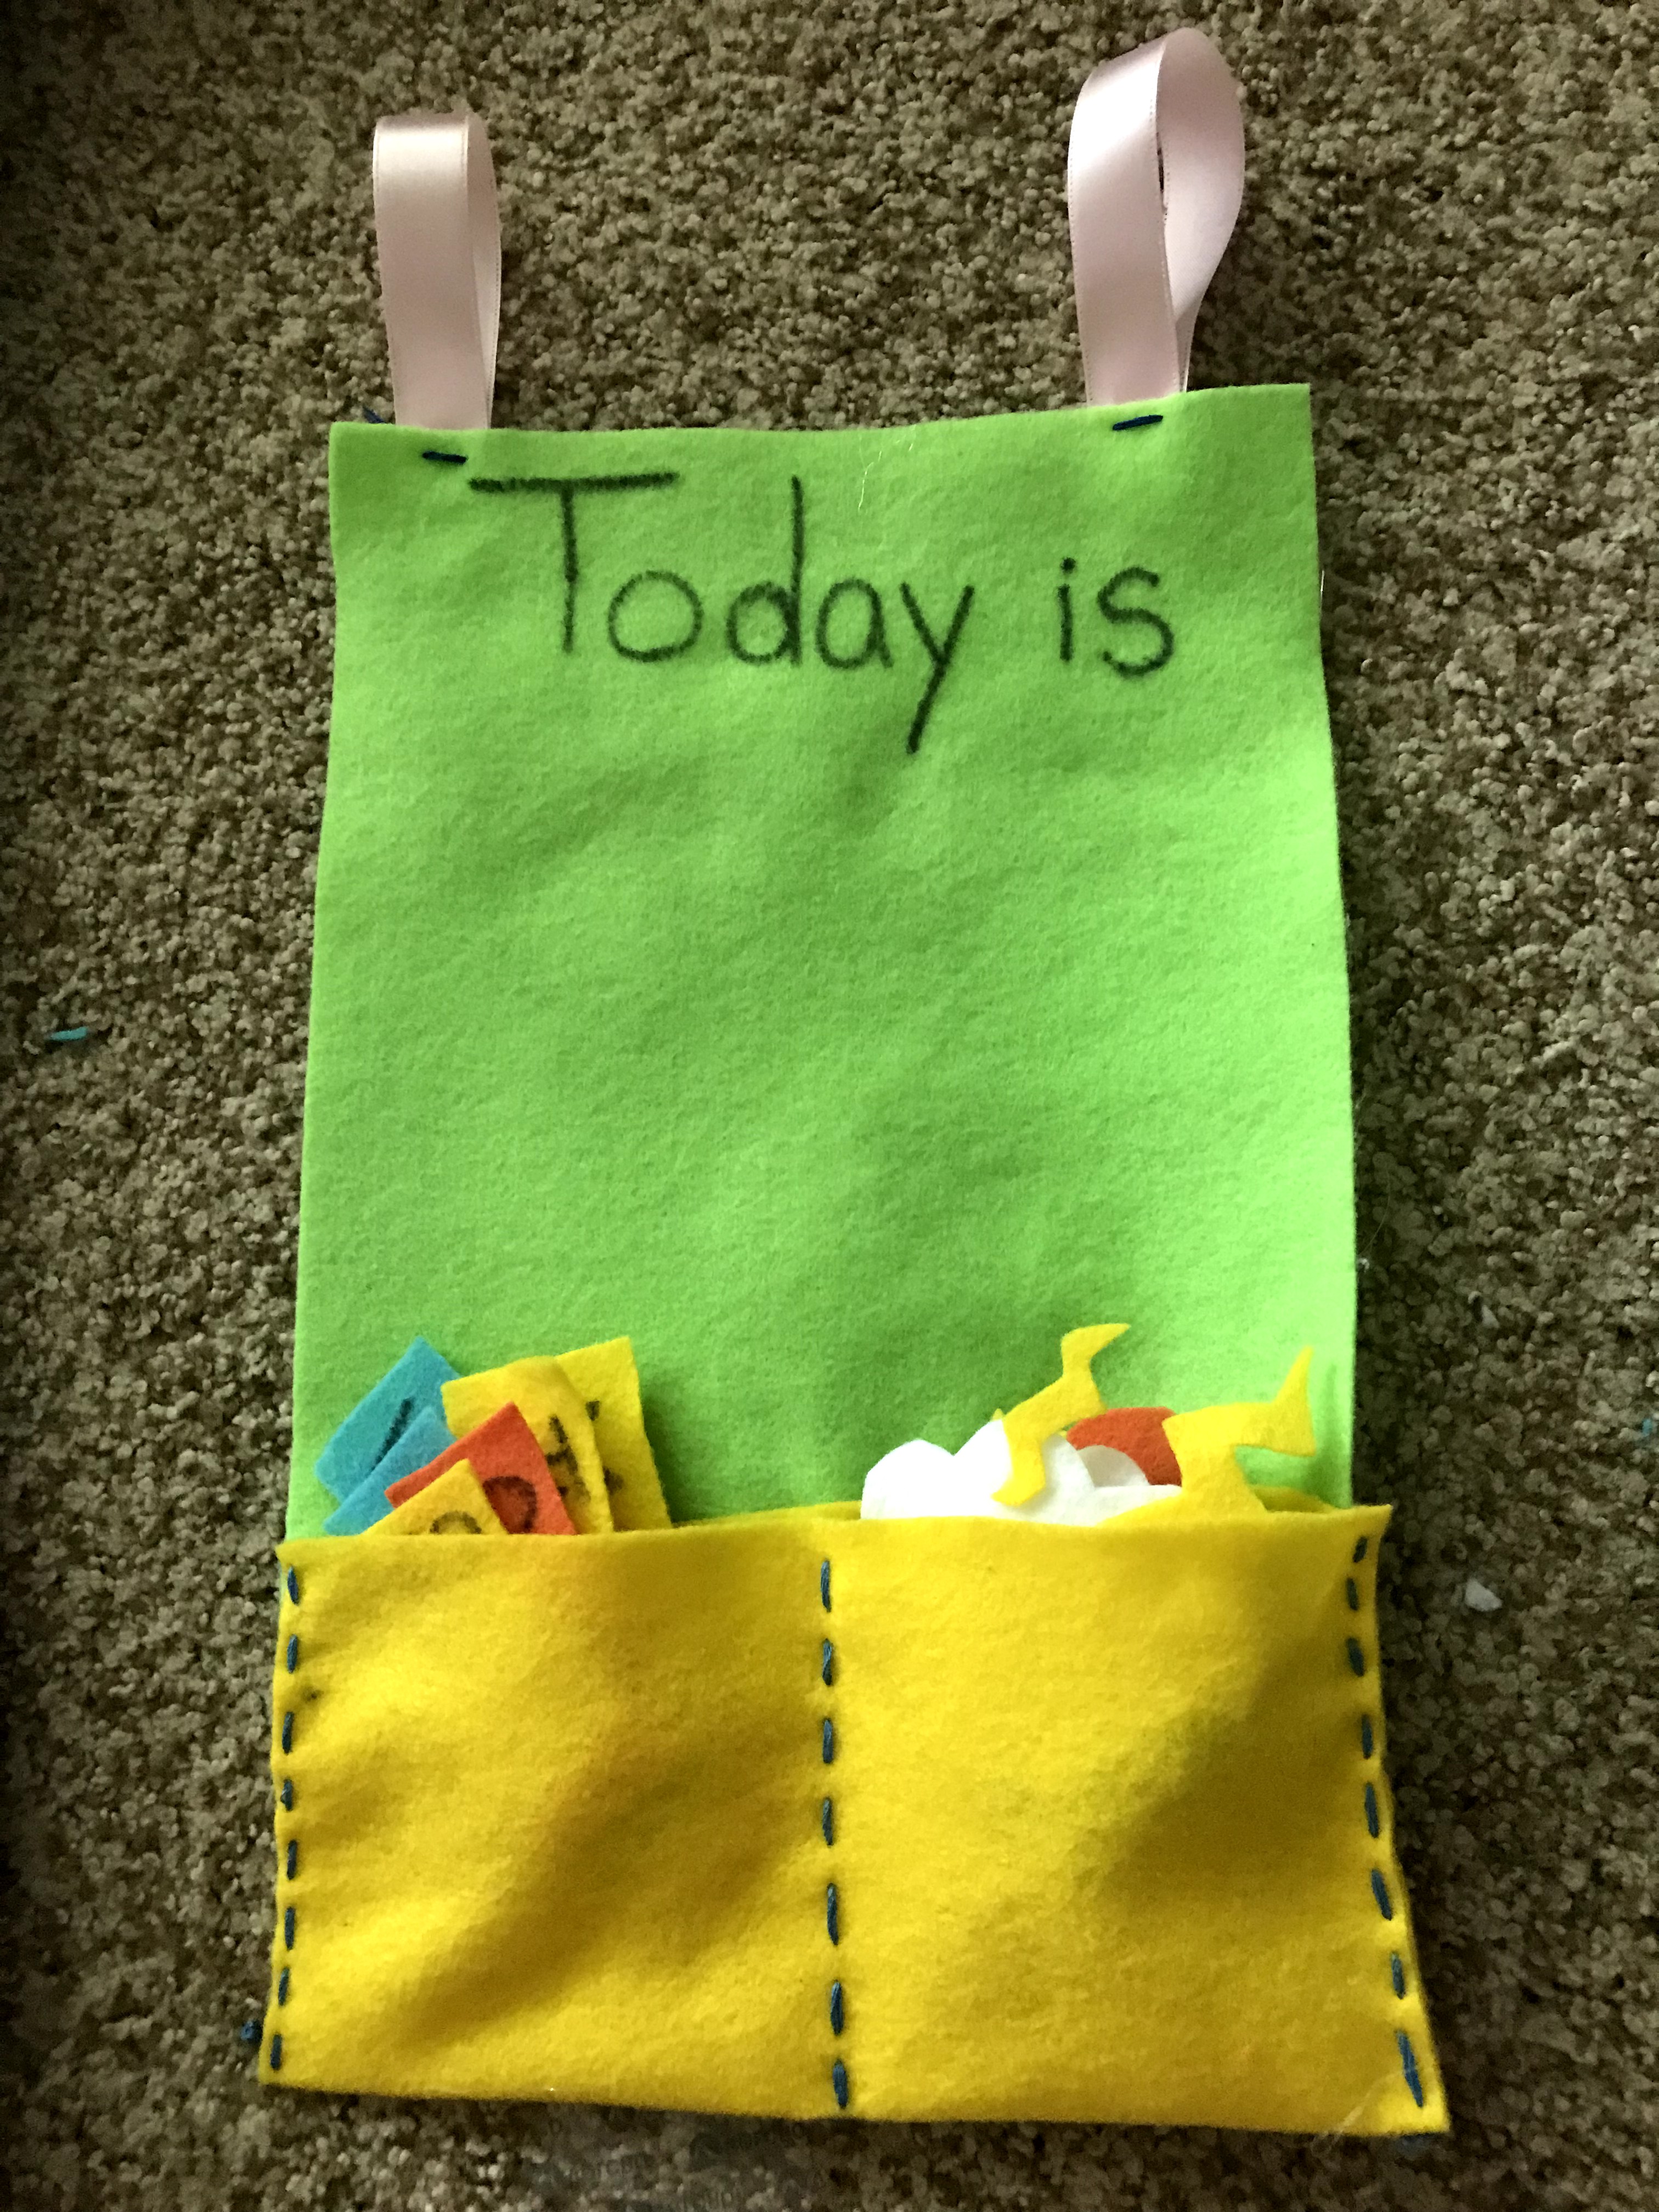
Next, I used a sharpie and wrote “Today is” at the top. I didn’t intend to do the days of the week as my girl is only 2, so she won’t really grasp that, but I had more felt and space! This weather chart can grow with her. Not only will I add more weather icons such as hail, sleet, moon phases, but I will also add the days of the week as she gets older. For now I will store them to the side to focus on weather!
Time for the fun part, making the weather symbols! There are countless ways to create them, I decided on these.
I also added a partly sunny symbol which you will see in later pictures. I did all of these by hand, sometimes outlining the pattern I wanted on the felt first, then cutting them out. I used the glue gun to add some different colors such as the white on the snowflake, the mittens, wind, lightning and rain.
I bought some velcro from Michaels. You can use the scratchy side on the back of the weather symbols. This scratchy side will stick to the felt that is the background, you don’t need the soft side of the velcro at all.
I also added a partly sunny symbol you can see at the top of the picture. I did not use the hot glue for the velcro, it just happens to be in the picture. The velcro has a sticky side that will adhere to the felt.
I had extra felt so I made days of the week!
My daughter won’t really grasp the days of the week but we can practice anyway. I can also store them until she’s ready. I might have to do that! She loves the felt weather board so much she puts them all up and takes them all down. Her favorite symbols are the sun and partly sunny. She had to take them to my sister’s house. Luckily I convinced her to leave them in the car so we didn’t lose them and I returned them to her board!
I ended up adding ribbon by making a stitch at the top. To make it extra sturdy I decided to hot glue the bottom of the ribbon to the felt too! You can use string, small ribbon, or anything you choose for this! I hung it above her work table using the clear command hooks that will easily come off of the wall if I want to remove them.
You can make the weather board a daily routine! Do it in the morning, or change it throughout the day based on the weather. Enjoy!!!
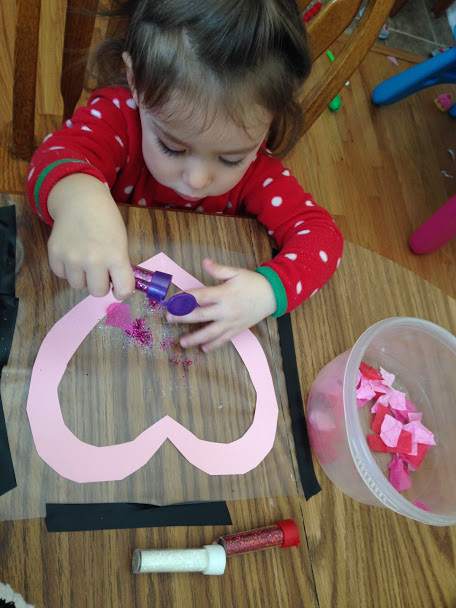
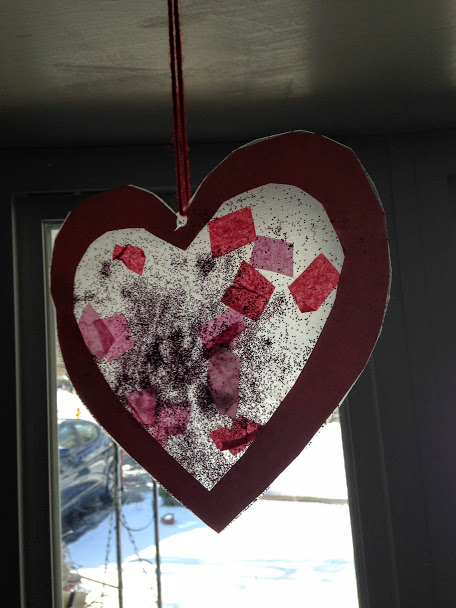
I’ve had contact paper sitting around for quite a while and decided it was time to use it! I had a snow (ice) day today and wanted a fun valentine’s craft for my toddler.
You will need:
-tissue paper in different colors
-contact paper
-tape
-glitter
-construction paper
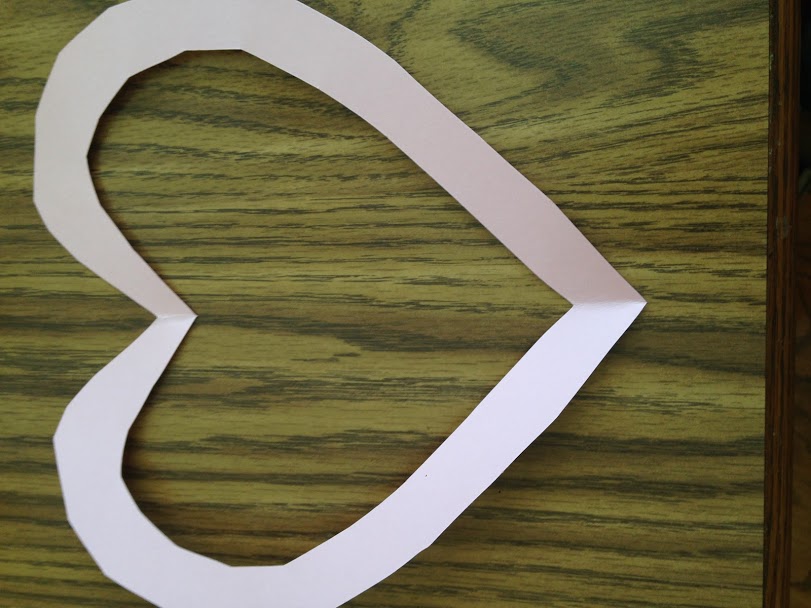
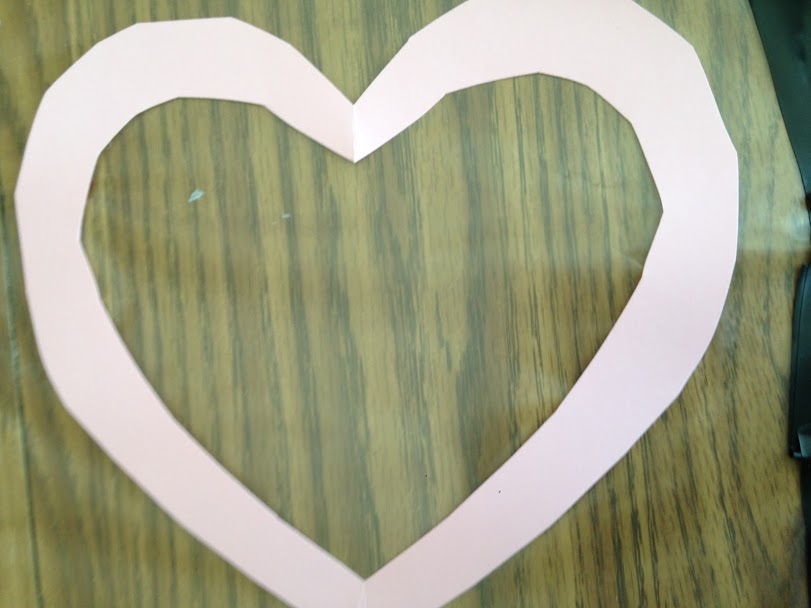
I used pink construction paper to cut out the heart. I simply folded the paper in half and cut out the heart shape.
Next, I cut out a smaller heart from the middle of the heart. This made a nice border.
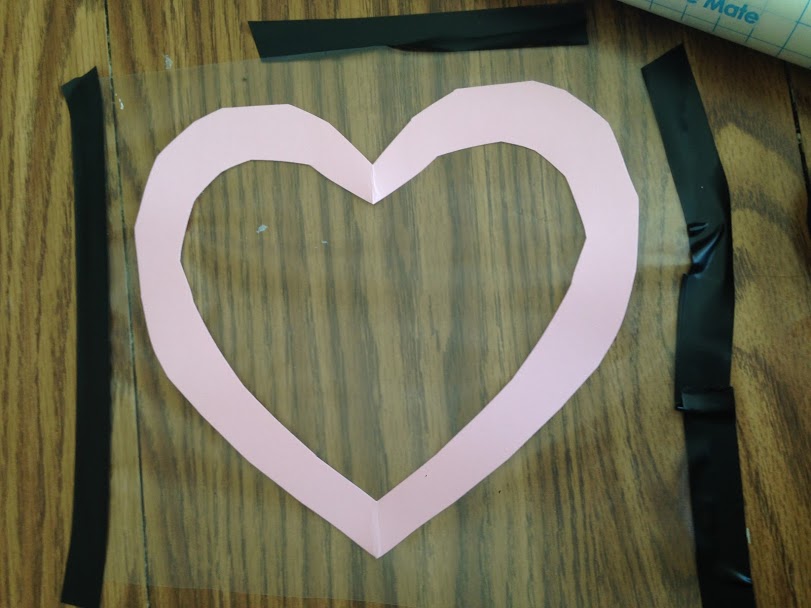
I cut out contact paper and put the heart on top of it. To get the contact paper to stay still and smooth, I put tape on the edges to keep it down.
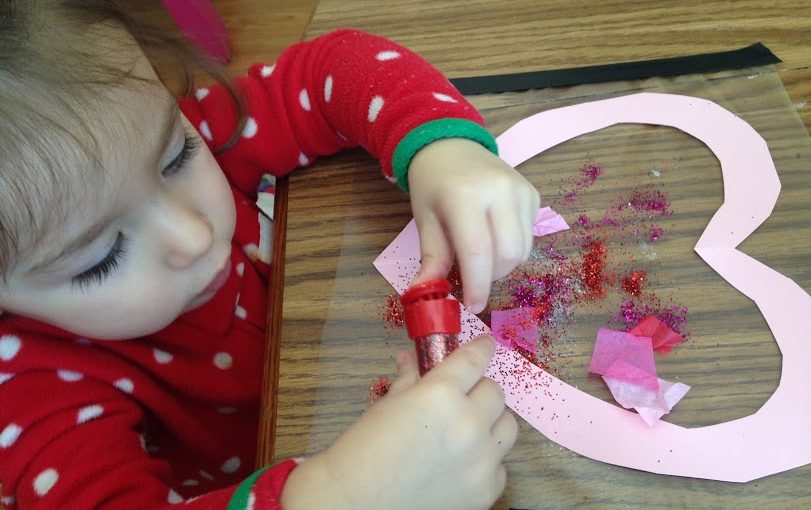
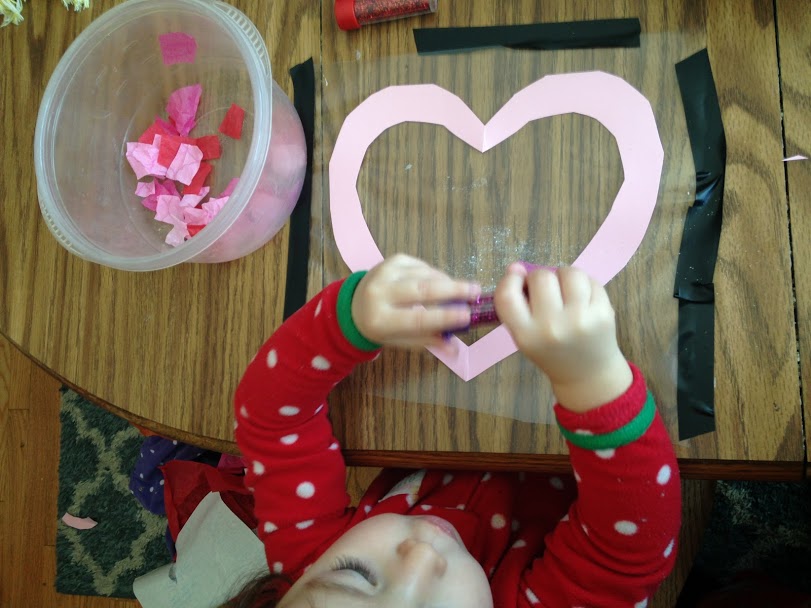
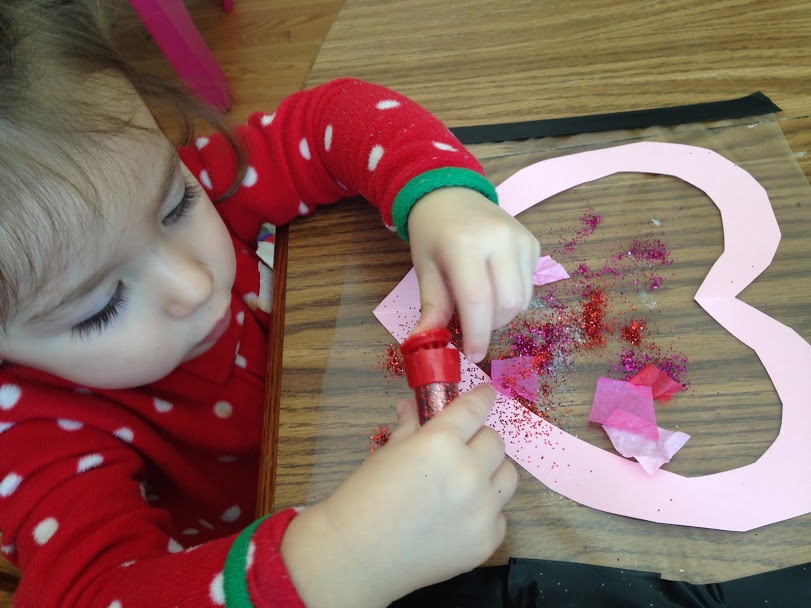
Here comes the fun part! Decorate! The heart is on the sticky contact paper, so anything will stick to it. My little girl used glitter and cut up pieces of tissue paper.
I underestimated how much she would love using glitter!
If she had a choice she would’ve just used glitter…all of it!
She LOVED this activity, so much that we made a few suncatchers! They make great presents for family 🙂
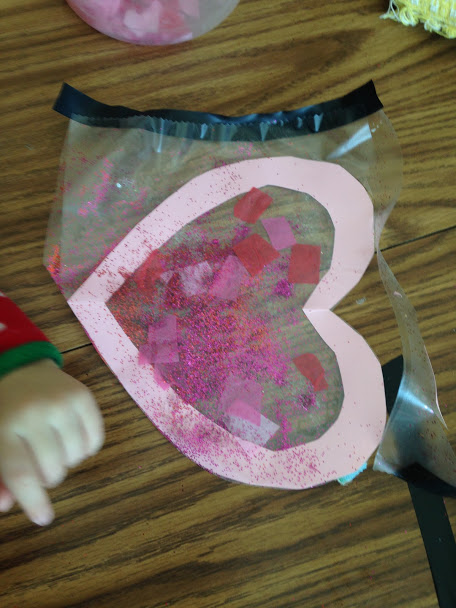
When your child is done decorating (or they’ve used all of the glitter), put another sheet of contact paper (sticky side down) on top of the heart. Cut out the extra contact paper around your heart.
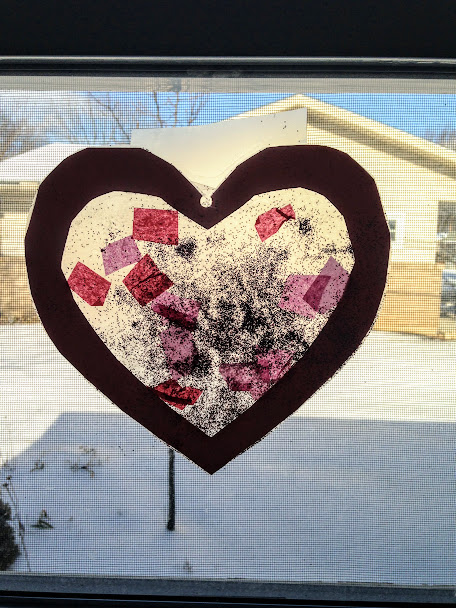
Then you are done! Hang it in a window that gets sunlight! You can hole punch and put a string on it or use contact paper to put it on the window. We will definitely make this again as she loved it soooo much! It’s a great craft idea for any age!
Since tomorrow is Valentine’s day and it’s currently snowing outside, the sky is cloudy. I couldn’t get a great picture of the finished product, but will post the pictures anyways. Keep in mind that the glitter is colored and will shine brightly when the sun is out but today it is cloudy!
If you have a special occasion coming up and are looking for a gift from your baby, toddler, or child, I have an easy peasy present idea!
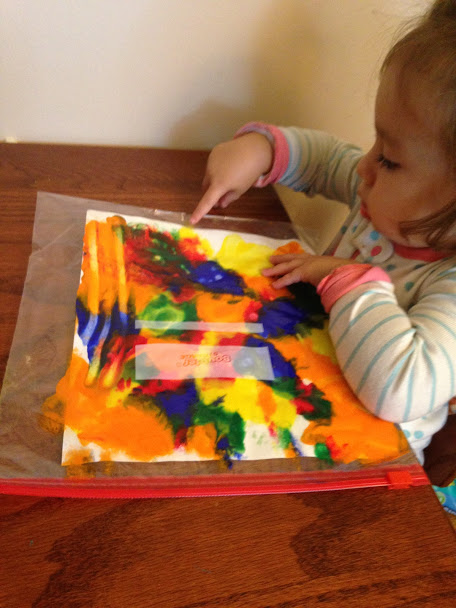
Paint…UGH PAINT! The word can invoke fear in any parent, except this is mess free! Okay, almost mess free.
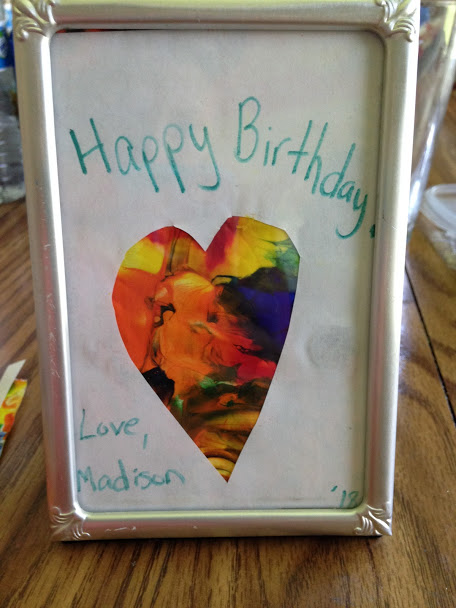
My mom’s birthday was coming up and I wanted to give her something from her granddaughter. I searched online and found this simple craft. I will admit I improvised because I was missing some of the items and I will mention what worked & what didn’t as I go through the steps.
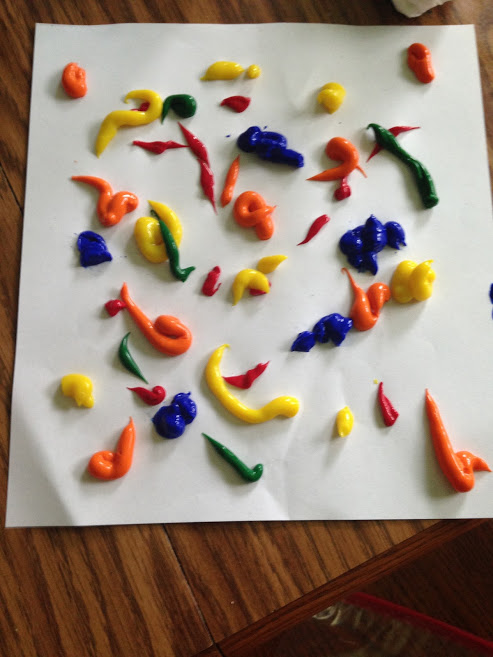
First, gather your materials. You will need:
-Paint in various colors (I used finger paint)
-cardstock (I used regular paper but it didn’t work so well)
-gallon ziplock bag
-picture frame (if you choose to use it as a gift)
-Heart stencil (or you could just draw it yourself)
-scissor
Next, put your choice of colors on your cardstock paper. Note: I didn’t use cardstock and it ripped easily and you could see through some of it. SO USE CARDSTOCK paper or thicker paper. If you are in a pinch you can use regular paper but you will have to be very gentle with it.
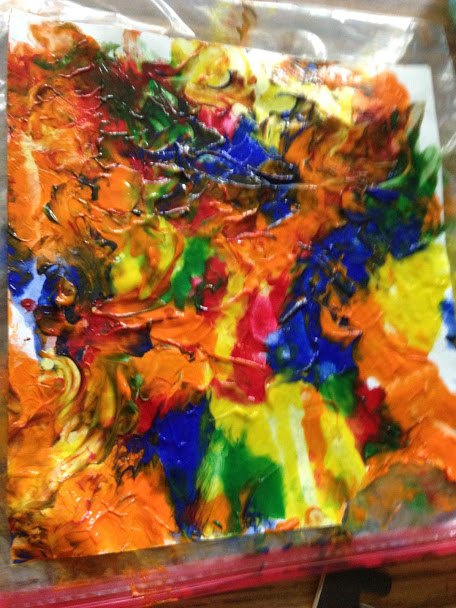
YES, I USED WAYYYYY TOO MUCH PAINT!!! My paint came jumping out of the bottle super fast, I’m really not sure how that happened (haha). It takes longer to dry with all that paint. It took days for it to dry when it should’ve taken overnight.
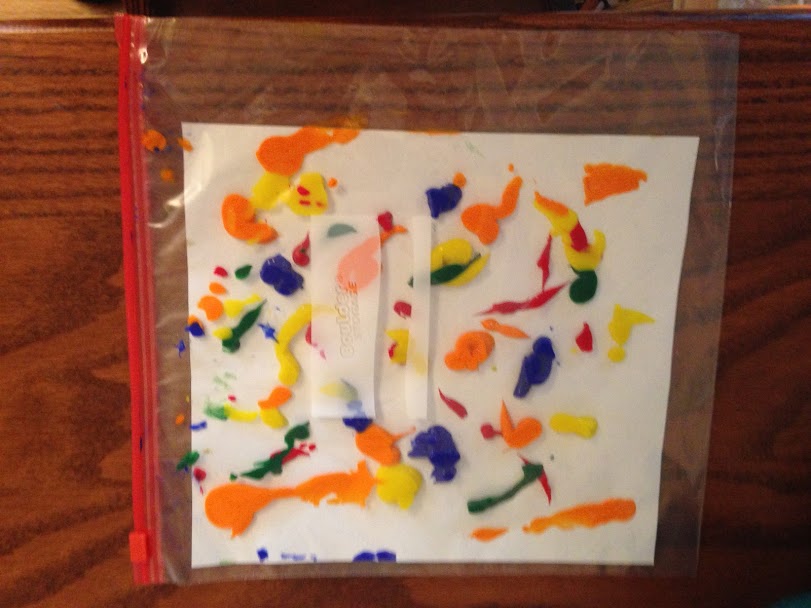
Take your cardstock paper and put it in a gallon sized ziplock. This insures your project will be mostly mess free! If you need to cut down the paper a little, go for it.
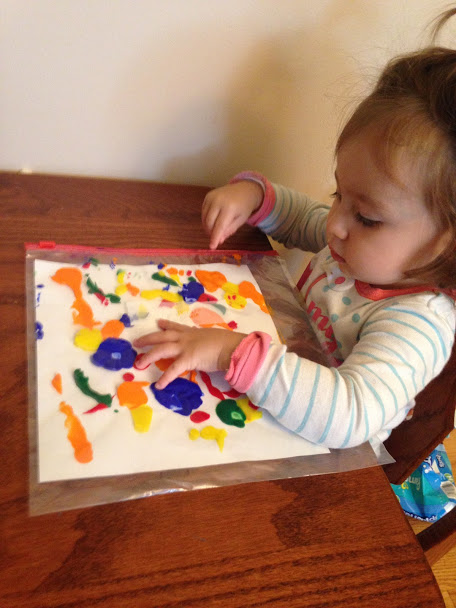
Now it’s time for fun!!! Let your child smear the paint!
Your child will love smearing the paint and you will love that it’s mess free!
When you like the smeared look your child has made, carefully take it out of the bag and leave it in a safe place to dry.
Look at all of that paint!!! TOOO MUCH! If you put way too much on like me, you can either dab it off with a paper towel or give it days to dry.
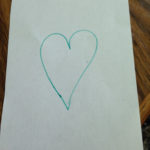
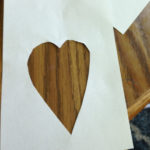
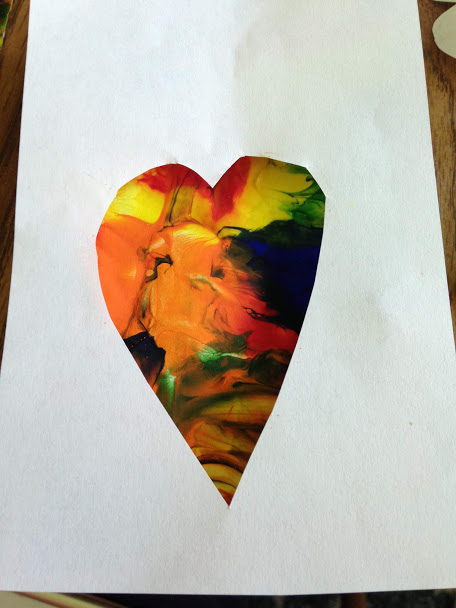
Here’s where you can vary the project. I drew a heart on a new piece of paper (use cardstock) and cut it out. You can pick any shape you like! If you are super crafty you could even cut out a name or shape of an animal. Cut down the paper to whatever size you would like it to fit. I cut it down to fit a frame. However, you could also make this into wall art, a card, or anything you can imagine!
Place the cut out on top of your painted paper. I moved mine around to find which colors I wanted to show. Cut the back painted piece to fit the frame. If you would like to write a message on the paper, go for it! Put in it a frame or glue and fold for a card!
Easy Peasy Paint Present! Note: I used regular paper and you can see that there are places you can see through the top paper. I highly recommend cardstock or thicker paper.
This project is perfect for any occasion!!! This could be done for birthdays, anniversaries, and holidays.
I’m thinking green colors with a Christmas tree or wreath cutout for Christmas! You could also use the paint bag trick for ornaments. Instead of using a top layer, just let the painted paper dry, cut out a tree shape, hole punch and use a ribbon and wallah!