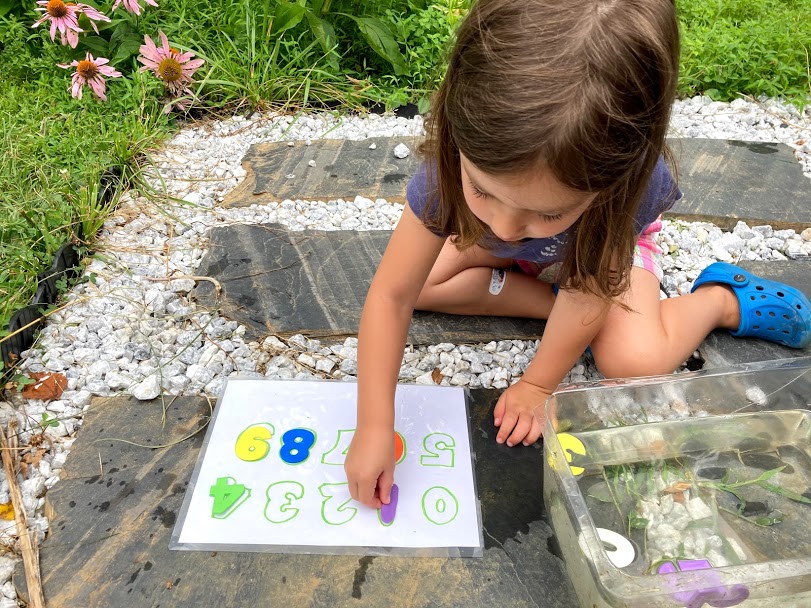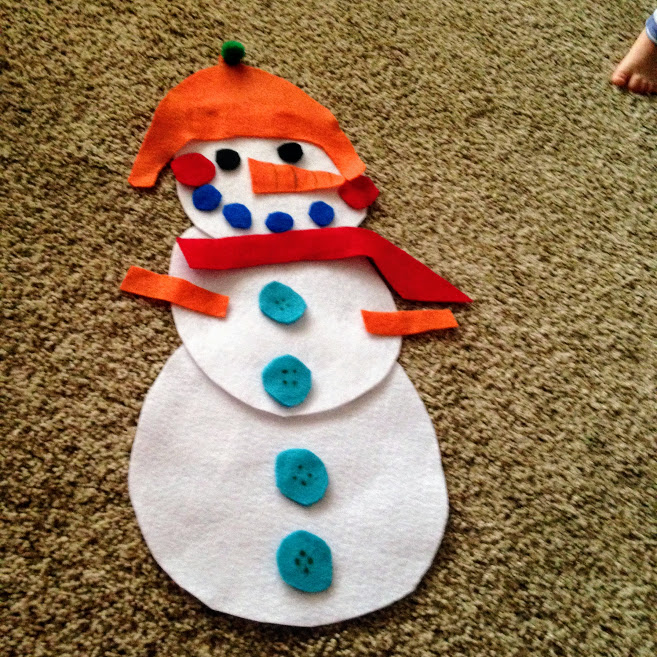
What’s that? A foot in the corner of the picture? Yes! Madison couldn’t wait to get her hands on the felt snowman and decorate him!
My pile of felt was stacking up after doing a few projects and Christmas was over…what to do with it? I took down the amazing felt tree my sister made after the holidays and felt a bit depressed. Noooo Christmas can’t be over! Winter isn’t over, so why not make a felt snowman similar to the felt tree Madison loved so much?
The project is very simple & super cheap!
You need:
- Felt in various colors: white, orange, black and a few other colors for the hat, buttons, and mouth.
- Velcro
- scissors
First, I cut out the 3 circles for the snowman out of white felt purchased at a local craft store (you can also get cheap felt at Walmart). I didn’t use any patterns, but just cut everything free hand. You could also use a marker to draw the shapes first, then cut them out.
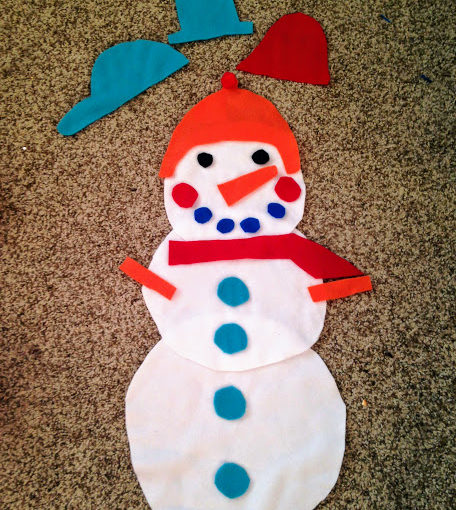
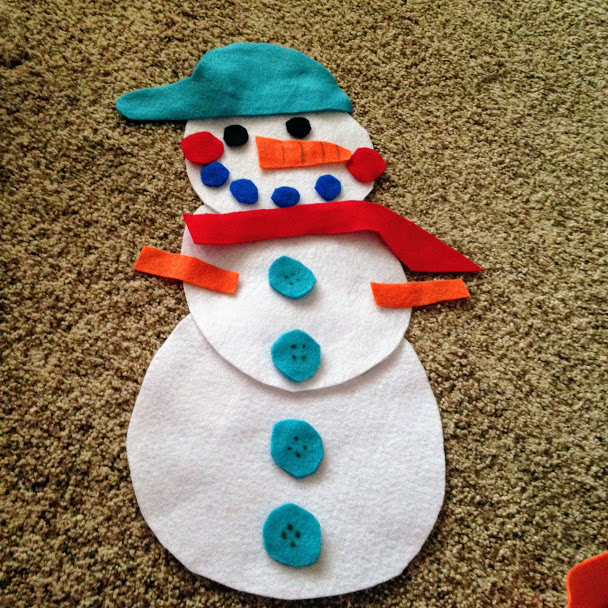
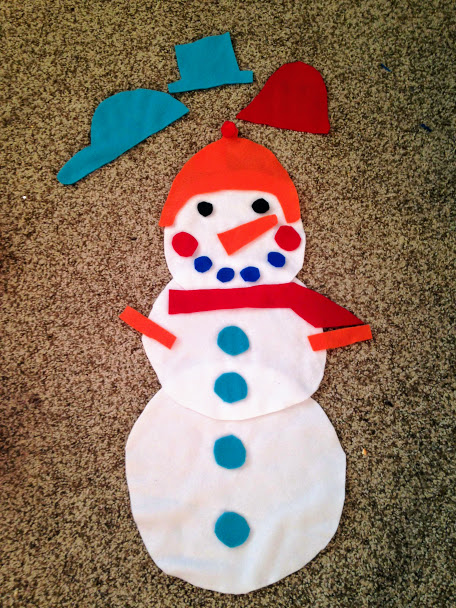 I went with simple features, a carrot nose, 2 arms, and a scarf. You can choose whatever colors suit you. I made 4 buttons, a mouth, rosy cheeks, eyes, and 4 hats.
Why 4 hats you ask? Madison likes to dress up different dolls and I thought she would like to make the snowman not only something she puts together, but gets to switch the different features. Plus, I had lots of extra fabric and time. After cutting everything out I hot glued the 3 white circles that make up the snowman together.
Another option would be to put velcro on the bottom of the top 2 white circles and your child could put the snowman together that way. I know my toddler, and she likes to pull on things, so gluing it together was the best option for us.
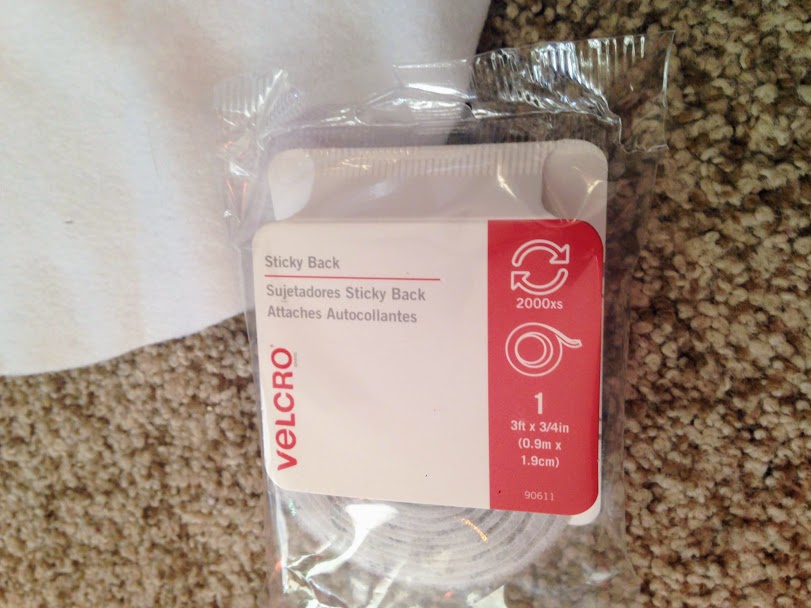 I bought velcro with sticky back so I wouldn’t have to glue it. I simply used the hook side of the velcro. Yes, I had to look that up, the hook side aka the rough side. I cut each piece depending on what I was using the velcro on. For example, the scarf is long so I used at least 5 inches of the hook side of the velcro.
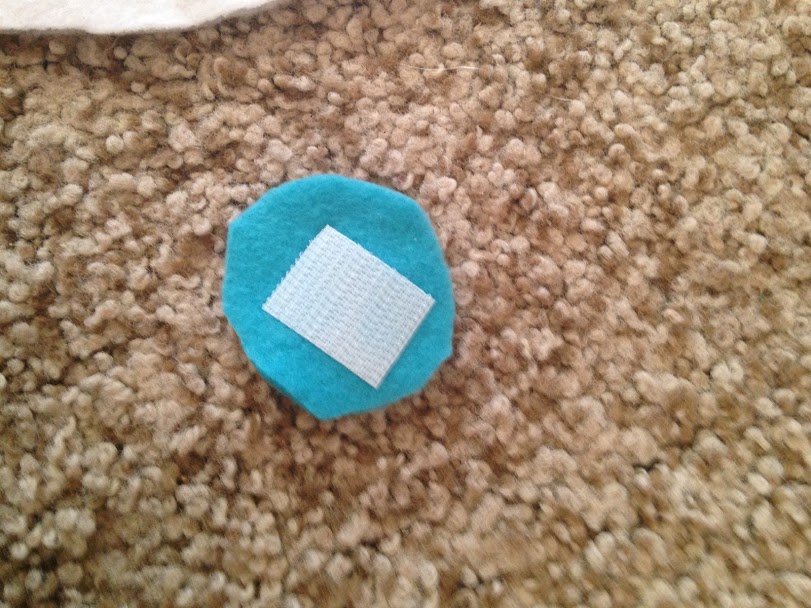
For the buttons I used about an inch each. You don’t need the soft side, the loop. If you use felt then the rough side of the velcro will stick to the velcro. After you cut the hook velcro just peel off the sticky side and put it on your snowman accessory. Do this for each accessory. When you are all done putting velcro on, you can have your child decorate!
If you wish you can put dots on the buttons and lines on the carrot nose with a sharpie marker! You can lay this on the floor or hang it up for your little one to decorate. It also makes a great present!Follow


Share