Princess Dress and Party!

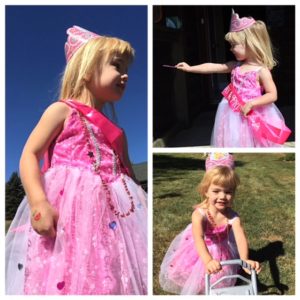
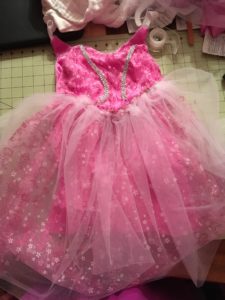
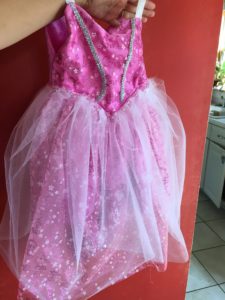
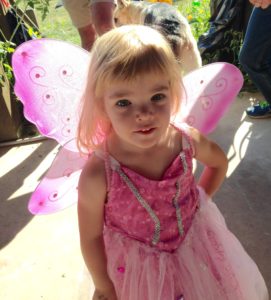
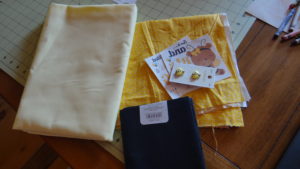
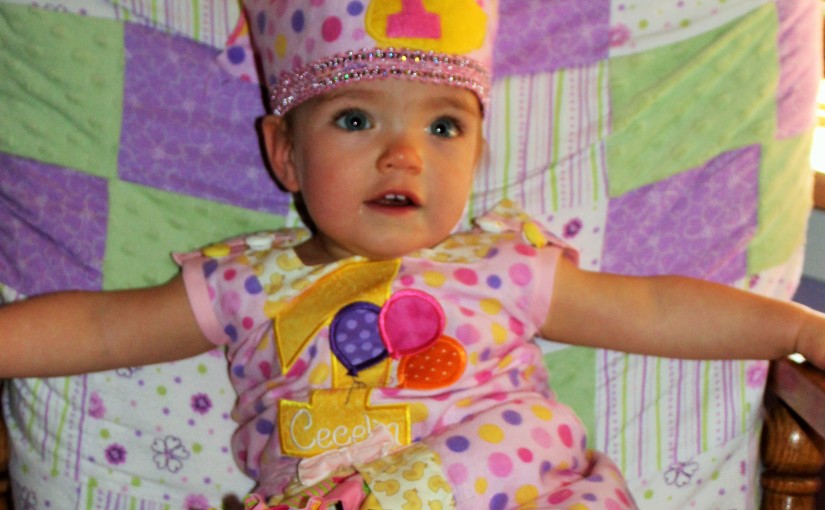
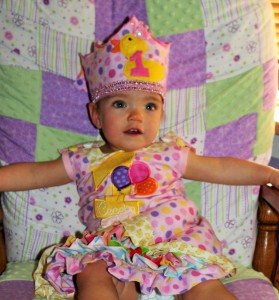
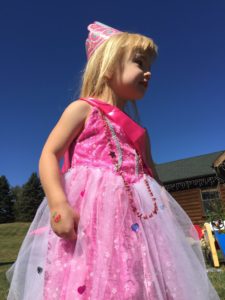
My daughter has recently developed an interest in princesses and playing dress up. I decided to take on the challenge of sewing a princess dress. I’ve made many dresses, including the princess-like 1st birthday dress, but I wanted to make something different, so I did some research and then bought fabric I thought she would love, and designed a dress. I made several adjustments during the process and added embellishments.
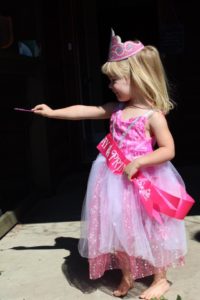
Since I did this all during the process of making it, I decided to take pictures instead of video like I usually do.


There is no pattern for this since I designed the dress as I went. I used one of her regular party dress to eyeball the correct sizing for a 3t dress. (This is what you can do too!)

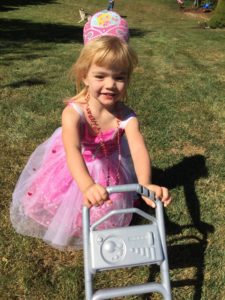
So below are pictures and some steps. If you want to design a similar one just use a dress to get an idea of the sizing. I don’t work with a lot of tulle sewing, so it didn’t turn out the best, but I’m proud of the end results, and she loves it too!

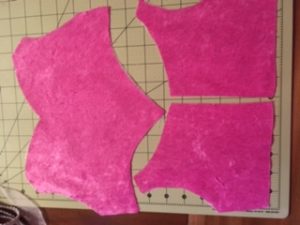
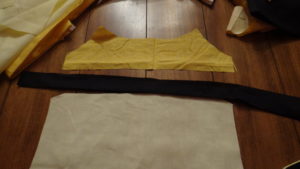
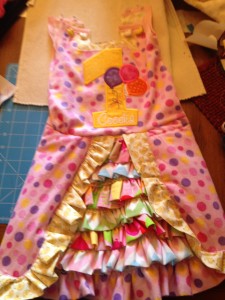
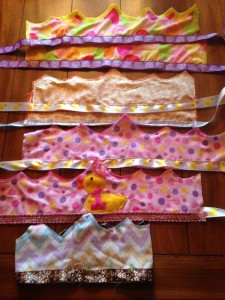
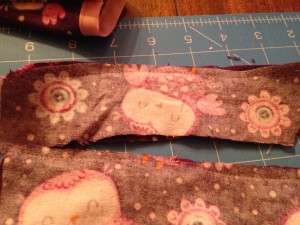
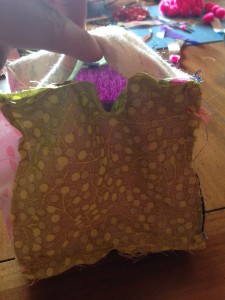
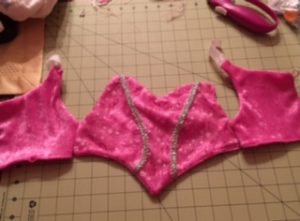
So I first made the front and two back pieces. You can copy these shapes from the picture and use a dress for sizing.

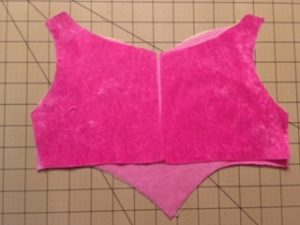
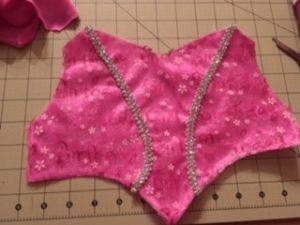
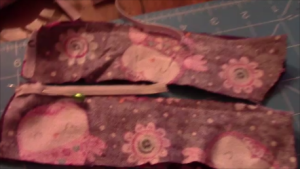
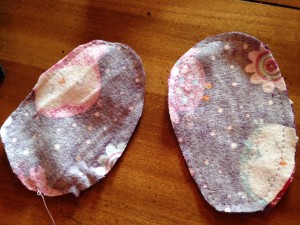
I ended up making another three pieces (another front and two back pieces) and using it as the inside of the dress.  So I took pattern facing pattern for the front piece and left a 3 inch space to pull it right side out.  Then I sewed this shut and ironed it all. I also used sparkly elastic and pinned it in between the pattern facing pattern (this is what I should have done but forgot and ended up just sewing it to the top).

I also added a tulle happy birthday and two pieces of silver design on the front. You can add or not add as many embellishments as you want.

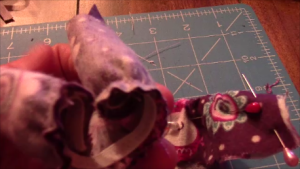
Next, I used interfacing ironed on both back pieces and then used white hair ties cut in half.  I pinned the half hair ties facing inwards in between the pattern facing pattern pieces then sewed all the way around except a 3 inch area and pulled it right side out and sewed then ironed it.
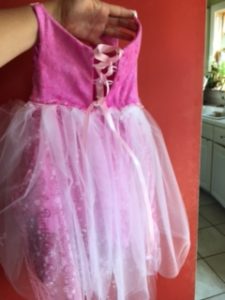
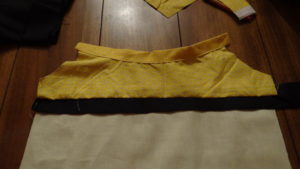
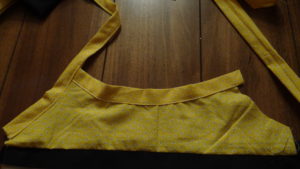
Following that, I placed the two back pieces on the front pattern piece and sewed the sides and then folded them back to have the top finished.
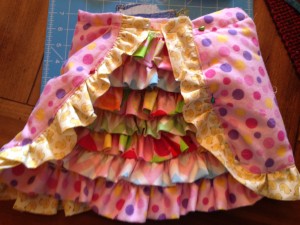
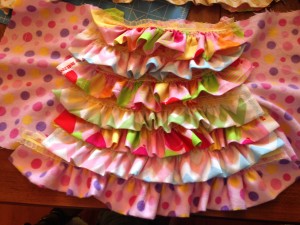
I then measured the skirt by measuring from the top down to the right length for my daughter with a measuring tape.  I used the soft fabric of the top for the under-skirt and then cut happy birthday tulle and tulle for the skirt.  i made the white tulle width three times the width length since I will gather it to make the skirt more “poofy.” I then gathered the tulle using the easy method of dental floss, on top of the soft under skirt. With this method, you use a large zigzag over the floss and then at the end you pull the floss out and it is gathered!
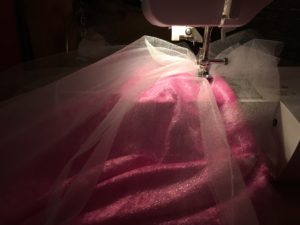
Next I decided to use the happy birthday tulle and sewed it on as well.  Then, I put the layers together and I put pattern facing pattern and sewed it all together.

I ended up sewing on a bead embellishments on ribbon in between the top and bottom.


Happy Sewing!

FollowFacebookpinterestrssyoutube
ShareFacebookpinterest

Summer Bee Dress

Cecelia’s Summer Bee Dress

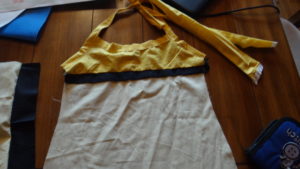
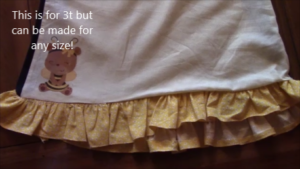
This lovely summer spaghetti strap dress was suppose to be made in time for my sister in laws baby shower in June.  However, I was unable to finish it due to my water breaking early and being hospitalized.  I finally finished it and love how it turned out!  I free handed the design and sizing.  I meant for it to end up as a 2t size, but as you can see it’s a bit big!  This works out great since its winter and not summertime!  She can wear it this upcoming summer.  I can’t wait for the warm spring and summer to come!  Bulbs and flowers emerging and gardening time, but let’s get back on track.

As always there is a youtube tutorial and this written one.  I do not have a pattern as a freehanded it and designed the pattern myself as I went.  I used one of my Cece’s dresses to size it and make part of the pattern to guess the sizing.

Unfortunately, a lot of the video tutorial was accidentally videotaped over with my baby boys arrival home (sorry more important anyways!).  So I videotaped again trying to explain the best I could.  If you have questions please let me know!  More great videos to come soon!

What you need:

  • Chose of fabric colors and types (I chose three colors
  • 1/4 inch elastic (for gathering of the top of back of the dress)
  • Bias tape (or you can make your own like I did)
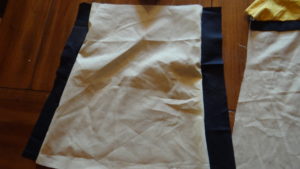
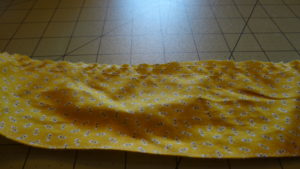
  1.  First you want to cut out your fabric pieces.  I looked at another dress I have for my little one and based the main front and back piece by measuring and estimating the sizing.  Then I cut the bottom piece I needed which ended up being about 40inches long and 4 inches wide (for the ruffle on the bottom). I ended up added another color (black) on the two sides of the dress.  Then I also cut out fabric to make bias tape (here is a good tutorial on making bias tape if you’ve never made it before..BIAS TAPE TUTORIAL. )
  2. Take your strap (black piece) and sew it to the top piece and bottom piece.  Pattern piece to pattern piece (facing each other) sew the bottom to the strap
    then the top.
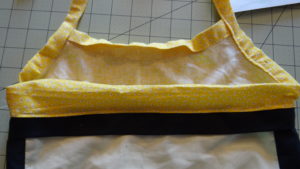
  3. I made my own bias tape by cutting and ironing the fabric.  Then you proceed to use it to line the top of the dress (sew it on!). Then sew up the armholes and long to tie…estimate how long you want the straps to be to tie behind the neck (longer the better!)
  4.  
  5. Take the back side and sew two black (or whatever color you choose) by sewing
    facing pattern sides together
  6. I decided to add a small piece of fabric above the black strap to make it higher .  If you want, sew and connect.  Then place from and back piece facing each other and sew to connect from and back.
  7. Add elastic to back piece if you want it ruched and tighter.
  8. The last part is the bottom ruffled part.
  9. Hem the bottom first about 1/8inch
  10. To gather your fabric put your machine on the longest thread setting make two
    straight lines (Do not reverse!). Roughly 1/4 and 1/8 inch away from the top.
    Leave long threads on the ends.
  11. Next you knot the bottom of the back side of the threads so you can gather, just the two in the back (not the front).
  12. Pull the bottom threads from the other end and slide the cloth along the threads toward your knot making small folds. When your cloth has been
    gathered the way you want it, knot the ends securely with each other.
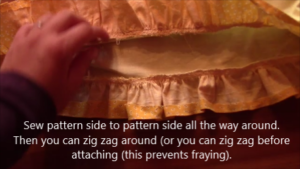
  13. Sew pattern side to pattern side all the way around.  Then you can zig zag around (or you can zig zag before attaching (this prevents fraying).
  14. Then you are finished! Great Job!  Have fun! Post your pics!
FollowFacebookpinterestrssyoutube
ShareFacebookpinterest

Easy Sock Snowmen!

What’s an easy gift that can be personalized and made in 15mins?  A sock snowman of course!

IMG_3866A what?  A Sock Snowman? What is that????

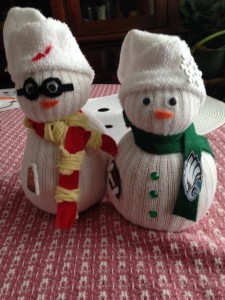
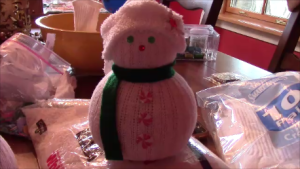
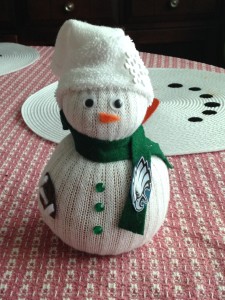
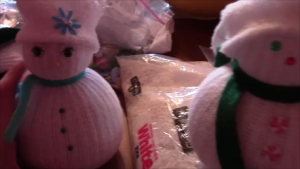
Well, let me tell you.  A sock snowman is a snowman made with rubber bands, rice, men’s socks, a hot glue gun, and personalized items.  It is easy, fast, and I love that you can personalize it any way you want for any time of the year!  I made 10 of them for Christmas gifts.  You can see the harry potter and eagles one above.  I also made a hunter, patriots, and princess snowman.  Then I made the usual Christmas snowman for decorations as well.  I even got most of my supplies at the dollar store!

Snapshot 1 (1-23-2016 2-55 PM)

As usual, there is a youtube video tutorial and the written instructions below.  These make great gifts for any occasion and are quick and easy! Enjoy!


What you need:

-Hot glue gun
-Crew socks or longer
-Any type of rice
-Rubber bands
-Decorations such as eyes, stick ons, felt, buttons, bows, pins

  1. Take your crew sock and cut below the ribbed area (the bigger the snowman the lower you want to cut (the bottom part will be the hat of the snowman).
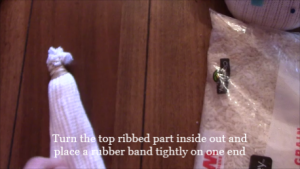
  2. Turn the top ribbed part inside out and place a rubber band tightly on one end
  3. Snapshot 1 (1-23-2016 6-23 PM)
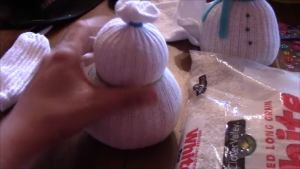
  4. Turn it right side out and pack with rice. Make sure you continuously pack it down with your hands to give the snowman a fuller shape.  Leave a small area on the top and then close it with another rubber band.
  5. Put a rubber band on the top then 1/3 of the way down place another rubber band as tight as you can and adjust the rice to form the body and head of the snowman.
  6. Snapshot 1 (1-23-2016 6-33 PM)
  7. Now time for the fun part- decorating!
  8. The scarf can be made out of felt, scrap fabric, or even a crocheted or knitted scarf!  I did this with camo yarn for a hunter snowman.
  9. I used the hot glue gun to make sure everything stayed in place including the scarf and hat!
  10. IMG_3865
  11. Take the bottom part of the sock and fold top of it and place on top of the snowman’s head for the hat!  Feel free to decorate the hat as well.
  12. Snapshot 2 (1-23-2016 6-49 PM)
  13. I made my sister a harry potter snowman.  I also made a hunter camo snowman, princess snowman, patriots snowman, soccer player, and Christmas themed
    snowmen.
  14. Congrats you are done!  Good job!  Post your pics!
FollowFacebookpinterestrssyoutube
ShareFacebookpinterest

DIY Felt Christmas Tree!

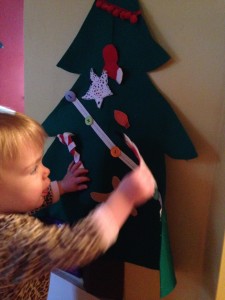
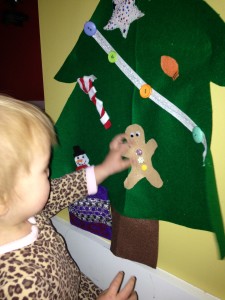
Cece bear loves to pull toys out of baskets and put them back in.  She also likes to build blocks and figure out other puzzles.  So I thought to myself, what can I make for Christmas that she can play with?  And a mini Christmas tree came to mind.  Eventually, I figured out a felt Christmas tree with all sorts of sensory stimulation and Velcro ornaments would work!  So I decided to get to work.

IMG_3608

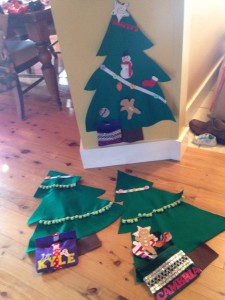
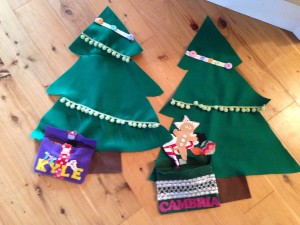
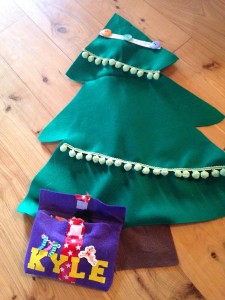
I decided to make three trees, one for each of Cece’s friends.  It also made a great birthday gift for her friend Kyle’s first birthday!  This is a great activity to do with older children as well.  They can make their own ornaments and decorate the tree!  There are a variety of ways to put the tree, ribbons, buttons, and ornaments together.  The two I used were sewing and hot glue gun, but you can do one or the other as well.  Just make sure if you have a baby, infant, or toddler, to make sure everything is very secure so they can’t pull it off!

IMG_3625

As always, there is a youtube video and written steps and pictures.  Feel free to add your own creativity and pizzazz!!!

If you have an older child, instead of using velcro to stick the ornaments on, you can use string or twine looped on the ornament and they can put them around buttons on the tree!


What you need:
*Green felt fabric (I used 1.5
yards for three trees)
*velcro
*Brown felt fabric (stump)
*Felt fabrics of various colors for
ornaments of your choice and design
*optional: buttons, ribbons,
and other accessories

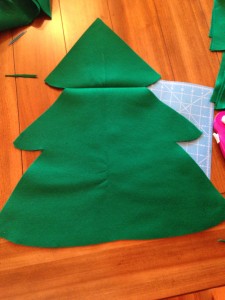
IMG_35381) Fold your green felt and make a tree outline on the fold (so half of it traced on).  Then cut your tree out!

IMG_3539

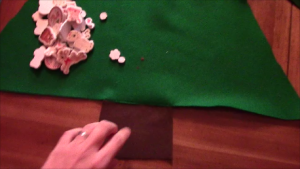
2) Next, if you want a stump, use brown fabric to cut one out!  Once again you can trace it out.  You can either sew it on the bottom or hot glue gun.

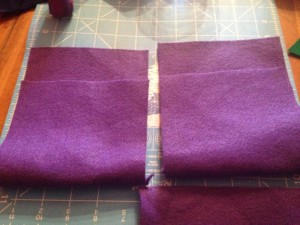
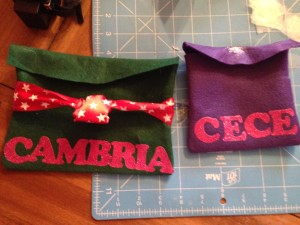
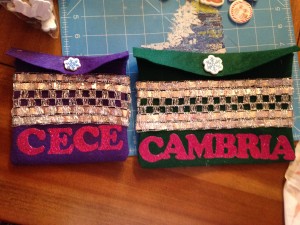
Snapshot 1 (12-8-2015 1-58 PM)3) I wanted to make something to hold the ornaments besides just having them stick to the tree.  So I decided a present with the child’s name on it would be perfect!  So next I chose a color of felt I had and cut about 11x 7 inches.

IMG_3552

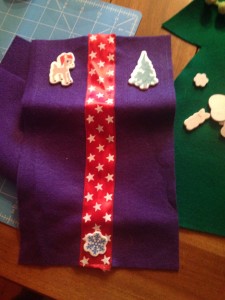
4) Next, for one of the presents I made I wanted the bow long ways down so I sewed a piece of ribbon straight down the piece. (the other two I made have it across the box which you can sew on now or later)

IMG_3553

5) The next step would be to turn it right sides facing inwards and sew to the length you want so you have the top of the present flap long enough.  Check out the picture to see what I mean. Then turn right side out.

IMG_3581

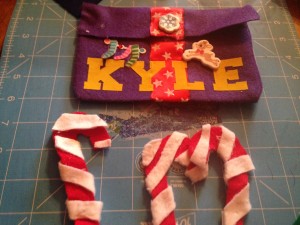
6) As you can see, I decided to iron on letters for the name of the child.  These two presents are different sizes.  Also, if you want to put a piece of iron on or sew on or glue gun on Velcro to the top of the present to have it stick now is the time.

7)  Then decorate the present at will.  I added some adhesive Rudolph stickers.  I did hot glue them so they would be more secure.

IMG_3582

8) Follow that, I sewed the present onto the tree.  This is optional, you can have it separate or not have a present at all.  I opened the top flap and sewed right along the fold to the tree.  You can also hot glue gun it.


IMG_3612

8) Now, back to the tree.  Now is the time to get even more creative!  Use ribbons, garland, buttons, or whatever you want on the tree!  You can sew or hot glue gun them on.  If you have an older child and want to have hanging ornaments on buttons then align your buttons!

9) Next, it is time to make ornaments.  If your child is older they can help decorate and make ornaments.  I chose actually Christmas items and one ornament and one light bulb.  I used whatever felt scraps I had to make them.  I also made a star at the end.  Remember to Velcro your ornaments on the back using the hard side of the Velcro.  You want to iron them on before you decorate the front!  Otherwise you might melt or damage your decorations.

IMG_3555

IMG_3583IMG_3584

To hang the tree, I used 3m adhesive strips, but I have heard that the blue paint tape works well on walls.  You can also use suction cups if its on the window or door.  Ok enjoy!  Feel free to post your tree below!

IMG_3609IMG_3627


FollowFacebookpinterestrssyoutube
ShareFacebookpinterest

1st birthday dress!

I wanted that special 1st birthday dress, but not that especially high price that comes with most of them!  So once again, I searched pinterest, etsy, and other sites to find ideas.  I ended up combining ideas, as well as making up my own, to design with the dress I created. The theme was rubber duckies for her party.  Therefore, I wanted to incorporate duckies as well as other birthday fabrics.  I went to the store and examined numerous fabrics, buying  a yard of my favorites!  The extra fabric I ended up using to create the crowns!

IMG_2549

I purchased the iron on birthday 1 and ducky from etsy.  The number is even personalized with her name!  I also bought the duck buttons from the store.  I used white hair bands that I cut to make the loop holes for the buttons on the top of the shoulders.

IMG_0057 (2)

So how did I make this dress?  Well that’s a secret! But I can give you some hints.  If you are truly interested in a dress like this you can private message me or come back and look for my future etsy link!

IMG_2455 IMG_2453

The skirt of course took the longest because of the detail.  I added yellow ribbon in between the rows as well.

IMG_2459

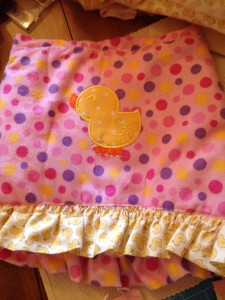
Then I added the cute duck to the back of the dress.  Personally, this dress could be used as a 2 in 1 dress because the back is also so cute!  However, the 1 in the front personalized this as a 1st birthday dress.


IMG_2457Well check out the other tutorials, as well as the 1st birthday party theme page for more ideas! Feel free to share pictures of your little one’s first birthday dress!
FollowFacebookpinterestrssyoutube
ShareFacebookpinterest

Easy Birthday Crowns!

Want to sew quick and easy crowns for a party or get together?  Then you’ve come to the right place!  I made a last minute decision days before my daughters’ first birthday party that we needed crowns!  The theme was rubber ducky, so I decided to make birthday crowns instead of hats!  Young kids and babies don’t enjoy hard hats on their head and also shouldn’t have a rubber band or elastic around their neck.

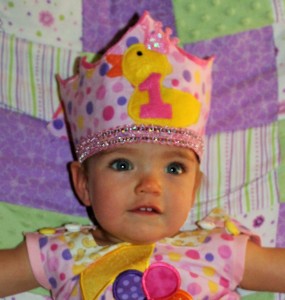
IMG_0058 (2)As you can see they are very cute for photo shoots as well!  She didn’t particularly like keeping it on, but I got a couple good shots!
As usual, there is a YouTube video and also a written explanation below.  I didn’t have a lot of time to embellish the other crowns but you can always spice things up with some ribbons, bows, glitter, rhinestones, or buttons!
To get started you need:
1) Choice of fabric and design
2) Scisscors
3)Thread
4) Closure for crown (velcro, button, ribbon) or you can sew all the way around if you know the exact size


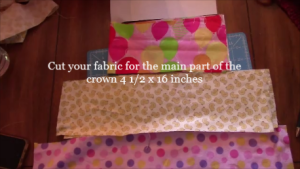
  1. Cut your fabric for the main part of the crown 4 1/2 x 18 inches
  2. Snapshot 1 (10-7-2015 8-50 AM)
  3. Make your own crown pattern by drawing the top on a piece of paper and cutting it out!
  4. Cut your design onto your fabric to make the shape of your crown! If you want a felt backing with another color cut that out as well.
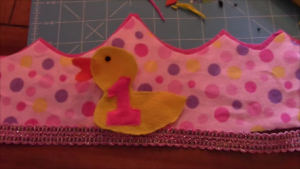
  5. Next, pick out your ribbon if you are using one, if you want any other embellishments get them ready!  I made a felt duck that I sewed onto
    the crown.
  6. Snapshot 2 (10-7-2015 9-02 AM)
  7. Line up your crown pieces and sew all the way around!  Then you are done! If you want to add button loops and buttons you can sew them on as well.
  8. IMG_2478Congrats and enjoy the party!  Check back often for new crafts or subscribe below!


FollowFacebookpinterestrssyoutube
ShareFacebookpinterest

Baby Slippers Tutorial!

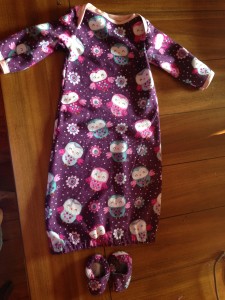
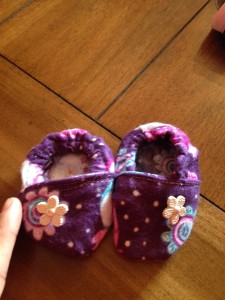
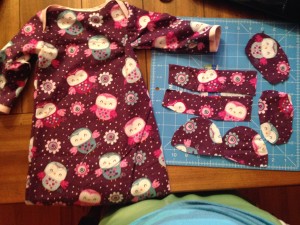
In one of my last tutorials, I showed you how to make a super cute sleeper.  Now, here are the matching slipper shoes!

IMG_2318           IMG_2303

What you will need:

  • Fabric of choice
  • 1/4 or 1/8 inch elastic
  • Thread color of choice
  • Optional: buttons or bows

I used a free pattern from marked crafts- > shoepattern

So lets get started!  here is the video tutorial and below that is the written and picture format.


  1. Cut your pattern out and decide on your color/colors you want to use (you can use two colors!
  2. IMG_2289
  3. Cut out your pieces- there should be 4 of each piece
  4. Take your upper pieces (the two sided rounded pieces) and place them pattern facing pattern as usual.
  5. Then sew the non-rounded part only (the bottom of it)
  6. Turn right side out, then iron you piece down with the right sides out and sew a nice little line across the outside where it is sewn together.


IMG_2291

7. Take your heel pieces (the long rectangles), and place the pieces facing eachother (as usual) and sew just down one long side IMG_2292IMG_2293

8. Cut your elastic to 4 inches long (2 pieces).  Pin it to one end of the sewn heel piece.

elastic

9. While sewing stretch the elastic and sew using your zigzag stitch across the length of the fabric

elasticcurl

10. It will be curled up as shown above.  Turn right side out.  Pin and sew below the elastic and all the way around the whole piece to make it look nice and then trim as needed.

11. Place sole pieces together with patterns facing eachother, use a basting stitch (set your stitch to longest number and do not backstitch).

IMG_2299

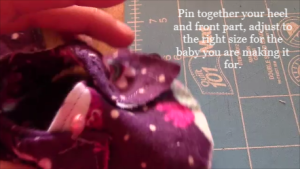
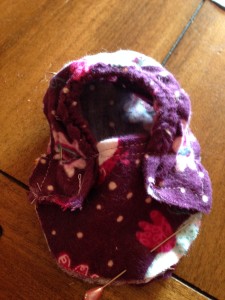
12. Pin together the heel and the front piece, adjust it to be the appropriate size for the baby/infant you are making it for.

bootie

13. Sew straight across where you already have the previous sewn line from the front piece.  Then trim the rest off.  This makes a nice neat line when you are finished.

14. Find the middle of the sole and the middle of the top part.  You can do this easily by folding in half.  Line them up together and pin.  (the back of the sole is the smaller part). Have the top part the wrong side still out to pin. IMG_2301

15. Now sew all the way around! Almost done!  Doesn’t it look so cute?

16. Trim the excess fabric being careful not to cut too close to your thread line.

17. Now turn right side out!  And WA-LA you are done!  You can add a button, ribbon, or any other accessory you want!  Great JOB!  Lets see those pictures

IMG_2303

FollowFacebookpinterestrssyoutube
ShareFacebookpinterest

Mess Free Painting for Baby!

Every want your baby to create a work of art?  Well, lets get realistic here, a work of art only a parent could love!

IMG_1332

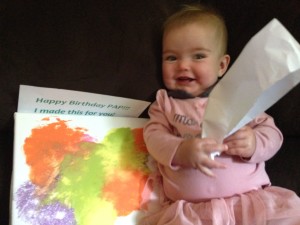
Here is an easy fun project for you and your little one!  I started this at 6 months of age and continue to have her enjoy smashing paint colors together frequently.

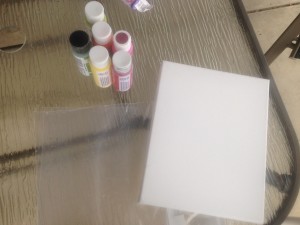
What you need:

  • Pack of small canvas or poster boards (I bought a pack of 10 small canvases at Acmore for $12- what a steal!)
  • Paint
  • Zip lock bags that the canvas or board will fit in
  • Scissors

IMG_2380

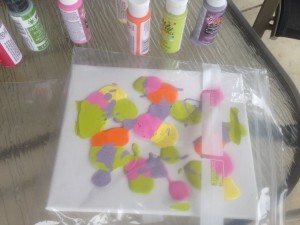
  1. Place blobs of paint on the canvas- go wild!  Place the canvas carefully into the ziplock bag. Zip it up!
  2. IMG_2384
  3. Place it in front of your little one and watch them enjoy
  4. Now, it’s more complicated to get it out without smearing it.  So I use the scissor to cut the sides off and then carefully lift up.  *Note, I first tried this with saranwrap, and I can tell you my little one just ripped it right away*
  5. Wa-La you are done and have a painting!  You can do this as often as you want or monthly to see a new creation!

IMG_1332

Now if you want a messy way, but edible check out this great blog post about making edible paint.


You can also purchase edible finger paint on amazon and some other stores!  ENJOY!


FollowFacebookpinterestrssyoutube
ShareFacebookpinterest

Sew An Easy Baby Sleeper!

Ever love that oh so cute baby sleepers with the elastic on the bottom?  I sure do, in fact I miss them now that my little one is getting older!  However, I have many showers to go to and it is a great gift!  The slip on sleeper with the elastic on the bottom is great for babies because you can easily change the babies diaper without fussing with all the buttons, snaps, or zippers.  It also keeps the baby warm and comfortable; not to mention how cute he or she will look!

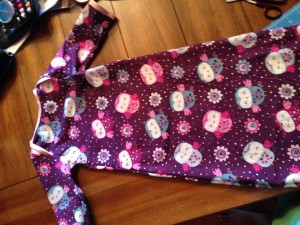
IMG_2318First off, you need the pattern.  For this one, I used a neighboring sewing blog’s pattern since there are so many out there:

Stitched Together Pattern

So print your pattern making sure you unclick the fit to page (you want it letter size).

What you need:
*Fabric of chose
*Thread
*Elastic 1/4inch or
1/8inch
*Optional: bias tape (can
also make or just hem)

Below is the link to the Youtube video tutorial.  Below that is written instructions with pictures…enjoy!

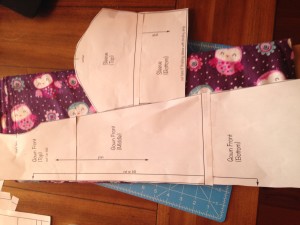
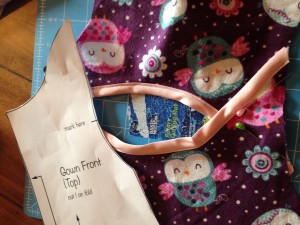
  1. Print your pattern.  Cut your fabric as instructed on pattern

IMG_2259 IMG_2260

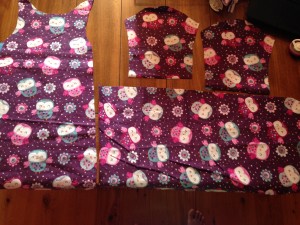
You should now have one front and one
back piece, and two sleeves.

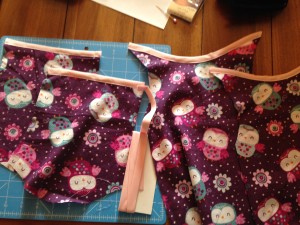
2. Next, you use your bias tape. If you don’t have bias tape you can hem the ends instead or you can make your own bias tape. Here is directions to make your own bias tape

IMG_22643. Fold your bias tape on the ends of the sleeves, pin on
and sew straight on both sleeves.  Do this also to the neckline of the front and back piece.

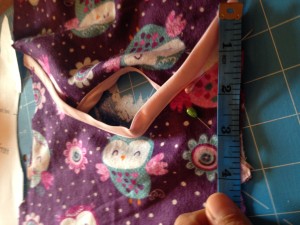
4.  Next, You want to overlap your front and back gown pieces by either looking at the mark you made from the pattern or you can measure 4 inches of overlap from the top down.  So you want to pin and sew the overlapping sides (the 4 inches)

IMG_2266

IMG_2267

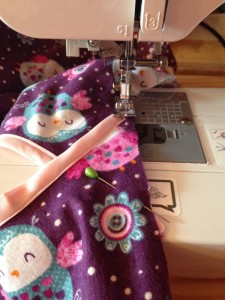
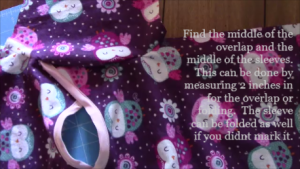
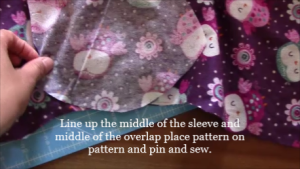
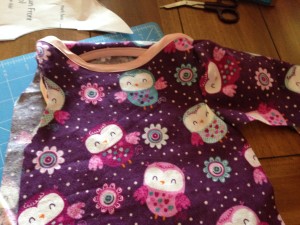
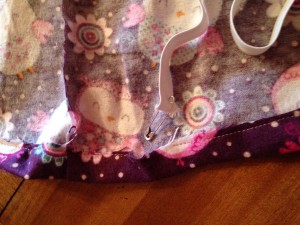
5. Find the middle of the overlap and the middle of the sleeves. This can be done by measuring 2 inches in for the overlap or folding.  The sleeve can be folded as well if you didn’t mark it. Line up the middle of the sleeve and middle of the overlap place pattern on pattern and pin and sew.

IMG_2265Snapshot 2 (9-8-2015 1-51 PM)Snapshot 1 (9-8-2015 1-51 PM)

You have to bunch it and pin it for it to stay.

IMG_2274

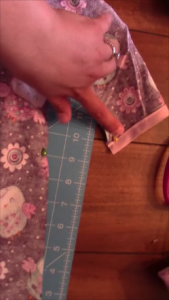
6. Turn your sleeper inside out and pin from the bias tape bottom all the way down to the bottom of the sleep.  Then sew!

Snapshot 3 (9-8-2015 1-57 PM)

 IMG_2276 IMG_2278

Almost there!

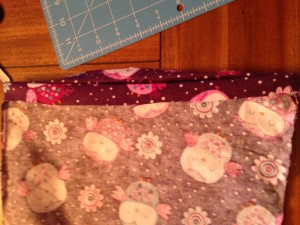
7.  Turn inside out and make elastic casing by folding up the bottom 1/4 inch for 1/8elastic or 1/2inch for 1/4elastic. Iron or pin the area to make it easier to
sew.  Don’t forget to leave a 1-2 inch opening to put the elastic through!
Remember to back stitch!

IMG_2280

8. To get your elastic through use a safety pin on the end and put in the opening
and pull through by bunching the fabric and then pulling the safety pin.

IMG_2281

9. Choose the tightness you need for your little one on the bottom and then sew your two pieces of elastic together.  Then sew the opening closed!

IMG_2318

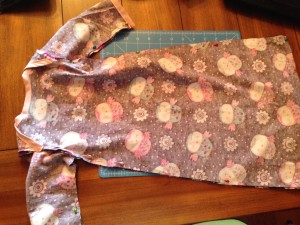
That’s it!  Congrats you have finished!  Great job.  Any suggestions questions please let me know.  Look for the next post to be the matching slippers!

FollowFacebookpinterestrssyoutube
ShareFacebookpinterest

Fun and Stimulating Toy Name Blocks!

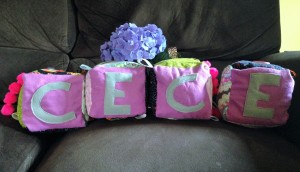
I’ve been looking for a toy that offers a variety of sensory activities through textures, sounds, and touch.

IMG_1968

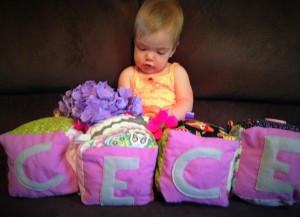
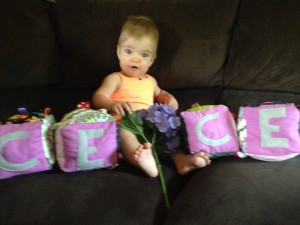
After making these squares, which by the way are FABULOUS for pictures, my little one couldn’t stop playing with all the ribbons, buttons, and laughing at the fabric and textures while sitting in her car seat.  What a great toy not only for entertainment, but for learning and increasing intelligence!  Not to mention it makes an amazing gift!

IMG_1999

Here is the Youtube tutorial:


If you would also like to follow the written then here goes:

What you will need: FABRIC, buttons, ribbons, polyfil, optional bells or rattle

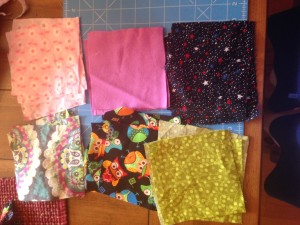
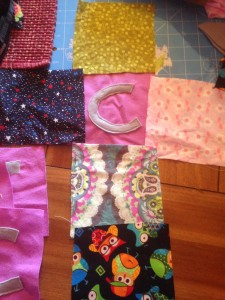
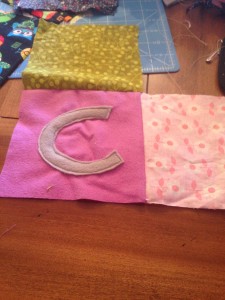
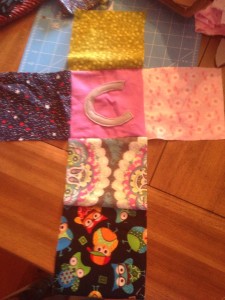
  1. fabric: There are six sides to each square.  You can chose your colors and textures. You will need six squares for each letter you are making.  In this case, I used four letters for four blocks and six different pattern pieces with all different textures and patterns.  This is the fun part!  You can of course color coordinate for a boy or girl; however, I chose to do fun patterns that I knew my little one would love to look at, catch her attention, and also advance her imagination.
  2. IMG_1933
  3. So there are six sides to the blocks so I picked those fabrics and chose my size for the blocks to be 6×6 and cut out four of each fabric I wanted to use.   This is also great if you have extra scrap pieces you want to use up.
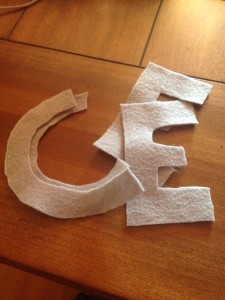
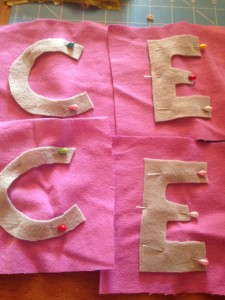
  4. Next, you want to cut out your letters.  I did this free hand.  I used extra felt I had sitting around!  Once completed, sew them on the fabric you would like for each block.
  5. IMG_1936IMG_1937
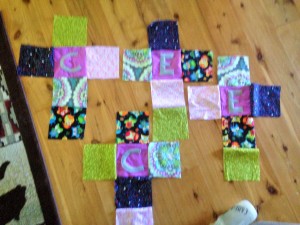
  6. Now you want to setup your pieces to
    make your block. Put the letter in the
    center and surround it as shown with your
    other fabrics. You may want to have the same pattern
    for each block or different spots for each
    fabric square
  7. IMG_1939
  8. Start sewing pattern pieces facing
    each other.  Take top piece and put pattern facing inside on the letter and sew the top edge, then continue until they are all sew together as shown below. Do this for all your blocks.
  9. IMG_1940IMG_1941IMG_1942
  10. If you want to add ribbons, buttons, or
    any other accessories this is the time to get
    those together! So now you want to decide where to sew them.  You can choose different spots on each block or the same!
  11. Sew the ribbons on facing towards the inside of the block.  If you do the opposite they will be on the inside instead of the out!
  12. IMG_1943 IMG_1944
  13. Start by sewing right sides together of two
    blocks. Take the top square and fold down and to the left. You will line up the left side of the top block to the top side of the left block.  Then sew.  Continue this around using the letter piece as the bottom part of the block.  The pattern of the fabric should end up in the inside of the block.
  14. IMG_1953 IMG_1955
  15. Continue around until you have all sides except one sewn together.
  16. For the last square, Sew each side around but for one side leave a 2-3 inch opening so you can pull the right side out.  Don’t forget to back stitch well!
  17. IMG_1956
  18. Okay!  Almost there!  So now you want to turn your block right side out.  So reach in there and pull the fabric through.  Then use a pencil, pen, crochet needle or what not to poke out the corners and make them shapely.
  19. Next, grab your stuffing, in this case polyfil, and start filling.
  20. You can put a bell or rattle in the inside of the block!
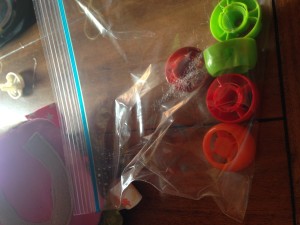
    To do this I put it in a small ziplock bag that is sealed with some air so that it has room to rattle around instead of being stuck in the polyfil. I actually have been saving the twist off tops of the food pouches and used them in a bag to make some noise!  So if you are going to do this try and put this in the center of the block then stuff around it.
  21. IMG_1966
  22. Lastly, close up that hole!  You can do a whip stitch or invisible stitch or even use your machine.
  23. IMG_1976
  24. Ta-Da you are done!  Great job….take some pictures and share!


FollowFacebookpinterestrssyoutube
ShareFacebookpinterest