DIY Romper Time!

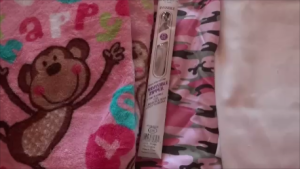
I decided it was time for the classic romper tutorial to come out.  I decided to make my first one with a free pattern of dinosaurs for my little cute nephew for his first birthday!  Now the size is 2-3t since he is not so little.  But you can easily adjust the pattern to your little ones size, just size it up with one of your little one (or big ones) outfit and adjust!  Easy Peazy!

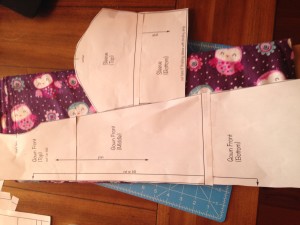
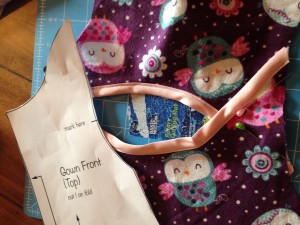
Here are the parts of the free pattern..this is a 2-3t however just hold up a onesie or romper to the pattern and adjust for smaller or larger!

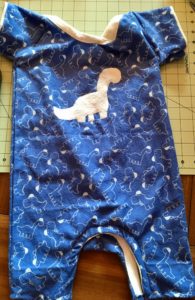
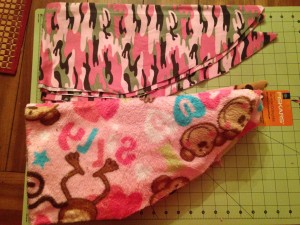
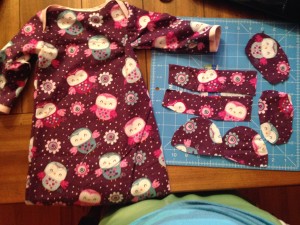
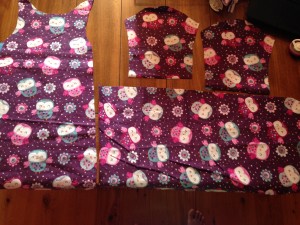
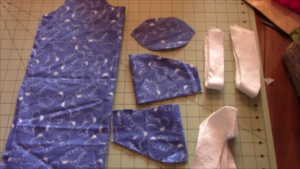
Also see the photo with the pieces cut out or the tutorial to see how they go together if you can’t tell!

  1. pieces

2. TopBody

3. BodyMain

4. BottomMain

And here is the link to the youtube tutorial as always!


Here is the written one besides what is written on the tutorial:

What you need:

  1. Fabric choice 1-2 yards depending on size. I used flannel fabric
  2. If you want an alternate color/fabric for for neckline and bottom (a stretcher fabric is best)
  3. Snaps/buttons/or velcro depending on what you want to use

Steps:

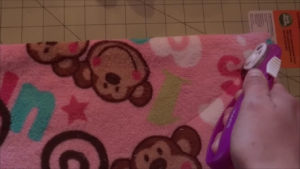
  1. Cut out fabric pieces as written out on the pieces.
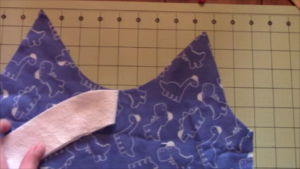
  2. Take one main body piece and find the center by folding in half and one neckline piece (and fold it in half and mark the middle) and place pattern facing
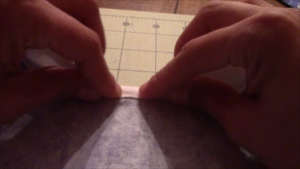
    pattern and stretch and sew. Look at the pictures below to see how you need to stretch it and sew (it is not easy if you are a beginner but it just takes practice! Also, if the neckline is a stretchy fabric it is much easier)
  3. Line center to center


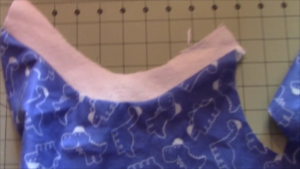
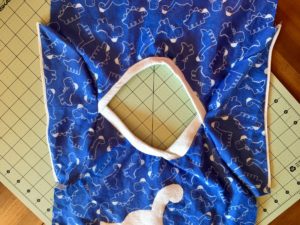
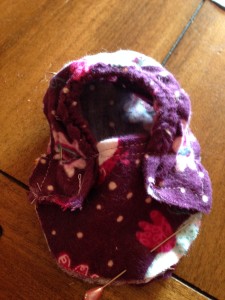
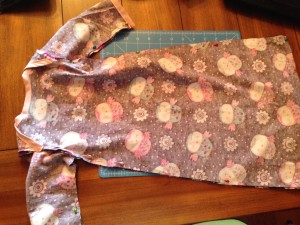
  4. This is the end result, do for both main pieces
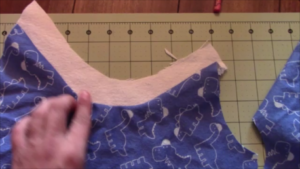
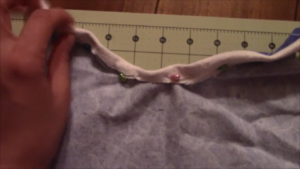
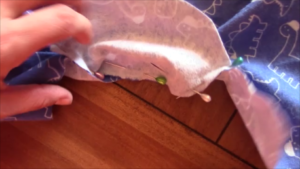
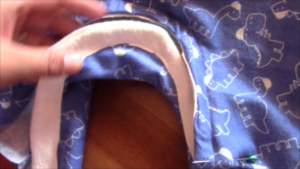
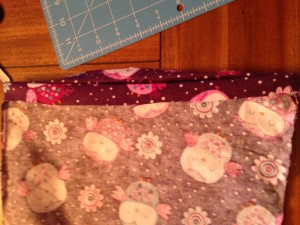
  5. Turn to the backside of the main body piece and fold up and iron the seam line as shown below.  Then fold the top down and iron to make it easier to sew and pin.
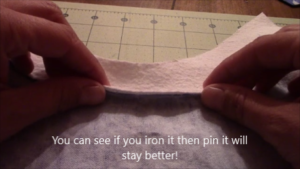
  6. Turn it right side and either change pins to the front or be careful and take pins out as you sew bottom of collar
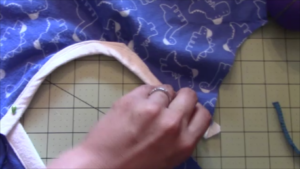
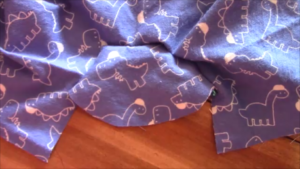
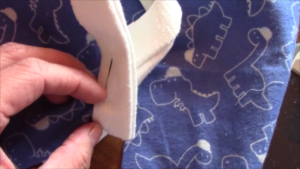
  7. Sew both necklines like this then we will create an envelope neckline.
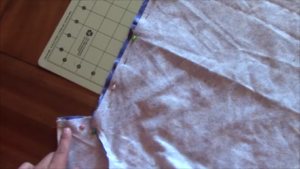
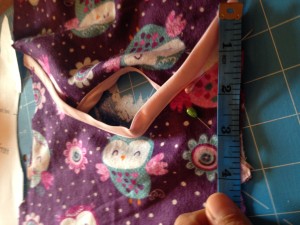
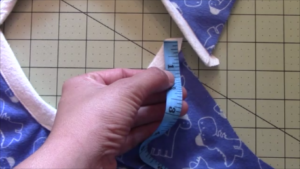
  8. You are going to line up your front and  back body piece with finished necklines and measure from the top of each side 1 to2 in down and this is where the top of one side touches the other side and you pin together (this may not be true if you need a bigger opening or smaller based on head size, adjust opening based on head size). Pin this on both sides
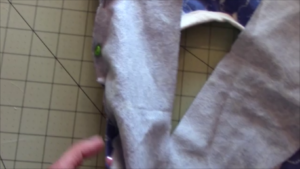
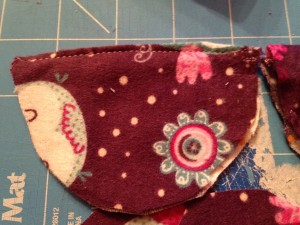
  9. Fold sleeve piece in half and line up middle of sleeve piece (the curved part facing outwards as shown) and where the collar intersects with pattern facing
    down and stretch and pin (see pics)
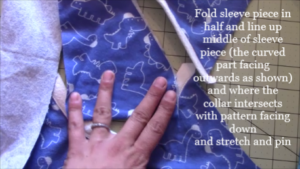
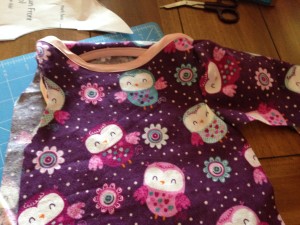
  10. Then sew using a zig zag stitch (which keeps it strong).  Do this for both sides and it will look like…

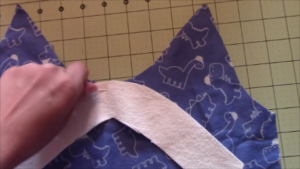
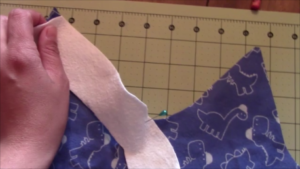
I then added double sided bias tape, for convenience and time saving, to the outside of the sleeve edge.

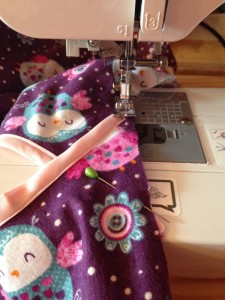
19. Body pieces and sleeve pattern facing pattern, pin around sleeve and down straight to bottom again I used the zig zag stitch. Then I trimmed the sides. Then you can iron it out.

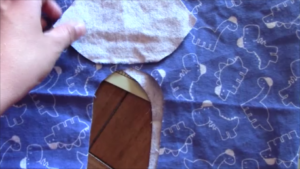
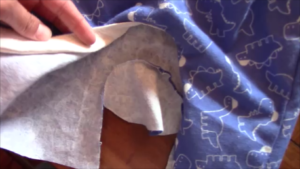
20. Turn your project to the backside and take your football piece and fold in half and line up middle of football with middle of opening pattern facing pattern, pin middle and stretch and pin around then sew.  Make sure the front piece is pushed out of the way (you don’t want to sew it shut! Just sew onto the back piece


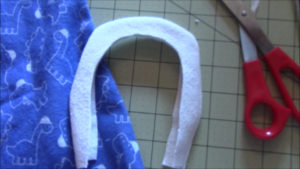
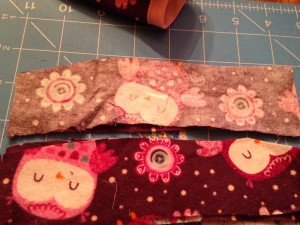
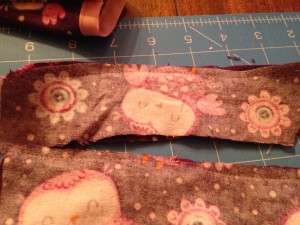
21. Take two of your leg banding strips and line up pattern facing pattern and sew the outside 1/8th straight stitch and then do this for the other two as well and turn right side out and iron.

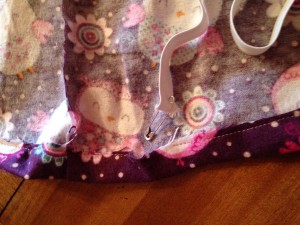
22. The binding piece ends up in the inside and it is used for the buttons or snaps (you can alternatively use fusible interface)

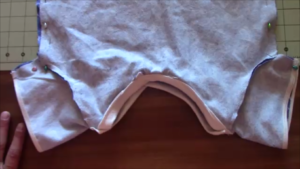
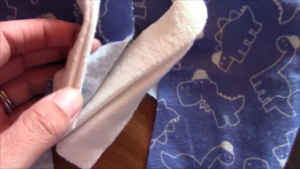
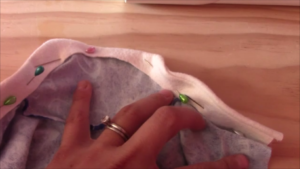
23. Next take your one banding piece and line it up with the front bottom with the fold on the inside and then stretch and sew (see video if this is too confusing!) You pin the outside and sew 1/8th zig zag around

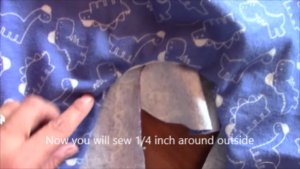
24. Now you will sew 1/4 inch around (the white part as shown will now be in the inside after you do step 23.

25. Next (phew we are getting there- keep going!) is the back banding strip, Same method for the back piece, except you just sew the one time and not the second sew around as in setp 24 because of the flap (you will see what I mean after you do the first sew.

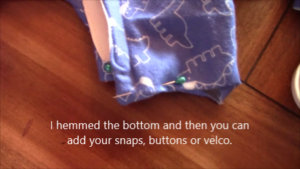
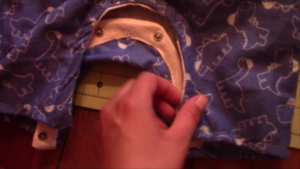
26. I hemmed the bottom leg openings and then did my snap buttons using the hammer method!  I used thick material for the banding which I regret (also that it was not stretchy!) I had to use bigger than normal snaps to get it through the fabric!

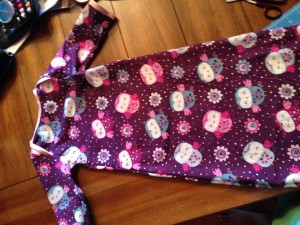
Congrats you did it!  Let’s see some pics!


FollowFacebookpinterestrssyoutube
ShareFacebookpinterest

DIY Child Bean Bag!

I don’t know about your little one, but mine sure does love to read!  Well at this age, it is more like browse through the pages and pictures!  She sits by the book shelf and pulls out book by book looking at each page.

At first I thought maybe I should purchase her a bean bag chair, and then I thought, well lets just make one! This can also be a great gift for anyone!  I actually sometimes sit in it too (shhhh!)

So of course I have the video tutorial on youtube below and then the written and picture tutorial below that.  Let me know if you have any questions!

IMG_3968

What you need:

  1. Fabric (you can use two or one color) 2 yards total of each color (or 4 yards of one color)
  2. A 24 inch zipper (or you can use velcro or buttons)
  3. 4 yards of muslin or cheap fabric
  4. Bean bag filling (100L) (I couldn’t find a large bag at my local craft store so I bought mine on amazon with free shipping)
  5.      Snapshot 1 (3-14-2016 7-40 AM)
  6. Make panels of 40×16 inches. You should do 6 outside (3 of one color and 3 of the other color) and 6 inner panels.
  7. Take one of your panels and fold once long way and once width. Have your fold on top and side when measuring to cut. Measure bottom to 6 inches (the long side) and start a curve and cut right up to the right corner. See picture below.
  8. Snapshot 2 (3-14-2016 6-41 PM)
  9. IMG_3931
  10. Line up two inside pieces and sew up and down one side.  I did this twice for more strength.  For the outside you will have the patterns facing inside towards each other and sew.
  11. IMG_3932
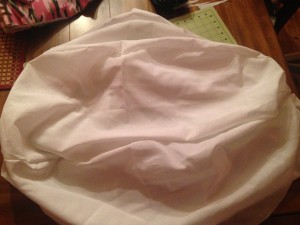
  12. Once sewn open the panel up. Then place another panel on the original piece and sew the opposite side (you will end up with three pieces sewn together)
  13. IMG_3933
  14. Then sew the other 3 inside pieces together and you will have two sets of three.
  15. Take the two sewn together pieces and face pattern side in (doesn’t matter with the inside bean bag layer) and sew all the way around the outside leaving a couple inches hole.
  16. Turn right side out.  Then you will put the bean bag filling it!  Ah what a challenge!
    Note: I did not completely fill and sew this until I was sure the outside would fit over properly.  I waited to finish this until the end of the project.
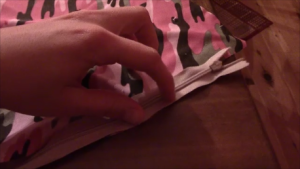
  17. Take one of your outside panels and face the zipper down on the pattern.  Line it up on your machine and sew the zipper on.Take one of your outside panels and face the zipper down on the pattern.  Line up the right outside part of the zipper to the outside of the panel (as shown) and sew the zipper on.
  18. snap
  19. See the video for more of a demonstration on how to attach a zipper
  20. Sew pattern and right side of the next panel to zipper right sides facing each other (inside) and sew together.
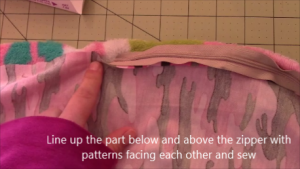
  21. Line up the part below and above the zipper with patterns facing each other and sew
  22. zipper
  23. Then sew your 3rd panel on…complete another 3 panels together as done with the inside pieces.
  24.  **Open your zipper all the way.  Take each 3 piece panel set and place them facing each other (inside) and sew all the way around the edges.  Do not leave a hole this time, you will pull it out through the zipper opening!
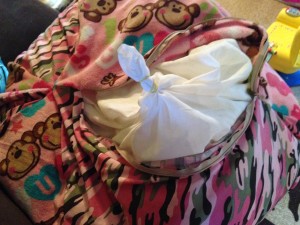
  25. Next you will place your inside bean bag that is partially full inside.  If its full then you are done!  However, if you partially filled…continue to fill all the way and sew the inside bag shut.
  26. IMG_3966
  27. Congrats you are done! Enjoy!  Post your pics below!


IMG_3968

FollowFacebookpinterestrssyoutube
ShareFacebookpinterest

DIY Felt Christmas Tree!

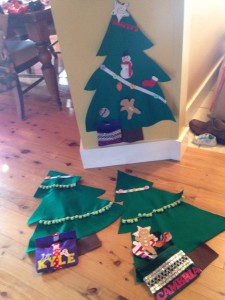
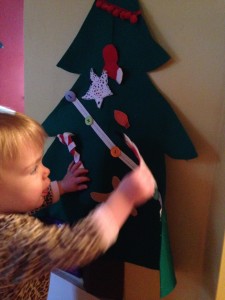
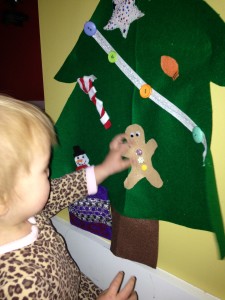
Cece bear loves to pull toys out of baskets and put them back in.  She also likes to build blocks and figure out other puzzles.  So I thought to myself, what can I make for Christmas that she can play with?  And a mini Christmas tree came to mind.  Eventually, I figured out a felt Christmas tree with all sorts of sensory stimulation and Velcro ornaments would work!  So I decided to get to work.

IMG_3608

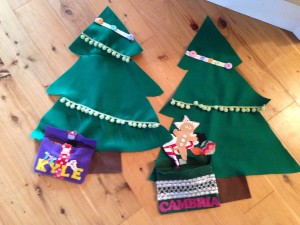
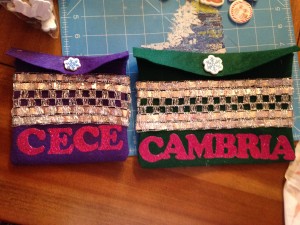
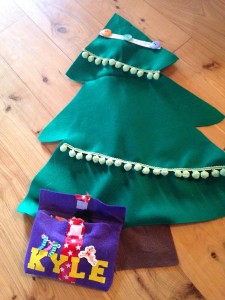
I decided to make three trees, one for each of Cece’s friends.  It also made a great birthday gift for her friend Kyle’s first birthday!  This is a great activity to do with older children as well.  They can make their own ornaments and decorate the tree!  There are a variety of ways to put the tree, ribbons, buttons, and ornaments together.  The two I used were sewing and hot glue gun, but you can do one or the other as well.  Just make sure if you have a baby, infant, or toddler, to make sure everything is very secure so they can’t pull it off!

IMG_3625

As always, there is a youtube video and written steps and pictures.  Feel free to add your own creativity and pizzazz!!!

If you have an older child, instead of using velcro to stick the ornaments on, you can use string or twine looped on the ornament and they can put them around buttons on the tree!


What you need:
*Green felt fabric (I used 1.5
yards for three trees)
*velcro
*Brown felt fabric (stump)
*Felt fabrics of various colors for
ornaments of your choice and design
*optional: buttons, ribbons,
and other accessories

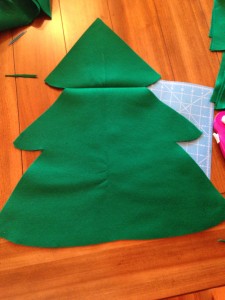
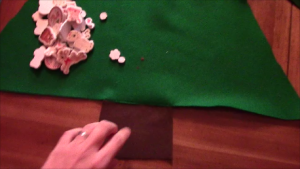
IMG_35381) Fold your green felt and make a tree outline on the fold (so half of it traced on).  Then cut your tree out!

IMG_3539

2) Next, if you want a stump, use brown fabric to cut one out!  Once again you can trace it out.  You can either sew it on the bottom or hot glue gun.

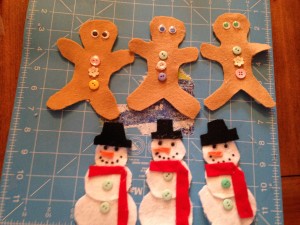
Snapshot 1 (12-8-2015 1-58 PM)3) I wanted to make something to hold the ornaments besides just having them stick to the tree.  So I decided a present with the child’s name on it would be perfect!  So next I chose a color of felt I had and cut about 11x 7 inches.

IMG_3552

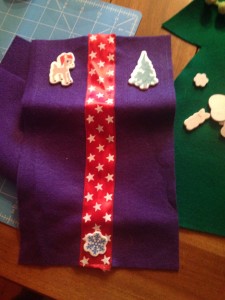
4) Next, for one of the presents I made I wanted the bow long ways down so I sewed a piece of ribbon straight down the piece. (the other two I made have it across the box which you can sew on now or later)

IMG_3553

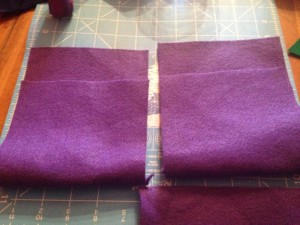
5) The next step would be to turn it right sides facing inwards and sew to the length you want so you have the top of the present flap long enough.  Check out the picture to see what I mean. Then turn right side out.

IMG_3581

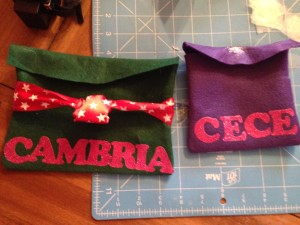
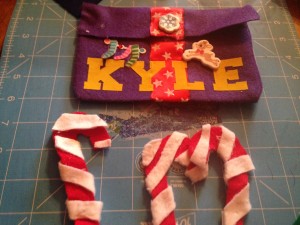
6) As you can see, I decided to iron on letters for the name of the child.  These two presents are different sizes.  Also, if you want to put a piece of iron on or sew on or glue gun on Velcro to the top of the present to have it stick now is the time.

7)  Then decorate the present at will.  I added some adhesive Rudolph stickers.  I did hot glue them so they would be more secure.

IMG_3582

8) Follow that, I sewed the present onto the tree.  This is optional, you can have it separate or not have a present at all.  I opened the top flap and sewed right along the fold to the tree.  You can also hot glue gun it.


IMG_3612

8) Now, back to the tree.  Now is the time to get even more creative!  Use ribbons, garland, buttons, or whatever you want on the tree!  You can sew or hot glue gun them on.  If you have an older child and want to have hanging ornaments on buttons then align your buttons!

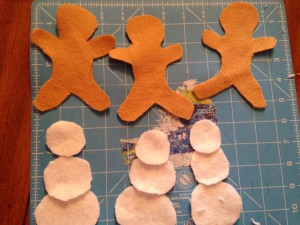
9) Next, it is time to make ornaments.  If your child is older they can help decorate and make ornaments.  I chose actually Christmas items and one ornament and one light bulb.  I used whatever felt scraps I had to make them.  I also made a star at the end.  Remember to Velcro your ornaments on the back using the hard side of the Velcro.  You want to iron them on before you decorate the front!  Otherwise you might melt or damage your decorations.

IMG_3555

IMG_3583IMG_3584

To hang the tree, I used 3m adhesive strips, but I have heard that the blue paint tape works well on walls.  You can also use suction cups if its on the window or door.  Ok enjoy!  Feel free to post your tree below!

IMG_3609IMG_3627


FollowFacebookpinterestrssyoutube
ShareFacebookpinterest

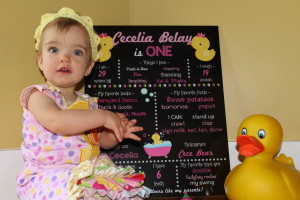
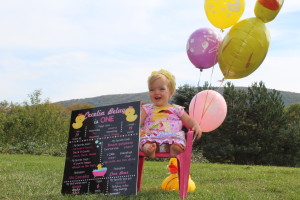
1st Birthday Ducky Theme!

As I searched the internet for ideas for my munchkins first birthday, I noticed a lack of imagination for the rubber ducky birthday theme!  So I have decided to share what I came up with in hopes of giving others ideas as well.
duck

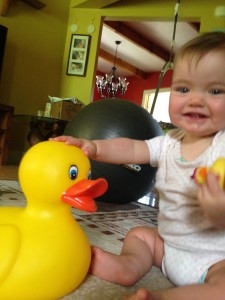
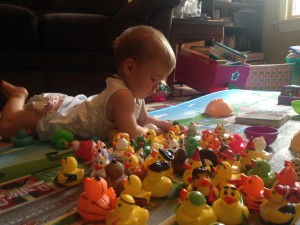
My little Cecelia loves rubber duckies.  She has since she was introduced in the bathtub to them.  Now, besides just the rubber duckies, she loves everything ducky!  She crawls right over to any books that contain ducks; especially, the duck and goose series!  I even got her a large rubber duck down at the shore.

IMG_1693

So I didn’t want to go overboard on her first birthday since she won’t remember it, but…of course we had to have rubber ducks everywhere!

 IMG_1456

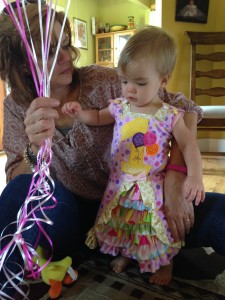
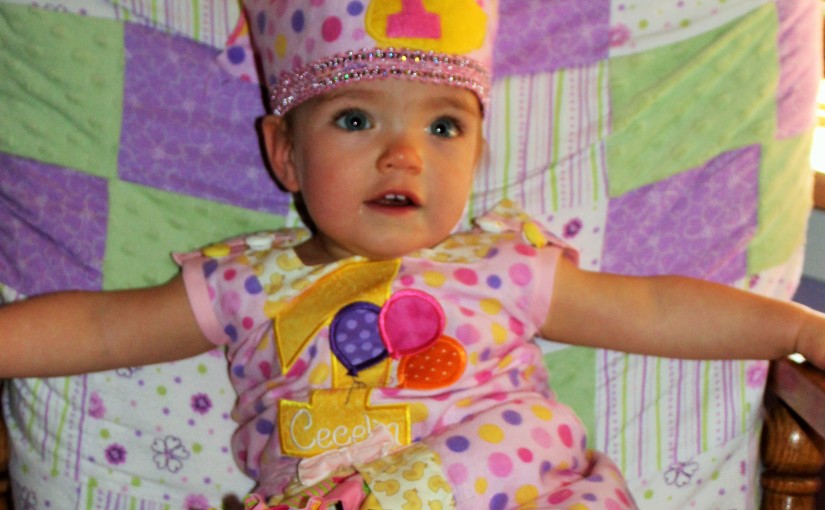
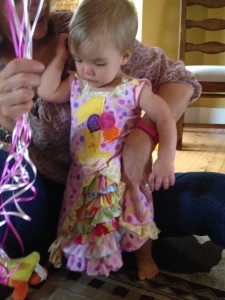
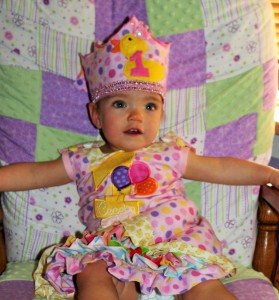
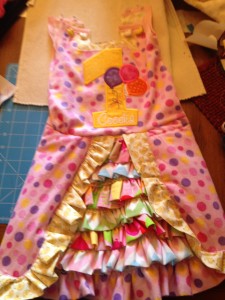
First, I made Cece a 1st birthday dress. You can click here to see some of the details however right now I do not have a full tutorial. If you are interested in purchasing one you can private message me.  My Etsy site is upcoming.
IMG_2545IMG_2457IMG_0192

First I thought to myself, well if it is a rubber duck party, then I definitely need rubber ducks for favors!  So I searched the web for the cheapest, yet best rubber duckies for about 35 people.  I ended up going with an assortment of 2 inch rubber ducks from amazon.  There were some bad reviews that they were not a good assortment; however, I found them very varied in theme.
IMG_2020

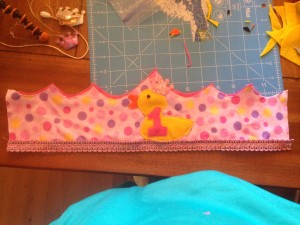
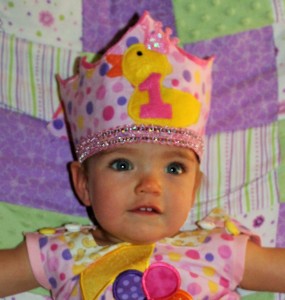
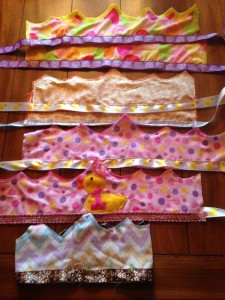
Last minute, I decided to make birthday crowns!  This tutorial can show you how to make easy quick crowns!  Of course, if you have a large amount of kids coming you may want to just buy party hats or completely skip this.  I used scrap pieces to make the crowns and just did ribbon along the bottom that could be tied.  You of course can do buttons, Velcro, or if you know the head size, sew it all the way around.

IMG_2475IMG_0058 (2) IMG_2478

Next, of course I needed party decorations!  I didn’t want to spend 10 dollars for 8 fancy paper plates with cute ducks on them.  So, I made a trip to my dollar store and bought yellow napkins, plates, cups, and silverware.  They also had cute I’m one plates, so I bought a couple of those as well.  Since the weather is nice, we had lots of tables outside and I bought yellow tablecloths.

plates

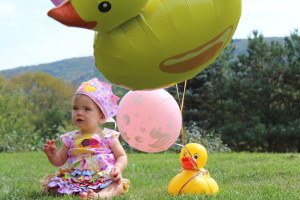
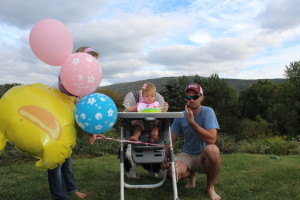
As far as balloons, I ended up buying balloons on amazon, ones with little ducks on them and then two large Mylar duck balloons.  They did not carry these type at my local stores.  The only place around to fill the balloons was the dollar store.  Do you see a theme here?  **Note: it does cost more to have Mylar balloons filled, so if you are saying a buck or two you can skip the Mylar and go for the regular smaller balloons.

 balloons

IMG_0145

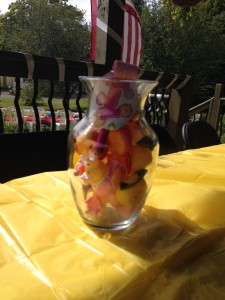
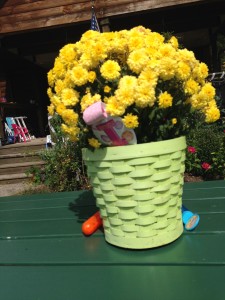
I also used the rubber duckies to decorate everywhere!  I had a couple mums and vases in the house and added little ducks to them!

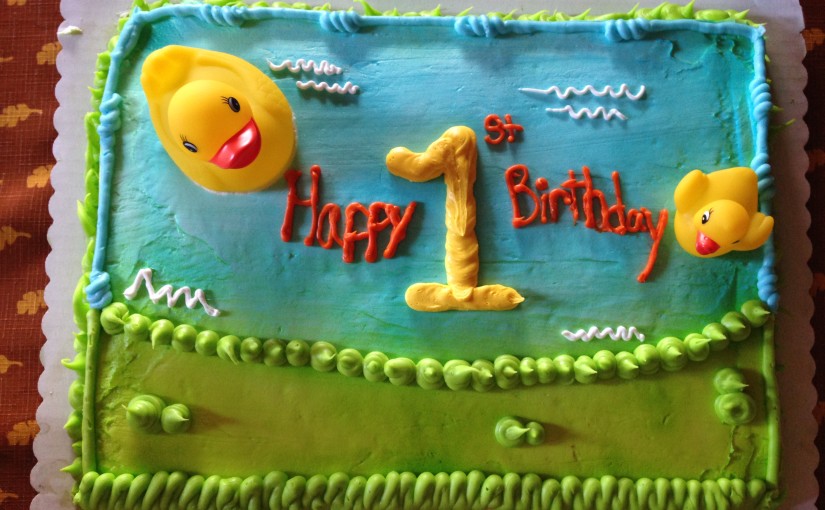
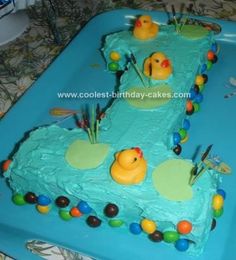
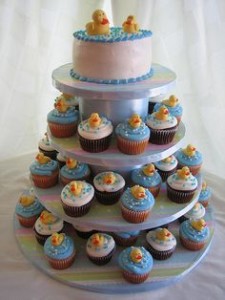
IMG_2559 IMG_2560Food…of course this is key for a party.  I wanted to save some time but not spend too much money either.  So, I decided to order a couple small party trays and then do crock pot recipes.  I didn’t go crazy with the duck theme food since there weren’t a lot of kids coming to the party.  However, if you want to see some duck themed food check out pinterest for lots of ideas.  Yes, we did deviled eggs and some quacky snack mix that I used small duck cups for.  Cake. Originally I was thinking of making my own cake, there are tons of ideas on pinterest.  However, with more than 40 people coming, and cheap but tasty sheet cakes with a free smash cake included, I decided to save myself the stress and space in my fridge, and order a cake with a duck theme.  However, let me show you some of the ideas I picked up from pinterest. 

cake2 cake3Duck Birthday Ideas: click for more pinterest ideas.
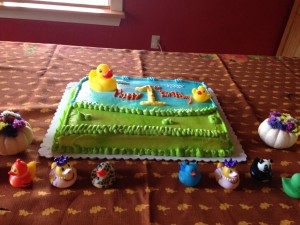
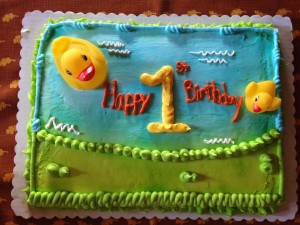
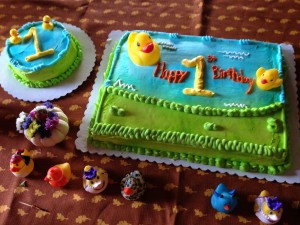
I was GIVEN THE WRONG CAKE WITH NO SMASH CAKE when I went to pickup the cake two hours before the party!  I was given a mere 1/4 sheet cake (wrong size) with the wrong duck design on it, and NO smash cake!  Don’t panic I told myself as my mind reminded me I only ordered this a month in advance to make it was done right!  After several minutes of panic, the manager apologized and stated they could make my cake and smash cake in about two hours.  I agreed but would have to send someone else back to pick it up.  Lukily, my brother in law agreed to pick it up and got fifty percent off the cake.  Phew, added stress you don’t need!

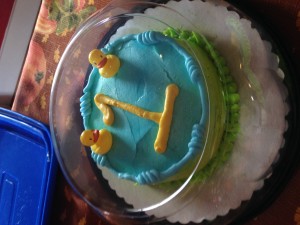
I ended up addin some small ducks to the smash cake! Note: it was a HUGE SMASH CAKE!

IMG_2576 IMG_2577 IMG_2578 IMG_2579IMG_0257

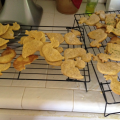
I also made duck shaped cookies with a duck cookie cutter!  And then I used yellow icing to make the number one of them!  Half were pumpkin sugar cookies and the other half regular sugar cookies

4c8a5e03-6c2c-44c9-be3f-3adc2c0edd95

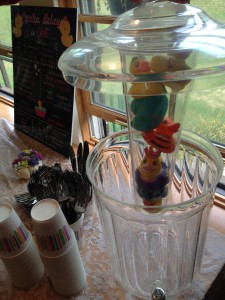
Drinks. Duck punch of course!  There are a variety of recipes to make blue punch.  I ended up doing half blue hawiian punch, half 7up, and then putting in vanilla ice cream to make it look like bubbles!  You can clean rubber ducks up well and put them in, or freeze them in ice!  I also had a punch server that I put ice and ducks in the middle and then put water in it! 

IMG_2532punch

Play.
Since there were a handful or two of kids coming, I decided to buy a couple items and also set up items for the kids to play with.  Of course we had games such as bean bag toss, bacchi ball, redneck golf, and Frisbee setup for adults.

IMG_2555

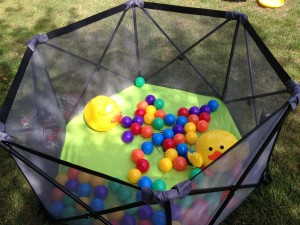
I bought some duck beach balls off amazon.  They came in a 12 pack so I got them cheap enough and gave them away as favors too.

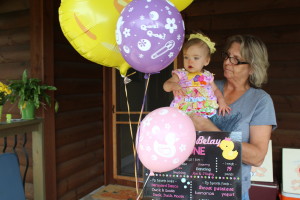
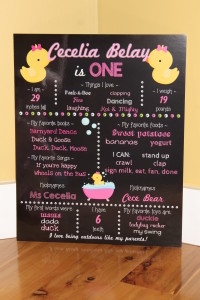
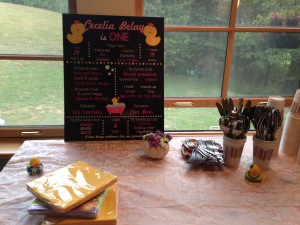
Birthday chalkboard!  I love this idea!  And it is so easy to make!  Now again, I needed to save myself some time with this project, but also not spend too much money.  My handwriting is awful, so making a chalkboard myself was out of the question.  I also wanted it on a poster board to have it as a keepsake.  So if you are into graphic design you can make your own up and have it printed at an office store.  However, I am not into graphic design so I investigated the options at etsy.  I ended up going with a 5.99 graphic for ducks and edited the sections myself with adobe.  I took it to staples to have it mounted on a poster board and enlarged.

IMG_0084

HOWEVER, **Note: the file was locked due to the seller having a password.  The staples I went to could not print it so I had to have it turned into a JPEG.  The seller offered to do it, but I didn’t want to wait, so I just changed it myself on a free online program.  Just type in change to JPEG and you can easily find a free site.  For these pre-made designs you cannot change the pictures or the design, only the words can be edited.  For mounting on a thick foam poster board and enlarging to 16×20, it cost me 16.99 online.  I am very pleased with the way it turned out and now it is displayed in her room as a great keepsake!IMG_0108 IMG_0154

You can of course buy a chalkboard and make your own.  You can even print out different fonts and trace them onto the board.  You can also buy a cheap graphic design program and make your own.  Again, for the price, and since it was last minute, it was easiest for me to order it.

IMG_2528

So that is it folks!  Although she won’t remember this, I have lots of pictures and we had lots of fun!

Hope you enjoyed the post and I hope it gave you some good ideas!  You can check out my pinterest site for more ideas!  Follow us on facebook too!


FollowFacebookpinterestrssyoutube
ShareFacebookpinterest

1st birthday dress!

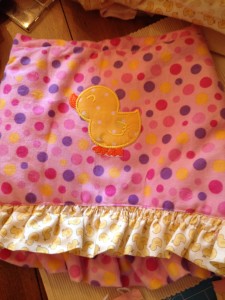
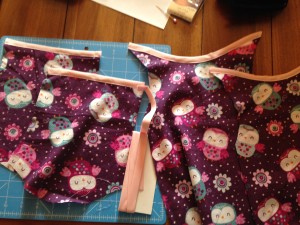
I wanted that special 1st birthday dress, but not that especially high price that comes with most of them!  So once again, I searched pinterest, etsy, and other sites to find ideas.  I ended up combining ideas, as well as making up my own, to design with the dress I created. The theme was rubber duckies for her party.  Therefore, I wanted to incorporate duckies as well as other birthday fabrics.  I went to the store and examined numerous fabrics, buying  a yard of my favorites!  The extra fabric I ended up using to create the crowns!
IMG_2549

I purchased the iron on birthday 1 and ducky from etsy.  The number is even personalized with her name!  I also bought the duck buttons from the store.  I used white hair bands that I cut to make the loop holes for the buttons on the top of the shoulders.
IMG_0057 (2)

So how did I make this dress?  Well that’s a secret! But I can give you some hints.  If you are truly interested in a dress like this you can private message me or come back and look for my future etsy link!

IMG_2455 IMG_2453

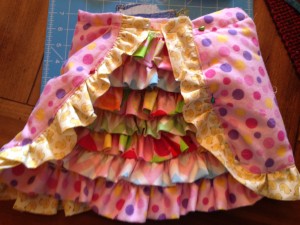
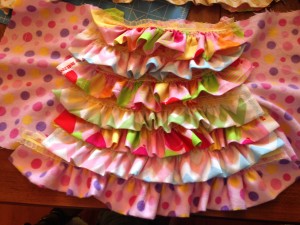
The skirt of course took the longest because of the detail.  I added yellow ribbon in between the rows as well.

IMG_2459

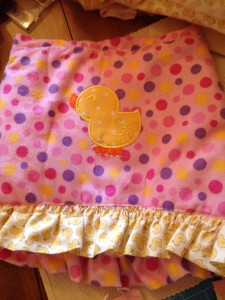
Then I added the cute duck to the back of the dress.  Personally, this dress could be used as a 2 in 1 dress because the back is also so cute!  However, the 1 in the front personalized this as a 1st birthday dress.


IMG_2457Well check out the other tutorials, as well as the 1st birthday party theme page for more ideas! Feel free to share pictures of your little one’s first birthday dress!

FollowFacebookpinterestrssyoutube
ShareFacebookpinterest

Baby Slippers Tutorial!

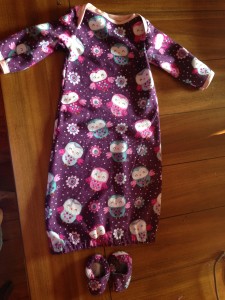
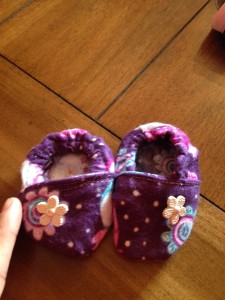
In one of my last tutorials, I showed you how to make a super cute sleeper.  Now, here are the matching slipper shoes!

IMG_2318           IMG_2303

What you will need:

  • Fabric of choice
  • 1/4 or 1/8 inch elastic
  • Thread color of choice
  • Optional: buttons or bows

I used a free pattern from marked crafts- > shoepattern

So lets get started!  here is the video tutorial and below that is the written and picture format.


  1. Cut your pattern out and decide on your color/colors you want to use (you can use two colors!
  2. IMG_2289
  3. Cut out your pieces- there should be 4 of each piece
  4. Take your upper pieces (the two sided rounded pieces) and place them pattern facing pattern as usual.
  5. Then sew the non-rounded part only (the bottom of it)
  6. Turn right side out, then iron you piece down with the right sides out and sew a nice little line across the outside where it is sewn together.


IMG_2291

7. Take your heel pieces (the long rectangles), and place the pieces facing eachother (as usual) and sew just down one long side IMG_2292IMG_2293

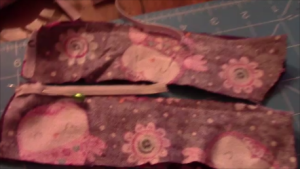
8. Cut your elastic to 4 inches long (2 pieces).  Pin it to one end of the sewn heel piece.

elastic

9. While sewing stretch the elastic and sew using your zigzag stitch across the length of the fabric

elasticcurl

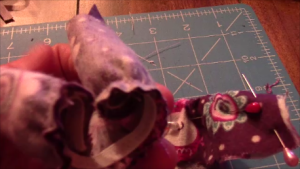
10. It will be curled up as shown above.  Turn right side out.  Pin and sew below the elastic and all the way around the whole piece to make it look nice and then trim as needed.

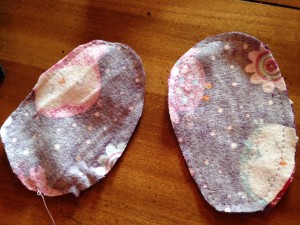
11. Place sole pieces together with patterns facing eachother, use a basting stitch (set your stitch to longest number and do not backstitch).

IMG_2299

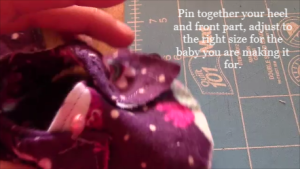
12. Pin together the heel and the front piece, adjust it to be the appropriate size for the baby/infant you are making it for.

bootie

13. Sew straight across where you already have the previous sewn line from the front piece.  Then trim the rest off.  This makes a nice neat line when you are finished.

14. Find the middle of the sole and the middle of the top part.  You can do this easily by folding in half.  Line them up together and pin.  (the back of the sole is the smaller part). Have the top part the wrong side still out to pin. IMG_2301

15. Now sew all the way around! Almost done!  Doesn’t it look so cute?

16. Trim the excess fabric being careful not to cut too close to your thread line.

17. Now turn right side out!  And WA-LA you are done!  You can add a button, ribbon, or any other accessory you want!  Great JOB!  Lets see those pictures

IMG_2303

FollowFacebookpinterestrssyoutube
ShareFacebookpinterest

Sew An Easy Baby Sleeper!

Ever love that oh so cute baby sleepers with the elastic on the bottom?  I sure do, in fact I miss them now that my little one is getting older!  However, I have many showers to go to and it is a great gift!  The slip on sleeper with the elastic on the bottom is great for babies because you can easily change the babies diaper without fussing with all the buttons, snaps, or zippers.  It also keeps the baby warm and comfortable; not to mention how cute he or she will look!

IMG_2318First off, you need the pattern.  For this one, I used a neighboring sewing blog’s pattern since there are so many out there:

Stitched Together Pattern

So print your pattern making sure you unclick the fit to page (you want it letter size).

What you need:
*Fabric of chose
*Thread
*Elastic 1/4inch or
1/8inch
*Optional: bias tape (can
also make or just hem)

Below is the link to the Youtube video tutorial.  Below that is written instructions with pictures…enjoy!

  1. Print your pattern.  Cut your fabric as instructed on pattern

IMG_2259 IMG_2260

You should now have one front and one
back piece, and two sleeves.

2. Next, you use your bias tape. If you don’t have bias tape you can hem the ends instead or you can make your own bias tape. Here is directions to make your own bias tape

IMG_22643. Fold your bias tape on the ends of the sleeves, pin on
and sew straight on both sleeves.  Do this also to the neckline of the front and back piece.

4.  Next, You want to overlap your front and back gown pieces by either looking at the mark you made from the pattern or you can measure 4 inches of overlap from the top down.  So you want to pin and sew the overlapping sides (the 4 inches)

IMG_2266

IMG_2267

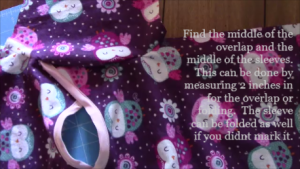
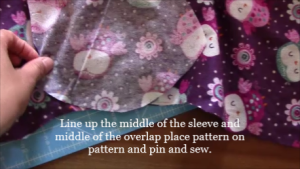
5. Find the middle of the overlap and the middle of the sleeves. This can be done by measuring 2 inches in for the overlap or folding.  The sleeve can be folded as well if you didn’t mark it. Line up the middle of the sleeve and middle of the overlap place pattern on pattern and pin and sew.

IMG_2265Snapshot 2 (9-8-2015 1-51 PM)Snapshot 1 (9-8-2015 1-51 PM)

You have to bunch it and pin it for it to stay.

IMG_2274

6. Turn your sleeper inside out and pin from the bias tape bottom all the way down to the bottom of the sleep.  Then sew!

Snapshot 3 (9-8-2015 1-57 PM)

 IMG_2276 IMG_2278

Almost there!

7.  Turn inside out and make elastic casing by folding up the bottom 1/4 inch for 1/8elastic or 1/2inch for 1/4elastic. Iron or pin the area to make it easier to
sew.  Don’t forget to leave a 1-2 inch opening to put the elastic through!
Remember to back stitch!

IMG_2280

8. To get your elastic through use a safety pin on the end and put in the opening
and pull through by bunching the fabric and then pulling the safety pin.

IMG_2281

9. Choose the tightness you need for your little one on the bottom and then sew your two pieces of elastic together.  Then sew the opening closed!

IMG_2318

That’s it!  Congrats you have finished!  Great job.  Any suggestions questions please let me know.  Look for the next post to be the matching slippers!

FollowFacebookpinterestrssyoutube
ShareFacebookpinterest

2 Ways to Make an Easy Headband!

Need a stylish way to keep the hair out of your face?  Want it cheap?  Well, believe it or not, you can sew a quick headband in almost under 5 minutes!  This is great to match your little one’s dress or outfit.  Also, you can match your own outfit or dress for a stylish design.  I made a neat flower dress for my munchkin and made myself a matching headband!  It looks great for pictures but it’s not the overboard matching outfits :op

Here’s how:

What you need:

  • Fabric (15×3 two pieces or 15 x6 or one piece folded)
  • Matching Thread
  • Elastic (1/4-1/2 inch)

headbandpicheadbands

1) First you want to cut out your fabric.  You can either make the headband with two pieces of fabric at 15×3 and cut on a slant.  Or you can do one piece with the fold on the long side (the 15 inch long side).

2) Following that you want to turn it with fabric sides facing each other and sew the sides (or side if you are folding) and leave ends open.  Turn inside out.

3) Fold the ends inwards.

4) Cut your elastic to 7 inches long (or if for younger you can measure ear to ear in the back and cut elastic)

5) Put elastic in end and sew up and down several times ! If you are doing the folded headband then take the corners of the fabric and fold in and sew.

6) And wala! You are done! Don’t be afraid to add buttons, glitter, bows, and other neat accessories!

Awesome!  Quick and easy, Enjoy and check back for more activities each week!


Lastly, do you think having matching outfits to your little one is too much?  I’d like to see the debate begin!

FollowFacebookpinterestrssyoutube
ShareFacebookpinterest

Creating A Photo Pillow

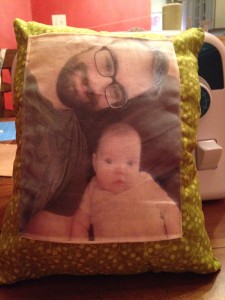
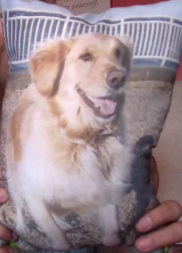
Looking for that perfect gift for someone?  Maybe for a holiday or special occasion?  Possibly a housewarming gift? Or maybe just an I’m thinking of you gift, the photo pillow is a perfect easy sewing project!  The pillow below always gives my little one a smile when she picks it up on the couch!  I know my husband enjoys it too because sometimes I find drool on it :op

 IMG_0709

Follow the You-tube tutorial here:

You can also follow along here:

pillowFor this tutorial you will need:

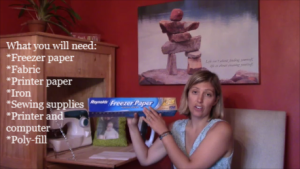
  • Freezer paper the size of a piece of printer paper (8.5×11″)
  • Computer and printer (choose your photos or photos)
  • Fabric (sizes vary on size of the pillow you would like)
  • Sewing machine and accessories
  • Poly-fill
  • Iron

1. Start by cutting a piece of freezer paper to the size of a piece of a paper (8.5×11′).  Also cut the piece of fabric you are going to print the photo on to that size.  Remember you most likely want to print on a light thin colored fabric so the picture stands out.freezerpaper2. Next, take your fabric you want the photo printed on and put it on your ironing surface with the side you want the photo printed on down.  Then put your freezer paper shiny side down against the fabric.  Have your iron on medium high and iron on top of the freezer paper.  You can also turn it over and iron the fabric with the freezer paper on the bottom.  Do not leave it on one spot too long or the fabric will develop a burn mark.  Make sure the corners are well ironed and the sheet should stick to the fabric.

3. Take the fabric and freezer paper that are now one to your printer.  Place it in the paper tray and print your photo.  Make sure there aren’t any loose strings hanging on the side of your fabric, this could catch in your printer.  Also make sure you put your paper in the way your printer will print on the fabric and not the freezer paper.  If you are unsure, take a piece of regular printer paper and mark one side. Put it in the tray and check and see which side it prints on.

4. Once you have your photo printed, you can easily peel off the freezer paper.  You can save the freezer paper to use one or two more times; quite economical if I should say so myself!  Then, if you are planning on putting the photo fabric on a larger piece of fabric to have a bigger pillow, you want to fold a hem around the edges of your fabric and pin and sew it onto the larger piece of fabric.  Below is an example.

  pillow

However, if you would like to make a small decorative pillow (the size of a piece of paper), you would skip this step.

5. Next take your photo fabric or front of the pillow and place it facing side up.  Take the back fabric for your pillow and place it on top facing in.  So now the fabric pieces you want to be on the outside of the pillow are now facing the inside.  Pin them together.  Then you want to stitch all the way around the outside except for a three inch opening.  So make sure you back-stitch when you start and end.  I suggest you do not do this on the corner because it will be harder to hand sew at the end.  This opening will be used to turn the pillow right side out and then stuff with poly-fill.

6. After sewing, turn it right side out.  Stuff it with poly-fill to your desired fullness.

7. Now you will have to decide what stitch you want to use to close it.  You can close it on the machine however it will be noticeable.  You can do the regular loop stitch which is easiest.  Another option which is used in my video is the blind stitch.  The blind stitch is used for hems and closures that you want “blind.

8. And Viola!  You are finished, congrats and enjoy!

cooltext124722308895836


FollowFacebookpinterestrssyoutube
ShareFacebookpinterest