1st birthday dress!

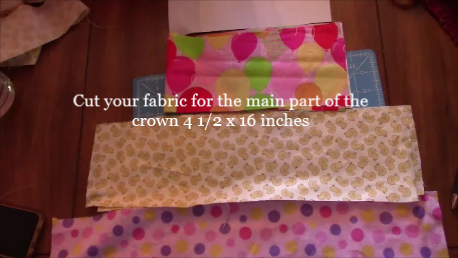
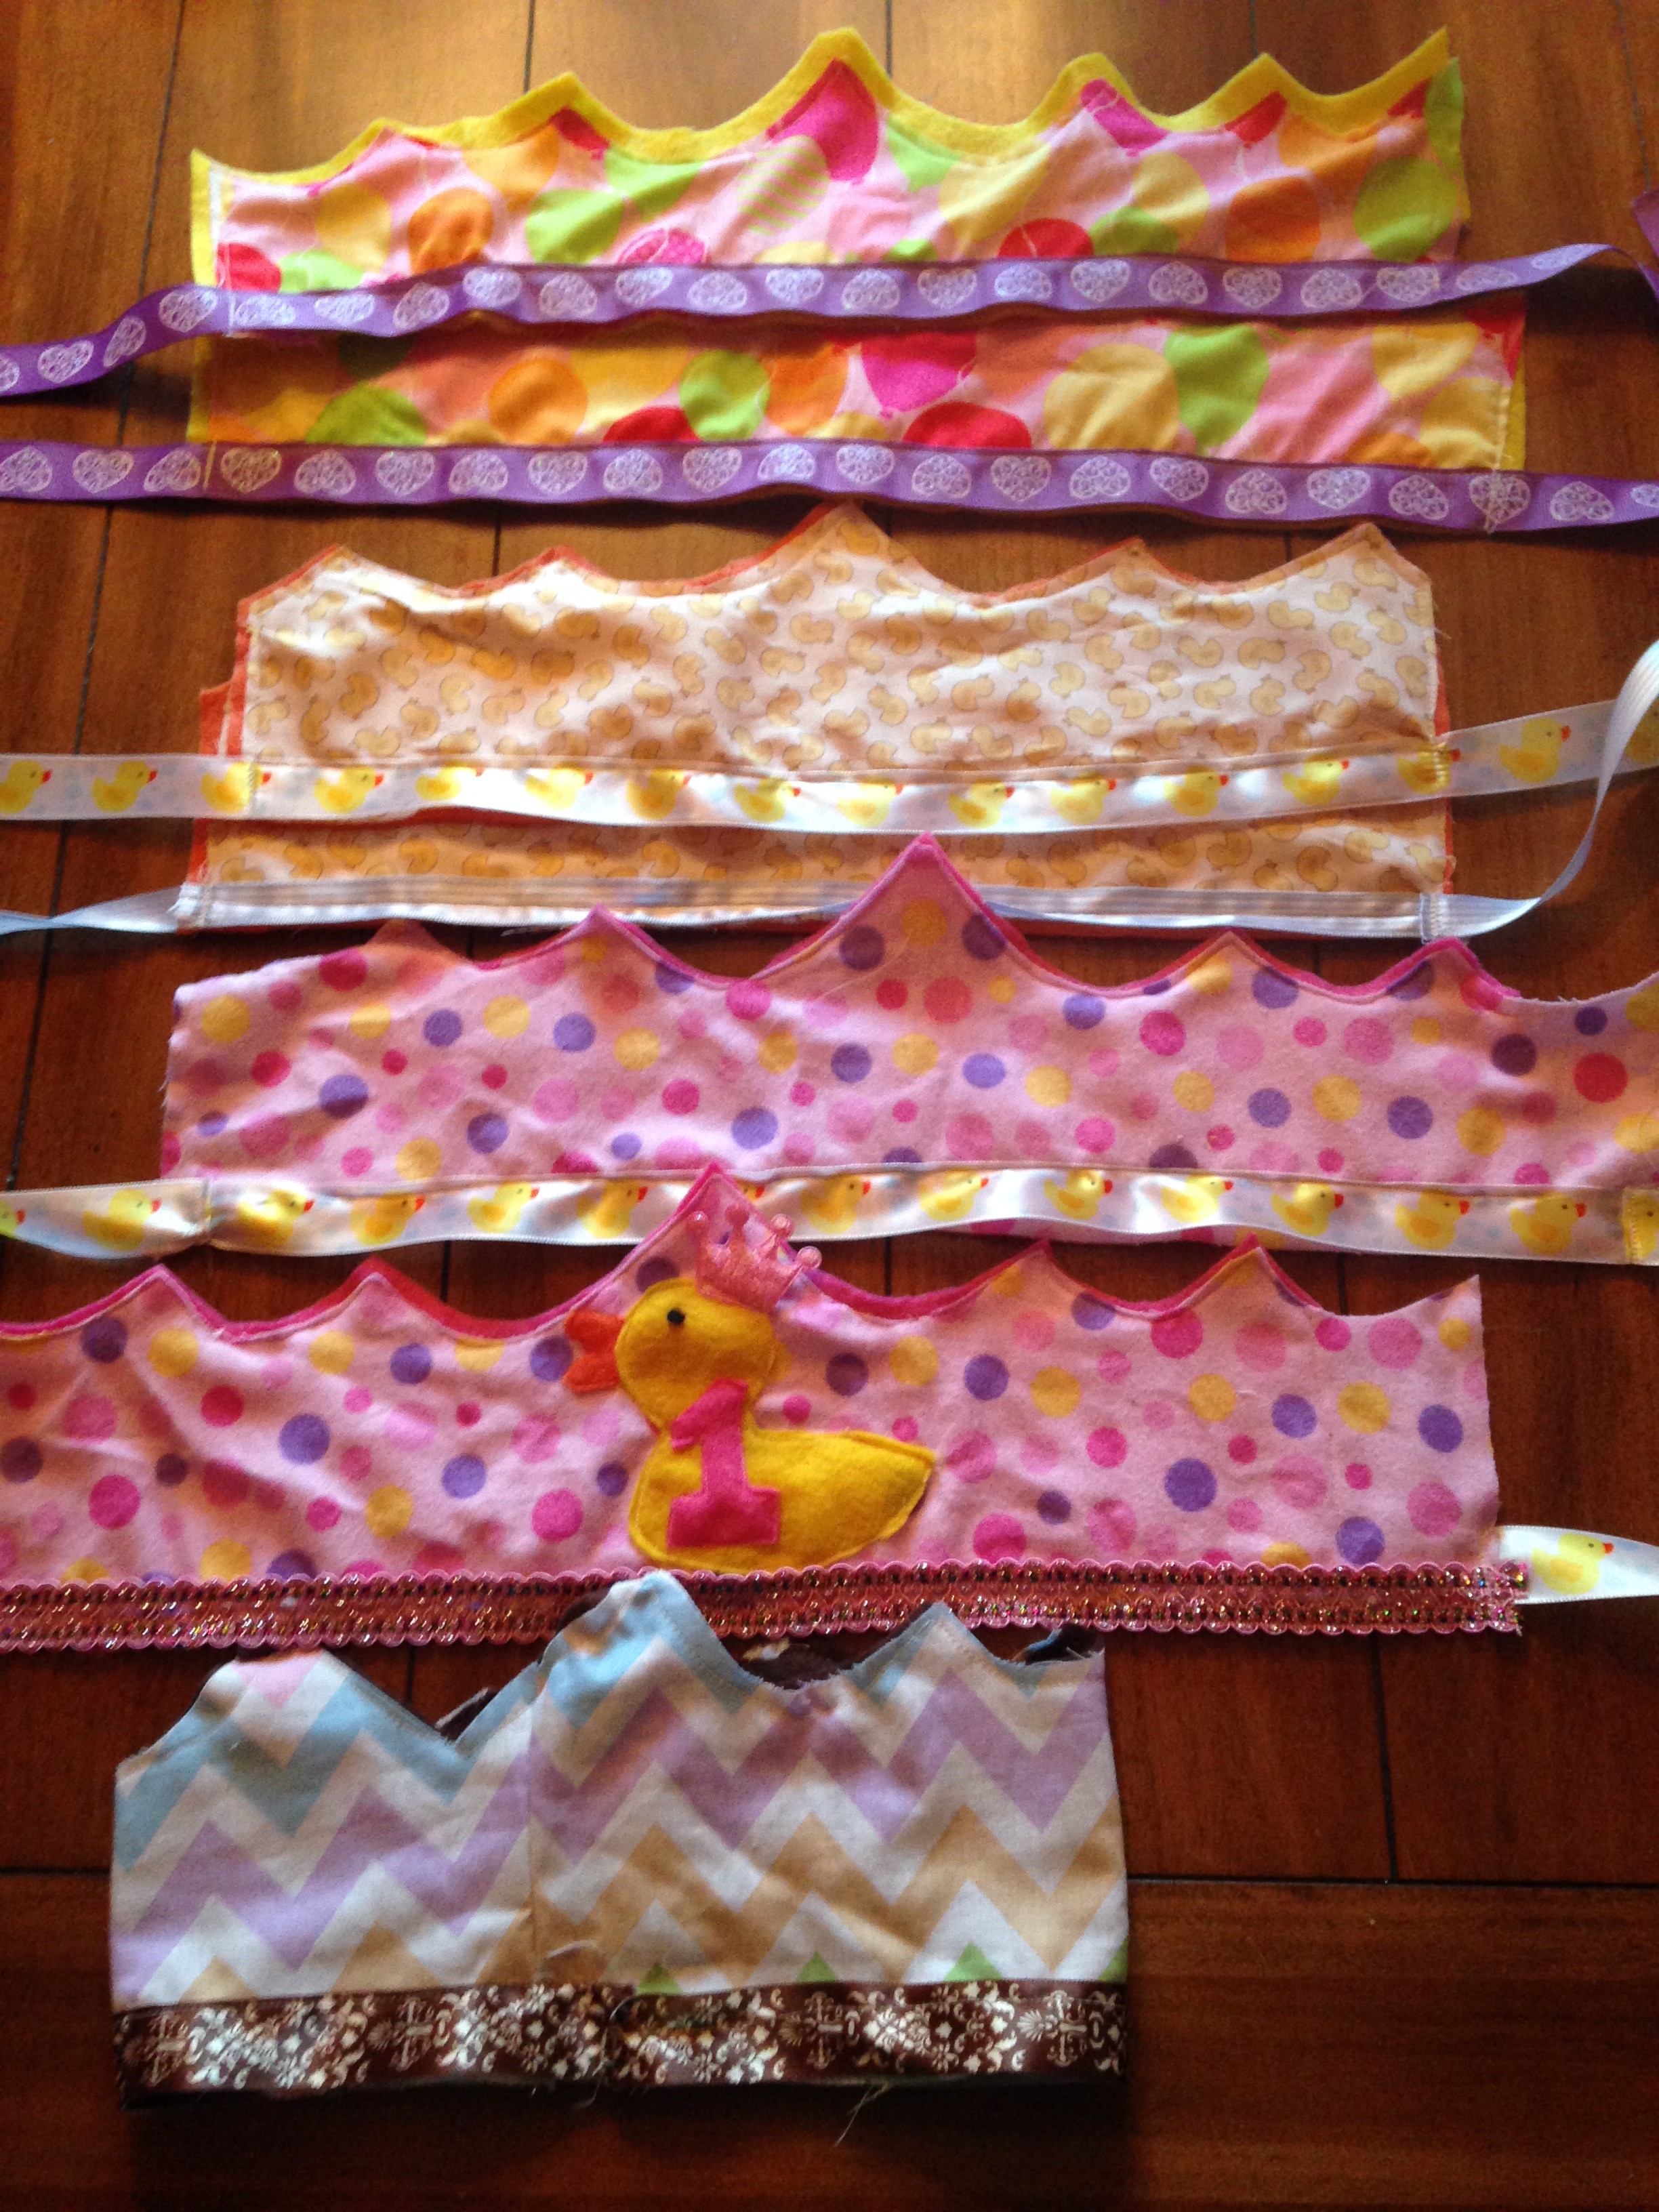
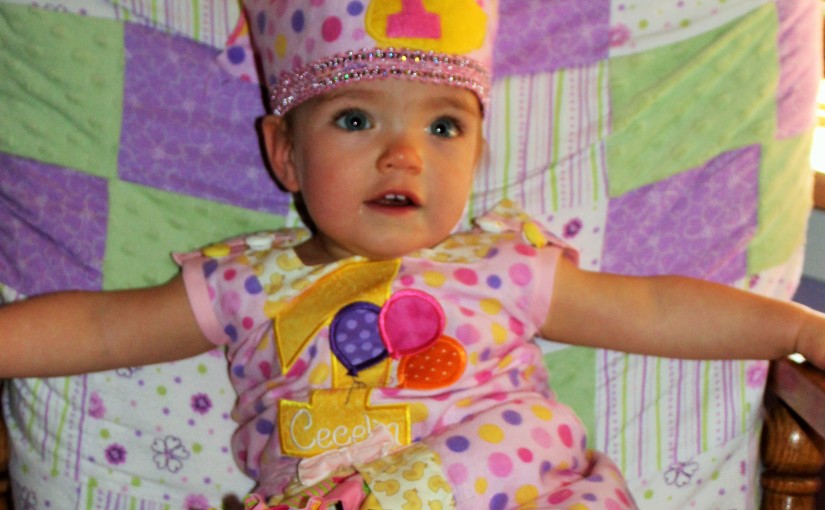
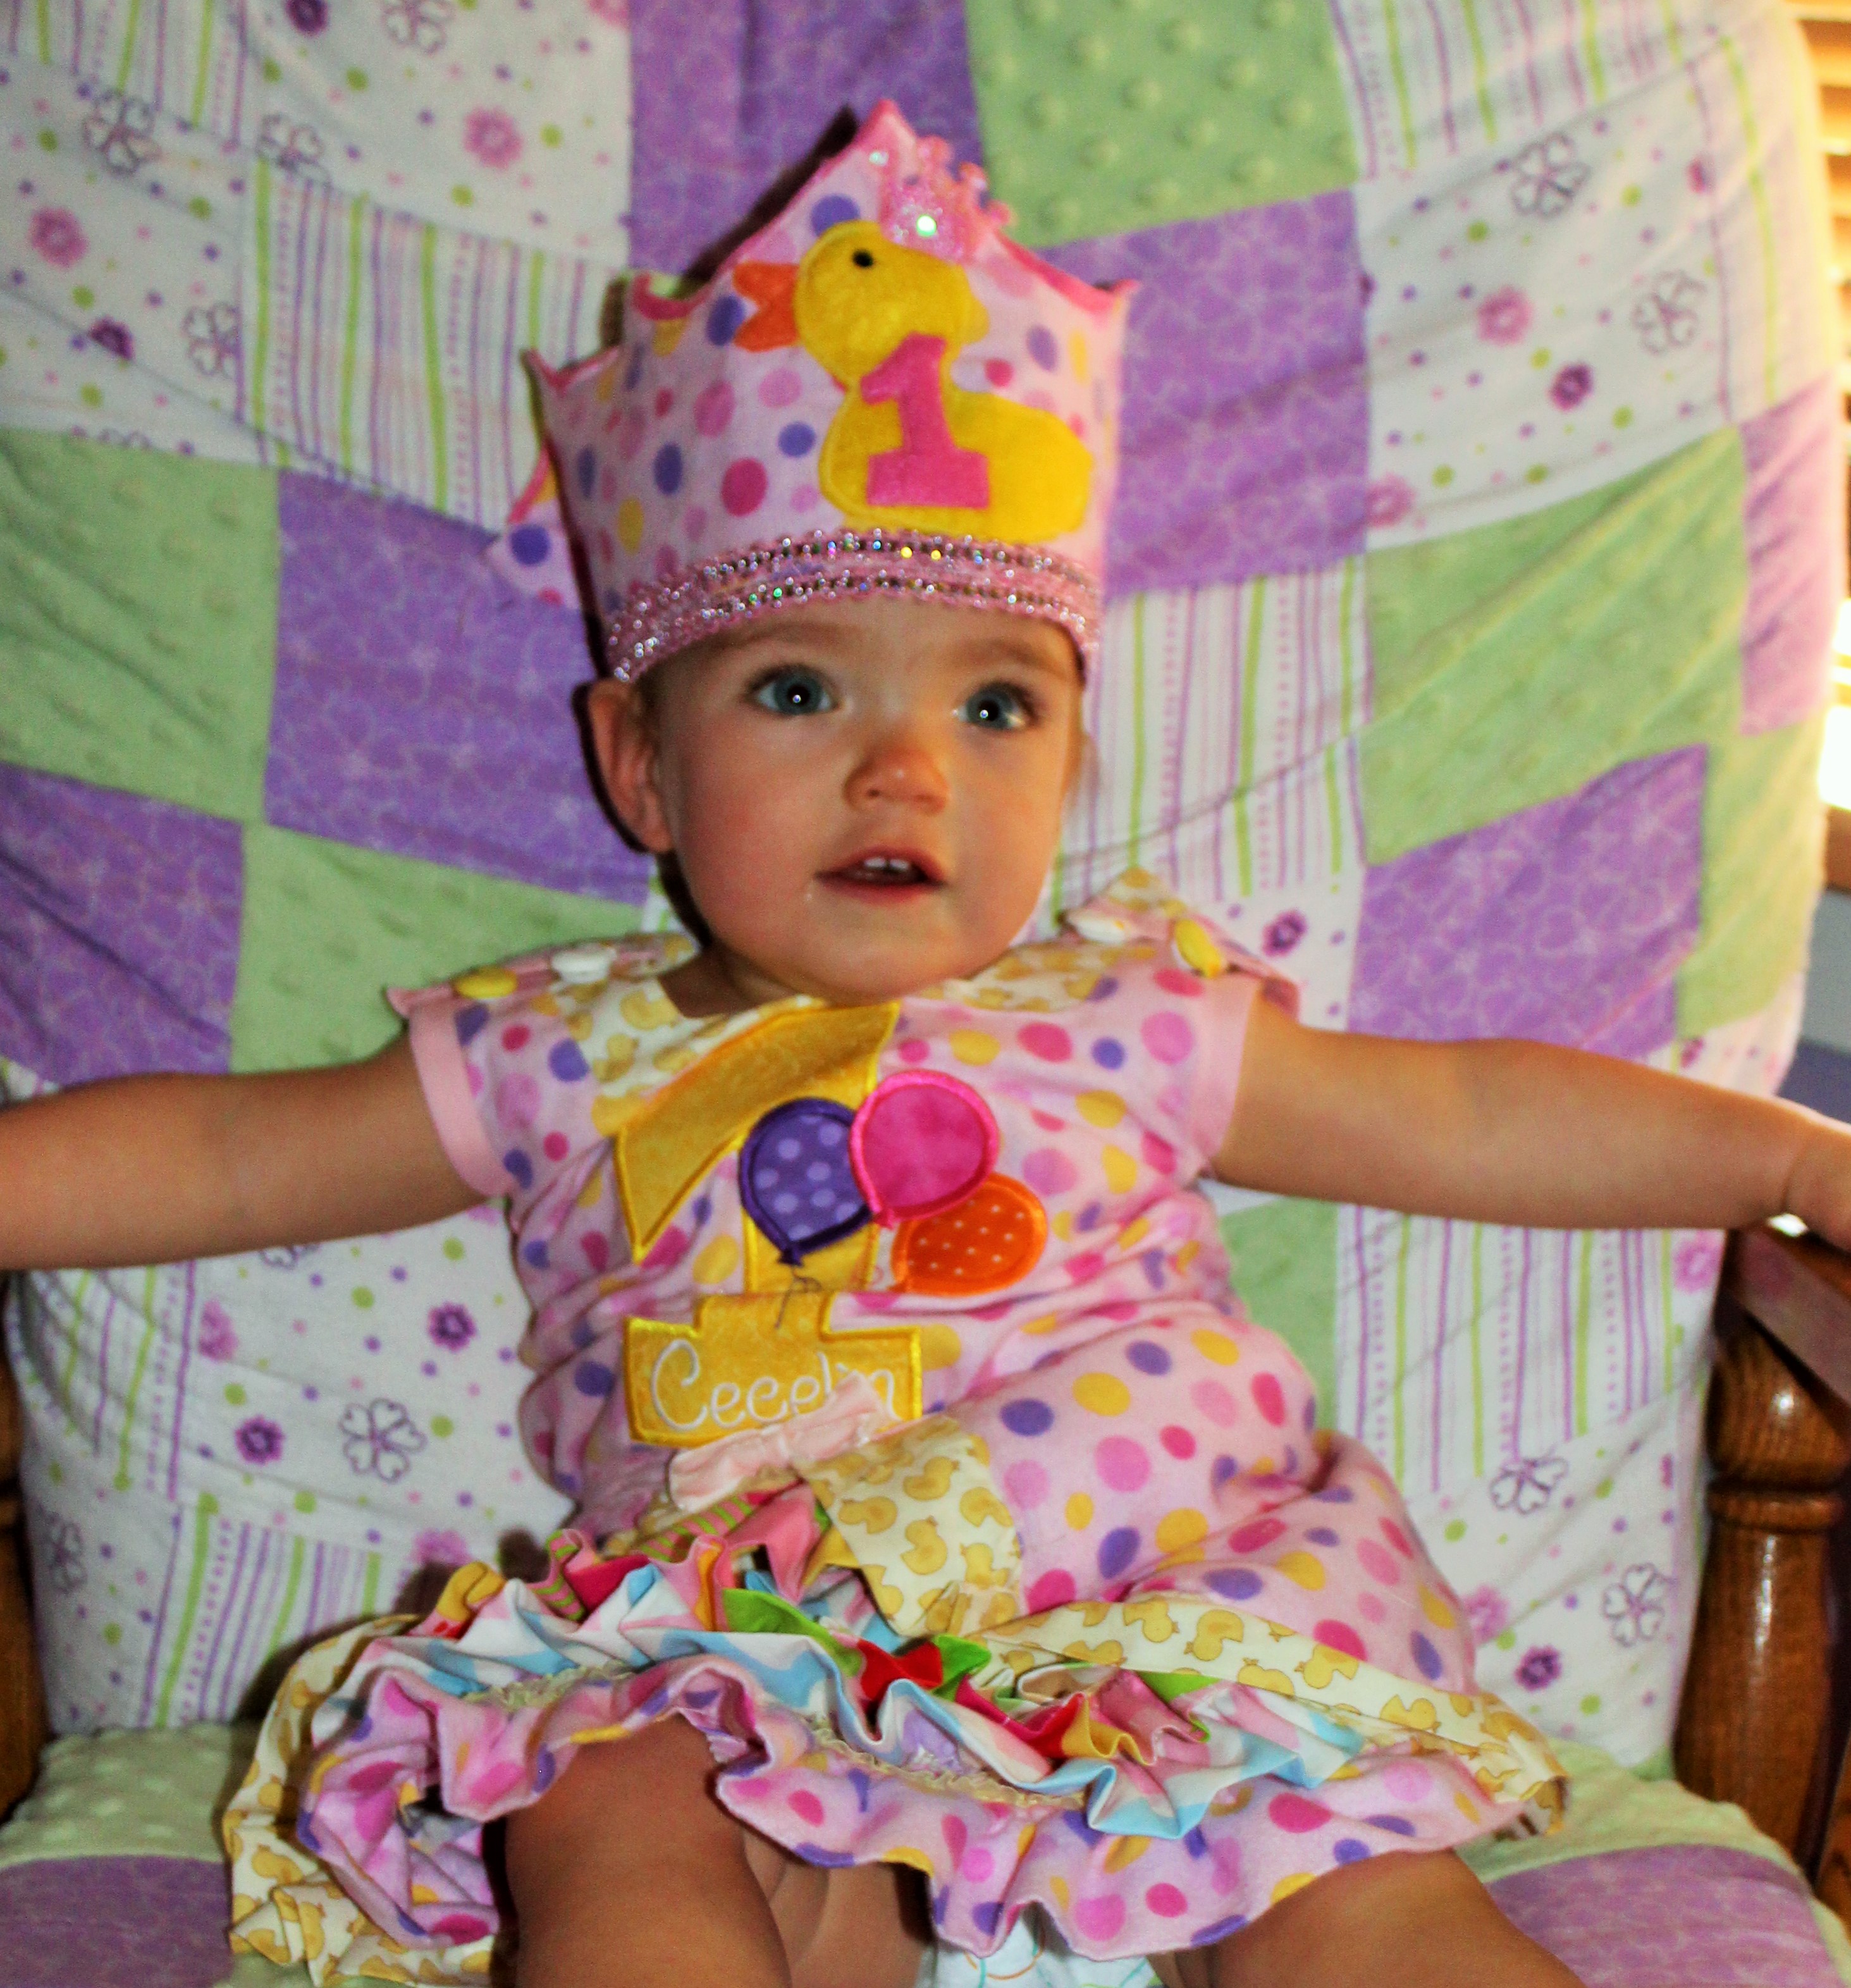
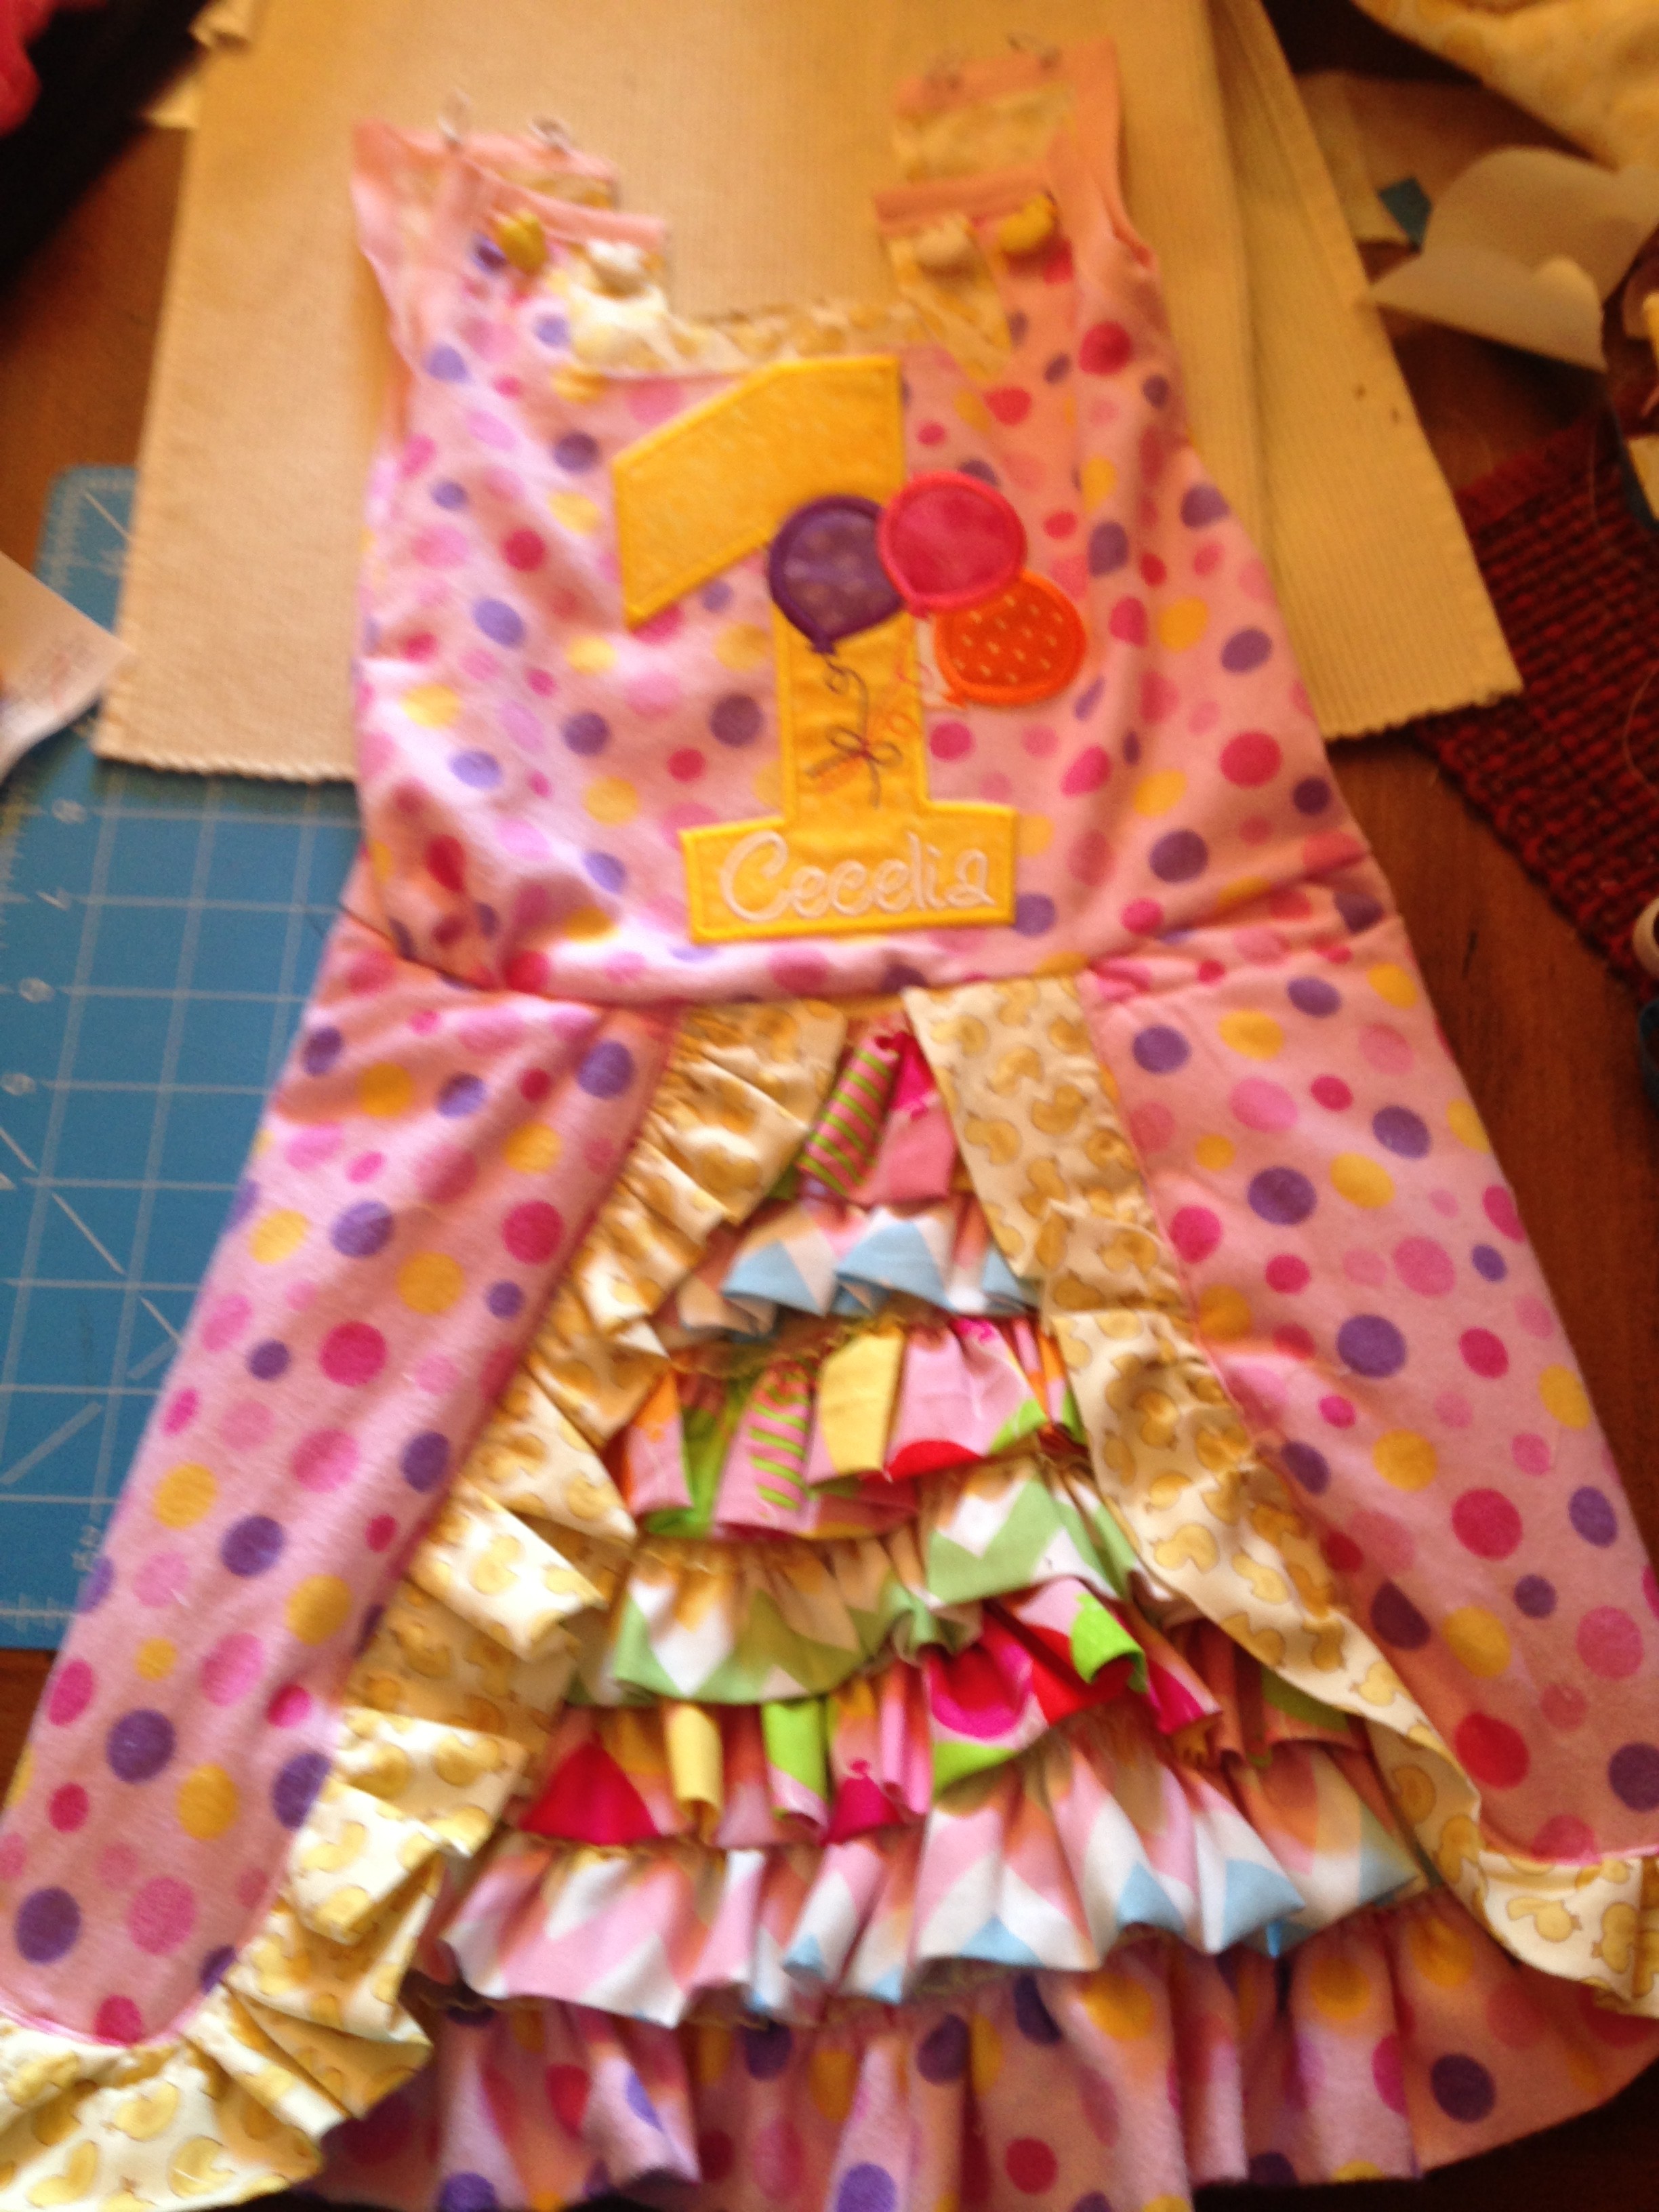
I wanted that special 1st birthday dress, but not that especially high price that comes with most of them!  So once again, I searched pinterest, etsy, and other sites to find ideas.  I ended up combining ideas, as well as making up my own, to design with the dress I created. The theme was rubber duckies for her party.  Therefore, I wanted to incorporate duckies as well as other birthday fabrics.  I went to the store and examined numerous fabrics, buying  a yard of my favorites!  The extra fabric I ended up using to create the crowns!

IMG_2549

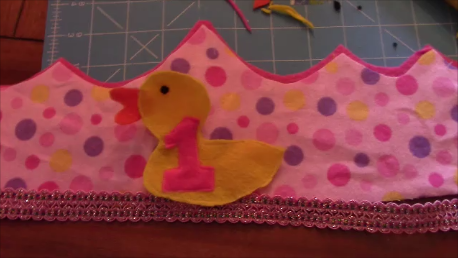
I purchased the iron on birthday 1 and ducky from etsy.  The number is even personalized with her name!  I also bought the duck buttons from the store.  I used white hair bands that I cut to make the loop holes for the buttons on the top of the shoulders.

IMG_0057 (2)

So how did I make this dress?  Well that’s a secret! But I can give you some hints.  If you are truly interested in a dress like this you can private message me or come back and look for my future etsy link!

IMG_2455 IMG_2453

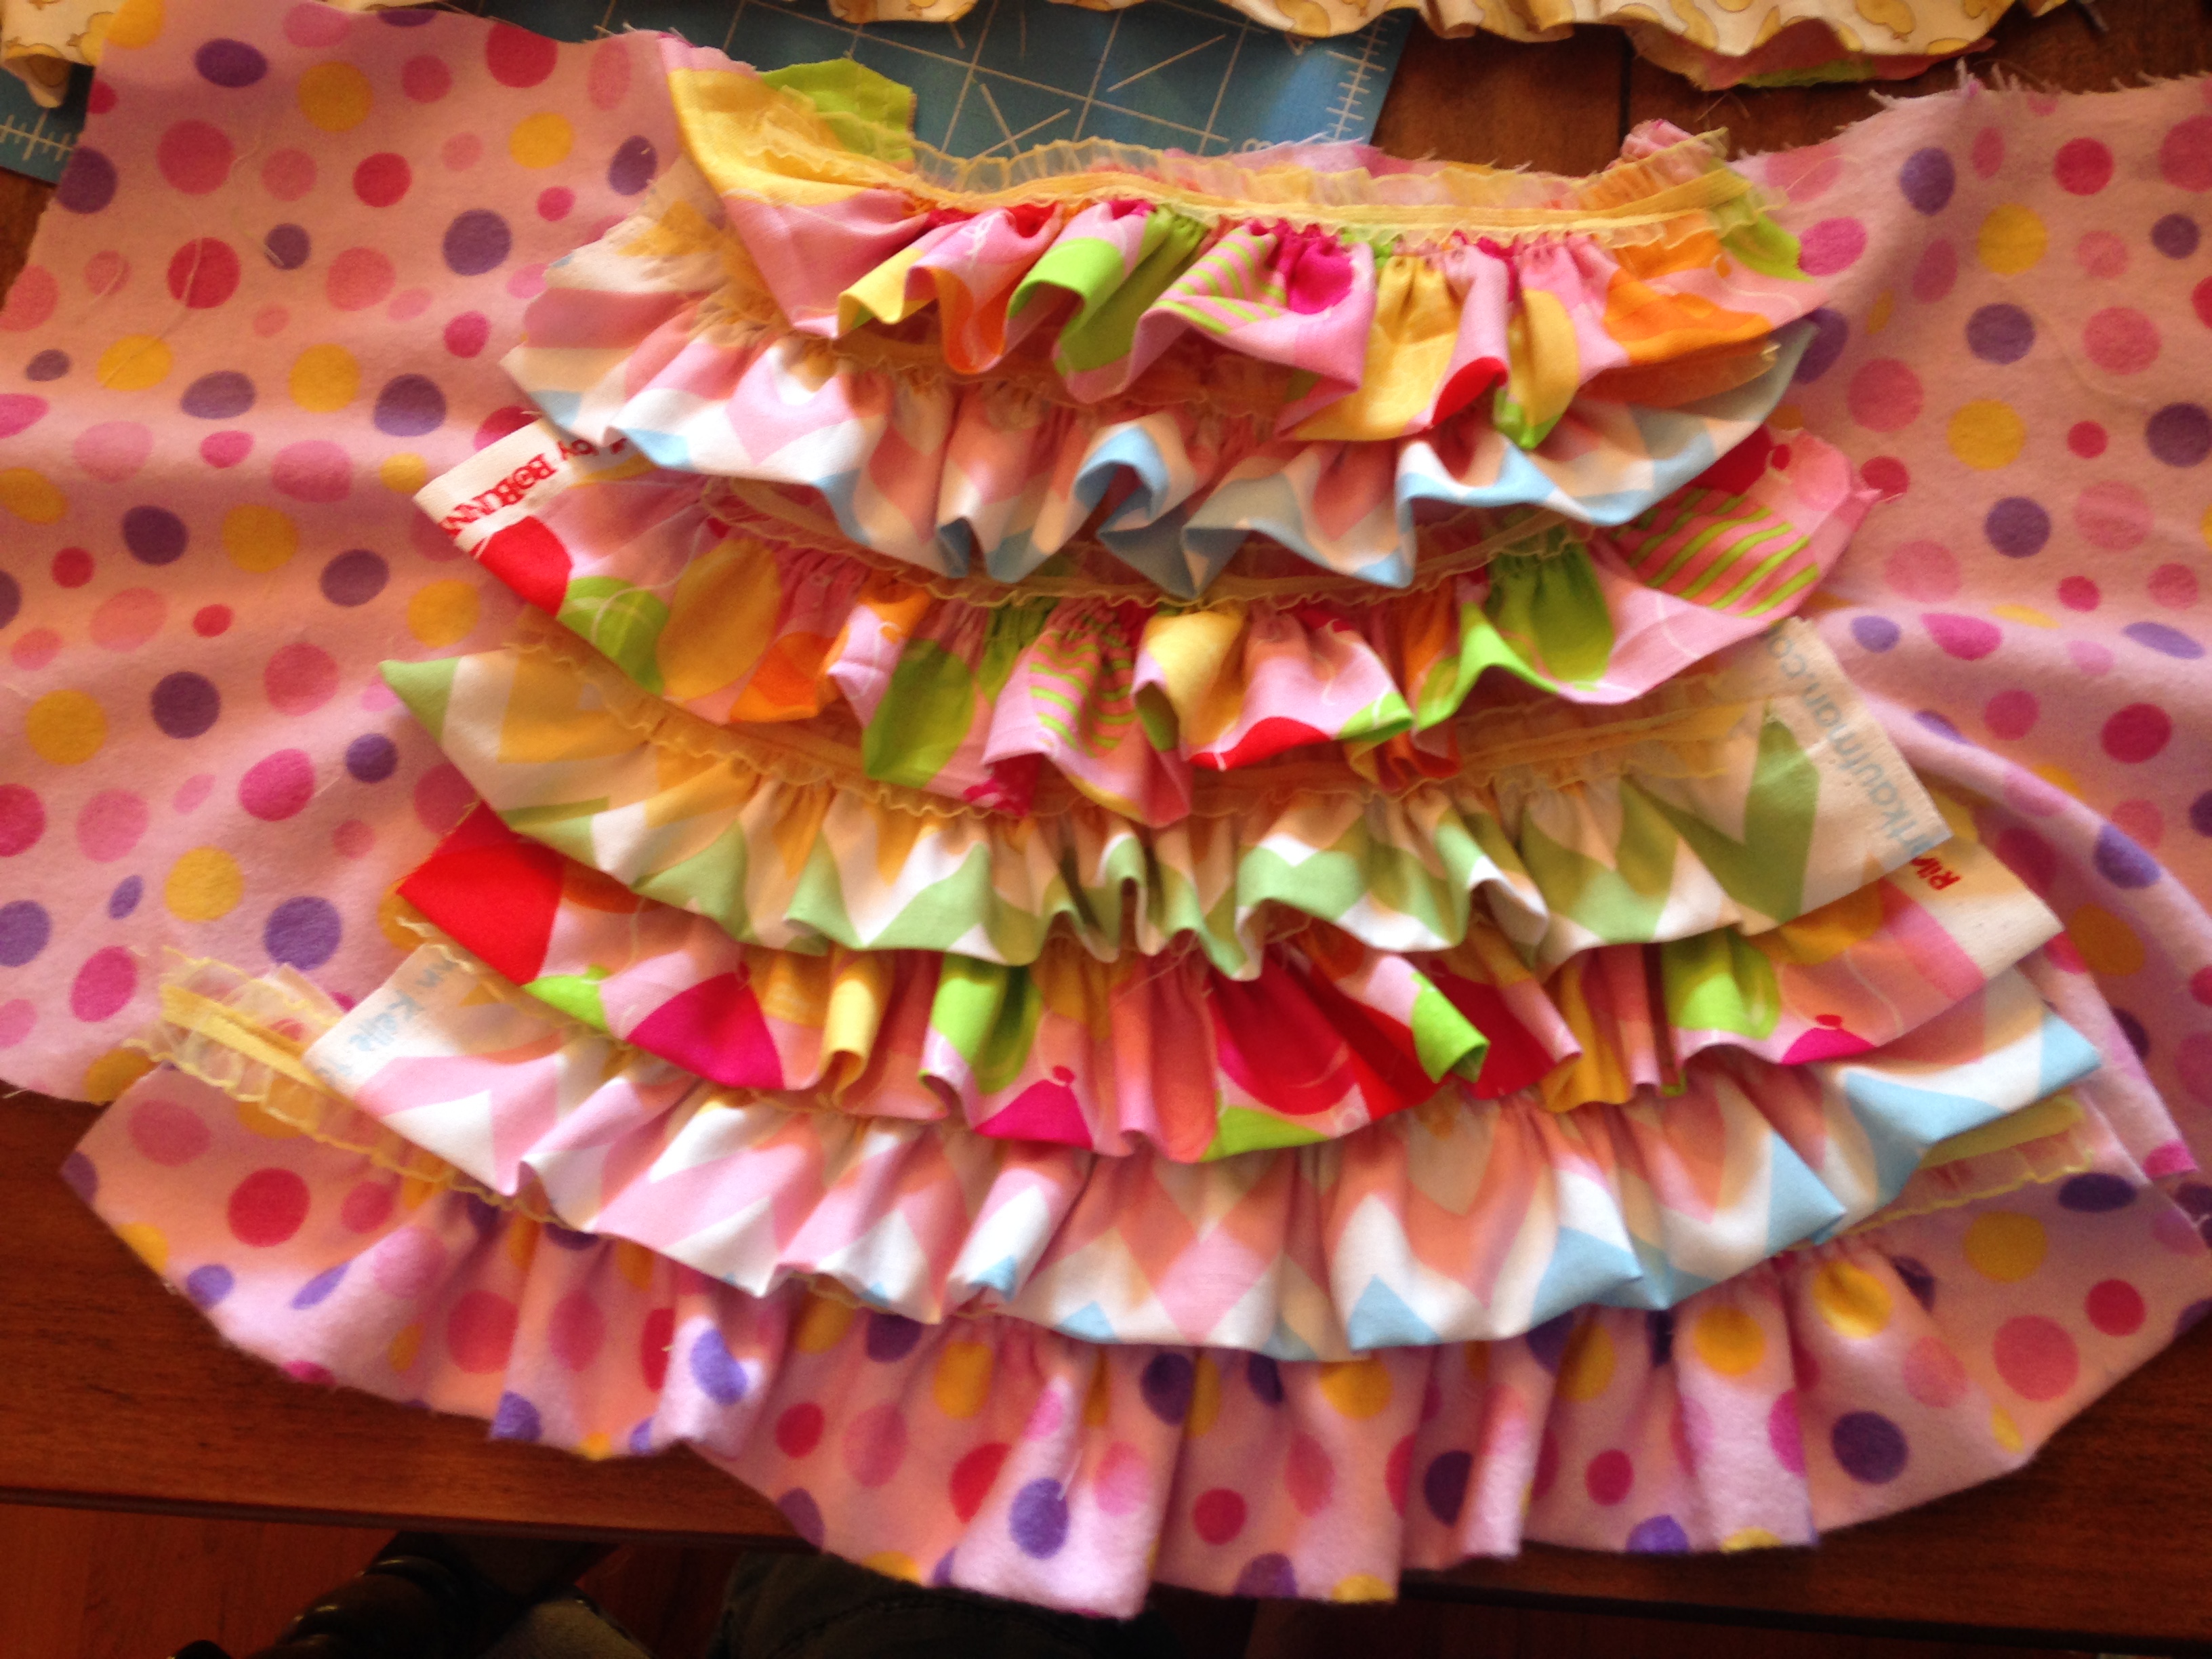
The skirt of course took the longest because of the detail.  I added yellow ribbon in between the rows as well.

IMG_2459

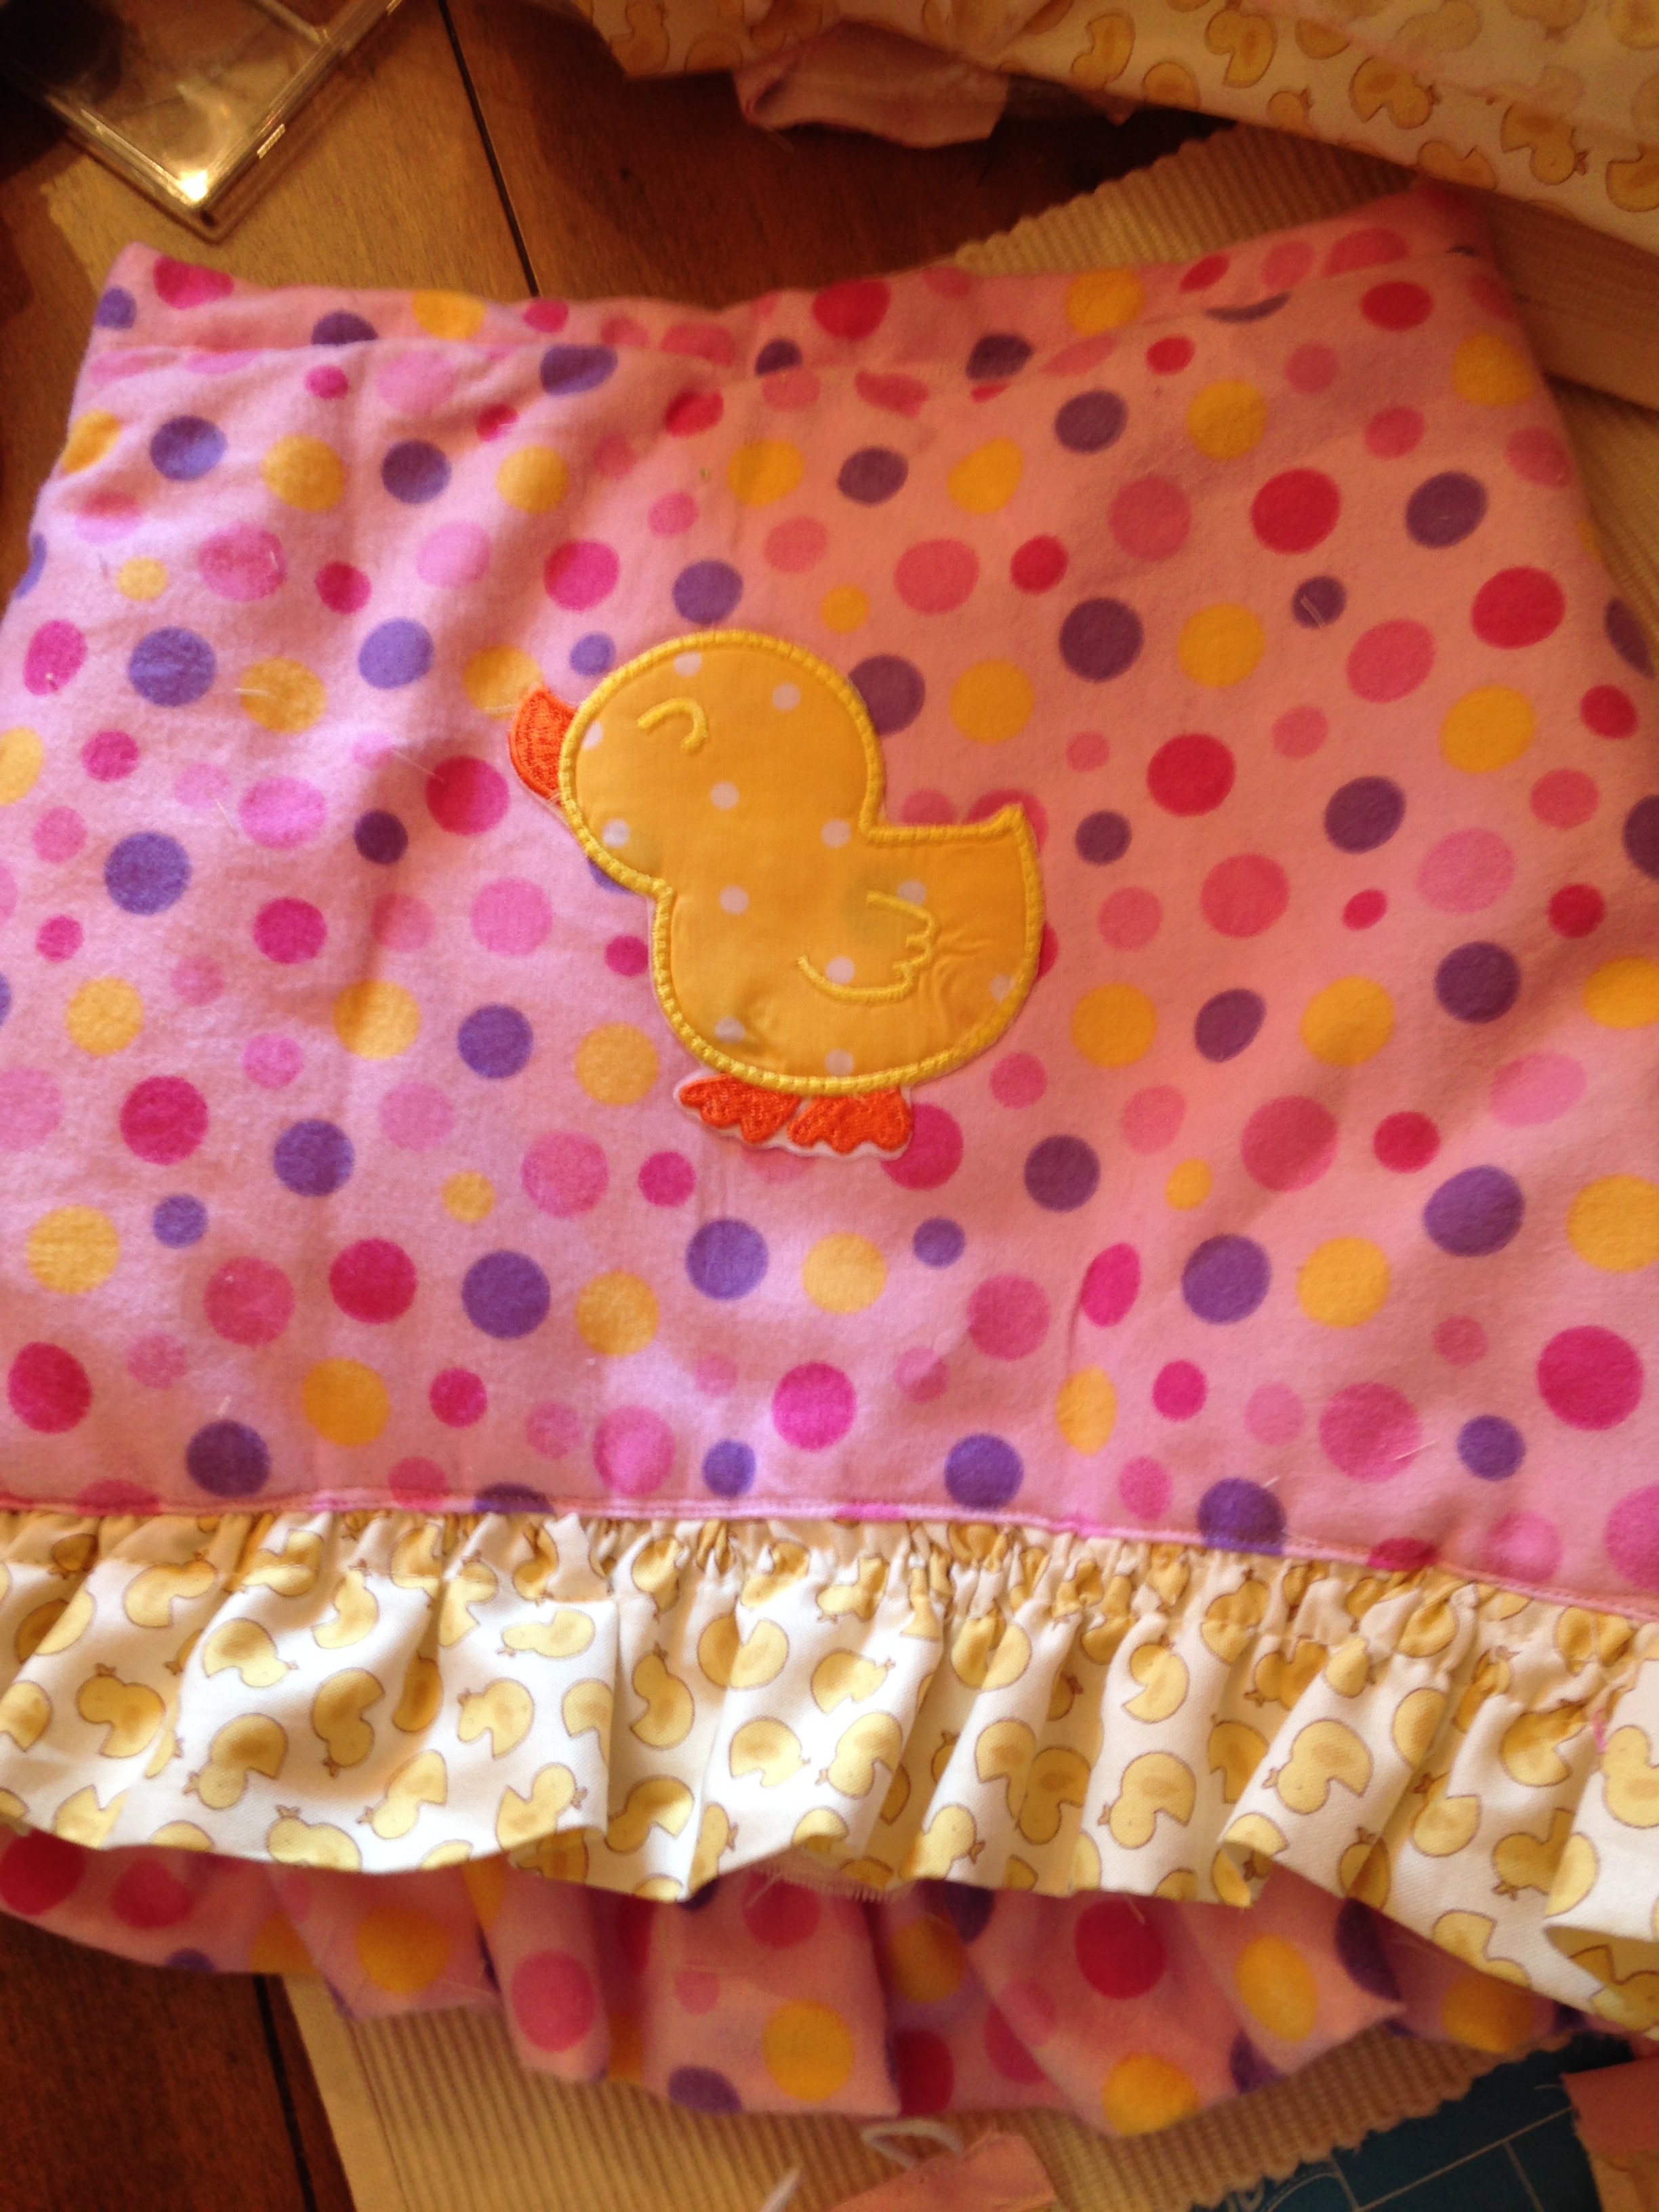
Then I added the cute duck to the back of the dress.  Personally, this dress could be used as a 2 in 1 dress because the back is also so cute!  However, the 1 in the front personalized this as a 1st birthday dress.


IMG_2457Well check out the other tutorials, as well as the 1st birthday party theme page for more ideas! Feel free to share pictures of your little one’s first birthday dress!

FollowFacebookpinterestrssyoutube
ShareFacebookpinterest

Easy Birthday Crowns!

Want to sew quick and easy crowns for a party or get together?  Then you’ve come to the right place!  I made a last minute decision days before my daughters’ first birthday party that we needed crowns!  The theme was rubber ducky, so I decided to make birthday crowns instead of hats!  Young kids and babies don’t enjoy hard hats on their head and also shouldn’t have a rubber band or elastic around their neck.

IMG_0058 (2)As you can see they are very cute for photo shoots as well!  She didn’t particularly like keeping it on, but I got a couple good shots!

As usual, there is a YouTube video and also a written explanation below.  I didn’t have a lot of time to embellish the other crowns but you can always spice things up with some ribbons, bows, glitter, rhinestones, or buttons!

To get started you need:
1) Choice of fabric and design
2) Scisscors
3)Thread
4) Closure for crown (velcro, button, ribbon) or you can sew all the way around if you know the exact size


  1. Cut your fabric for the main part of the crown 4 1/2 x 18 inches
  2. Snapshot 1 (10-7-2015 8-50 AM)
  3. Make your own crown pattern by drawing the top on a piece of paper and cutting it out!
  4. Cut your design onto your fabric to make the shape of your crown! If you want a felt backing with another color cut that out as well.
  5. Next, pick out your ribbon if you are using one, if you want any other embellishments get them ready!  I made a felt duck that I sewed onto
    the crown.
  6. Snapshot 2 (10-7-2015 9-02 AM)
  7. Line up your crown pieces and sew all the way around!  Then you are done! If you want to add button loops and buttons you can sew them on as well.
  8. IMG_2478Congrats and enjoy the party!  Check back often for new crafts or subscribe below!


FollowFacebookpinterestrssyoutube
ShareFacebookpinterest

Baby Slippers Tutorial!

In one of my last tutorials, I showed you how to make a super cute sleeper.  Now, here are the matching slipper shoes!

IMG_2318           IMG_2303

What you will need:

  • Fabric of choice
  • 1/4 or 1/8 inch elastic
  • Thread color of choice
  • Optional: buttons or bows

I used a free pattern from marked crafts- > shoepattern

So lets get started!  here is the video tutorial and below that is the written and picture format.


  1. Cut your pattern out and decide on your color/colors you want to use (you can use two colors!
  2. IMG_2289
  3. Cut out your pieces- there should be 4 of each piece
  4. Take your upper pieces (the two sided rounded pieces) and place them pattern facing pattern as usual.
  5. Then sew the non-rounded part only (the bottom of it)
  6. Turn right side out, then iron you piece down with the right sides out and sew a nice little line across the outside where it is sewn together.


IMG_2291

7. Take your heel pieces (the long rectangles), and place the pieces facing eachother (as usual) and sew just down one long side IMG_2292IMG_2293

8. Cut your elastic to 4 inches long (2 pieces).  Pin it to one end of the sewn heel piece.

elastic

9. While sewing stretch the elastic and sew using your zigzag stitch across the length of the fabric

elasticcurl

10. It will be curled up as shown above.  Turn right side out.  Pin and sew below the elastic and all the way around the whole piece to make it look nice and then trim as needed.

11. Place sole pieces together with patterns facing eachother, use a basting stitch (set your stitch to longest number and do not backstitch).

IMG_2299

12. Pin together the heel and the front piece, adjust it to be the appropriate size for the baby/infant you are making it for.

bootie

13. Sew straight across where you already have the previous sewn line from the front piece.  Then trim the rest off.  This makes a nice neat line when you are finished.

14. Find the middle of the sole and the middle of the top part.  You can do this easily by folding in half.  Line them up together and pin.  (the back of the sole is the smaller part). Have the top part the wrong side still out to pin. IMG_2301

15. Now sew all the way around! Almost done!  Doesn’t it look so cute?

16. Trim the excess fabric being careful not to cut too close to your thread line.

17. Now turn right side out!  And WA-LA you are done!  You can add a button, ribbon, or any other accessory you want!  Great JOB!  Lets see those pictures

IMG_2303

FollowFacebookpinterestrssyoutube
ShareFacebookpinterest

Sew An Easy Baby Sleeper!

Ever love that oh so cute baby sleepers with the elastic on the bottom?  I sure do, in fact I miss them now that my little one is getting older!  However, I have many showers to go to and it is a great gift!  The slip on sleeper with the elastic on the bottom is great for babies because you can easily change the babies diaper without fussing with all the buttons, snaps, or zippers.  It also keeps the baby warm and comfortable; not to mention how cute he or she will look!

IMG_2318First off, you need the pattern.  For this one, I used a neighboring sewing blog’s pattern since there are so many out there:

Stitched Together Pattern

So print your pattern making sure you unclick the fit to page (you want it letter size).

What you need:
*Fabric of chose
*Thread
*Elastic 1/4inch or
1/8inch
*Optional: bias tape (can
also make or just hem)

Below is the link to the Youtube video tutorial.  Below that is written instructions with pictures…enjoy!

  1. Print your pattern.  Cut your fabric as instructed on pattern

IMG_2259 IMG_2260

You should now have one front and one
back piece, and two sleeves.

2. Next, you use your bias tape. If you don’t have bias tape you can hem the ends instead or you can make your own bias tape. Here is directions to make your own bias tape

IMG_22643. Fold your bias tape on the ends of the sleeves, pin on
and sew straight on both sleeves.  Do this also to the neckline of the front and back piece.

4.  Next, You want to overlap your front and back gown pieces by either looking at the mark you made from the pattern or you can measure 4 inches of overlap from the top down.  So you want to pin and sew the overlapping sides (the 4 inches)

IMG_2266

IMG_2267

5. Find the middle of the overlap and the middle of the sleeves. This can be done by measuring 2 inches in for the overlap or folding.  The sleeve can be folded as well if you didn’t mark it. Line up the middle of the sleeve and middle of the overlap place pattern on pattern and pin and sew.

IMG_2265Snapshot 2 (9-8-2015 1-51 PM)Snapshot 1 (9-8-2015 1-51 PM)

You have to bunch it and pin it for it to stay.

IMG_2274

6. Turn your sleeper inside out and pin from the bias tape bottom all the way down to the bottom of the sleep.  Then sew!

Snapshot 3 (9-8-2015 1-57 PM)

 IMG_2276 IMG_2278

Almost there!

7.  Turn inside out and make elastic casing by folding up the bottom 1/4 inch for 1/8elastic or 1/2inch for 1/4elastic. Iron or pin the area to make it easier to
sew.  Don’t forget to leave a 1-2 inch opening to put the elastic through!
Remember to back stitch!

IMG_2280

8. To get your elastic through use a safety pin on the end and put in the opening
and pull through by bunching the fabric and then pulling the safety pin.

IMG_2281

9. Choose the tightness you need for your little one on the bottom and then sew your two pieces of elastic together.  Then sew the opening closed!

IMG_2318

That’s it!  Congrats you have finished!  Great job.  Any suggestions questions please let me know.  Look for the next post to be the matching slippers!

FollowFacebookpinterestrssyoutube
ShareFacebookpinterest

Reversible Lace Baby Sunhat!

IMG_1868

Are you looking for a cute sunhat to shade your little one from the sun?
Well, this matching reversible hat is the perfect one!  It works great for pictures and photo shoots as well.  The hat is also an easy pattern that can be completed in under an hour.  The hat really completes the outfit as you can see above!!!

You can look back at my last tutorial on how to make a peasant dress to make a matching dress.

IMG_1885

What you will need:

  • The free pattern here:    sunhat 001
  • fabric (can do one color or two)
  • lace and or buttons (optional)
  • scissor
  • matching thread

For the people who enjoy a visual demonstration, below is the YouTube video.  Following that, is the written and picture directions.


Okay, first you need to cut out your pattern pieces.  You need 8 crown pieces and 4 brim pieces.  If you want two different colors for each side then its half in one color half in the other!

IMG_1829

Next, you take two of your crown pieces and place them together with fabric patterns facing each other.  Pin and sew down one side.  This is what it will look like unfolded.

IMG_1830

Then take another piece and place on one of the two pieces sewn together.  You again want fabric pattern to fabric pattern facing each other.  Then sew the one side.  Do this until you have four pieces.  Once you have all four pieces sew the four side together as well.

IMG_1832

And WA-La!  You have your first crown hat completed. Now start the process again with either the same color, or if you are using a different color scheme on the other side of the hat use that.  Complete another crown.

crown

One you have the two crowns, you want to line up two of your brim pieces with the patterns facing each other.  Sew the small short ends together as indicated on the pattern pieces.  Then do this for the other two pieces as well so you have two full circle brim pieces.

Next, you want to connect the brim pieces to the crown pieces.  You do this by magic.  Hah, no just kidding, you face fabric to fabric again and sew around the edges.

hatpinned

Then you will end up with two formed hats!  Trim around the seems.

hats

Next you want to make 2 into 1!!!  So to do this, you need to place fabric to fabric again. So put one hat inside out and line up the outside brim pieces again.  Remember to match up the seems of the crown and brim to each other.  Pin, then sew around the outside leaving a 3 inch opening.  This opening will allow you to turn the hat right side out.

hatss

Once completed turn right side out by pulling the fabric through the opening.

hathat

Now, you want to sew that hole closed.  To do this, fold in the edges and either press or pin to stay.  Then sew it closed baby!  Press the seems

So this is your hat.  If you want to add a button or lace continue on.

I decided to add lace to match the peasant dress tutorial completed last week.

Line the lace up with the brim and pin.  Then just sew on!  AND WA=la!  Beautiful matching hat complete!

IMG_1886 (2)IMG_1863IMG_1885

FollowFacebookpinterestrssyoutube
ShareFacebookpinterest

Sewing machine tutorials!

New to sewing?  Want to learn how to thread your machine?  Then, you have come to the right place.  Yes this may be a little boring for some, but I found similar help at different sites and decided to put it all together in my own way for anyone new to nursing.

So if you don’t fall asleep along the way, you may learn something!  :op

Below are three tutorials on using your sewing machine.  This particular tutorial features the brother xl model, which I highly recommend as an affordable and easy to use first machine that has more advanced properties as well.  However, if you have another machine, it may be quite similar so you can follow along!

machineSo here is a basic diagram of the machine I made that outlines the important components.


This is a video on the basic parts of the machine and what buttons are used most.


Next, is a video on how to thread your bobbin!  Don’t worry it gets much easier each time!


Lastly, how to put everything together!  This tutorial demonstrates how to thread the machine and start up!


Good Luck and Enjoy!  More tutorials to come…

FollowFacebookpinterestrssyoutube
ShareFacebookpinterest