As a child I remember making many candles from crayons at my grandparents house. I also remember how much fun we had making candles from crayons. So, during the quarantine, I decided why not try it?
Of course the kids are still young and can’t work with the melted wax, but they can find broken crayons or pieces of crayons too small to use. I put them hard at work finding these crayons and then taking all the wrappers off of them. Next, they categorized them by colors.
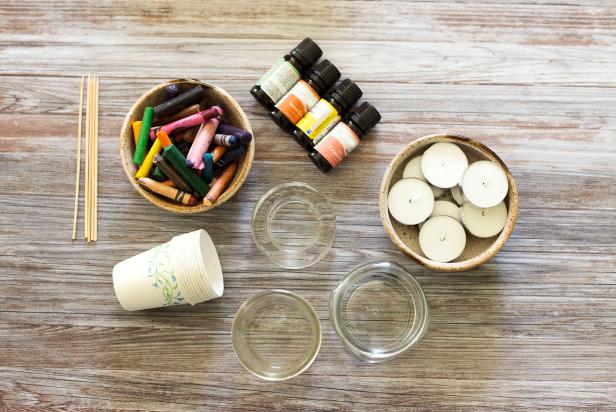
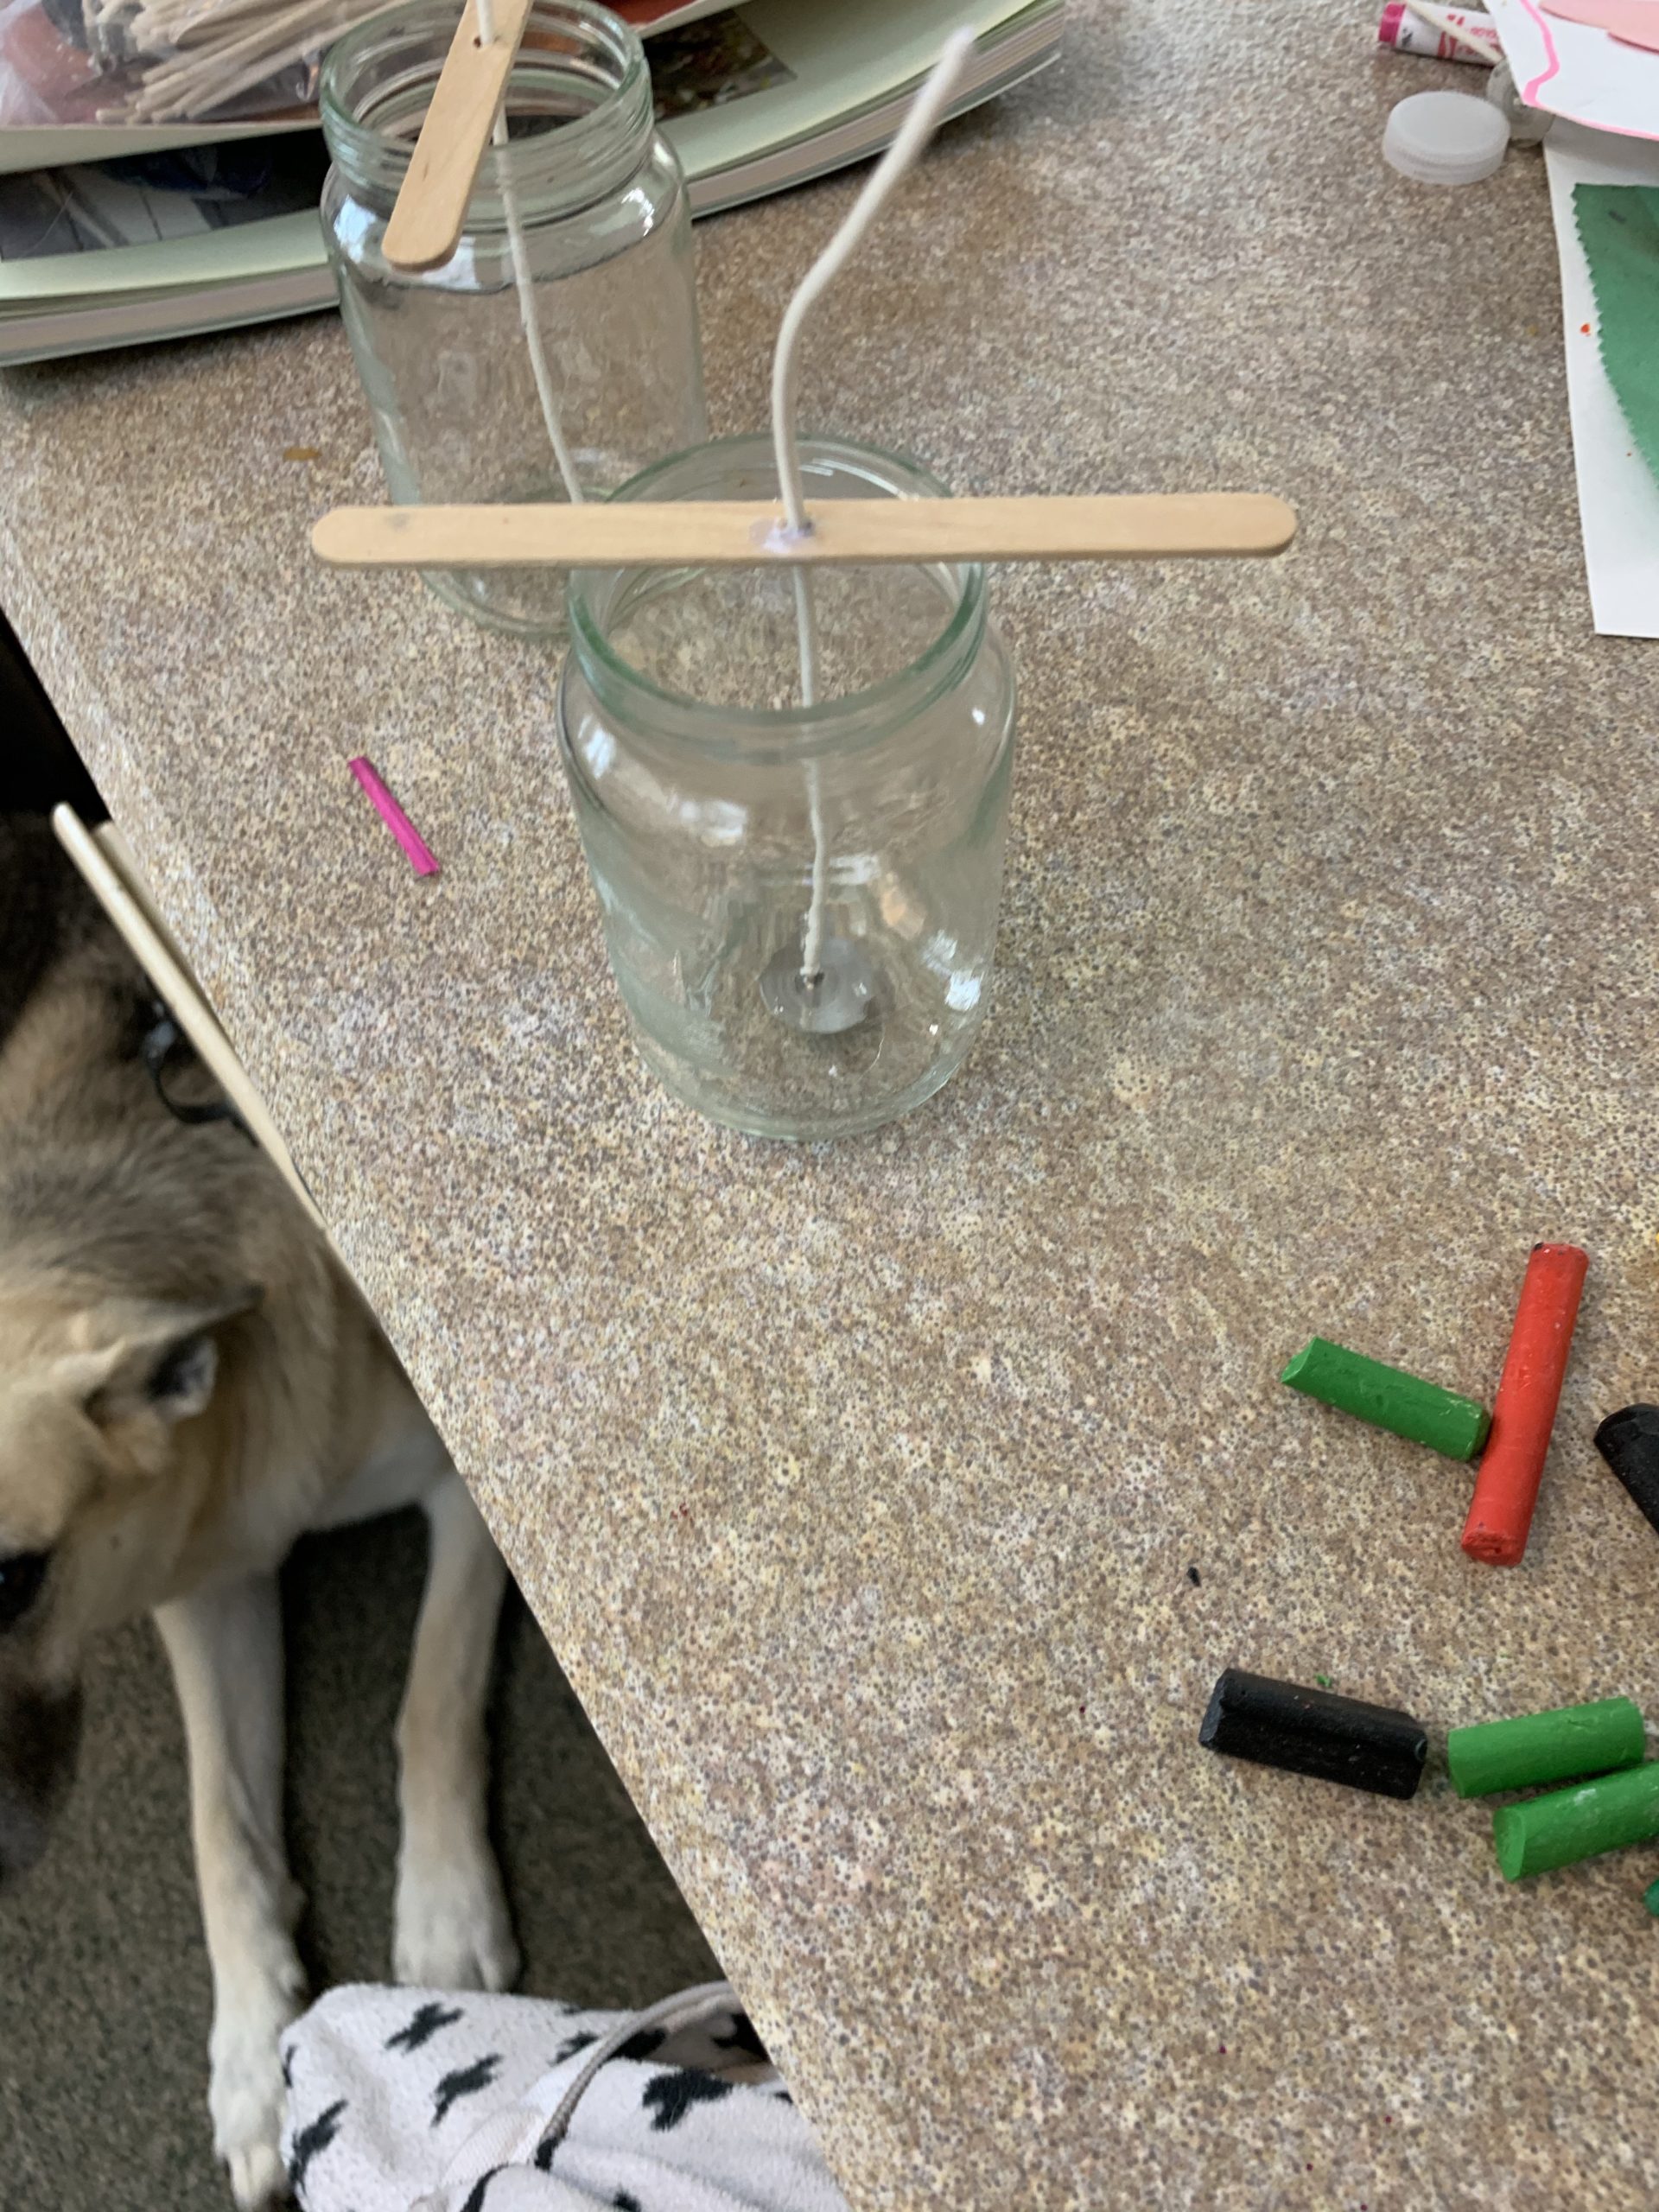
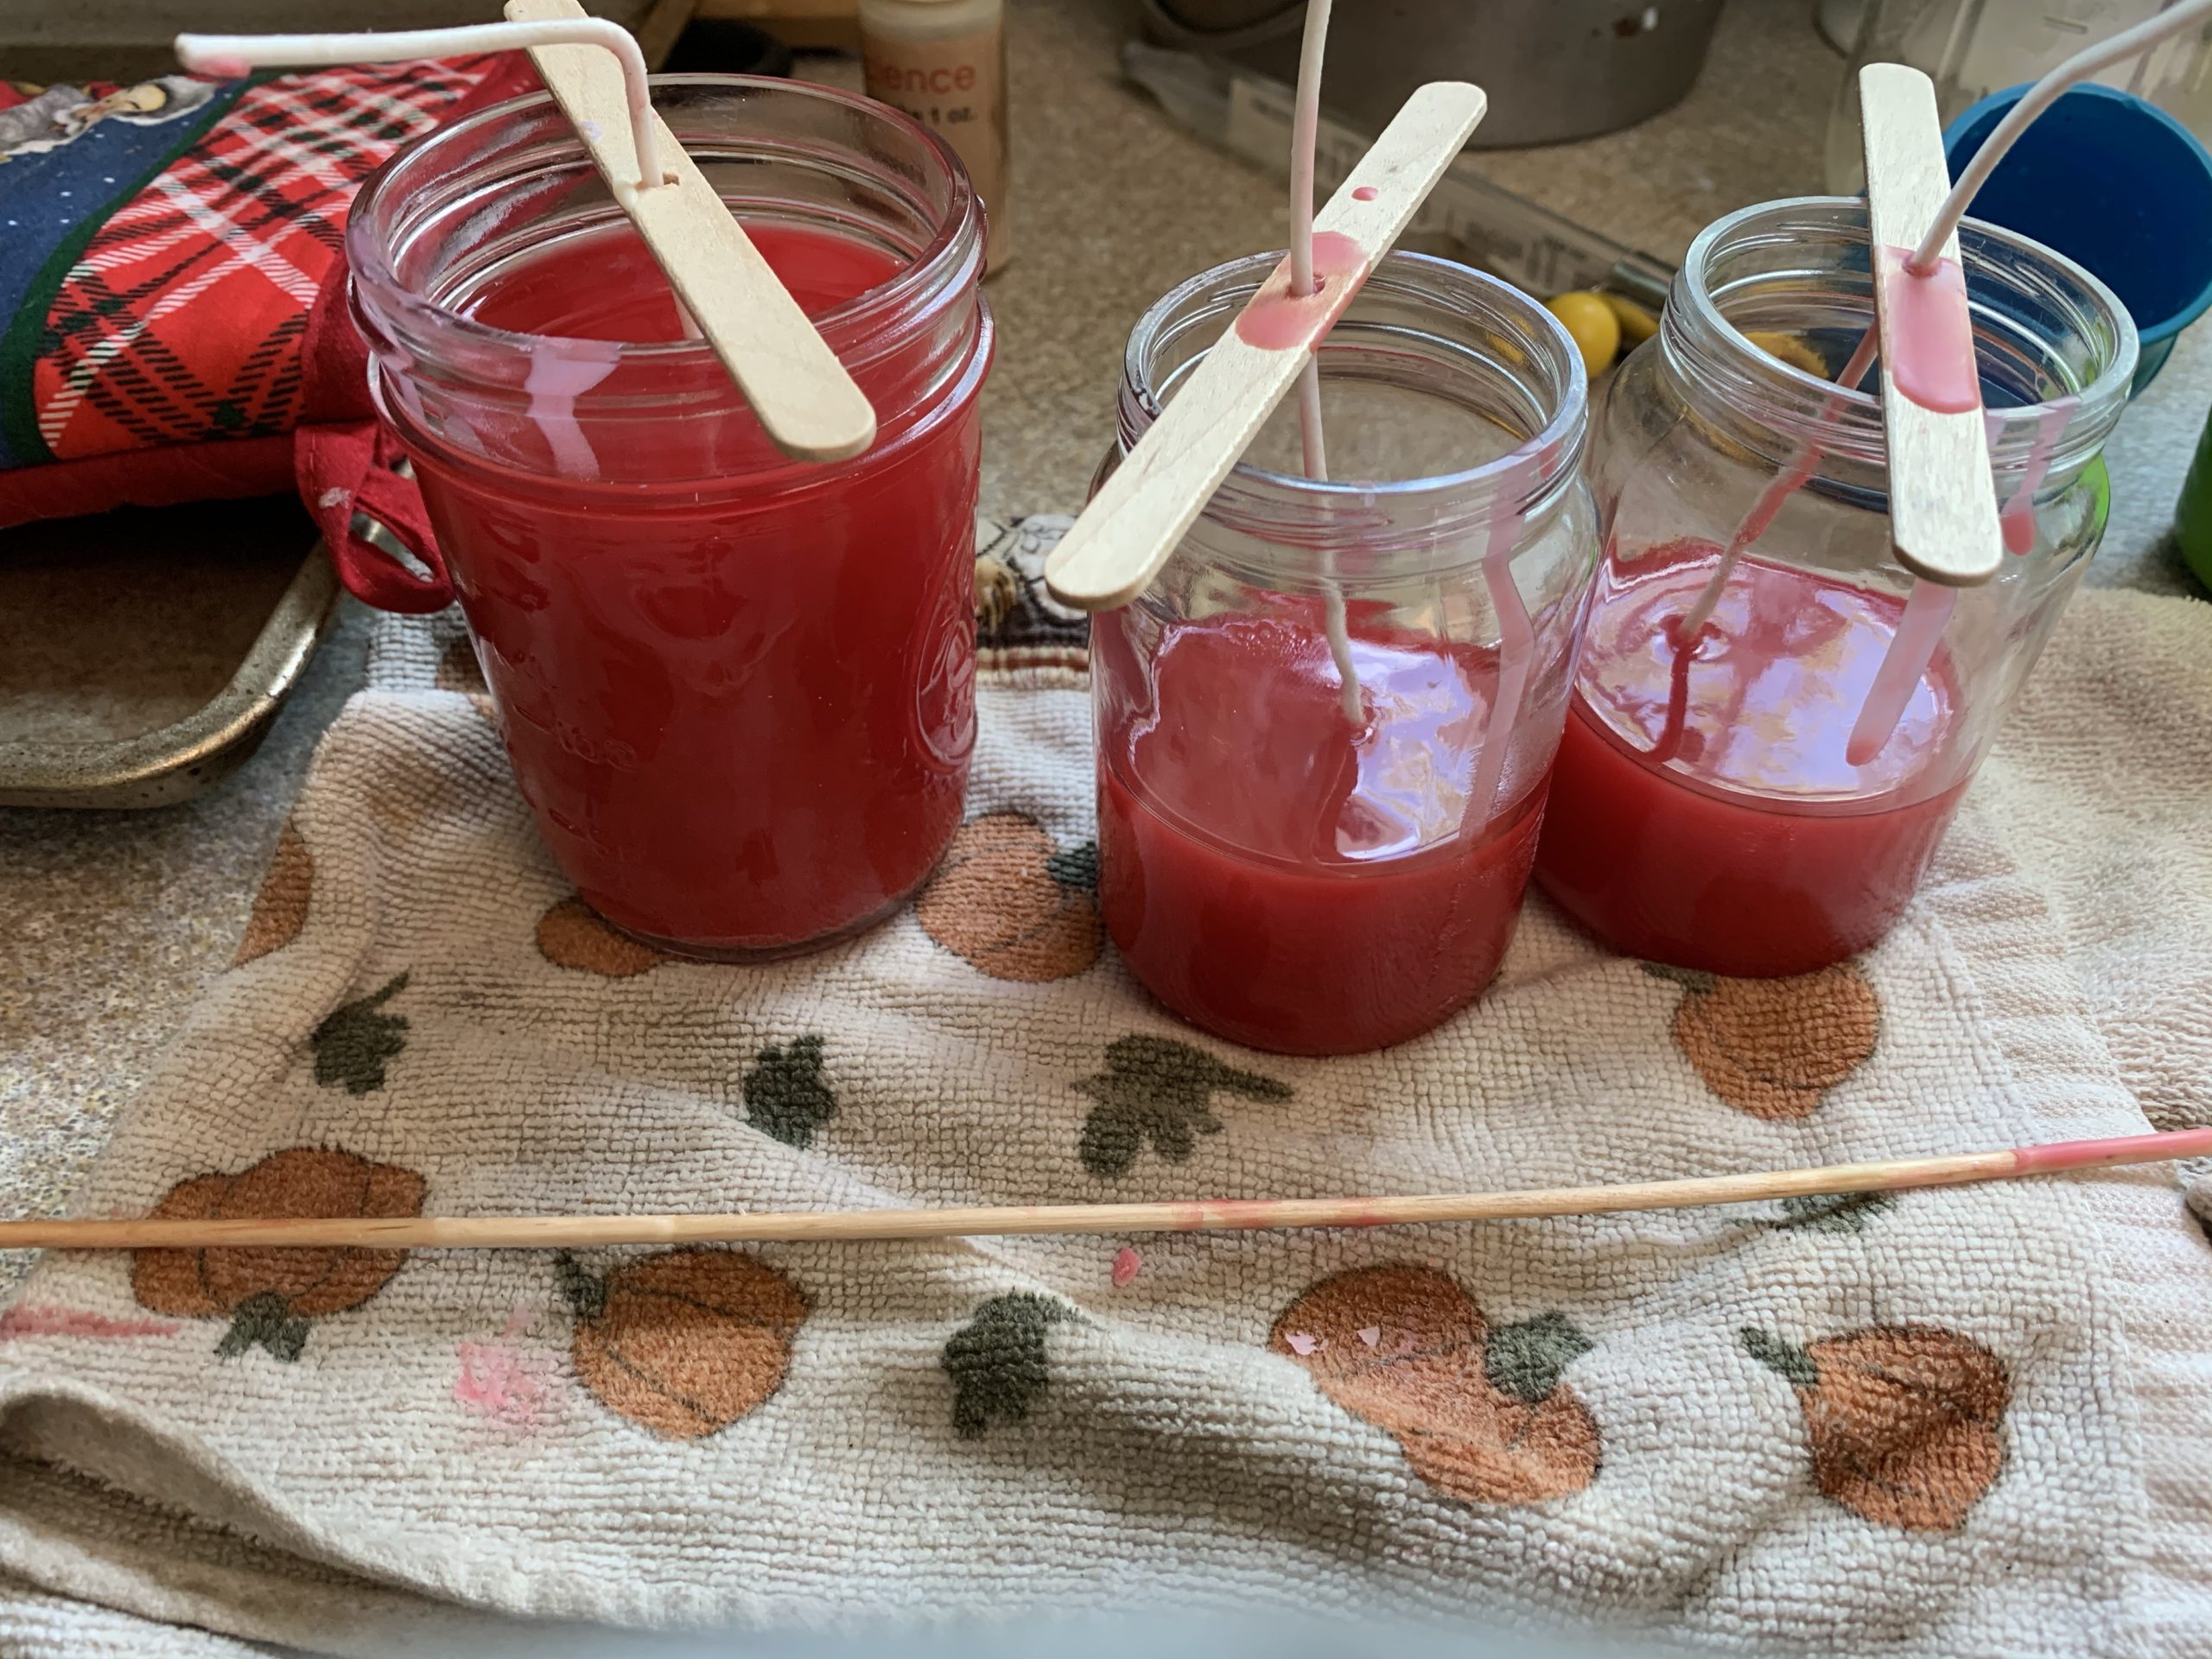
Next, I had little jars I had previously saved from baby foods that we could use for candles. Make sure its a glass jar and not plastic! We also had Popsicle sticks, wicks, and a boiling pan and thermometer for melting the wax. We have small holes in the Popsicle sticks, but you can also wrap it around the stick if needed. Have your container and wick ready.
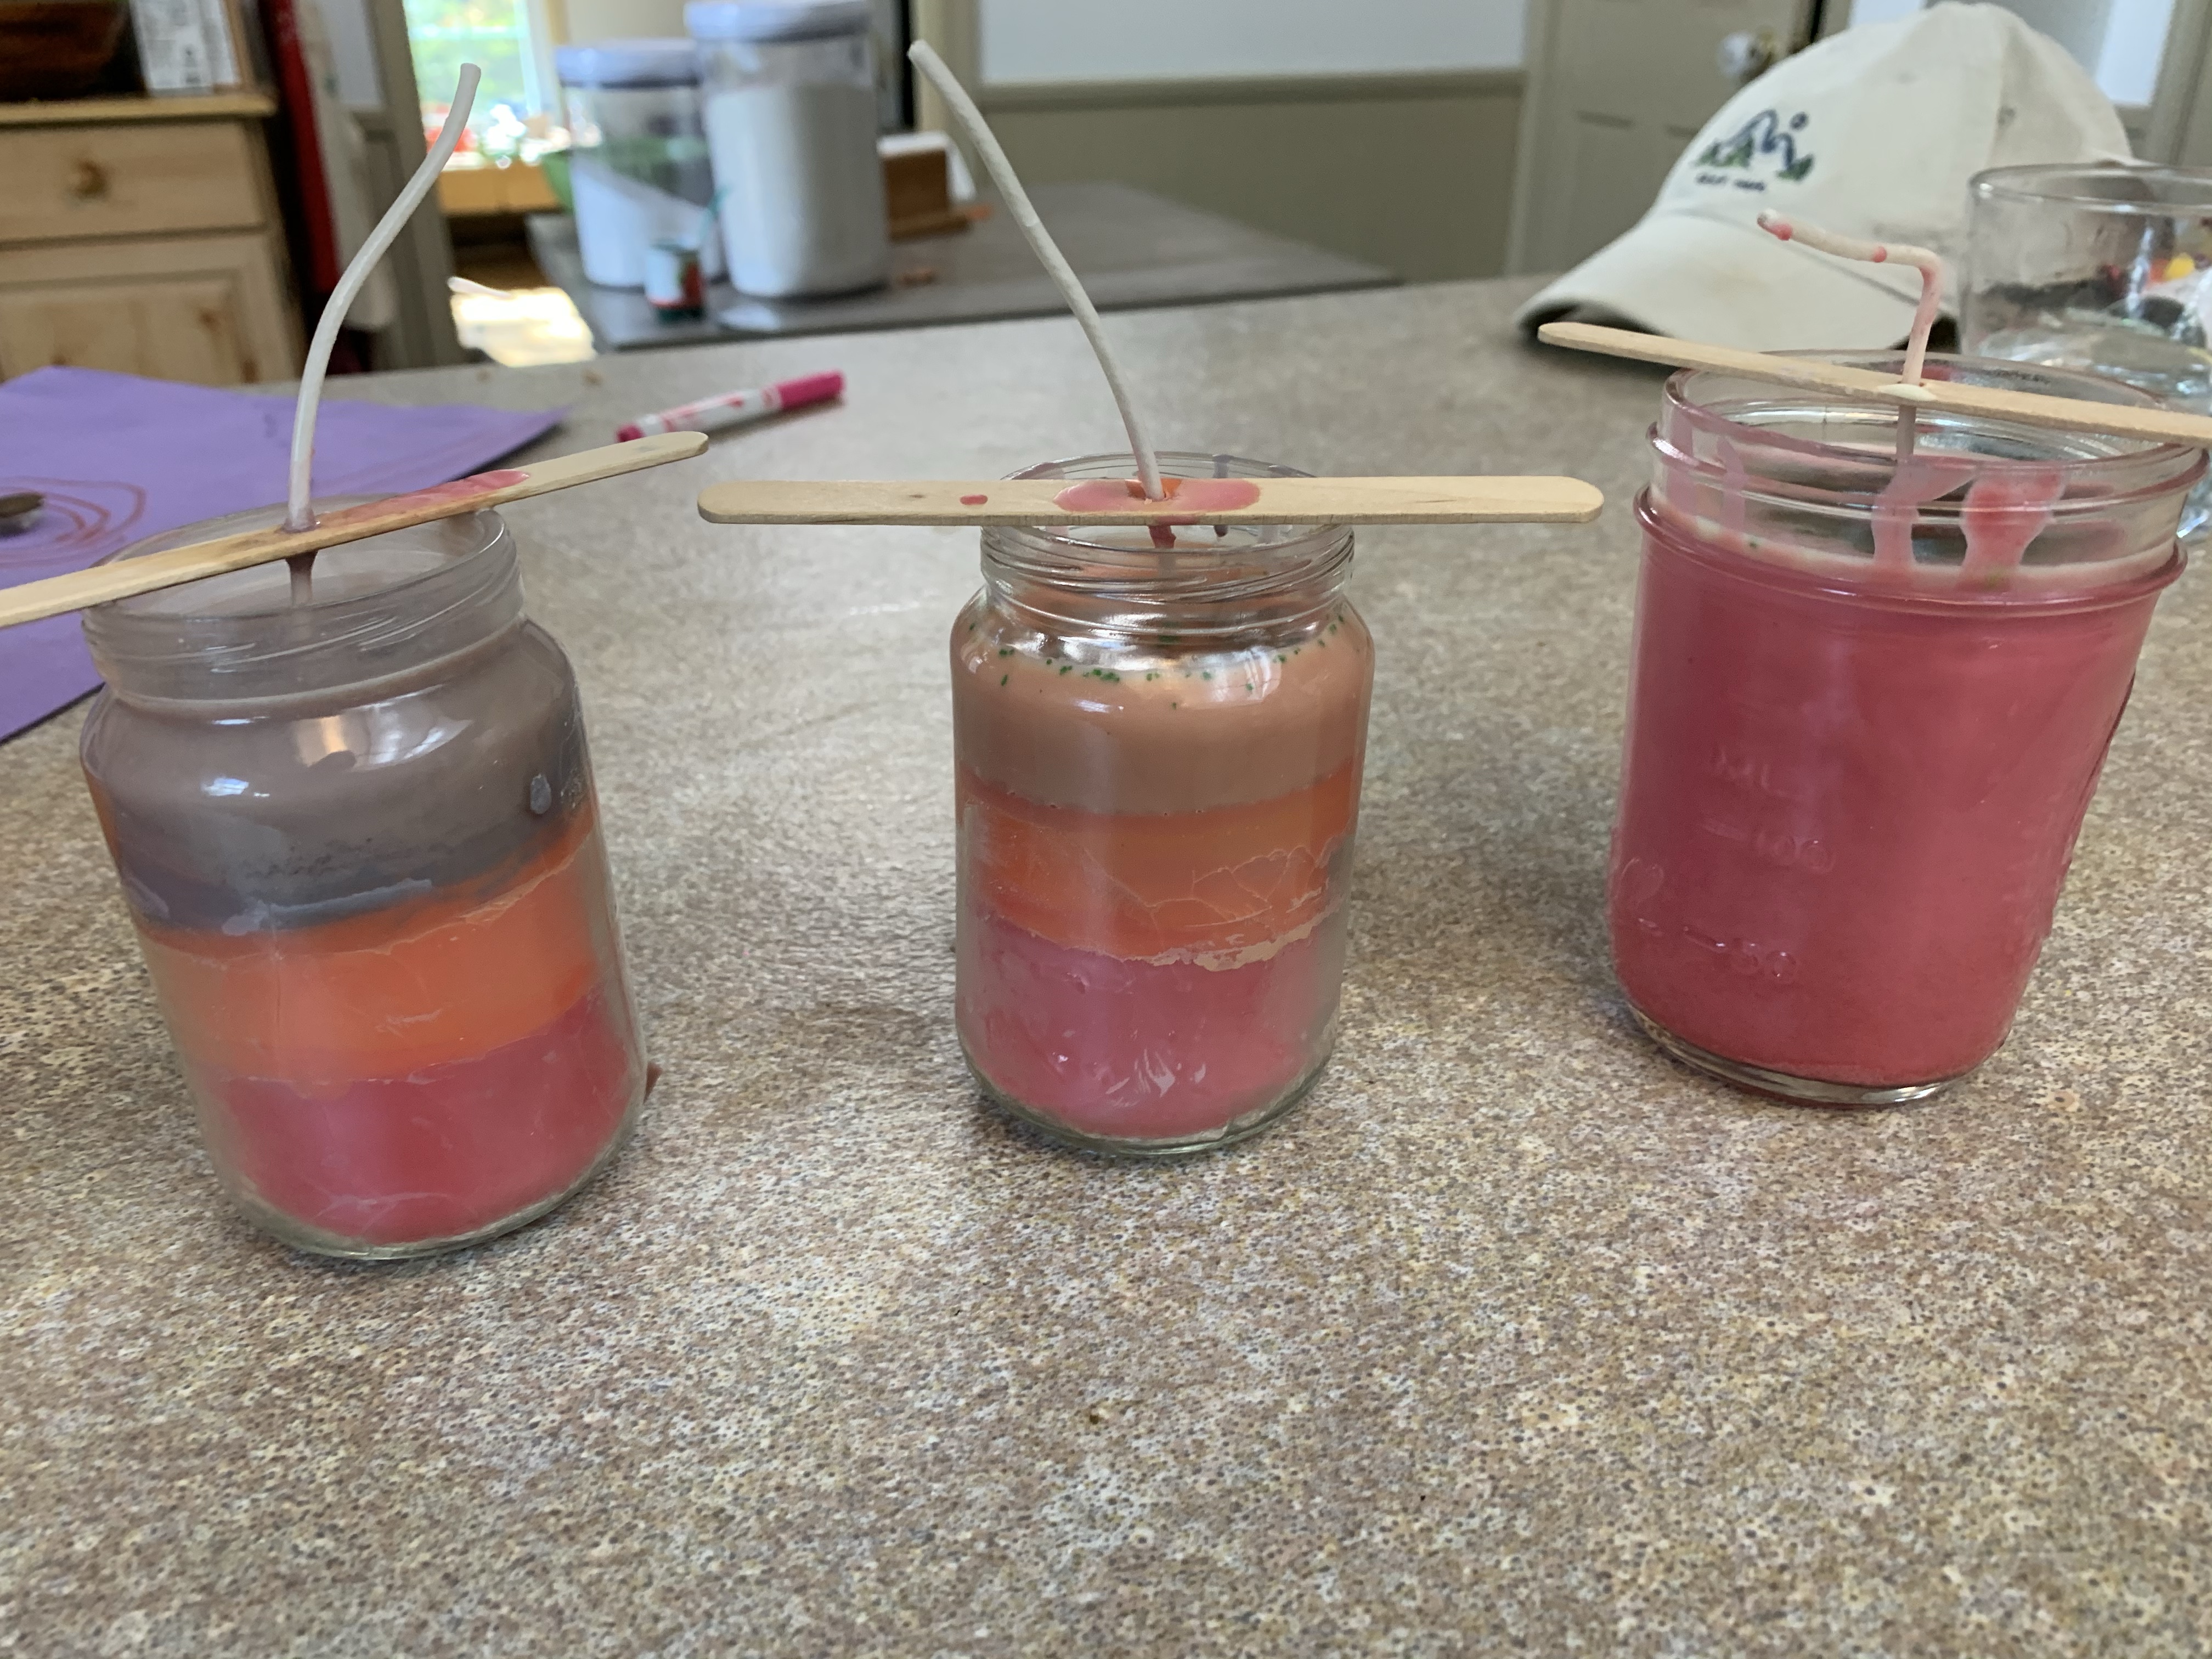
Next, decide if you are going to do just one color candle or multiple. If you choose to do multiple you have to let the candle wax dry in between which can take a while. I ended up getting a big pan of ice and putting it around the outside of the candle after pouring the wax in order to cool it quicker.
Another factor is if you want a scent. If you have different scents you can add them, or you can use essential oils to add a scent.
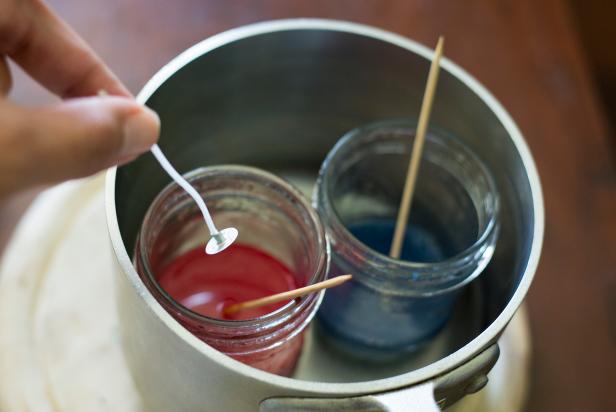
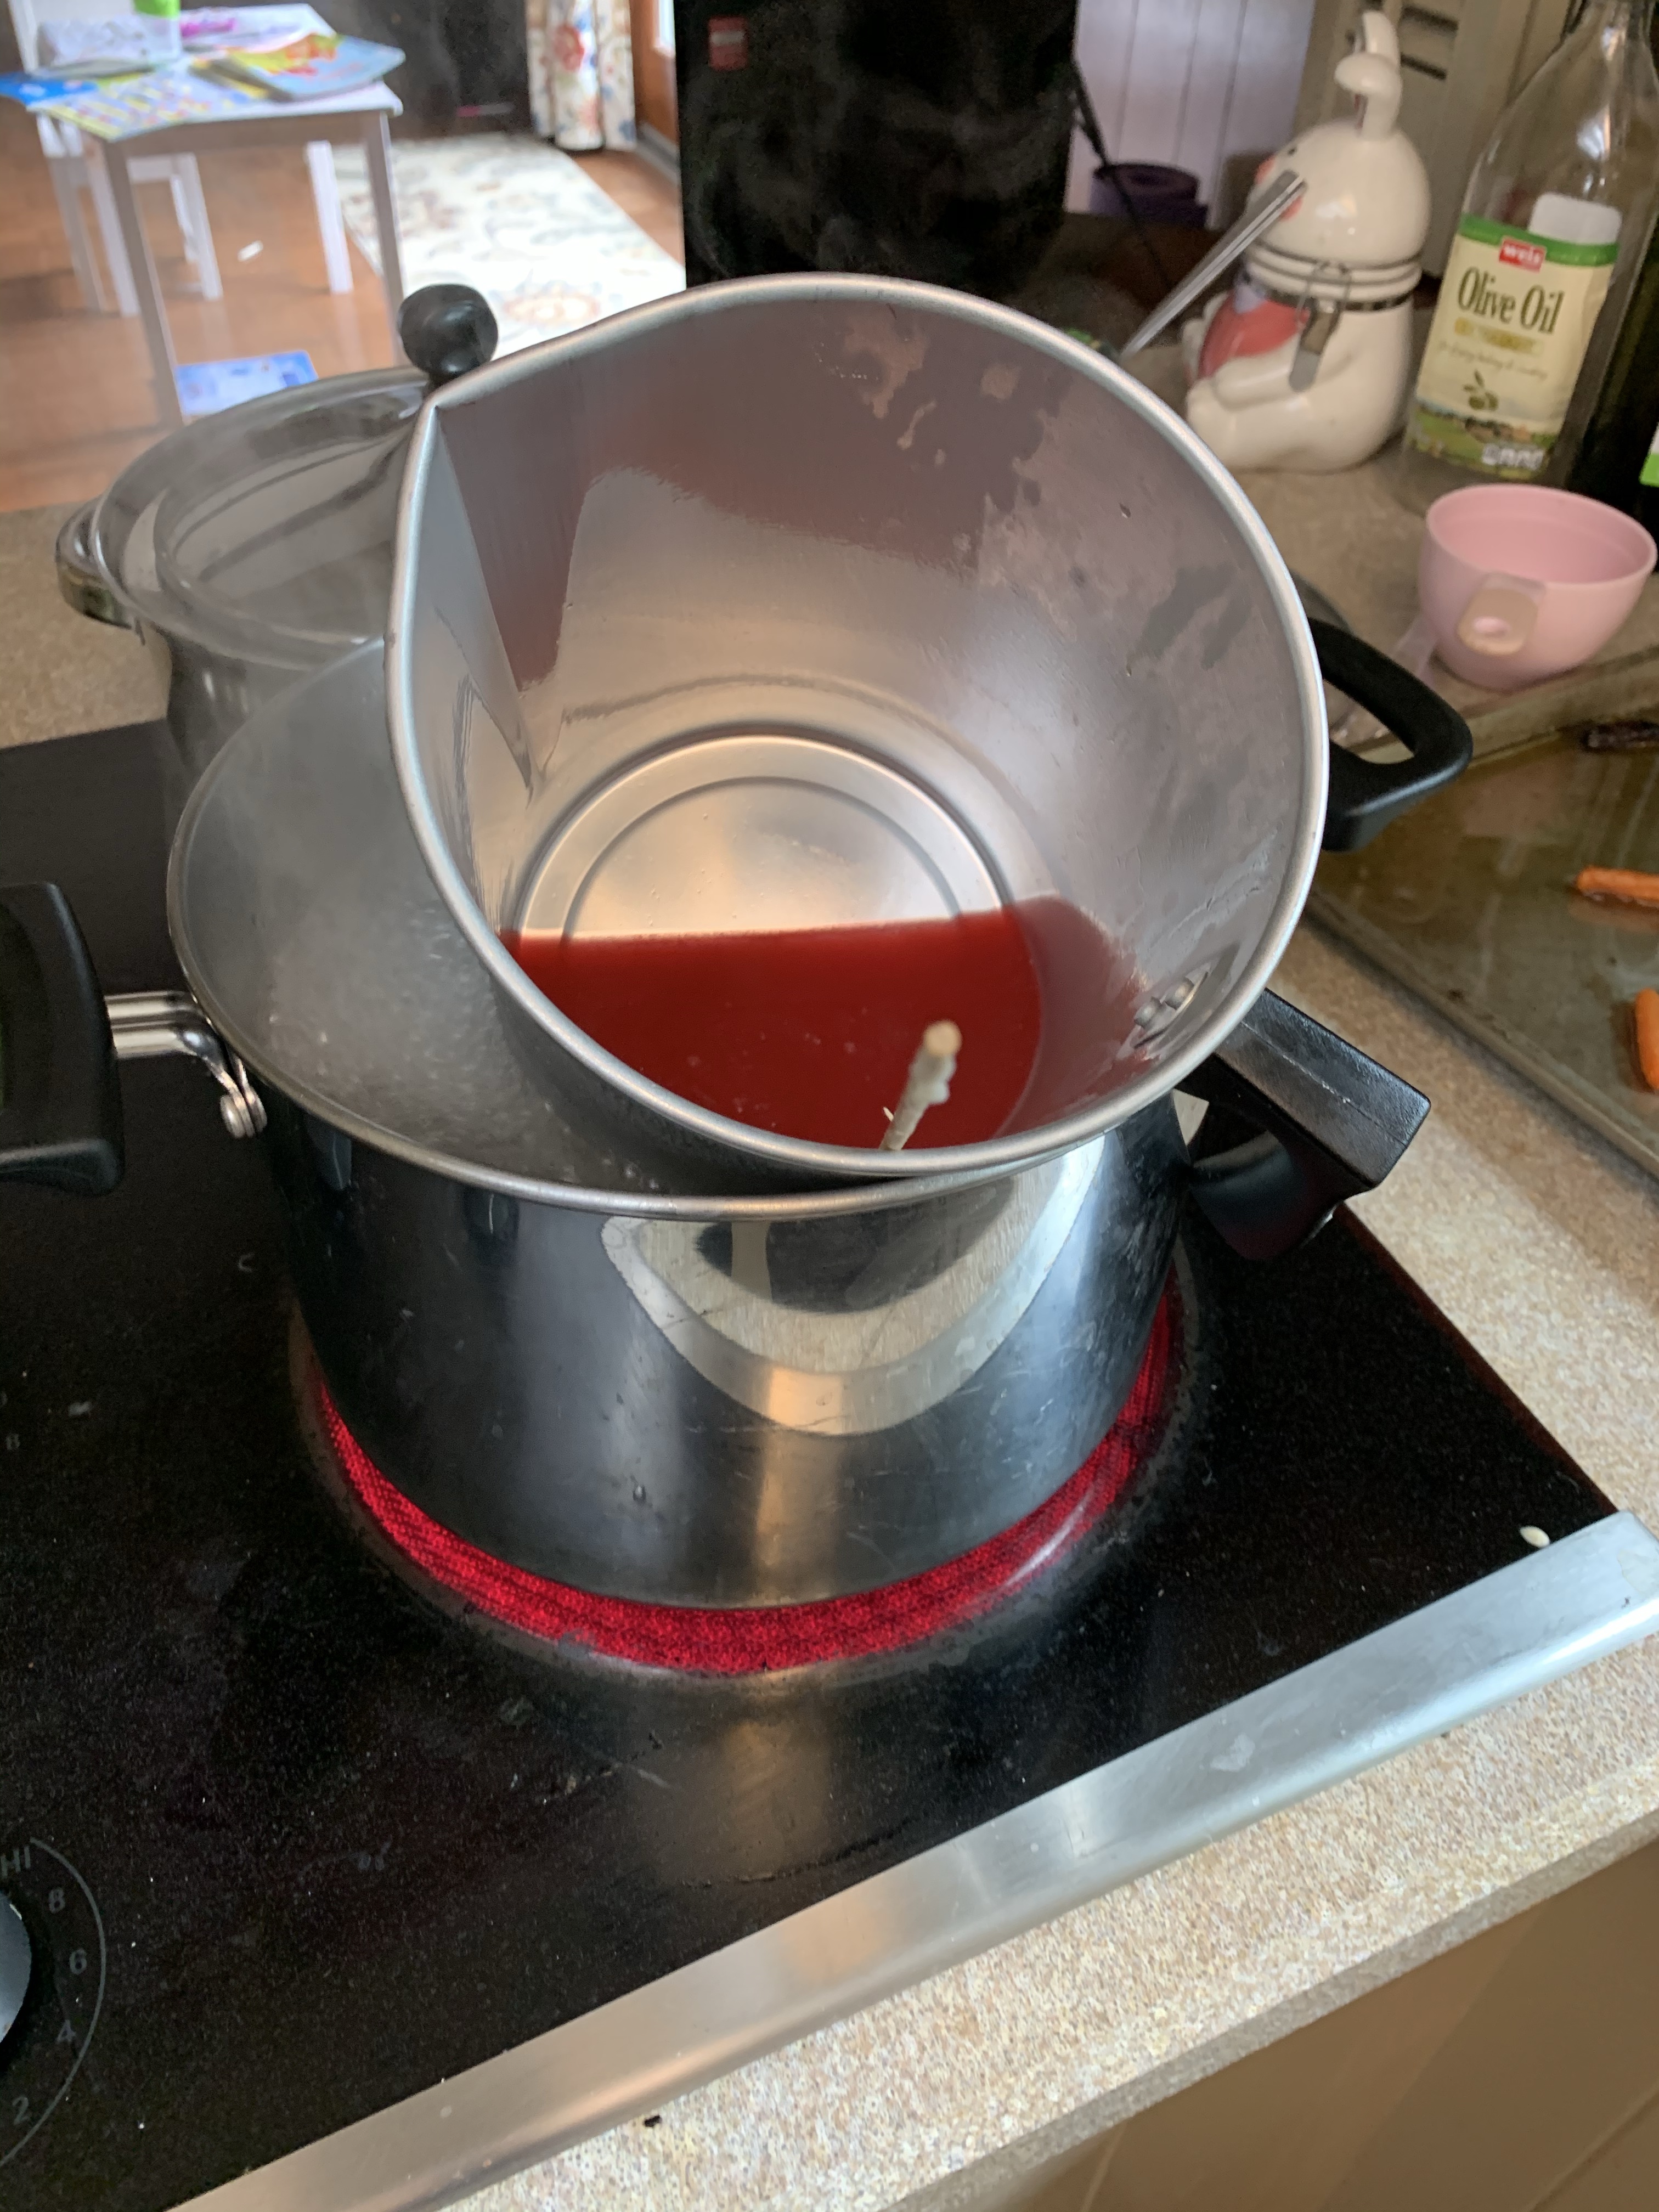
Now, you do need some regular wax as well! I happened to have some white wax shavings from a long time ago we used and added the crayons for coloring. You can also use the small tea candles that are cheap at the store and take them out of the tin wrapper. Depending on the size of your jar you are filling, you will need a different amount of candles. We melted the wax and coloring in the special candle pot we have and poured it out into the containers. Some people also like to put the wax and crayon right into the jar and put 3 inches of water into a pan and place the jar in the pan and let it melt. Warning–your jar will get very hot this way! Also make sure u have your wick in when you do it this way. If you want to try that method I found a great website for you to follow Click here
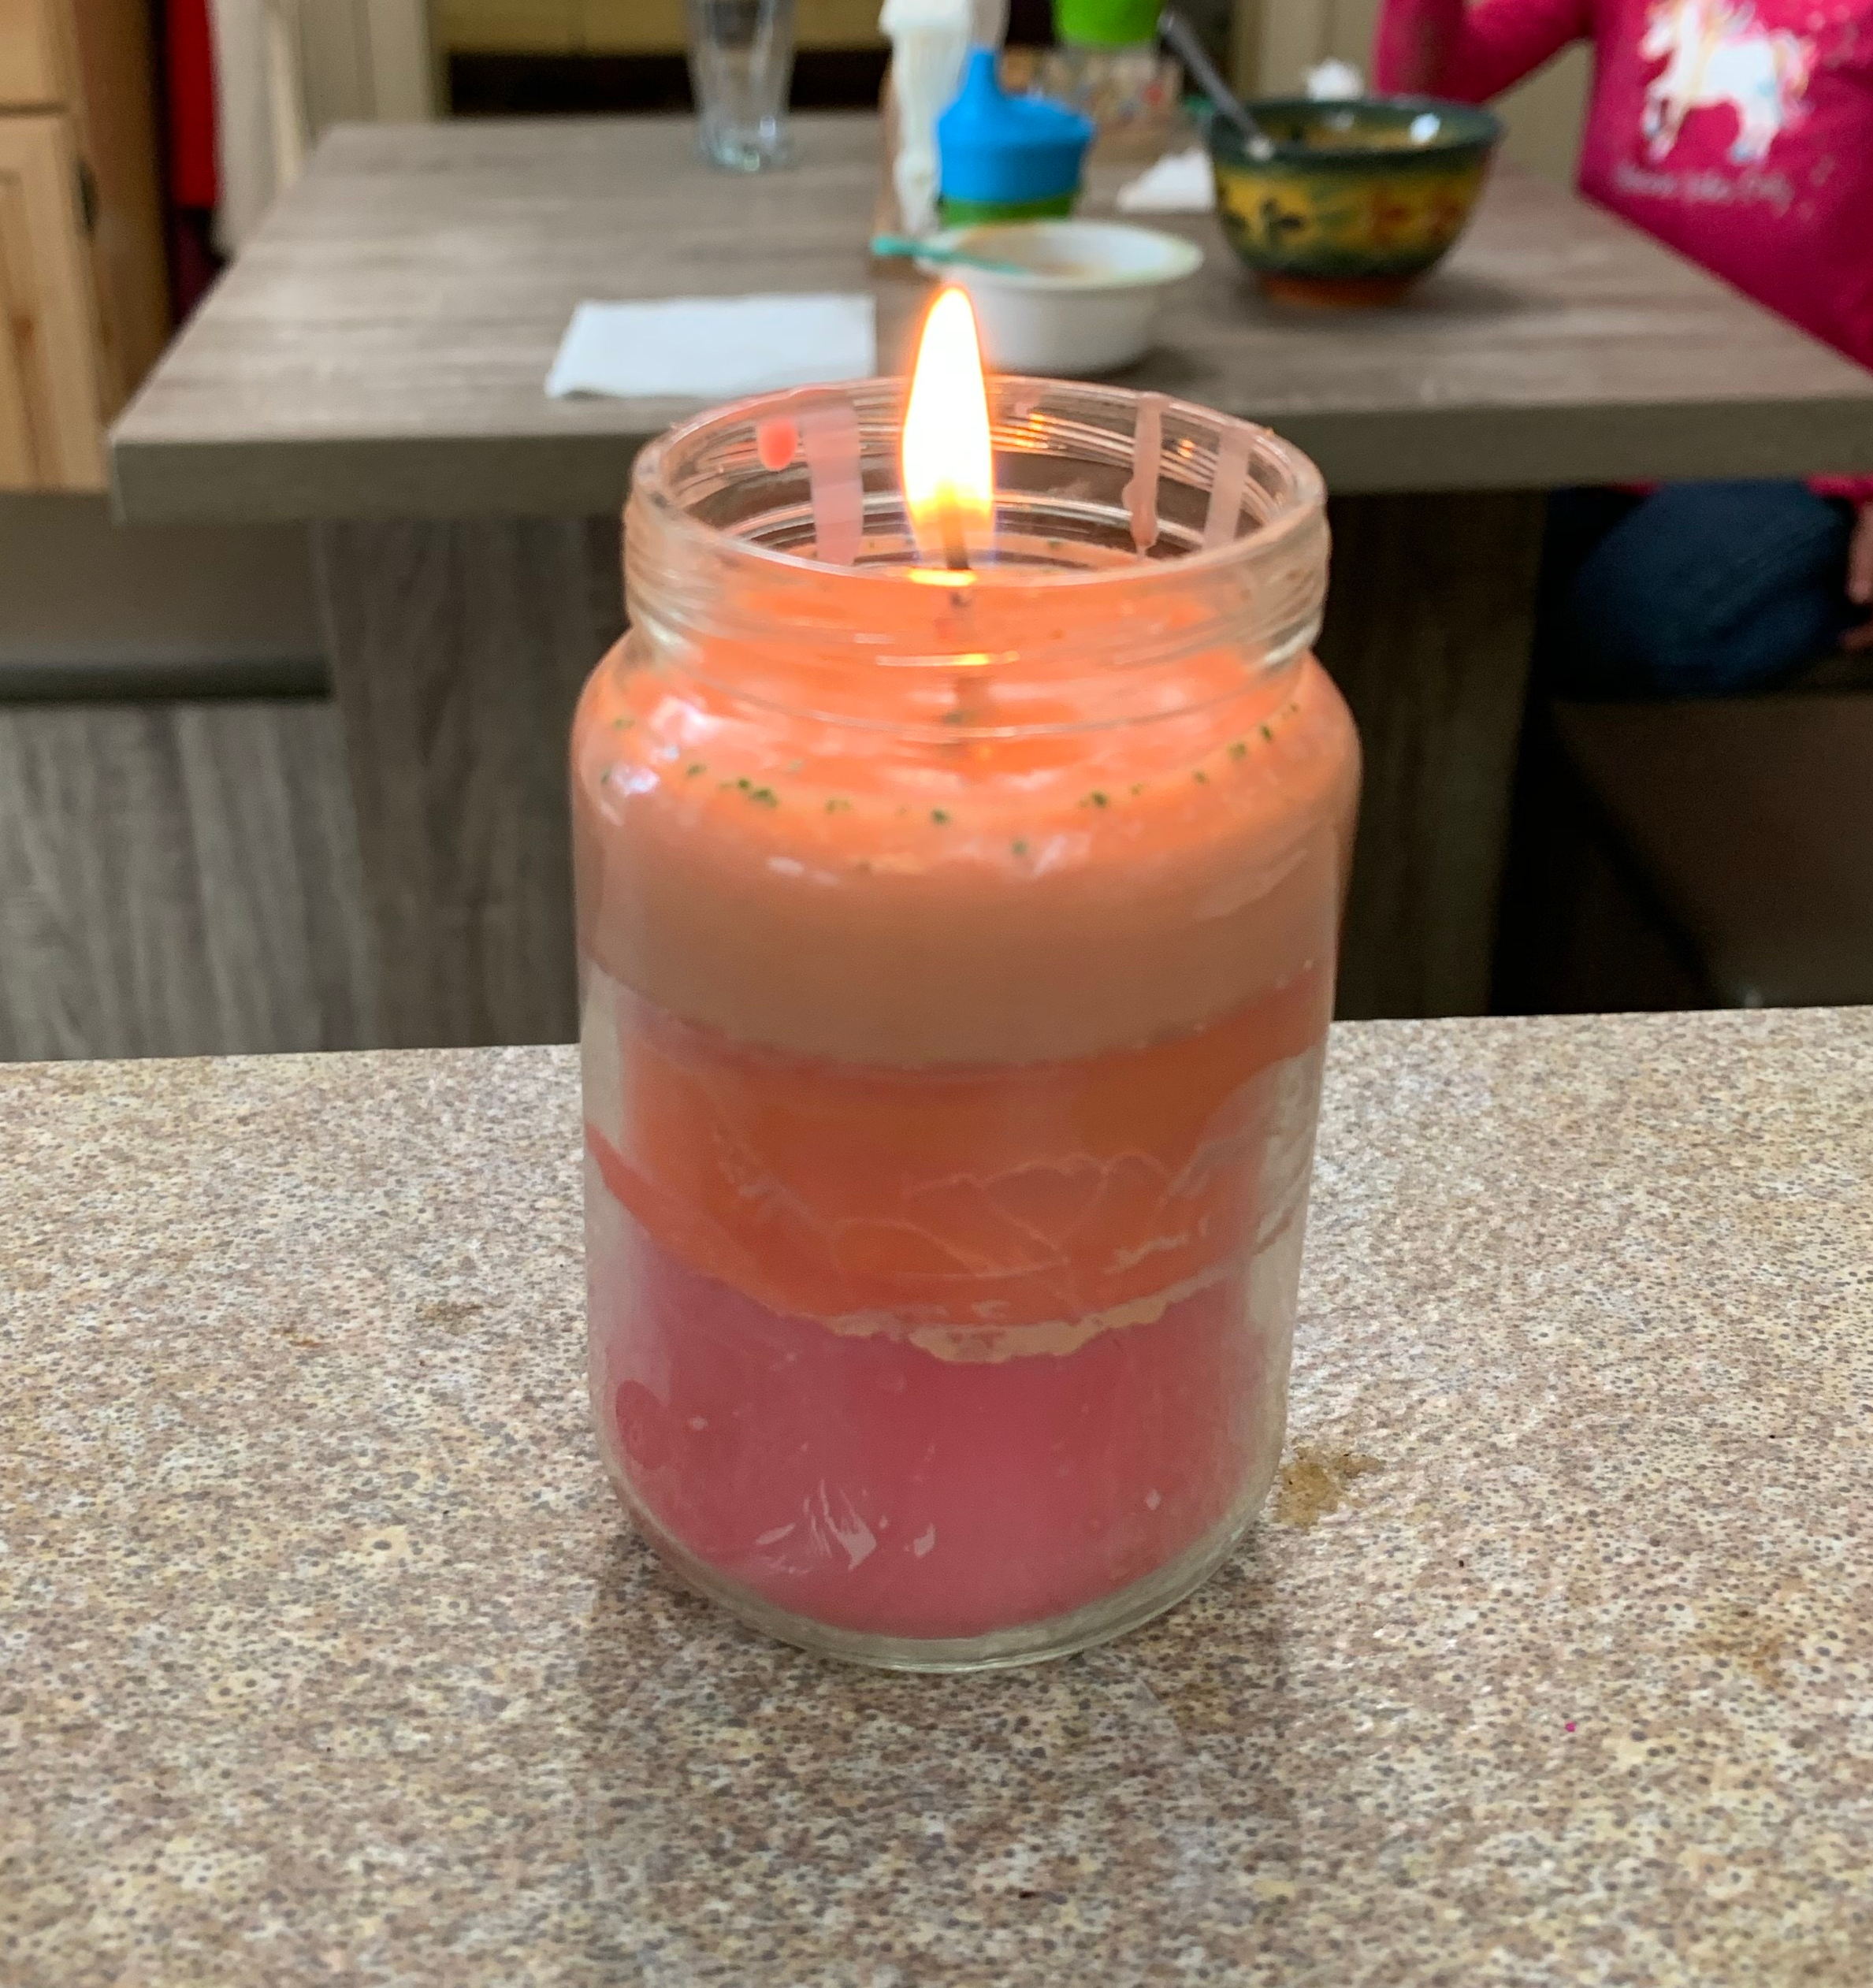
I tilted the candle wax pan for you to see. As you can see the pot below has water in it and it melts the wax and crayon. When its all liquid you can pour it directly and carefully into your jar and make sure your wick is centered. Then you allow it to dry!
Following that, if you are doing another color, repeat the melting process and make sure the bottom layer is completely dry before adding the next color in the candle.
After its all dry you can cut your wick to the proper size and enjoy your candle! Of course you should light the candle and not the kiddos!
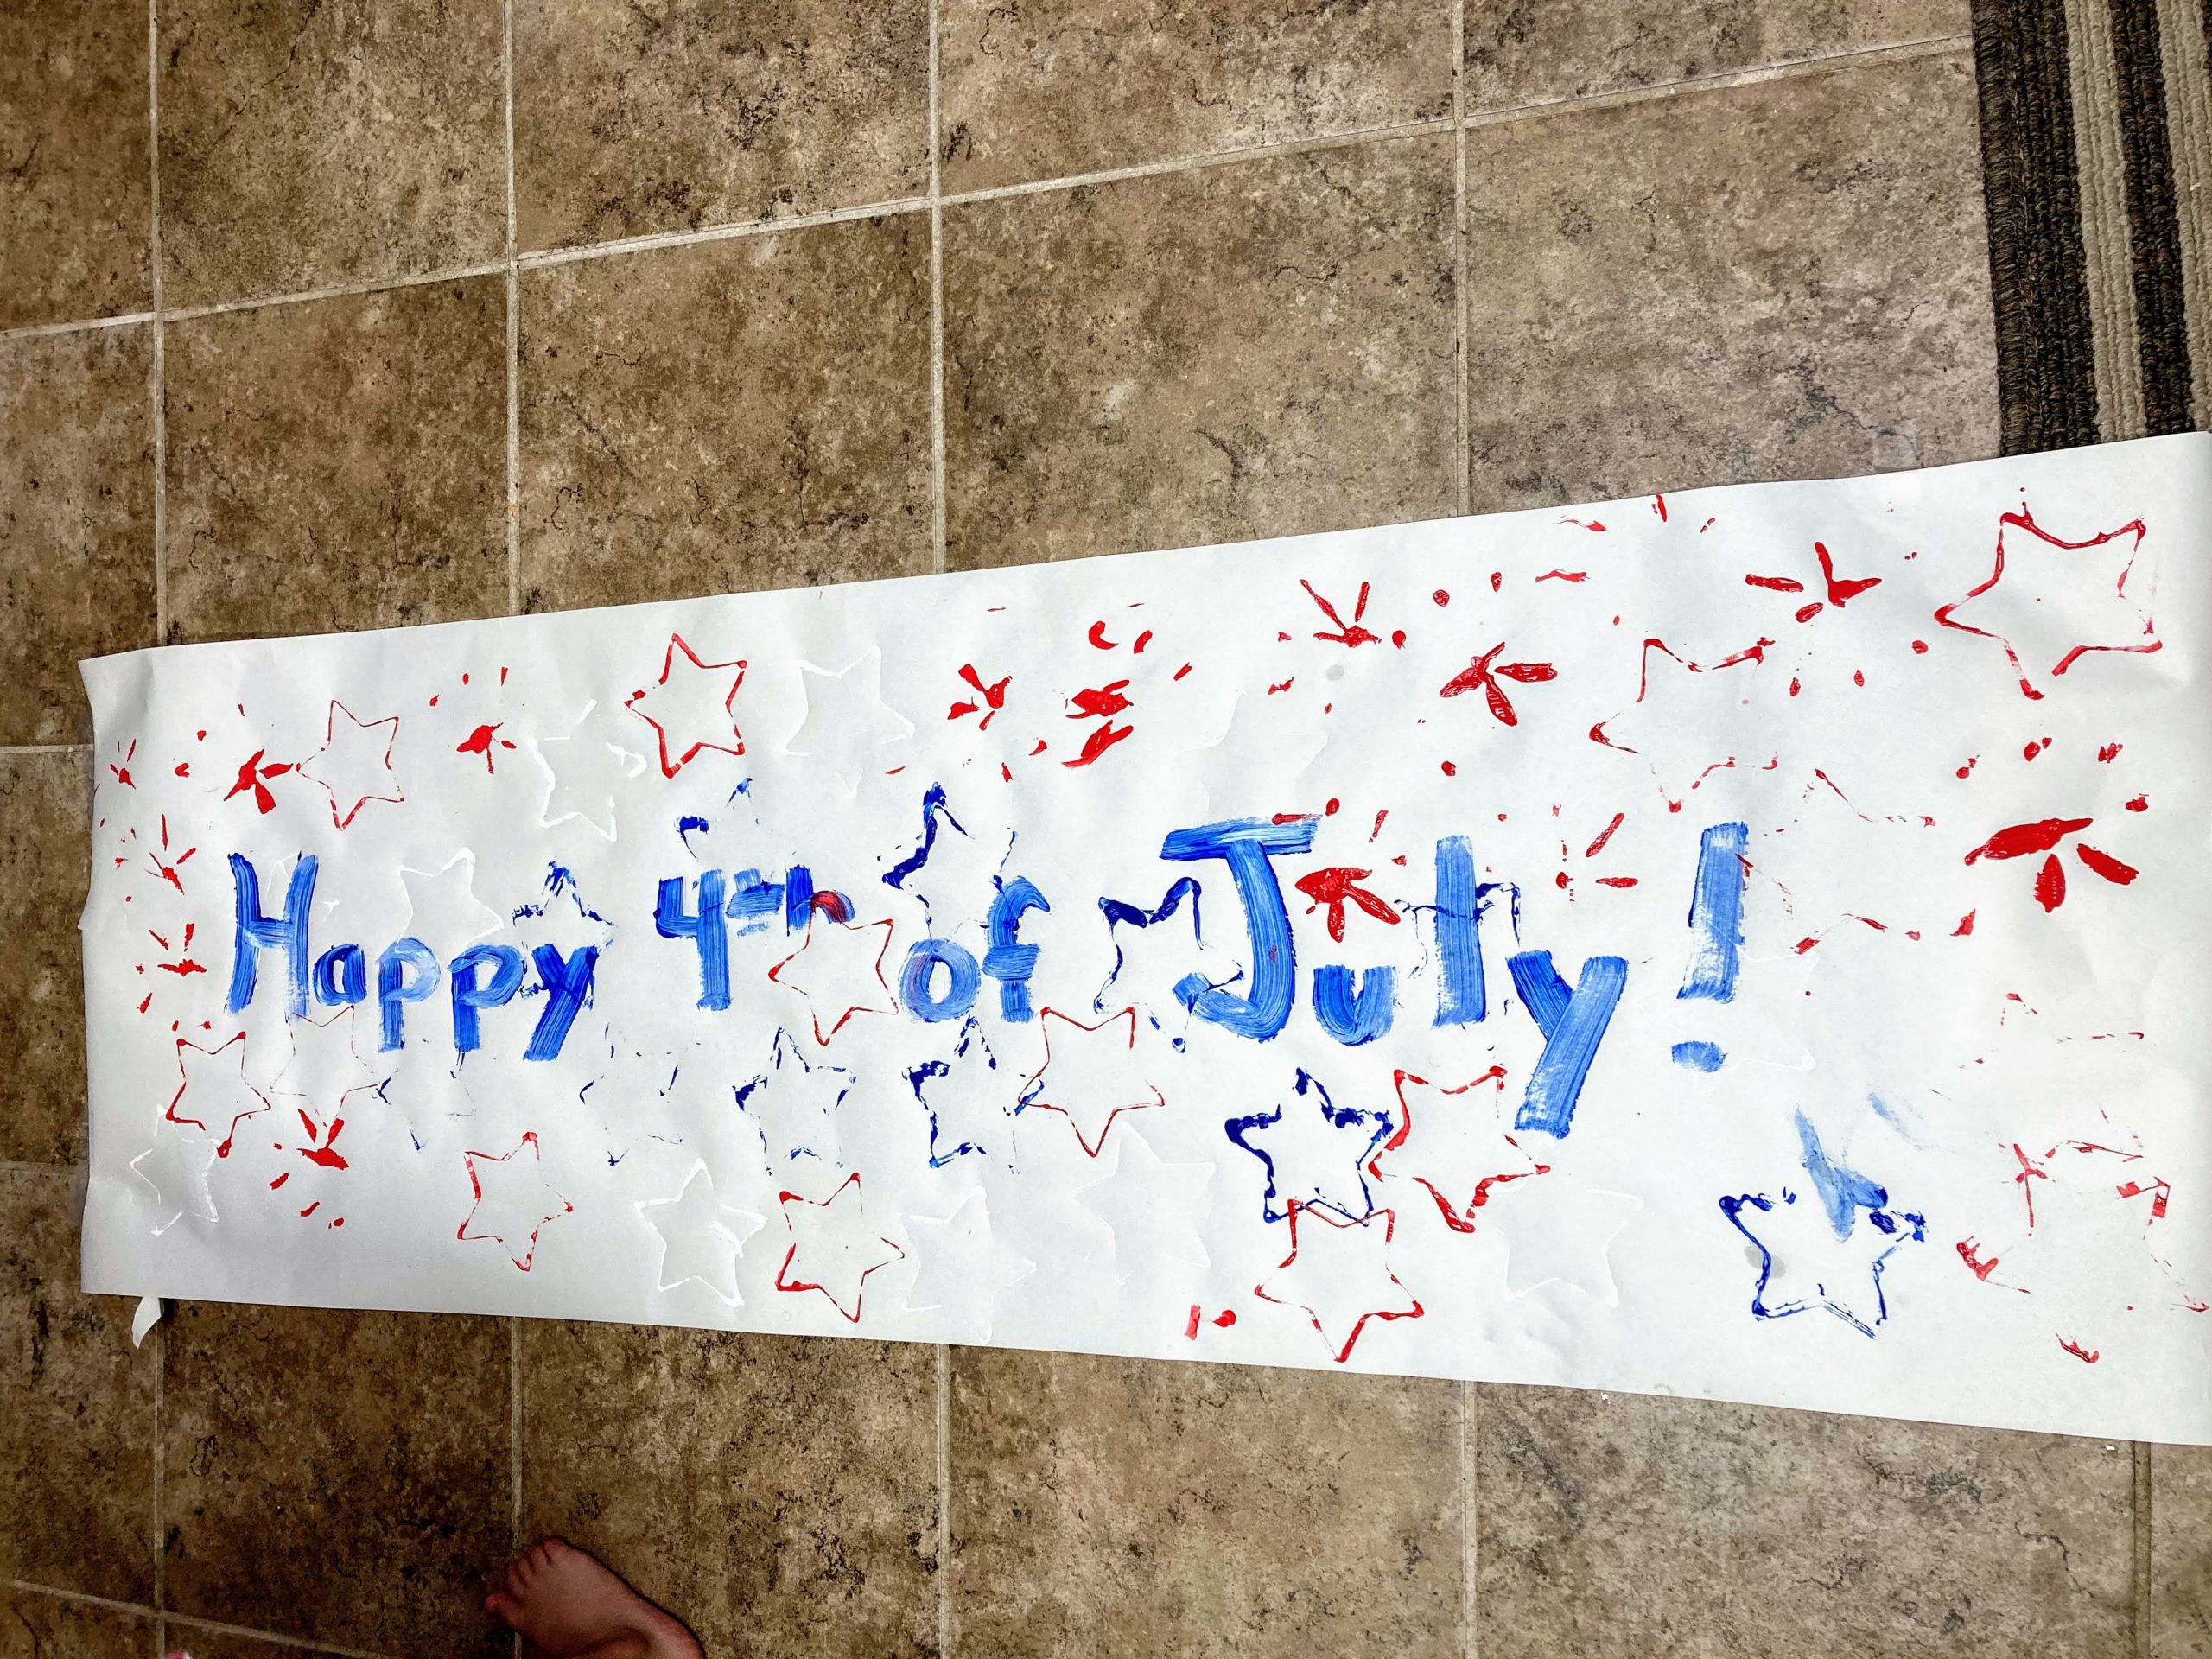
Whether you are celebrating in quarantine or with a small group of people, this banner will be a hit! You can use this activity to make cards, artwork, or even use the stamping to make paper headband hats!
Materials:
Large piece of paper for the banner (we used her easel paper)
Red, White & blue paint
Pipe cleaners
Star cookie cut out (or you could cut a sponge or potato in the shape of a star)
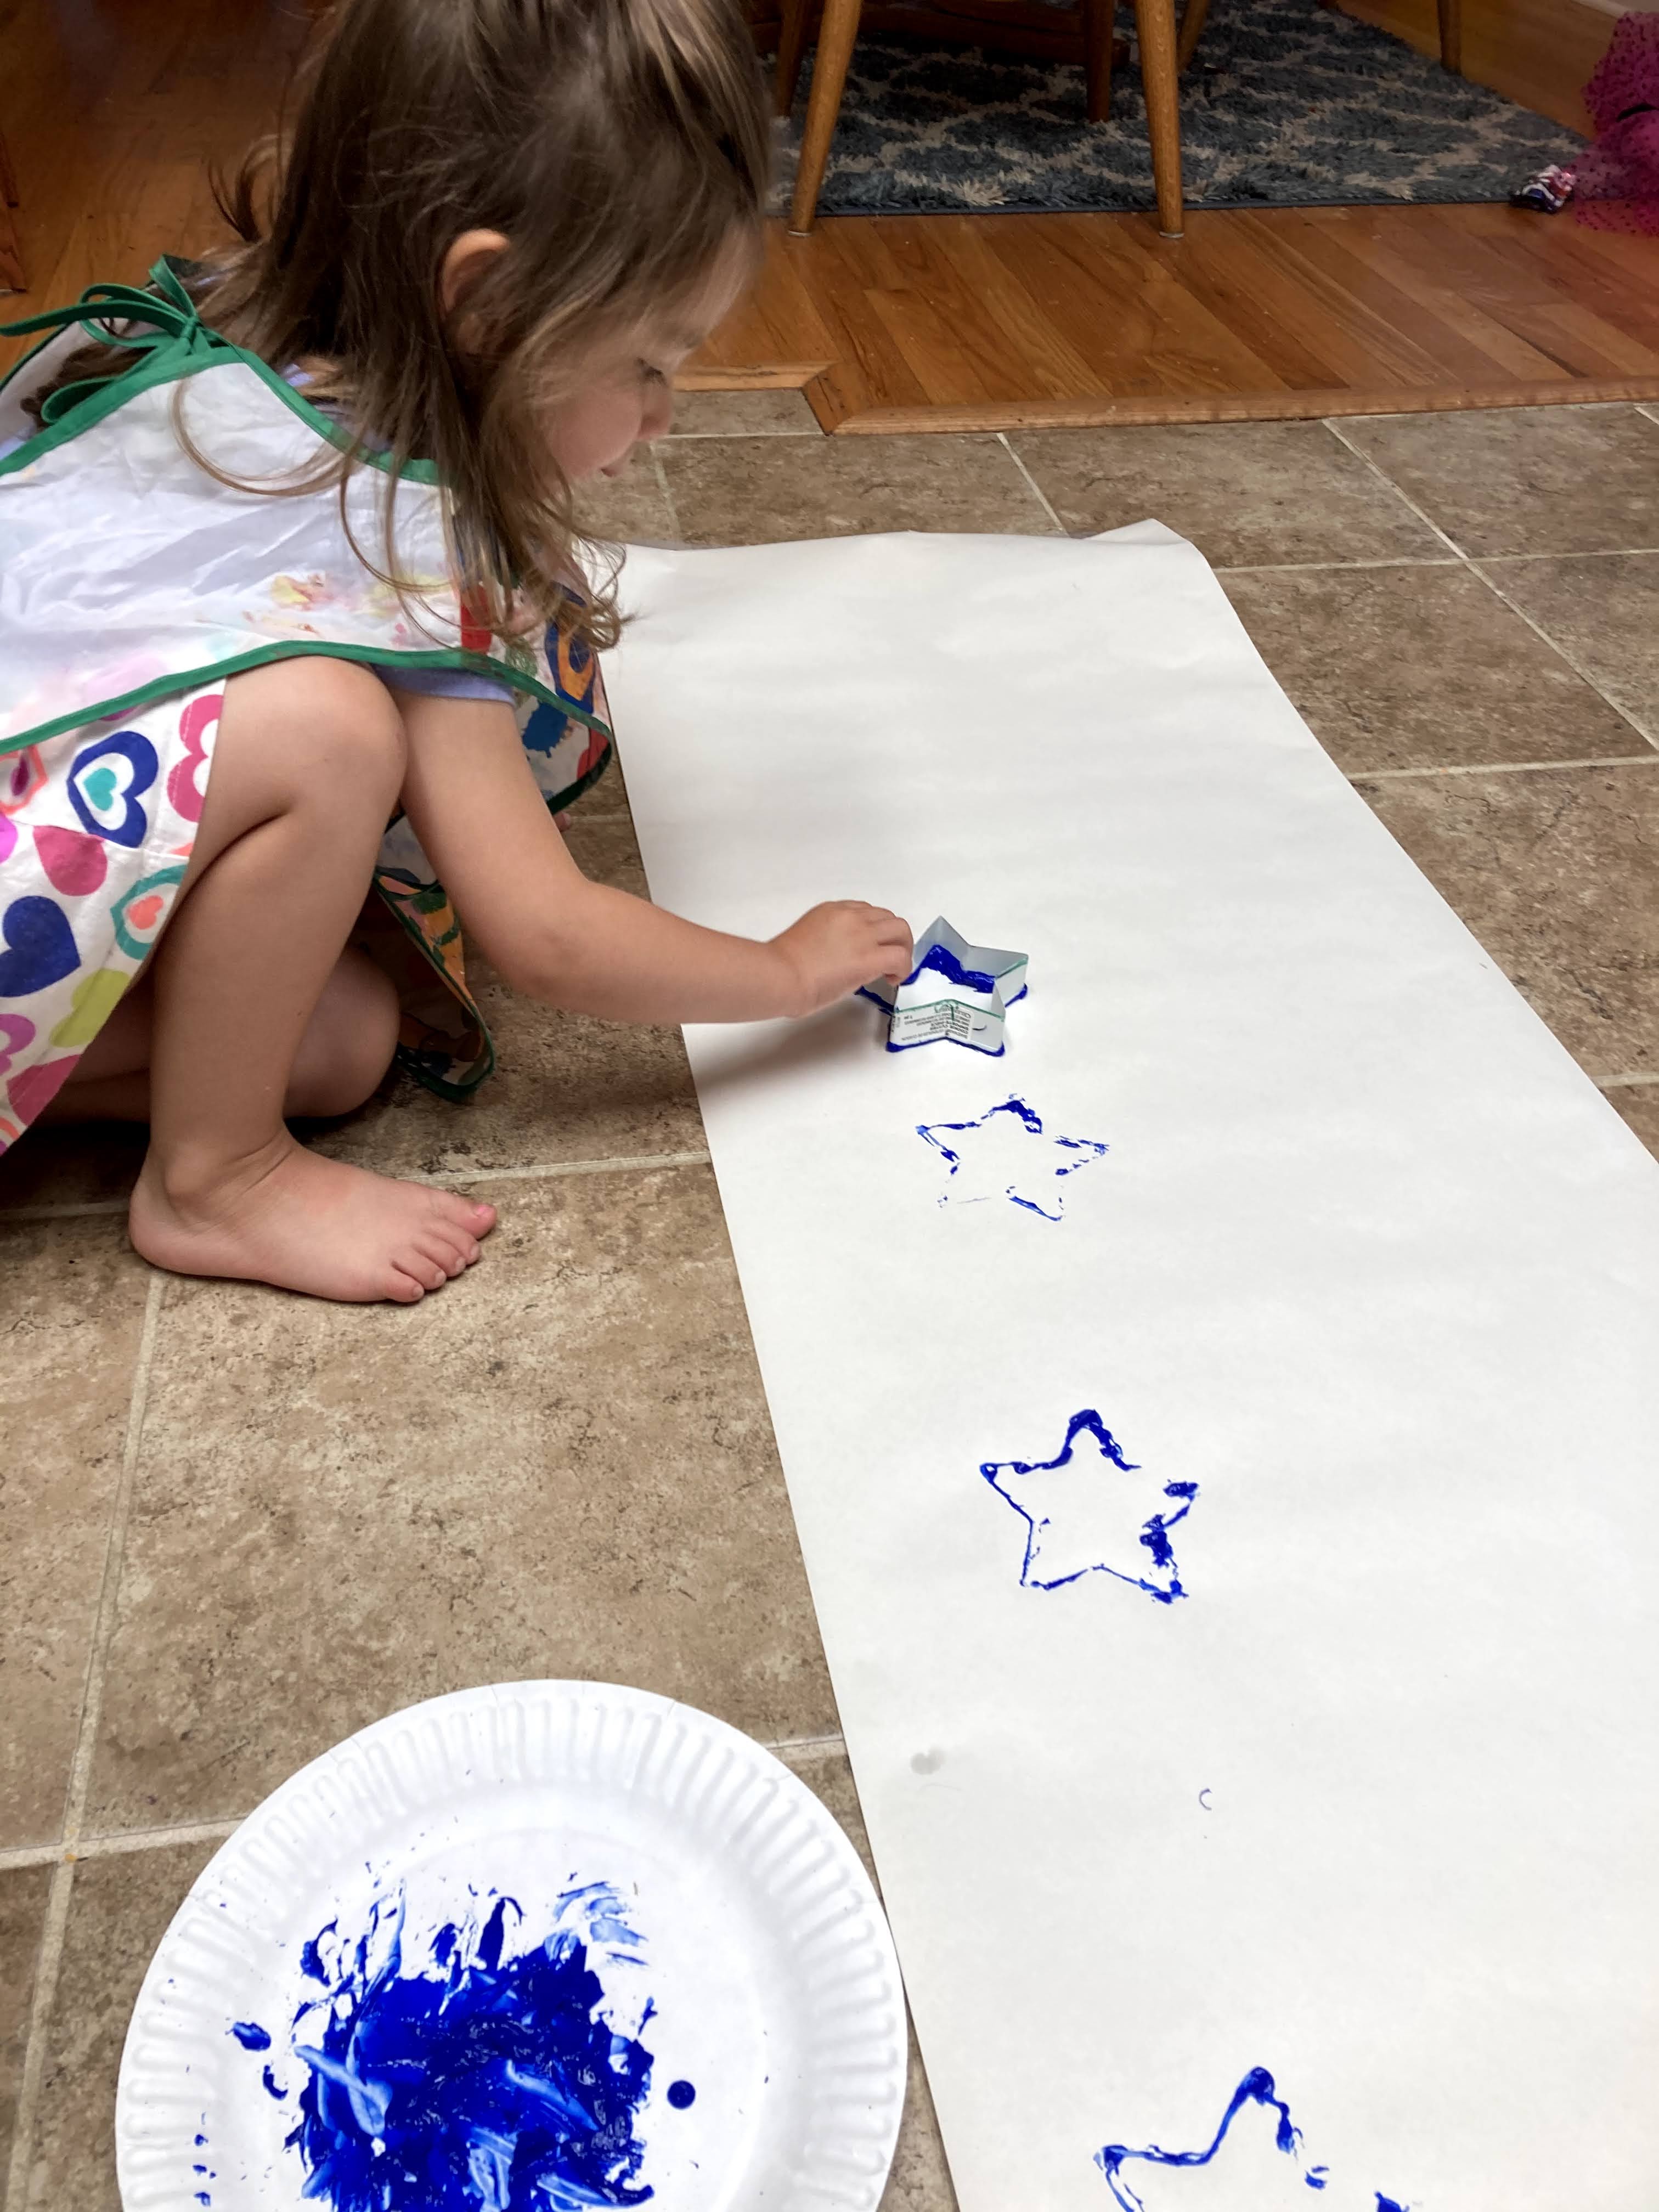
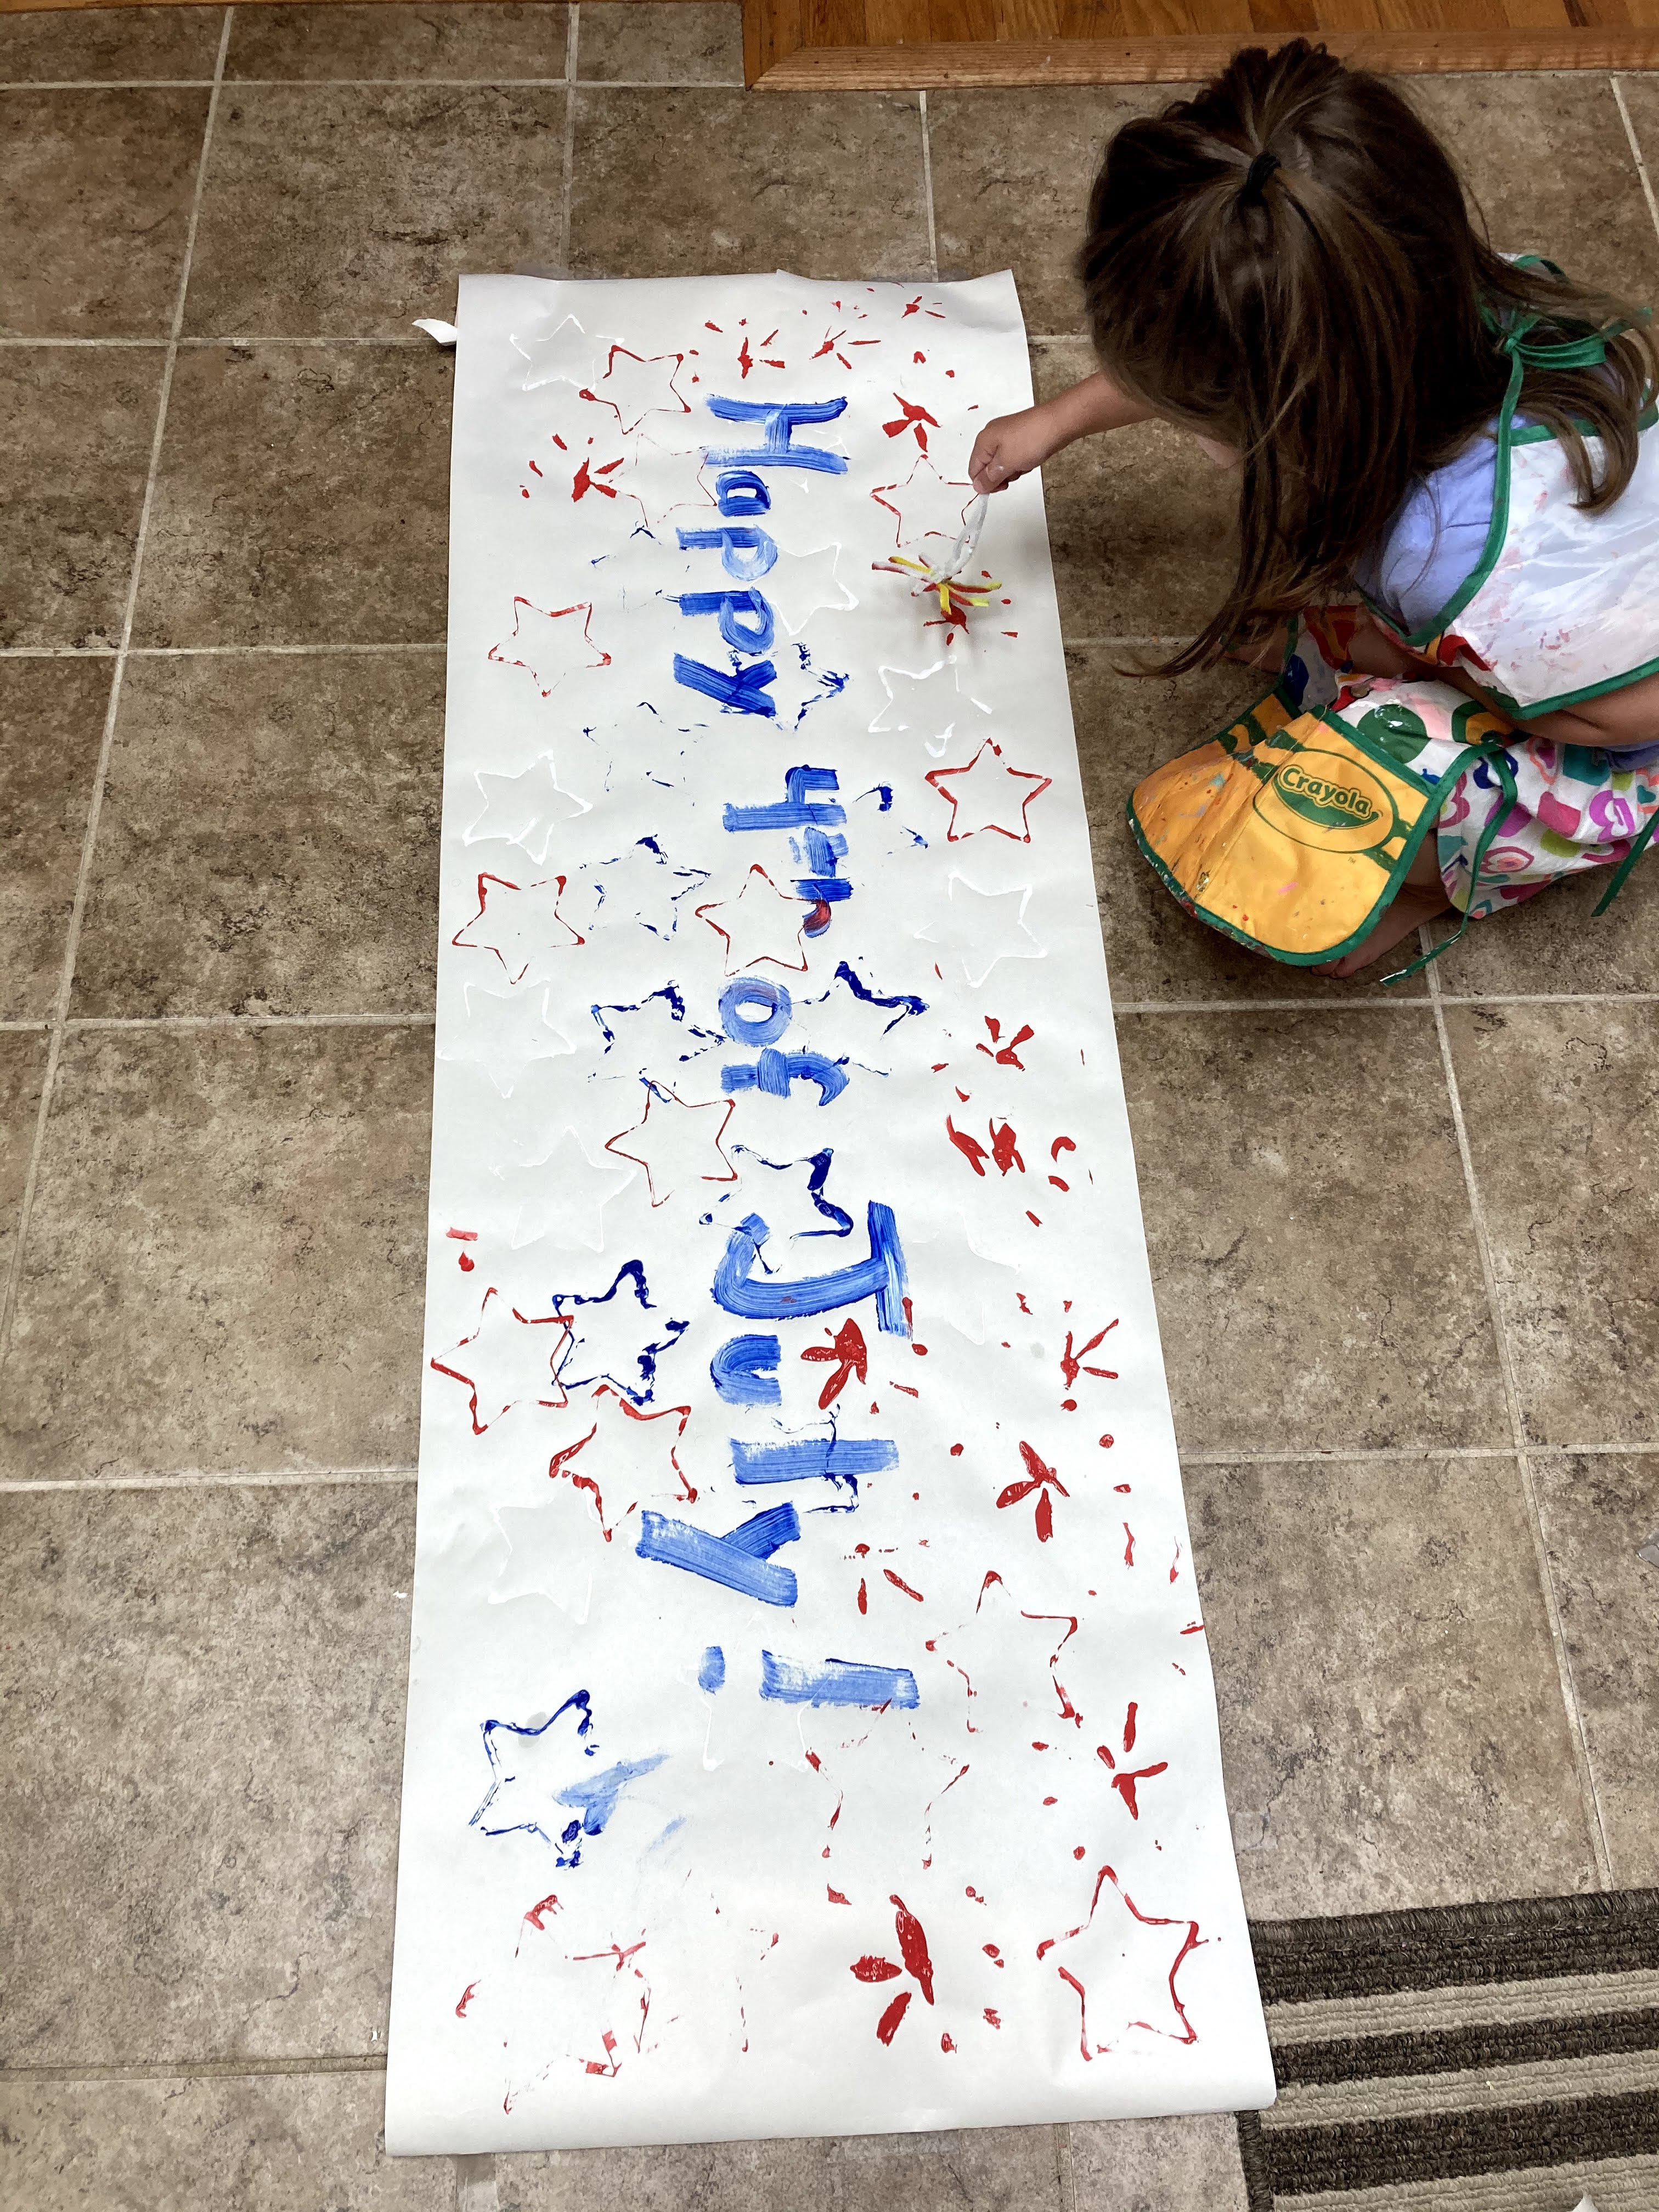
I put paint on a plate and used a star cookie cutter. Madison dipped it in the paint & had fun doing red, white & blue stars!
If you don’t want to make a banner, you can do this on a paper, card, or cut a sheet of paper in half and tape it to the other half to make a “crown” or stars for 4th of July!
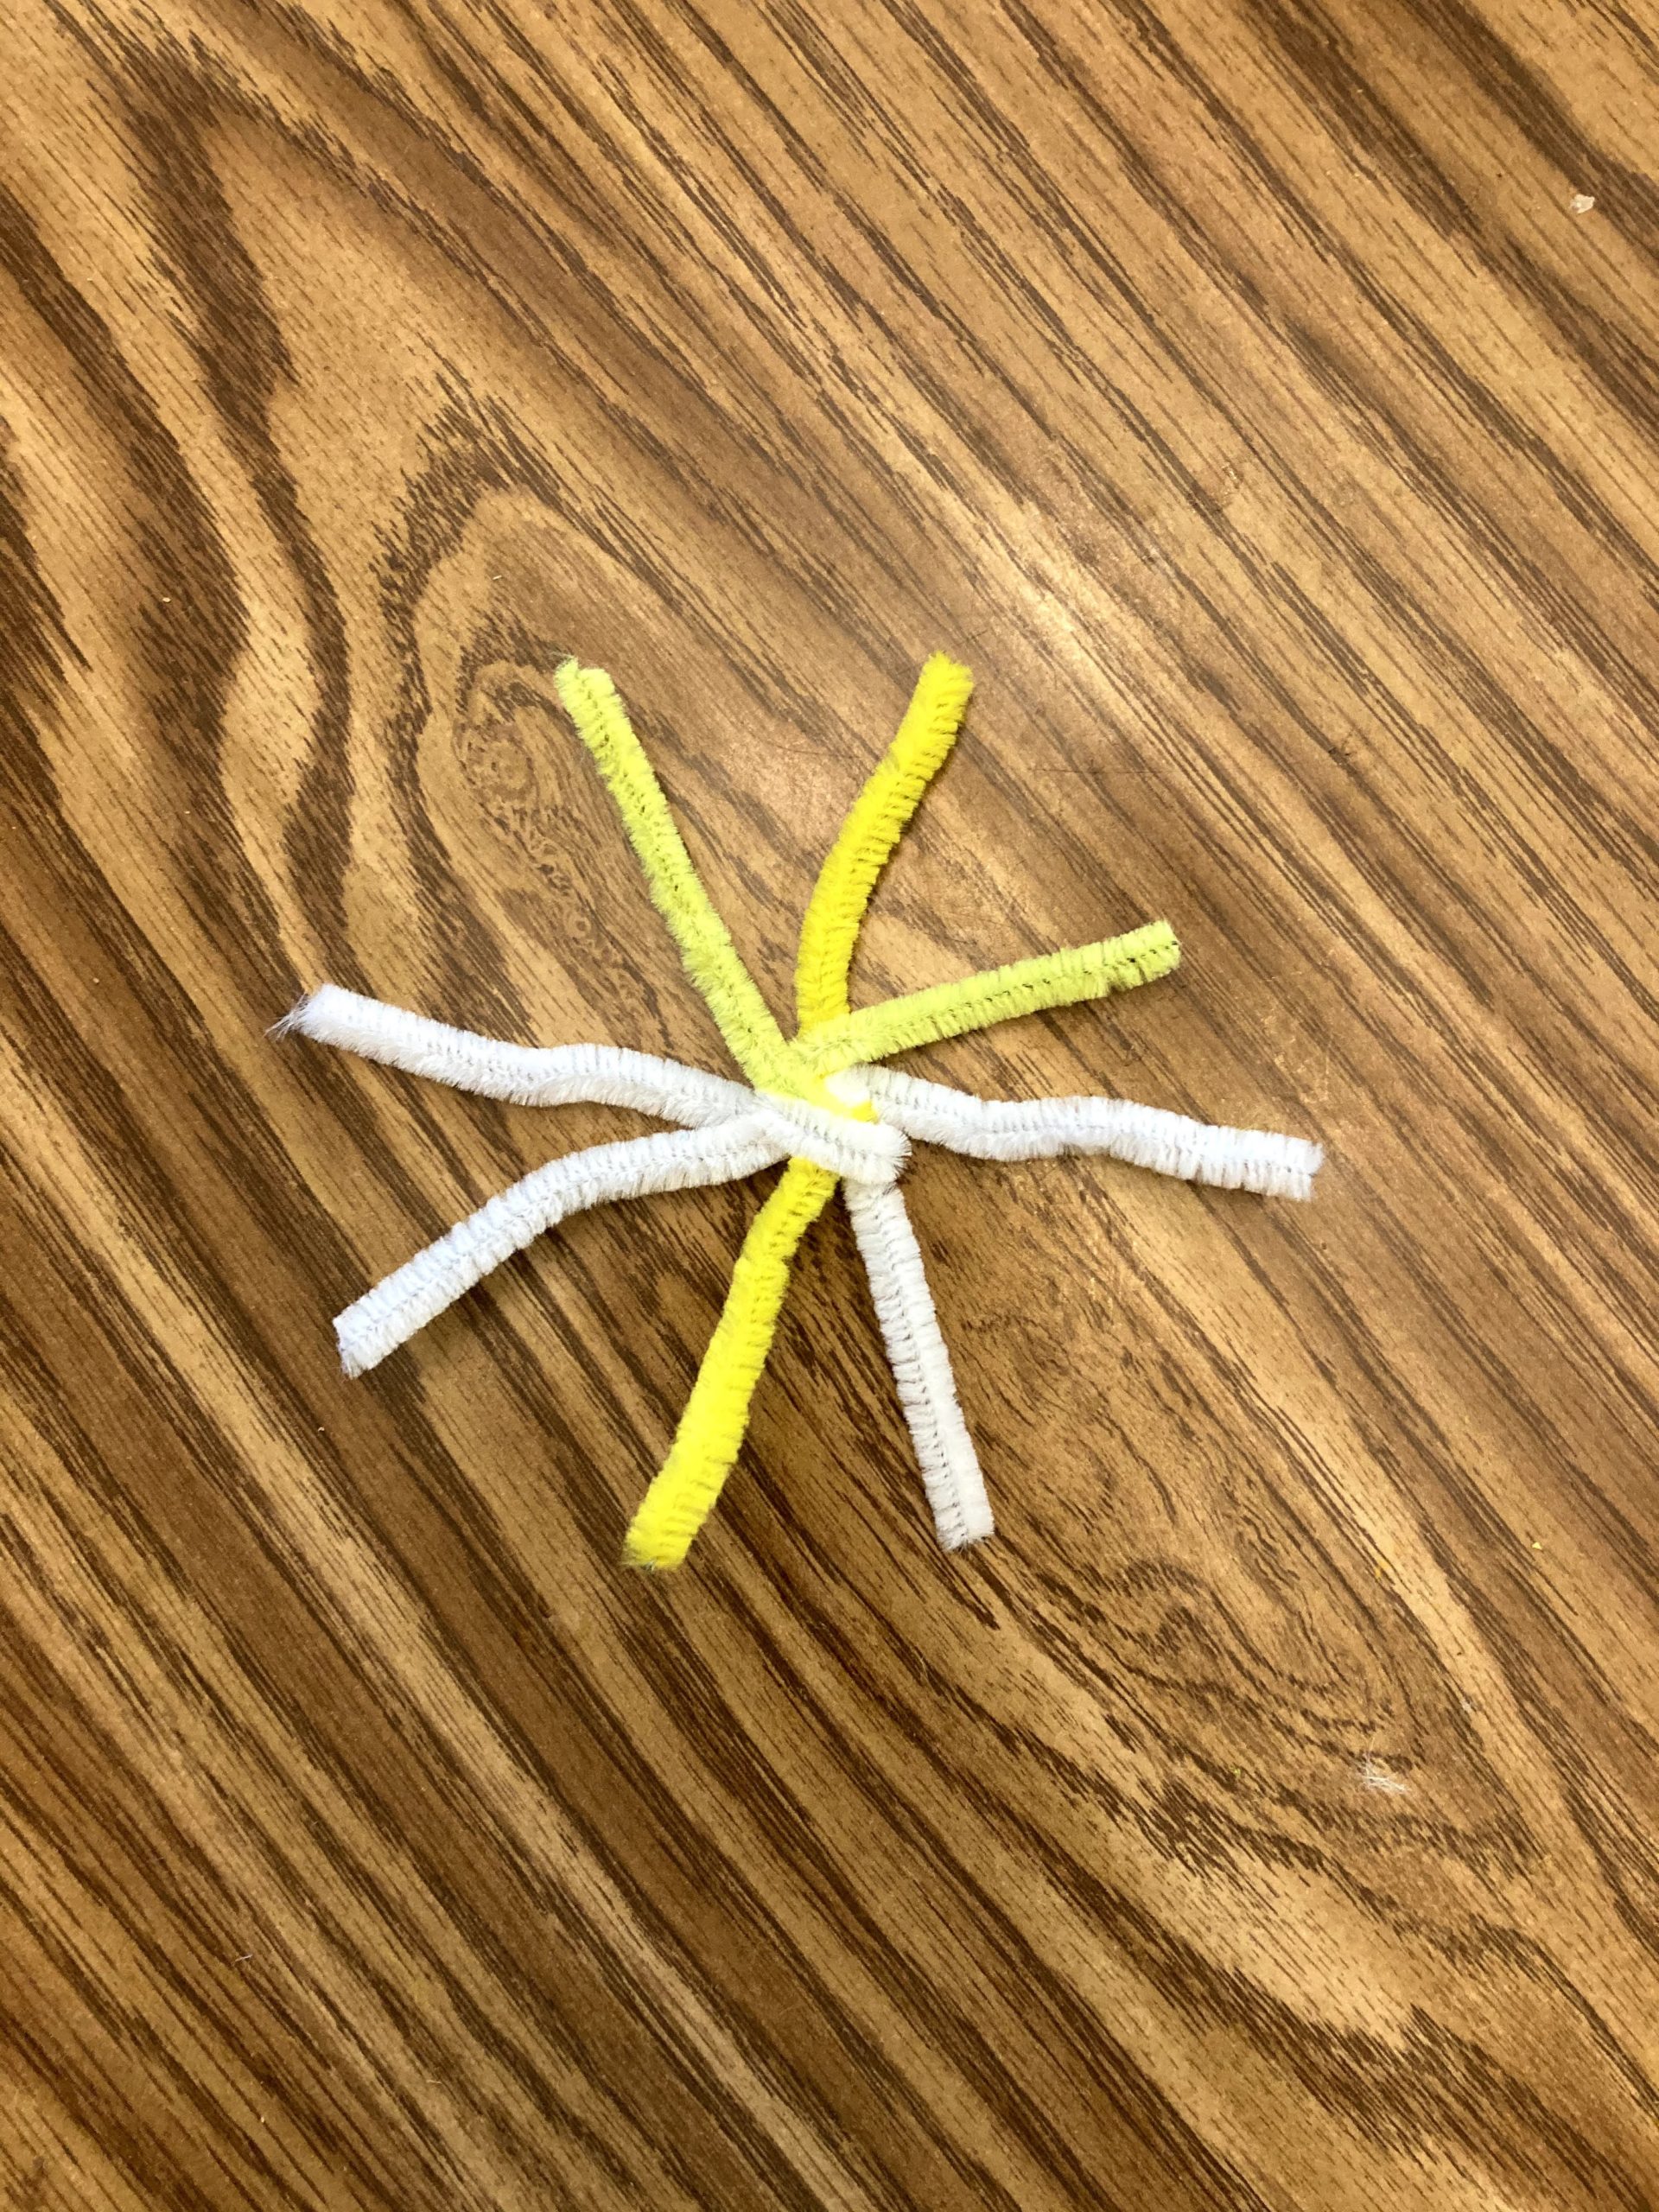
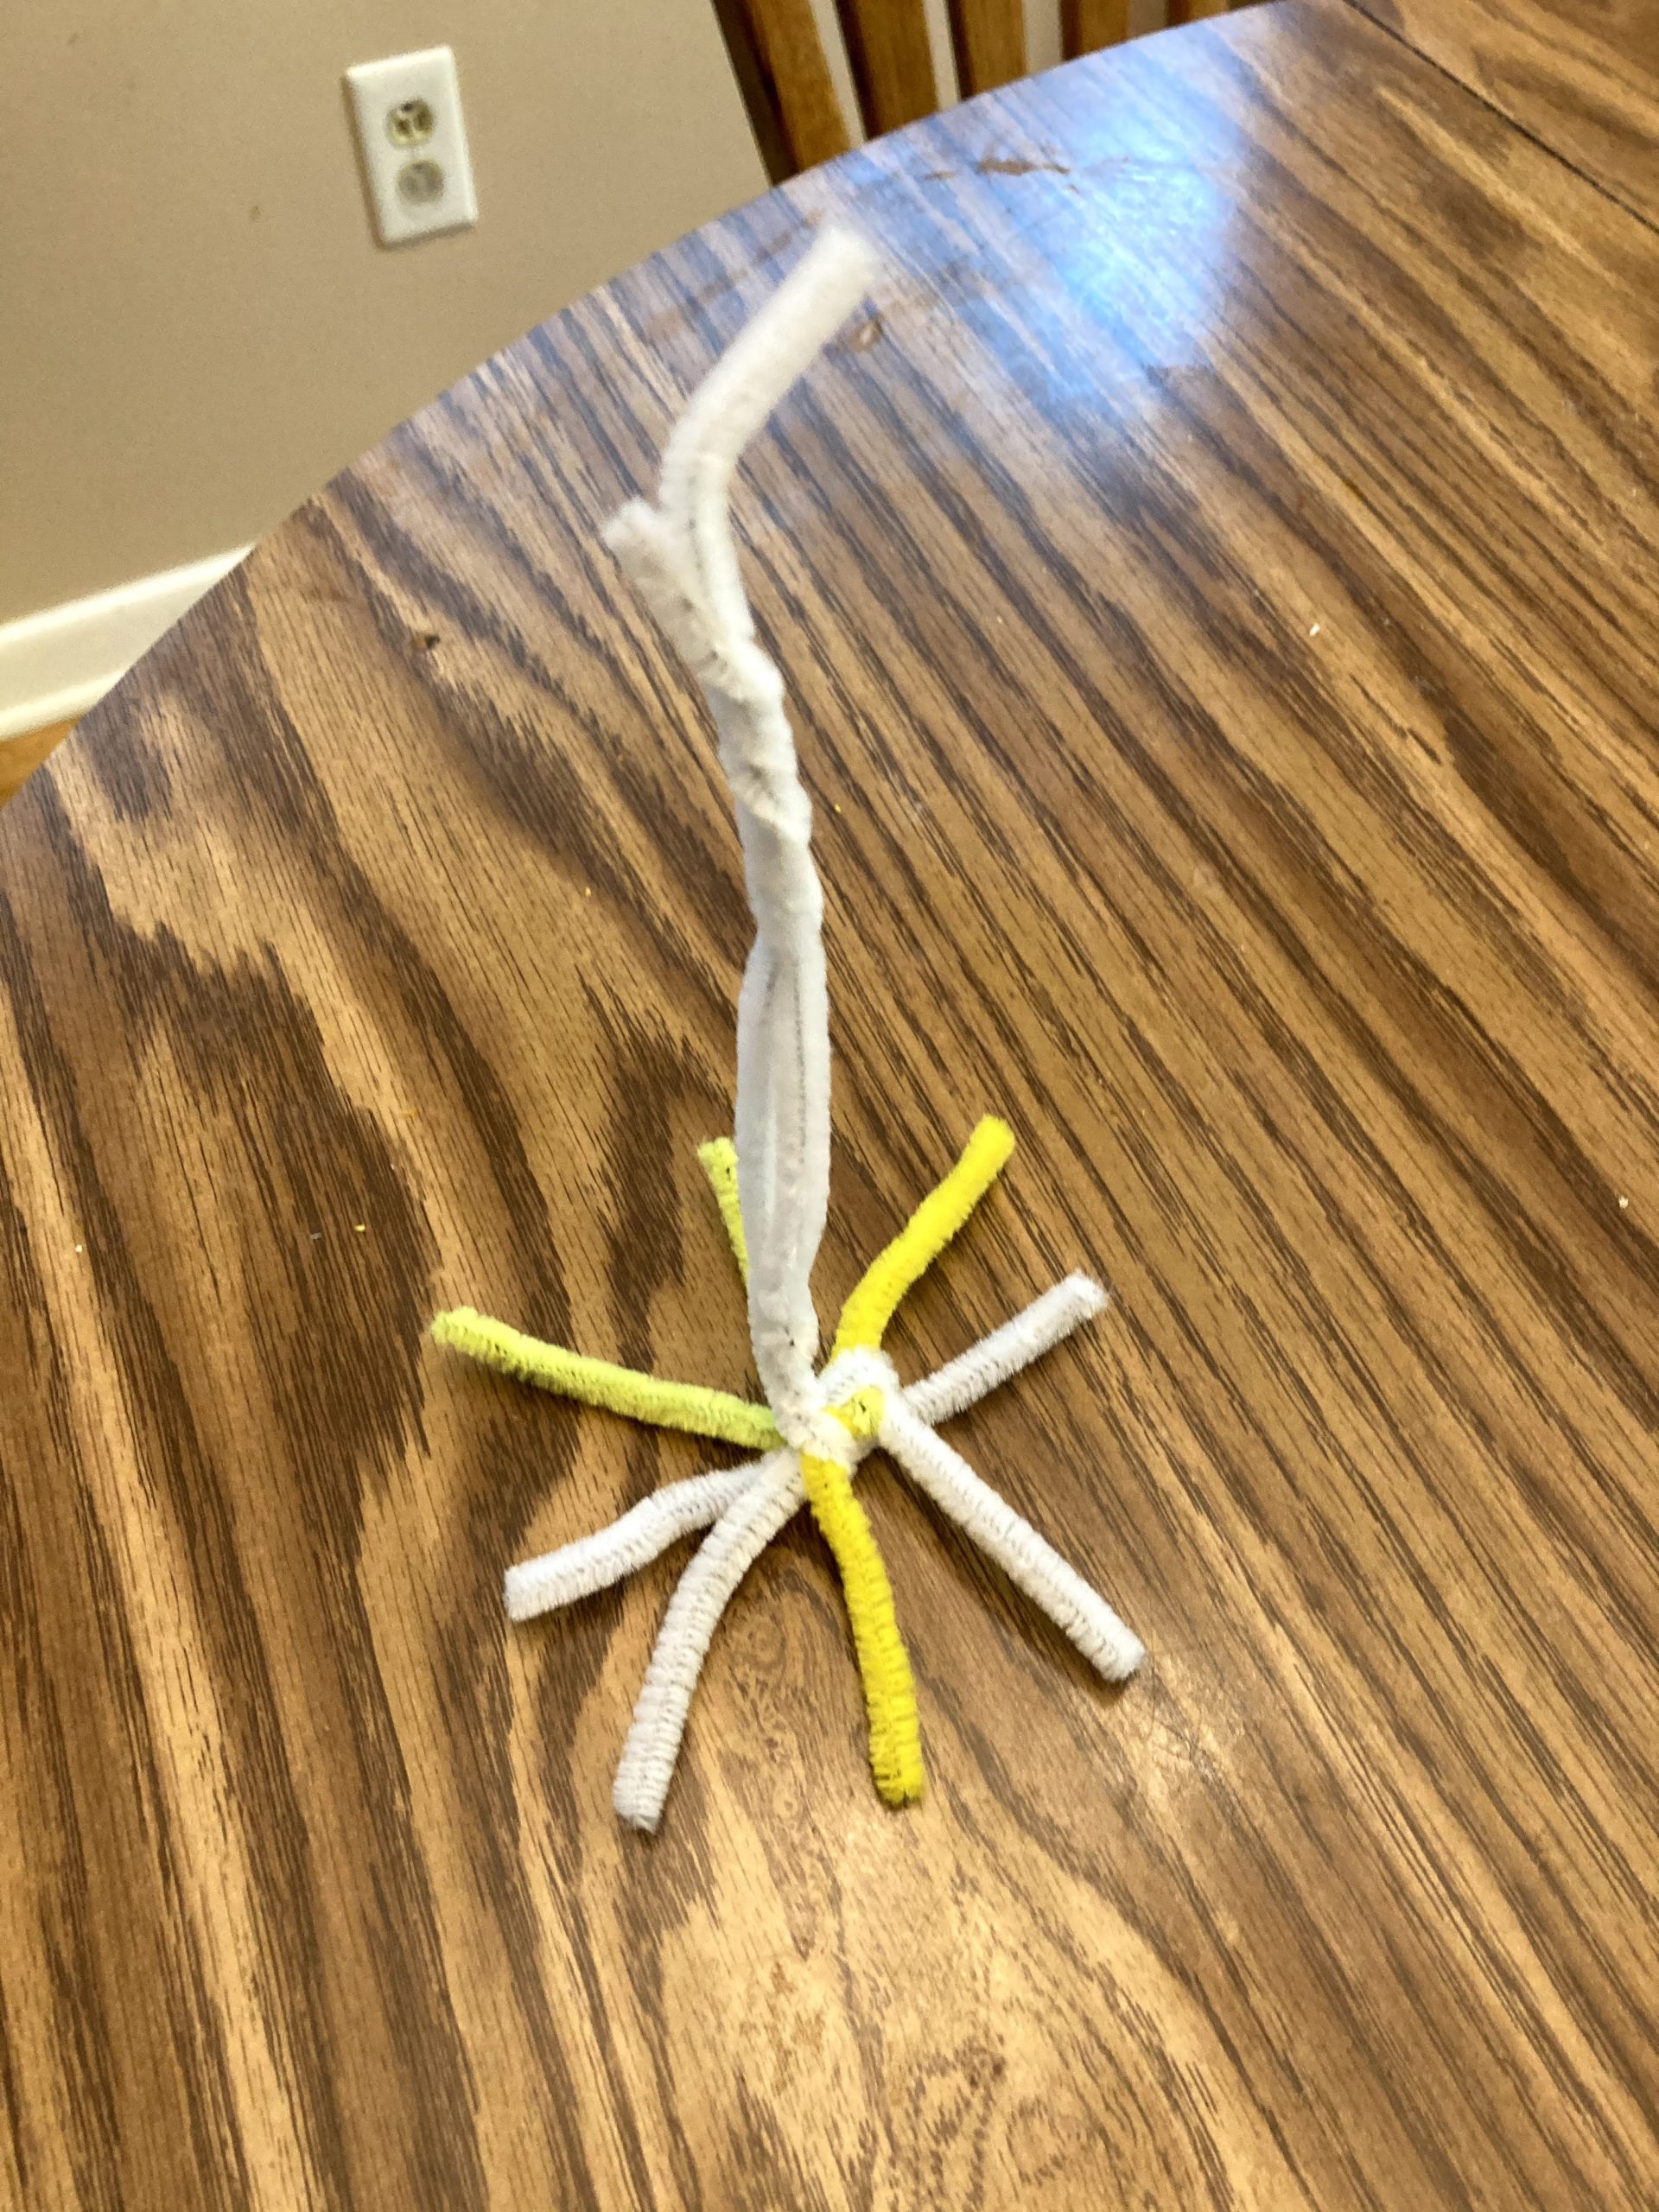
After doing the stars we decided to make fireworks. We bent pipe cleaners around each other to create a firework shape, then added a handle for easy dipping.
She had so much fun! I wrote “Happy 4th of July” to complete the banner. If your kiddo is a little older they could write it or you could do bubble letters they can paint!
Madison loves painting and gluing, so this craft is the perfect combination! I wanted something that we could easily mail to grandparents and this fit the bill!
Materials:
construction paper in the color of your choice for the “trunk” of the tree
white paper
paint in various colors for the “leaves”
assorted markers or crayons
glue
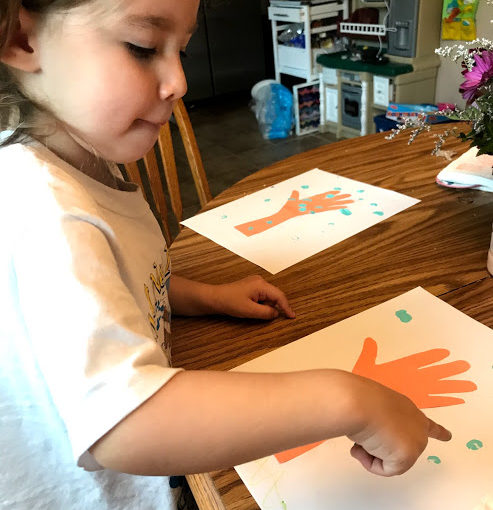
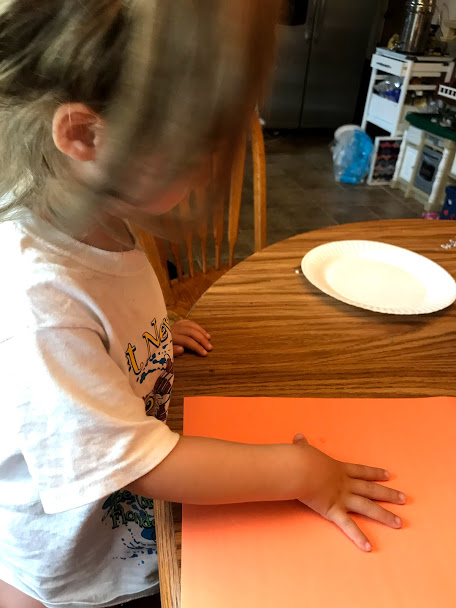
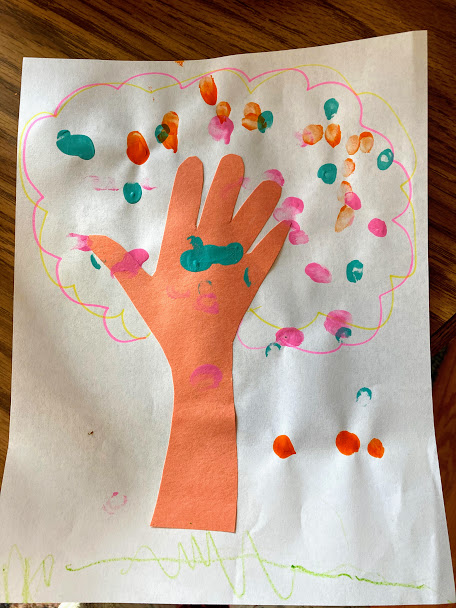
Trace your child’s hand and arm for the branches and trunk of the tree.
Next, cut out the trunk and branches and glue them to the white paper.
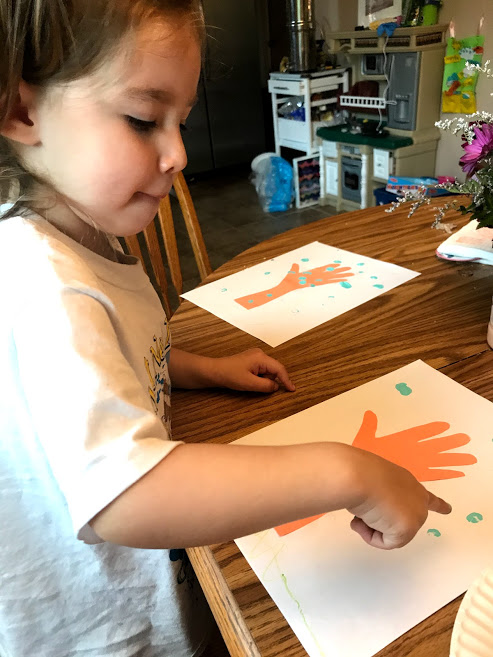
Choose different colors of paint and have your child use their thumb or fingers to make “leaves.” Madison liked making the leaves all over the place. You can vary the colors based on the season you are creating.
For summer, use lots of different green colors. For fall, use browns, reds and yellows. For winter ,use a different color background like blue and do white snowflake prints. For spring, choose colors like pink, purple, green, and yellow!
If your child is a little older then they can draw different scenery, animals and clouds. Your child could also add stickers. We sent these to her grandparents and they loved them!
Day who knows what of quarantining, and it’s another rainy day. The previous night was unlike many others, with one or both children up several times at night for no particular reason, maybe overtired, nightmares, thirsty, the list could go on and on.
For those parents with kids who sleep through the night since they are little and have no trouble getting their kids to sleep, please, do not tell me that. Since we had our second child after being in the hospital for 4 weeks on bed rest due to my water breaking early, our little 34weeker at 4lbs something ounces has absolutely hated sleeping. When I say hates sleeping, I mean he’s almost four years old and still wakes up at least four evenings or more a week multiple times a night (I’m talking he will wake up then go back to sleep for five to ten mins and then up again just when u fell asleep and continue this for hours on end).
He is adorable, kind hearted (when he’s not utterly exhausted), lovable, and has that cute face that my husband jokes keeps him from going to the orphanage (he is really joking). He also has the nickname of destructo. We have heard boys are different from raising girls and now we know. I’m not sure how you moms with multiple boys handle them. As my husband says, “if you want your house completely destroyed in ten mins we can bring him over for you and he will have the walls down to the studs before you know it.”
It had been particularly hard for us and for the kids with the quarantining. We usually go out and do lots of activities the stimulate their brains and bodies, and also to avoid total destruction. Luckily, we have a beautiful field behind us and a creek nearby and plenty of outdoor activities to enjoy with the warmer weather now. The routine had changed since preschool stopped and my little boy keeps saying he misses school and his friend Jack.
In the last couple weeks he has gone from potty trained with both poop and pee (yes that’s the technical terms when you’re a mom) during the day to holding in his poop. He was constipated and it hurt to poop and now it’s plainly awful. He holds it for days and when he gets uncomfortable for at least 24 hours before he goes, he screams and yells and says his butt hurts but will not go on the potty or even a diaper until he literally cannot possibly hold it in any longer. Yes, we have talked to his pediatrician and added probiotics, prunes, and many other things which eventually make him go, but the terrified look and screams he has is awful. Once he finally goes he says he feels much better and he is proud of himself. We tried the bribing for anything, literally anything if he goes on the potty, didn’t work. We tried not mentioning pooping, didn’t work. And now every 3rd or so day the night and the next day are terrible, the kind where I’d rather be working during quarantine as a nurse then be stuck at home (for the most part).
Today was particularly hard as we haven’t gotten a good nights sleep for a couple years now (almost 4), and all day he was crying and yelling off and on that his butt hurt, or his belly hurt, and he couldn’t sit still. My friend had told me her son was going through this a long time ago, and I thought, ugh that must be hard. Well, if you haven’t experienced this fun, then you are really missing out. Poor little guy is so uncomfortable and just literally pushes it back in my clenching and grunting to hold it in. And before you say something else could be going on, again we talked to the pediatrician, and we work in the healthcare field. Also, this is very common in boys (if you look it up you will see).
I was so grateful my husband was home from work so I could breath for two mins and use the bathroom in privacy (I had to lock the door of course). My husband is good at distracting and playing with the kiddos. My son was good for a bit but started putting his hands on his butt (which we explained is not hygienic). Eventually we got the kids upstairs for bedtime. Earlier in the day we made giant forts in their rooms with king size blankets and mommy promised a goodnight show with the stuffed animals. So I begin the show and my son cannot with still since he will poop in his pants if he does. He is constantly moving while I have the stuffed animals talking to each other. About two mins in my daughter is yelling at my son to sit still. He starts swinging his ladybug night light stuffed animal, which consists of a stuffed head and a plastic big body with star holes that light project out of it. He swings it fast and hard and nails me right in the eye. This will be my second black eye from my son, with the first being him whacking his head back into my eye at full force as little toddlers do when sitting with you.
I went downstairs and iced my cheek as my husband took over (thank you). More than the pain, I’m emotionally drained. I feel terrible for my child going through this, and I’m exhausted as a parent trying to keep it together. I feel bad for my daughter who yells this is the worst light show ever (little kids don’t have the capacity to care for others as much yet). I know she could be learning and doing more, but I’m constantly paying attention to my son who begs for attention throughout the day. Now I’ll be going to see patients with a nice big black eye, hopefully my mask and goggles will cover it this weekend!
This post is meant for be a venting post, of course not all days are like this and we have tons of fun and tons of love. As you can see from all of the other posts we absolutely love and adore our family and will do anything for them! We have a great family and friends and are blessed.
I just want other moms to know you are not alone out there (looking at you Kimberly), and I’m sorry if I haven’t been as compassionate to other moms with their own issues. You honestly don’t know what anything is really like until you personally experience it. I’m also still not sure how our parents survived!
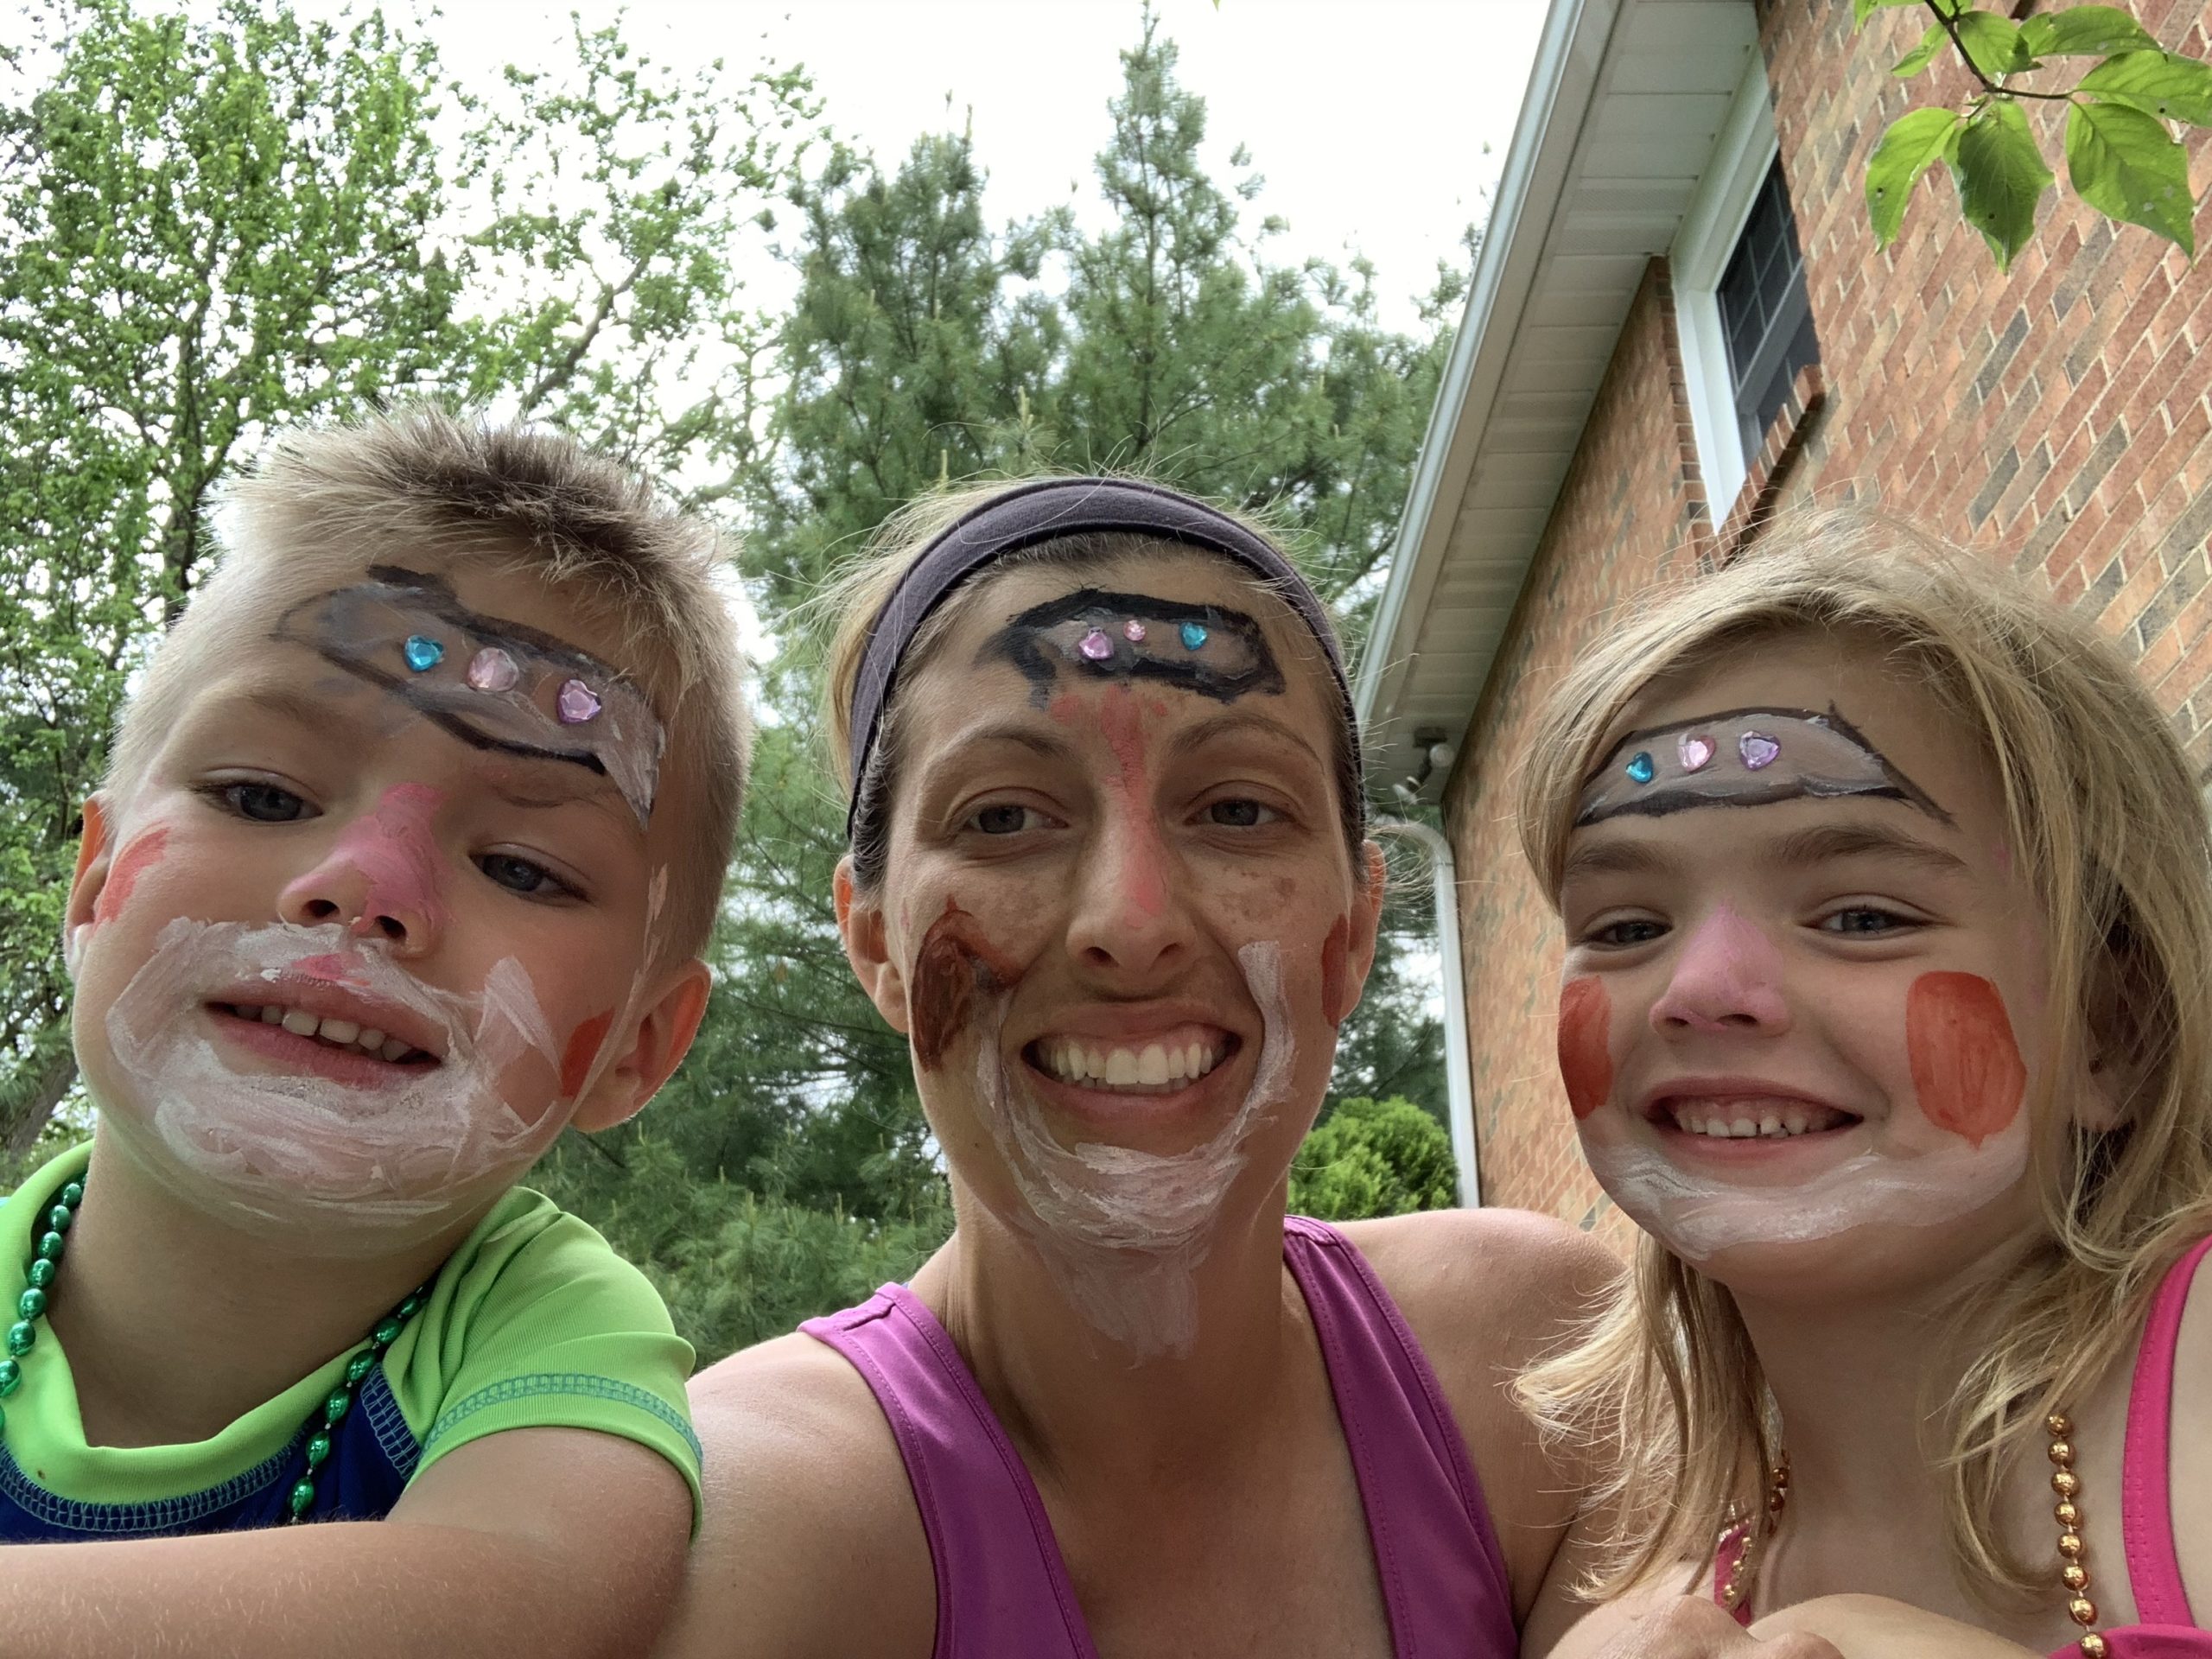
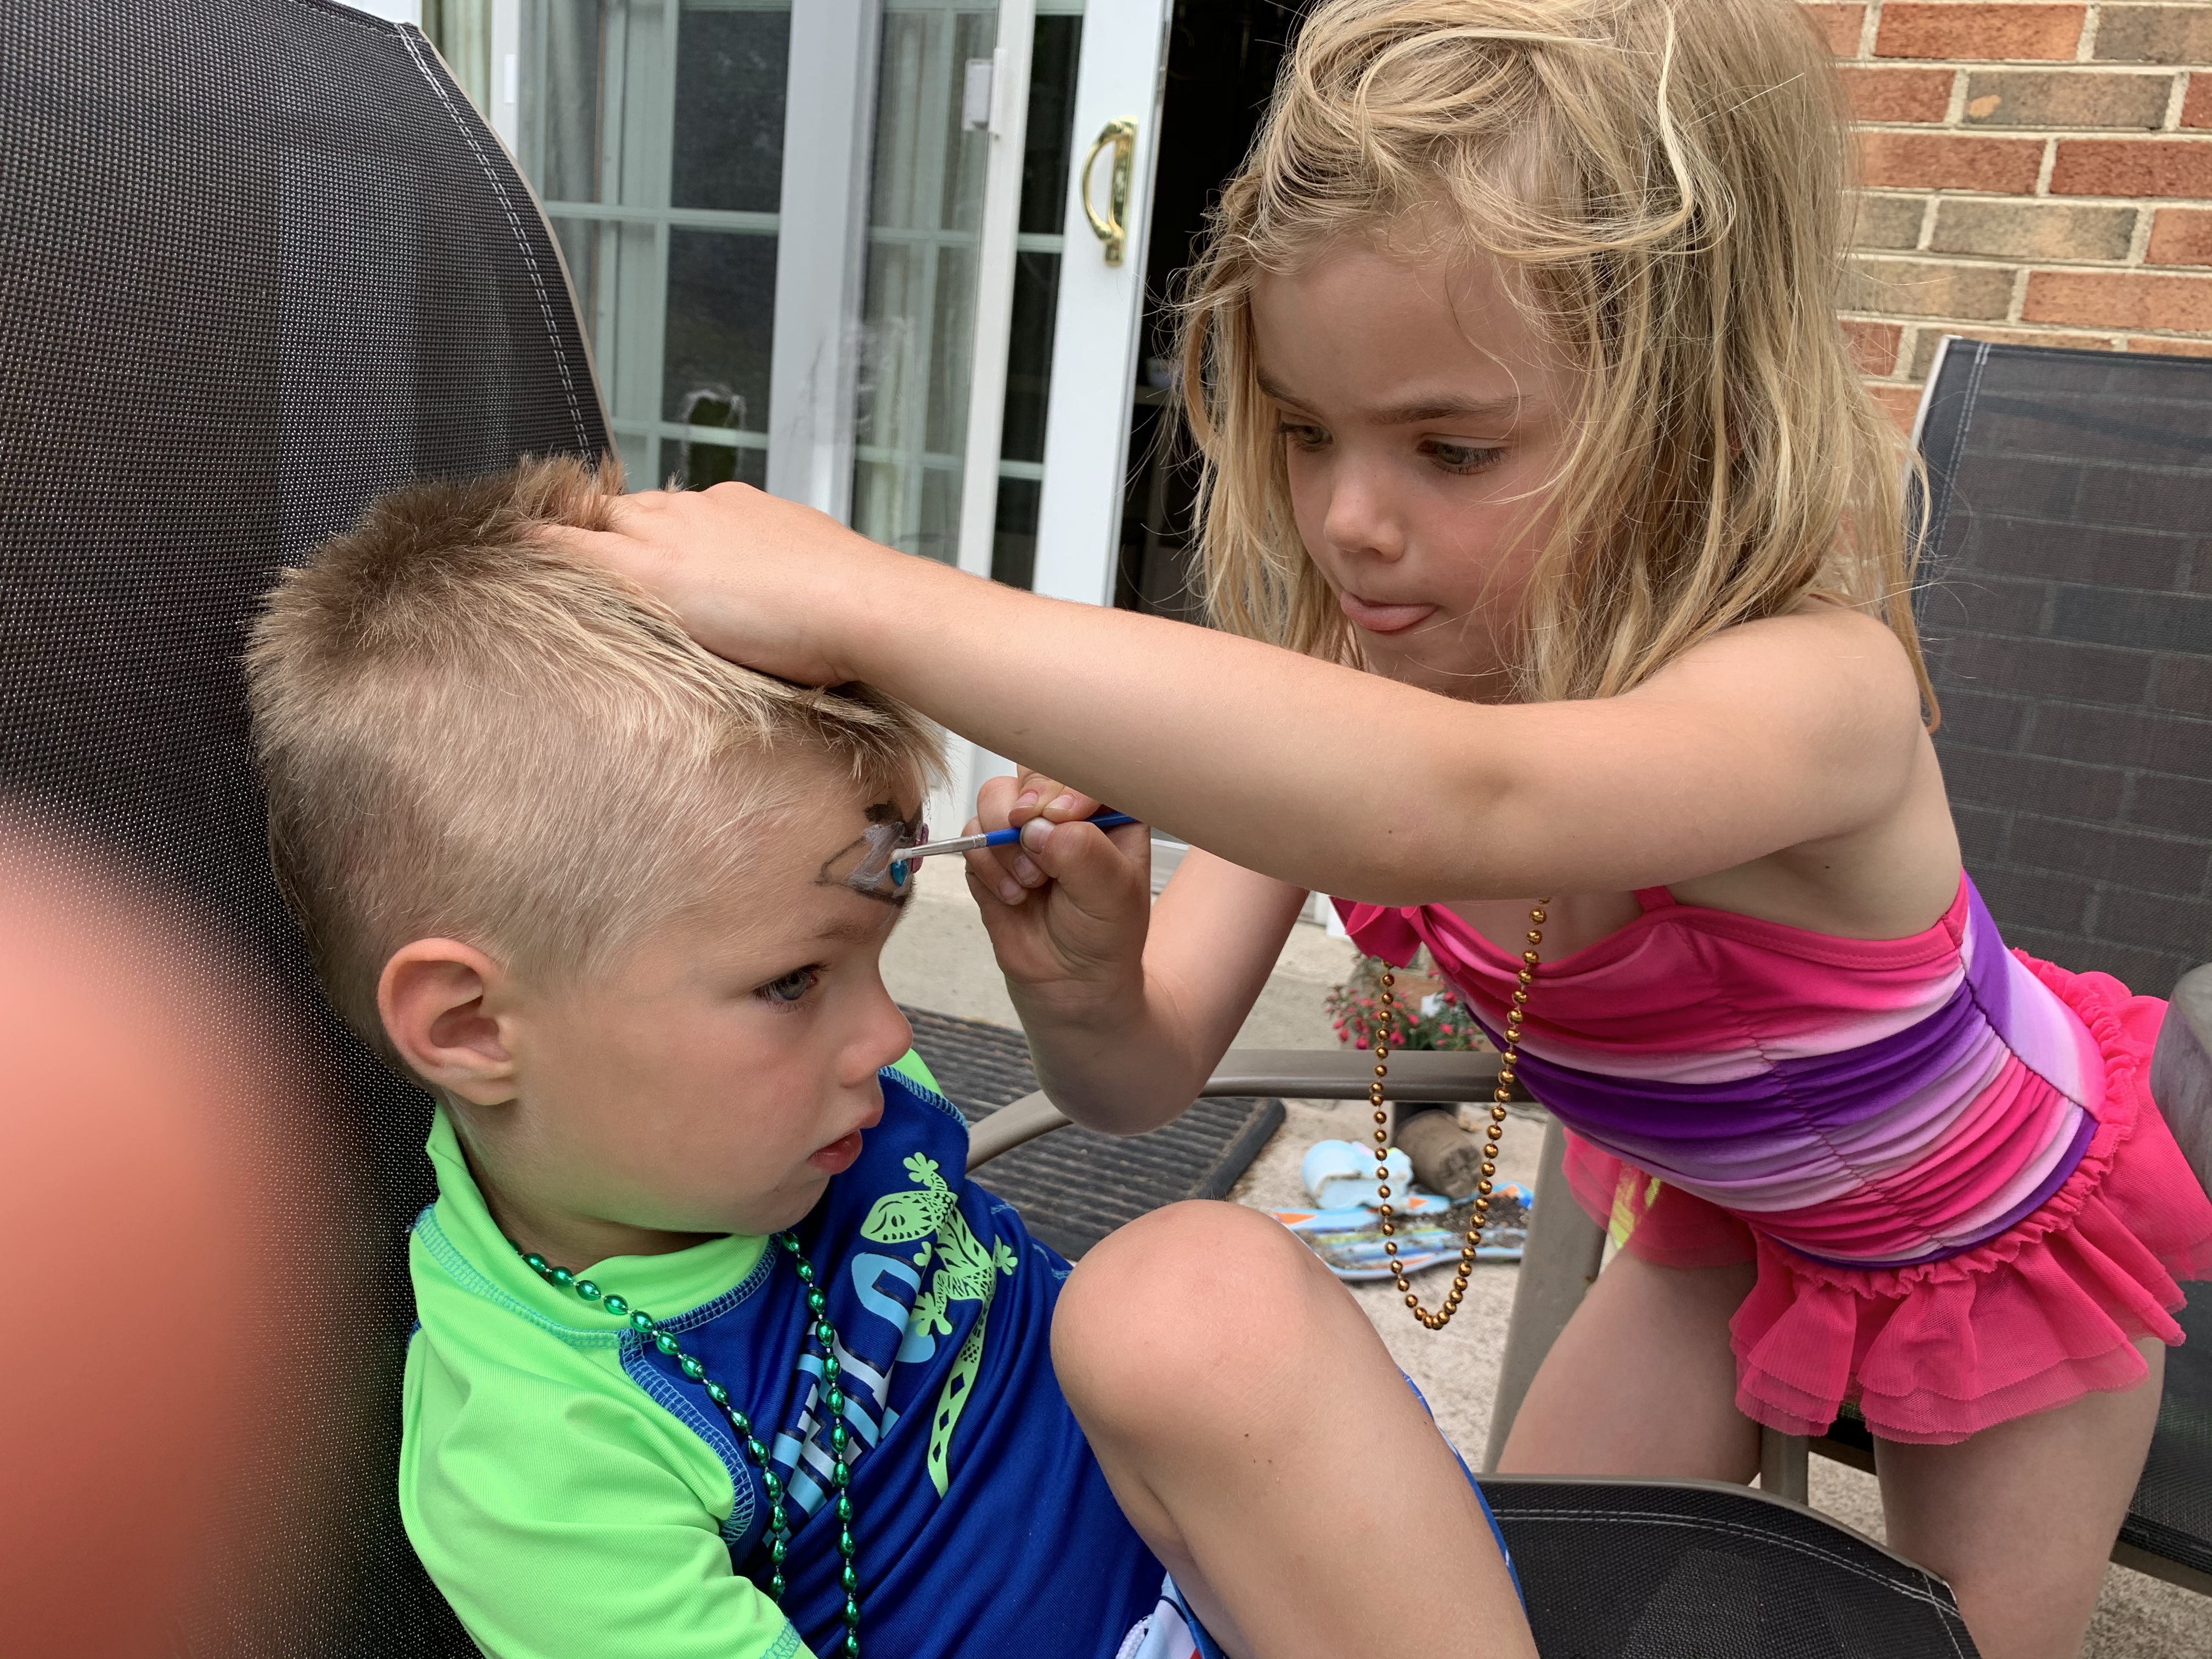
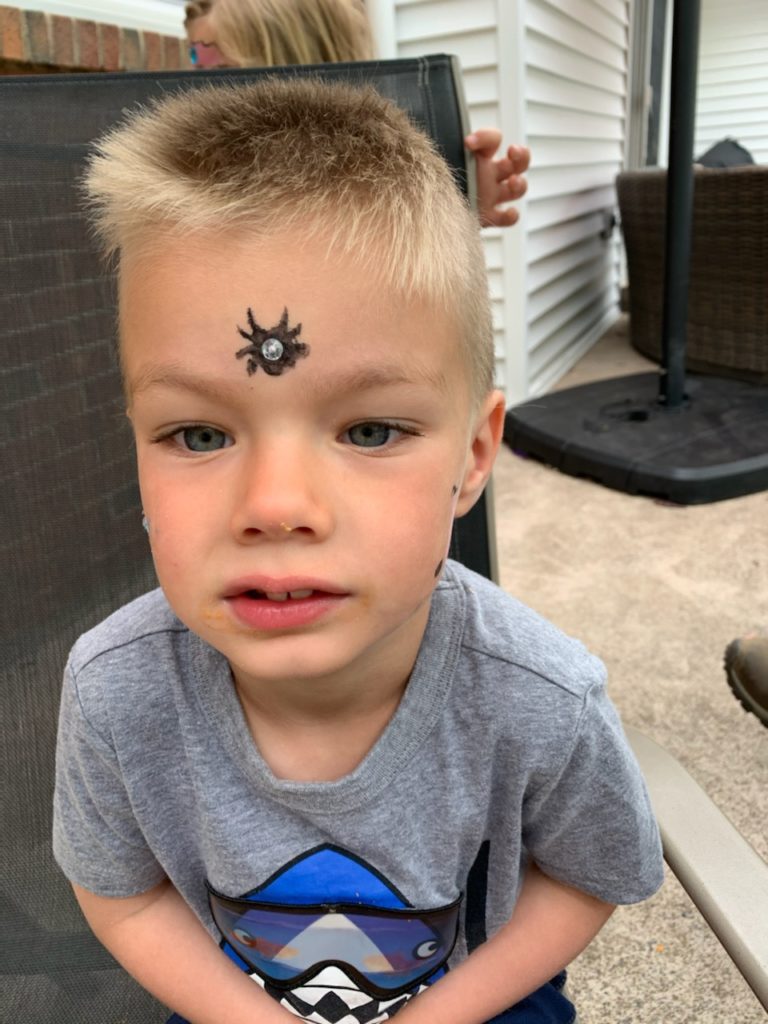
It all started with my daughter using a marker on my son’s face. She said she simply wanted to paint his face! Well, obviously, this wasn’t going to work. So I searched for face painting supplies. At first I thought face paint would be way too messy and not worth the money. However, I found that face paint is super fun, easy, and the kids just love it!
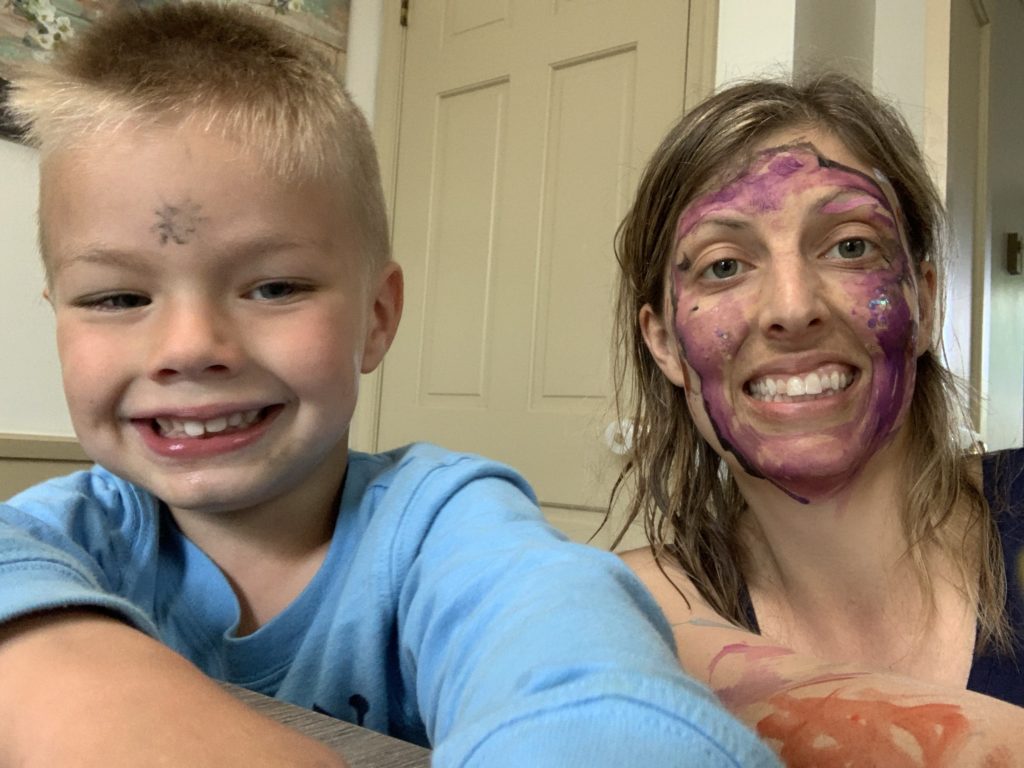
An easy and fun activity is face painting! My daughter loves painting faces and my son loves having his face painted.
We got this easy set from amazon. Bowitzki Face Paint Kit
Bowitzki Face Paint Kit with 10 Colors,32 Stencils,2 Brushes,2 Chunky Glitters,2 Sponges,1 Body Glue
When we first started I had to remind my daughter not to go near the eyes, but since then no problems at all!
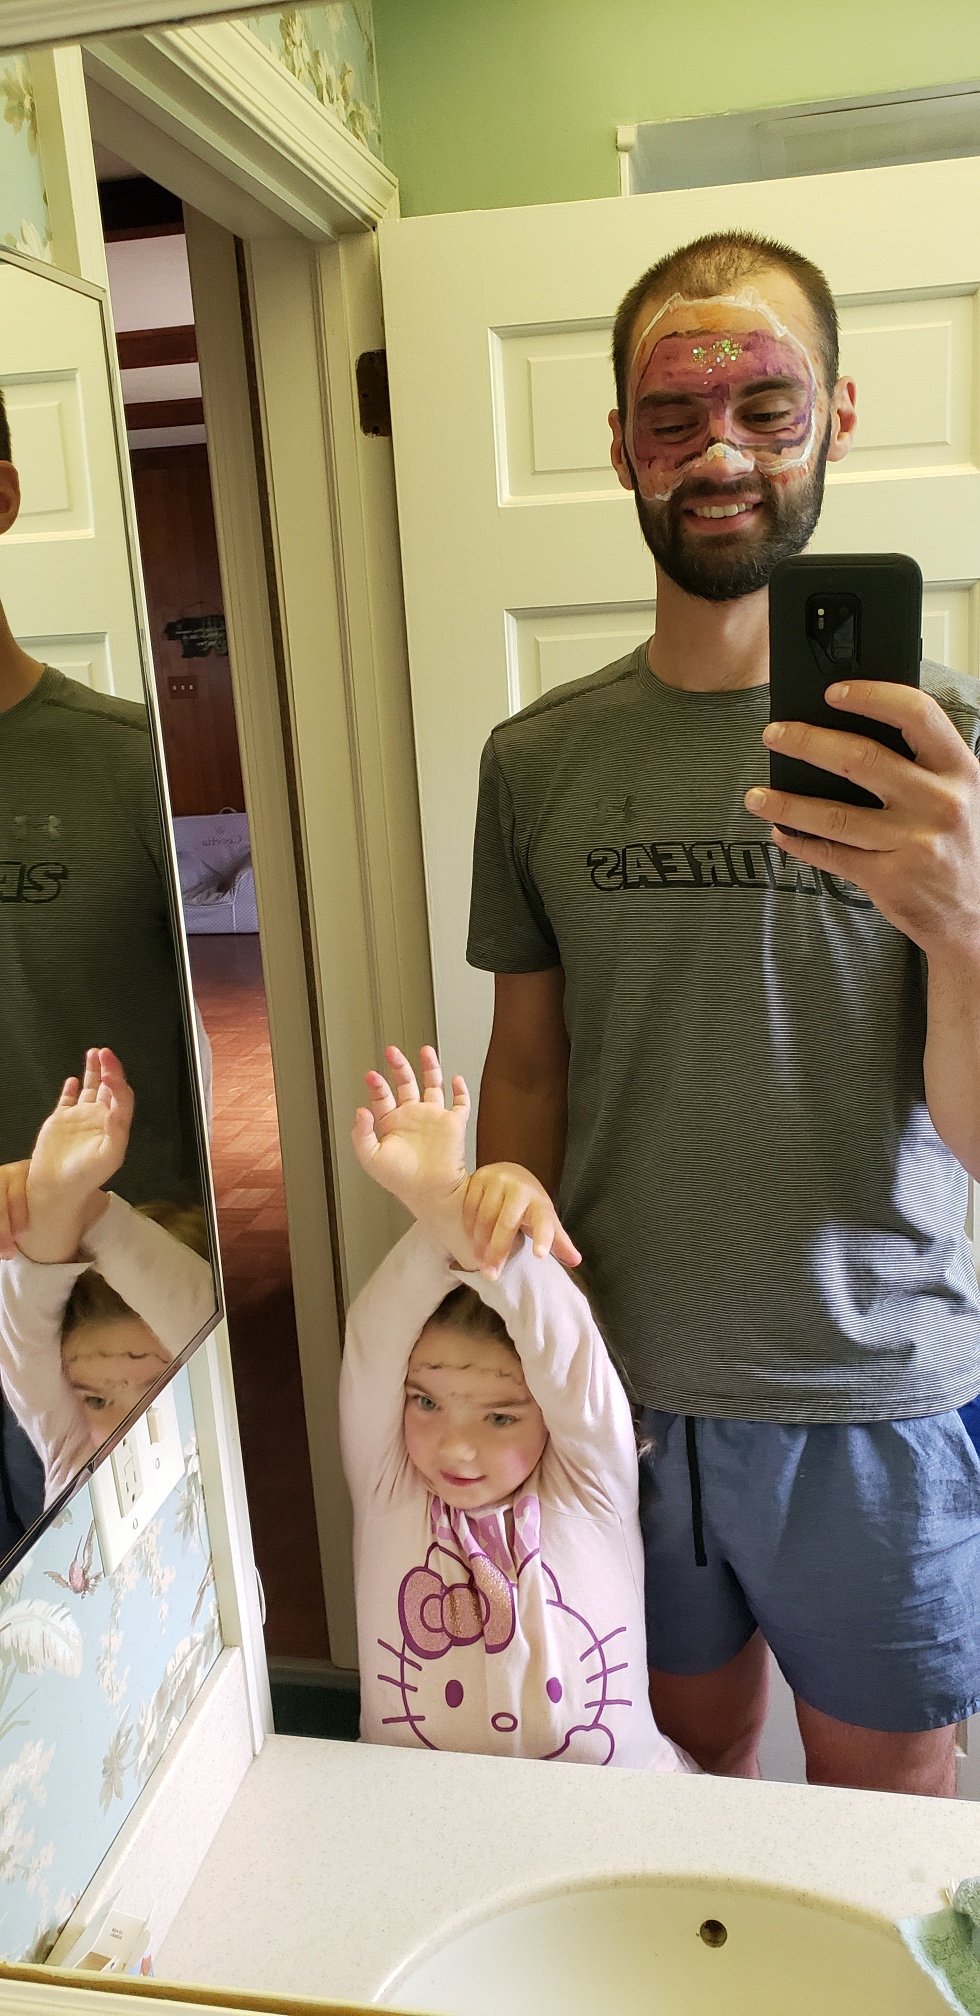
Daddy even got his face painted by Cece!
Grammy did a little face painting as well…
They love this activity and it’s fun, easy, and inexpensive! I hope you try it too!!
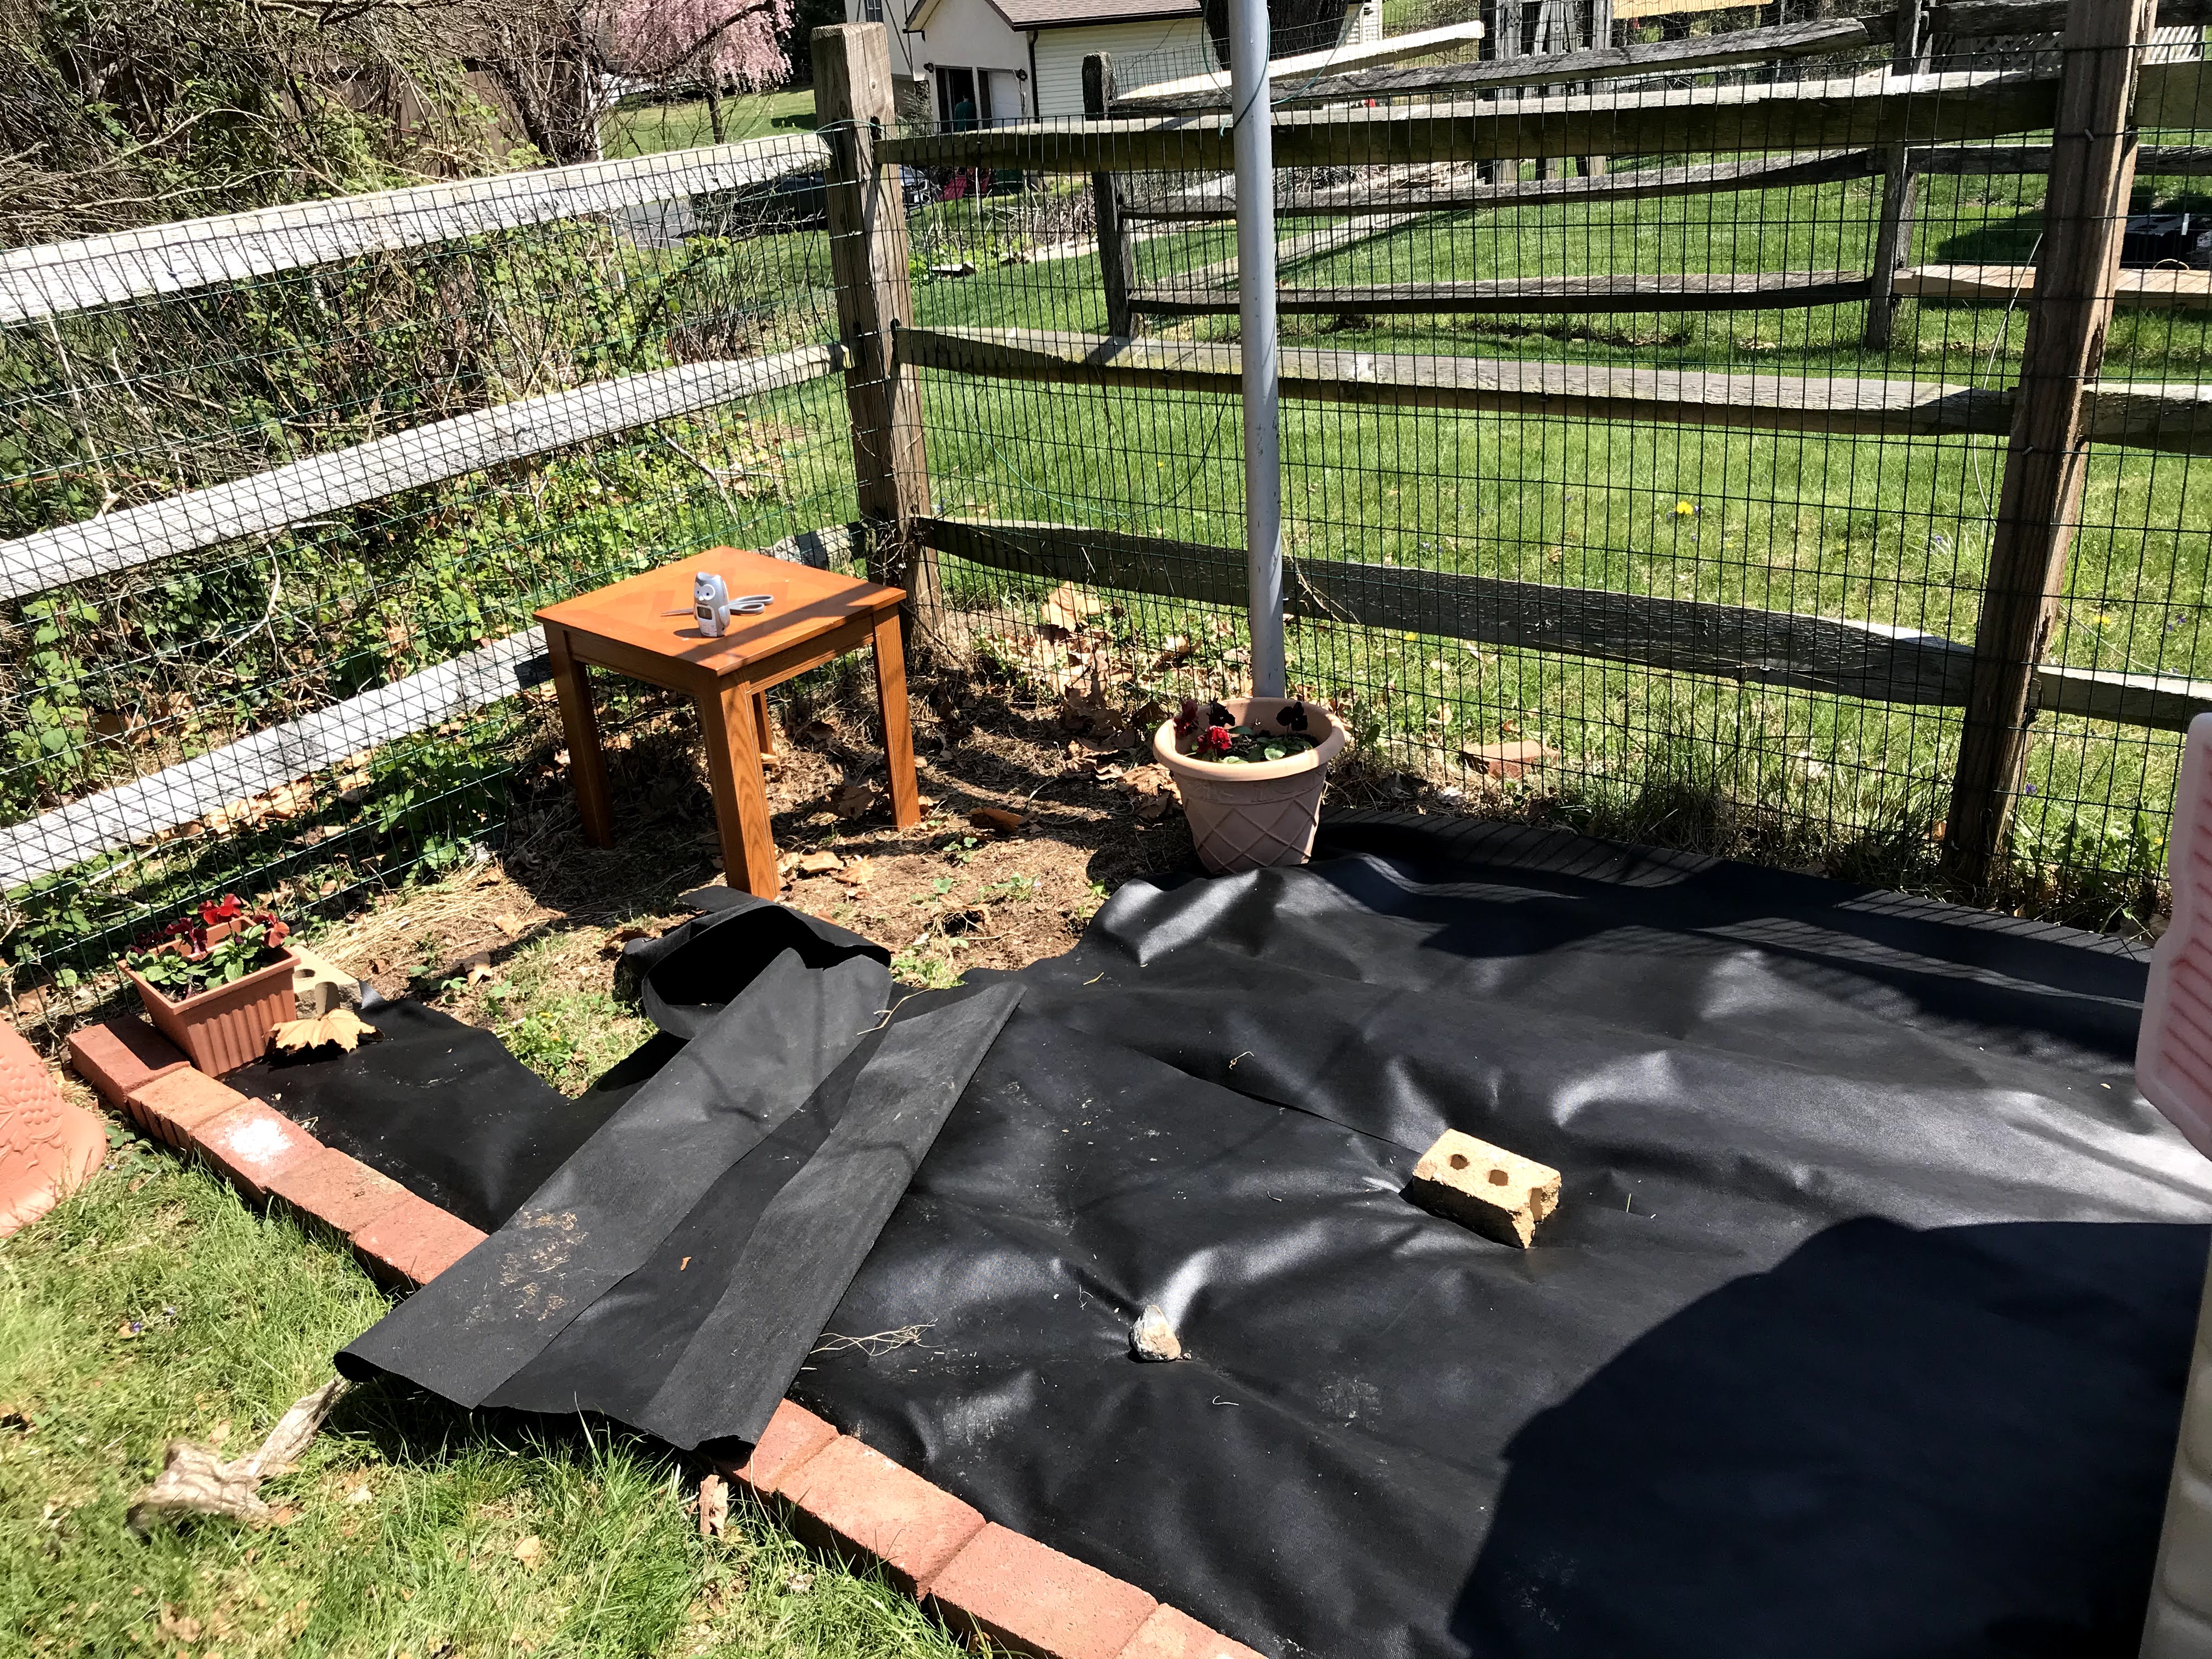
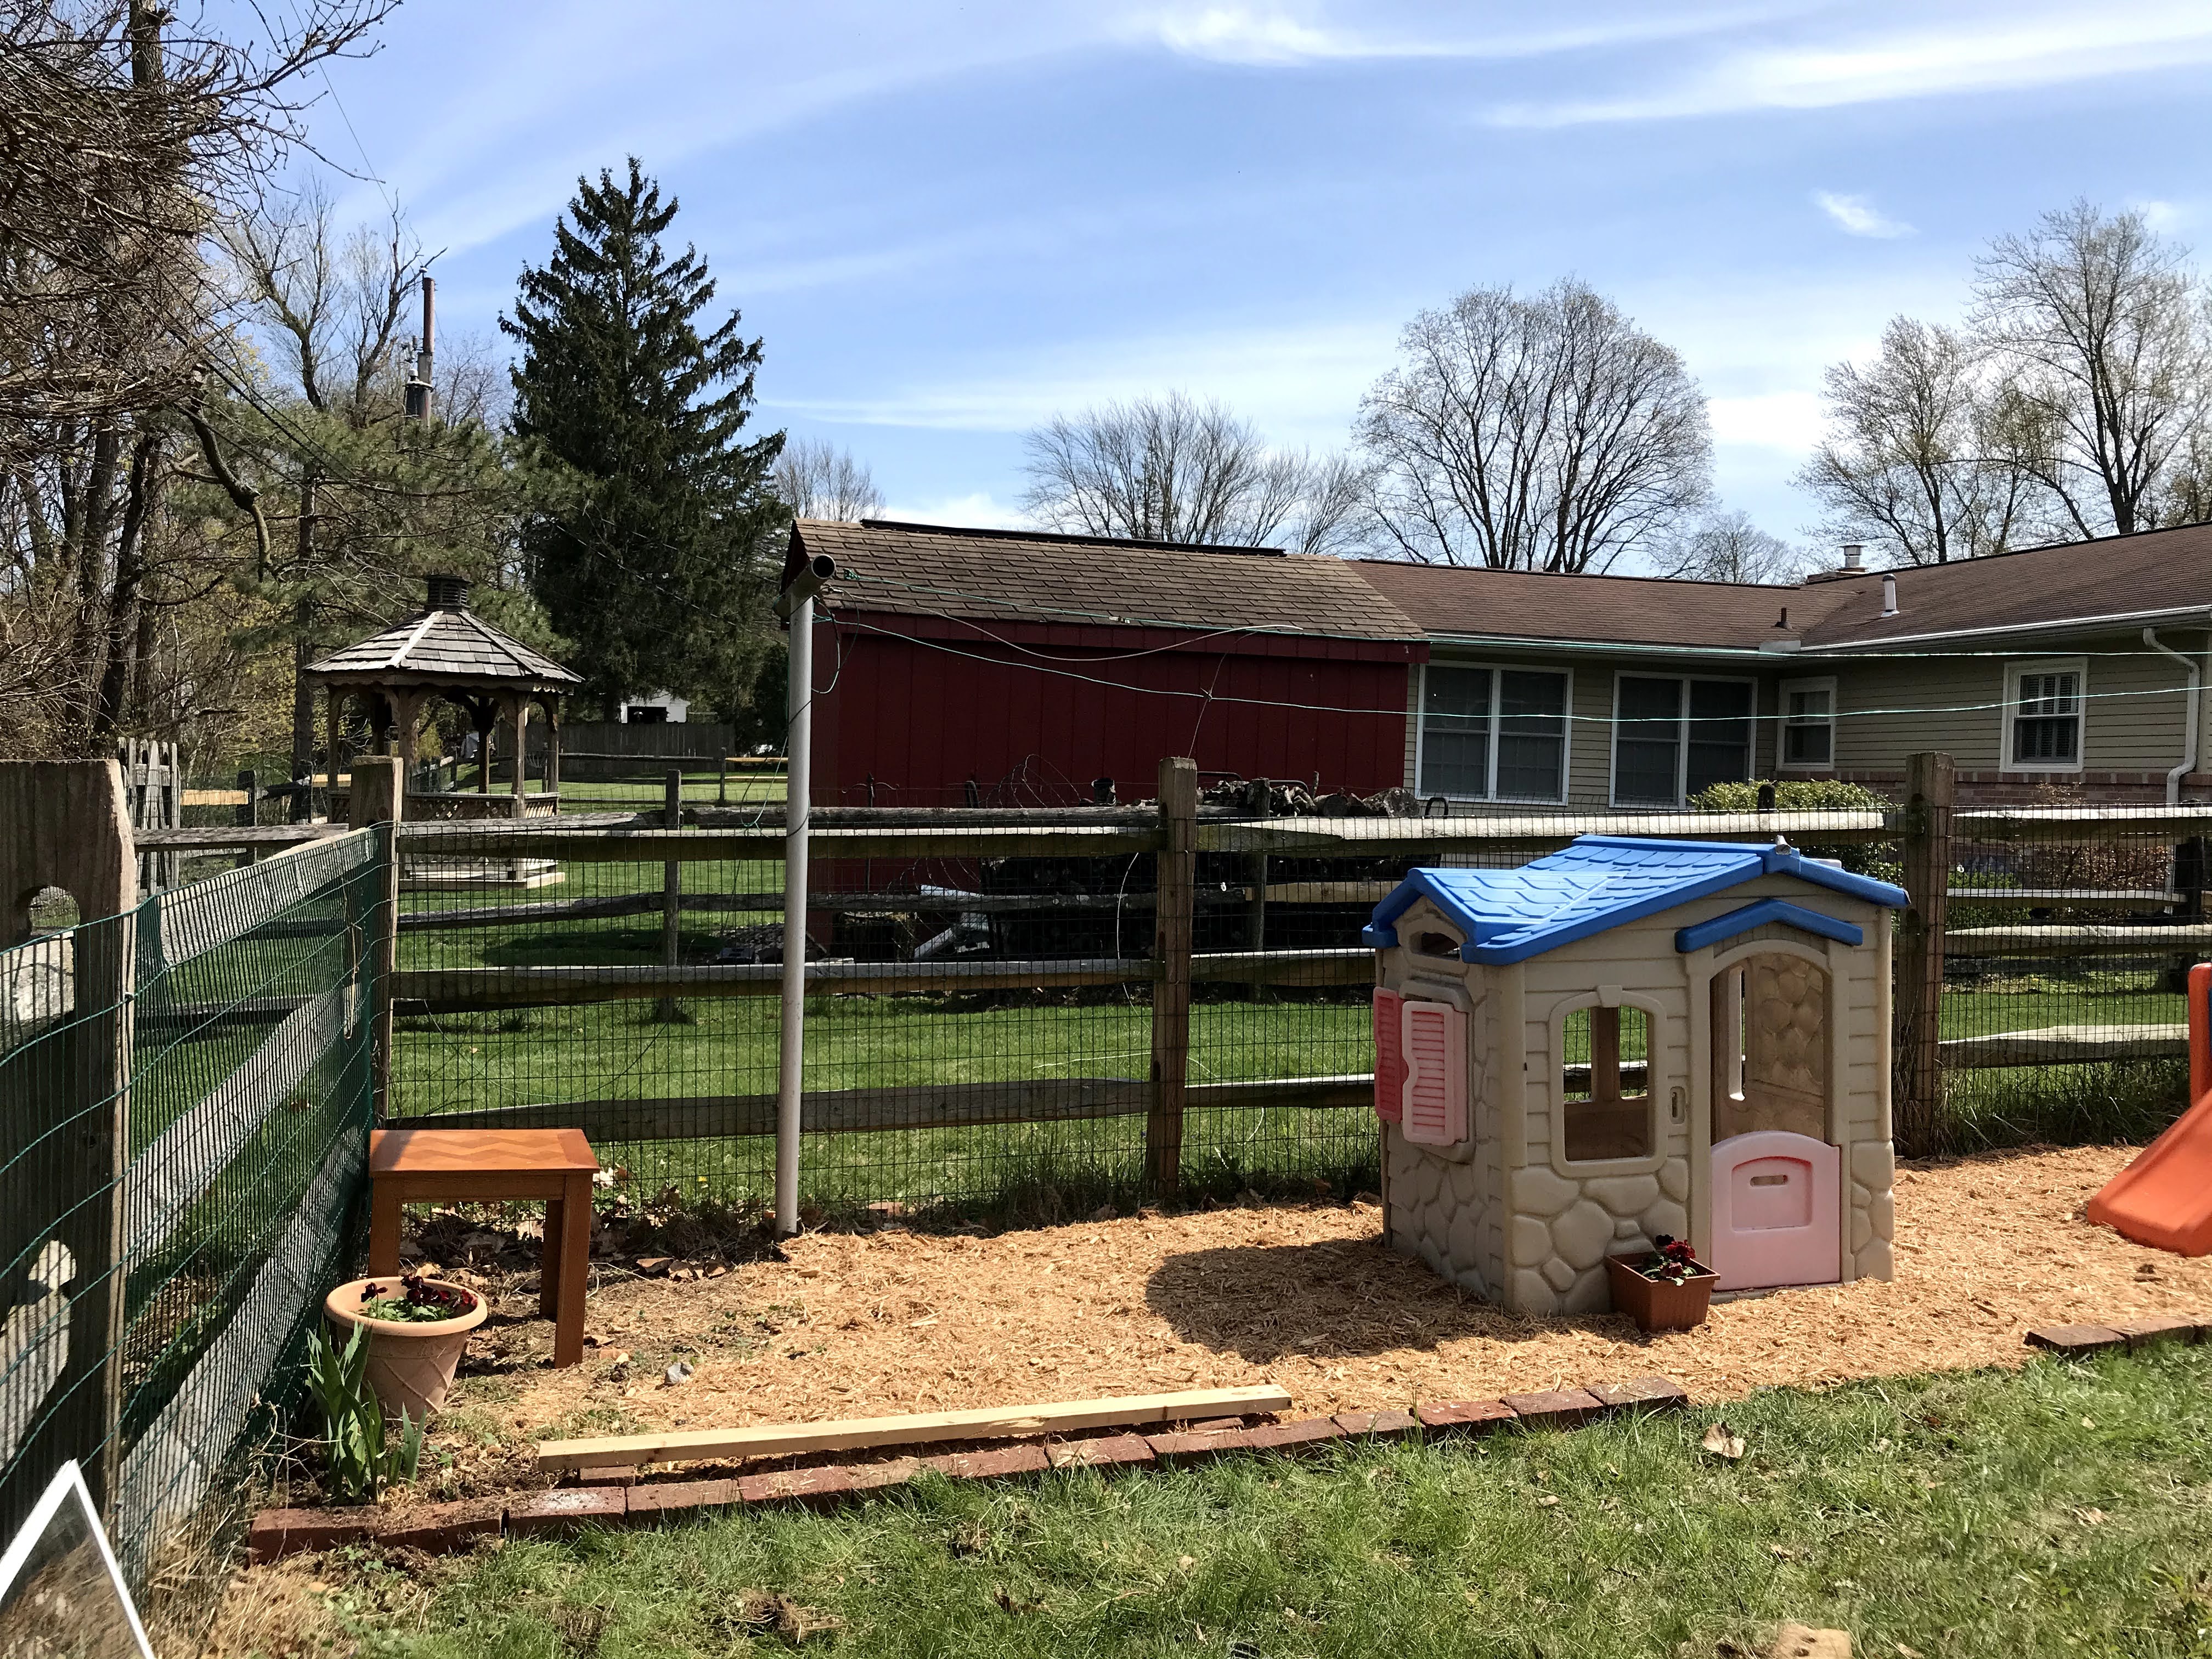
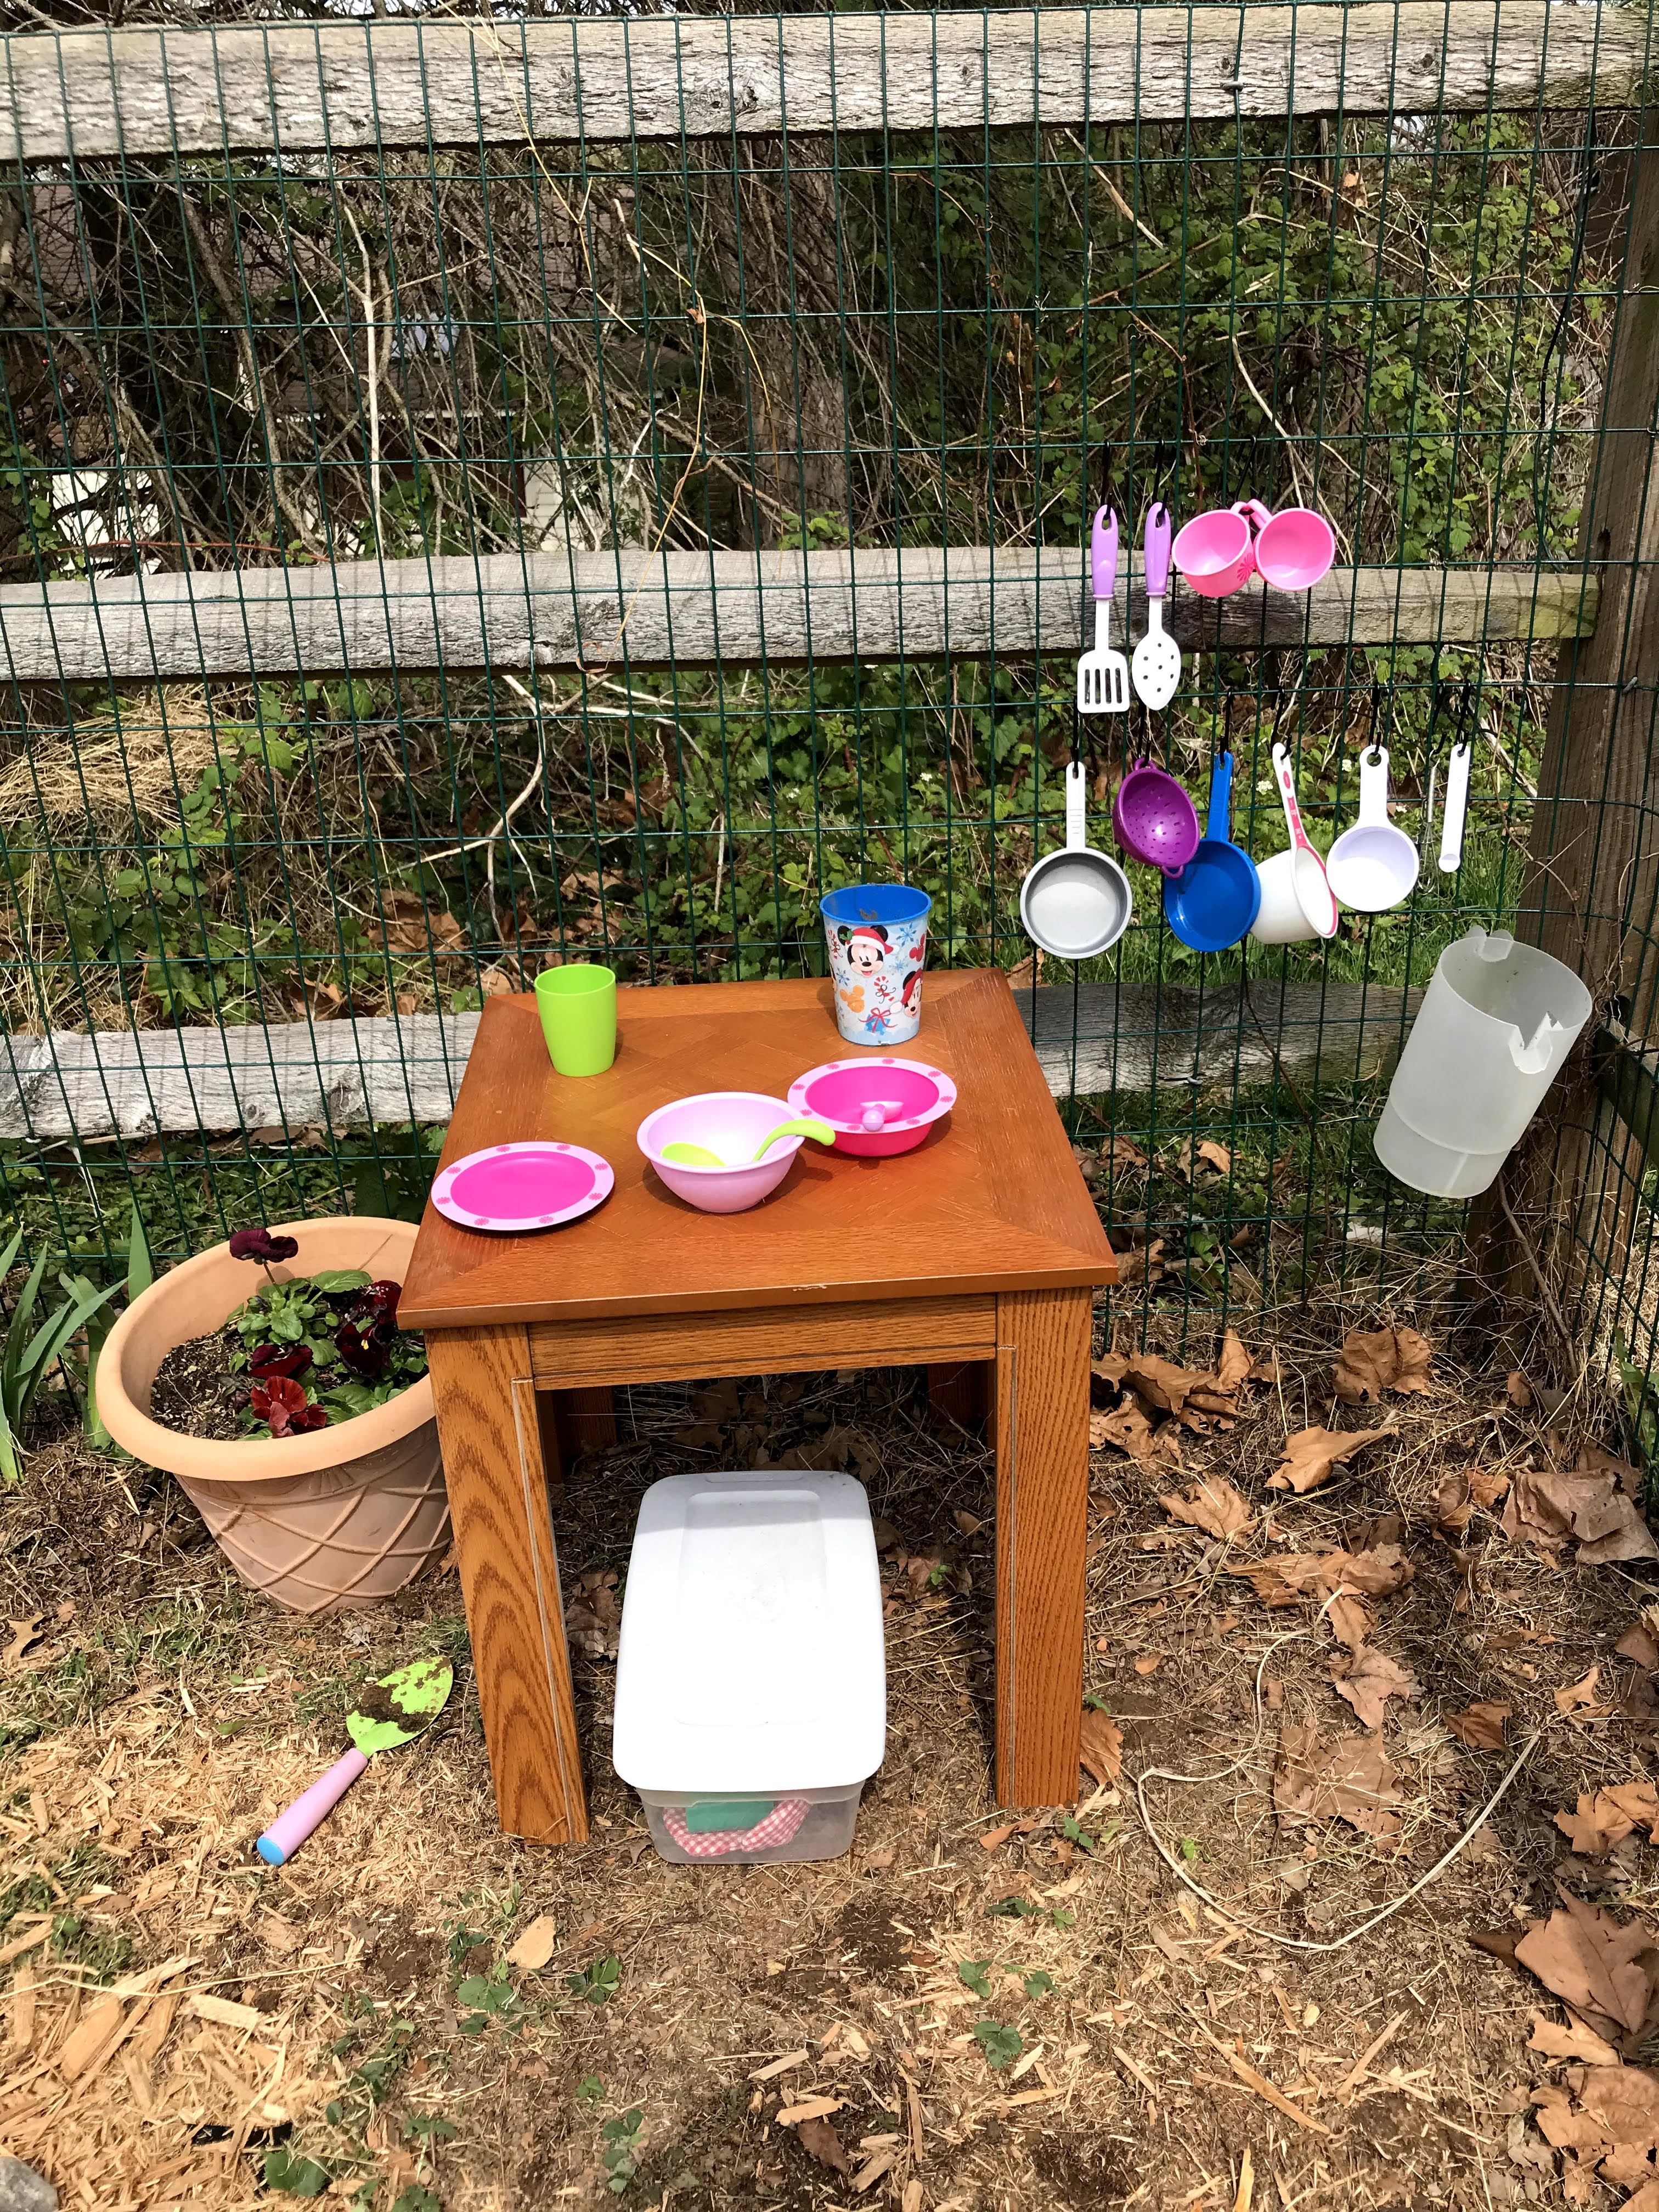
I have been using pinterest a lot lately. Since being home due to the coronavirus crisis, I have more time on my hands and I love being outdoors and doing projects for my little one. I really wanted an area for a mud kitchen and a place for her play house and slide. I found many really cool ideas on pinterest but I had to use materials I already had or that I could get with contactless delivery to my home or car. I ordered landscaping fabric and picked out a spot in my yard along the fence.
I ended up cutting away some of the fabric as you can see in the picture. I did this so my daughter can dig for dirt near her mud kitchen. I ended up having lots of extra bricks at home which I used to line the outside. I left 2 openings near the playhouse and the slide to get into the area. You could also use edging for the project.
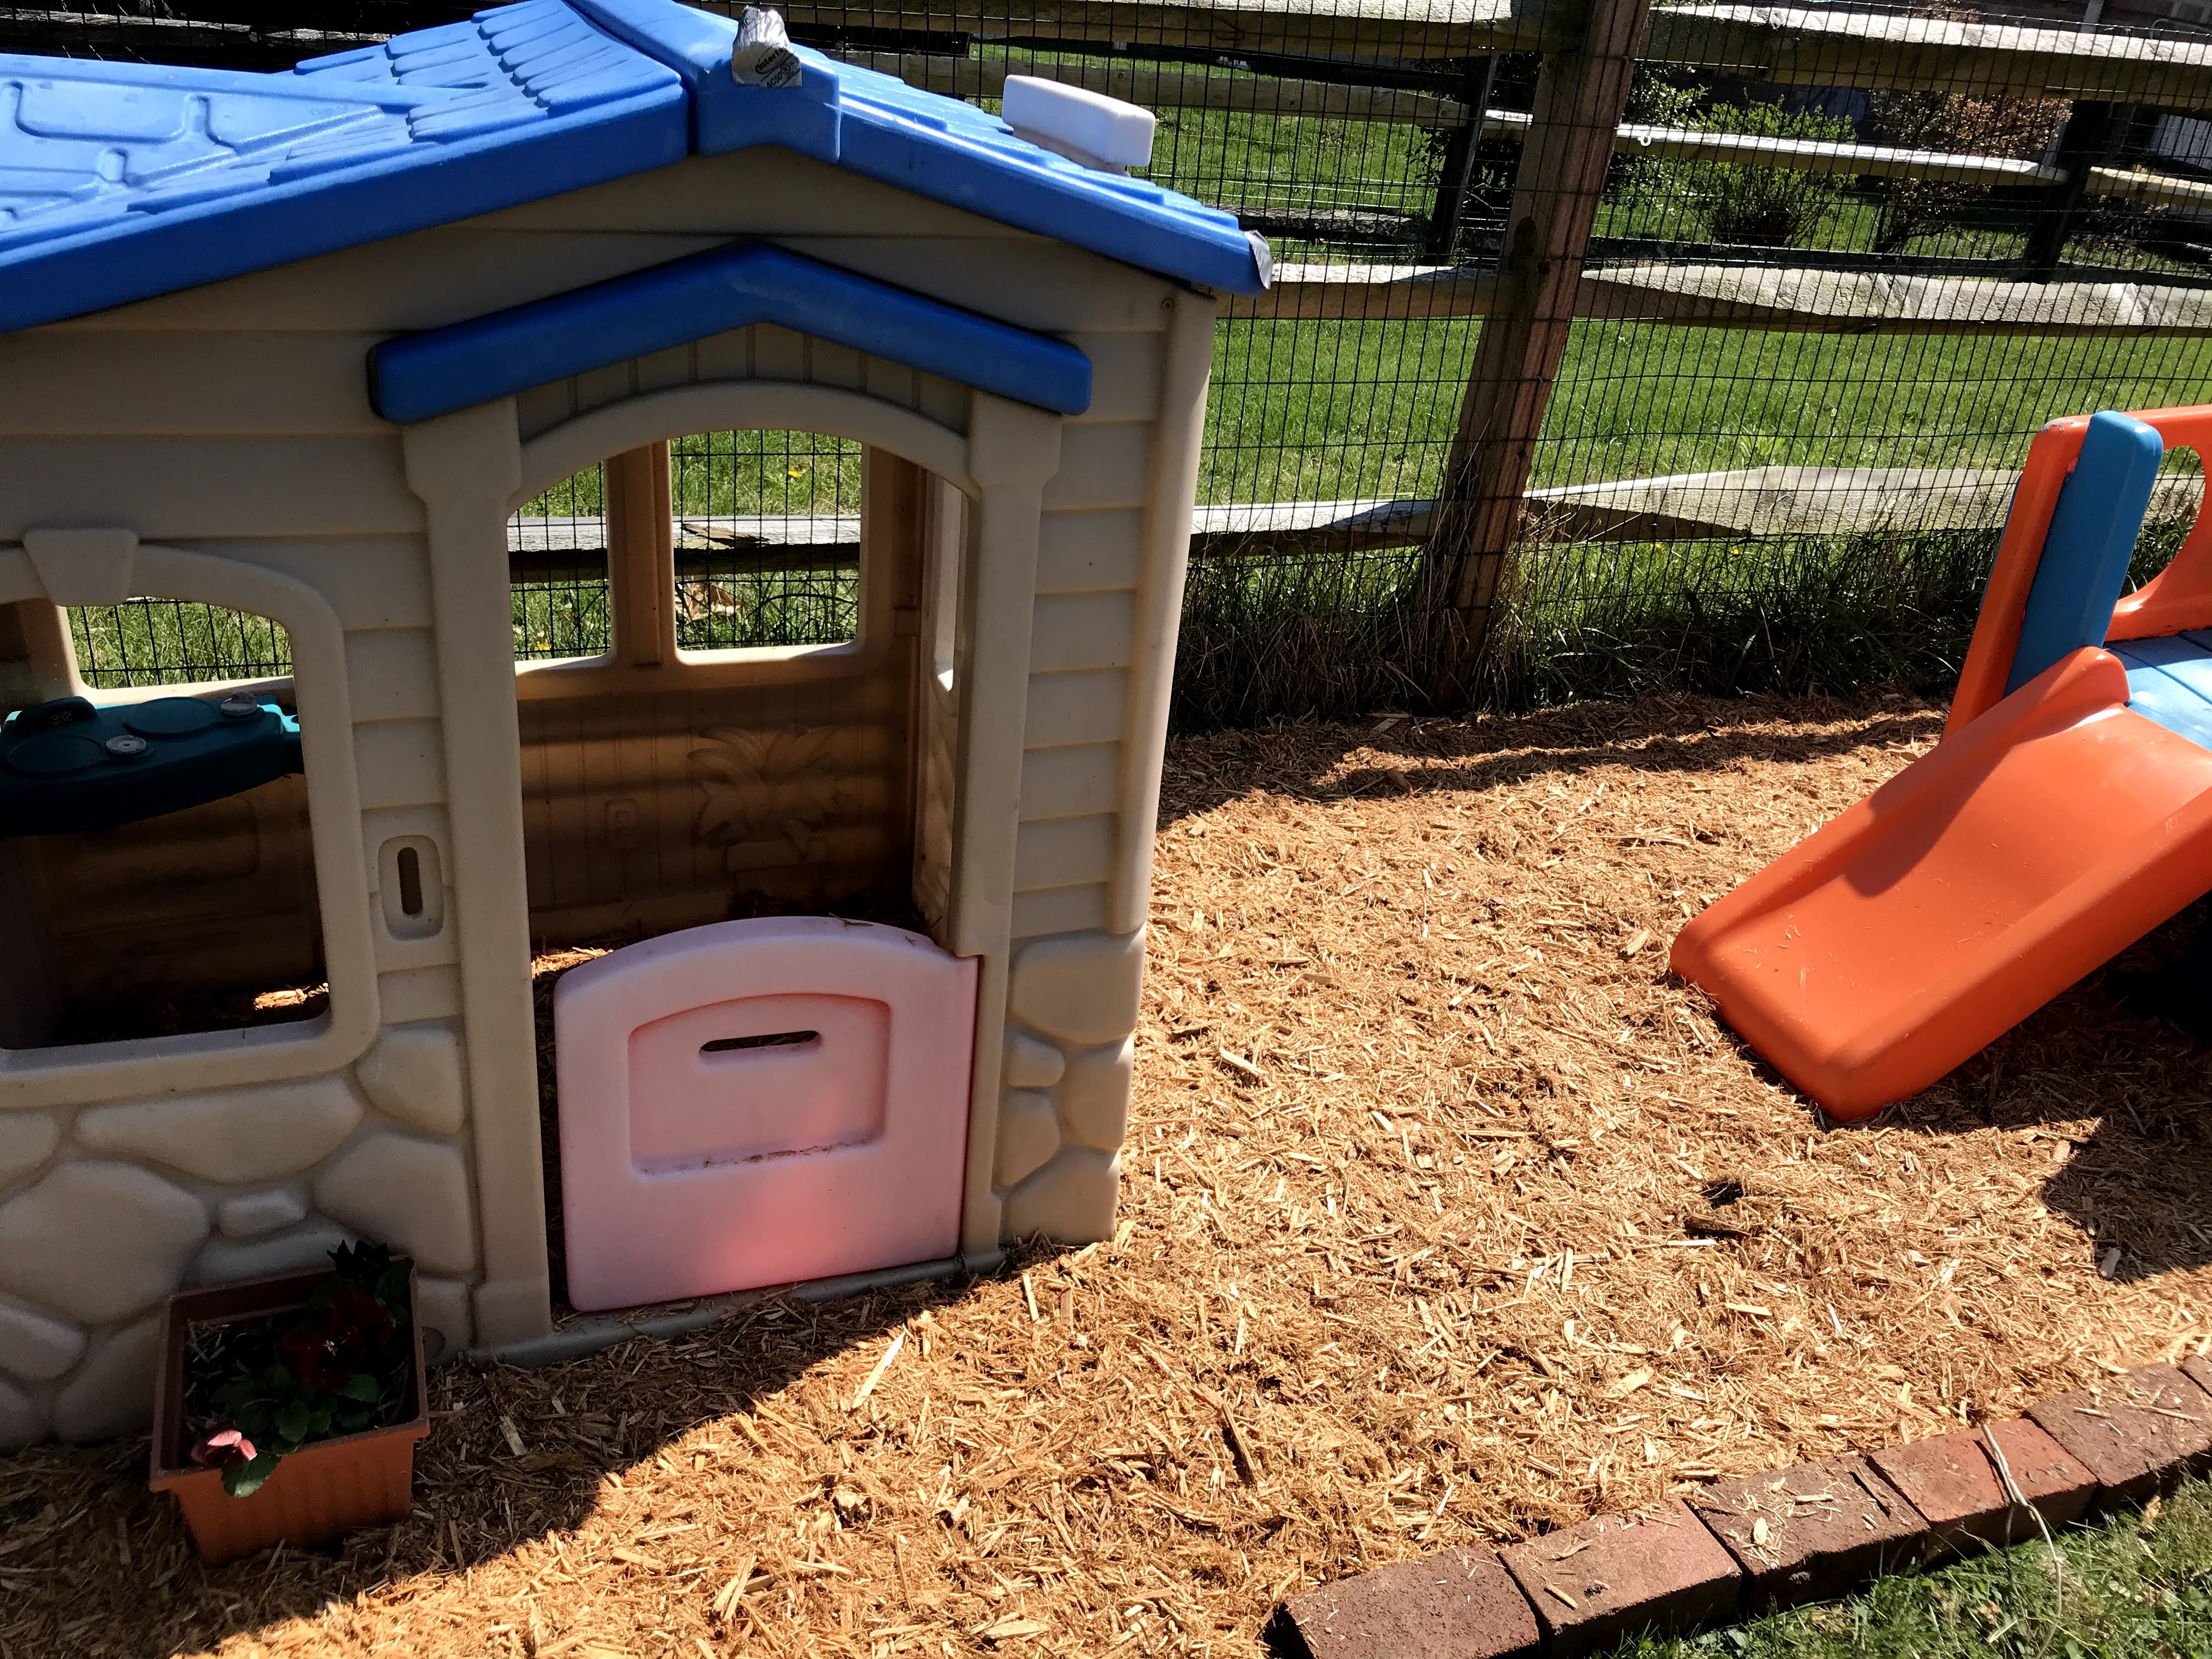
Next I added mulch on top. I went with cedar natural mulch. You definitely don’t want dyed mulch because it will only be a mess. Some people used rubber mulch but I figured that might get too hot in the summer.
I added some potted plants around the house.
I plan to add some stepping stones (which will be tree stump slices) and paint numbers on them.
I also added a little balance beam (made with bricks and a long piece of wood I had sitting in the garage.
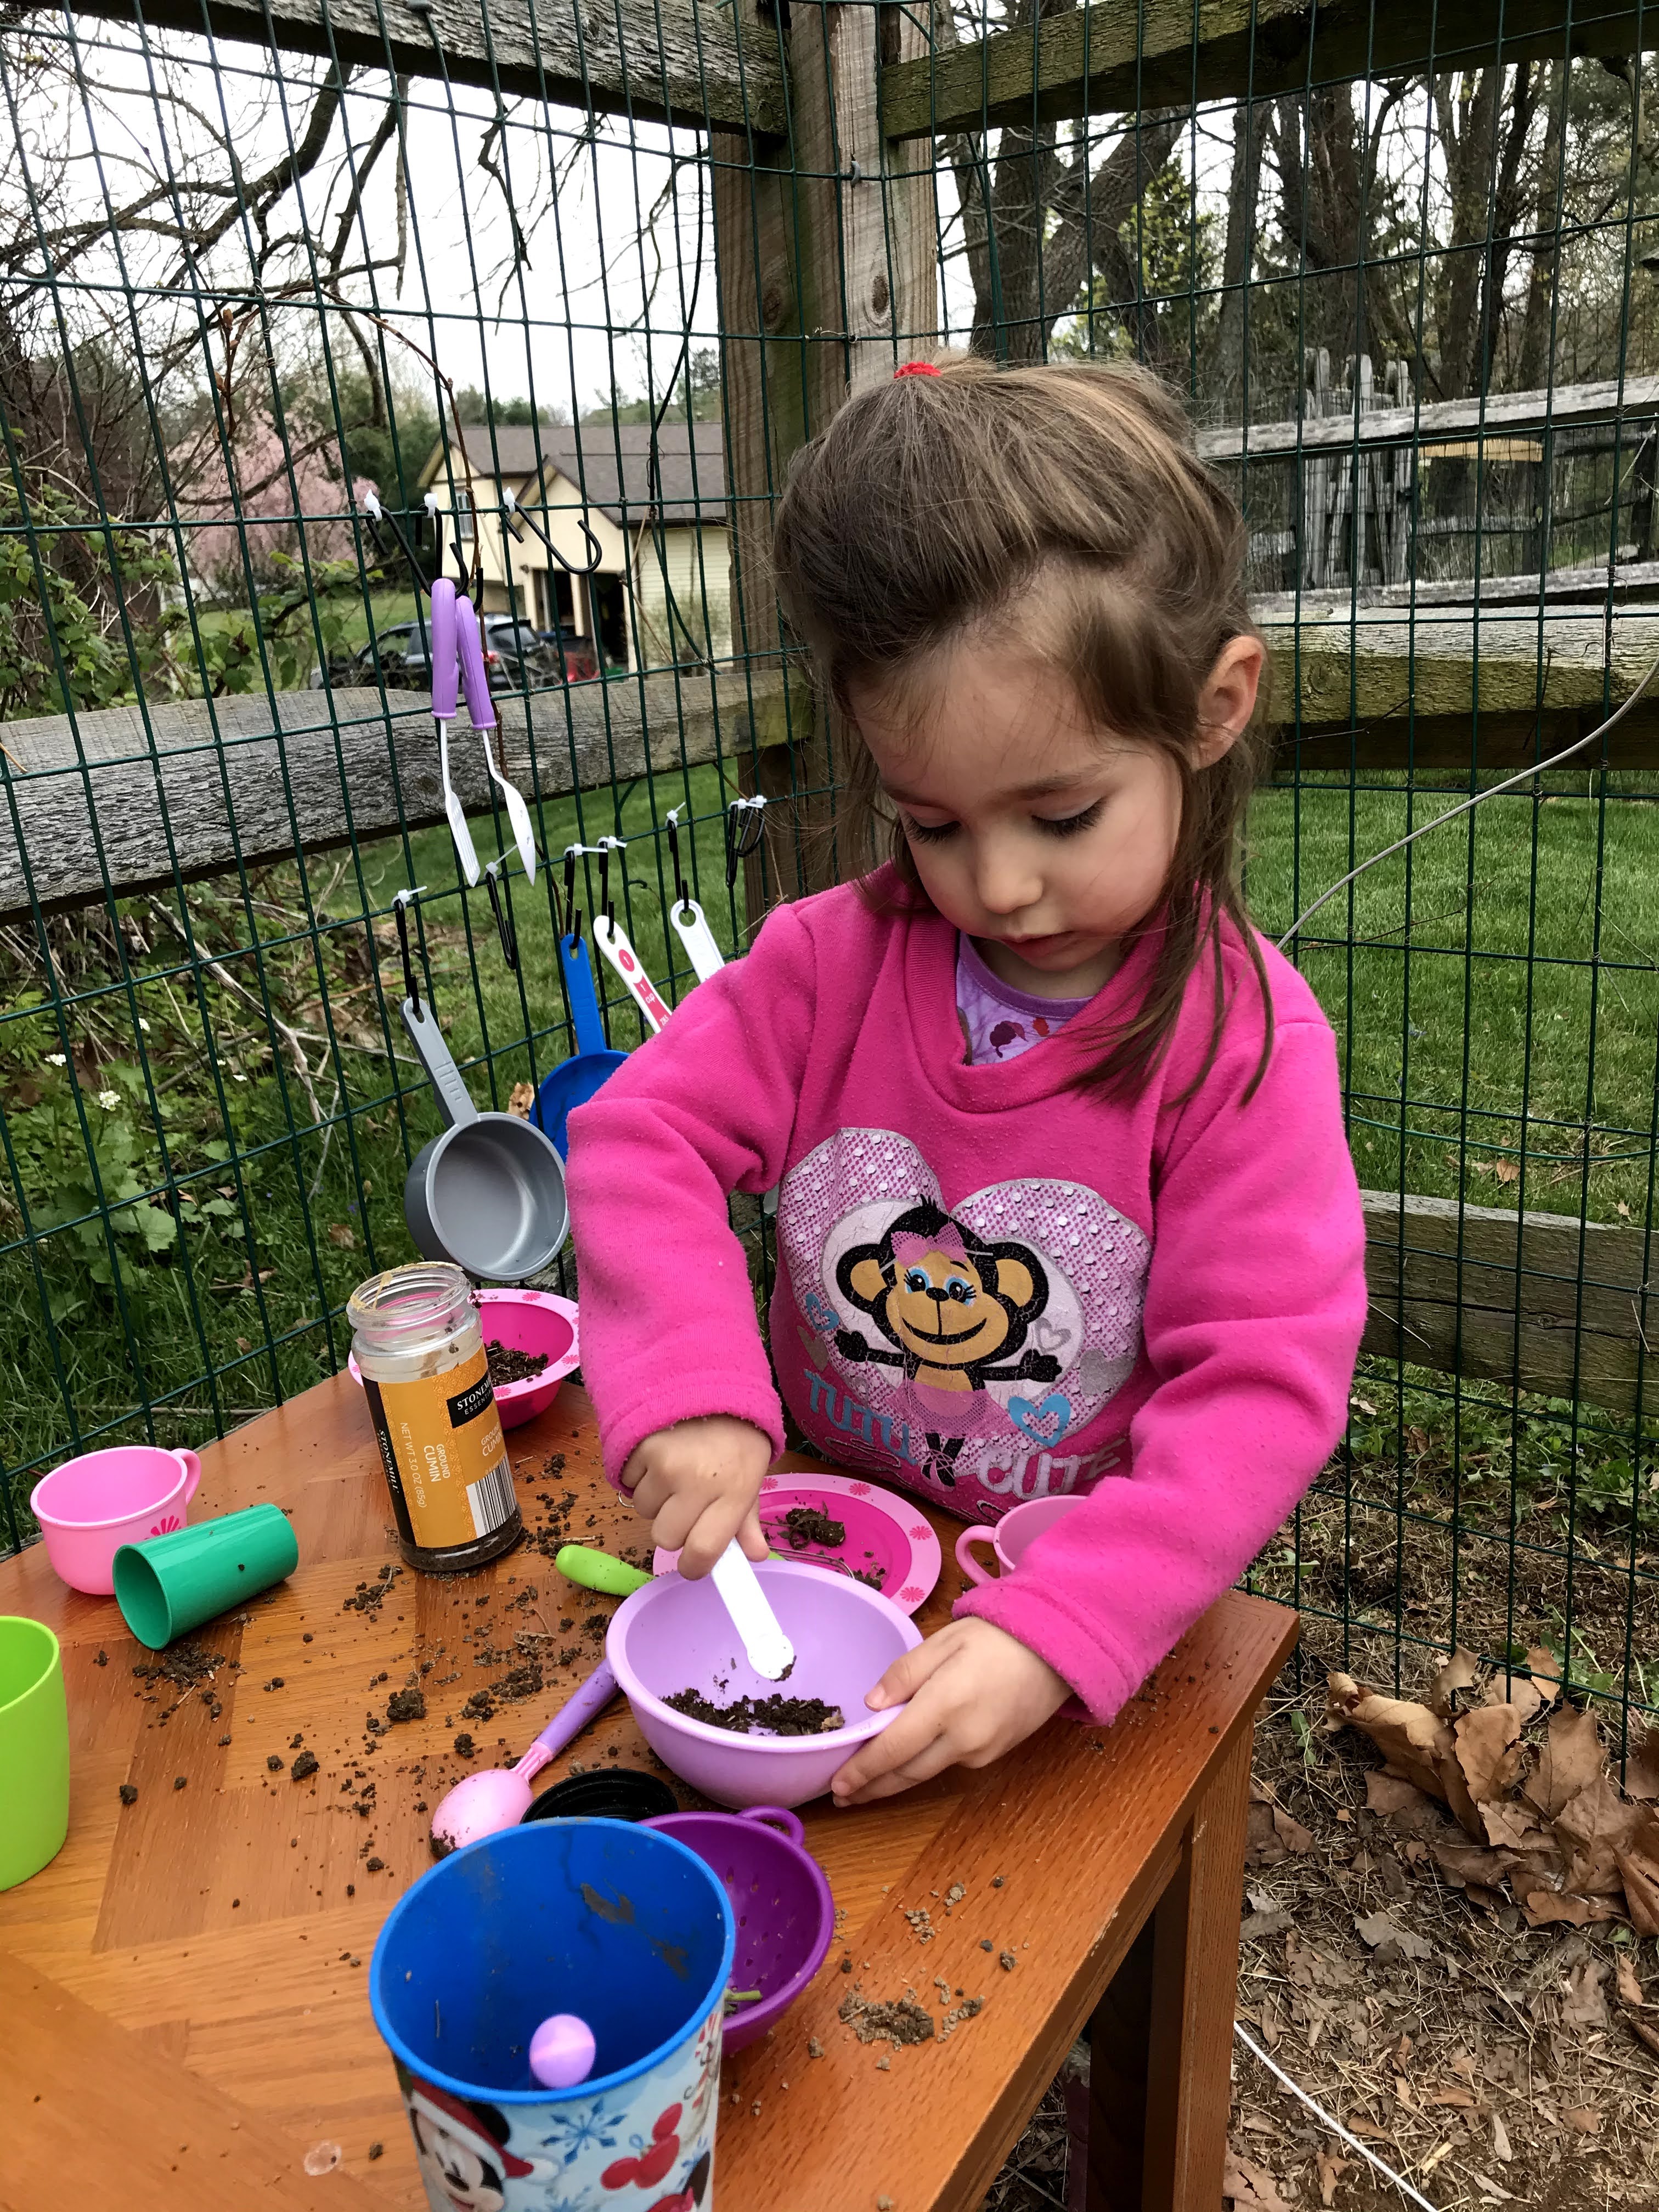
I used tools from her play set and extra kitchen tools for her mud kitchen. What is a mud kitchen? It’s just an area where kids can create and make “food” out of outdoor materials. Some people buy them, some use old wood, crates, or tables. I had an old side table I was going to get rid of so I used that. I ended up ordering hooks to attach to the fence for her materials and a container with a lid. Before summer I will probably try to add an umbrella or shade to the area using the fence or clothes line for shade.
She loves her new play area, especially her mud kitchen. She makes “salamander tea” and soup. She heats it up on her stove in her playhouse.
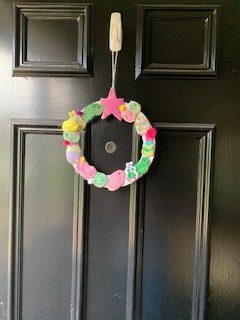
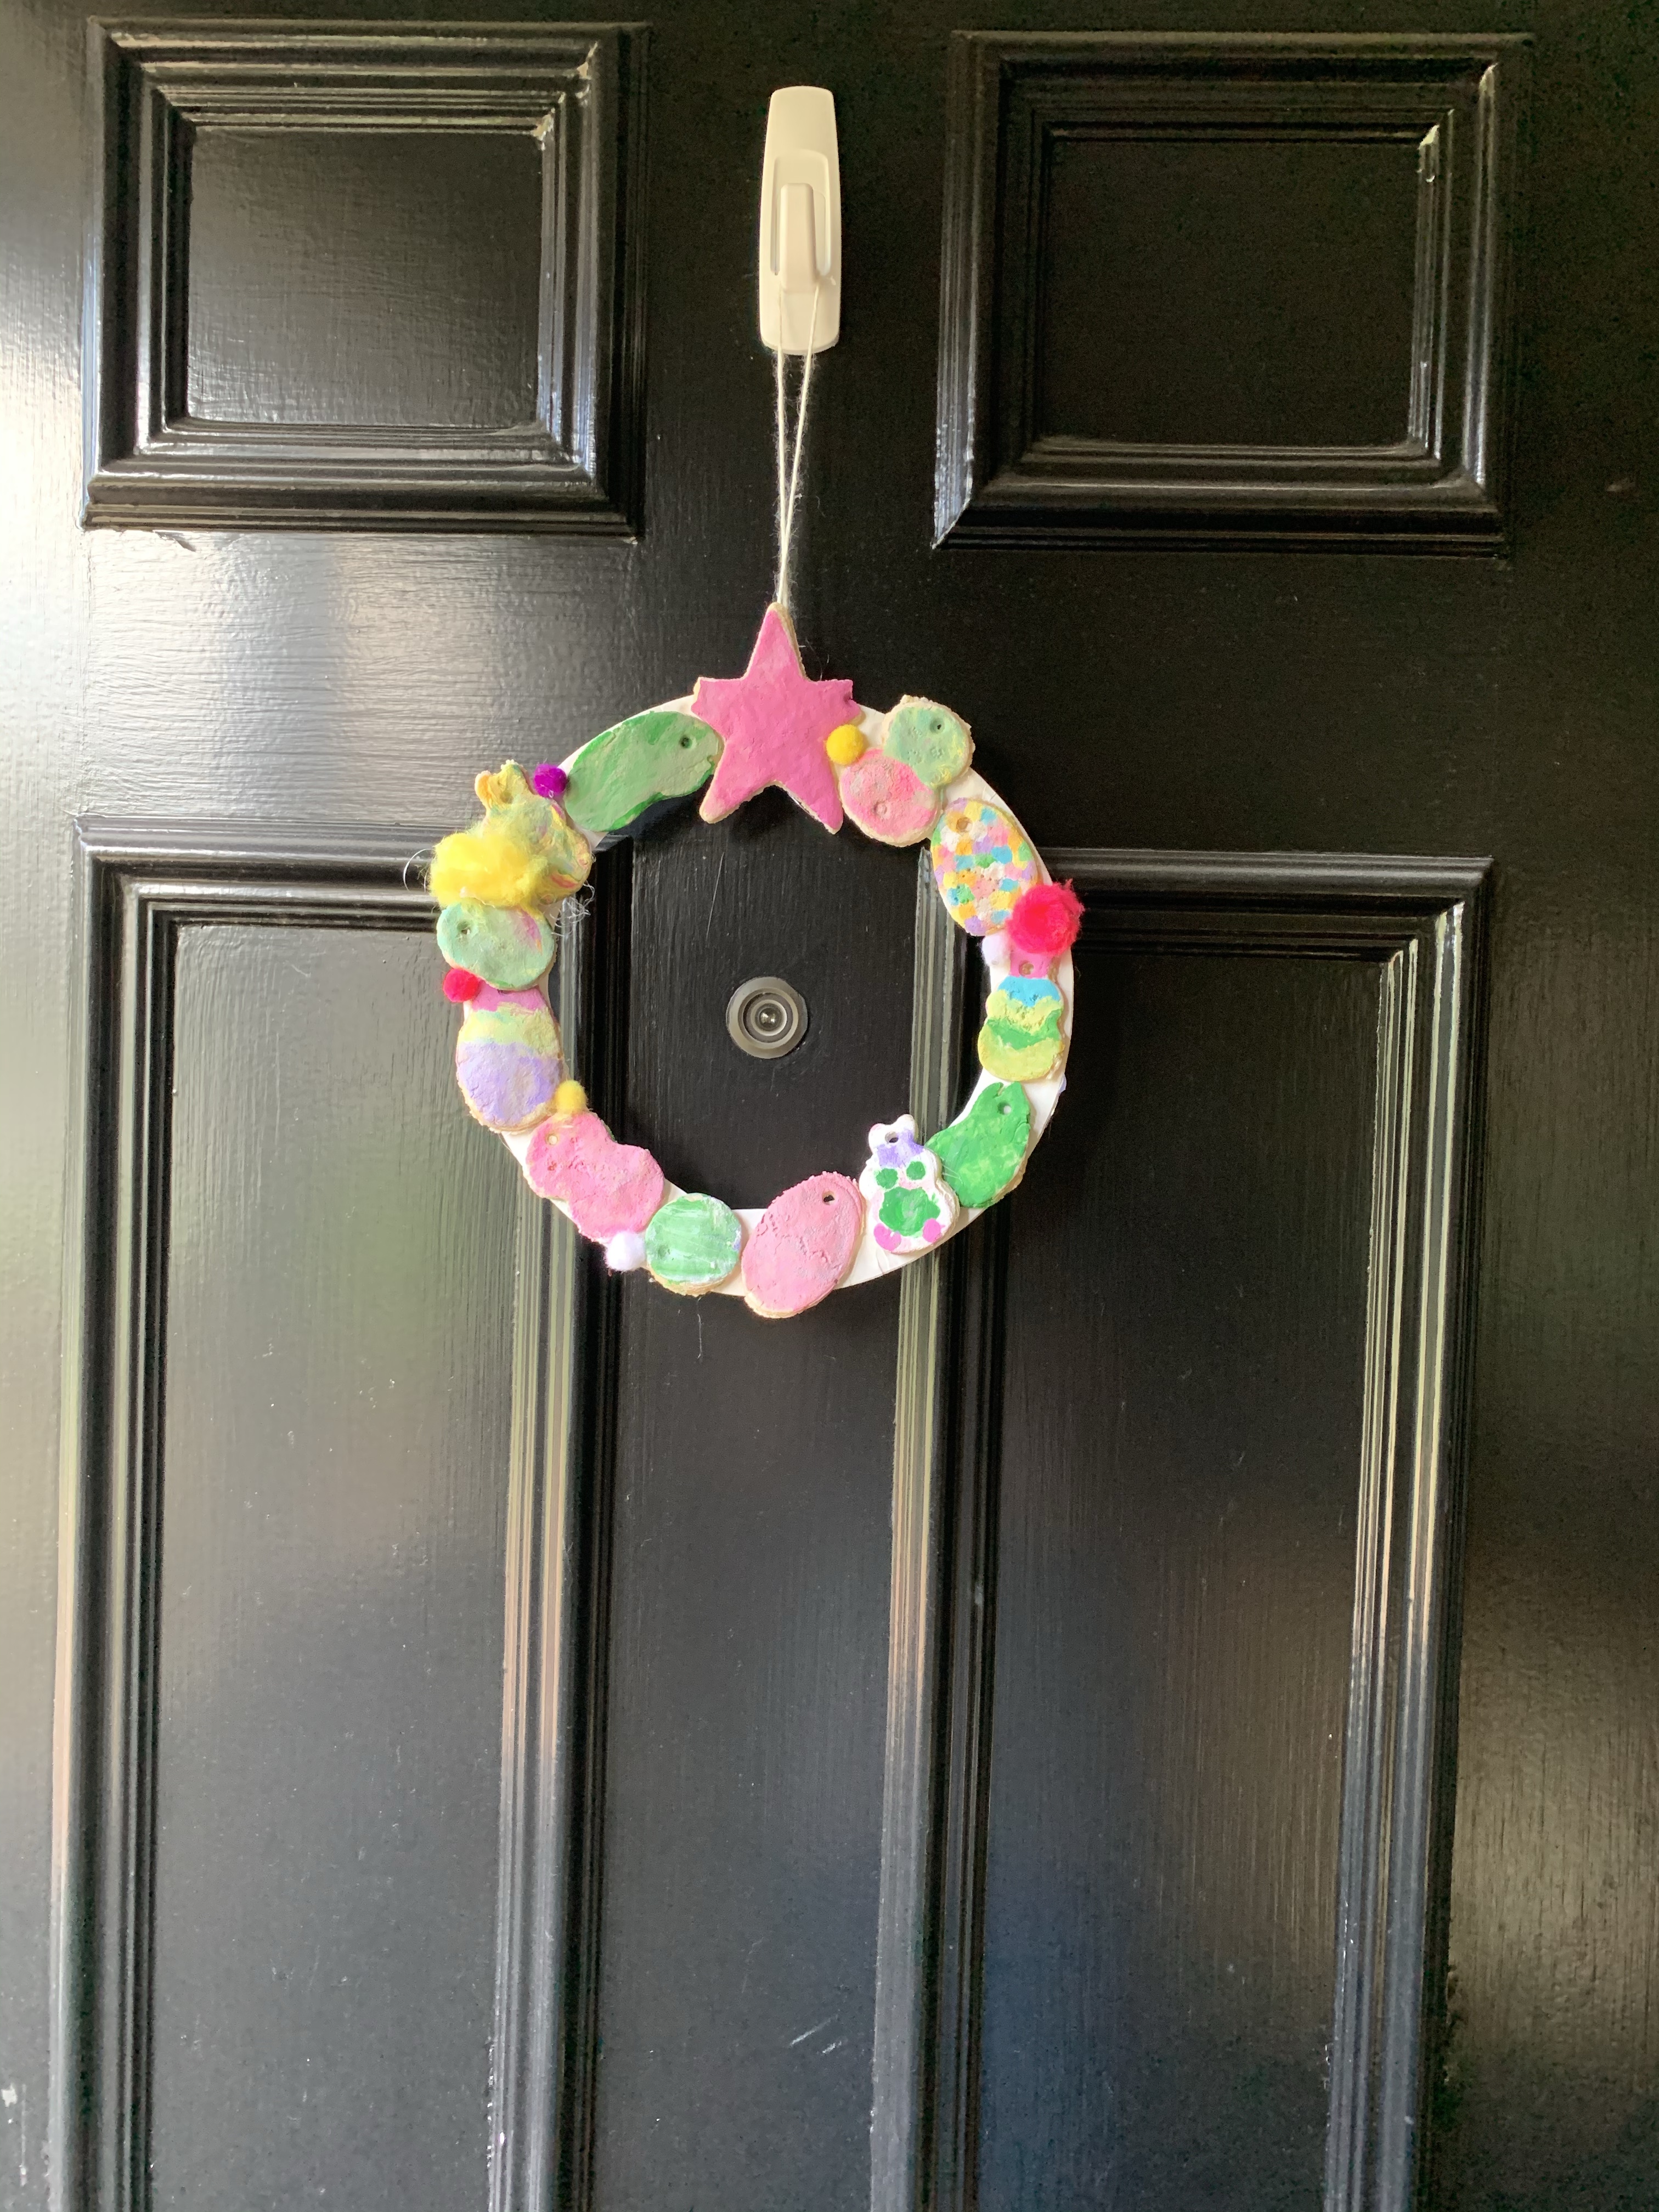
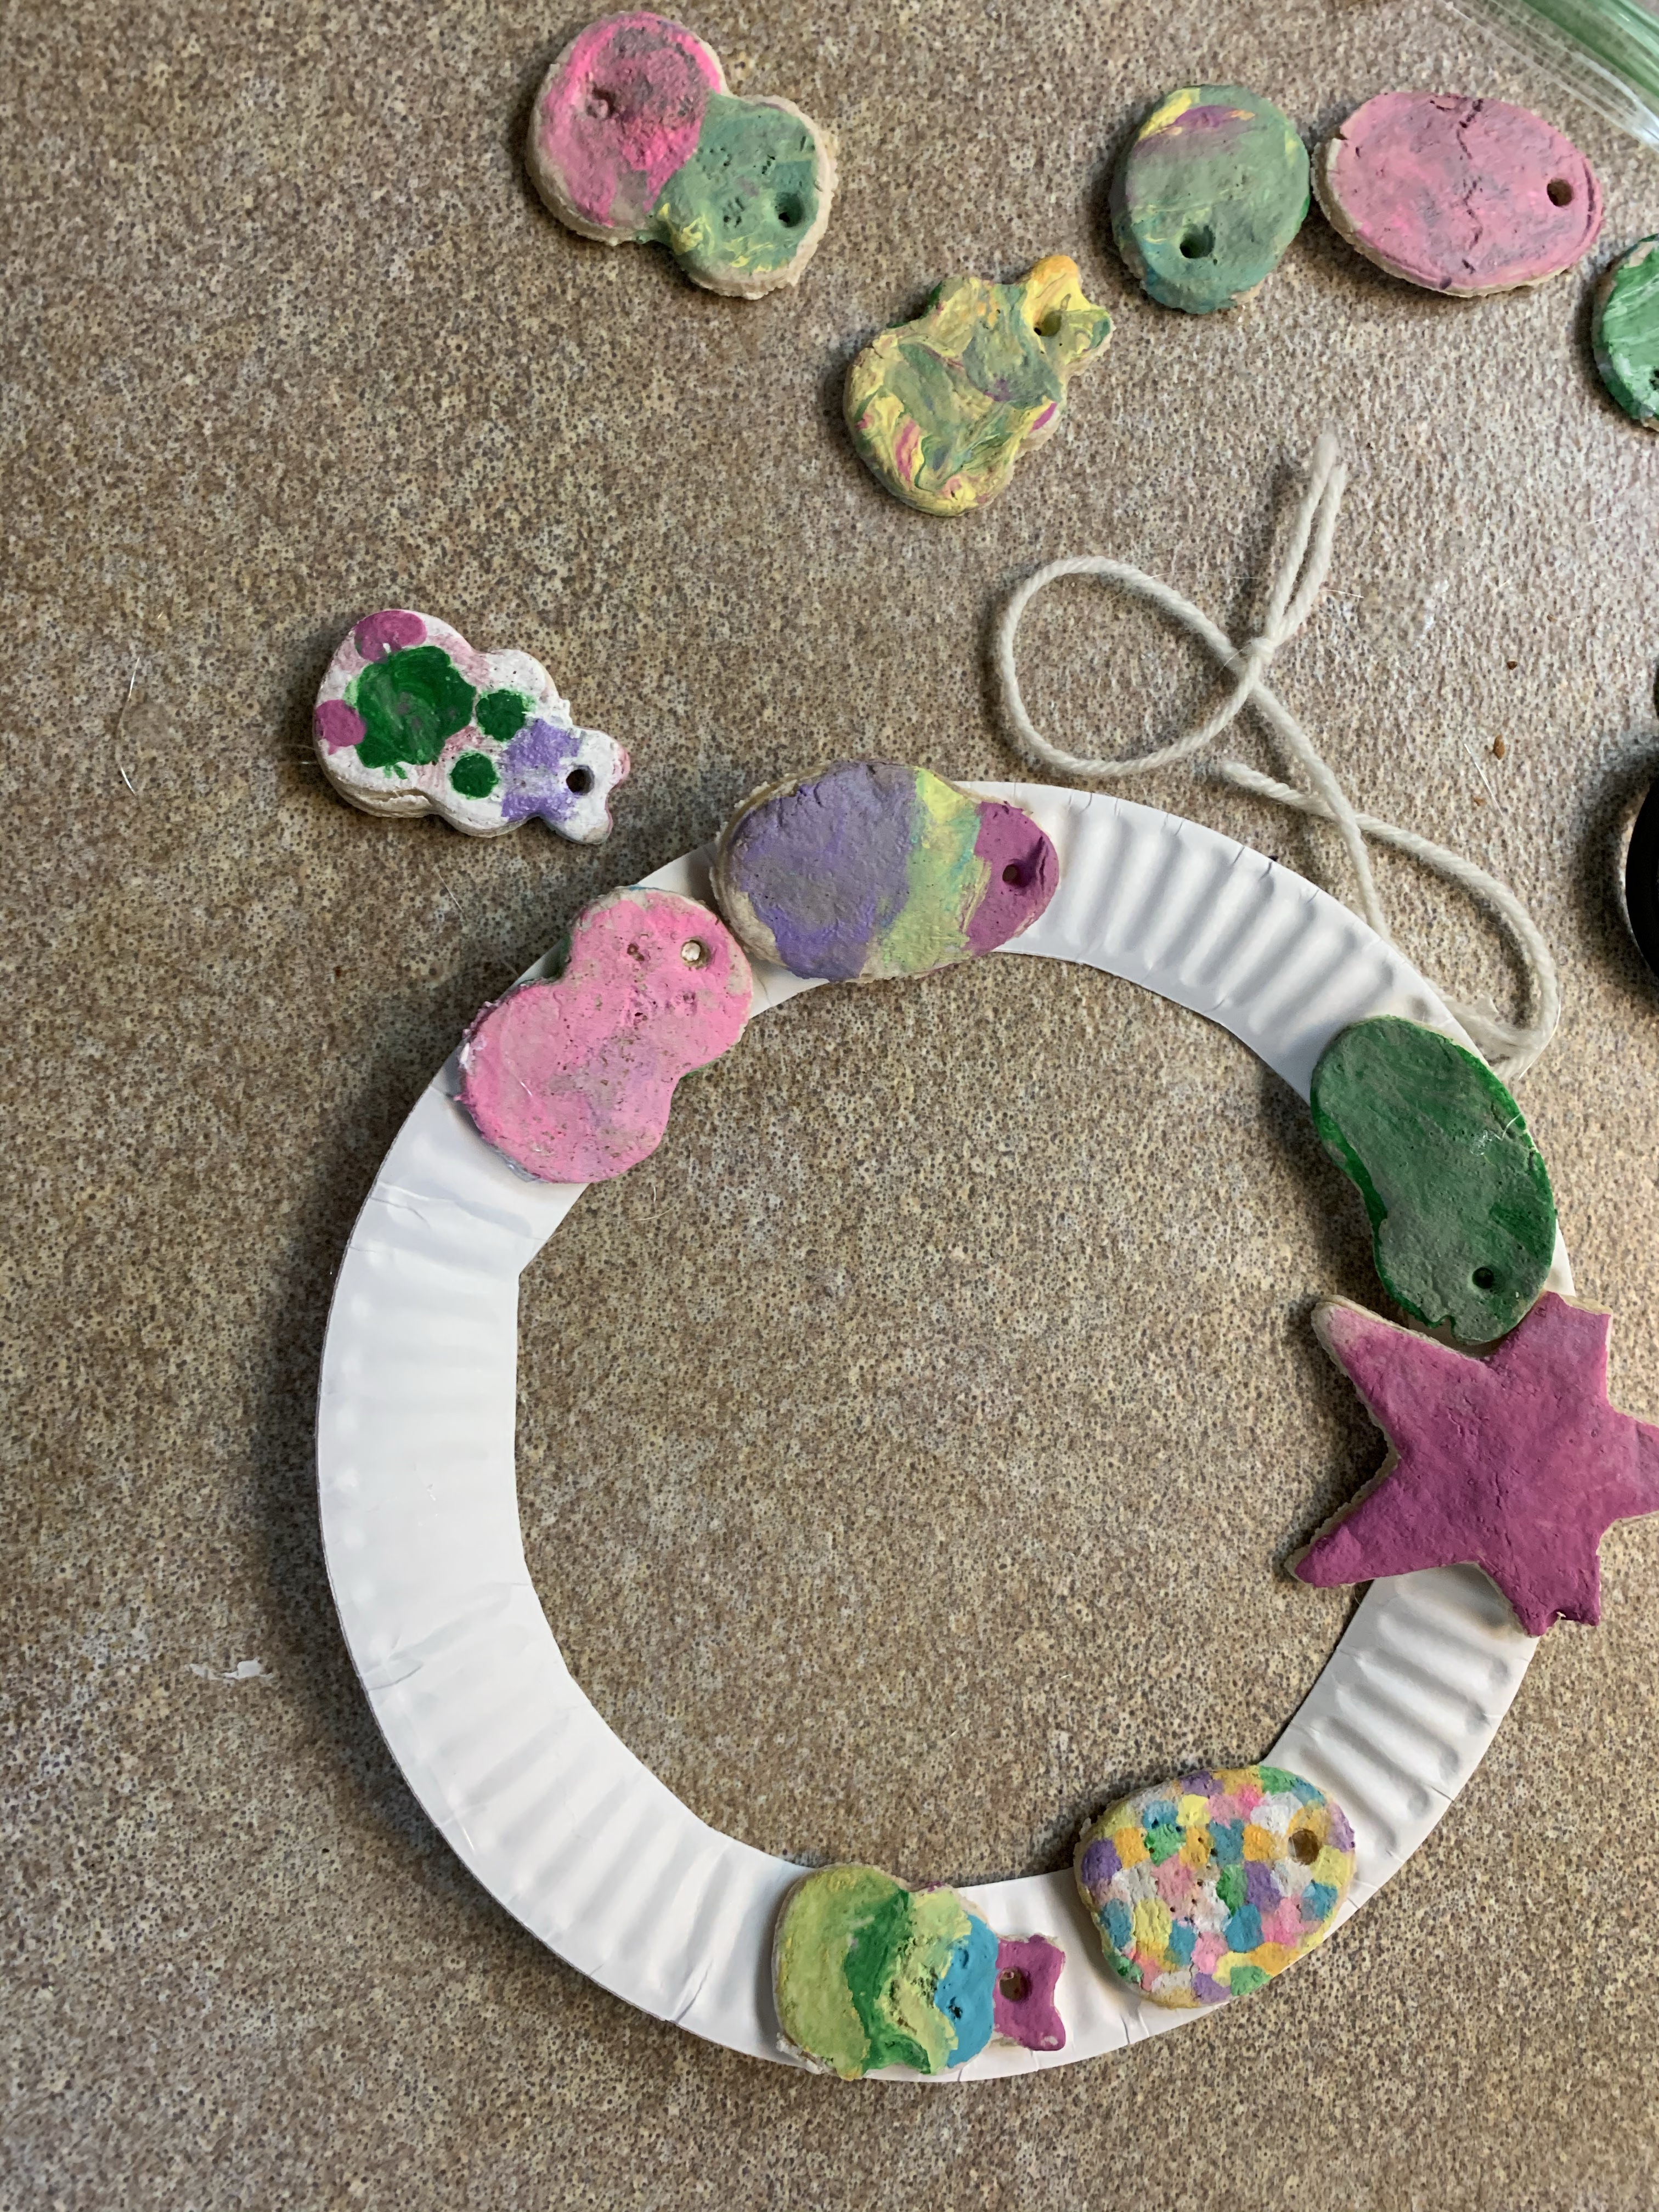
So we have done the salt dough ornaments before, but this time we made garland and a wreath out of our painted Easter ones!
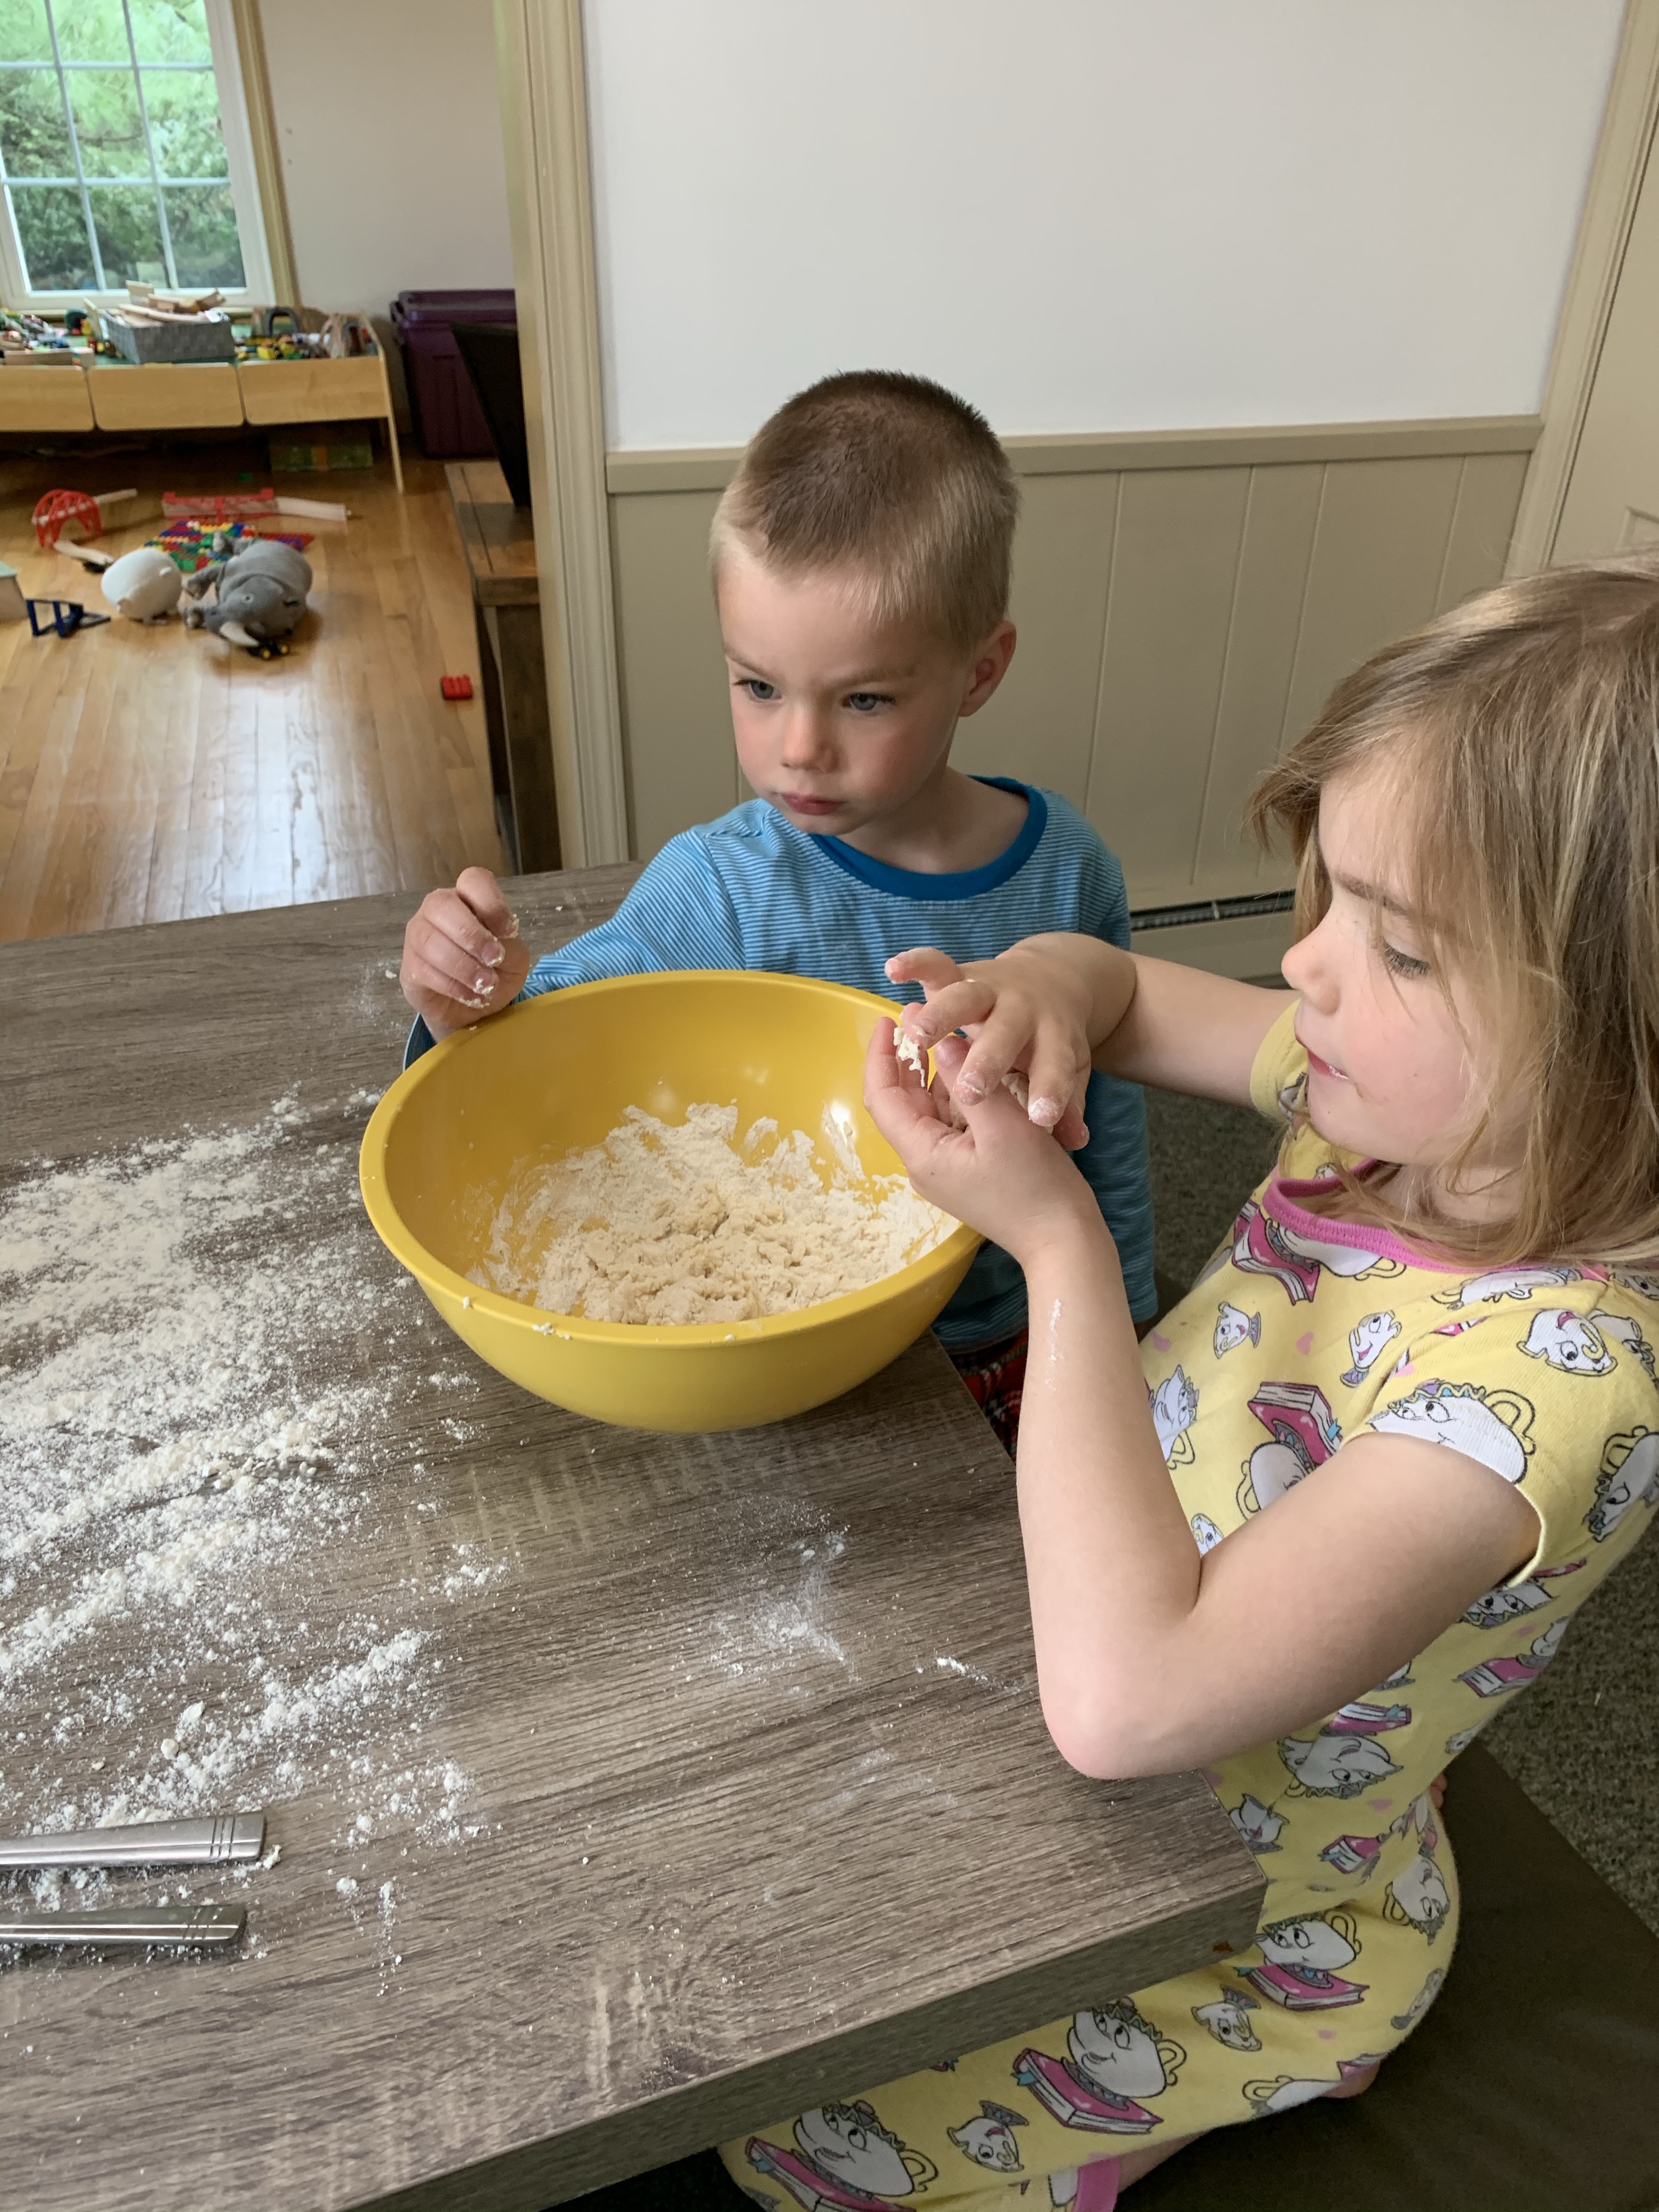
All you need to make salt dough ornaments is flour, water, and salt. So, start with two cups of flour, 1 cup and salt and mix. Then add water slowly until it is a play dough like consistency. We ended up using our hands to mix it up. If it is too sticky, add more flour, too dry add more water.
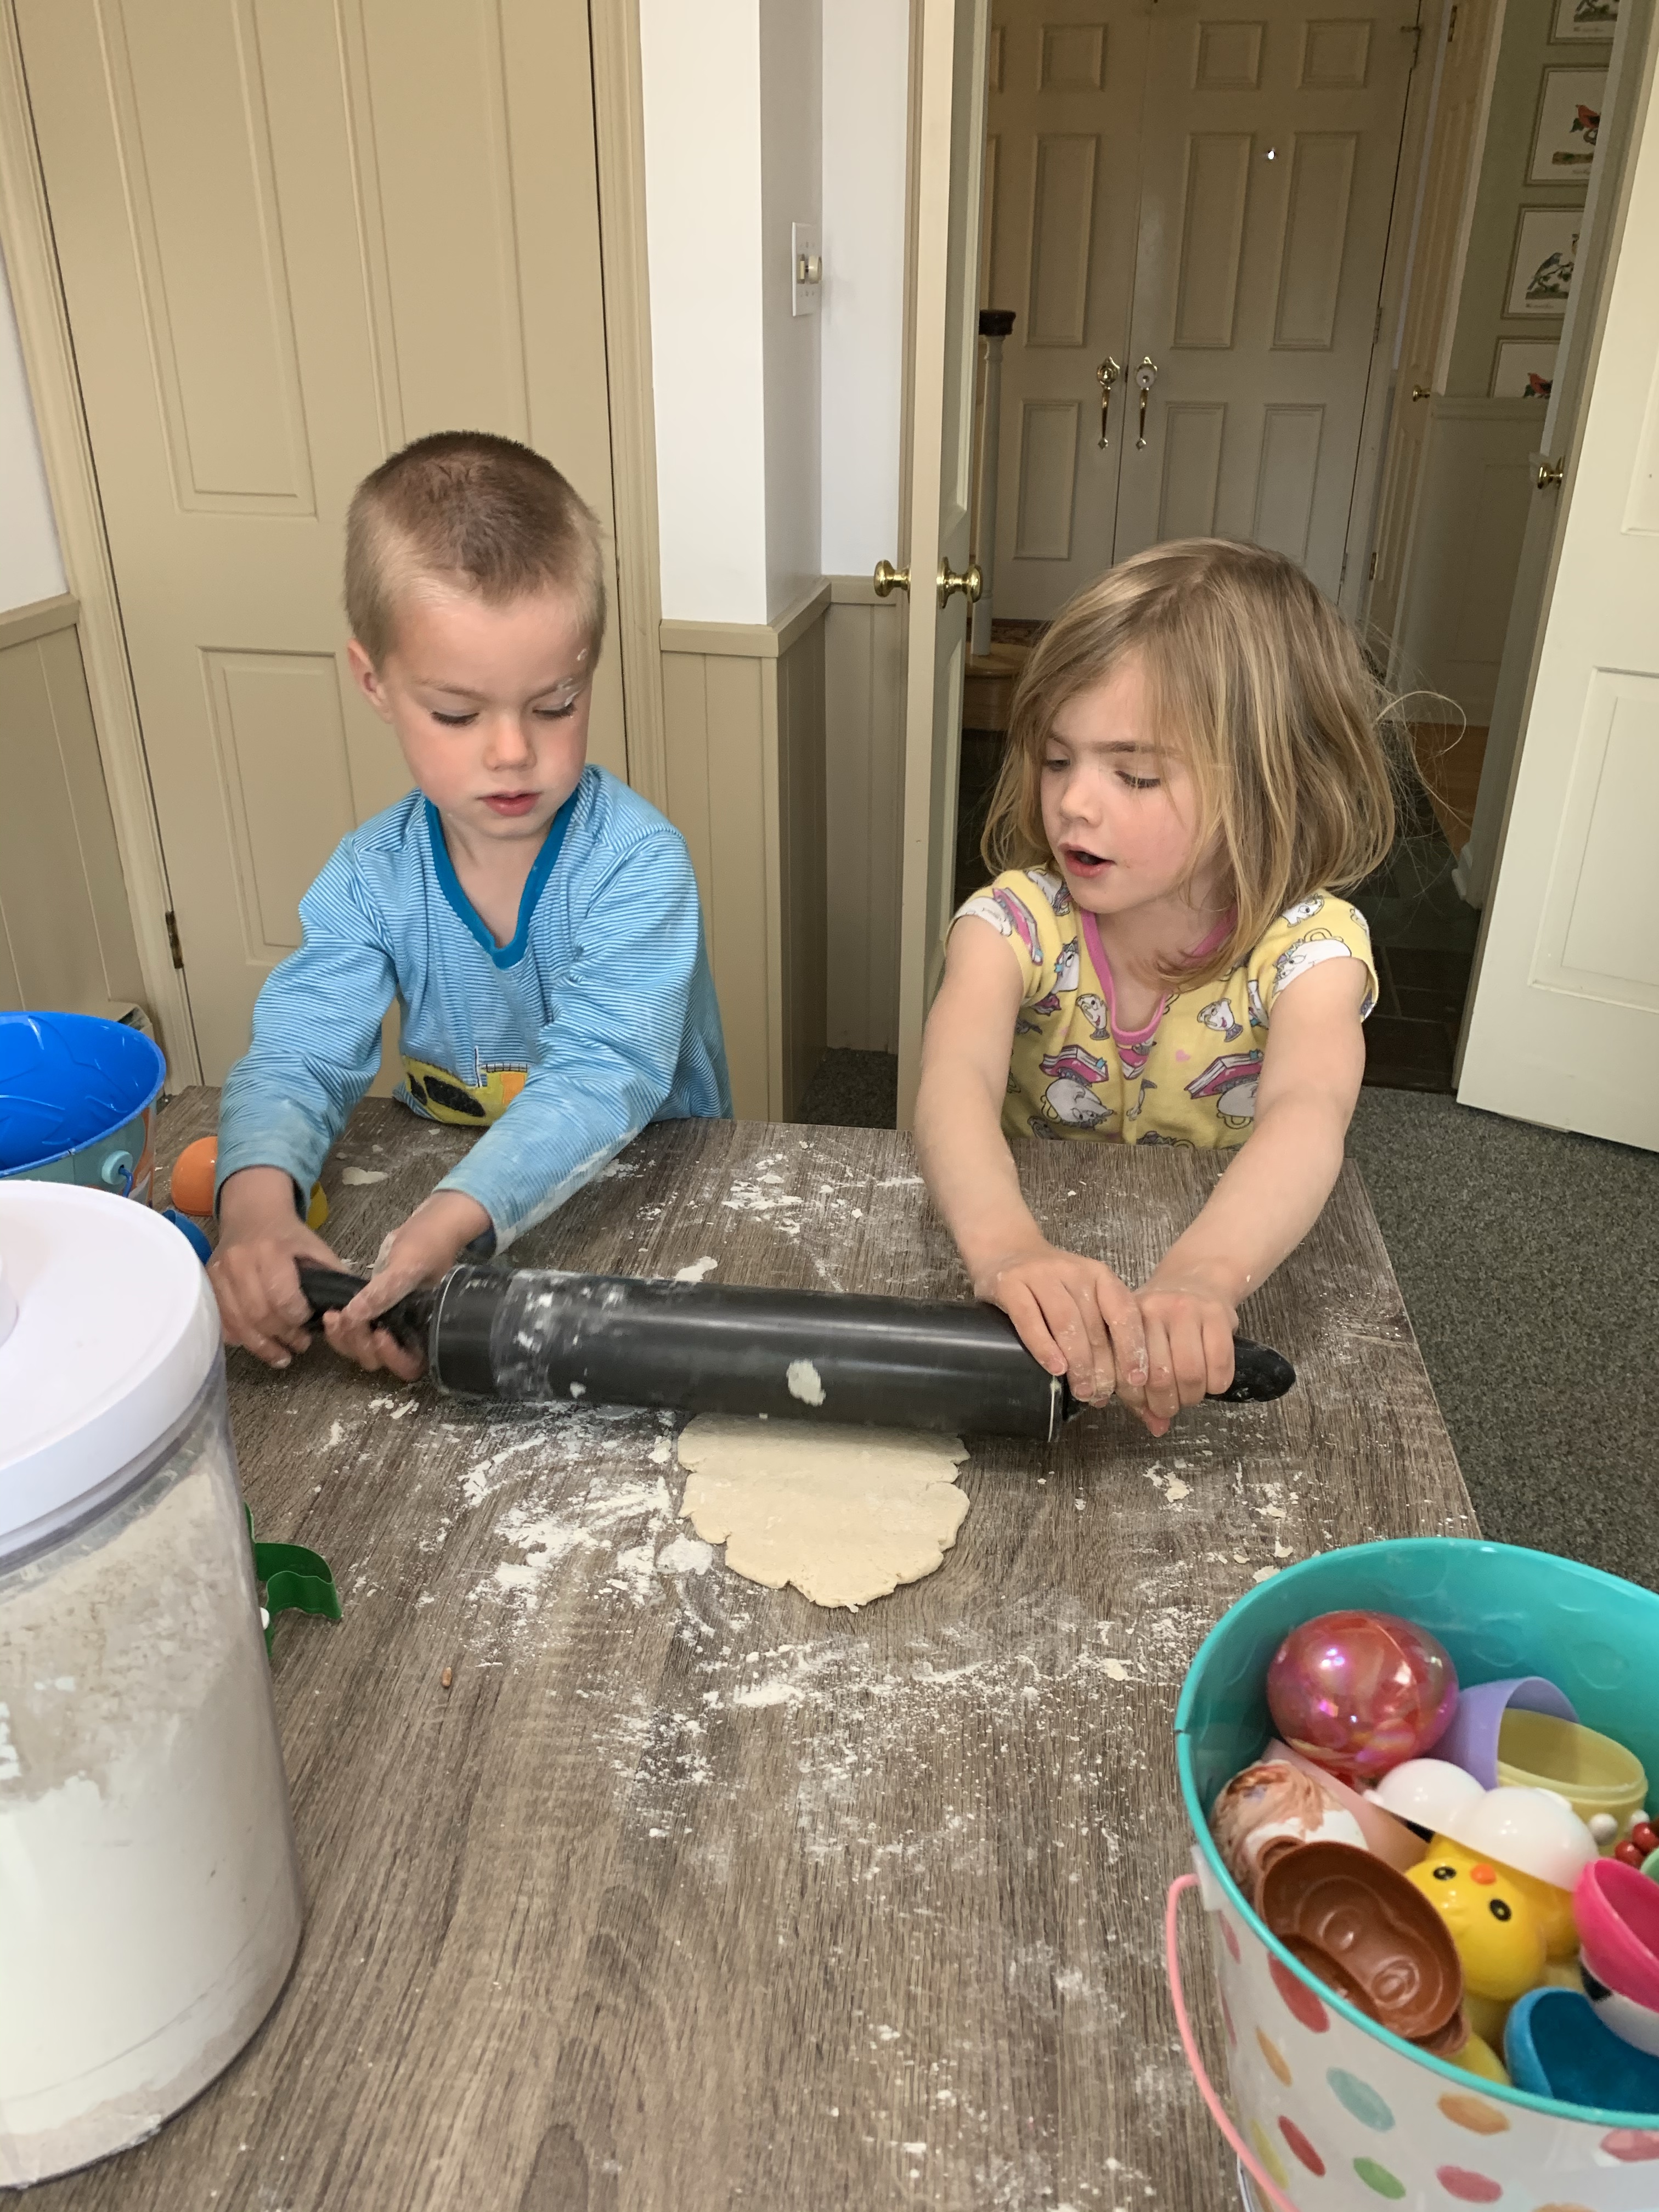
Then we rolled out the dough to a 1/4 inch thin, and used some Easter egg halves, including a bunny, chick, and jelly bean shape. You can of course just use cookie cutters as well. Use a straw to make a circle hole at the top of each ornament so you can add string later.
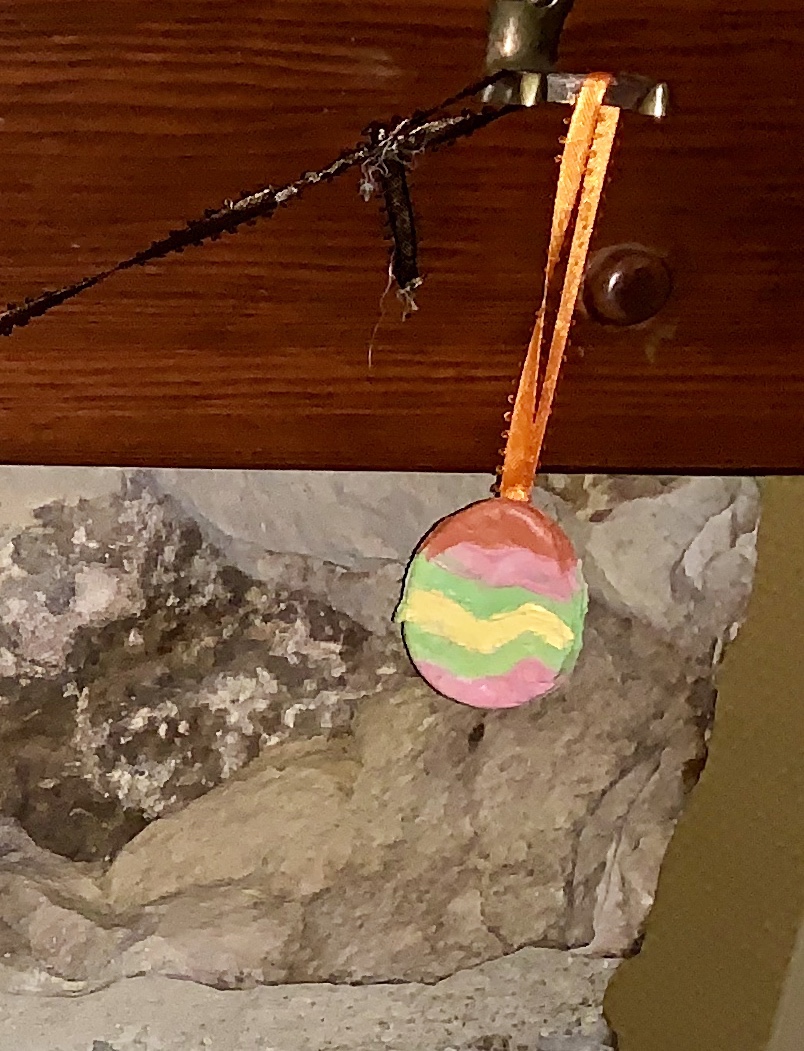
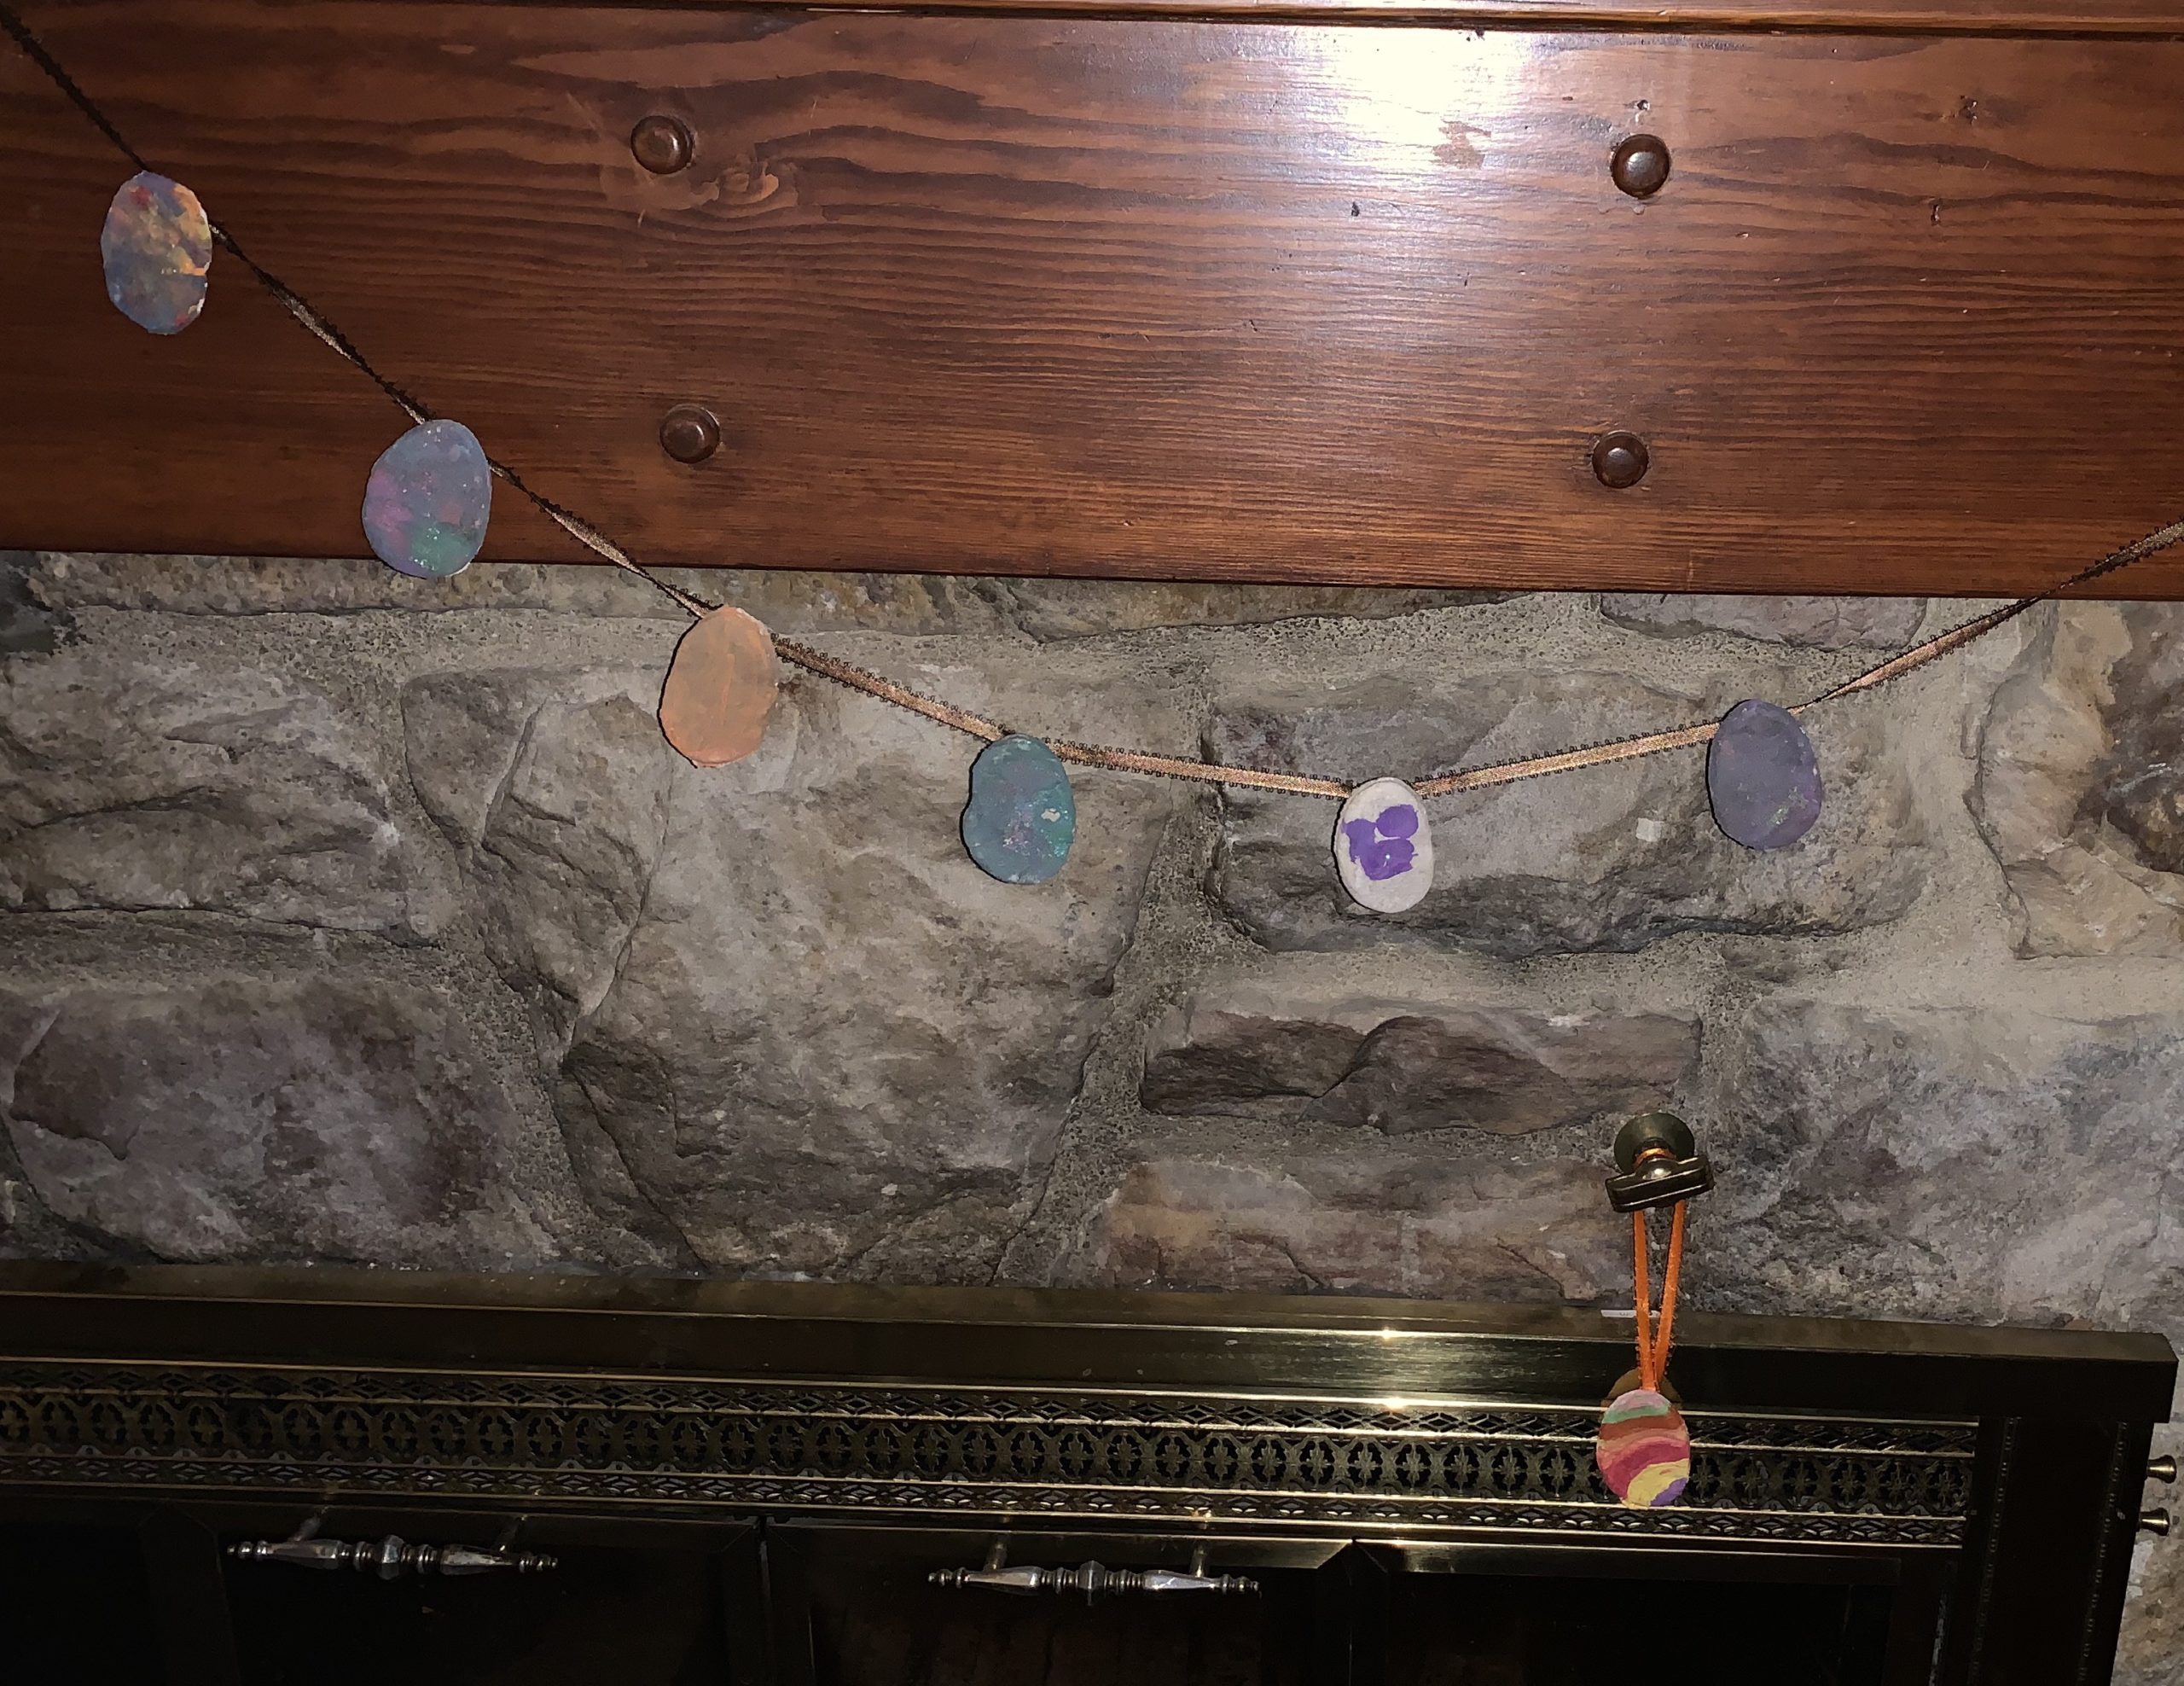
Turn the oven on at 200 degrees and put parchment paper on the tray and leave in the oven for 2-3 hours. If you don’t have parchment paper just move the ornaments with a pie lifter to make sure they don’t stick about an hour in. Time depends on how thick the ornaments are. Once cooled and dried, paint them as you wish. You can add sparkles if you want. Once all dried, use string or ribbon through the hole and tie. After that hang them up!
Or, you can make garland by putting one ornament through the string and then tying it in place and continuing until desired effect.
If you want to make a wreath, we just used 2 paper plates glued together and cut out the inner circle then used a hot glue gun. Of course you can use cardboard or other material, but this is what we had on hand with the quarantine.
We used the glue gun to glue on some ribbon and add pom poms.
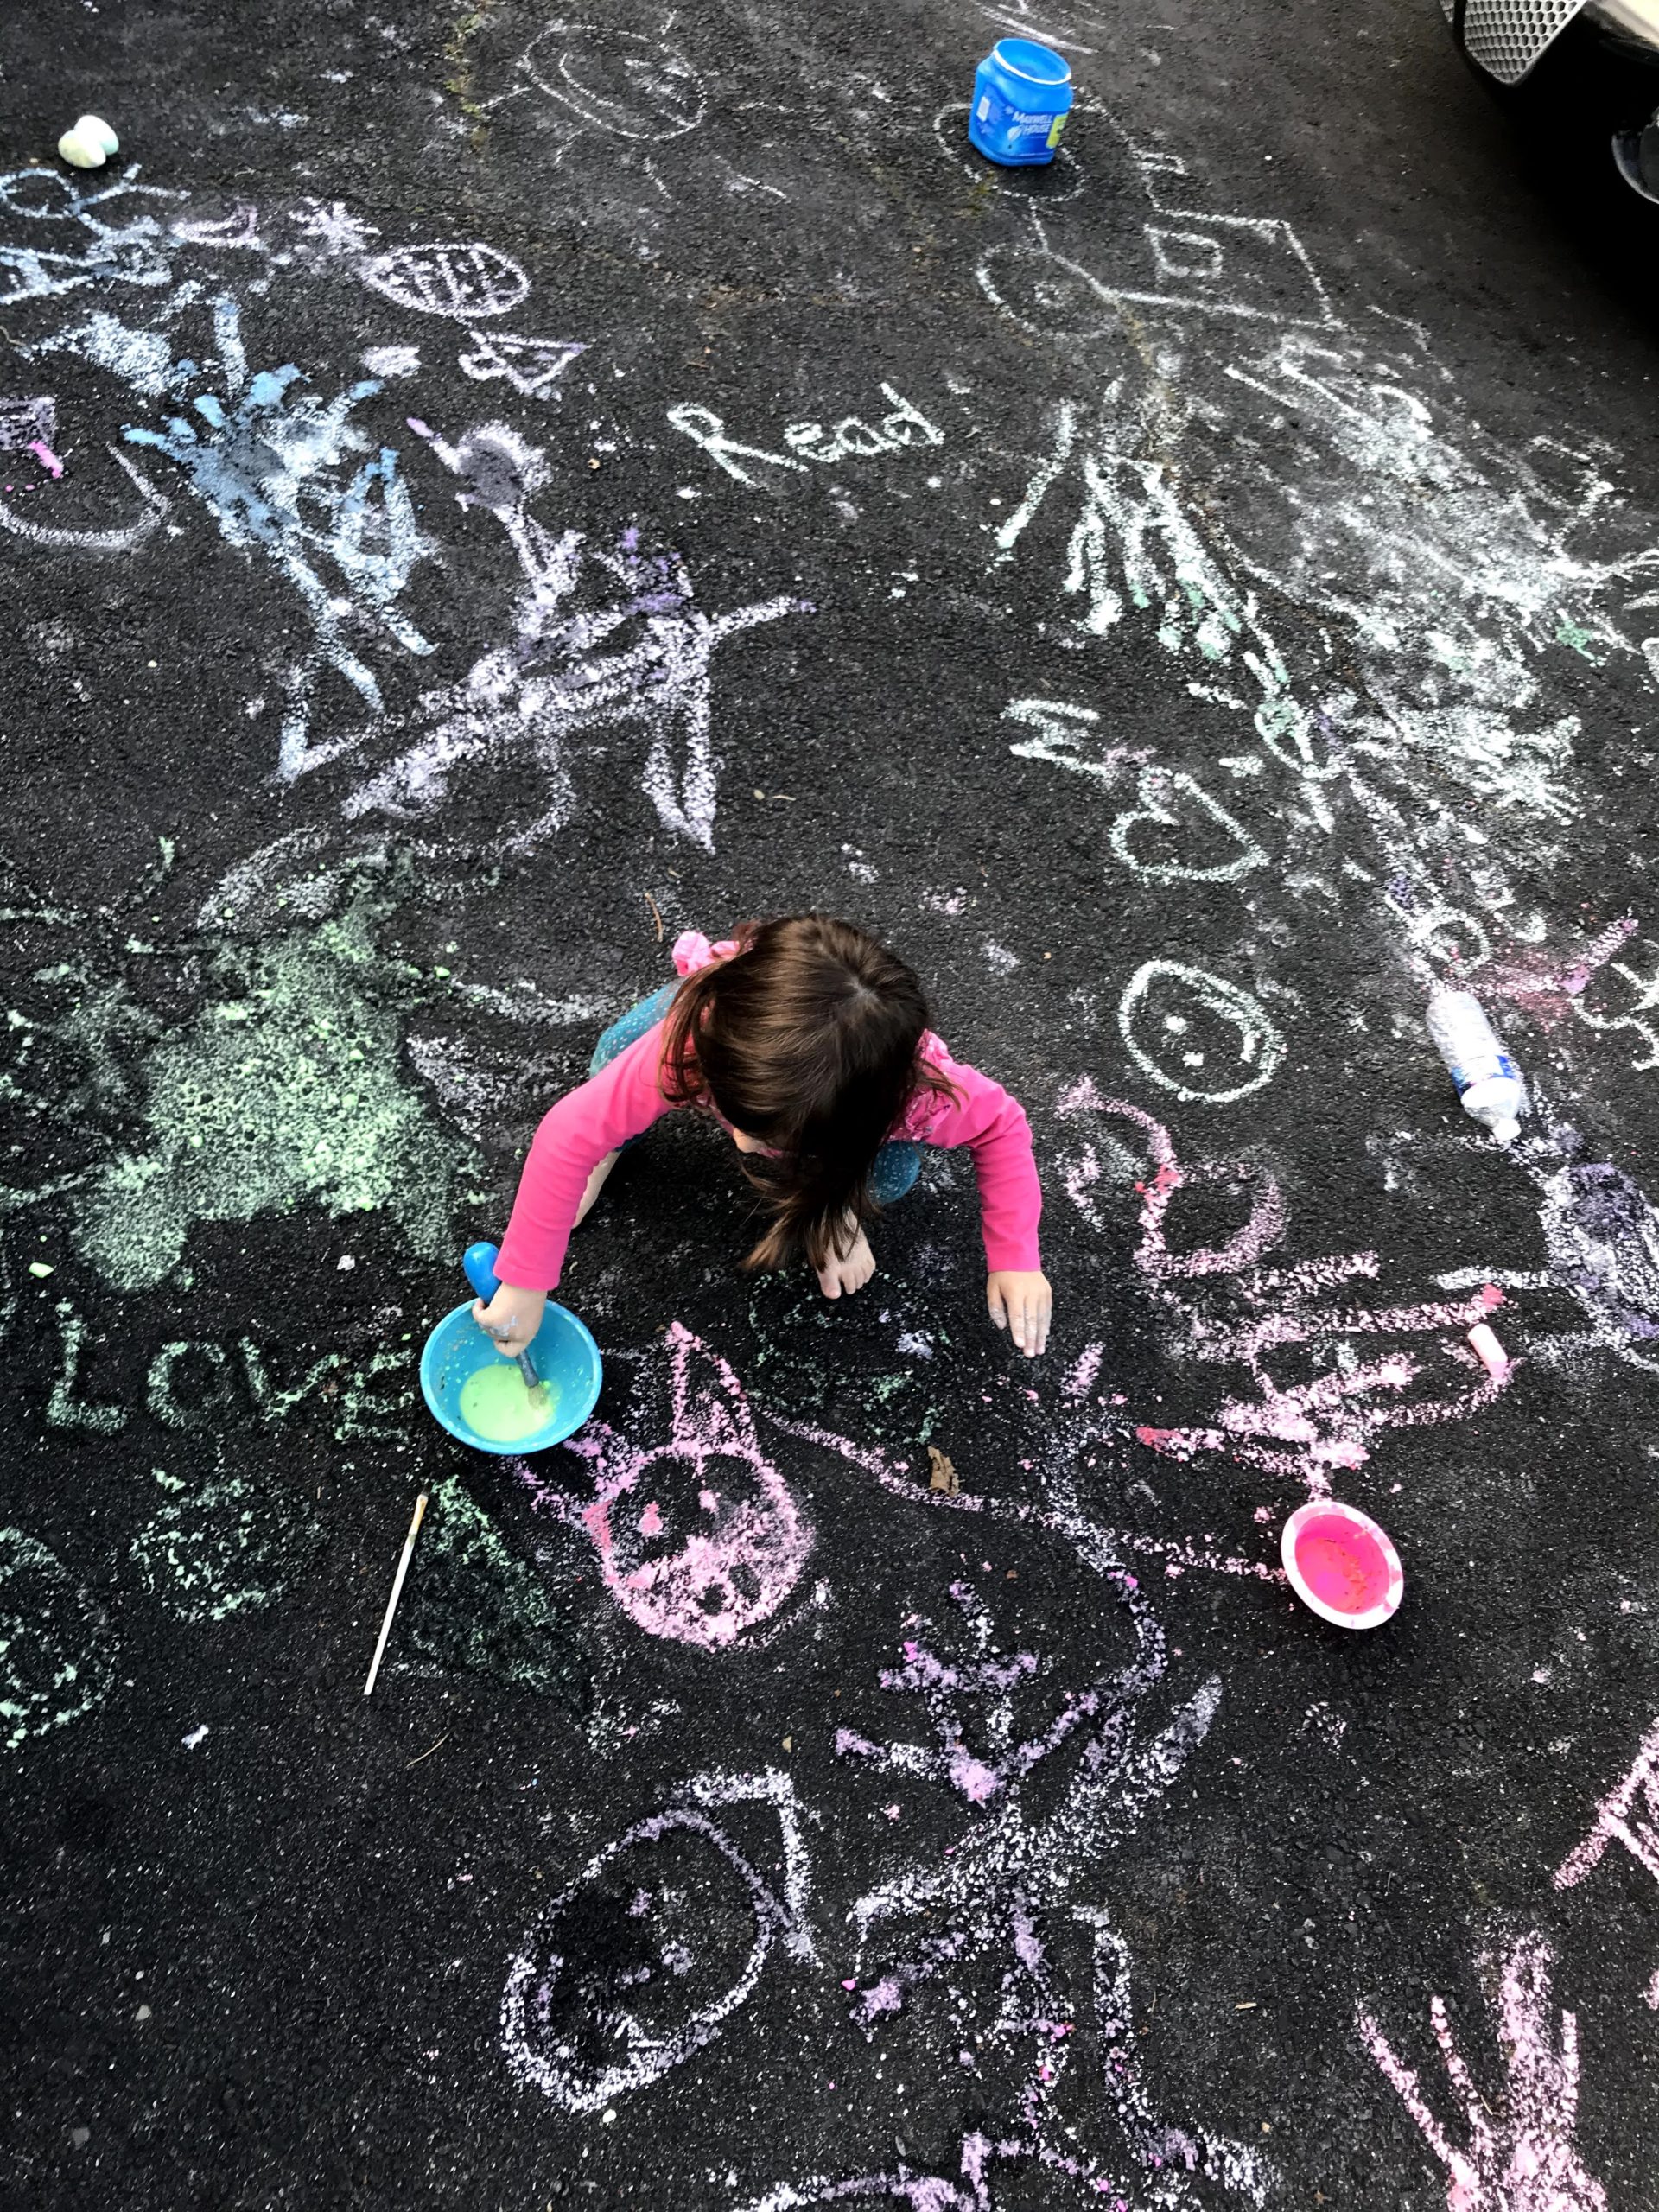
Have any old pieces of chalk laying around? If you have lots of chalk, you are bound to have small pieces here and there. Take those pieces and make chalk paint for the driveway or sidewalk! Your child will have fun mixing colors, smashing chalk, and painting up the driveway!
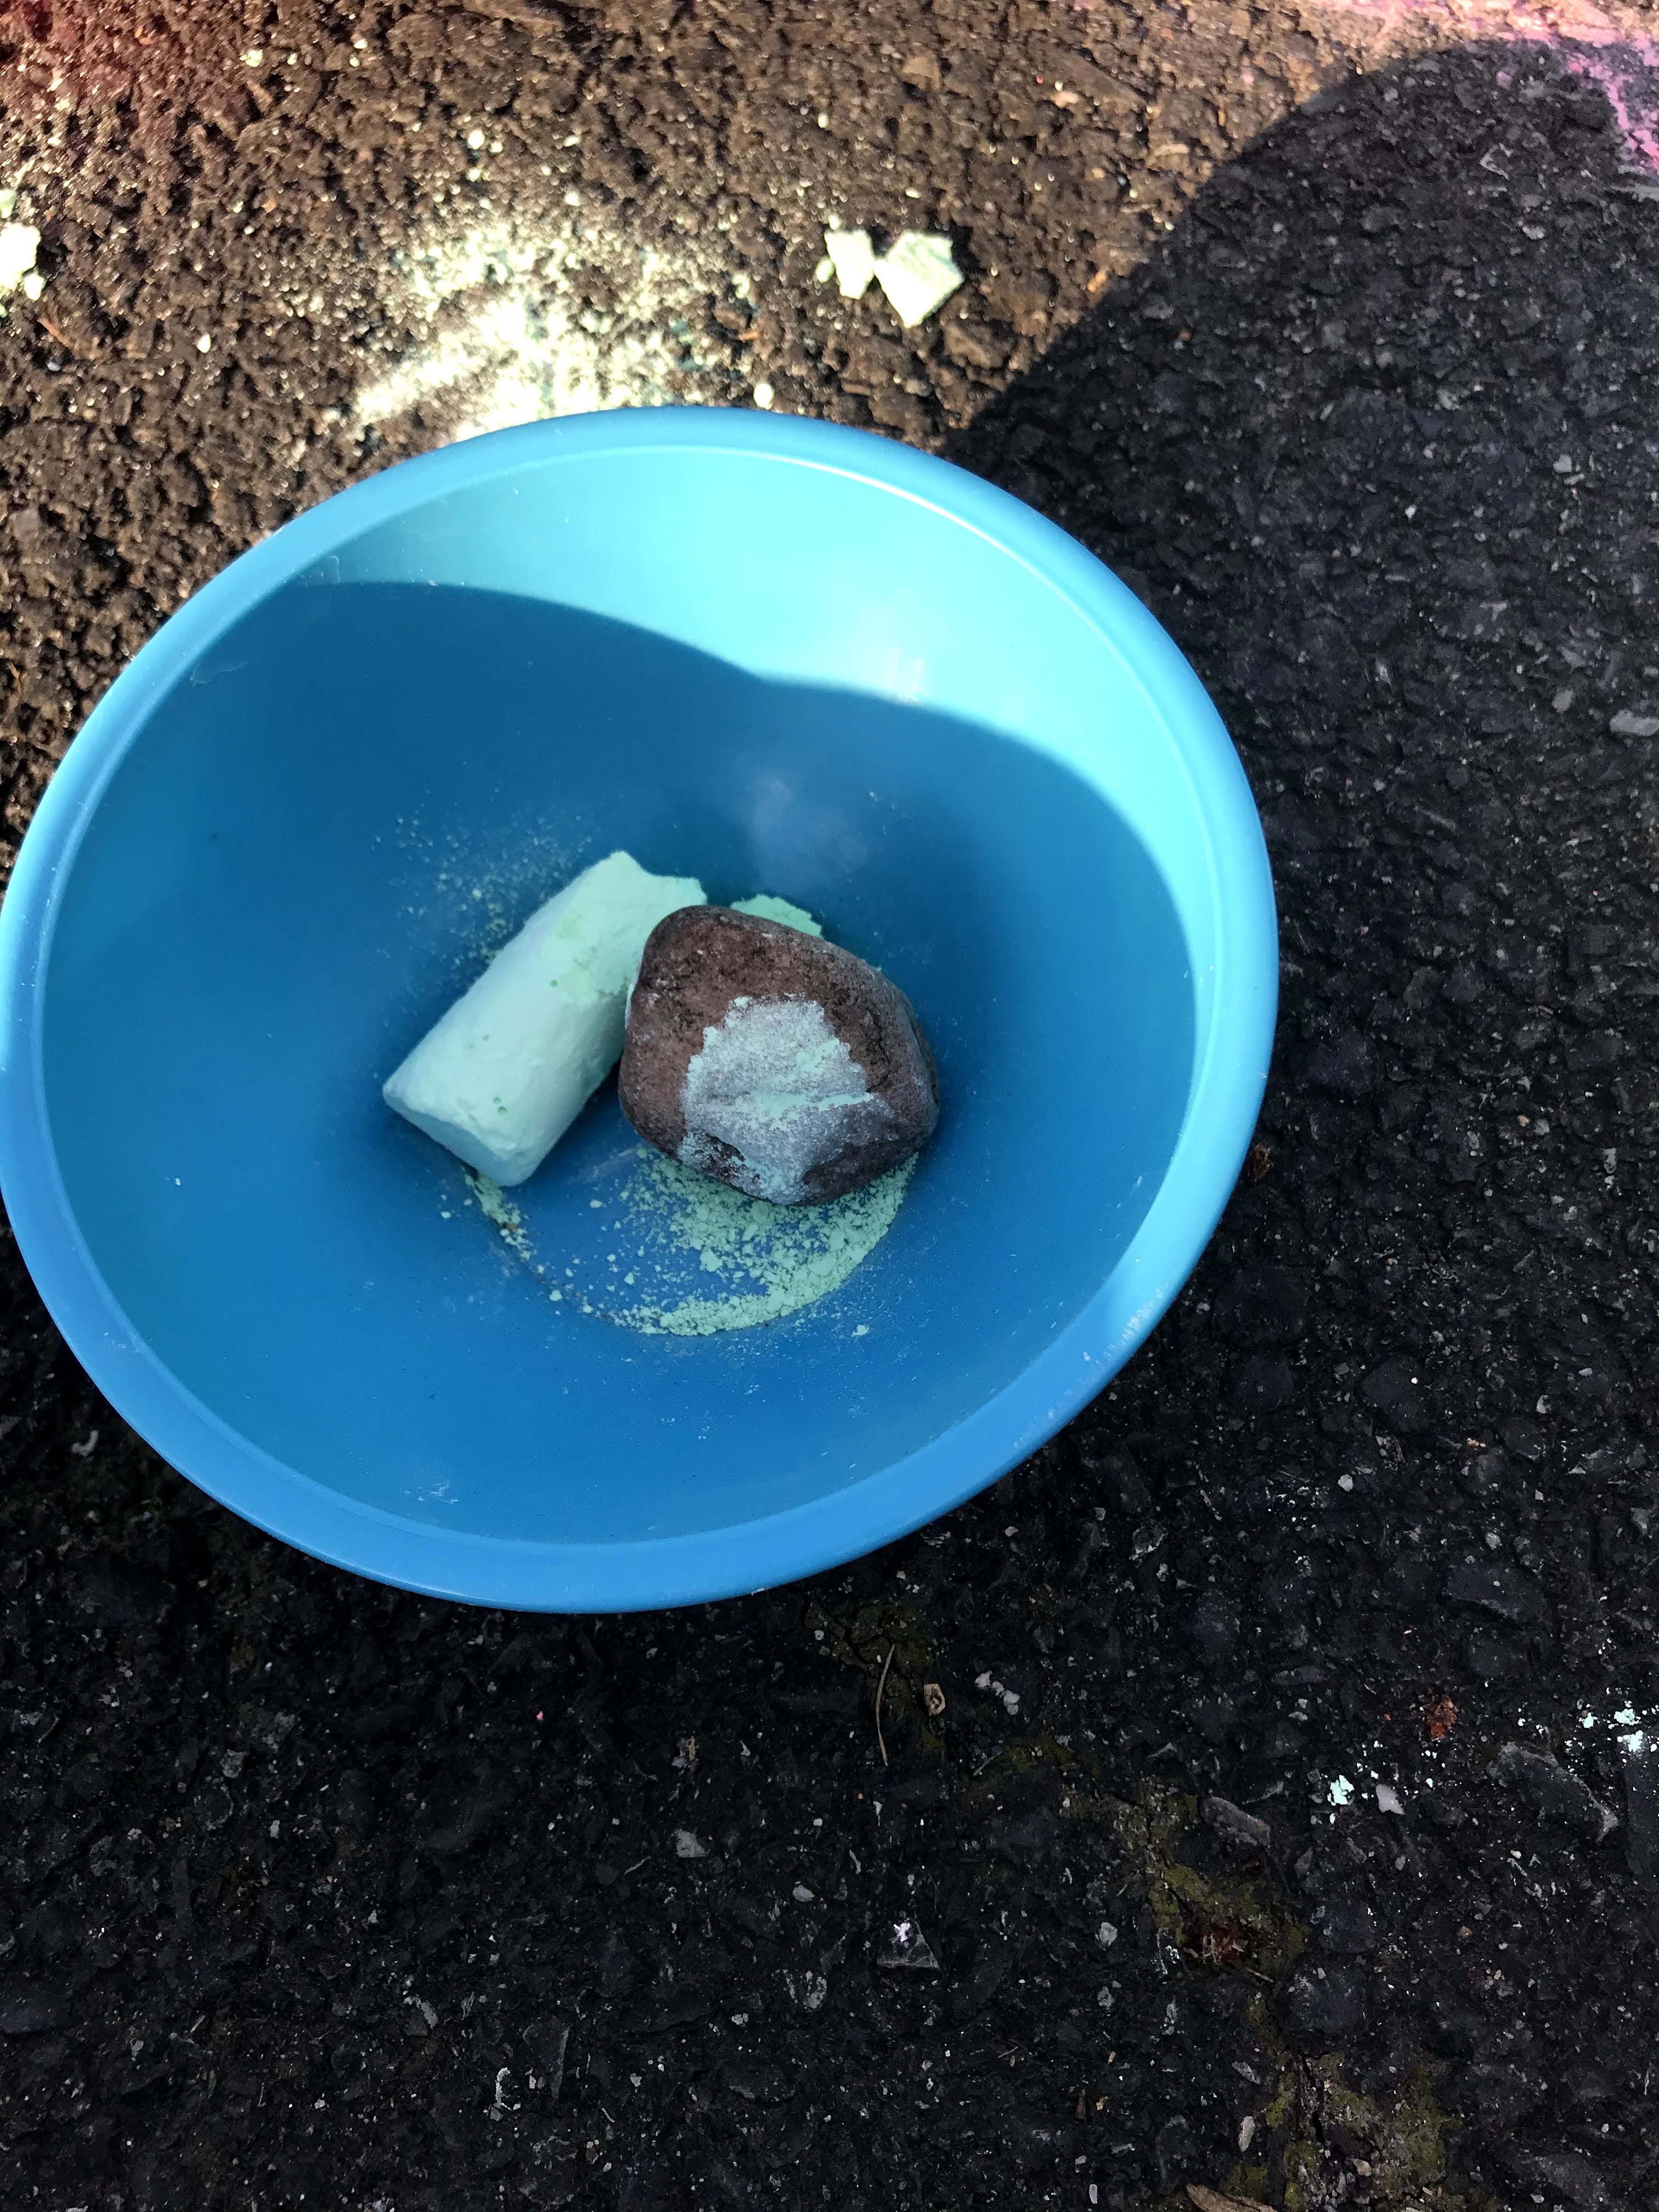
First, take the chalk and crush it into a powder. You can do this by putting it in ziploc bags and smashing it with a hammer. We did it by simply putting it in a bowl and smashing it with a rock (neanderthal style).
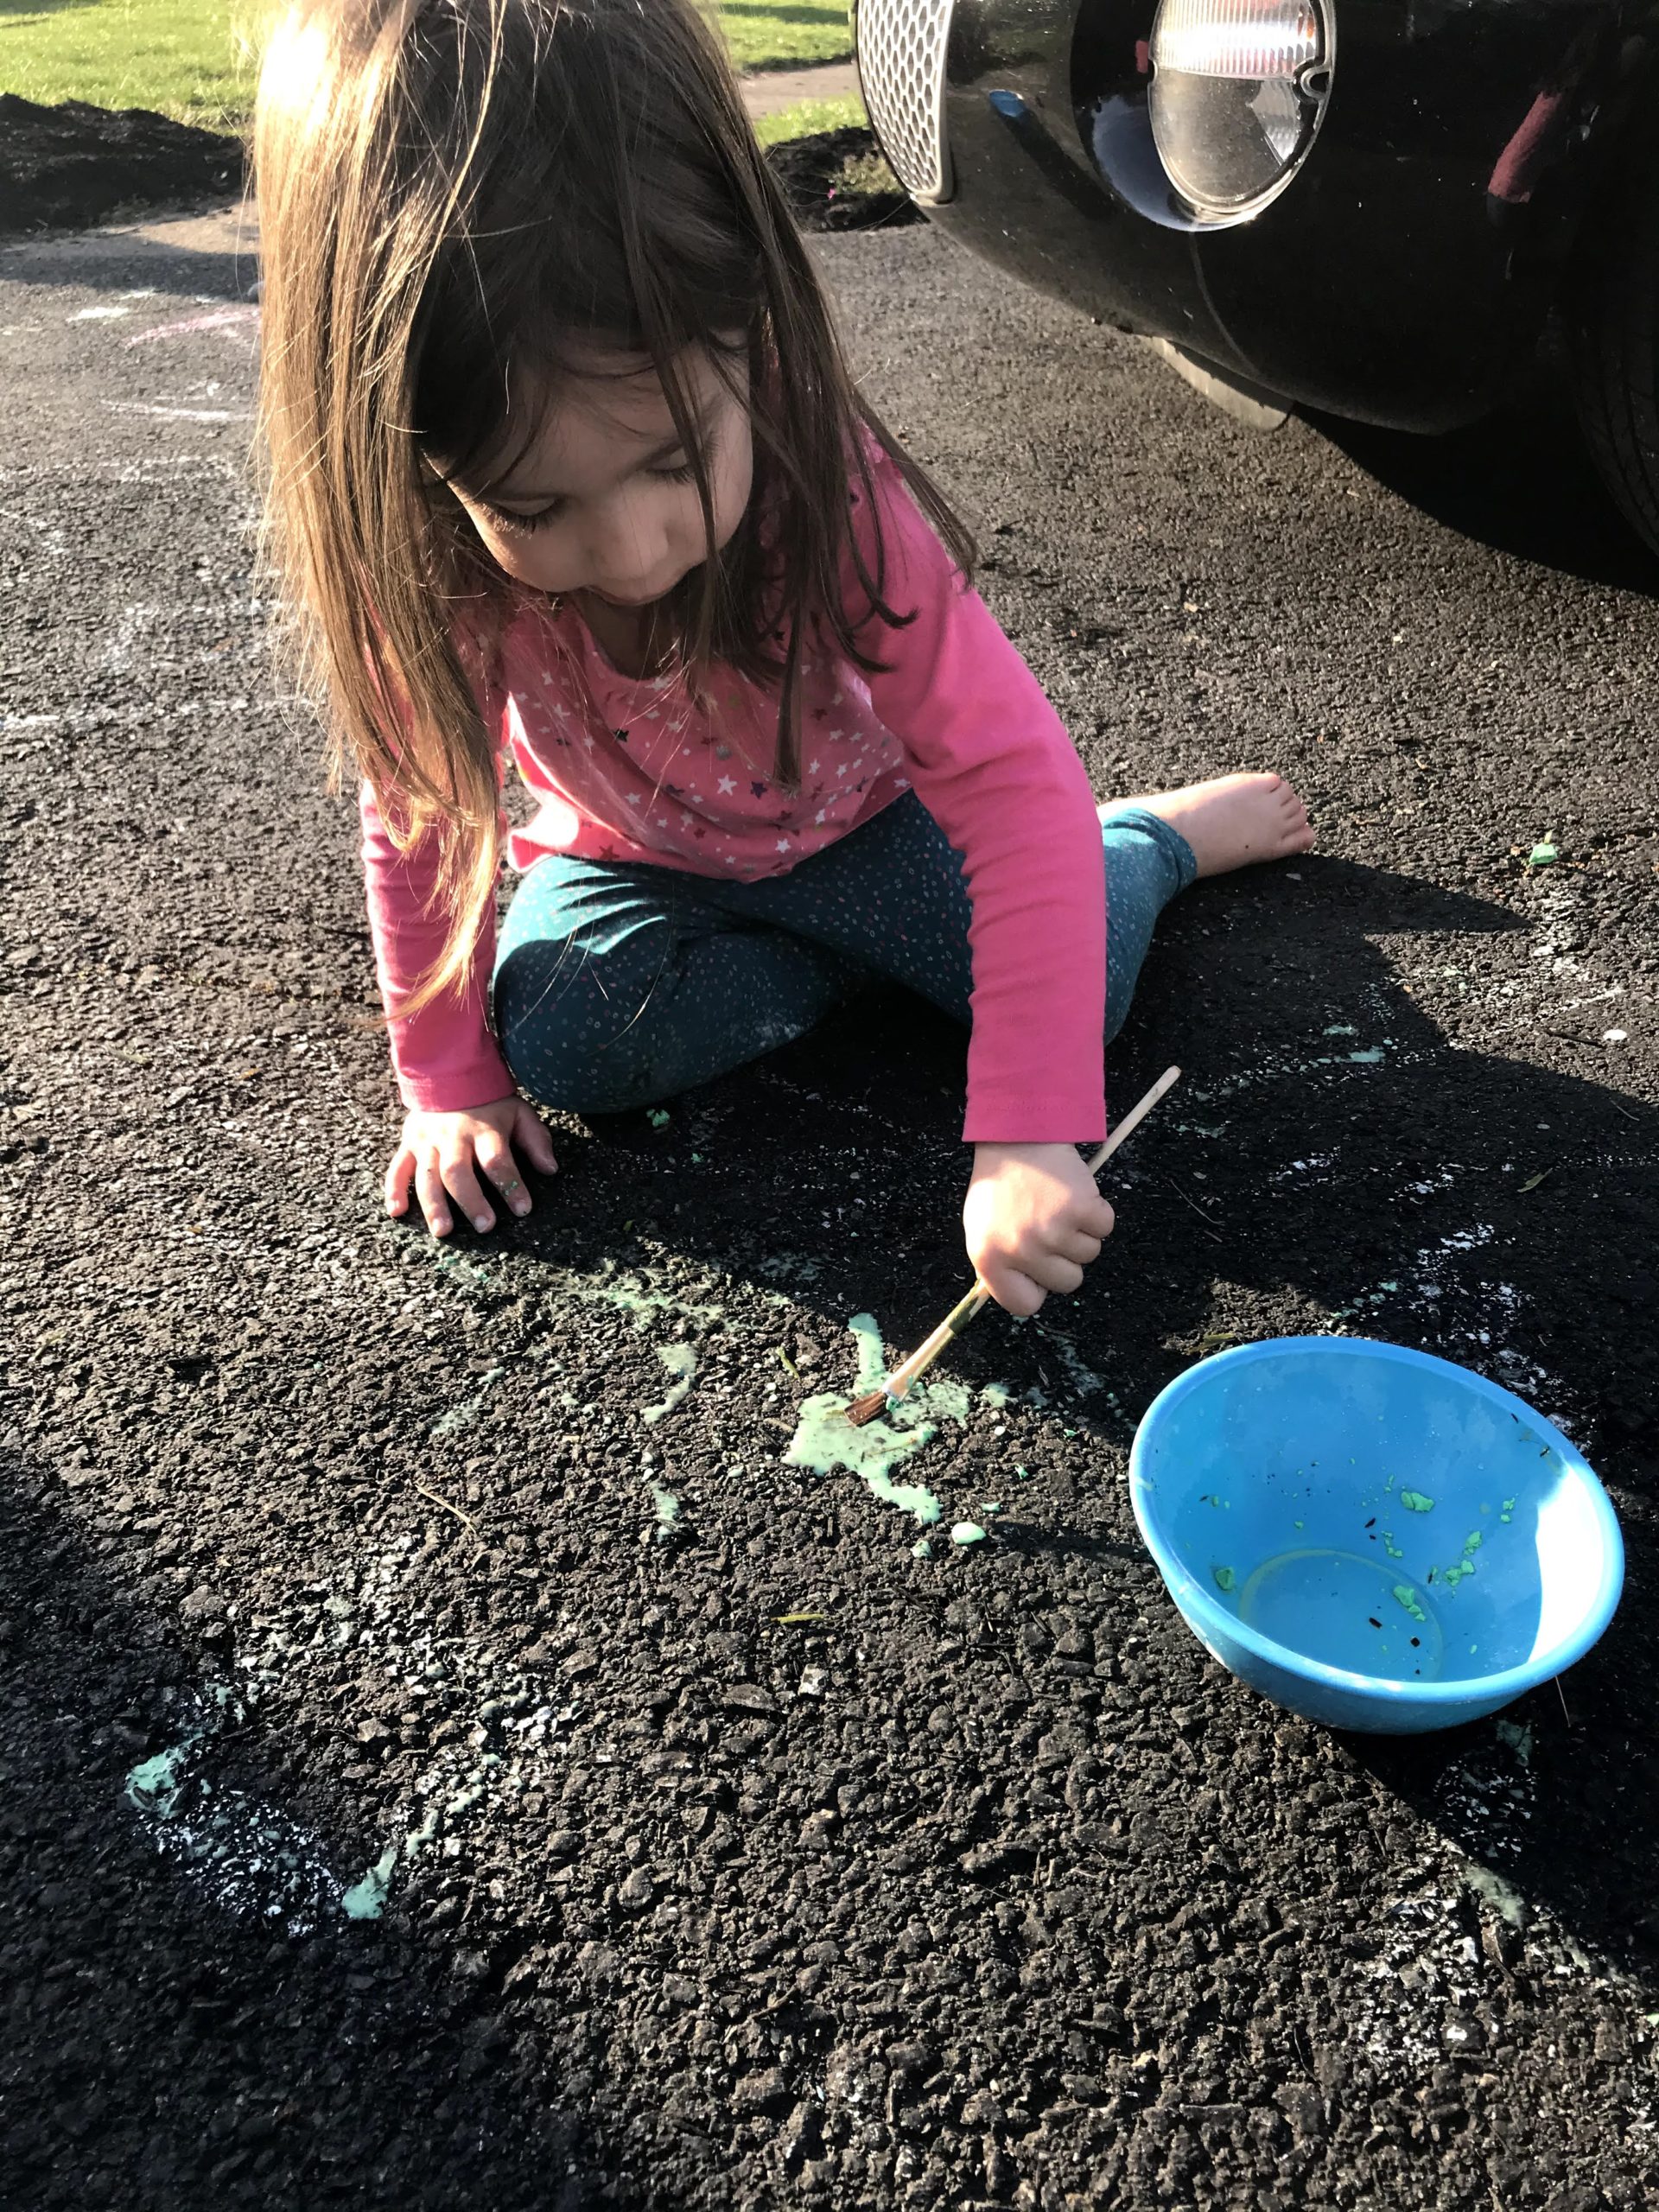
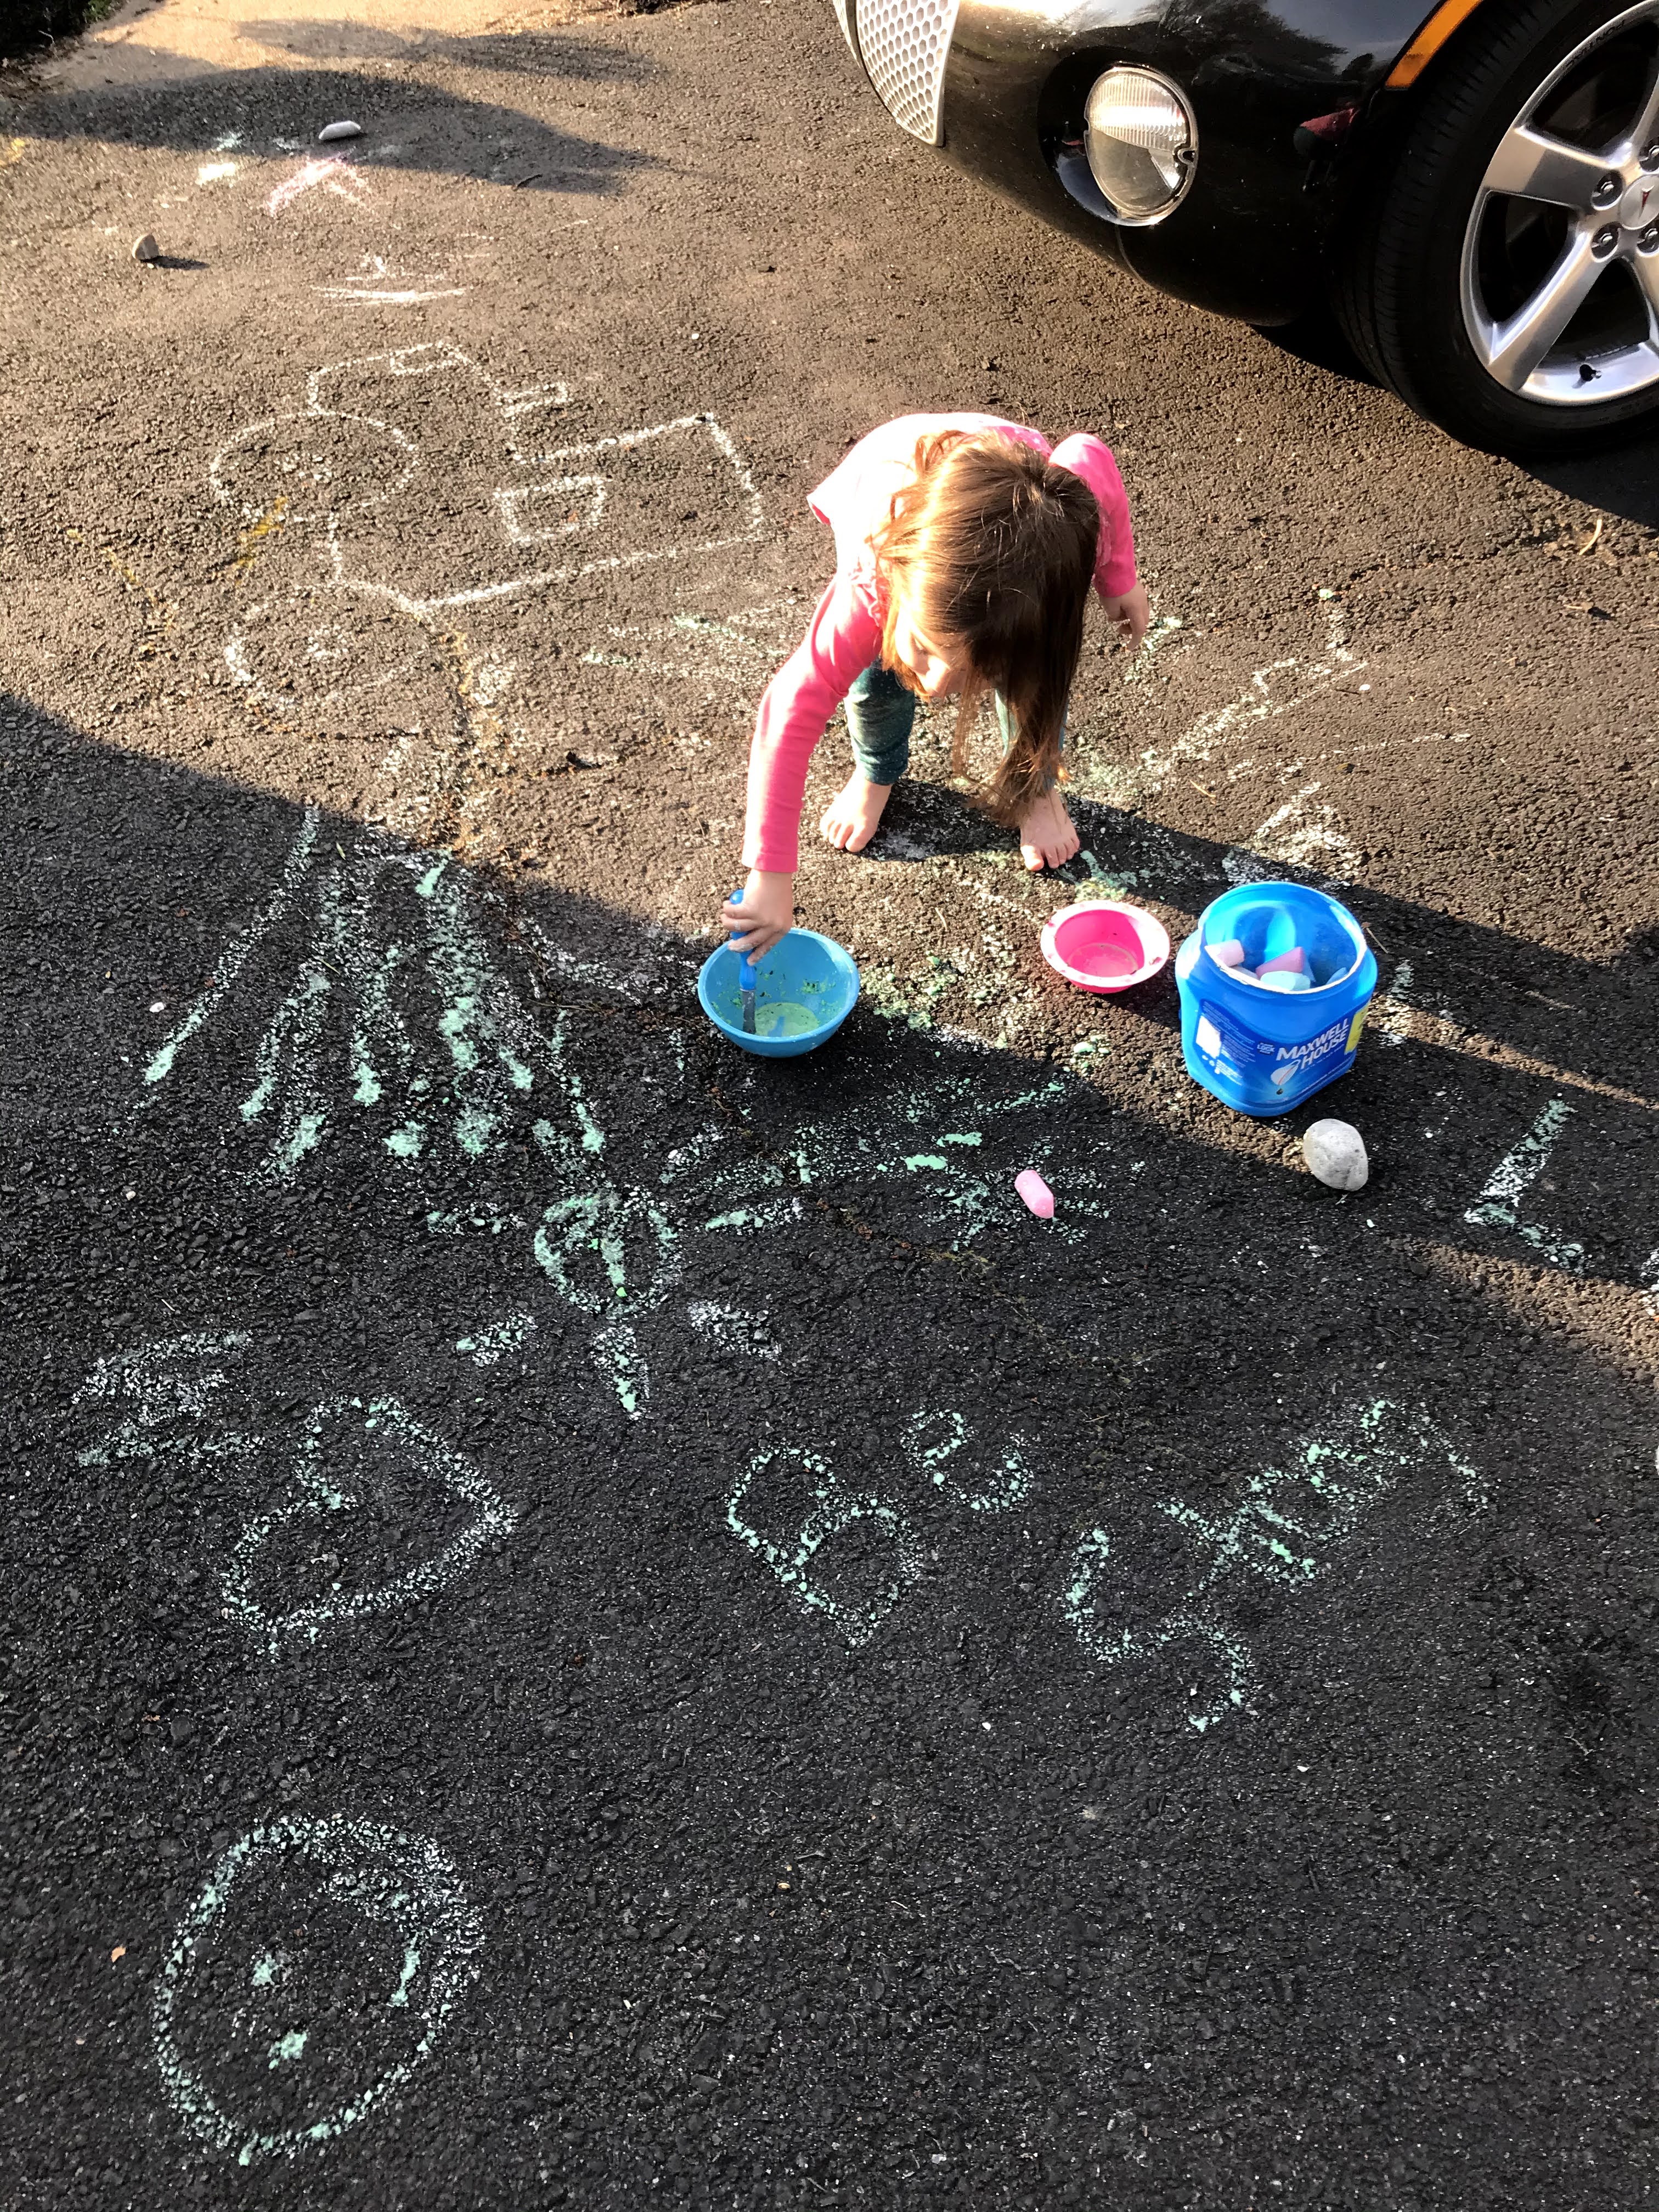
When you have all the chalk crushed add water to the consistency you like. BOOM! There you go! Mix it up. If you want to get rid of the smaller chunks you can use a whisk, but we just kept it simple and mixed it with our paintbrushes.
You can use all different sizes of paintbrushes and mix colors. My daughter played with this for over an hour and a half! She probably would’ve done it longer if it wasn’t getting dark outside.
You might not think your child will love it, but give it a try! While painting the color is not very bright but dries brighter than regular chalk! Enjoy!!Follow Share
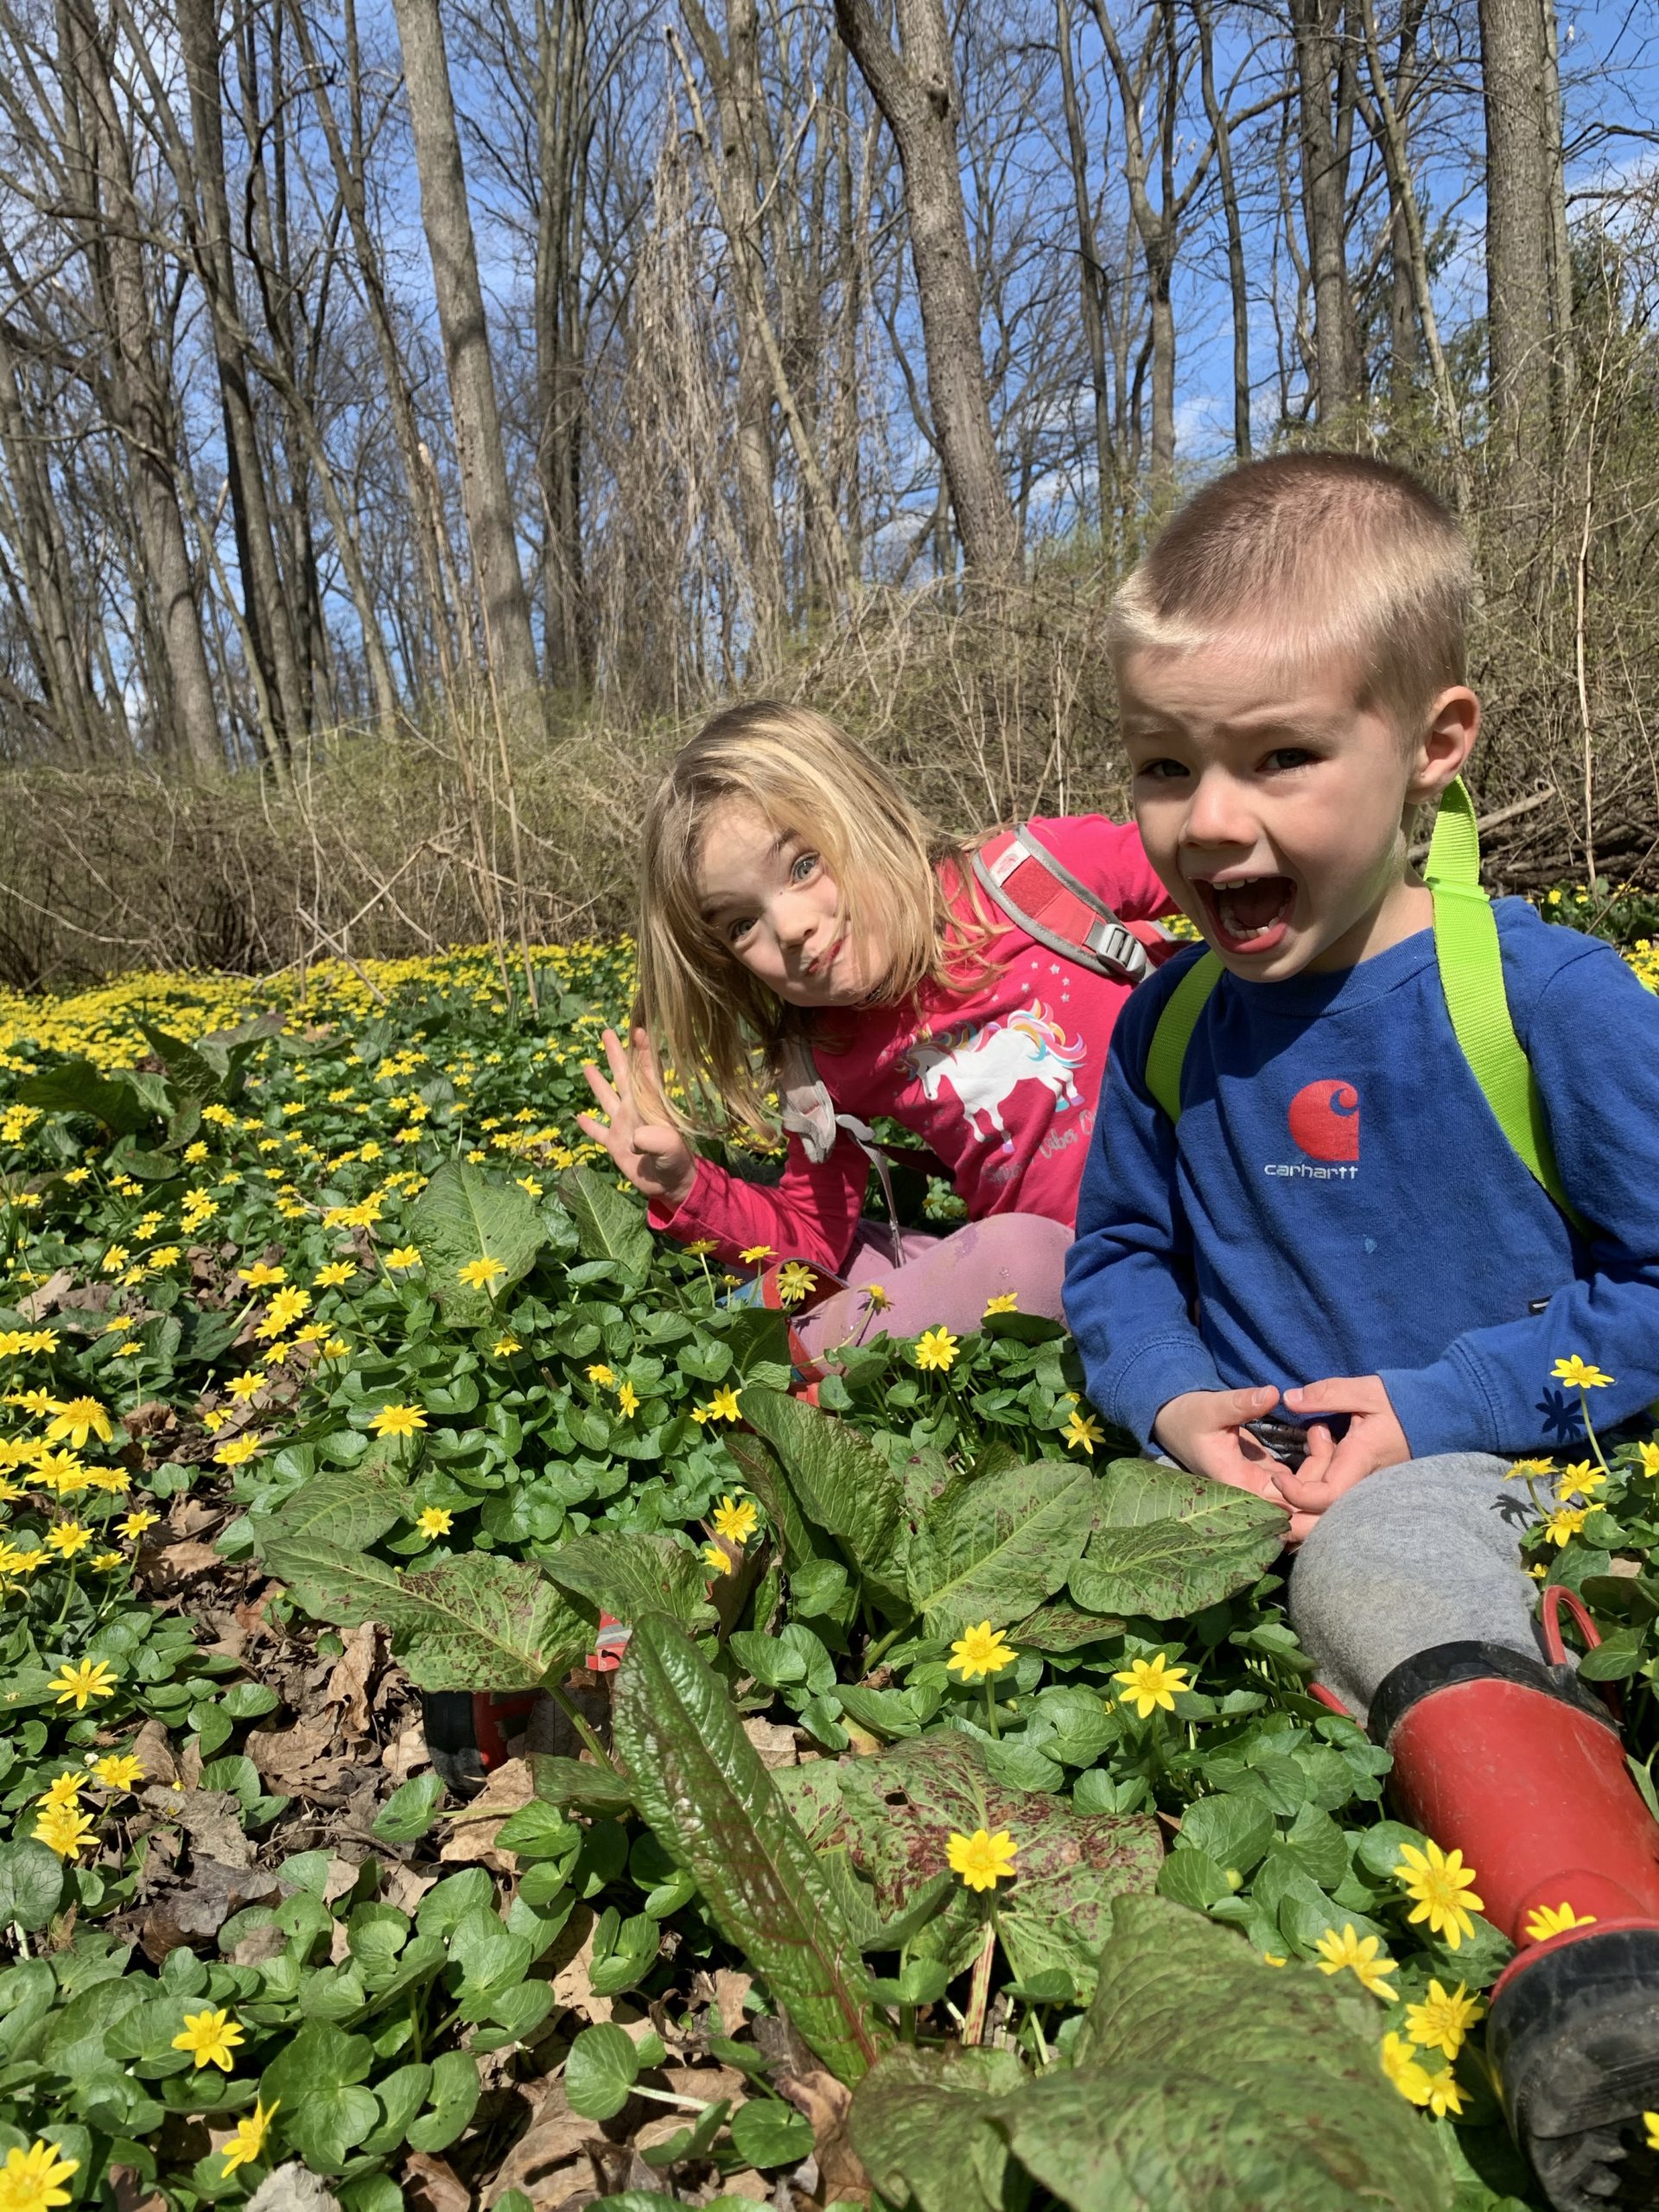
Today, when walking down a hill with my two children, an older woman and her dog passed by (don’t worry it was over 6 feet away!), and the woman said, “Oh, don’t go down there it’s treacherous down there! I just smiled and nodded as my son ran up the dry creek bed and tripped on a rock landing face first. What I thought in my head was, “It’s more dangerous going to the food store these days.”
I’m not about to lock the kids in the house, but I’m not going to take them to a crowded park. Getting outside is important for children’s brains to develop, grow, and learn; not to mention, to have fun and explore! So get outside and find new paths, hear new bird calls, have a picnic, get wet and jump in puddles for goodness sake! This is the times you and the kids will remember. In fact, after all this, the kids were exhausted. My daughter said it was the best day ever!
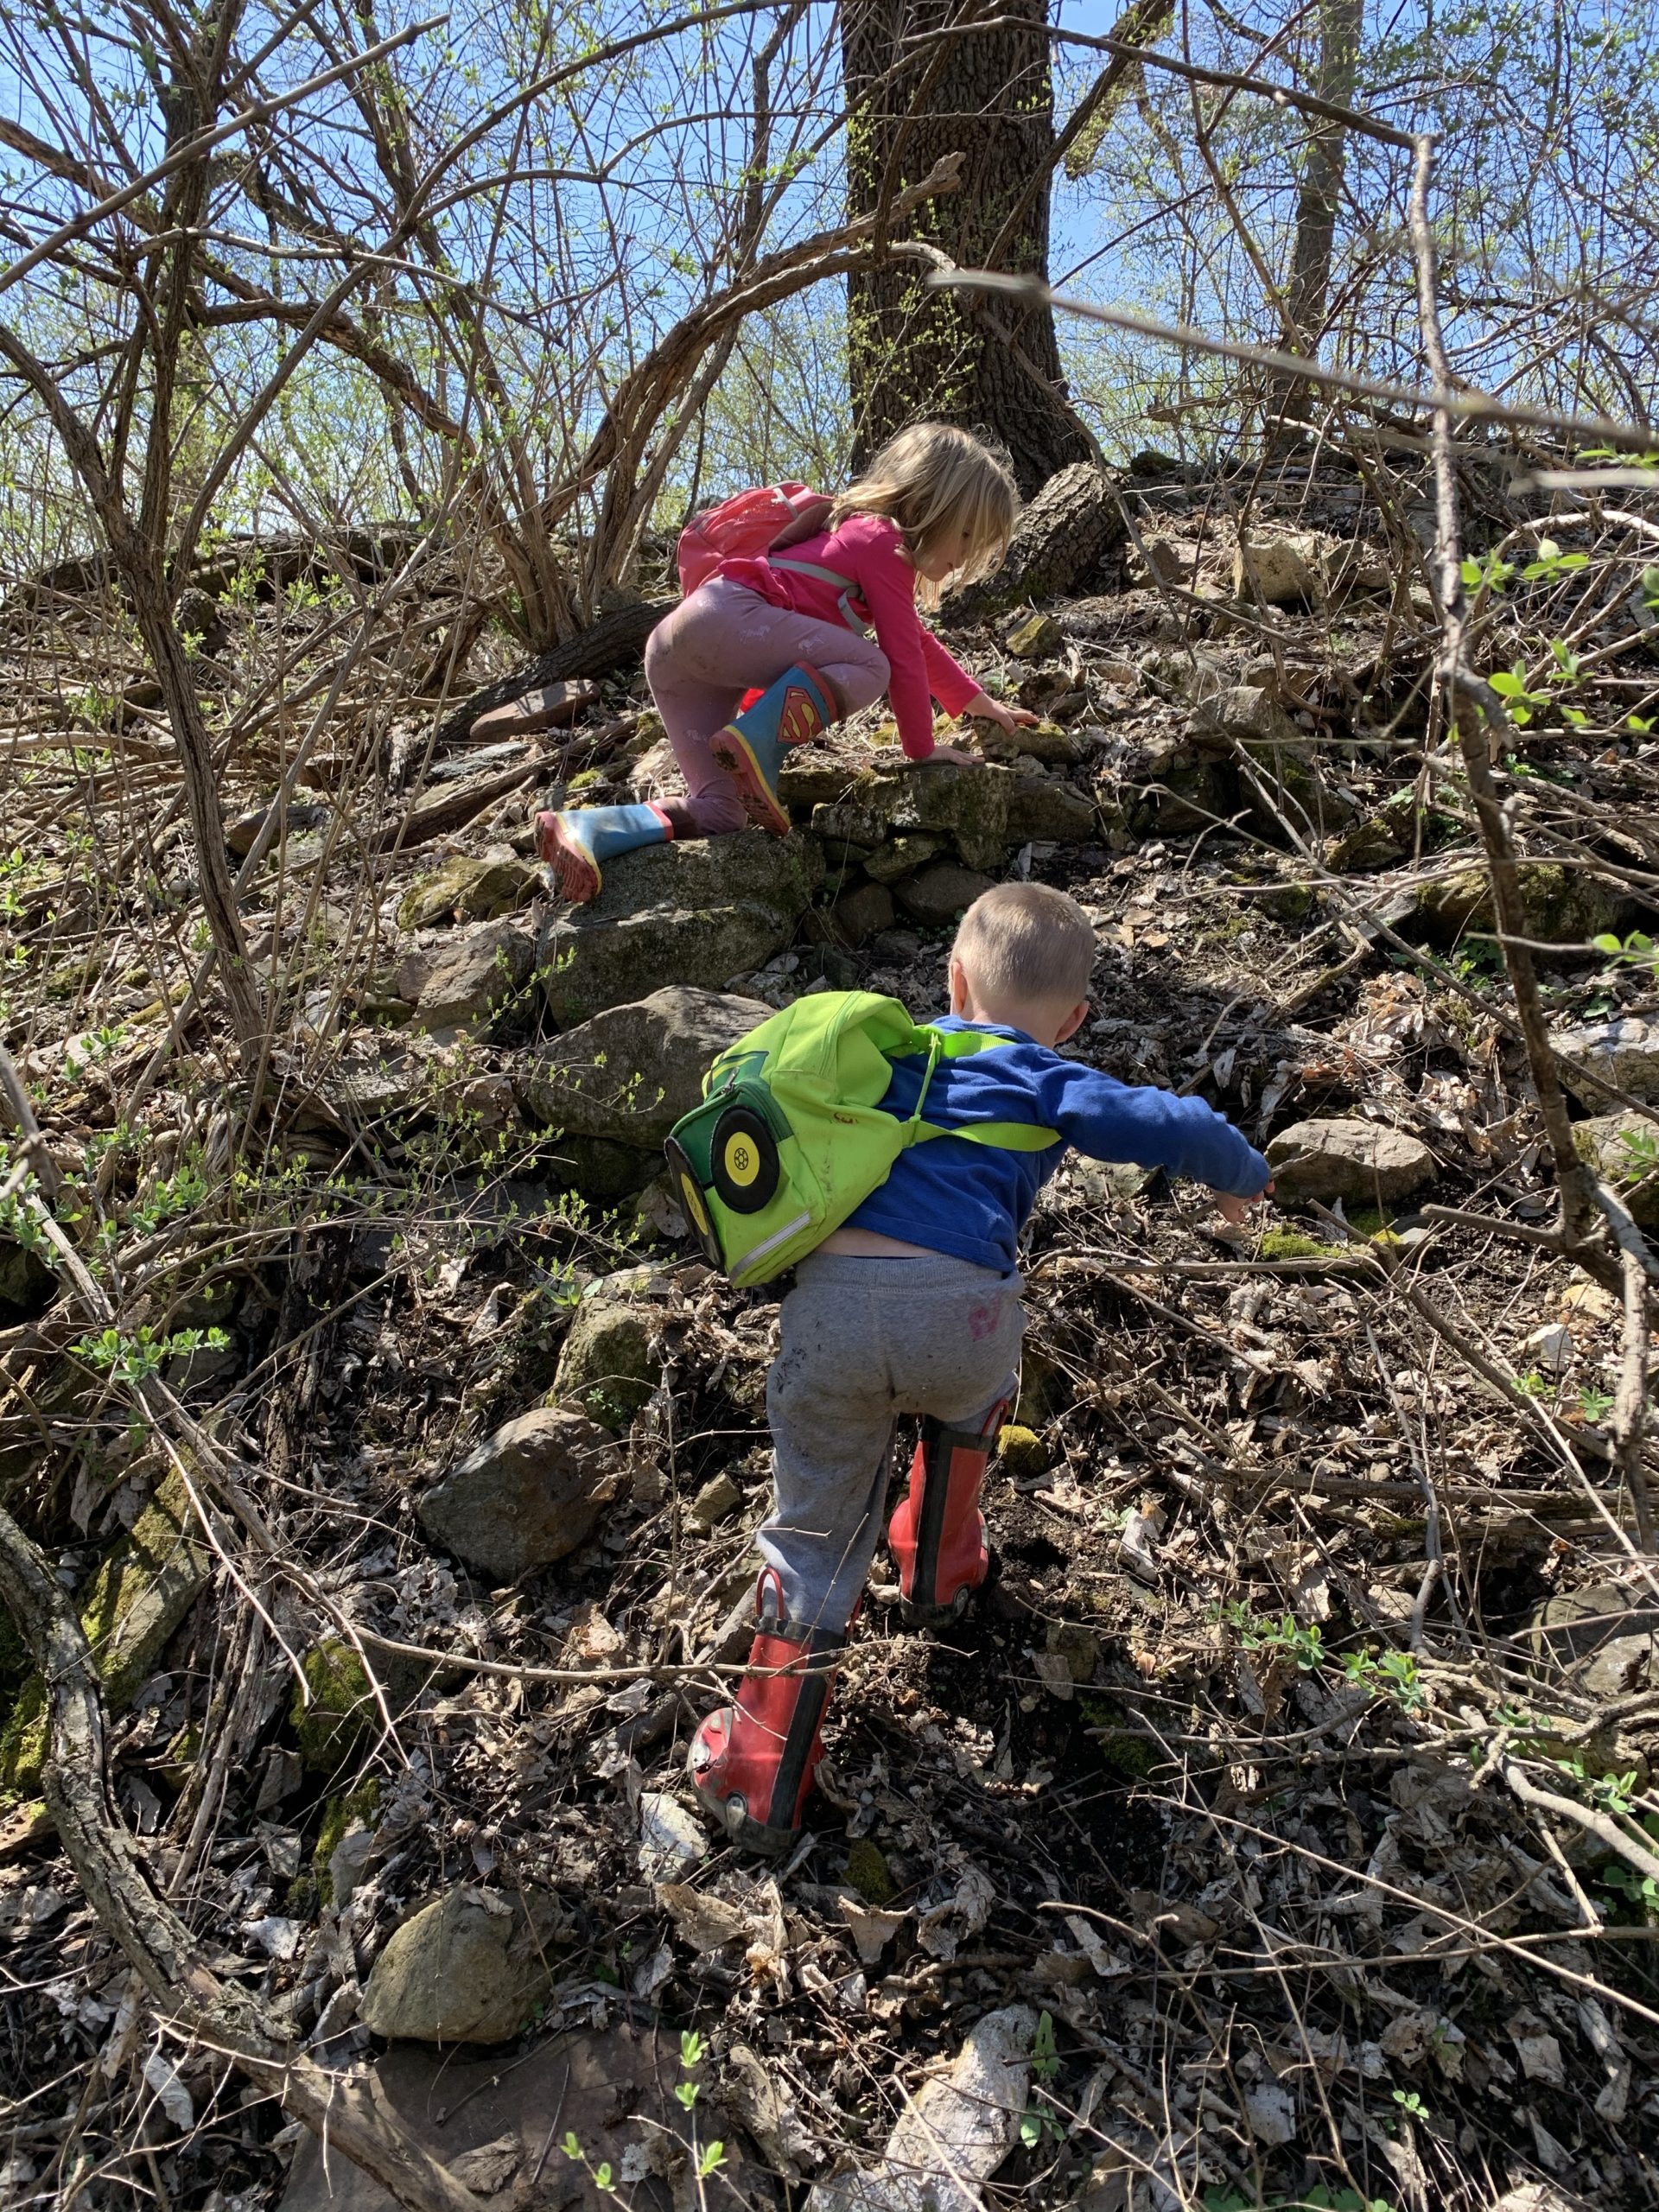
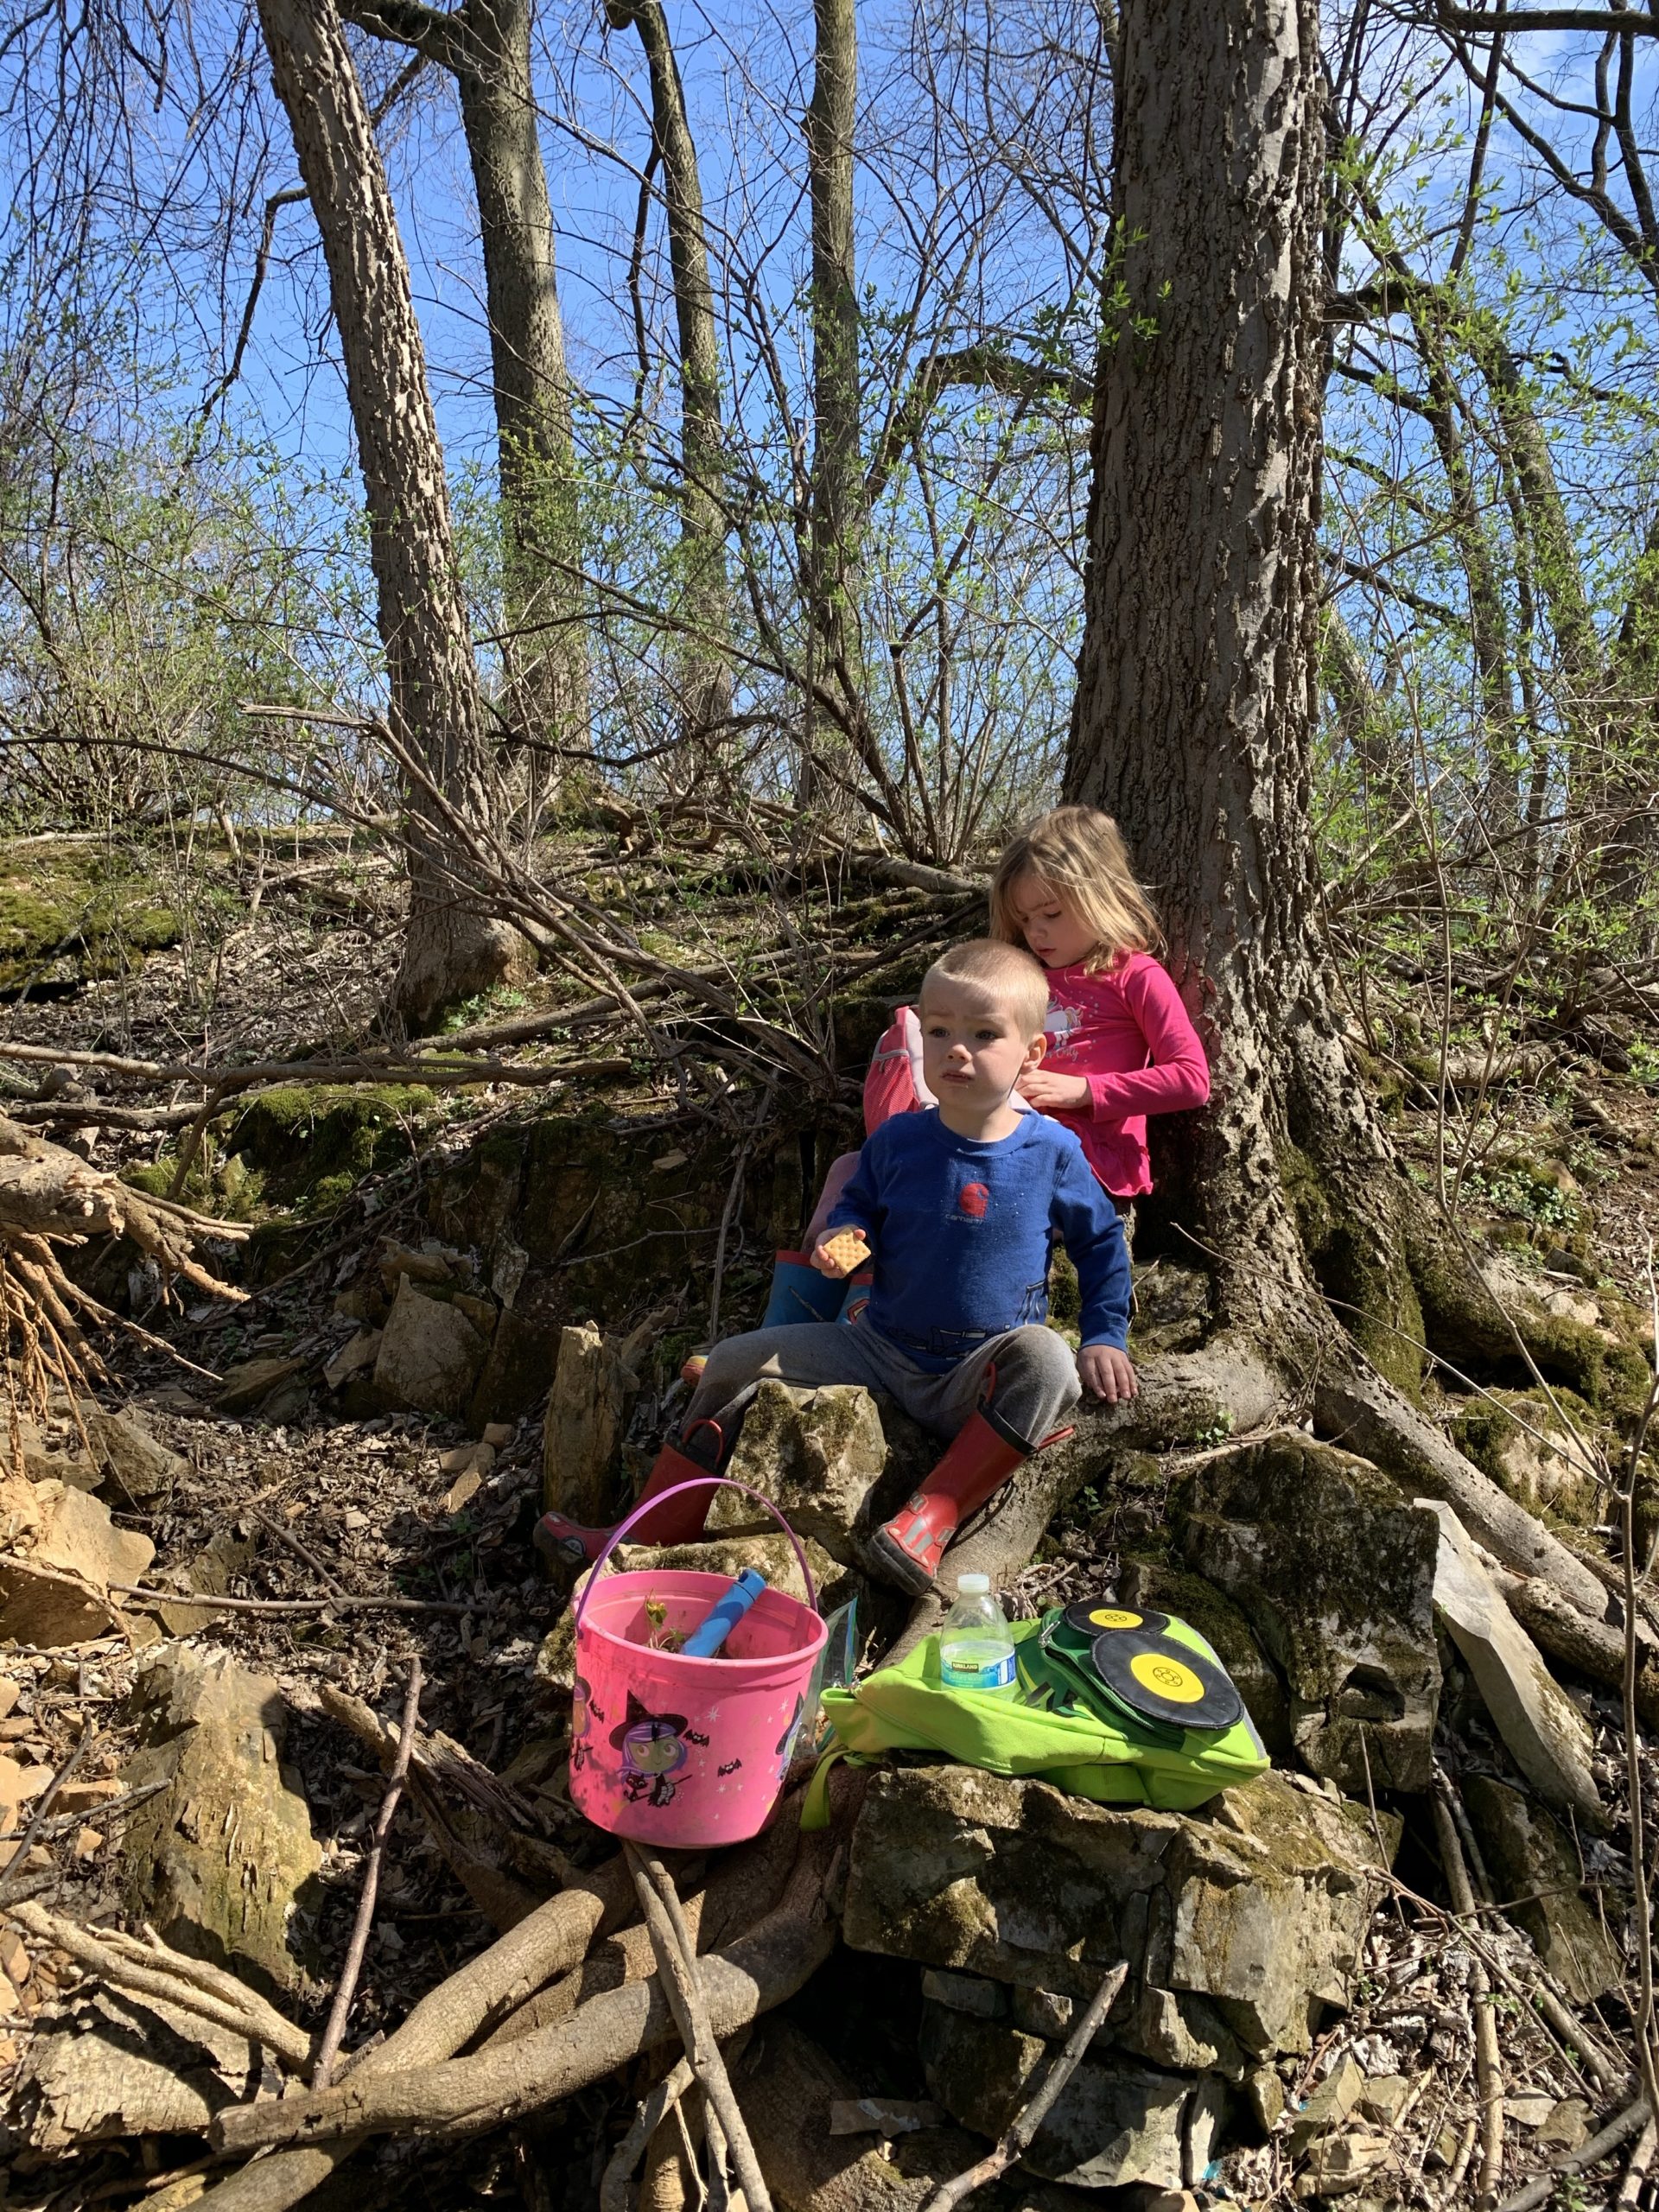
We saw frogs and toads, explored dry creek beds, found “hideouts” (make believe hideouts), looked for fossils under tree roots, climbed mountains (to a kid its a mountain), balanced and walked on logs (with mommy’s hand of course), jumped in puddles, and went through tunnels (under bridges).
So pack a backpack, even better, have your kids pack theirs with extra socks, a dish towel (to dry off their feet), snacks, water, magnifying glass, zip-lock bag or bucket (to hold things), binoculars and any other things they want to bring (but that their backpack wont be to heavy and you will end up with it!),
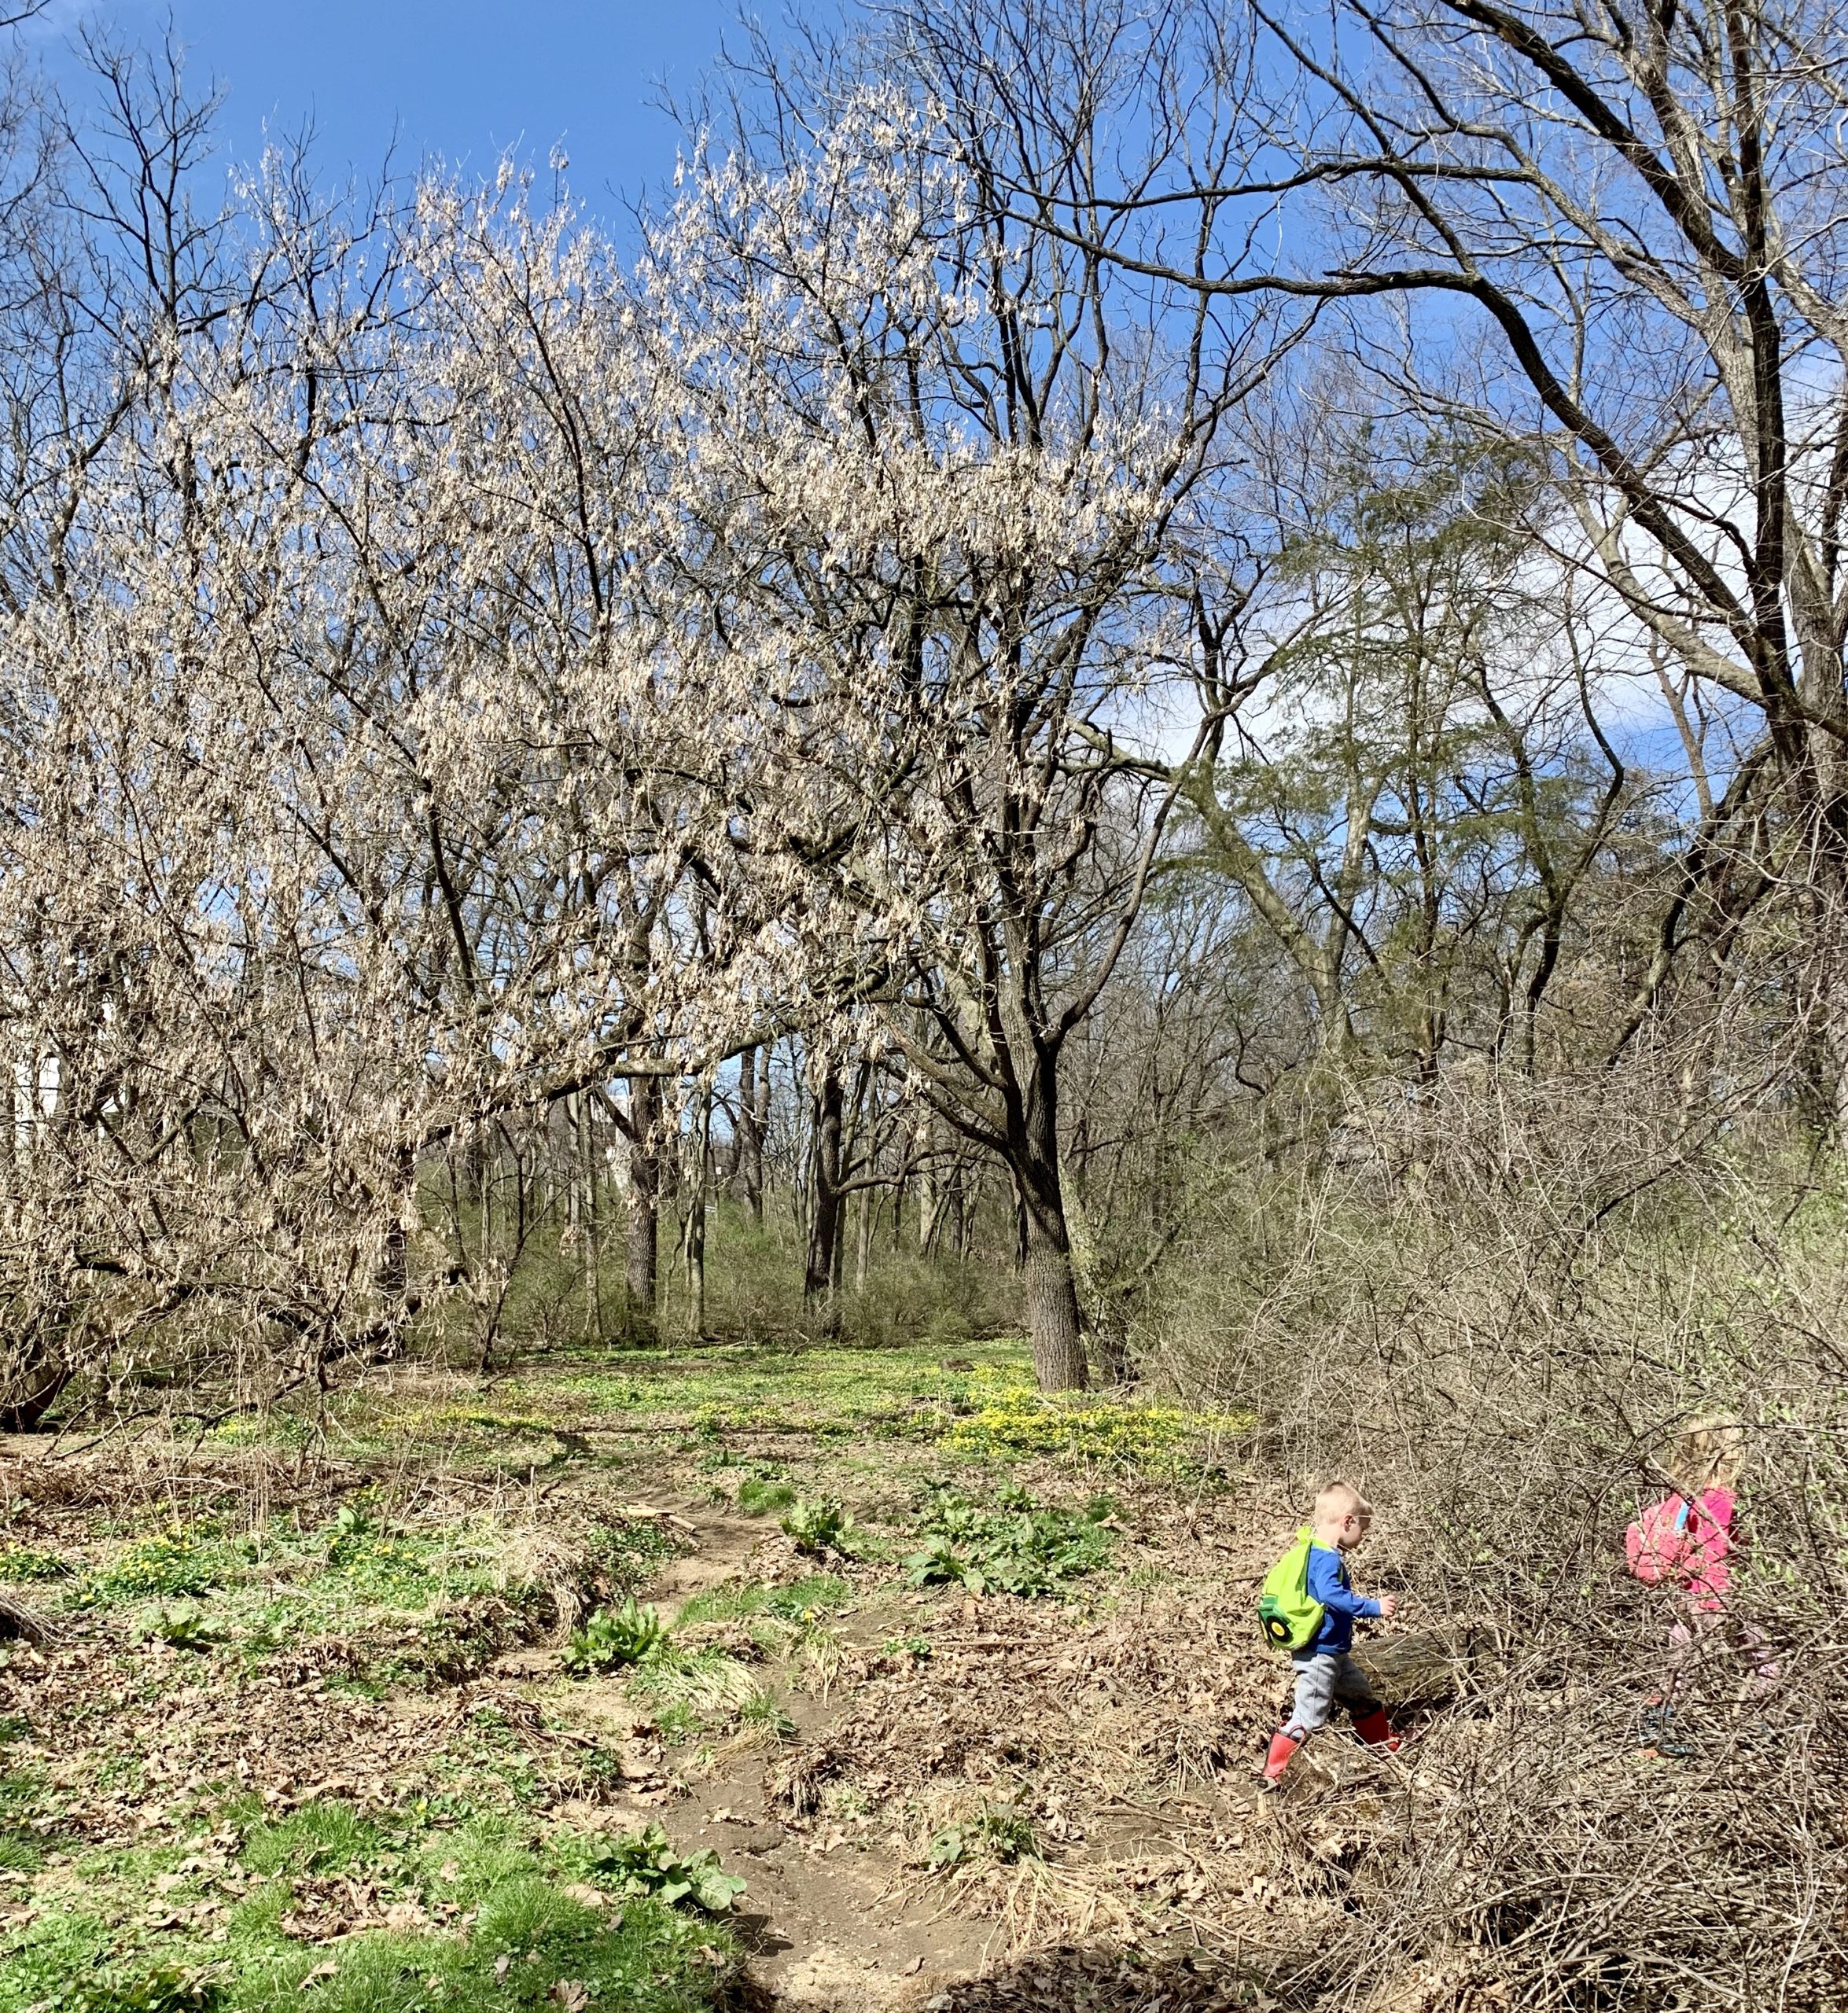
When we moved from a less populated wooded area to a more populated neighborhood, I didn’t think we would find so many fun outdoor activities for free this easily! Behind the baseball field that is near our house is a small woods with boy-scout paths and a creek, and this is fun for days for the kids to explore and play! I can’t wait for tadpoles!
So get out there and explore your surroundings!Follow Share
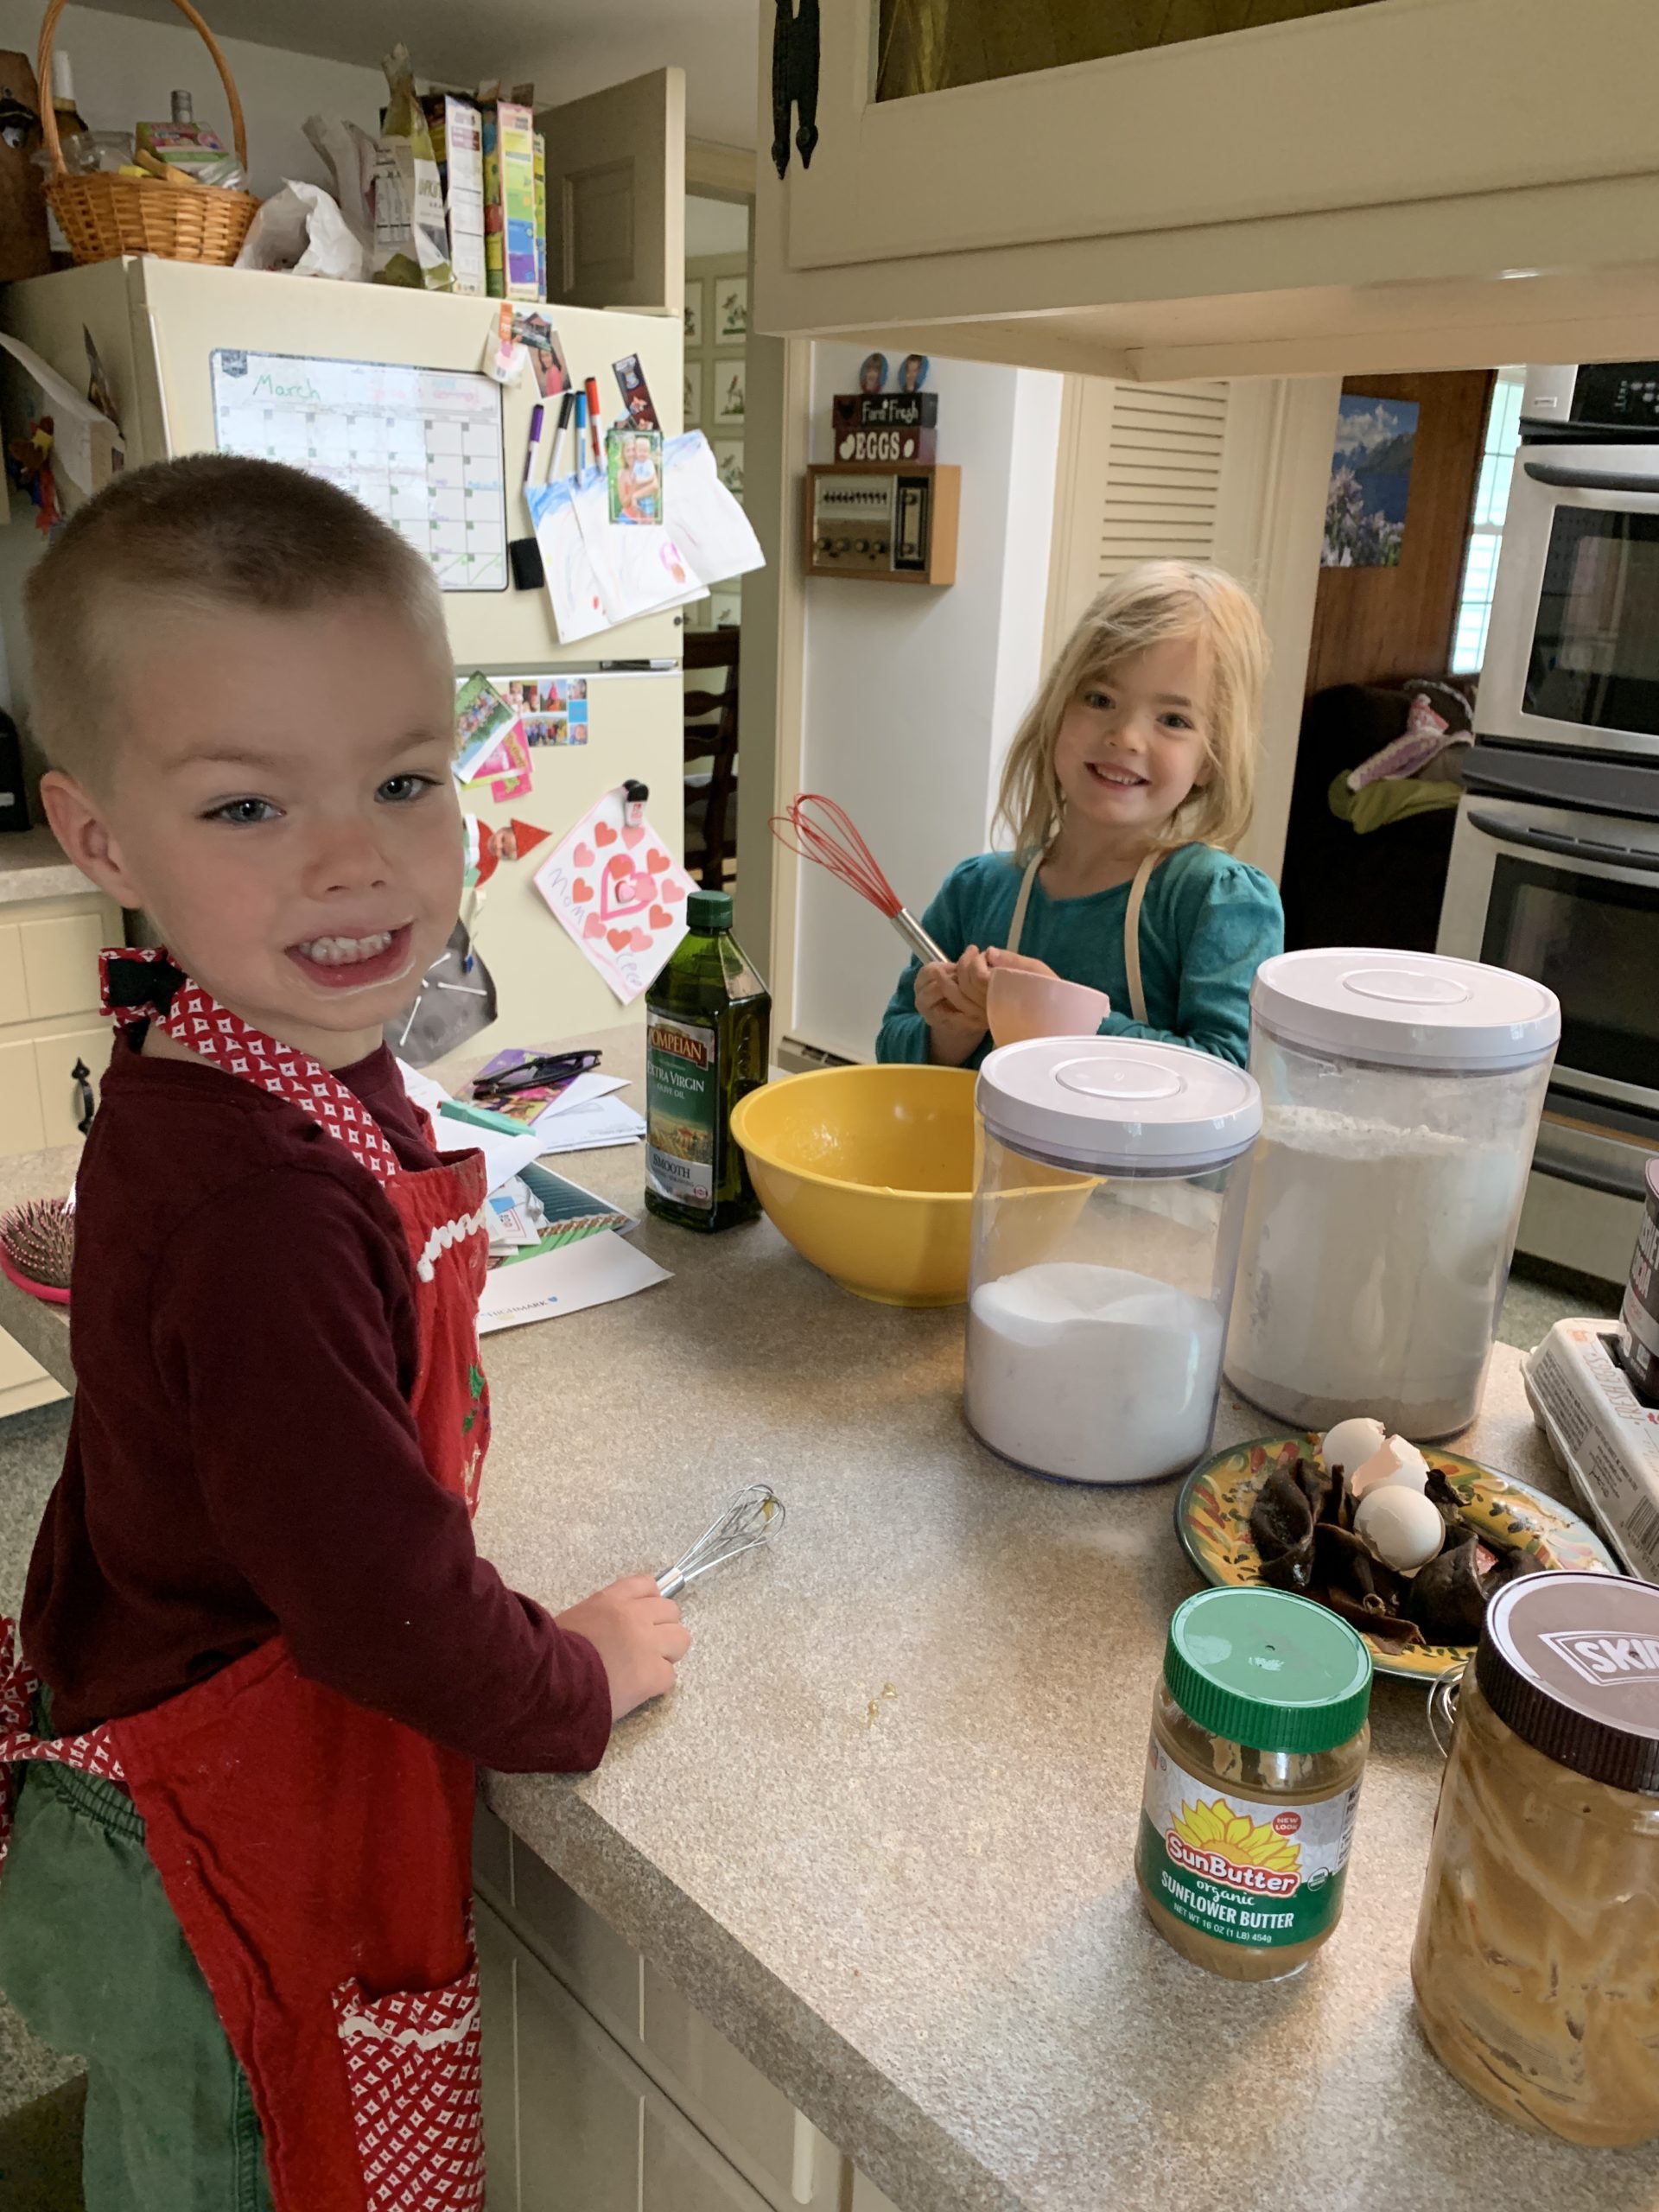
If you are on lockdown like our county is, and possibly soon to be state, you need some more activities to do with your kiddos! My kids love baking! Of course it gets messy, but that’s part of the fun (or that is what I tell myself). My kids love baking and using measuring cups. They prefer more ingredients so they can stir more together and also pour more (and make more of a mess!). When I get a box of something to mix with one or two things, they are sorely disappointed. So, most of the time we make recipes not from a box (don’t worry its pretty easy!).
Luckily, we had the ingredients this morning to make banana bread. I always freeze bananas that are starting to go bad to save them for occasions like this (I mean when its raining not when there is a pandemic!)
So, I’m going to list some of the kids favorite things to bake on a rainy cold day.
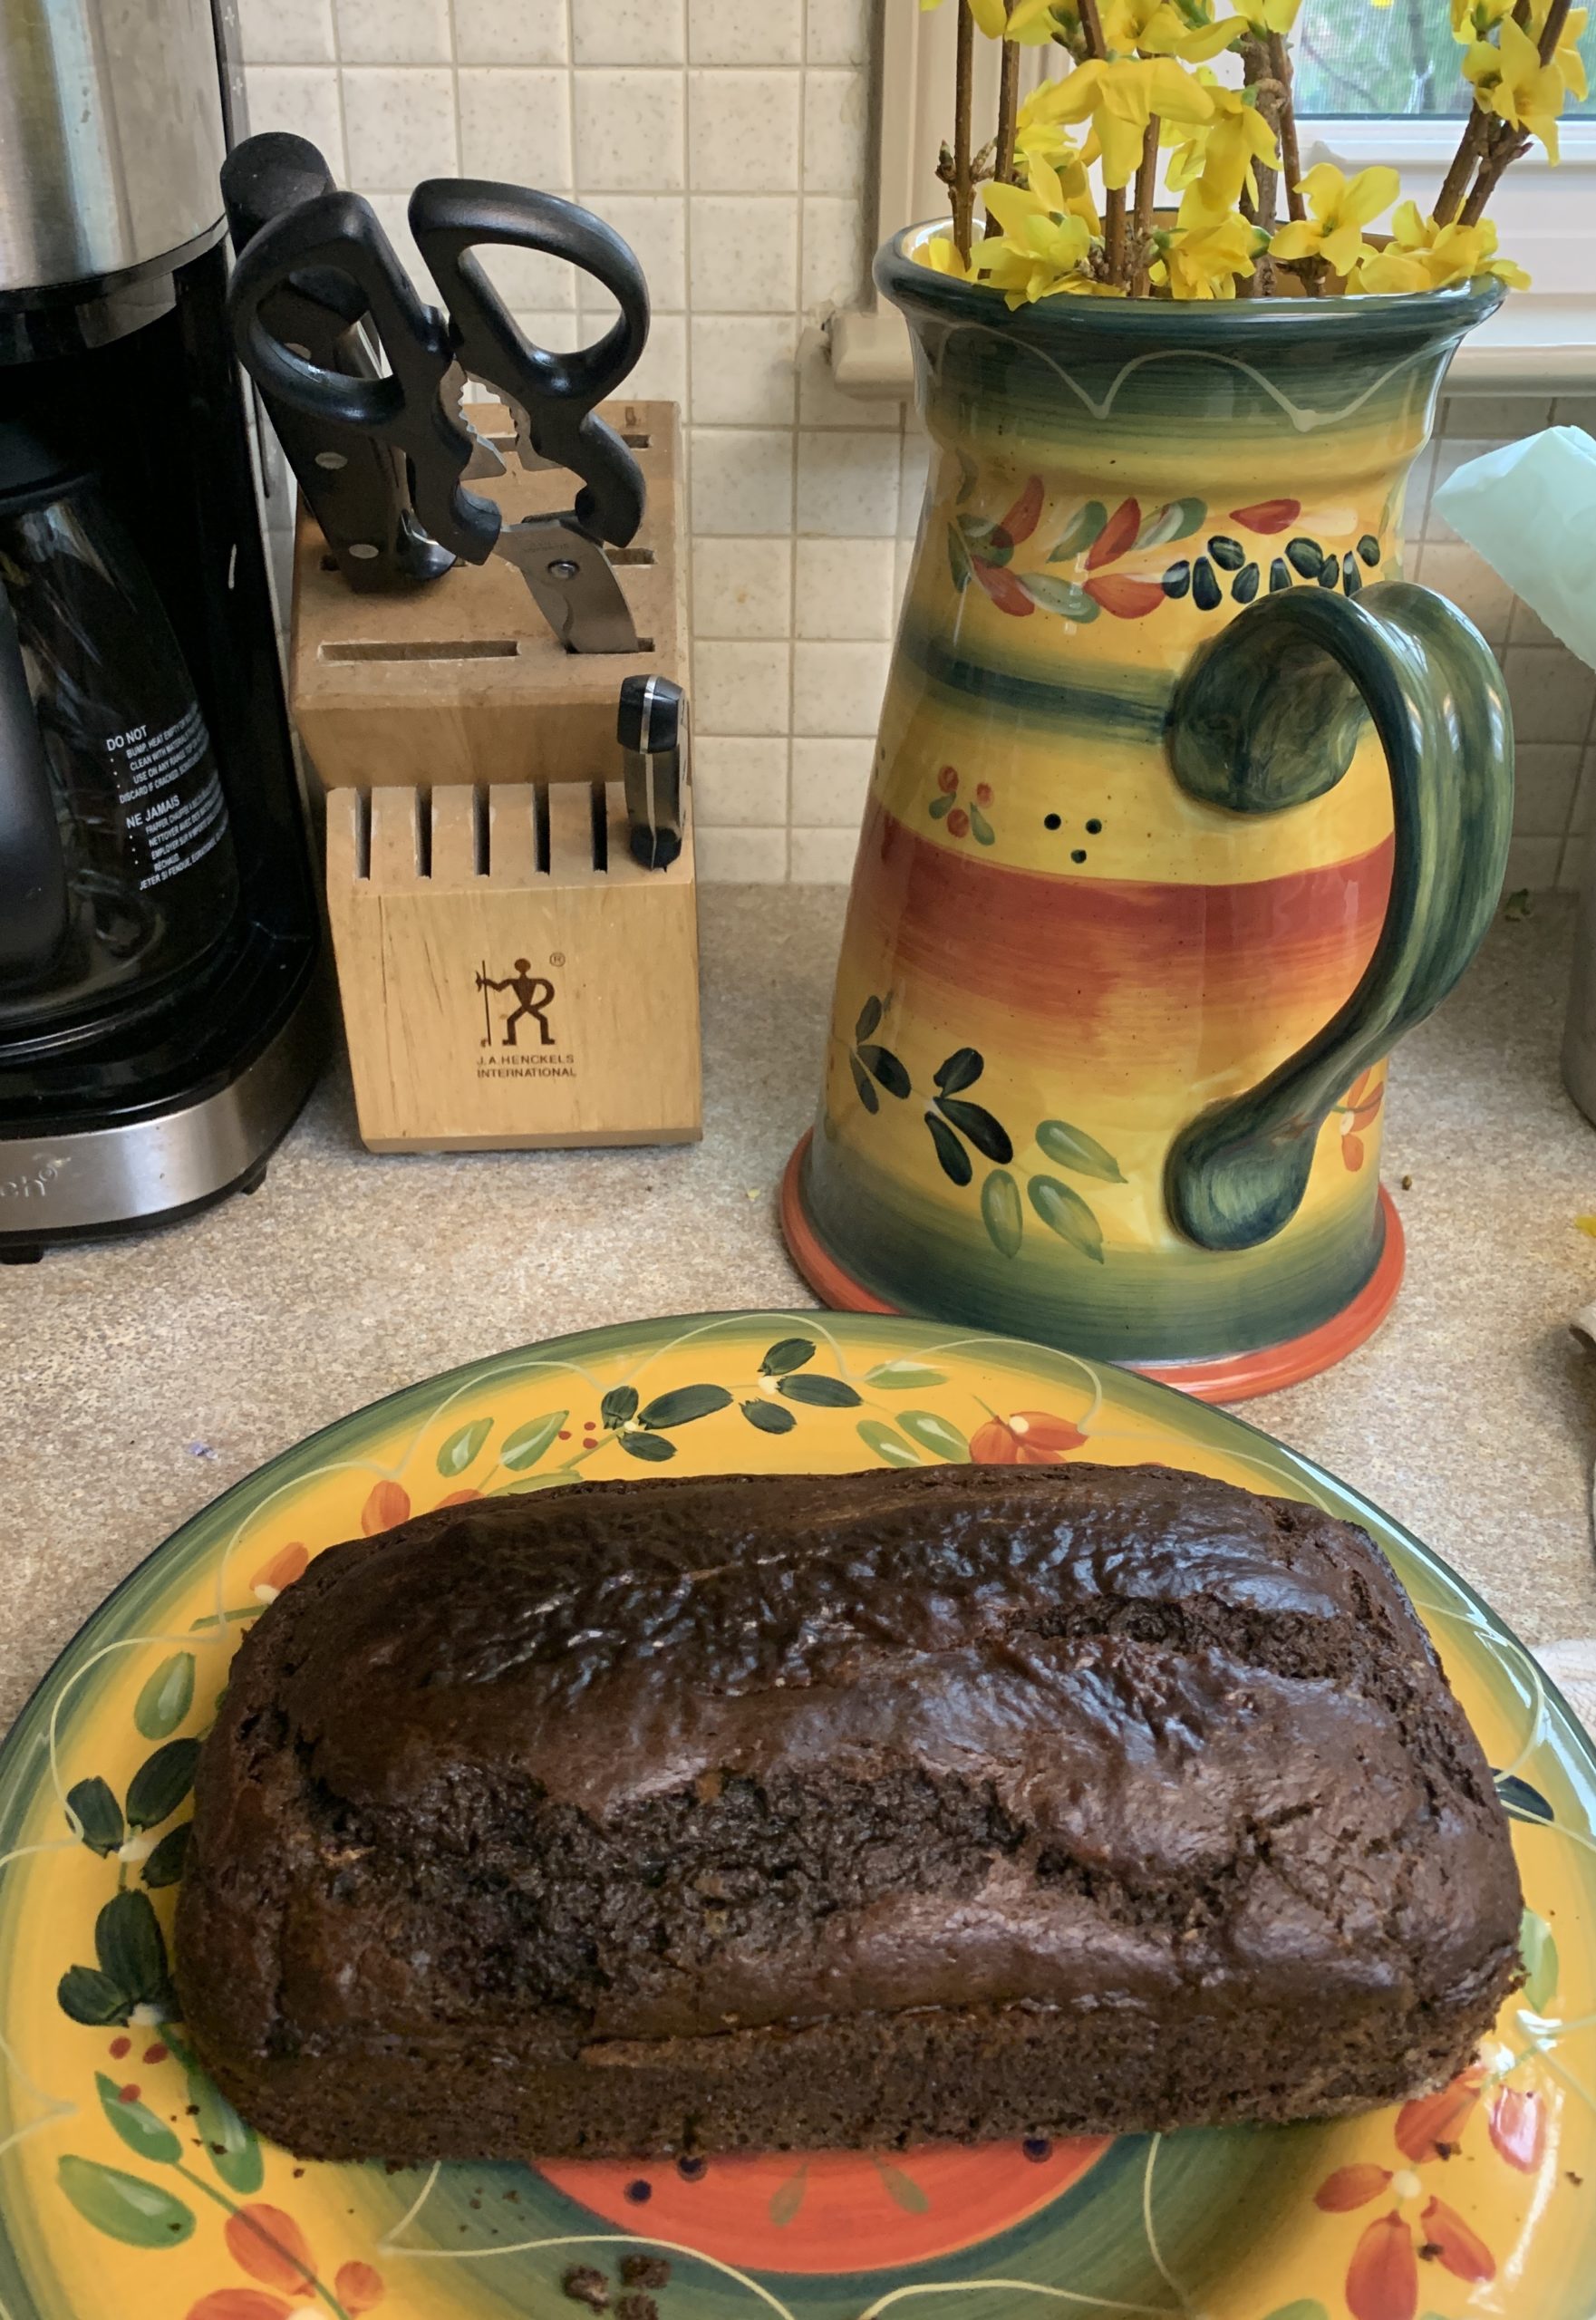
Today we made chocolate peanut butter banana bread (but just plain old banana bread with chocolate chips is what they usually like best!)
Especially sugar cookies! They love to decorate them! I try to do a recipe that doesn’t have to be refrigerated before hand. They love using cookie cutters and decorating each cookie (although expect for it to take a long time to get all the shapes cut out and expect way too make sprinkles!)
6) Here are some fun cupcake recipes!These are on the fancier side- we usually just ice the top with a knife and call it a day (the cupcakes are gone before you have a chance to make it fancy!) I’ve wanted to try the ice cream cone cupcakes- that will be next on our list!)
Any baking recipe the kiddos will love to make the memories with you! Don’t forget to take pictures!!!


 Follow